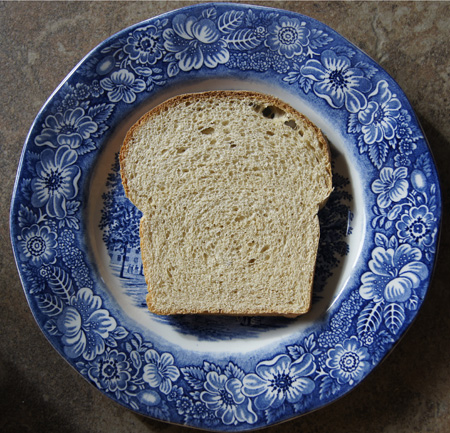
This is the bread I make every week for my sandwiches. Whole wheat and hearty but soft and pliable.
I am not going to try to teach you guys how to make yeast bread. Lessons for that skill are covered by a multitude of books, or passed on by family members or friends, or learned in a cooking class. But I will share my own methods and tips as I go along in this cooking blog. And a little philosophy.
I learned how to make bread soon after I was out on my own. I wanted to make cookies, pies and cakes, but couldn’t afford the calories. So I turned my love of baking to yeast breads. I remember when I was twenty-one and living in Huntington Beach, California. I was in the kitchen of a funky old house, kneading bread. Someone knocked at the door, and I went to answer with whole-wheat-dough-messy hands. It was Jehovah’s Witnesses, and they started giving me advice on how to make bread!
It was the 1970s, and I of course was bra-less, wearing beat-up jeans. Hippie time. My first loaves made from heavy wheat flour were dense and heavy and flat. But the smell, the smell! Freshly baked bread, even heavy bread, smells wonderful.
I grew up a little and moved to Colorado and got a real job. I continued to hone my bread making skills, gleaning knowledge from books and magazine articles and later, online communities. Like those Jehovah Witnesses, everyone had their opinions on how to make the best bread.
I learned how to combine flours to make a healthy and light loaf of bread. At first, I hand-kneaded my breads. Yes, there is a sense of accomplishment in this task, and the elastic, perfectly kneaded loaf feels good under your hands. But I’m not the most patient person. My results were inconsistent, but I kept going, I still kept baking.
I received as a gift a KitchenAid mixer in the 80s, and soon I employed it to knead bread. That made a huge difference in the consistent outcome of my bread loaves. I watched the bread as it kneaded and adjusted the flour and liquid as necessary to get a smooth, elastic loaf.
That went on for a decade or so. Then I was given a bread machine, and wow, was I hooked. Today I use a bread machine to knead most of my loaves of bread (there are no-knead breads too, but that’s another post). The machine controls kneading as well as rising factors; you can plan your time because you know exactly when it will be read to bake. I’m a chemist, and the more factors you can control in an experiment, the more you are able to play around with ingredients. I prefer to bake my loaves in a conventional oven, though. I just don’t like taking a loaf out of a bread machine and having to take out the little mixing paddles from the bottom of the loaf. Currently I am on my third bread machine, I wore out one, and I keep an older one in case I want to knead two kinds of bread at the same time!
Again bringing in my chemist-background lab experience, I weigh my flours and carefully measure the liquids. There is no better way to consistently get the proper liquid/flour proportions in a loaf. I also watch a loaf as it kneads in the bread machine and add more flour or liquid as necessary. I still have occasional failures, when I experiment a little too much! But “My Daily Bread”, the recipe below, works for me week after week.
I am not going to force my method of bread making on anyone. I’ll give you tips, but no more. Take them or leave them. You can only learn how to make yeast bread by many tries, many failures, many successes. With practice, each person figures out their own way to make perfect bread. Each person works with currently available ingredients and equipment, societal fads, and their own preferences. Each person finds their own way, and their way is as good as any other, as long as it’s enjoyable.
Bread making is a journey, like life.
Here is my daily bread, my staple for sandwiches and toast. It is high in fiber, while still making a bread that slices for sandwiches and toast. I know my ingredients, so I am assured that there are no preservatives or excess sugars or fats. I trust this bread to keep me healthy, as well as provide great taste!
My Daily Bread
Two thin slices of this bread (60 grams) have about 100 calories.
- 1 cup buttermilk
- 1 tablespoon vegetable oil
- 1 tablespoon sugar
- 1/2 teaspoon salt
- 1/2 teaspoon baking soda
- 12 ounces flour (see below)
- 1 tablespoon active dry yeast
Each week, I vary the types of flours that I use. I always use about 1/3 cup gluten flour, a half-cup of all purpose flour, and a large amount of white wheat flour (King Arthur Flour). Sometimes I include about a half-cup of oat or other whole grain flour, and a few tablespoons wheat germ, hi-maize high fiber flour, or flax seed meal. What is important is that the weight of the flours is 12 ounces. (If you add too much whole grain flour other than white wheat flour, the bread will not rise well and the cooked loaf will be dense.)
If I have leftover cooked hot cereal, barley, or rice, I sometimes add it too (about a half cup). But if I do, then I’ll watch closely as the bread kneads, and add a bit more flour if necessary.
Put all the ingredients in a bread machine and set to the dough cycle. Watch the dough as the machine kneads it. Sometimes a paddle will not rotate and needs some fixing. Sometimes the flours are too dry, and you see just lots of clumps instead of a ball of dough. If this happens, add more liquid by the tablespoon until it forms a ball. Sometimes the dough is too sticky; if this happens, add more flour by the tablespoon until the dough looks smooth and elastic. Most machines will knead and rise a loaf of bread in about 1 1/2 hours.
When the bread machine signals that it is done, remove the dough from the machine.
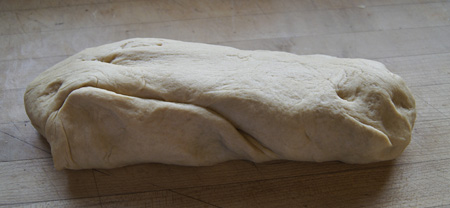
Next, fold in thirds and push it around a little to re-distribute the yeast, then form it into an oblong that will fit into an 8 1/2 x 4″ loaf pan.
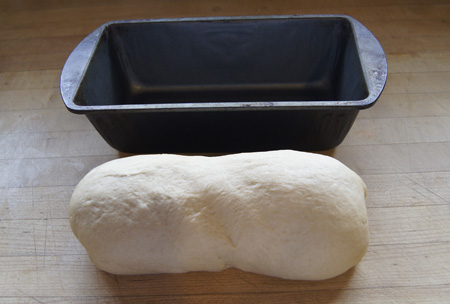
Place it in the loaf pan and set it in a warm and non-windy part of your kitchen. I usually put it on the top of the stove. Start preheating your oven to 385˚.
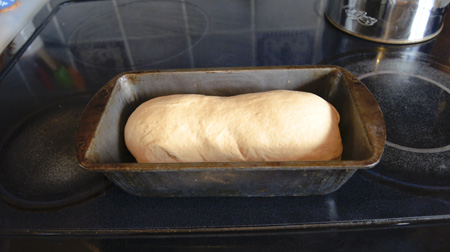
Let the loaf rise until it’s double in bulk, or until it has risen above the edges of the loaf pan. In the summer, this might take only 20 minutes. When my kitchen is cool in the fall or winter, it might take 45 minutes. Here’s a well-risen loaf:
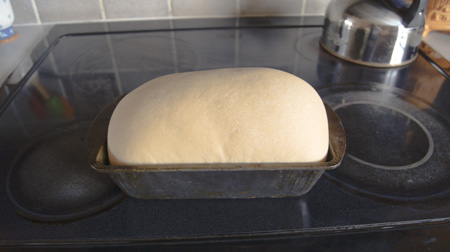
Bake at 385˚ for 20 minutes. Take it out and let it cool. It’s tempting, but if you cut it now and eat a hot slice, it really messes up the loaf for later neat-slicing. (I don’t always follow this rule <grin>)
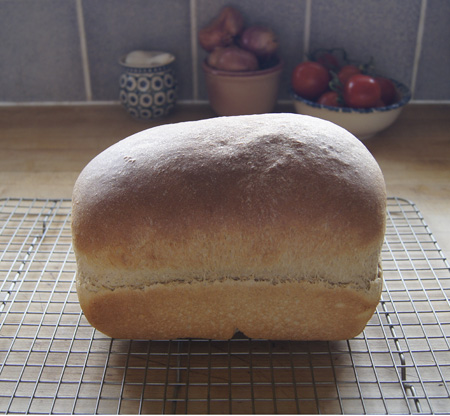
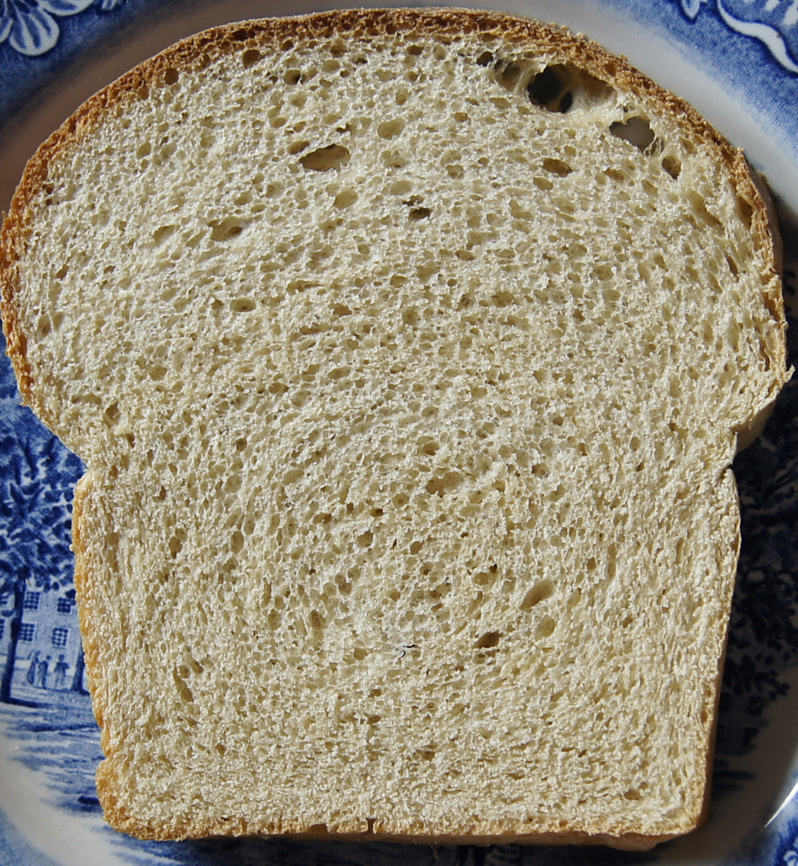
Here’s a close-up of the great crumb and texture of this bread. Click on this photo and it will get even larger:
I do love my bread! It’s great for sandwiches, and great for toast!

