Rye Caraway Tortillas

Happy Saint Patrick’s Day! That was the inspiration for these tortillas. Well, that and Sam Sifton’s recipe for Irish Tacos (New York Times Cooking website).

I have been making flour tortillas for awhile and have developed a recipe that I like (flour tortillas). Why not a rye bread tortilla? Should be yummy good stuffed with home-cooked corned beef and Swiss cheese and pickles and a tasty cabbage slaw. And it was! Below is how I made these delicious “tortillas”.

Rye Caraway Tortillas

  • cup rye flour
  • 1 1/4 cup bread flour
  • 1/4 cup gluten flour (or bread flour)
  • 1 teaspoon salt
  • 1 tablespoon caraway seed (or less – it’s up to you)
  • 1/4 cup olive oil
  • 1 cup water, microwaved one minute

Put the flours, salt, and caraway seed in a bowl and mix well. Add the olive oil and about half the water. Mix the dough, and continue adding only enough of the remaining water so that you have a dough that holds together and is smooth and not sticky. Continue kneading a few times, then divide into 8 portions and roll each portion into a ball.

Let the dough rest, covered, for 2-3 hours at room temperature.

Heat a heavy flat pan on a stove top burner set on medium. The pan is ready when you feel good heat when your hand is about 3/4 inch above the pan. You do not want it smoking hot. I use a remote temperature sensor and try to get (and keep) the pan at about 400˚.

Roll the balls of dough into 8-inch circles. Put a tortilla on the pan and let it cook for about 20-30 seconds on the first side. It is ready to flip when light brown spots appear on the underside (peek!). Flip, and cook the other side of the tortilla the same way.

Enchilada Sauce, revisited

enchilada sauce

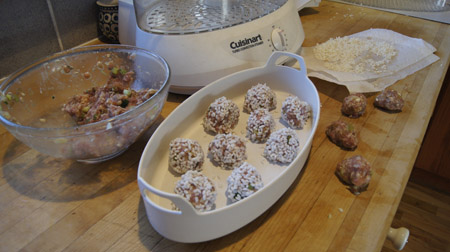
My last adventure in making enchilada sauce was in 2013. I made “Red Chile Sauce”, a sauce meant for enchiladas, according to a recipe in my 1972 Sunset Mexican Cook Book. The sauce I made captured the flavor that I wanted – a deep chili flavor similar to the canned enchilada sauces that I find on store shelves. It was just a bit, well, bitter or something, and it was thin. It was a big batch, and I eventually used it all up, but each time I cut the enchilada sauce with a good amount of canned tomato sauce and spices. I haven’t made it since. I went back to canned enchilada sauce.

Five years later, I am going through my browser bookmarks. I run across a blog post titled Homemade Enchilada Sauce on the Circle B web site. This site is authored by a woman about my own age who also grew up in the 1950s in Southern California. She too was on a quest for homemade enchilada sauce – as she put it, “a killer enchilada sauce”. After a couple years of search, she found a recipe in a cookbook on her own shelf, “Mexican Family Cooking”, a collection of “family recipes handed down from Mothers, Aunts and Grandmas”. (Oddly enough, she posted her enchilada sauce blog post about the same time I posted my Mexican Cook Book post.) Her sauce was a lot more successful! I was on the right track though – starting with dried chiles.

Here are the secrets. Begin as I did with a package of dried chiles. But, do not toast them, and do not use the chile cooking liquid to add back to the sauce. I think this is why mine tasted bitter – both the toasting and the adding the liquid back. After cooking and draining, blend the chiles with fresh water (and a lot of garlic!). Add sugar and a good amount of salt and season the sauce with chile powder and cumin. Add a tablespoon of tomato paste. Thicken the sauce with a roux made of cooking oil and flour. Let simmer awhile until the flavors blend.

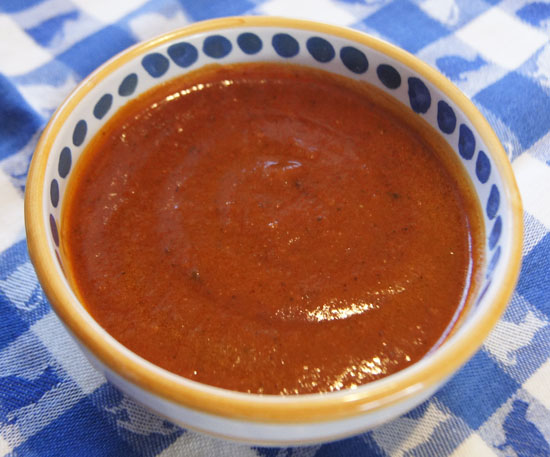
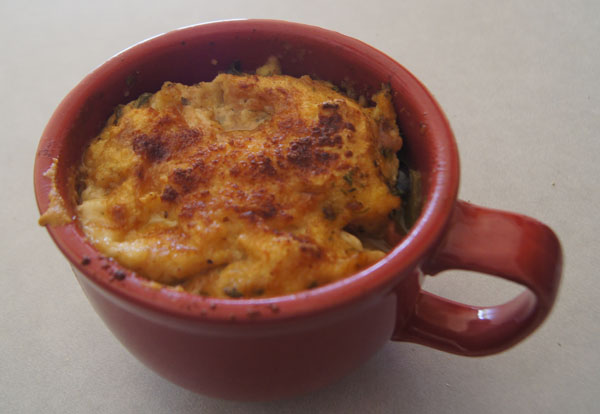
Boy oh boy, this enchilada sauce is absolutely the best I have had – ever! It is just heavenly. Rich, red, thick, and spicy. It captures the essence of the canned enchilada sauces that we are used to, but it goes to a whole new level of goodness. It’s hard to believe I made a quart of this sauce and only used a tablespoon of tomato paste because it looks like there is a lot more tomato than than just that in it.

I can now type the recipe from memory. I cite the Circle B website as my reference. The recipe below is essentially that recipe, but I used olive oil instead of vegetable oil. I highly recommend olive oil in this, it made it extra rich tasting. Also, I added less water for a thicker sauce. I was also rather heavy-handed when I added the cumin and chile powder. And, I used a food processor instead of a blender.

I got my chiles at a local store, either Safeway (produce section) or a Mexican grocery. I had several bags in my pantry, as making enchilada sauce has haunted me. The type of chile is not specified on the bag, it just says “New Mexico Chile, 3 oz.”, and the brand is Badia. I don’t remember how long these have been in my pantry, so these dried chiles might have been a bit old. Nevertheless, they worked!


Everybody should have enchilada sauce this great. Come to my house and I’ll give you some!

Enchilada Sauce

Note: this recipe makes over a quart of enchilada sauce. When I tried doubling the sauce, I found it overwhelmed my food processor and strainer (and patience). So, my advice is to make one recipe at a time.

  • 3-4 ounces dried Mexican chiles (see note above)
  • enough water to cover the chiles in the pot
  • 4 cloves garlic
  • 1 1/2 tablespoon red chile powder
  • 1 teaspoon cumin
  • 1 tablespoon salt
  • 1 tablespoon sugar
  • 4-5 cups water
  • 1/4 cup olive oil
  • 5 tablespoons flour
  • 1 tablespoon tomato paste (generous)

Take the seeds and any pith out of the dried chiles. You don’t have to be ultra-careful in removing every last seed.

Put the cleaned chiles in a medium pot and cover with water. Bring to a boil and simmer for 20 minutes.

Pour the chiles and their cooking water through a colander. (I used a regular colander, not a fine one.) Remember: you want the solids, not the liquid. Transfer the drained chiles to a food processor. Toss the cooking liquid and rinse the colander.

Add the garlic, chile powder, cumin, salt, and sugar to the chiles in the food processor. Add enough of the 4-5 cups of water for a good slurry to form. Process the mixture several minutes, until the particles are pretty fine.

Set up your rinsed colander over a big bowl. Pour through it the pureed chile mixture. Press the puree in the colander to get as much of the sauce through as possible, leaving behind any bits of chilis and seeds. Remember: this time, what goes through the colander. Rinse the food processor with some water and put this through the colander too.

In a good sized sauce pan, heat the olive oil. Add the flour and stir for several minutes over medium heat, until the flour just starts to show a bit of brown. Carefully add the tomato paste and stir for a minute. Then, carefully stir in the pureed, strained chile mixture. Add more of the 4-5 cups water until the thickness of the sauce is to your liking. I left mine pretty thick!

Heat and stir the sauce for 5-10 minutes minutes to blend flavors. Adjust the seasoning to your own taste – feel free to be creative! Add hot pepper powder (like cayenne) if you want your sauce with more kick.

Use immediately, or store in the refrigerator for a few days or the freezer for a lot longer.

Favorites: Chile Verde Pot Pies

Imagine pork simmered in rich broth with lots of green chiles and cumin and cilantro and oregano and tomatoes and onions, covered with cornmeal oozing with jack cheese. And imagine that in a bowl all your own, and you are tucked back in a chair on a cold night, savoring each spicy bite, taking it slow because it is so very hot but it tastes so good you just can’t stop.

Chile Verde Pot Pies

Gosh I love these green chile pot pies.

The inspiration for my Chile Verde Pot Pies came from a recipe clipped from a magazine or newspaper in the 80s or so. I first tried it in 2006, and improved the recipe over the years, added the topping from another old clipped recipe in 2012, and today pretty much stick with the version below.

The pièce de résistance is the topping. It’s a cornmeal based batter with big chunks of jack cheese in it. The jack cheese does not bake entirely into the batter – it oozes out and is just delicious.

A few pointers:

  • I make it in 2-3 bowls, but it could be baked in one medium pot pie.
  • We usually have a little left over for the next day!
  • I use random individual-portion ovenproof baking dishes or bowls.
  • You could make a double batch of the chile (without the cornmeal topping) and freeze half for a later meal.
  • Do not use grated cheese, especially pre-grated cheese. It simply will not melt properly.
  • The chile itself can vary a lot, but stay to the recipe with the topping. The chile part is free-form (more like the way I cook!).
  • Taste the chile after it simmers and adjust the seasonings to your own taste.

Chile Verde Pot Pies
serves 2 (usually with leftovers, we have no problem with that)

Green-chile stew

  • 9 ounces boneless pork, cut in 1/2″ cubes (I use boneless pork loin)
  • a little oil for the pan
  • 2 cloves garlic, minced
  • 1 small onion, chopped
  • 1/2 to 3/4 cup freshly roasted green chiles, chopped OR about a cup of bottled green chile salsa OR a small can of chopped green chiles OR about a cup of fresh or canned salsa
  • 3 small tomatoes, chopped OR part of a can of tomatoes OR use less of the salsa/green chile ingredients instead and use a can of Rotel®
  • 1/2 teaspoon oregano (use Mexican oregano if you have it)
  • 1/2 teaspon cumin
  • 1 teaspoon red chile powder
  • salt to taste
  • half a small can of pinto beans (about 1/2 to 3/4 cup)
  • 1-2 cups chicken stock
  • 1/2 C chopped olives
  • 2 T chopped cilantro

Cornmeal Topping

  • 3/4 cup milk
  • 1 tablespoon butter
  • 1/4 teaspoon red chile powder (or paprika if you want to tame the heat)
  • 1/4 teaspoon salt
  • 1/3 cup cornmeal
  • 1 egg, beaten
  • 1 cup diced Jack cheese
  • 1/4 cup shredded or grated Parmesan cheese

In a medium saucepan, brown the pork in hot oil, then add garlic and onion and cook about 5 minutes. Stir in chiles, salsa, tomatoes, spices, and pinto beans (sometimes I add the pinto beans near the end of the cooking so they don’t get too mushy). Add enough chicken stock to cover the mixture and then simmer an hour or two. Stir and check occasionally, and add more chicken stock as necessary. It is done when the pork is tender, but longer cooking only makes it better.

Near the end of the chile’s cooking time, prepare the Cornmeal Topping. Combine milk, butter, red chile powder (or paprika), and salt in a saucepan and heat to a gentle boil. On heat, gradually stir in the cornmeal. Heat gently until it thickens, stirring frequently (it cooks fast!). Off heat, fold in the egg and the jack cheese.

When ready to prepare the pot pies, add the olives and cilantro. And, taste and adjust the seasonings. Add a little chicken stock if necessary: make it a little on the “wet” side, as it will bake in the oven and dry out a little. It does not require any thickening (with cornstarch or the like) as it is usually a pretty thick chile on its own.

Divide into 2-3 small individual casseroles. I use any oven-proof baking dish I have that holds about 2 cups of liquid.

Divide the Cornmeal Topping among casseroles, spreading evenly to nearly cover tops. Bake at 375˚ about 25-30 minutes or until the cornmeal is baked through.

Let cool long enough so that you do not burn your tongue, if you can stand the wait!

Favorites: Tallarnee

TallarneeI haven’t made this in ages! I made it last week and it was so, so good. Just had to share.

When I google “tallarnee” I find weird stuff like foreign language references, Indian removal records, and “layer tick boxes”.  But – when I google “tallarnee recipe” google changes the spelling to “tallarni recipe” and pulls up a bunch of hits with casseroles similar to my own recipe. It’s a casserole with noodles, hamburger, corn, olives, onions, tomato soup and cheese.

I am keeping my spelling: tallarnee. I found this recipe in my recipe box behind my recipe for “Tetrazini crepes” (another miss-spell, as it turns out). Tallarnee is a great comfort food type casserole that many of us baby-boomers remember from childhood.

My recipe for Tallarnee is handwritten by me on a 3×5-inch card. That means I copied it from my mother’s collection in the late 1970s or so.TallarneeRecCard1

When I made it this week, I cut the ingredients in about half for the two of us, and we had leftovers. I used olive oil to cook the onions instead of Crisco. For the tomato soup and water, I used some really good “tomato bisque” that I found at a local store.

soup can

The above type of soup does not call for dilution with water, so I eliminated water from my old recipe for Tallarnee. If you use the undiluted kind of tomato soup, do add water.

Tallarnee
serves 2-3

  • 1 tablespoon vegetable or olive oil
  • 1/2 onion, chopped
  • 12 ounces ground beef
  • 1/4-1/2 teaspoon salt (you can probably leave this out)
  • 1 cup dry noodles (I use wide, short noodles)
  • 1/2 cup corn: fresh off the cob, canned, or frozen
  • 1/2 cup black pitted olives
  • 1/2 can condensed tomato soup mixed with 1/4 cup water OR 1 can full-strength “fancier” tomato soup (I used a little less than the full can, reserved a little for tasting)
  • 1/2 cup grated cheddar cheese

Cook the onion in the oil until soft. Add the ground beef and cook until the meat is brown. Cook the noodles as the meat and onion cook.

Mix together everything except the cheese and put in a suitable sized casserole or baking dish. Top with the cheese.

Bake at 350˚ for 35-40 minutes, until all is bubbly and the cheese is melted.

Serve!

Comment

I liked the chunky tomato bisque soup that I used. It gave great flavor, while keeping the comfort-food-ness of this casserole from my childhood. I think there is more to explore along these soup-lines to nudge a few more old casserole recipes into the twenty-first century.

Favorites: Julie’s Cherry Pie

I had a craving for cherry pie this week. I pulled out my old recipe card and figured I had better save it in a better format before it was totally ruined.

Julie's Cherry PieJulie's Cherry PieThis is a great cherry pie. I copied it from my mother’s collection when I left home in the 70s. Why is it called “Julie’s” cherry pie? I have no idea. My husband has a sister named Julie, but I was making this pie before we met. Cherry pie is probably my husband’s favorite pie! He always insists that I make criss-crosses of crust strips on top.

The crust recipe on this card calls for Crisco and half and half. It is a good, tender crust, but these days I prefer my newer crust recipe that uses Crisco, butter, and vodka.

As for the tart cherries, the easiest to find are canned cherries. But I have used fresh-picked (when very lucky!) or fresh-frozen cherries as well in this recipe. (Not sure where I got the cherry juice in those instances, but I’m pretty sure today that cherry juice is sold separately somewhere.)

This weekend, I made this pie as two small pies. We split one pie on Saturday and still had another for the next night. Mini-sized desserts works well for the two of us – here are a couple other mini-dessert recipes on a previous blog entry.

Double the recipe and bake in a 10-inch pie pan. (If you use a 9-inch pie pan, it might run over.) My small pie “pans” are fiesta ware 6-inch slanted side oven-safe dishes, a little over 1 3/4-inch deep.

Julie’s Cherry Pie
makes 2 small pies

  • one recipe pie crust (use 1 1/4 cup flour)
  • 1 can tart cherries; 14.5 oz. size
  • scant 1 cup sugar
  • 3 tablespoons corn starch
  • 1 cup cherry juice
  • a few drops red food coloring (you can leave this out)

Drain the cherries, reserving juice.

Combine the sugar and corn starch in a pan, then slowly stir in 1/2 cup of the cherry juice. Bring to a boil, stirring constantly, then simmer and stir a couple minutes. It doesn’t get real thick or real clear, but it’s okay.

Remove from heat and add the red food coloring (if using) and the drained cherries. Cool.

Divide the crust dough into 3 nearly equal portions. Roll out 2 of them and fit into 2 small pie pans. Divide the cherry mixture between the two pans.

Roll the rest of the dough and cut into strips. Put the strips in a criss-cross pattern on each pie. Trim the crusts, roll under and flute.

Bake at 425˚ for 10 minutes and then at 350˚ for 30 minutes.

Julie's Cherry PiesBoy these are good. A little ice cream on top? Sure. Absolutely heavenly.

Apple Coconut Muffins

Instant favorite: A muffin recipe from the Whittier Wildcats Cookbook, this week’s 250 Cookbooks blog entry. These muffins are oh so good! They pack a full cup of coconut and a cup and a half of apples into 12 muffins. I added some cinnamon and used fresh nutmeg.

I think these are really “cupcakes”. Too rich to be called “muffins”. Maybe a little whole wheat flour will assuage my conscience.

Here is the original recipe:

Apple Coconut Muffins recipeBelow is my version:

Apple Coconut Muffins
makes 12 muffins

  • 1/2 cup unsalted butter (or use regular butter and skip the additional salt)
  • 1 cup sugar
  • 1 teaspoon vanilla
  • 2 eggs
  • 1/2 cup milk
  • 1 cup whole wheat pastry flour
  • 1 1/2 cups all-purpose flour
  • 2 1/2 teaspoons baking powder
  • 1/2 teaspoon salt
  • 1/2 teaspoon ground nutmeg (freshly ground if possible)
  • 1 teaspoon cinnamon
  • 1 cup shredded sweetened coconut (this weighed 3 1/2 ounces on my scale)
  • 1 1/2 cups chopped, peeled apple (for me, this took 1 1/2 large apples)

Prepare 12 muffin tins in your favorite fashion.

In a mixer, cream the butter, sugar, and vanilla.

Stir together the flours, baking powder, salt, and spices.

Whisk together the eggs and milk.

Add the flour mixture alternately with the egg mixture to the creamed mixture, blending after each addition only until just combined. Stir in the coconut and apples.

Bake at 350˚ for 30 minutes or until they are light brown on top and test done with a toothpick. Cool in pan at least 15 minutes before removing to cool on a wire rack.

Apple Coconut MuffinsBe sure to let these cool before removing from the pan. I tried getting one out after only 5 minutes and – oops! It fell apart. So of course I had to taste it. And then go back for more. Addicting!

Favorites: Sukiyaki

One of my college roommates was Japanese, and she wrote out this recipe for Sukiyaki for me:Sukiyaki RecipeWhen we cooked in our on-campus apartment, we made this in my electric fry pan. She was a very neat person (I, on the other hand, can tend to be slovenly) and put neat little piles of the different ingredients – meat, veggies, tofu, noodles – in different sections of the pan. I always loved this meal. And the memories of our times together, including visits to her aunt’s house in Southern California.

I just re-discovered my electric fry pan and was inspired to dig out my old recipe card. I actually found it! Here is how I prepared Sukiyaki last Saturday, here in the year 2015.

Sukiyaki
serves 2

  • 9 ounces beef tenderloin or sirloin, cut into small strips
  • a couple green onions, cut into 1-inch pieces
  • bamboo shoots, about half a can
  • yam noodles (fresh, from an Asian market, or maybe a local supermarket)
  • water cress (one small bunch; could use spinach)
  • mushrooms, sliced (I used fresh shitakes)
  • tofu, about 10 half-inch chunks
  • sauce: 1/4 cup sugar, 1/4 cup soy sauce, 1/2 tablespoon mirin (rice wine, or use sherry), 1/2 cup water

Heat a large electric fry pan to 360˚ (or use a large, flat skillet on your stove top). Add a few tablespoons vegetable oil and fry the meat until brown. Push the meat to a corner of the pan. Lower the heat to 320˚ and add the sauce. Put the green onions, bamboo shoots, noodles, water cress, mushrooms, and tofu in separate piles in the pan. Continue to heat until all the ingredients are hot. Serve!

Sukiyaki

Favorites: Pita Bread

Pita breads are easy to find in stores, but they can be thick or thin or have pockets or not. I like my pitas thin and with pockets. But store ones that are thin and have pockets usually fall apart when you fill them with a lot of stuff.

I recently made Beef Steak Pitas for this blog. The thick, pocket-less pita that I bought at a local Mediterranean market reminded me: I can make my own pitas!

Sometimes you just have to do it yourself to get it right. I made these last week and they turned out perfect. I enjoy the nutty taste and chewy texture that the whole wheat flour lends these breads. I like watching them puff up in the oven. I love taking out a hot one, cutting it in half, filling it with a slice of cheddar cheese, and ooh-ing and aah-ing at the experience.

(I also like filling them with a lot of stuff. I also like that they store well, on the counter or in the freezer.)

In 1999, I wrote up my method for pita breads in my old blog (here is the history of that blog). Here is that post, along with my slightly updated recipe for pitas.

1999 post:

I was inspired to make these after a member of a news group I was reading, rec.food.baking, asked for suggestions as to how to get pita bread to bake with even crusts. No one else in the group was posting an answer, so I dug out my old recipe (it’s been at least 15 years since I tried these, back when I was baking with more whole grains than I do currently) and gave it a whirl. And yes, I did use a bread machine to do the dough, sorry, but I like the freedom it gives me, plus I’m busier than I used to be. The recipe works just as well if you do the kneading by hand, then let it rise until double, punch down and form the loaves.

I was amazed at how good they came out – nutty and chewy and utterly delightful. I get such a kick out of the way they puff up, but then I’m easily entertained. They make a great pocket for fillings, because they stay together much better than the store-bought cracker-like pitas. Most of these had even crusts top and bottom, though a couple were uneven: I have no explanation as to why, I thought I did them all the same. (Guess they were rebel pitas.)

Pita Breads
makes 10

  • 1 1/2 cups water
  • 1 teaspoon salt
  • 1/2 tablespoon sugar
  • 1 generous tablespoon olive oil (you can use any vegetable oil)
  • 2 1/4 cup all purpose flour
  • 2 tablespoons gluten flour (or regular flour)
  • 1 1/2 cups whole wheat flour (not white wheat flour)
  • 1/4 cup wheat germ
  • 2 tablespoons yeast

Mix in bread machine on the dough cycle, monitoring the dough after the first few minutes in the machine, adding a little more flour or water if necessary to keep a nice ball of dough. If you can, leave the dough a little bit wetter than you would for conventional loaves. When the cycle is complete, divide the dough into 10 pieces, knead each piece briefly, then roll each into a 6 inch circle. At this point, you may let them rise until puffy, about 20 minutes.

Put a heavy griddle on the bottom of your oven. If you have a gas oven, this really means on the BOTTOM; in an electric oven, you must use the lowest rack (take out the upper rack). Heat the oven and the grill to 425˚ for at least 15 minutes before you start baking the pitas. Place the loaves on the heated grill, a couple at a time, and bake for 6-8 minutes. They should puff up magically! If desired, you can then place them under the broiler to brown the tops.

Note: You can use a baking stone instead of a griddle.

Here are my 10 little pitas, ready for the oven.

10 little pitasHere they are magically rising when I opened the oven to take a peek!

pitas risingHere is one of the baked pitas. These actually kept their puffiness and I had to kind of squish them down before storing in plastic bags.

pita breadYum!

Favorites: Applesauce-Carrot Muffins

Applesauce Carrot MuffinsMuffins in the morning! One of my favorite things. These have apples and carrots and raisins and even some whole wheat flour in them. I often use my own homemade cinnamon-infused applesauce in these.

Applesauce-Carrot Muffins
makes 12 muffins

  • 1 cup all-purpose flour
  • 3/4 cup whole wheat flour or whole wheat pastry flour
  • 1 teaspoon baking soda
  • 1/2 teaspoon salt
  • 1 teaspoon cinnamon
  • 1/2 teaspoon nutmeg (freshly grated if possible)
  • 1 egg
  • 1/2 cup sugar
  • 1/4 cup oil
  • 1/2 teaspoon vanilla
  • 1/2 cup milk
  • 1 cup applesauce (canned or homemade)
  • 3/4 cup grated carrots
  • 1/2 cup raisins (I like to use sultans – golden raisins)
  • lemon zest (about 1/2 lemon rind, grated)

Beat together egg and sugar until light, then beat in oil, milk, and vanilla. Stir in applesauce.

Combine flours, baking soda, salt and spices in large bowl. Stir applesauce mixture into flour mixture only until just blended. Quickly fold in carrots and raisins.

Put into 12 muffin-pan cups. Bake at 400˚ for 15 to 18 minutes until lightly browned.

Favorites: Pearl Balls

“Pearl Balls” are pork meat balls, seasoned with ginger and soy sauce, rolled in soaked rice, and then steamed. I forget when I first discovered these treats, but I always go back to my 1968 The Cooking of China Time-Life Books cookbook when I get a hankering for these. (I have admitted here before that I love meat balls so my current hankering isn’t out of character.)

The recipe below is adapted for my tastes. I believe the fresh ginger and water chestnuts to be essential in Pearl Balls, and I buy the best quality ground pork that I can find. These can be used as appetizers or to round out a Chinese-style meal.

Pearl Balls
serves about 4 as part of a Chinese-style meal

  • 1/2 cup rice, preferably a glutinous or starchy rice like a sushi rice
  • 1 pound ground pork
  • 1/2 cup finely chopped water chestnuts
  • 1 green onion, finely chopped
  • 1/2 cup finely chopped mushrooms (use fresh white or shitake mushrooms, or reconstituted dried shitake mushrooms)
  • 1 teaspoon grated fresh ginger
  • 1/2 teaspoon sugar
  • 1-2 tablespoons soy sauce
  • 3/4 teaspoon salt (adjust this amount to your own taste)
  • 1 lightly beaten egg

Start the rice soaking in a cup of water before you begin the Pearl Balls. About an hour’s soak is enough.

Combine the pork with the rest of the ingredients and mix well. Form the mixture into 1-inch meat balls.

Drain the soaked rice through a strainer and lay it out on a paper towel. Roll one pork ball at a time in the rice, pressing down gently but firmly as you roll so that the rice grains adhere to the meat.

Steam the pork balls for about 30 minutes. I use an electric steamer; a bamboo steamer set in a wok also works.

Serve at once! (Although, I enjoyed one of these cold out of the refrigerator the next day.)

Preparing the Pearl Balls:

pearl ballsCooked Pearl Balls along with Egg Rolls in Phyllo Dough:

Egg Rolls and Pearl Balls