
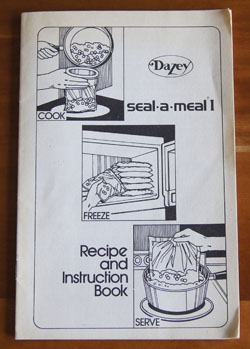
Cookbook #195: Seal-A-Meal I, Recipe and Instruction Book, Dazey Products Company, 1976.
I bought a “seal-a-meal” by Dazey sometime way back in the late 1970s or early 1980s. I still have it! And it still works. It’s an inexpensive little unit, with a heating bar and a way to hold and press bags over the bar.
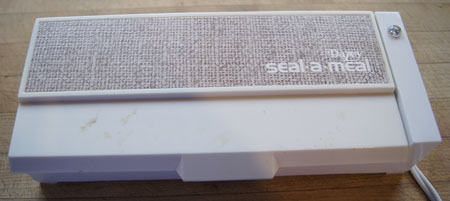
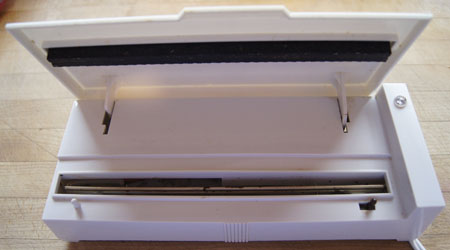 Note the two pegs in the above photo, the white one on the left and the black one on the right. Special bags, or “pouches”, were sold that had holes along the side to latch on to the bags. I have a small roll of this type of this bag material – as you can see in the photo below. See the little round hole in the bottom right corner of the photo?

I searched and searched, but to my knowledge, this type of bag (with holes along the sides) is no longer sold. The Seal-a-Meal® brand now owned by Sunbeam Products (doing business as Jarden Consumer Solutions). The bag sealer units of today use vacuum to remove the air from the bag filled with food, and then heat seal them. Both approaches result in an air-tight, sealed bag, a bag that can be put in a freezer or in boiling water.
There are zillions of reasons to have food or other things in an air-tight bag, or pouch. “Ideas, ideas, ideas” on pages 12-15 of Seal-A-Meal I suggest pouch-sealing food such as tomatoes, vegetables, fruits, eggs, dough for rolls, coffee, even sandwiches. Sportsmen can seal survival kits and fishing gear. Mothers of babies and toddlers can freeze formula and baby foods, and put anything that children shouldn’t touch in seal-a-meal bags. Picknickers can mix up martinis, seal in pouches, and put in the cooler. Seamstresses can store delicate laces and sequins. Teenagers can make water pillows. One can store polished silver in sealed bags.
I contribute this idea: buy meat or fish on sale and seal in the seal-a-meal then freeze; this prevents freezer burn.
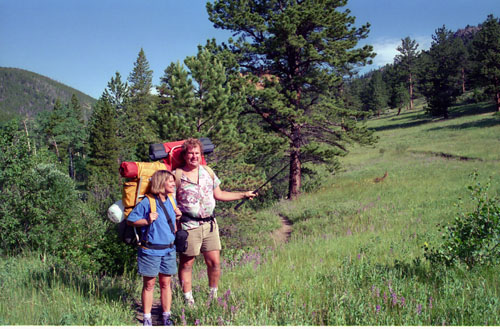
How have I used my seal-a-meal? Mostly for short backpacking or car camping trips. I’d make a batch of chile or spaghetti sauce, pouch-seal and freeze it. The meal would go into one of the adult backpacks, while we watched our kids scamper up the trail. The frozen meal acted like an ice block to keep items like cheese cool in the pack. After we reached our campground and set up camp, we’d heat the pouch of food over a camp stove. And enjoy a great meal, with the wind blowing softly in the pine trees, the stars coming out over the Rocky Mountains.
My Seal-A-Meal I booklet includes a handful of recipes for cooking foods directly in the bag, like poached eggs and or “Fussless Fudge Sauce”. Another handful of recipes are for main dishes like stew, spaghetti sauce, and chile: you prepare ahead (or prepare a double recipe) and freeze in a seal-a-meal bag for later.
For this blog, I decide to cook a batch of stew meat to “demonstrate” the seal-a-meal process. For a change, I am not going to give you a formal recipe for my stew. Unlike this blog, much of my cooking is done sans recipe. Here goes:
Stew Meat Base
Cut up a chuck cross rib roast – one or two inch chunks – about 3 or 4 pounds of meat (or use pre-packaged stew meat). Toss away any big chunks of fat. Turn on an electric pressure cooker to “brown”, then add about half the meat. Oil in the pan is optional. I found that the first half of the meat I put in the pan browned well and most of the liquid evaporated – I should have removed it and browned the other half, but I looked at the clock and was running late, so I just tossed in the rest of the meat. In a few minutes, the splattering pile of meat still had a lot of liquid in it, but what the heck, time is ticking. Add a roughly chopped onion and carrot, and maybe 4 chopped garlic cloves. And some salt and pepper. Open a bottle of red wine and pour in a good dollop. Add maybe a cup of water. Cover and seal the pressure cooker, set to “high pressure” for 22 minutes, then let the pressure come down on its own. Well, I let it come down until it was time to leave, when I released the pressure totally and unplugged the unit. I came back maybe 6 hours later. And it was perfect!
This made enough cooked stew meat for 3 meals for 2 people. I divided it in thirds, and put one portion in a pan on the stove top. I mushed up the cooked carrots and onions with a fork: they are there just for flavor. I added chopped carrots, celery, and potatoes, more water, and cooked until veggies were done. Then I thickened with a little cornstarch mixed in a bit of water. It was one of the best stews I have ever made!
I took the other two portions of stew meat base and pouch-sealed. I used two recently-purchased vacuum style seal-a-meal bags and filled each with stew. (I lost the EZ fill gadget that makes it easy to fill bags without getting food on the sides of the upper portion of the bag so there was a bit of food on the edge I wanted to seal – I forged ahead anyway.)
I heated the seal-a-meal unit for 3 minutes, placed the top of the bag on the hot bar, pressed out most of the air, closed the top, and said “one seal-a-meal, two seal-a-meal, three seal-a-meal, four seal-a-meal”, then it was sealed. It sizzled a bit because there was a bit of food in the sealing area, but it still formed an air-tight seal.
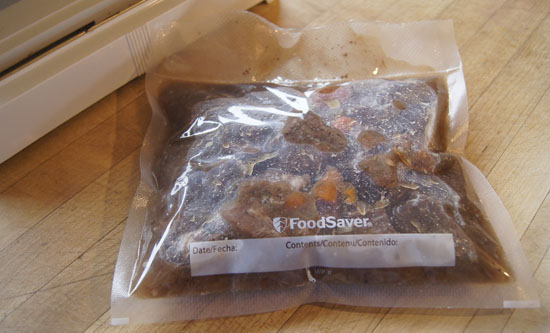 The filled bags are now in my freezer, ready for a couple quick meals.
Comments on food storage, 2017 style
As I used my seal-a-meal this week, I did find the it to be a good method to seal foods for storage. The frozen pouches take up little space in the freezer (compared to a plastic lidded container). The drawback is the time involved (maybe 5 minutes to find and heat the unit and to fill the bag) and the messiness of filling a bag with a wet food like a stew.
Since the advent of seal-a-meal units in the 1970s, plastic bags with nearly air-tight “zip” type seals entered the American marketplace (Hefty and Ziplock brands). Although I wouldn’t freeze something like stew in these bags, I do use them for fresh meats that I’ve bought in bulk; cooked hamburger and sausage; tomatoes, fruits, nuts . . . I use these ziplock-style bags all the time. The advantage over seal-a-meal is that they are quick and easy to fill. Also, I often re-use these bags by rinsing with water.
For leftovers like pasta sauce and chile, I use reuseable, lidded solid plastic containers like Tupperware® or Rubbermaid®. Most of my Tupperware is ancient (they don’t make it now as well as they used to!). Recently, Rubbermaid has come out with a line of “easy find lid” containers that I like a lot because many of the lids are interchangeable between container sizes and the lids are easy to find and the containers stackable. I like them too because they are reusable and thus better for the environment.
And nerdy me, I keep a list of what’s currently in my freezers in Evernote, accessible from my computer, iPhone, and iPad. I have two freezers, one with the refrigerator and one huge one down in the basement. We are 6 miles from the nearest town, and 20 miles from a big supermarket, and I hate to run out of something and have to drive out to a store. Plus I can take advantage of sales. Plus when I was working, I could cook for a whole week on Sundays and store the meals in the freezer.