
Cookbook #59: Hershey’s 1934 Cookbook. Hershey Foods Corporation, USA, 1971.
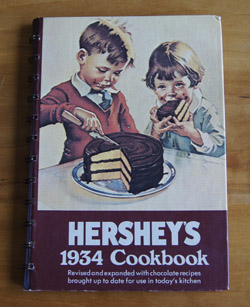 I have four “Hershey’s” small cookbooks and this 1971 one is my oldest. The full title is “Hershey’s 1934 Cookbook, Revised and expanded with chocolate recipes brought up to date for use in today’s kitchen.” From the forward:
“Thirty-seven years ago, in 1934, Hershey published its own chocolate cookbook, filled with all kinds of wonderful chocolate desserts. It is from this source that many of the recipes have been taken and brought up to date for you to use today. We’ve revised some of the recipes, and added some others. Margarine wasn’t around when the first Hershey book was published. Neither were electric blenders or no-stick pans, all the things that make baking a lot easier for you than it was for your mother. Even though the method of baking has become more convenient, the end product remains essentially the same. Hershey’s test kitchens have taken painstaking care to assure the same wonderful flavor that has become a trademark of Hershey baked products throughout the years. We hope you enjoy the recipes, we hope you enjoy the book.”
The first dozen or so pages are devoted to old photos and a bit of nostalgia about the depression times including wages, the price of food, and a woman’s role in the kitchen: “nobody could bake like your mother”. It’s interesting reading. It makes me think how cooks used to have to spend hours making meals for the family, and then hours washing clothes and cleaning house. Today I can instead spend hours in the kitchen playing making flavored oils and being creative. Cooking can be now be just a hobby, not a chore.
I’ve used this cookbook for a chocolate cake recipe and as a reference when I needed to make other basic chocolate items, like chocolate sauce and brownies. I haven’t used it a lot, though, because we usually shy away from rich desserts because of calories, and when I want to make something old-fashioned and rich, I’ll look for one of my own mother’s recipes. The book is correct, nobody can bake like my mother did.
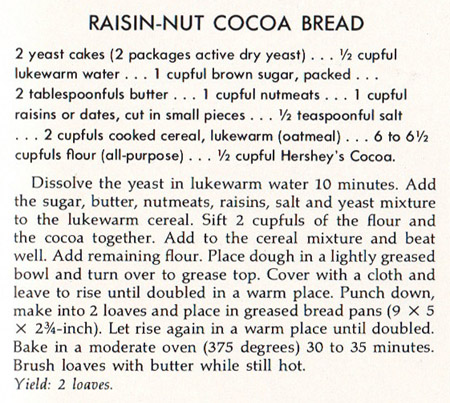
I passed over all of the rich dessert recipes and chose a recipe for a chocolate yeast bread, “Raisin-Nut Cocoa Bread”. This recipe is relatively low in fat and sugar, and is packed with the nutritional benefits of raisins (or dates), walnuts, and oatmeal. I plan to use this bread as toast for breakfasts. Ummm, should be extra good with cream cheese!
 One of “all the things that make baking a lot easier for you than it was for your mother” that we have in 2014 is a breadmaker. I will use mine to knead and rise a half-recipe of this dough, then bake it in one 8 x 4-inch loaf pan. My experience tells me that this is the more appropriate size pan for this amount of dough. For the oatmeal, I will cook some of my favorite extra-thick rolled oats. To make enough for the batter, I boiled 1 1/4 cup water and added 5/8 cup oats and cooked for about 5 minutes. It makes just a little more than one cup.
Raisin-Nut Cocoa Bread
makes one 8 x 4-inch loaf
- 1 package dry yeast (2 1/2 teaspoons)
- 1/4 cup water
- 1/2 cup brown sugar
- 1 tablespoon butter
- 1 cup cooked oatmeal (see my note in the above paragraph)
- 1/4 cup Hershey’s Cocoa
- 3 – 3 1/4 cups flour
- 1/2 cup chopped nuts (I used walnuts)
- 1/2 cup raisins, or dates cut in small pieces (I used some of each and probably more than 1/2 cup total)
Put the yeast, water, brown sugar, butter, cooked oatmeal, cocoa, and 3 cups of the flour in the pan of a breadmaker. Set to the “dough” cycle and start the process. Watch the dough as it is kneaded and add more flour if necessary. This is a heavy dough and may take awhile to come together into a ball of dough. Add a little water if it is not sticking together.
If your breadmaker automatically adds raisins (etc.), set it up to do so. Otherwise, add the nuts and raisins (and dates) during the last five minutes of the kneading cycle.
When the dough has risen, take it out of the breadmaker and form it into a loaf and put it in the loaf pan. Let it rise in a warm kitchen about 45 minutes. This dough is heavy and will never puff up a lot.
Bake at 375˚ for 35 minutes. Take out of the pan and let cool on a wire rack.
Comments
This loaf turned out fine. It’s a dense, heavy bread, and very tasty. I had it for breakfast about four days in a row – just thinking of it made me eager to get out of bed!
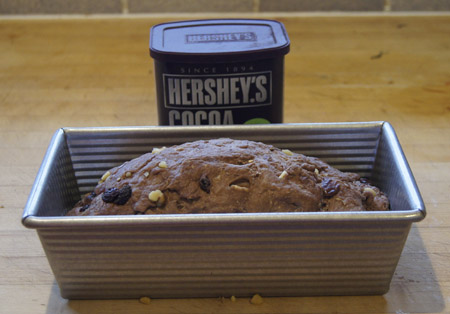
Here is my loaf before the rise-in-the-pan step. Note that it is just about to the rim of the pan. I know that the raisins on the outside will burn in the baking step, so I pull a few of them off:
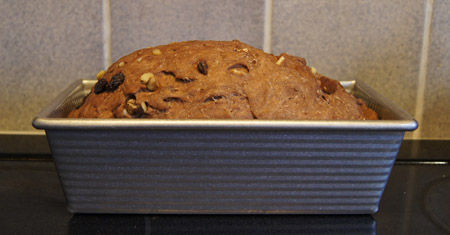
 Here it is after about 45 minutes, risen and ready to put in the oven:
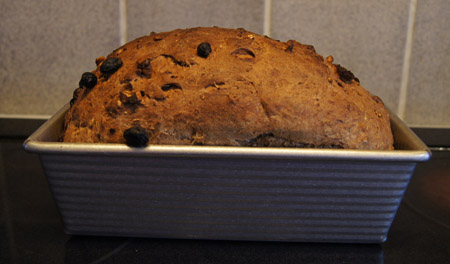
 And here it is baked:
 And on a rack:
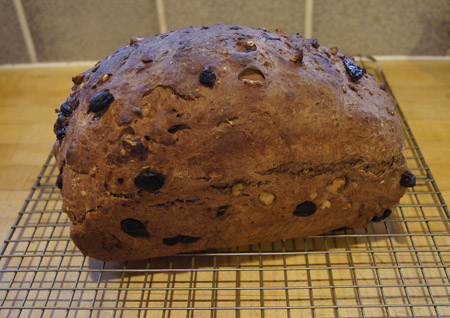 No, it’s not the prettiest-looking loaf I’ve made, but it sure tastes good. Here is a slice, half with whipped cream cheese, on a plate of my Nana’s depression glassware:
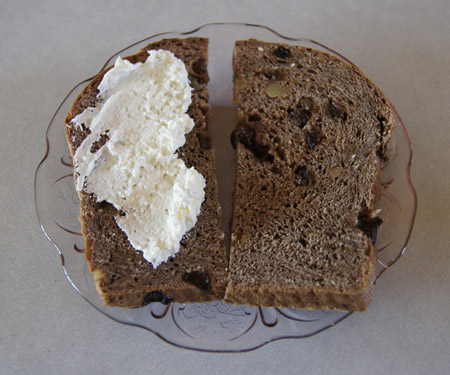 Yum!
Yum!