Pita breads are easy to find in stores, but they can be thick or thin or have pockets or not. I like my pitas thin and with pockets. But store ones that are thin and have pockets usually fall apart when you fill them with a lot of stuff.
I recently made Beef Steak Pitas for this blog. The thick, pocket-less pita that I bought at a local Mediterranean market reminded me: I can make my own pitas!
Sometimes you just have to do it yourself to get it right. I made these last week and they turned out perfect. I enjoy the nutty taste and chewy texture that the whole wheat flour lends these breads. I like watching them puff up in the oven. I love taking out a hot one, cutting it in half, filling it with a slice of cheddar cheese, and ooh-ing and aah-ing at the experience.
(I also like filling them with a lot of stuff. I also like that they store well, on the counter or in the freezer.)
In 1999, I wrote up my method for pita breads in my old blog (here is the history of that blog). Here is that post, along with my slightly updated recipe for pitas.
1999 post:
I was inspired to make these after a member of a news group I was reading, rec.food.baking, asked for suggestions as to how to get pita bread to bake with even crusts. No one else in the group was posting an answer, so I dug out my old recipe (it’s been at least 15 years since I tried these, back when I was baking with more whole grains than I do currently) and gave it a whirl. And yes, I did use a bread machine to do the dough, sorry, but I like the freedom it gives me, plus I’m busier than I used to be. The recipe works just as well if you do the kneading by hand, then let it rise until double, punch down and form the loaves.
I was amazed at how good they came out – nutty and chewy and utterly delightful. I get such a kick out of the way they puff up, but then I’m easily entertained. They make a great pocket for fillings, because they stay together much better than the store-bought cracker-like pitas. Most of these had even crusts top and bottom, though a couple were uneven: I have no explanation as to why, I thought I did them all the same. (Guess they were rebel pitas.)
Pita Breads
makes 10
- 1 1/2 cups water
- 1 teaspoon salt
- 1/2 tablespoon sugar
- 1 generous tablespoon olive oil (you can use any vegetable oil)
- 2 1/4 cup all purpose flour
- 2 tablespoons gluten flour (or regular flour)
- 1 1/2 cups whole wheat flour (not white wheat flour)
- 1/4 cup wheat germ
- 2 tablespoons yeast
Mix in bread machine on the dough cycle, monitoring the dough after the first few minutes in the machine, adding a little more flour or water if necessary to keep a nice ball of dough. If you can, leave the dough a little bit wetter than you would for conventional loaves. When the cycle is complete, divide the dough into 10 pieces, knead each piece briefly, then roll each into a 6 inch circle. At this point, you may let them rise until puffy, about 20 minutes.
Put a heavy griddle on the bottom of your oven. If you have a gas oven, this really means on the BOTTOM; in an electric oven, you must use the lowest rack (take out the upper rack). Heat the oven and the grill to 425˚ for at least 15 minutes before you start baking the pitas. Place the loaves on the heated grill, a couple at a time, and bake for 6-8 minutes. They should puff up magically! If desired, you can then place them under the broiler to brown the tops.
Note: You can use a baking stone instead of a griddle.
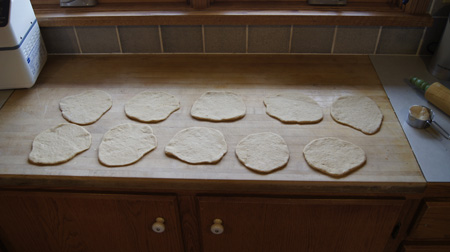
Here are my 10 little pitas, ready for the oven.
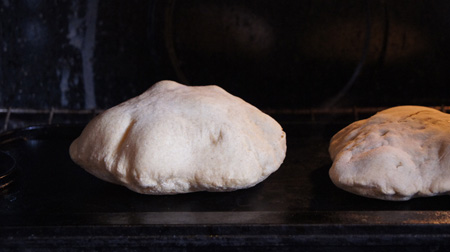
 Here they are magically rising when I opened the oven to take a peek!
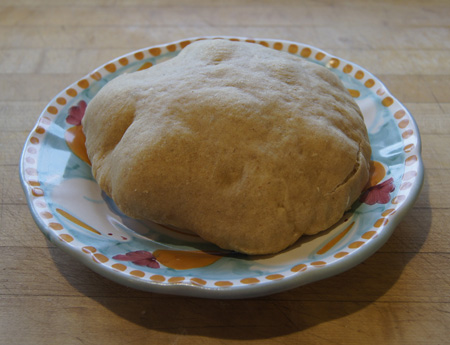
 Here is one of the baked pitas. These actually kept their puffiness and I had to kind of squish them down before storing in plastic bags.

