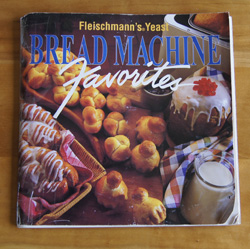
Cookbook #106: Bread Machine Favorites (Fleischmann’s Yeast), Copyright by Specialty Brands, a Division of Burns Philp Food Inc., San Francisco, CA, 1994. Tested in the Better Homes and Garden Test Kitchen, a registered trademark of Meredith Corporation.
 This is a great cookbook. I have thumbed through it many times and it shows! I keep it with my other favorite cookbooks, near the Joy of Cooking.
I like the recipes in Bread Machine Favorites because they all work. Each recipe includes a “recommended bread machine cycle”, so they work across the different brands of bread machines. There is a great “Troubleshooting Guide” if your loaves are not turning out perfect. This guide helped me hone my bread-machine-breadmaking skills. Most importantly, I learned to watch the bread in the machine and add more water or flour as necessary. (Here is my discussion of my experience with – and love of – yeast breads.)
These are the recipes I have tried and liked in Bread Machine Favorites: Blueberry-Lemon Bread, Cottage Wheat Bread, Pumpkin-Nut Bread, Zucchini-Carrot Bread, Old-Fashioned Cinnamon Rolls, and Dried Cherry-Almond Bread. The one I used to make almost weekly is Cottage Wheat Bread. It has cottage cheese in it, therefore a little added protein and calcium. Plus it’s just a darn good whole wheat bread.
Most of the loaf recipes in this cookbook call for baking the bread in the bread machine. It is my preference to bake yeast loaves in a conventional oven. I bake a small loaf (8 1/2 x 4 1/2 inches) for about 22 minutes at 385˚, or until it is nicely browned. The Bread Machine Cookbook also has recipes for rolls and braided loaves, and those are baked in a conventional oven.
About yeast. I like to know my yeast, so I buy it in two-pound packages (and I usually do not buy Fleishmann’s yeast, not that it isn’t good). By always using the same yeast, and using the bread machine to rise the loaves at a consistent temperature, I know I will get consistent results. After I acquire a two-pound package of yeast, I fill a small jar and keep it in the refrigerator, and store the rest in the freezer. Here is my discussion of bread yeast.
For this blog, I will try the “Basic Sourdough Bread”. About a year ago I purchased a sourdough starter from King Arthur Flour. Up until now, I have only used this starter to make no-knead rustic loaves. I have been very happy with the flavor and consistency of these rustic loaves loaves. They are not as sour as San Francisco sourdough bread, but I’m not sure that sort of sourness is possible in Colorado. In any case, they taste different than no-knead bread made without sourdough starter. Now I want to expand my sourdough repertoire to a kneaded loaf!
(By the way: this is the first time in my life that I have kept a sourdough starter fed and perfect for an entire year!)
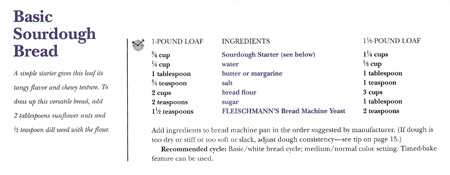
Here is the sourdough recipe in Bread Machine Favorites:
 I had to make a few changes in the recipe. As the bread kneaded, it was too dry, and I added at least 1/4 cup water to get the correct consistency. When I examine the “Sourdough Starter” directions in Bread Machine Favorites, I note that this cookbook directs to feed the starter with equal parts water and flour. My starter is fed with twice as much flour as water, therefore, 2 cups of flour in this recipe is too much. Below is my revised version, as well as directions for feeding my starter.
Sourdough Bread Machine Bread
makes one 8 1/2 x 4 1/2 loaf
- 3/4 cup unfed sourdough starter (see directions below)
- 1/4 cup water
- 1 tablespoon butter
- 1 3/4 cups bread flour
- 1/2 teaspoon salt
- 2 teaspoons sugar
- 1 1/2 teaspoons yeast
Put all the ingredients in your bread machine and set to a dough cycle, or to a basic white bread cycle with medium color (baking) setting.
If you have the bread machine do the baking, you just wait until it’s baked!
If you want to bake the bread in the oven, transfer the dough to an 8 1/2 x 4 1/2-inch pan. Let rise at room temperature just until the loaf peaks a half-inch over the sides of the pan. Bake for 25 minutes at 385˚.
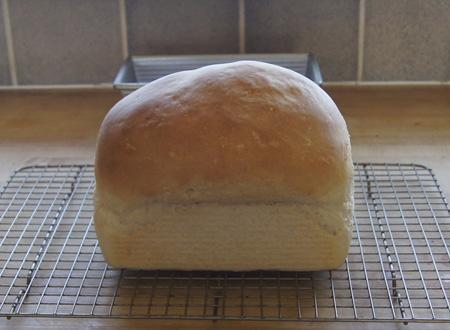
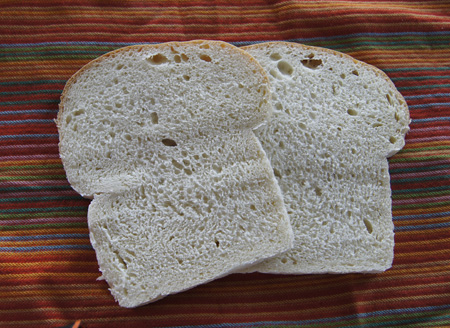
 This is great bread. The sourdough gives it a subtle flavor and soft texture. My only problem was that I used the original amount of flour and had to add more water, and ended up with a huge loaf. Honest: This loaf was just to the top of the pan when I put it in the oven, but it ballooned up on baking! Even so, the bread doesn’t have huge holes in it, nor a coarse texture. I made it Saturday and today is Wednesday and I am so looking forward to my lunch-time sandwich on this tasty, soft bread. (My directions, above, incorporate this revision of using less flour so it should not be such a tall loaf.)
My advice on sourdough starter is to get some from a friend or purchase from a reliable source. My starter is fed like this:
- remove 8 ounces or about a cup and either use it or toss it
- add 1 cup flour and 1/2 cup water and mix well
- let stand at room temperature an hour or two, until it is bubbly
- cover with plastic wrap and refrigerate
- repeat once a week, whether you are baking a sourdough loaf or not!
The directions that came with my starter say to use freshly fed starter in a recipe. However, for the bread machine sourdough loaf that I made for this blog, I used unfed (just out of the refrigerator) starter and it worked great.
Note
I have an extra copy of Bread Machine Favorites! I liked it so much that I bought a copy to give away, then forgot to.

