
Cookbook #44: Artisan Bread in Five Minutes a Day. Jeff Hertzberg and Zoe Francois, Thomas Dunne Books, St. Martin’s Press, NY, 2007.
 Finally, one of my contemporary cookbooks! 2007! I bought this book to learn more about a new way of making yeast breads, called the “no-knead” technique.
No-knead yeast breads are prepared by mixing flour, yeast, and water into a wet dough and letting the mixture stand at least overnight. The dough is then shaped gently into a free-standing loaf and baked on a stone or in a crockery pot in a very hot oven. The result is an artisan-type bread, like you would buy from a good bakery in your town. The crumb is uneven and creamy, the crust is thick and chewy and dark brown. It’s amazing. I experimented with bread baking for forty years but never produced an artisan loaf until I tried this new method.
The method is not only new to me, it’s new to the world of baking, according to this 2006 article in the NY Times: The Secret of Great Bread, let time do the work. I read that article, and Jim Lahey’s recipe that goes along with it, sometime in 2007, but did not try the technique until I saw a recipe in a King Arthur Flour catalog for “The Almost No-Knead Baguette“. I studied that recipe, and re-read the NY Times articles, and then tried the baguette. It turned out great.
I bought the cookbook Artisan Bread in Five Minutes a Day from King Arthur Flour after my success with the baguette. I tried several recipes from this book, mostly with success. Then I saw a class on no-knead breads offered by the Culinary School of the Rockies – I signed up for it. It was a great class. Today, in 2013, I am totally hooked on this technique. So much so that I wrote about it on my other blog: A Lovely Loaf (2011).
Traditional bread making employs the process of kneading to “develop the gluten”. This means, the gluten molecules move into a side-by-side alignment and then bind to each other to produce the elastic network that gives yeast breads their lift and their texture. No-knead bread making uses time and a wet dough to the same end. Since the no-knead dough is wet, the gluten molecules can move about on their own, but it takes some time (at least a few hours).
Nowadays, I rarely hand-knead breads – I use my bread machine instead. So why would I want to try the no-knead method? First, it sounded like a good experiment. Second, once I did it, I found the result quite different from kneaded bread. Usually there are (desired) uneven pockets of air in baked no-knead bread, and the crust is always thick and chewy. No-knead breads just look cool. I still make both kinds of yeast breads; one method is not better than the other – each has its place in my repertoire.
No-knead bread advantages:
- if you are used to kneading your bread without a machine, these breads use less of your hands-on time
- they bake up like artisan loaves
- great for pizza dough and focaccia
- can store the dough in the refrigerator for two weeks
Kneaded bread advantages:
- you can use a high proportion of whole grain flour in your breads
- the crust is soft and easy to cut through to make sandwich slices
- the texture is smooth and uniform (sometimes nicer for sandwiches)
- you don’t have to start your bread the day (or week) before
The recipes I gleaned from the cooking class call for mixing the ingredients for a loaf of bread the day before baking. In the Artisan Bread book, you can bake the bread the same day, or you can let it sit in the refrigerator for up to a couple weeks. This is an advantage, especially if you have a full schedule of work and family and play. Time in the refrigerator also helps develop the bread’s flavor. The disadvantage is that the dough takes up a chunk of refrigerator space.
I chose to make “Deli-style Rye Bread” from the Artisan Bread cookbook. Since this is a recently-published book, I’m not going to scan in the recipe (copyright issues). Artisan Bread has a plain design, with some black and white photos in the “how-to” section and a few glossy photos in the center. It is clearly written and friendly. I highly recommend it for the adventurous bread maker.
(In addition, there are recipes for items that go with or use bread: Tuscan White Bean Dip, Bruschetta, Spicy Pork Buns, marmalade, kebabs, and more.)
My version of the recipe below is a little different from the book’s, and the directions are written to explain how I make this bread in my own kitchen.
No-knead Rye Bread
makes 4 1-pound loaves
Mixing and Resting
- 3 cups water
- 1 1/2 tablespoons yeast
- 1 tablespoon salt
- 3 tablespoons caraway seed (I like lots of caraway; use less if you don’t)
- 1 cup rye flour
- 5 1/2 cups bread flour (you can use all-purpose flour)
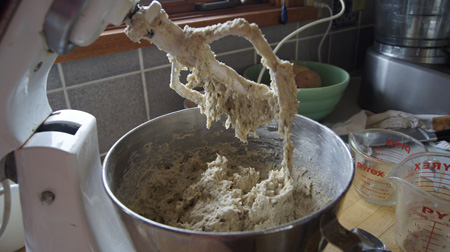
Mix all the ingredients in a large mixing bowl. You can used a stand mixer, or you can do it by hand. Mix only until all the flour is incorporated. It’s really, really sticky. It took some work to get all the dough off these beaters:
 Let the dough stand at room temperature a couple hours (covered lightly).
Note: I left the dough in my mixer’s metal cooking bowl and it (1) rose up over the top and (2) stuck to the bowl, making it hard to clean. I suggest moving the mixed dough to a glass, plastic, or enamel bowl that is lightly oiled and large enough to allow the dough to rise to double its bulk.
After two hours, use the dough immediately or better yet, put it in your refrigerator. (The refrigerating step makes the dough easier to handle when you go to bake it, and it adds some flavor as the yeast works with the flour and sours it a bit.) If you decide to refrigerate the dough, transfer it to a plastic container large enough to allow for the dough to grow in volume by at least 50%. Lightly cover the dough in the container.
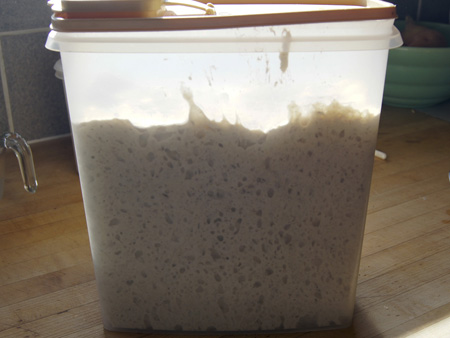
Here is my dough (in the bright light of the morning), after a couple days in the refrigerator:
Baking
You will need:
- a pizza peel
- a large baking stone
- cornmeal
- flour
- a cornstarch/water glaze (microwave 1/2 teaspoon cornstarch in 1/2 cup water for 60 seconds)
- a baking pan with about a half-inch of water in it
Sprinkle some cornmeal on a pizza peel. Take the dough out of the refrigerator and dust with a little flour (just enough to make it less likely to stick to your hands). Grab about a quarter of the dough: if you weigh it, it should be about one pound. This is a messy process:
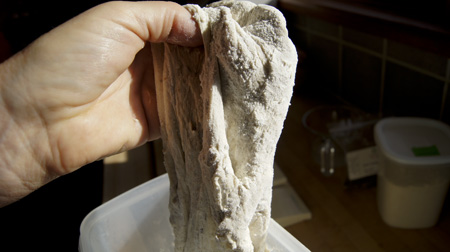 This is sticky dough! I had to keep washing my hands to take these photos.
(Put the rest of the dough back in the refrigerator. It keeps two weeks.)
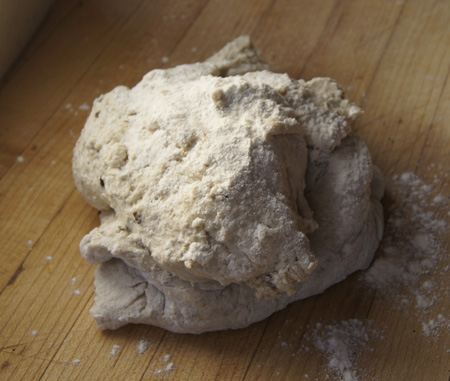
Here’s what the dough looked like before forming the loaf:
 Cloak the dough. This means that you take it in two hands, and stretch the outside of the ball of dough down to the bottom, rotating as you work around the dough. (I’ve used this method a lot of times to form rolls; it’s hard to explain. What you want is a smooth surface on top, with the ends are tucked down on the bottom side of the formed ball of dough. It takes about 30 seconds.)
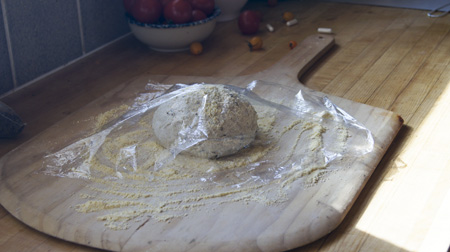
Place the dough on the corn meal sprinkled pizza peel. I had a lot of flies in my kitchen, so I put some plastic wrap on top (with a tiny amount of cornmeal sprinkled on the loaf to prevent it from sticking to the plastic).
Here is my formed loaf, before rising:
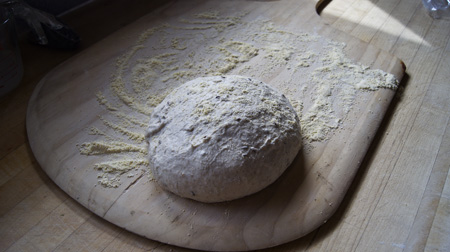
 Let stand 40 minutes to 1 1/2 hour (I let mine rise 1 1/4 hours). Dough that has not been refrigerated will take the lesser amount of time. You won’t see the dough rise a whole lot, especially if it has been refrigerated. (In fact, mine flattened out.) Here is my “risen” dough:
 At least twenty minutes before you bake the bread, put a baking stone on the top rack of the oven and preheat to 450˚.
Just before you put the dough in the oven, put the pan with water in it on the rack under the heated baking stone. (This helps develop a good crust.)
Brush the dough with the cornstarch/water glaze and slash the top with deep cuts using a serrated knife. I sprinkled it with more caraway seeds. Slide the loaf off the pizza peel onto the heated stone in the oven.
Bake 30 minutes. Voila! You are done.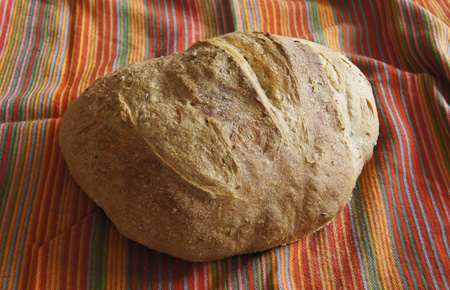 This bread makes great corned beef sandwiches. I used my own dill pickles – yummy. I sliced the bread after only an hour’s cooling, and found it easiest to slice the chewy crust with an electric knife. Since there is rye flour in the dough (whole grain flours break up air bubbles), the texture is more uniform than in my no-knead white-flour only loaves.
I had fun with this bread project. It was a hot day, so I wanted to bake it in the morning and have it ready for lunch. While it rose on my counter and the oven heated, I was off on a bike ride, getting exercise as advised by Jane Brody in her NY Times column (Jane Brody’s nutrition book is my preceding cooking blog entry). Bread baking doesn’t have to mean that you spend your whole day in the kitchen.