
Cookbook #244: From Julia Child’s Kitchen, Julia Child, Alfred A. Knopf, NY, 1975. Second printing, 1982. Hardcover edition.
 “I smile warmly at Julia Child’s complete love of cooking”. These words were mine when I explored Mastering the Art of French Cooking. And I again smile as I open From Julia Child’s Kitchen.
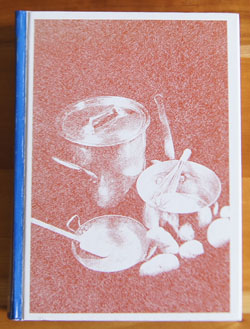
Fourteen years passed between the (initial) publication of these two books. In 1975, Julia Child has a successful television series and is world renown. And she hasn’t lost her love of cooking. That love bursts from the pages of From Julia Child’s Kitchen. And the photographs! Her husband’s stunning photographs and drawings grace the book.
Let me share the first paragraph from the introduction. It’s a perfect illustration of what the book is about and Julia’s style of writing.
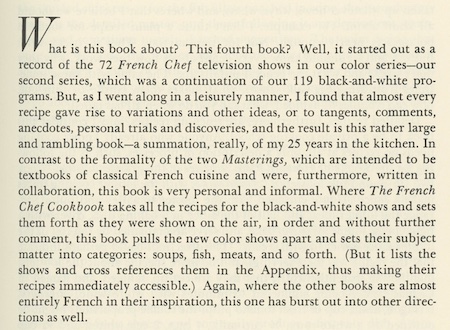 From the above excerpt, we learn that Mastering the Art of French Cooking was written as a textbook, a complete guide, and was written as a collaboration. I used to be a bit intimidated by that first tome. (Now I totally enjoy it!) From Julia Child’s Kitchen is less serious and more fun. Sure, it includes all the important methods of preparing soups, poultry, meats, egg dishes, quiches, homemade sausages, fresh vegetables, French breads, pastries and desserts. But it focuses on the American home cook, with recipes that can be made in a reasonable amount of time and with any level of cooking skill. From Julia Child’s Kitchen also has a chapter on “earthy alternatives”, such as lentils, beans and rice. I find most of the recipes a bit less calorie-laden than in her previous book. And, there are cartoons throughout.
Every chapter and many recipes begin with memoirs of her experiences and travels. Also intertwined are references to her television shows in the 1970s and 1980s. Often a recipe expands on a recipe from a half-hour show that didn’t have time to give all the alternatives.
“Salads, aspics, and summer fare” begins with “Musings upon Caesar and his salad”:
“One of my early remembrances of restaurant life was going to Tijuana in 1925 or 1926 with my parents, who were wildly excited that they should finally lunch at Caesar’s restaurant. Tijuana, just south of the Mexican border from San Diego, was flourishing then, in the prohibition era. People came down from the Los Angeles area in droves to eat in the restaurants; they drank forbidden beer and cocktails as they toured the bars of the town; they strolled in the flowered patio of Agua Caliente listening to the marimba band, they gambled wickedly at the casino. Word spread about Tijuana and the good life, and about Caesar Cardini’s restaurant, and about Caesar’s salad.”
Caesar’s salad! I used to think it originated in Italy. In fact, one of my cookbooks, International Recipes, classified Caesar’s salad as Italian. I have noted recipes for Caesar’s salad in at least four of my cookbooks, and made it for this blog using the recipe in Joy of Cooking. I called that version “a classic Caesar’s, no mushrooms or other vegetables, with the perfect dressing, made on the salad rather than in a bottle.” The Joy of Cooking calls it a famous recipe from California. But no, it is actually from Mexico. At the restaurant with her parents in the 1920s, Caesar himself made the salad for them. She remembers “the only thing I see again clearly is the eggs. I can see him break 2 (coddled) eggs over that romaine and roll them in, the greens going all creamy as the eggs flowed over them.” The salad was a sensation partly because “it was only in the early twenties that refrigerated transcontinental transportation came into being. Before then, when produce was out of season in the rest of the country, there was no greenery to be had. Before then, too, salads were considered rather exotic, definitely foreign, probably Bolshevist, and, anyway, good only for sissies.”
See how I get caught up in this book? Julia goes on to write that she contacted the daughter of Caesar Cardini to get the original recipe for the TV show and for From Julia Child’s Kitchen. Accordingly to Julia, anchovies were not in the original recipe; instead, Worcestershire sauce was used (Worcestershire has a “speck” of anchovy in it). The Joy of Cooking recipe only differs from the recipe in From Julia Child’s Kitchen in the anchovies and the inclusion of a little wine vinegar along with the lemon juice.
Garlicky Sautéed Potatoes is a good example of presentation style of recipes in From Julia Child’s Kitchen. Actually, the full title is “Garlicky sautéed potatoes and a pressure-cooked quickie”. “Pressure-cooked quickie?” Intrigued, I read on. I find the title covers three ways to prepare garlicky potatoes, and the third is the pressure-cooked version:
- Pommes de terre sautées à la catalane, or Potatoes sautéed with onions, peppers, and herbs
- Pommes de terre sautées à l’ail, or Potatoes sautéed with garlic and herbs
- Pommes de terre sautées à la minute, or Fast potatoes with onions and herbs, pressure-cooked
Potatoes sautéed in a stove top pan is a staple at dinners at our house. I never use a recipe, just throw them together. It might be good for me to take some time studying Julia Child’s methods, because sometimes mine turn out good, and sometimes disappointing. And I can compare her recipe for the pressure-cooked version with one I tried previously for this blog entry: Country Style Potatoes.
“Egg Dishes” catches my eye. Remember when I discussed how to boil an egg in Kitchen Science? Well, Julia Child uses the same method. Her discussion of hard boiled – or HB – eggs covers 8 pages! I use a push-pin to poke a whole in the egg, but she actually had an egg-pricker. (They even sell complicated egg prickers online these days.) Continuing with eggs, we come to poached eggs. I use silicone cups to hold eggs to “poach” them in boiling water, but true poached eggs are made by sliding a cracked egg directly into boiling water. She calls poached eggs the “purest and loveliest of ways to cook eggs. I have tried the method of poaching eggs directly in boiling water, but was never successful. But this morning, I carefully studied Julia Child’s method and on my first try, successfully made 4 poached eggs! They were almost perfect! And definitely yummier than the silicone cup method.
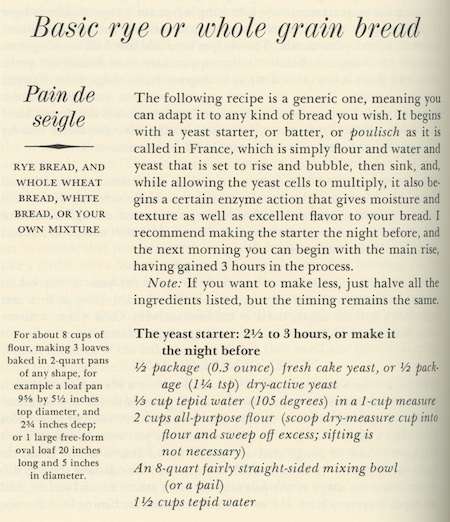
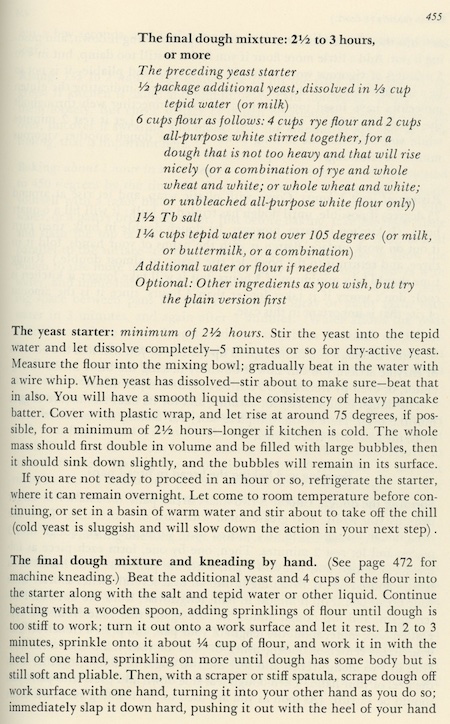
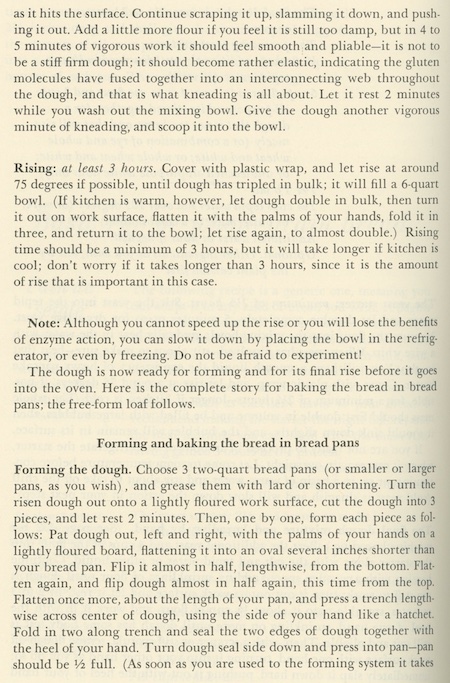
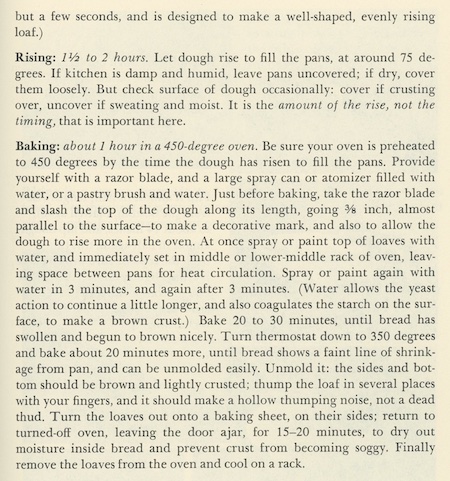
At first, I kind of want to make Julia’s Garlicky Sautéed Potatoes for this blog. But then I came across her recipe for Rye Bread. I have a lot of rye flour in my pantry that I should use up, and rye flour is a whole grain flour and thus “good for us”. So I decide to try the rye bread first, and then the potatoes some other time. Below are the first two pages of Julia Child’s recipe for rye bread. The entire recipe goes on for another five pages!
 And in the very back of From Julia Child’s Kitchen I find this – what I call very funny – passage in one of the appendices:
![]() What tickles me about this? The “or your own holy mixture” clause. Ahem, that’s me! I am always substituting flours like gluten or bread flour or high fiber flour in recipes. And note I have already made three types of rye bread for this blog:
What tickles me about this? The “or your own holy mixture” clause. Ahem, that’s me! I am always substituting flours like gluten or bread flour or high fiber flour in recipes. And note I have already made three types of rye bread for this blog:
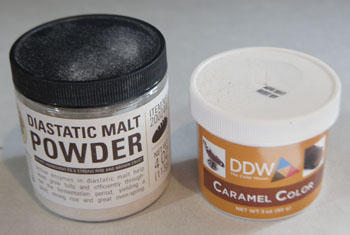
I’ll call my version of Julia Child’s Basic Rye Bread “My Own Holy Mixture Rye Bread”. I will halve the recipe, use my tried-and-true dry active yeast, and a mixture of rye, unbleached white, and gluten flours (see my entry on flours and yeast). I like to add diastatic malt powder (to improve the rise) and caramel color. Finally, I added caraway seeds, because I like them in rye bread. Here is a photo of my malt and caramel:
My Own Holy Mixture Rye Bread
makes one large 9×5-inch loaf
Yeast starter:
- 5/8 teaspoon active dry yeast
- 2 1/2 tablespoons water
- 1 cup unbleached all purpose flour
- 3/4 cup water
Stir the yeast into the 2 1/2 tablespoons water until it is dissolved, then stir in the flour and the 3/4 cup flour. Cover the mixture and let it stand at room temperature for at least 2 1/2 hours and up to overnight. Here is how my yeast starter looks the next day:
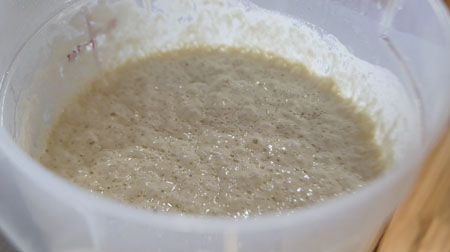 It is just lovely and bubbly and has a wonderful yeasty sour smell.
Final rye dough mixture:
- the yeast starter mixture, all of it (above)
- 3/4 cup buttermilk
- 5/8 teaspoon active dry yeast
- 2 cups rye flour, or 8 1/2 ounces (I used dark rye flour)
- 1 cup of a mixture of unbleached AP flour (75%) and gluten flour (25%), or 5 ounces total
- 1 teaspoon diastatic malt powder
- 1/2 teaspoon caramel color
- 1 1/2 teaspoons salt
- 1 tablespoon caraway seeds (add at the “beep” of the bread machine)
Put all of the ingredients except the caraway seeds into the bowl of a bread machine. Set to a dough cycle that includes a rising step. Start the machine, and monitor the dough a bit to make sure it is forming a big ball of dough. My dough was pretty sticky, but I didn’t add any more flour. From experience with my bread machine and my yeast, I know that a heavy dough like this will give a better rise and texture if left sort of sticky to the touch.
Add the caraway seeds when the machine beeps that it is time for such ingredients, or fold it into the dough when it is finished kneading and rising.
When the dough cycle is complete, remove the dough to a lightly floured board. Fold and press the dough for a minute or so, then form it into a loaf and place it in a lightly greased 9/5-inch loaf pan.
Bake at 375˚ for 25 minutes, then turn the oven to 350˚ and bake another 7-10 minutes, until the top is nicely browned. When done, it should sound hollow when tapped.
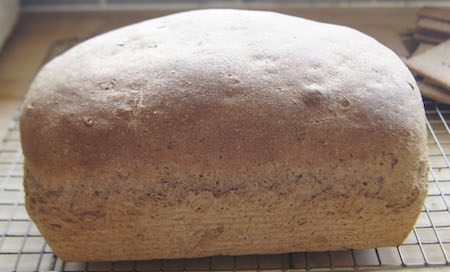
Here is my loaf. In my opinion, the amount of dough was a bit too much for the pan, but I would not change this in the future. If you like, experiment with free form loaves as in Julia Child’s original recipe.
The texture was a tiny bit moister than my usual whole wheat bread. But, it was entirely delicious! It stayed together as a slice, but was soft and yummy tasting, especially with corned beef or pastrami on it.
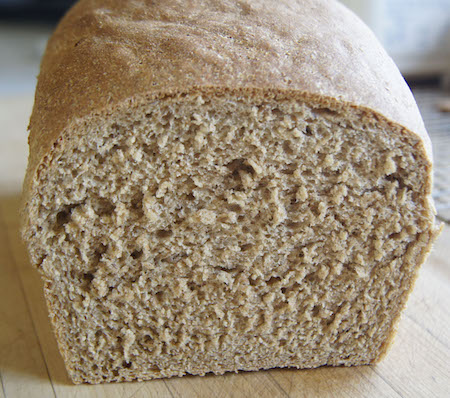
Success!