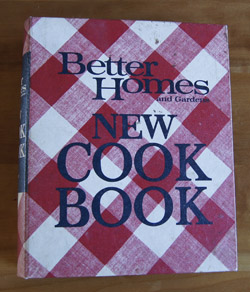
Cookbook #82: Better Homes and Gardens New Cook Book, Better Homes and Gardens, Meredith Press, NY, Des Moines, 1968.
 This is one of my mother’s basic cookbooks. By “basic cookbook” I mean it is the type of cookbook that encompasses all types of recipes and can serve as one of a cook’s core references. For instance, if you want to know how long and hot to cook a roast, or a fruit pie, or a vegetable, the answer is in this book. Such cookbooks tend to be less trendy than what I think of as specialty cookbooks. And, these cookbooks tend to remain useful over the decades.
1968: the publication date of Better Homes and Gardens New Cook Book. I graduated from high school in 1967. Thus my mother did not use this cookbook as a reference when I was a young child at home. But, the recipes certainly reflect the type of cooking I grew up on in my mother’s kitchen. Casseroles and one-dish meals, including chili con carne, enchiladas, macaroni and cheese, chicken divan, tuna casserole, hamburger pie, and goulash. Salads for a group, including frosted cheese mold, waldorf salad, coleslaw, five-bean salad, potato salad, ambrosia, and cran-raspberry ring. Other chapters include appetizers, barbecues, breads, cakes, candies, canning, desserts, meats, poultry and fish, soups, and vegetables.
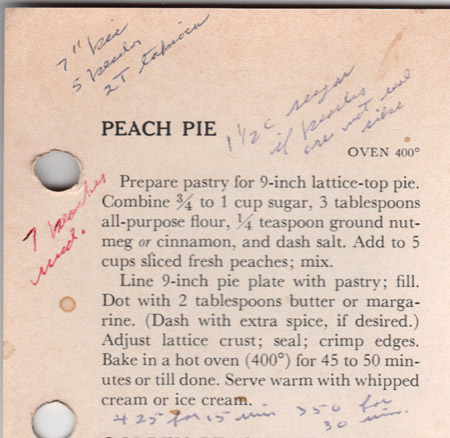
Mother marked several recipes in this book, including Potato Rolls (yeast rolls with mashed potatoes), Herbed Chicken Bake (wild rice, mushrooms, cream of chicken soup, pimientos), and Italian Salad Bowl (lettuce with raw vegetables, Italian dressing, and blue cheese). These recipes are similar to favorites of mine that I discovered on my own from other sources. But for me, the two treasures in this book are the peach and cherry pie recipes. These are her reference – her “work-in-progress” – recipes. On each she wrote notes as to how she made the pie and how to change it next time. What tickles me is that she and I both came up with the same baking method for a peach pie – 425˚ oven for 15 minutes and then 350˚ for 30 minutes – rather than the reference directions of 400˚ for 45-50 minutes. Guess I am my mother’s daughter!
 Better Homes and Gardens New Cook Book is a ring-bound cookbook: the pages are loose-leaf, it opens flat, and you can remove and add recipe pages to it. Indeed, my mother cut a few pre-punched recipes from the Better Homes and Gardens monthly magazine and added them to the appropriate chapters in this cookbook. A nice idea to keep a cookbook current, but in reality, it kind of makes it messy.
I decide to make “Deviled Swiss Steak”. Swiss steak and salisbury steaks were popular ways to cook beef when I was in elementary school.
Steak. And elementary school. That brings back a memory. I was in first grade, at Vinedale Elementary School in Sun Valley, California. The Art Linkletter Show “Kids Say the Darndest Things” chose me (me!) to go on TV. The show’s crew interviewed me and the other little kids for the episode just before we went on live TV. They asked us what our favorite food was, then we were supposed to combine that food with the name of our principal to re-name our elementary school. Well my favorite food was chicken. But some other little kid had already chosen chicken, so I had to choose steak (I didn’t like steak then, found it too chewy). The principal of our school was Mrs. Salisbury. So they had me say:
My school is “Mrs. Salisbury Steak School”.
I didn’t understand what I had said until years later. They tricked me into saying something I would never have come up with on my own. Ah, show business. So honest, so real.
Back to 2014 and the recipe for Deviled Swiss Steak. It calls for a thick round steak. In my opinion, it’s hard to find good recipes for round steak. It can be tough if cooked quick and to medium rare, and it can be dry and tasteless if braised for a long time. This recipe holds promise because of the flavorful mustard and Worcestershire (Yes! I can spell it), the pounding with a mallet, and the gravy that should result after a long cook time.
 I decide to use my old cast iron pan to cook this Swiss steak recipe. It has a very heavy lid, and it’s hard to beat cast iron for braising. Cast iron pans are nearly indestructible (as opposed to my easy to clean but finicky non-stick cookware). I’ve had my cast iron pan since the 70s.
I made a couple changes in the Deviled Swiss Steak recipe as I went along; below is my version of Swiss Steak.
Swiss Steak
serves 3-4 but easily scales up
- 1 1/2 pound round steak, 1-1 1/2 inch thick
- 2 tablespoons flour
- 3/4 teaspoon dry mustard
- salt and pepper
- vegetable oil for frying
- 1 tablespoon Worcestershire sauce
- water (as needed, start with 1/2 cup)
- mushrooms, about 1/2 cup sliced
Combine the flour and dry mustard. Salt and pepper the round steak, then sprinkle half the flour mixture on top and pound with a mallet; turn over and sprinkle the rest of the flour on the other side and pound again. (This is fun!)
Heat a big heavy pan (choose one that has a close-fitting lid) and add enough oil to coat the bottom. Brown the steak on both sides.
Combine the Worcestershire sauce with a half-cup water, pour carefully onto the steak, stir up a little, then cover and turn the burner to a low setting. Cook for 1 1/2 – 2 hours. Check occasionally and add water as necessary. It’s done when the meat is tender.
Remove the meat from the pan. Scrape the pan juices and heat, adding water until there is about a cup of gravy in the pan. I wanted the gravy thicker, so I rubbed a tablespoon flour into a tablespoon of butter, dropped it in small pieces into the pan gravy, and stirred while heating until it was the thickness I wanted. Add fresh (raw) sliced mushrooms to the gravy and heat just until the mushrooms are done.
Slice the meat and serve with the mushroom-pan gravy. I found there was not enough gravy to serve this dish over rice or noodles, so instead I made twice-baked potatoes.
Comments
This Swiss Steak was good, we both liked it. Not a “stellar” dinner, but a good, tasty, homey, and inexpensive weeknight meal.
Here are my ingredients:
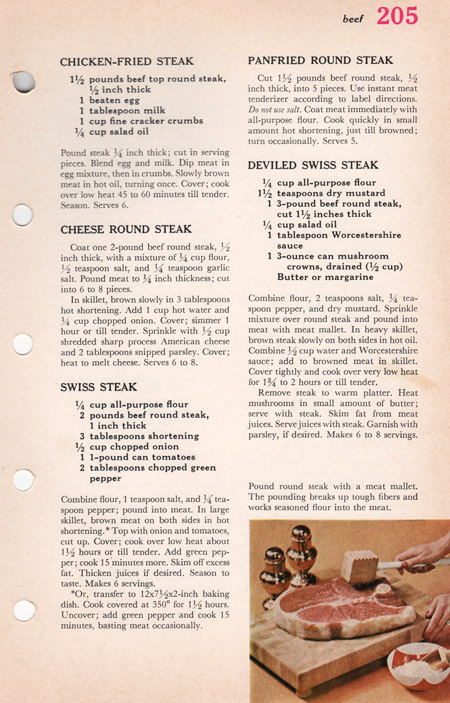
 My round steak has a lot less fat than the one in the photo printed in the cookbook. Look at my mallet! I was my mother’s and I think it’s cool. And I like my old cast iron pan too.
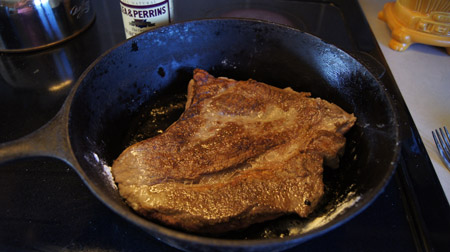
Below is the floured-pounded steak browning in the skillet.
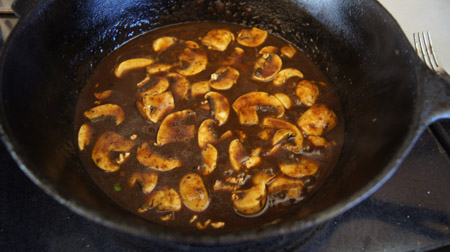
 The steak cooking (above) is not very pretty. But look at the mushrooms cooking in the gravy!
 I consider this meal a success. And I’ll keep the cookbook, not only for sentimentality, but because I marked several recipes to try.