For the last several weeks, I have bought Fritos at the store in anticipation of making Mexi-Chili Casserole, the next recipe in my “pandemic seven”. Each of these weeks, when I went to make the casserole, the Fritos were gone.
The first bag disappeared during a spontaneous outdoor socially-distanced family gathering. I hadn’t been to the grocery store in over a week and suddenly had many mouths to feed. I prowled my pantry and freezer and found enough hot dogs and buns and dessert to feed us all, but I needed chips. Aha! I had bought a bag of Fritos for Mexi-Chili Casserole! So as we were grilling hot dogs, I produced the bag of Fritos . . .
. . . my husband’s eyes lit up. And a little later, my pregnant daughter has the bag of Fritos and is sitting on the couch, munching steadily away. She said, “Fritos have always been my favorite! I used to get them a lot in high school.” Her kids loved them too.
That Frito bag was gone! No Frito casserole that week. So the next time I get to the market, I buy another bag. One day that week I find my husband with the opened bag of Fritos, saying “these are like crack!” Okay, so I’ll buy another bag and try again the next week. “You may never get to make that Frito casserole you are planning . . . ” he says. So I am trying again. I bought two bags – they were 2 for 6 dollars. I hid one away.
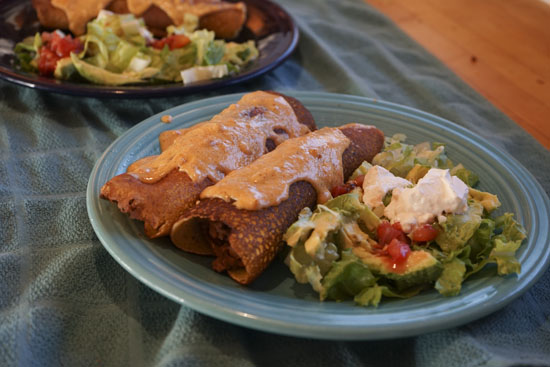
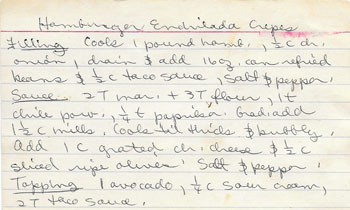
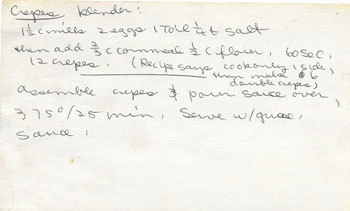
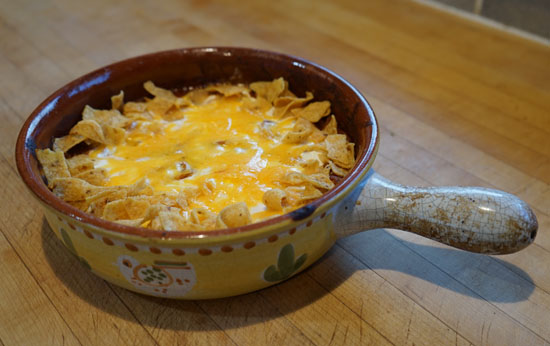
Frito-essential Mexi-Chili Casserole is a typical 50s to 60s casserole. All it takes is a can of chili, a can of enchilada sauce, a can of tomato sauce, onion powder, sour cream, cheese and of course, Fritos. My recipe card is one that I typed before I left home to live on my own in the late 60s. I don’t make Mexi-Chili Casserole often. In fact, I can’t remember the last time I made it. I was always dieting.
In the fifties and sixties, home cooks found an abundance of canned and packaged products in grocery stores. A new, convenient, and quick way of cooking became the rage. Make a white sauce from scratch for a casserole? No, now the housewife could open a can of cream of mushroom soup instead. Take an hour to cook whole grain rice? No, now the housewife could use instant white rice. Cook vegetables? No, now there were canned varieties. Cook a fish? No, open a can of tuna and mix it with packaged pasta for a tuna casserole. (I discussed this before in my blog post on Eat, Drink and Be Healthy.)
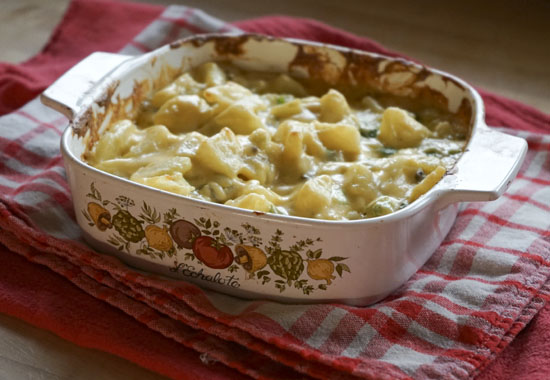
Back to my Mexi-Chili casserole. The time finally arrived when I had a bag of Fritos and was in the mood to cook this casserole. It was so weird mixing together the canned ingredients. These days I usually make my own chile from scratch, add my own seasonings to a casserole, employ some vegetables other than “onion powder”, and don’t use a bag of chips as the starch. This should be fun.
Note: the bag of chips cost $3 and was 9 1/4 ounces. I know those 6-ounce bags of chips once cost 25¢.
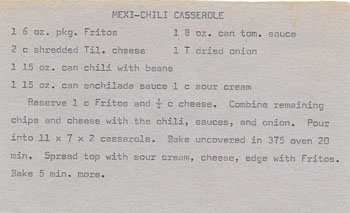
Mexi-Chili Casserole
- 1 x 6 ounce package Fritos (I used a scale to get the proper amount)
- 2 cups grated Tilamook (cheddar) cheese
- 1 x 15 ounce can of chili with beans
- 1 x 15 ounce can enchilada sauce
- 1 x 8 ounce can tomato sauce
- 1 tablespoon dried onion
- 1 cup sour cream
Reserve 1 cup Fritos and 1/2 cup cheese.
Combine remaining chips and cheese with the chili, sauces, and onion. Pour into an 11 x 7 x 2 casserole.
Bake uncovered at 350˚ for 20 minutes. Spread top with sour cream and cheese, and edge with the Fritos. Bake 5 minutes longer.
This casserole got me interested in “Fritos”. How long have they been around, and who invented them? Wikipedia to the rescue! Fritos have their own entry. They were created in 1932 by Charles Elmer Doolin. They are made from deep frying “extruded whole cornmeal”.
Frito Pie, similar to my Mexi-Chili Casserole, also has its own wikipedia entry. Basic Frito Pie is chili, cheese, and corn chips. The oldest known recipe using Fritos brand corn chips with chili was published in Texas in 1949, my year of birth! Frito Pie was sometimes served directly from a Frito bag, which was thicker than it is today.