250 Cookbooks: 101 Perfect Chocolate Chip Cookies

Cookbook #137: 101 Perfect Chocolate Chip Cookies, Gwen Steege, Storey Communications, Inc., Pownal, Vermont, 2000.

101 Perfect Chocolate Chip Cookies cookbookI must have purchased this cookbook in a weak moment! The recipes are great, all of them. But calorie-laden. If you like chocolate chip cookies but are in a cookie-rut, it’s time to open this book and make a slightly different batch of these delights. Me? I love chocolate chip cookies, but I’ve only tried one so far from this cookbook: “Joyous Chocolate Chip Cookies”.

Who contributed the cookie recipes to this book? Well, they are the best recipes from entries to a contest in 1987 sponsored by The Orchards, an inn in western Massachusetts. Entries came from “almost every state, as well as from Italy, Canada, and Mexico”. So, the recipes were contributed by people like you and me. Each recipe has a note written by the person who sent it in. It’s a very friendly book.

And how can there be so many chocolate chip cookie variations? The chips can be chunks and can be of differents sizes or different chocolates (milk, semi-sweet, or bittersweet), or non-chocolate chips can be added to the mix. Flour can be white or whole wheat; a grain like oatmeal can be added. Butter, margarine, vegetable shortening or oil can be used. Different sweeteners are employed: brown or white sugar, honey, corn syrup, molasses. Peanut butter and nuts, fruits and vegetables are nutritious additions.

The first chapter of this book is a great reference for the effects of different oils and sugars on the texture of cookies. For beginners, it’s also a great reference for basic cookie mixing and baking techniques.

Gwen Steege published this and one other cookie book, and a book on gardening. She’s published lots of stuff on knitting.

I decide to make Apple Orchard Chocolate Chippers.

Apple Orchard Chocolate ChippersI used the maximum amount of flour and I did add nuts, and I changed the cooking temperature. I had my own apple butter to use in this recipe. Below is my version.

Apple Chocolate Chip Cookies
makes about 3 dozen

  • 1/2 cup butter (preferrably unsalted)
  • 1/2 cup sugar
  • 1/4 cup brown sugar
  • 1 egg
  • 1 teaspoon vanilla
  • 1/4 cup apple butter
  • 2 cups flour
  • 1/2 teaspoon baking soda
  • 1/2 teaspoon salt (use less if your butter is salted)
  • 6 ounces semi-sweet chocolate chips (1 cup)
  • 1 medium apple, cored and grated
  • 1 cup chopped walnuts

Cream the butter and sugars, then add the egg and vanilla and beat until light and fluffy. Add the apple butter and mix well.

Stir together the flour, baking soda, and salt. Gradually add this mixture to the creamed mixture. Stir in the chocolate chips, apple, and walnuts.

Drop by teaspoonfuls onto lightly greased or parchment lined baking sheets. Bake at 375˚ for about 12 minutes, or until they are beginning to brown.

Apple Nut Chocolate Chip CookiesThese are great! They are kind of cake-like, some said they even are like “muffin tops”. They definitely satisfy (or encourage) my sweet tooth.

Favorites: Julie’s Cherry Pie

I had a craving for cherry pie this week. I pulled out my old recipe card and figured I had better save it in a better format before it was totally ruined.

Julie's Cherry PieJulie's Cherry PieThis is a great cherry pie. I copied it from my mother’s collection when I left home in the 70s. Why is it called “Julie’s” cherry pie? I have no idea. My husband has a sister named Julie, but I was making this pie before we met. Cherry pie is probably my husband’s favorite pie! He always insists that I make criss-crosses of crust strips on top.

The crust recipe on this card calls for Crisco and half and half. It is a good, tender crust, but these days I prefer my newer crust recipe that uses Crisco, butter, and vodka.

As for the tart cherries, the easiest to find are canned cherries. But I have used fresh-picked (when very lucky!) or fresh-frozen cherries as well in this recipe. (Not sure where I got the cherry juice in those instances, but I’m pretty sure today that cherry juice is sold separately somewhere.)

This weekend, I made this pie as two small pies. We split one pie on Saturday and still had another for the next night. Mini-sized desserts works well for the two of us – here are a couple other mini-dessert recipes on a previous blog entry.

Double the recipe and bake in a 10-inch pie pan. (If you use a 9-inch pie pan, it might run over.) My small pie “pans” are fiesta ware 6-inch slanted side oven-safe dishes, a little over 1 3/4-inch deep.

Julie’s Cherry Pie
makes 2 small pies

  • one recipe pie crust (use 1 1/4 cup flour)
  • 1 can tart cherries; 14.5 oz. size
  • scant 1 cup sugar
  • 3 tablespoons corn starch
  • 1 cup cherry juice
  • a few drops red food coloring (you can leave this out)

Drain the cherries, reserving juice.

Combine the sugar and corn starch in a pan, then slowly stir in 1/2 cup of the cherry juice. Bring to a boil, stirring constantly, then simmer and stir a couple minutes. It doesn’t get real thick or real clear, but it’s okay.

Remove from heat and add the red food coloring (if using) and the drained cherries. Cool.

Divide the crust dough into 3 nearly equal portions. Roll out 2 of them and fit into 2 small pie pans. Divide the cherry mixture between the two pans.

Roll the rest of the dough and cut into strips. Put the strips in a criss-cross pattern on each pie. Trim the crusts, roll under and flute.

Bake at 425˚ for 10 minutes and then at 350˚ for 30 minutes.

Julie's Cherry PiesBoy these are good. A little ice cream on top? Sure. Absolutely heavenly.

250 Cookbooks: Crockery Cookery

Cookbook #136: Crockery Cookery, Mable Hoffman, H. P. Books, Tucson, AZ, 1975.

Crockery Cookery cookbook“Welcome to good eating! Slow cooking is the secret of good cooks the world over.” So begins the introduction to Crockery Cookery. This is a very friendly book – totally opposite from my last blog entry, Let’s Cook It Right. However, Mable Hoffman touts slow cooking just like Adelle Davis did, e.g., the slow-baked roast beef that I made last week. Hoffman writes that slow cooking “retains many vitamins high temperatures destroy.”

Mable Hoffman published 18 cookbooks over 25 years. She was one of the first to publish recipes specifically for slow-cookers. This 2010 article, Mable Hoffman dies at 88; slow-cooker pioneer wrote ‘Crockery Cookery’, tells us about her life and writing.

(See my first crockpot blog entry for a little on the history of crockpots.)

I like Crockery Cookery. Lots of good-sounding recipes with ingredients I usually keep on hand. The first chapters cover the use and care of slow cookers and measurement conversion charts, and a chapter titled “Consumer’s Guide) is of historical interest – it decribes the crockpots available in 1975. There is a temperature chart with details on how these recipes work with each type of pot. The soups and stews chapters are the ones I would use most often, but I noted the snack mix recipes (like chex mix) in the appetizers chapter as well. Of course, the recipes are 4 decades old, but that doesn’t mean they aren’t tasty.

And I’ll keep this cookbook for another reason: it was my mother’s. She noted several recipes and stashed clipped slow cooker recipes between several of the pages. I decide to make one of the recipes she marked with notes, German Short Ribs:

German Short RibsShort ribs are available bone-in or boneless. They are usually cut into individual ribs, like country-style pork spareribs. Short ribs are a flavorful but less-tender cut of meat: perfect for a slow cooker. I went to the butcher at Whole Foods and found short ribs that were in long chunks, both bone-in and boneless. The bone-in ones were very fatty and the boneless ones very lean. I got one bone-in rib for the flavor, and then four boneless ribs for the lower calories. Then I cooked them as in the above recipe, using my mother’s advice to cook for 1 hour on high and 7 hours on low.

German Short Ribs
serves 4-6

  • 3-3 1/2 pounds beef short ribs (I suggest boneless ones)
  • 2 tablespoons flour (for dredging the meat)
  • salt and pepper
  • oil (or lard or shortening) for browning the meat
  • 2 medium onions, sliced
  • 1/2 cup red wine
  • 1/2 cup chili sauce (can use ketchup)
  • 3 tablespoons brown sugar
  • 3 tablespoons vinegar (I used white vinegar)
  • 1 tablespoon Worcestershire sauce
  • 1/2 teaspoon dry mustard
  • 1/2 teaspoon chili powder
  • 2 tablespoons flour (for thickening)

Salt and pepper the short ribs and dredge in the 2 tablespoons flour. Brown on all sides in hot oil (I used groovy lard). I did this browning step in a pan on the stove; if your slow-cooker has a browning setting, you can do it in the cooker itself.

Remove the meat from the fat (drain it if you brown it in the cooker).

Combine the onions, wine, chili sauce, brown sugar, vinegar, Worcestershire sauce, mustard, and chili powder in the slow cooker. Add the meat and mix.

Cover and cook on low for 6-8 hours. Remove the meat from the cooker. Mix the final 2 tablespoons flour in a small amount of water and stir it into the sauce in the slow cooker. Turn the slow cooker to high and cook about 10 minutes, or until slightly thickened.

Serve over wide noodles.

German Shortribs“Delicious flavor” just like my mother noted! The ingredient mixture was perfect. And it smelled really good cooking!

I cooked them an hour on high and 7 hours on low. But next time, I will cook them 6-8 hours on low. I think my crockpot cooks a bit higher on low than crockpots from the 1970s; anyway, I felt mine were a little overdone. The meat was broken down almost like a shredded beef dish. No complaints from my dining partner, though! I will make these again.

Note: We had leftovers so I froze the meat and gravy. A couple weeks later, I heated it up and added potatoes and carrots and served it like stew. This meat really has great flavor.

Note: These are the crockpot cookbooks that I have covered so far.

250 Cookbooks: Let’s Cook It Right

Cookbook #135: Let’s Cook It Right, Adelle Davis, Harcourt Brace Jovanovich, Inc., NY, NY, 1970.

Let's Cook It Right cookbookAdelle Davis. I remember this author as one of the gurus of the health food movement back in our hippie days.

My copy of this book is well-worn. I keep it in the kitchen as a reference for cooking meats because it has good roast-cooking time tables. I always cook turkeys according to her directions: stuffed and on a rack with the breast side down. Each Thanksgiving since 1995, I have left a note on a piece of paper tucked between pages 54 and 55 of this book. On each note is how I cooked the turkey, and how it turned out.

notes in Let's Cook It RightLet’s Cook it Right was first published in 1947, then updated in 1962 and 1970. My 1970 edition dedication reads:

“Dedicated to my daughter, Barbara, in the hope that here husband and children will not have to eat TV dinners.”

I haven’t actually read this book in decades. I recall Davis as being a bit “preachy”. But I liked her, partly because she – like me – earned a masters in biochemistry. This week I take some time scanning through Let’s Cook it Right. From the preface:

“Surely we all agree that our foods should be both delicious and sufficiently health-building to enhance our enjoyment of life; and that dishes which are good for you but almost impossible to eat deserve little praise. Since we spend approximately a thousand hours each year eating our meals, they should be pleasant hours, times of family unity and companionship.”

Davis stresses that we need to buy nutritious foods and then cook them correctly to preserve the nutrients. And she assumes the cooking is done by the woman of the household, as in:

“Despite the need to retain maximum value in all food preparation, women are advised by thousands of recipes to extract and discard nutrients or to destroy them by high temperatures, long cooking, or the incorporation of air”.

The tone of Adelle Davis’ writing is serious and didactic: women must learn how to cook properly so that they do not ruin or toss nutrients. Her reward for this work:

“When she hears her physician praise the beauty of her children, when she sees her husband, young beyond his years, succeeding because of his energies, when she feels the surge of vibrant health in her own body, she will realize that she is largely responsible. She has shouldered her tasks and has seen to it that good health has come from good cooking.”

Once I get past the preachiness and non-feminist ideas, I do like many of the concepts in this book. “You Need Have No Failures in Cooking Meats” is the chapter I have used the most. “Serve Your Salads First” is a firm and steady rule of my household, just ask any member of my family. In “Get Acquainted with Fish” she asks: “How many hundreds of tmes have you heard housewives remark, ‘I don’t cook fish because I don’t like the odor in the house’? The fact is that when fish is properly cooked, there is no odor.” Davis’ advice for cooking fish at low temperature helped me keep fish odors to the minimum.

Let’s Cook it Right leans heavily towards protein-dense foods. Adelle Davis frowns on sugar, and writes that if a person is sedentary, they should only eat 1 slice of bread per day. The chapter on bread is titled “If You Want to Bake Bread”. In her opinion, one should buy whole wheat bread loaves rather than bake it at home. I am the opposite – I love home-baked bread! From my notes in this cookbook, I can tell that I tried her whole wheat bread recipe, but I did not write whether or not it turned out. There are almost zero cake recipes in this version of Let’s Cook it Right. In the chapter on desserts, “Desserts Can Contribute to Health”, Davis writes: “Frankly, I have never been good at baking cakes.”

This excerpt from the bread chapter illustrates the tone of Davis’ writing:

“Never shall I forget a dinner to which a friend invited me, saying, ‘I’m going to prepare everything from your cookbook.’ It was her first attempt to use whole-wheat flour and powdered milk. She had tried to make yeast bread of rancid pastry flour and still more rancid wheat germ, purchased from a market where the turnover was slow. She had added to the bread powdered milk which should have been sweet-smelling and as fine as face powder but which had an offensive odor and looked like crushed rock; such changes occur when powdered milk has been left exposed to the air. It was impossible to say who was the more embarrassed, my hostess or myself. We ate cold cereal, however, and remained friends. But I shudder when I think of how many other hosewives may have unknowingly obtained products of inferior quality.”

Davis would be amazed to walk into today’s stores with their abundant fresh whole grain flours, not to mention the ready availability of responsibly grown beef, pork, and chicken products.

(I note this with some distress: Davis writes that if we are enjoying the aroma of something cooking, we should be aware that the nutrients are leaving the meal along with the smells.)

In Let’s Cook it Right, Adelle Davis does not toute vitamin supplements. But apparently that is not true of all of her writings. On Quackwatch, the article “The Legacy of Adelle Davis” by Stephen Barrett claims that her recommendations of supplements for certain conditions were sometimes dangerous. From Wikipedia: “She . . .  became the most recognized nutritionist in the country. Despite her popularity, she was heavily criticized by her peers for many recommendations she made that were not supported by the scientific literature, some of which were considered dangerous.” On the other hand, the Adelle Davis Foundation is entirely positive about her contributions and continues her legacy.

For this blog, I turn to the chapter “You Need Have No Failures in Cooking Meats”. Adelle Davis presents a wonderful way to cook a beef roast. You put it in a 300˚ oven for an hour, then turn the oven down to the temperature you want it to end up at (or turn the oven off) and leave it the entire day. Come home and the roast is cooked to perfection, evenly medium-rare pink throughout. I used to do this all the time! It’s great for the working person, and it’s also great (according to Davis) for keeping nutrients in the meat. This method is similar to sous vide, in that you slow cook the meat by setting the cooking device – the oven in this case – to the desired finished temperature.

(No scan of this recipe; Davis’ method is explained in a two-page section titled “Slow Roasting”.)

In the spirit of Adelle Davis, I buy a responsively grown 4 pound beef rump-round roast at Whole Foods. (She would not have approved of the cost, however!)

uncooked roastIn 2015, I have an oven that I can set to any temperature from 100˚ to 550 ˚ F. This should work even better than the oven I had back when I first explored this method, as that oven did not have low temperature settings.

Slow-Roasted Beef

  • 3-4 pound beef rump or round roast
  • salt and pepper
  • olive or vegetable oil

If the meat has more than 1/2 inch of fat on it, trim some of the fat off. Season the roast with salt and pepper (Davis says not to salt the meat; I disagree). Rub a little oil over the surface of the roast. Place the roast in a roasting pan, on a rack if possible. Do not cover the roast. Insert a meat thermometer in the center of the roast.

Place the roast in a preheated 300˚ oven for 1 hour (to destroy bacteria on the surface). Then, turn the oven down to internal temperature that you desire. (If your oven does not have a low setting, simply turn it off. It should work.) Do not open the oven door!

  • rare 135˚
  • medium 150˚
  • well done 160˚

For a rare-cooked roast, it takes about 2 1/2 hours per pound.

When the meat has reached the internal temperature that you want, take it out and serve.

slow-cooked roastMine turned out perfect! I cooked it to rare. It was evenly pink throughout, just the way we like it! Good the first night with mashed potatoes and gravy, and excellent sliced/shaved very thin for sandwiches the next several days.

250 Cookbooks: Food Lover’s Companion

Cookbook #134: Food Lover’s Companion, 3rd ed., Sharon Tyler Herbst, Barron’s Educational Series, Inc., Hauppauge, NY, 2001.

Food Lover's CompanionFood Lover’s Companion is a dictionary of food, drink, and culinary terms. No, it’s not a “cookbook”, but it’s in my cookbook database, so one of my “250 Cookbooks”.

I bought this reference book on the recommendation of a fellow classmate at the Culinary School of the Rockies (now Escoffier’s) in Boulder. While flipping through Artichoke to Za’atar, I thought to look up some of the unfamiliar Middle Eastern terms in Food Lover’s Companion. All the terms I looked up were there! And I thought “aha, I’ll use this incidence to segue from a cookbook to a reference book in my blog”. So now I hold Food Lover’s Companion in hand to find something to cook for this blog, even though I’ll have to search for the recipe elsewhere.

There are almost 6000 entries in this book. One might ask: Why own a printed dictionary when you can search online? A few reasons. One, often I find something else interesting when searching for a specific term. Two, books are often more carefully edited and researched than internet sources. And – especially in my case – sometimes your internet service is slow and boggy and fails. (That’s one of the downsides of living out in the boonies.)

“Abalone” is the first entry in Food Lover’s Companion. I know that word, but the second entry I do not: “abbacchio, Italian for a very young lamb”. I once bought a “black radish” at Whole Foods, now I know that this large radish dates back to ancient Egypt, and can be used in salads or stir-fry dishes. “Hangtown Fry” consists of fried breaded oysters cooked together with eggs and fried bacon, and is named for a town known for its frequent hangings. “Mesclun” is a “potpourri of young, small salad greens” – essentially it is “salad mix”. “Pound cake” was originally “made with one pound each of flour, butter, sugar and eggs”. “Sémillon” is a white grape grown mostly in France. “Tsukemono” is a Japanese-style pickled vegetable. “Yuba” is the skin that forms when soymilk is heated; it is then removed and dried in sheets. “Zwieback”, oven-crisped bread, is the last entry in Companion. But this entry does not denote the end of the book: the appendices are helpful too, especially an extensive list of different types of pasta.

For this blog? I decide to make a rösti. In Switzerland, rösti means “crisp and golden”, like fried foods browned on both sides. Usually it refers to potatoes, as in, “Rösti Potatoes”. These are like potato latkes and common hashbrowns.

Rosti RecipeI search online for “rösti potatoes” and find many recipes for this dish. And all the recipes are different! The potatoes might be grated, julienned in a food processor, or sliced by hand; they might be fried in butter or oil or a mixture of both; a lot of fat might be used or very little. I choose a recipe for Pomme Rosti on ChefSteps, largely because the photos are so great.

In this ChefSteps recipe, the potatoes are sliced thin (1 mm) in a mandolin. Then, the slices are stacked and sliced thinly again into strips (see the photos on the website). I used a food processor to slice the potatoes, took them out and stacked them, and sliced the stacks into strips by hand. Mine were not as neat as theirs!

Next, the potatoes are rinsed in water, drained, and blotted dry. In a bowl, you add about a cube of melted unsalted butter and some salt to the potatoes, then pour the mass into a heated non-stick pan and lightly brown on one side by cooking for about 5 minutes. The pan is then put into a 375˚ oven for 10-15 minutes until the potatoes are well browned on the bottom. The pancake is turned to cook the other side for about 10-15 minutes. On the ChefSteps site, the potato pancake is actually flipped in the air above the pan! No way could I do that. I would have had potatoes all over the kitchen.

My rösti did not turn out as pretty as the ChefSteps one, but it tasted very good. We scarfed it all up.

Rosti potatoesWould I make it again? No, not this exact way. For one, it was way too rich with all the butter. Second, I need to use a different pan to brown them, either a non-stick or a cast iron pan (I used my newish and not well seasoned Matfer black steel frypan). I think I should have pressed the potatoes more firmly into the pan while they cooked. I feel that there was much water in the potatoes – they sputtered as they cooked. When I make potato pancakes, I spin them in a salad spinner to get rid of the excess water; this same technique could be applied to a rösti. And maybe the butter mixed in with the potato shreds prevented them from forming a solid mass. It’s back to google searches or searches in my own cookbook library for the next time I make rösti potatoes.

But I’ll keep this book! I highly recommend it.

Note: The latest edition of Food Lover’s Companion, the fifth, was published in 2013.

250 Cookbooks: Artichoke to Za’atar

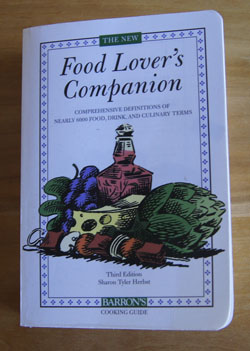
Cookbook #133: Artichoke to Za’atar, Greg Malouf and Lucy Malouf, University of California Press, Berkeley, Los Angeles, CA, 2008.

Artichokes to Za'atar cookbook
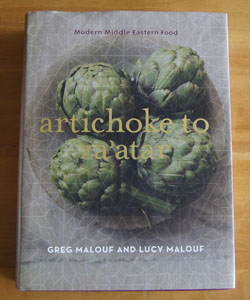
This is a beautiful cookbook. The photos are amazing. Pleasing designs and colors are carried throughout the pages. And – the Middle Eastern recipes are interesting and often enticing.

My daughter brought me this cookbook when she moved from Washington, DC to Togo, West Africa. She knows a lot more about Middle Eastern cooking than I do. I only took a class in it – she traveled to Morroco and stayed with families there. I do want to learn more about this cuisine, and Artichoke to Za’atar is great for reference and for recipes. I’m glad this blog got me to take this book off the shelf and spend some time with it.

A little about the authors. Greg Malouf is “modern Middle Eastern” grand chef. He lives in Australia but his heritage is Lebanese. On this site, you can see some of his handiwork (2015). I recommend his Facebook page too. Lucy Malouf, who is now his ex-wife, has had a “rich and varied career”. From her site, Lucy “. . . is regarded as one of the most experienced food editors in the publishing industry. She is also a member of that peculiar group of people who enjoy compiling indexes.” Ah, a woman after my own heart! I once indexed an organic chemistry laboratory text and thoroughly enjoyed that task!

Oh yes, I can learn a lot from Greg and Lucy Malouf.

Many recipes in Artichoke to Za’atar look exotic, but the directions seem clear and easy to follow. I think that my problem will be in finding some of the ingredients in local stores. Examples: amardine (apricot leather), orange blossom water, haloumi cheese, merguez sausages, white haricot beans, fresh fava beans, juniper berries, sumac, quinces, rose water, Vialone Nano rice, poussin (very young chicken), pigeon, rabbit. (Rabbit? We have tons of rabbits on our land this year, but I am not about to kill and dress one.)

I decide to make “Honey-Roasted Pear and Walnut Salad” for this blog:

Honey Pear Walnut Salad recipe
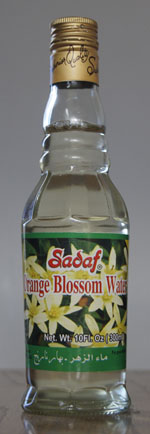
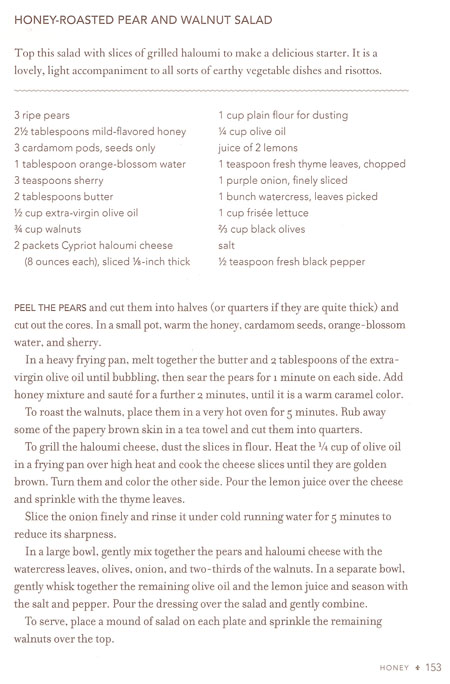
The ingredients that might be hard to find are orange blossom water and haloumi cheese and frisee. I start in downtown Boulder with a visit to my favorite ingredient and spice shops. Got lucky on my first store, Peppercorn, and found the orange blossom water (with the help of a saleswoman).

Orange Blossom WaterCypricot haloumi cheese? I know that Whole Foods has a good selection of cheese, so I started there. Couldn’t find it in the fancy cheeses, but a store helper led me to the area of fresh mozzarella, feta, quesa fresca – those sorts of cheeses – and there it was:

Hamoumi Cheese
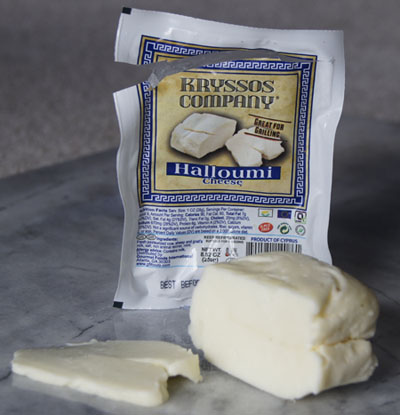
When I got to the check-out stand, they couldn’t find a price on this cheese, even sent the bagger back to look, so they gave it to me for free! The clerk raved about this cheese as a “grilling cheese”. I am looking forward to tasting it!

Frisee is a type of lettuce that is often in the “spring mix” packages, but I don’t recall seeing it sold separately. I was wrong! I found “endive frisee” sold by the head in the produce section of Whole Foods.

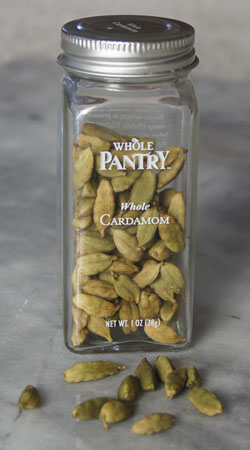
I have cardamom pods in my own spice cabinet. They smell wonderful! Cardamom comes in seeds, powder, or pods. Here is my jar of whole cardamom pods:

Cardamom Jar
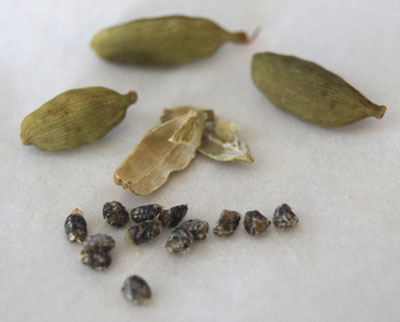
The cardamom seeds are inside the greenish pods. I cracked a pod and peeled it apart and found these black seeds:

cardamom pods and seedsIf you have cardamom seeds or powder in your pantry, my guess is that you could substitute them for the pods.

The rest of the ingredients (even watercress) are easy to find. Pears especially are easy – it is fall and pears are in abundance. (Once I ordered “roasted pear salad” at a restaurant in Boulder, and they only put one measly pear in it! This time I will have a lot of pears.) The recipe does not say how many it serves. It looked like too much for the two of us, so I cut back the ingredients.

Aargh. As I prepared this salad, I took issue with many of the instructions. It said to use a “very hot oven” for the walnuts. To me, a “hot” oven is 475˚, the temperature I use to bake rustic breads. I chose 450˚ to roast the walnuts, and they were burnt after 4 minutes of cooking (I had to start over). It calls for the “juice of 2 lemons” but did not specifiy how much went for the cheese and how much for the dressing. I don’t think running the onion under water for 5 minutes is necessary. It says to “add the pears”, but I wasn’t sure if I was supposed to add just the pears, or the pears and their cooking liquid. (For that matter, I was disappointed that the pears were “roasted” by frying in a pan, not cooking in a hot oven.) The recipe lists frisee but does not specify when to add it to the salad. Whisk the oil and lemon juice “gently”? That’s odd, usually you want to whisk it to an emulsion.

Below is my version of this recipe.

Pear, Walnut, and Haloumi Cheese Salad

Pears

  • 2 ripe pears, peeled and cut into quarters
  • 2 1/2 tablespoons honey (about 50 grams)
  • 3 cardamom pods, seeded (use the seeds only)
  • 1 tablespoon orange-blossom water
  • 1 tablespoon sherry
  • 2 tablespoons butter
  • 2 tablespoons of extra-virgin olive oil

Combine the honey, cardamom seeds, orange-blossom water, and sherry in a small pan and heat gently to combine. Save.

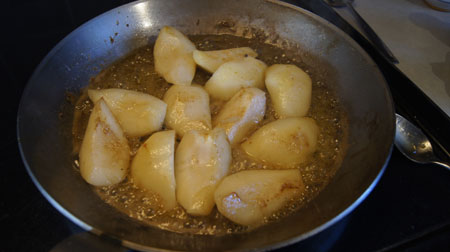
Heat the butter and 2 tablespoons extra-virgin olive oil in a heavy fry pan. Keeping the heat at medium high to high heat, add the pear and sear the pears for 1 minute on each “side” (my pears had 3 sides). Add the saved honey mixture and cook for 2 more minutes, or until the liquid is a caramel color. Turn the pears carefuly a few times as the liquid is caramelizing.

cooking the pearsSet the pears aside and save.

Walnuts

  • 1/2 cup walnut haves

Roast the walnuts by placing in a pan in a 400˚ oven for about 5 minutes. Check during the cook time, as they can become black quite quickly.

Cheese

  • 4 ounces Haloumi cheese, sliced 1/8-inch thick
  • 1/4 cup flour
  • 1-2 tablespoons olive oil (extra-virgin not necessary)
  • 1 tablespoon lemon juice (juice one lemon and use 1 tablespoon here, the rest in the dressing)
  • thyme, about 1 fresh sprig chopped or about 1/4 teaspoon dried

Heat a fry pan over high heat and add enough olive oil to cover the bottom of the pan. Dust the haloumi cheese in the flour and then cook the cheese slices until they are golden brown on each side. Remove the cheese from the pan and sprinkle with the 1 tablespoon lemon juice and the thyme.

Salad

  • 1/4 of a red (purple) onion, thinly sliced
  • about 1/4 of a bunch of watercress, leaves only
  • about 1/2 cup endive frisee lettuce (if you can find it)
  • (use any lettuce combination you have on hand)
  • about 1/3 cup whole black olives, brined are especially good
  • 3 tablespoons extra-virgin olive oil
  • juice of one lemon (well, what is left after taking out the 1 tablespoon for the cheese slices)
  • salt and pepper to taste

Put the pears (fish them out of their cooking liquid), the fried haloumi cheese, the watercress, frisee, olives, onion, and most of the walnuts in a bowl and mix gently. In a separate small bowl, whisk together the olive oil and lemon juice and salt and pepper. Pour the dressing over the salad and mix gently. Serve topped with the remaining walnuts.

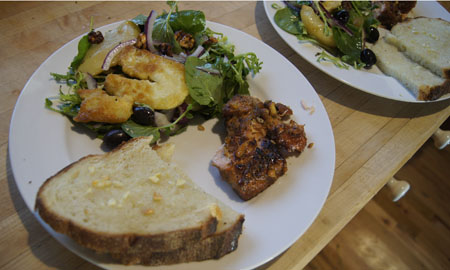
My version of this salad was very flavorful, and quite pretty. In the cookbook they say to serve it as a “starter”. Since it is a fairly substantial salad, I decided to serve it plated with salmon and garlic bread as a complete meal.

Honey Pear Walnut SaladI will make a version of this again, I’m sure. But next time I might try a couple variations. I would like to try the haloumi cheese grilled outside instead of fried in oil. For the pears, I want to try roasting them in the oven instead of frying in a syrupy sauce.

A small additional note. This cookbook is organized in alphabetical order by ingredient name. But, “artichoke” is not the first entry, “almond” is. And the last entry is “zucchini”. “Za’atar” is a thyme spice mixture, and does not have it’s own entry. I guess they did not want to call this book “Almond to Zucchini”!