250 Cookbooks: 365 Great Cookies You Can Bake

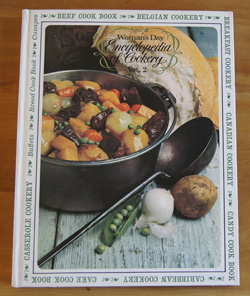
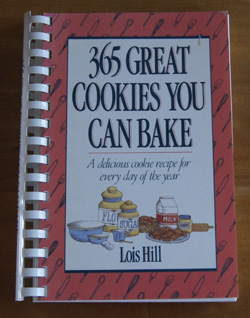
Cookbook #39: 365 Great Cookies You Can Bake. Lois Hill, Weathervane Books, NY, 1990.

365 Cookies CBI must have bought this cookbook on a whim, because the last thing I need is more cookie recipes! It is, though, a good selection of cookies, and it would be fun to make a different kind of cookie every day for a year.

I don’t think this cookbook is in print any more. My edition is 1990, and by searching online, I find there was also a 1997 version. Both are available “new” from Amazon resellers.

“Nothing tastes quite as good as a homemade cookie fresh from the oven.” Thus begins the introduction, and I totally agree. This cookbook has recipes for “bars, brownies, drop cookies, macaroons, meringues, hand-rolled cookies, cookie cutter and pressed cookies, special one-of-a-kind cookies, and sugar-free cookies.” It really is a good selection, a one-stop book to search when I am looking for a particular type of cookie to bake. The layout and recipes are pleasing and straightforward.

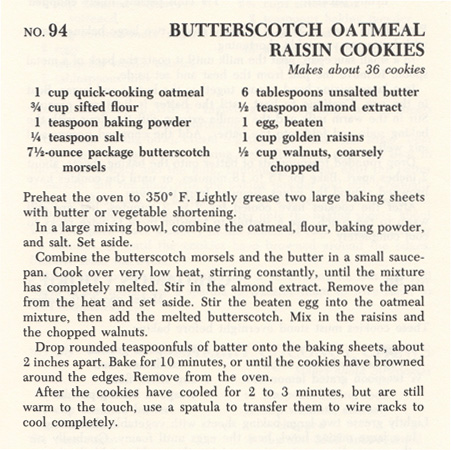
I decided to try “Butterscotch Oatmeal Raisin Cookies”. The oatmeal, nuts, and raisins will lend a hint of fiber and nutrition to this treat.

Butterscotch Oatmeal Raisin Cookies RecipeI chose these for the oatmeal-raisins-nuts, and it wasn’t until I was mixing them up that I realized there is no added sugar in this recipe. I had to double-check to make sure. You add a beaten egg to the dry ingredients, a very unusual cookie-practice. Also, you don’t use a mixer. Hmm, are these really going to work?

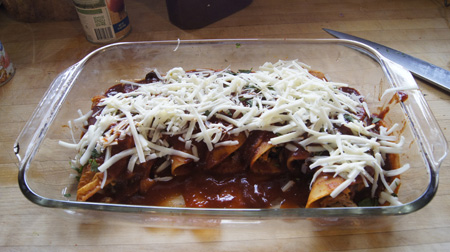
I went ahead and followed the directions. My butter-butterscotch chip mixture separated into two layers, no matter how much I stirred it. After mixing it with the egg-dry ingredients and the nuts and raisins, the batter looked like this:

cookie dough
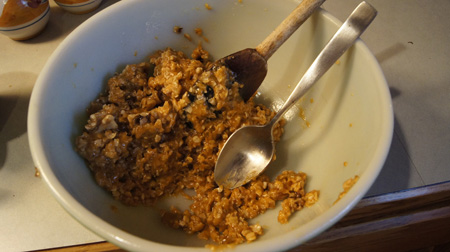
It’s wet and gooey. I went ahead and used the teaspoon to form cookies:

cookies ready to bake
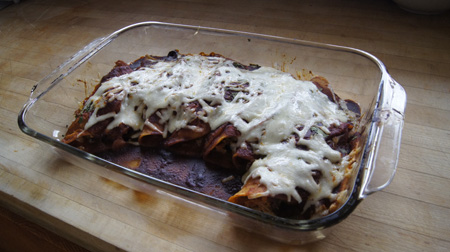
And baked them 10 minutes:

baked cookies
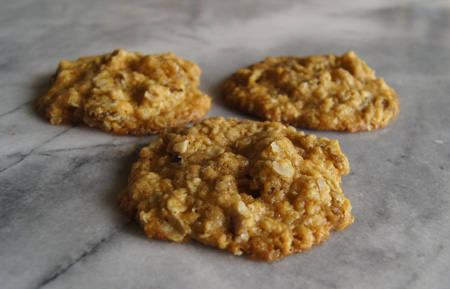
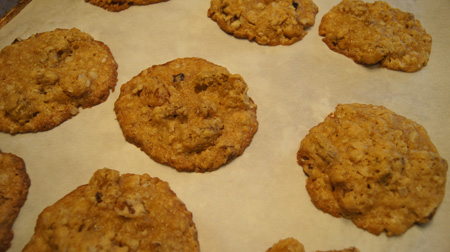
They were just nicely browned along the edges. I let them cool a couple minutes before removing from the pan, as suggested. And wow! These are great cookies! Warm from the oven, they are chewy and not too sweet. Perfect. Almost like a really good and fresh energy bar.

Butterscotch Oatmeal Raisin Cookies
-be sure to get golden raisins because they really make these cookies pretty
-made exactly 36 cookies

  • 1 cup quick oatmeal
  • 3/4 cup flour
  • 1 teaspoon baking powder
  • 1/4 teaspoon salt (leave out if you use salted butter)
  • 7 1/2 ounces butterscotch chips (they are now sold in 12 ounce packages, sorry, you will have some left over)
  • 6 tablespoons unsalted butter
  • 1/2 teaspoon almond extract
  • 1 egg, beaten
  • 1 cup golden raisins
  • 1/2 cup chopped walnuts

Combine the oatmeal, flour, baking powder, and salt. Set aside.

Combine the butterscotch chips and the butter in a pan and melt on the stove top, stirring constantly. Don’t worry if it separates into two layers, but be sure to heat long enough so the melted chips are smooth. Stir in the almond extract.

Stir the beaten egg into the dry ingredients, then add the melted butter-butterscotch mixture, the raisins, and the walnuts. Mix together well.

Drop by a teaspoon onto baking sheets. I used a parchment-lined half sheet pan; the other option is a lightly greased baking sheet. Bake for 10 minutes at 350˚, until the cookies are brown around the edges. Cool on the pan for 2-3 minutes before transferring the cookies to a wire rack. (At first, they are too soft to transfer without breaking the cookies.)

cookie ingredients
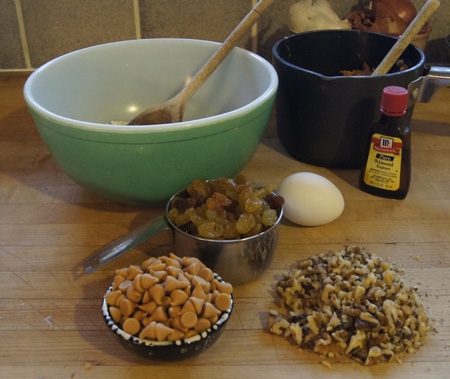
Above are the ingredients. I was going to add the leftover butterscotch chips to the batter just before cooking, but decided not to.

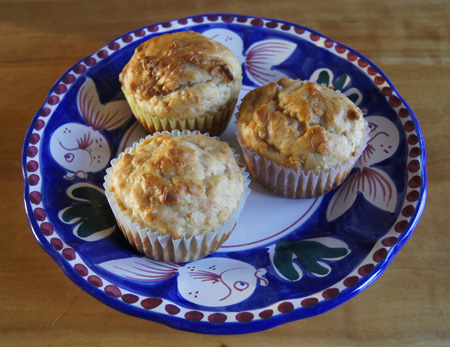
Here are the cookies! They were wonderful.

cookies!


250 Cookbooks: Mexican Cook Book

Cookbook #38: Mexican Cook Book. By the Editors of Sunset Books and Sunset Magazine, Lane Books, Menlo Park, California, 1972.

Sunset Mexican Cook BookThis was one of my mother’s cookbooks. The first thing I notice when I pull this book from the shelf is a pile of loose recipe clippings tucked in the front cover:

clippingsclippingsAll of the clippings are for Mexican-style dishes, and all are dated in the early 1970s. Mother’s writing is on some of them. Apparently she used this book as her “Mexican cooking file”. I sigh. Burdens of memory. I should toss the lot but I know I’ll go through them one by one, thinking of her planning dinners.

At first glance I thought I’d just recycle this cookbook. It isn’t old enough or personally marked up enough to warrant historical value. But actually, I find that it is a good reference for basic, from-scratch Mexican cooking. This cookbook is more usable than my other 250 Cookbooks entry, Elena’s Secrets of Mexican Cooking, at least in my opinion.

This Sunset Mexican Cookbook book gives straightforward directions for preparing all types of Mexican food. In the tortilla chapter, for instance, advice on buying prepared tortillas is given along with recipes for homemade tortillas. Recipes are given for basic sauces and fillings, tortilla dishes, enchiladas, tamales, appetizers, soups, salads, vegetables, rice, and desserts. The recipes don’t call for odd ingredients. My only complaint is that many of the recipes call for frying foods in oil, thus adding calories.

Like Elena’s, this cookbook discusses the history of Mexican-style cooking. I learned that the Aztecs were highly advanced in horticulture and grew tomatoes, avocados, sweet and white potatoes, peanuts, squash, pineapple, papayas, vanilla, and varieties of beans not known in Europe. And chocolate too. The Spaniard ships that returned to Europe were laden with seeds and cuttings, which flourished in various climates. And the Spaniards introduced many new foods to Mexico, such as beef and chickens, wheat, rice, nuts and spices, peaches and apricots.

Interesting excerpt from this book:

historyNow, what to cook? OMG, here is a recipe for Red Chile Sauce! To be used on enchiladas! Why does this interest me? For years, I’ve bought canned enchilada sauce. The price keeps going up, so that a small can now costs over 2 dollars. What the heck? Couldn’t I make my own? But I’ve tried, starting with tomato sauce and adding spices. Never could get that same “enchilada sauce” taste. My tries just tasted like tomato sauce, reminiscent of spaghetti sauce. So I had spaghetti-sauced rolled tortillas. Not very good.

So I started buying different brands of enchilada sauce and carefully noting the ingredients on each type. Most of them contain “dried red chiles” as the main ingredient (after water, that is). A couple of years ago I pulled a few enchilada sauce recipes from the Web and planned to try them. But I never did. So now is the time!

The Red Chile Sauce in this cookbook starts with dried red chiles. First they are soaked, then blended and cooked with a few spices and a small amount of tomato paste. I had nabbed an online recipe that is similar, so I sort of combined the two into a plan of attack.

I’ll use the sauce to make Folded Pork Enchiladas. Now, I have a method for making enchiladas that I like, and I’ll share that too. But I’ll do the Folded Pork Enchiladas like the recipe in this book, just to compare and contrast methods.

The Red Chile Sauce isn’t going to be a recipe for someone who doesn’t like fooling around in the kitchen. This is a recipe for a chemist at heart. For me, this is going to be fun. And messy. And potentially a failure.

Folded Pork EnchiladasThe pork filling is cooked pork (I have some pulled pork in the freezer), cooked onions, green chiles, and olives, mixed with a little red chile sauce. Note that the tortillas are fried and then dipped in hot sauce. I usually don’t fry tortillas for enchiladas, but will for this recipe.

Now, here is the Red Chile Sauce recipe:

Red Chile SauceSo what this involves is taking a whole bag of dried chiles, blending and cooking them until they make a sauce. I’ve always wondered why they sold bags of dried chiles in the Mexican foods aisles!

dry chilesI don’t advise toasting the chiles, as I did and my sauce was slightly bitter. It wasn’t very hard to remove the stems and seeds, and there really wasn’t enough pith to worry about. I just chopped off the stems and shook out the seeds.seeding chilesI consulted another recipe, and decided to cook the chiles first, then process them in the food processor. It also suggested adding flour. I decided to use beef broth in the cooking liquid, as well as a few tomatoes and more spices.

Here is what the cooked mass of chiles looked like:

cooked chilesI put the cooked chiles in the food processor in batches. Then, I pushed the processed mass through a colander.

processing chiles

I put the processed-strained chiles back into a pot on the stove, tasted it, and added more spices and ingredients to get the taste more like the canned store-bought enchilada sauce that I like.

And here it is!

enchilada sauce

Now to assemble the enchiladas. Here is the pork filling:

pork fillingThe filled enchiladas:

filled enchiladas

The above covered with cheese:

cheese on enchiladasCooked enchiladas:

cooked enchiladasThese were very good. I probably won’t make them this way again, though, mainly because of the frying step (calories). I usually steam the tortillas until pliable, fill with meat/cheese/olives/cooked onions, place not-touching in a glass baking dish, cover withe sauce, and then cover lightly with foil and bake at 375 for 15-20 minutes.

I will make the red chile sauce again, though. Plus I have lots frozen to use in the coming weeks. This was a successful project!

Red Chile Sauce (note: updated recipe, 2019)
use for enchiladas

  • 12 ounces dried mild red chile pods (I found a 14 ounce bag and used most of it)
  • 1 tablespoon cumin seed
  • 3 tomatoes, cored and peeled (or use canned)
  • 1 onion, roughly chopped
  • 2 cloves garlic, chopped
  • 2 teaspoons Mexican oregano
  • 1 1/2 teaspoons salt
  • 2 cups stock, beef or chicken
  • 6 cups water

Cut the stems off the dried chiles and remove the seeds. In a large pot, toast the cumin seed until you smell the aroma, then add the chiles and the rest of the ingredients. Bring to a boil and then simmer 30-60 minutes. Let cool a little.

Place the chiles and the liquid in your food processor in batches – it probably won’t all fit in at once. Process until very smooth, a couple minutes at least.

Press the processed chile mixture through a colander. This removes any big pieces of chile skins.

Put the sauce in a pan. Taste and adjust seasonings. I added:

  • 5 ounces tomato juice
  • 1 teaspoon onion powder
  • 1 teaspoon garlic powder
  • 1/2 teaspoon dried cumin
  • 1-2 tablespoons vinegar
  • 1 teaspoon salt
  • 2 teaspoons sugar

Simmer about 15 minutes to blend the flavors.

To make enchiladas, I used a couple cups of the above sauce and added just about a half cup of canned tomato sauce. The flavor was a tiny bit bitter (I think because I toasted the peppers) and I thought the tomato sauce mellowed it to perfection.

250 Cookbooks: Salsas, Sambals, Chutneys and Chowchows

Cookbook #37: Salsas, Sambals, Chutneys and Chowchows. Chris Schlesinger and John Willoughby, Hearst Books, 1993.

Salsas, Sambals, Chutneys and ChowchowsThis is a great cookbook, one of my newish favorites. I was surprised that the publication date was 1993, since this is a very contemporary book. I bought it sometime in the 2000s for myself, probably at Peppercorn. It’s still for sale, new, on Amazon. Because of copyright issues, I’m just going to take a photo to show you the lovely layout of the book instead of scanning in a recipe.

All the recipes in this book are “little dishes of intense flavor”. I’ve used the salsa section more than any other section of this book. The authors define salsa as a Mexican/Latin American version of a little dish. Salsas are made from different combinations of a variety of ingredients, such as cilantro, oregano, cumin, chile powder, corn, tomatoes, jicamas, pineapples, mangoes, black beans, tomatillos, limes, and hot chile peppers. “The most important thing to remember about salsas is that, like the Latin dance that shares their name, the best ones are wild, loose, and loud.” “Just mix ’em up and enjoy the taste. In this case, everyone can dance.”

This book taught me to add fruit to a salsa. Or corn and avocado and black beans. I used to use only peppers, onions, and tomatoes. The authors remind me to toast cumin seeds before use to brighten their flavor. These tricks have given a new world of flavor to my salsas!

Chutneys are a bit harder to define. They originated in India and can be raw or cooked, chunky or grated, and can contain a variety of fruits, vegetables, and spices. Traditionally, they go with spicy foods (like curries). The chutney recipes in this book usually include a sweetener like molasses or sugar, a fruit and/or vegetable, ginger, garlic, and spices such as star anise, mace, coriander, or curry. I like that they cover spices, such as star anise, with a two-page layout of a description, tips, and photos. I’ve made a couple of the chutneys, but since my dining partner does not like curry, I don’t make them very often.

Blatjangs, atjars, and sambals are chutney-type dishes from Africa, East Indies, and Southeast Asia. Chowchows are pickled relishes – mixtures of vinegar, spices, and vegetables. The book includes recipes for chowchows of the American South, a light version of kimchi (Korean), and spicy pickled grapes. I probably won’t try too many of these, but the pictures are pretty and the ingredients always fresh and full of flavor.

The title of the book is misleading, because more than salsas, sambals, chutneys, and chowchows are covered in this book. There are also sections on relishes, catsups and other condiments. The final section is “pantry”, in which some of the more unusual ingredients are discussed (along with great photos).

Creativity is the theme of this book. In this spirit, I created a salsa based loosely on “Papaya Salsa”. I used cantaloupe and mango instead of papaya, green and red bell pepper instead of just red, and added enough red onion so that it “looked right”.

Fruit Salsa

  • about a cup of chopped fruit – I used half cantaloupe and half mango, but use papaya, peaches, pineapple or any fruit you have around
  • about a quarter of a red bell pepper, sliced into short, thin slices
  • about a quarter of a green bell pepper, sliced into short, thin slices
  • about half of a medium-sized red onion, sliced into long, thin slices
  • 1/4 cup chopped fresh cilantro
  • 1 clove garlic, minced (more or less to taste)
  • 1/4 cup pineapple juice (or orange or any other type of sweet juice)
  • 1/4 cup of fresh lime juice (more or less to taste)
  • 1/2 of a jalapeno pepper, very finely chopped (you can include the seeds)
  • salt and pepper to taste

Mix all the ingredients together well. Taste and adjust seasonings and/or amounts of onion and jalapenos. It keeps 3-4 days in the refrigerator.

Fruit SalsaSalsas are great in the summer. On a hot night, they perk up a taco, wrap, sandwich or grilled meat or fish. I used this Fruit Salsa on pulled pork, folded inside some thick pita breads from the Mediterranean Market in Boulder. Yum!

This photo is an example of the layout of this book.

inside page


250 Cookbooks: Light Cooking

Cookbook #36: Light Cooking – Low Fat, Low Calorie, Low Cholesterol. Publications International, Lincolnwood, IL, 1994.

Light CookingWell, dang. This is a big book that takes up a bit of space on my shelf. I picked it up thinking I could get rid of it, but I paged through it and wrote down about ten recipes that I wanted to try. So, I’ll have to keep it. Oh well.

This is a “brand name” cookbook. Right on the cover is Crisco, Dannon, Jell-o, Perdue, Egg Beaters, Borden, Dole, and Hershey’s, all with the ® next to them. I bought it from a check-out display at Safeway for I think $20. The introduction is only two pages, just a short guide to healthy eating. The recipes have no personal notes from an author. I’ve always felt that the main purpose of this cookbook is to advertise their products, since recipe ingredients often include brand names. But in its 515 pages of recipes there are some very good ideas for cutting calories and fat and controlling portion size.

Most of the recipes in this book are plain, simple, and easy to prepare. Each recipe has calorie, fat, cholesterol, and sodium content. Other than the brand name issue, the recipes rarely call for odd ingredients. It’s a very “American” cookbook.

The recipes that I marked now to try include muffins, fruit crisps, beef, pork tenderloin, and chicken recipes. Common menu items that I cook a lot, with just enough twists to make me keep this book. I found a lot of pages marked with slips of paper from the last time I used it, probably over a decade ago. I still like those recipes.

Guess I have re-discovered a useful cookbook!

For this blog, I decided to try Banana Yogurt Muffins. Seems I always have an old banana laying around, and great non-fat Greek yogurt. They call for Special K® cereal, one I used to eat often but it somehow fell off my radar. Time to buy a box and try it again, both in the muffins and as a breakfast cereal.

Banana Yogurt MuffinsI plan to make these pretty much like the recipe. I don’t have vanilla yogurt, so I’ll use plain yogurt and add some vanilla. And cinnamon, I think these need a little spice in them.

Banana Yogurt Muffins

  • 1 1/2 cups flour
  • 3 tablespoons sugar
  • 2 teaspoons baking powder
  • 1/2 teaspoon cinnamon
  • 1/4 teaspoon salt
  • 1 egg white
  • 3/4 cup milk
  • 1 banana (or more: I used 1 1/2 bananas)
  • 1/3 cup plain yogurt (or use flavored and skip the vanilla)
  • 1/2 teaspoon vanilla
  • 3 tablespoons vegetable oil
  • 2 1/2 cups Kellogg’s Special K® cereal, crushed to 2 cups (I used a rolling pin)

Stir together the flour, sugar, baking powder, cinnamon, and salt.

Using a mixer, blend the egg white, banana, yogurt, vanilla, and oil. Mix until there are no longer big chunks of banana in the batter. Add the cereal and let stand about a minute until the cereal softens.

Combine the dry and wet ingredients just until combined. Fill 12 muffin cups, either paper-lined or use a non-stick pan.

Bake at 400˚ for 25 minutes.

Banana Yogurt MuffinsThese turned out pretty good, for a low-calorie muffin. I’d make them again – it’s a good way to use up aging bananas and have a tasty, healthy weekday breakfast treat.

250 Cookbooks: Encyclopedia of Cookery, Vol. 2

Cookbook #35: Woman’s Day Encyclopedia of Cookery, Vol. 2, Bea-Cas. Woman’s Day, Fawcett Publications, NY, 1967.

Encyclopedia of Cookery 2This is the second in a series of 12 food encyclopedia volumes. I discussed the first in an earlier post. Briefly, these cookbooks are interesting sources of information about food items and cooking methods. Sure they are dated, but I always find something in them that is interesting or odd. And a good recipe or two.

The first entry in this cookbook is “Bearnaise”. The first interesting entry is “beaten biscuit”. I have never heard of these, so I read on:

“This crackerlike Southern bread harks back to pre-Civil war plantation days when kitchen help was assured, for labor, not a leavener, softens the gluten of the flour in these biscuits. They are baked slowly, are of a pale gold color, and have a characteristically dry brittle texture … There were beaten-biscuit machines, consisting of a marble slab or a wooden box with a double roller and a handle to turn. The dough was put through the rollers many times, or until it blistered and became smooth. Beaten biscuits are part of America’s food folklore.”

Interesting! You can google “beaten biscuits” for updated recipes, if you are interested.

Continuing on to the B’s, I find “beef”. “Beef is the flesh of an adult animal of the Bovidae family of ruminants which has been killed for food.” The section goes on to discuss more beef history, then cuts of beef, cooking times and methods, and recipes. My mother tried and liked the meat loaf recipe, but not the beef with noodles one. At beets, she liked the pickled beets. At breads, she tried “limpa” (a round rye bread) and potato rolls.

The buffets entry is interesting:

“In French culinary language, a buffet indicates a good-size tiered table on which various dishes have been arranged in a decorative manner and, by implication, a restaurant that has such an arrangement. But even in French-speaking countries, the word is also used for an informal restaurant where a quick meal can be found, such as in Buffet de la Gare, “a station restaurant.” In America, the word buffet is used as a term for a meal where the guests help themselves from a table on which the foods are placed in a decorative array. Buffet entertaining has become popular in recent years for three good reasons. First fewer people have servants in this modern era … third, informality is the keynote of much of life today … but buffet meals do require careful planning and special equipment.”

(Fewer people have servants??)

On to cakes. I have enough cake recipes, but if I ever want to make the Chocolate Charlotte Russe cake, which includes ladyfingers, I’ll know that my mother tried and liked it. She also liked the Sweet-and-Sour Red Cabbage.

“Canadian Cookery” is followed by “Candies”. I don’t make candies anymore, but I’m making a note to myself that in this book, in this section is Mother’s divinity recipe that I could never find before! Divinity is a candy made from corn syrup, sugar, egg whites, vanilla, and chopped nuts. I remember divinity from childhood. She clearly used the recipe in this book, as it is marked with her notes. There is also a recipe for penuche, a brown sugar candy, although she did not mark this recipe. I remember penuche, too, from childhood.

Canning, carving, and finally casseroles round out this volume.

I decided to try the “Potato Rolls” from the section on breads. I like that it uses a potato rather than dried potato flakes, and my mother had marked the recipe as “Delicious“.

Potato RollsPotato Rolls I will make a half-recipe but other than that, I plan no changes to this recipe.

Potato Rolls
makes about 10

  • 1 1/2 teaspoons yeast
  • 1/2 cup warm water (105-115˚ F)
  • 1 egg
  • 2 1/2 tablespoons sugar
  • 3/4 teaspoon salt
  • 2 1/2 tablespoons oil
  • 3/4 cup riced cooked potato (boil or microwave a medium potato, then skin it and mash it well with a fork or masher or put it through a ricer if you have one)
  • 1/4 cup dry milk
  • 2 1/4 to 2 1/2 cups bread flour

Sprinkle the yeast into the warm water and let stand for 10 minutes, then stir until dissolved.

Put the yeast mixture and the egg, sugar, salt, oil, potato, and dry milk into an electric mixer and beat at low speed until well blended. Gradually add 1 cup of flour and beat well. Slowly add an additional 1 1/4 to 1 1/2 cups flour, first using the mixer, then by hand. Add enough flour so that the dough forms a ball away from the sides of the bowl. You do not need to knead this dough.

Put the dough in a lightly oiled bowl and let rise until double in size (less than an hour in a warm kitchen).

Press the dough out on a floured bread board until it’s about 1 1/2 inches thick. You can use a roller, but it’s hardly necessary. Cut with a 2 1/4-inch biscuit cutter, re-rolling the dough as necessary. Make about 9-10 rolls. Place the rolls in a buttered 8×8″ baking dish. Let rise again until they puff over the top of the baking dish; this will probably take a little more than a half hour if your kitchen is warm.

Bake at 375˚ for about 25 minutes.

Serve immediately with hot butter!

Comments

These turned out great!

You don’t need a potato ricer, I just used one for the fun of it. However, my ricer leaves a lot of un-riced potato stuck in the bottom, so to make the necessary 3/4 cup, I had to hand-mash what the ricer missed. Turns out, my dough looked a little lumpy. I suggest you mash the potato thoroughly with a fork, then mix it well during the blending step in the mixer.

riced potatoesHere is my lumpy, unrisen dough:

unrisen doughRisen dough:

risen doughI plopped the dough out onto a floured breadboard. Then I used a roller on the dough and wished I hadn’t. After brief rolling, the dough thickness was under 1 1/2 inches, and when I cut out a roll, it smushed down even further.

cutting the rolls

So, I ended up with about 12 rolls, and only 9 fit in the pan. I put the others in a separate pan.

unrisen rollsNote that the above nine rolls are not quite touching. By the time they rose for about half an hour, they looked like this:

risen rollsYou can see the extra three malformed rolls in the other pan.

After baking, the rolls are golden brown and light and puffy:

potato rollsI couldn’t resist. I just had to taste one. And they literally sang out butter! I put one on a plate and pulled it apart and put some butter on it. It took a lot of willpower to stop to take a photo before putting this roll in my mouth.

potato roll with butterSoft and yummy and as good as the aroma promised. I’ll make these again.