250 Cookbooks: Soup and Crock-Pot Recipes

Cookbook #149: Soup and Crock-Pot Recipes, The Pillsbury Company, 2000.

Soup and Crock-Pot Recipes cookbook

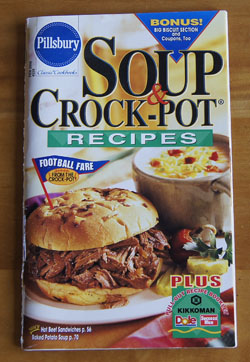
This is one of the series of “Classic Pillsbury Cookbooks” – I discussed their history in a previous post.

Soup and Crock-Pot Recipes has three main chapters: Quick ‘n Easy Soups, Hearty Crock-Pot Meals, and Slow-Simmering Soups. The recipes in the Quick ‘n Easy Soups chapter call for brand-name convenience foods: packaged au gratin potatoes, rotini tomato soup, purchased cole slaw blend, instant rice, canned spaghetti sauce, and even ramen noodle mix. Far, far from my love of from-scratch cooking!

So I turned to the “Hearty Crock-Pot Meals” chapter with some trepidation. Will I be able to find something to cook from this book? To my pleasant surprise, the recipes in this chapter are more up my line of cooking. I jot down “Jerked Chicken Sandwiches” and “Hot Beef Sandwiches au Jus” to try. Between chapters, I find a recipe I like for a yeast bread called “Wild Rice Batter Bread”.

The “Slow-Simmering Soups” chapter yields a couple more recipes. I note “Pork and Tortellini Soup” (because I often find pork loin on sale and tortellinis are good) and “Chicken Soup with Cornbread Dumplings” (because I love dumplings and it uses leftover chicken). Finally, “Roasted Vegetable Soup” looks interesting – you roast zucchini, onions, red bell pepper, whole mushrooms, and garlic in the oven, then add them to a broth and cream mixture for a short time on the stove top. Might not get this soup past my meat-eating husband, but us girls would probably like it.

Will I keep this cookbook? No, I will recycle it. But first I will scan in the recipes I want to try. 
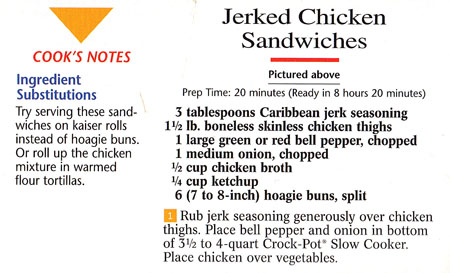
For this blog, I will make the “Jerked Chicken Sandwiches”.

JerkedChickenSandRec1Jerked Chicken RecipeIt’s a crock pot recipe, but I plan to simmer the jerked chicken on the stove top instead. For the rolls, I will make my own from a King Arthur Flour recipe.

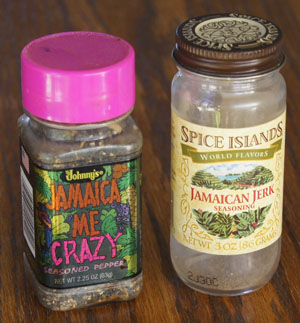
Jerk seasoning is usually easy to find in a market, and often it is called “Jamaican” rather than “Caribbean” jerk seasoning. Each brand will vary, but most are made from a combination of hot pepper, onion and garlic powders, and the spices cinnamon, nutmeg, and allspice. You can make your own jerk seasoning too – just search online. In my own spice cabinet I found the two jerk seasoning jars in the photo below. I combined them to get 3 tablespoons, finishing one jar in the process.

Jerk seasonings

Jerked Chicken Sandwiches
makes about 6 sandwiches

  • 3 tablespoons jerk seasonings (see my notes in the above paragraph)
  • 1 1/2 lb. boneless skinless chicken thighs
  • about 1 cup chopped mild peppers: I used half a green bell pepper and half a pablano pepper
  • 1 medium onion, chopped
  • 1/2 cup chicken stock
  • 1/4 cup ketchup
  • sandwich or hoagie buns (I made Philadelphia-Style Cheesesteak Sandwich rolls, a King Arthur Flour recipe)
  • sandwich garnishes like mustard, sliced onions, tomatoes, lettuce

Rub the jerk seasoning into the chicken thighs.

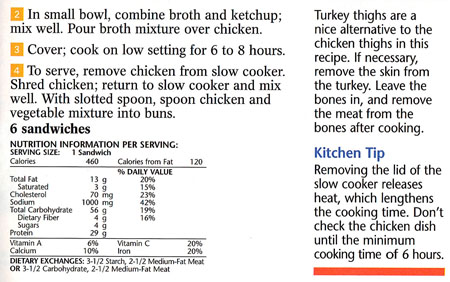
Put the peppers and onion in a large pot (for stove top cooking) or in a slow cooker. Add the chicken thighs, broth, and ketchup. Mix.

If you are cooking on the stove top, simmer about 2 hours, or until the chicken is tender. In a slow cooker, cook 6-8 hours on the low setting.

Remove the chicken pieces from the cooking pot, shred them, then put them back in the pot.

Slice the sandwich rolls in half. Spread mustard on the rolls if you wish. Remove the jerked chicken mixture with a slotted spoon (too much of the liquid can soak the rolls) and pile it high on each sandwich. Garnish as desired, and serve!

Jerked Chicken Sandwiches

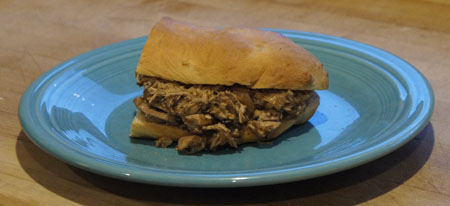
These were a hit. I took the photo before I added the garnishes. The lettuce-tomato-onion was a last minute idea on my part, and it was a great idea – these sandwiches were delicious! Hubbie added mustard to his second sandwich. Yes, he went back for seconds. That’s why I give a thumbs up for this recipe.

The pablanos were a good idea too. They are flavorful and just a bit spicy hot. You could go hotter with fresh green chiles or even jalapenos.

My homemade rolls were great. Really great! Soft but tough enough to hold together, not too tall, not too flat, had a delicious flavor . . . these may just become a standby in my kitchen repertoire. I baked two of the rolls in a baguette pan and one on parchment and found that the parchment method worked best.

Note: This jerked chicken recipe would adapt well to an electric pressure cooker. Also, you could double the batch and freeze leftovers for later quick meals.

Favorites: Tallarnee

TallarneeI haven’t made this in ages! I made it last week and it was so, so good. Just had to share.

When I google “tallarnee” I find weird stuff like foreign language references, Indian removal records, and “layer tick boxes”.  But – when I google “tallarnee recipe” google changes the spelling to “tallarni recipe” and pulls up a bunch of hits with casseroles similar to my own recipe. It’s a casserole with noodles, hamburger, corn, olives, onions, tomato soup and cheese.

I am keeping my spelling: tallarnee. I found this recipe in my recipe box behind my recipe for “Tetrazini crepes” (another miss-spell, as it turns out). Tallarnee is a great comfort food type casserole that many of us baby-boomers remember from childhood.

My recipe for Tallarnee is handwritten by me on a 3×5-inch card. That means I copied it from my mother’s collection in the late 1970s or so.TallarneeRecCard1

When I made it this week, I cut the ingredients in about half for the two of us, and we had leftovers. I used olive oil to cook the onions instead of Crisco. For the tomato soup and water, I used some really good “tomato bisque” that I found at a local store.

soup can

The above type of soup does not call for dilution with water, so I eliminated water from my old recipe for Tallarnee. If you use the undiluted kind of tomato soup, do add water.

Tallarnee
serves 2-3

  • 1 tablespoon vegetable or olive oil
  • 1/2 onion, chopped
  • 12 ounces ground beef
  • 1/4-1/2 teaspoon salt (you can probably leave this out)
  • 1 cup dry noodles (I use wide, short noodles)
  • 1/2 cup corn: fresh off the cob, canned, or frozen
  • 1/2 cup black pitted olives
  • 1/2 can condensed tomato soup mixed with 1/4 cup water OR 1 can full-strength “fancier” tomato soup (I used a little less than the full can, reserved a little for tasting)
  • 1/2 cup grated cheddar cheese

Cook the onion in the oil until soft. Add the ground beef and cook until the meat is brown. Cook the noodles as the meat and onion cook.

Mix together everything except the cheese and put in a suitable sized casserole or baking dish. Top with the cheese.

Bake at 350˚ for 35-40 minutes, until all is bubbly and the cheese is melted.

Serve!

Comment

I liked the chunky tomato bisque soup that I used. It gave great flavor, while keeping the comfort-food-ness of this casserole from my childhood. I think there is more to explore along these soup-lines to nudge a few more old casserole recipes into the twenty-first century.

250 Cookbooks: The Fannie Farmer Cookbook

Cookbook #148: The Fannie Farmer Cookbook, Wilma Lord Perkins, Little, Brown and Company,Boston, Toronto, 1965.

The Fannie Farmer Cookbook

I think I found The Fannie Farmer Cookbook in an old house that we lived in from 1975-76. The house, known as “Walnetto” in our group of friends, was on Walnut Street in Boulder, at about 21st. The backyard of the house stretched back to a creek. We had a big garden. Chickens. Volleyball games. Parties. We could walk to downtown bars. I rarely drove my old VW bug because I could walk up to the university where I was a grad student. Once the house a couple doors down was on fire, and my boyfriend-now-husband pulled an elderly woman to safety.

Of course those times are gone and the land is now covered with apartments and condos. But we have our memories.

So what is The Fannie Farmer Cookbook? It’s important enough in American cooking history to have its own Wikipedia entry. I learn that Fannie Farmer, born in 1857, was raised in a family that valued education, but could not attend school because of a crippling illness as a teen. So she started cooking at a boarding house at her parents home. Her interest in cooking took her to the Boston Cooking School, where she excelled as a student and eventually became school principal.

Fannie’s food interests covered nutrition, diets for the sick, sanitation and cleanliness in the kitchen, the chemical analysis of food, techniques of cooking and baking, and managing the kitchen and household. These “domestic science” topics were part of a movement in the US around 1890, and Fannie was there at the right time with the right interests and intelligence and the right – spunk! In 1896 she wrote her first book: The Boston Cooking-School Cook Book. (I have a copy of the 1906 edition of that book on my bookshelves – still to be covered in this blog.)

(The practice of “domestic science” – nutritious foods and clean kitchens and efficient homes – improves the lives of families and individuals on a daily basis. It got a bad rep in the hippy/women’s lib movements as being yet another gender-defiining ploy: “let the girls stay in the kitchen”. Women in my generation knew domestic science as “home economics”, or “home ec”. Most girls – me included – took home ec in junior high.}

Fannie Farmer left the Boston Cooking School in 1902 to continue her teaching at Miss Farmer’s School of Cookery. She lectured on diets and nutrition for the sick at Harvard Medical School. “To many chefs and good home cooks in America, her name remains synonymous today with precision, organization, and good food” reads the current Wikipedia entry.

My 1965, eleventh edition of The Fannie Farmer Cookbook has been revised many times:

FFCB copyright page

Note that Fannie’s last edition was the 1914 one; Cora D. Perkins revised from the editions from 1915-1929 and Wilma Lord Perkins 1930-1965. After 1965, a few other editions were published; Marion Cunningham is listed as the author from 1979 on. I think the last issue was the 1996 Anniversary Hardcover edition.

This is the first time I have really read my copy of The Fannie Farmer Cookbook. The writing style is friendly and clear and to the point. (One of my favorite American-standby cookbooks, The Joy of Cooking, tends to be a bit bossy.) It’s well organized and the index is almost 100 pages!

I am impressed with how the recipes still stand today as cookable. The clam chowder, with fresh shucked clams and salt pork, is a recipe I’d like to try. Roast guinea hen with a slice of bacon inside and more laid across the top also sounds interesting. Classics of American cooking like Boston Baked Beans. Alligator pears? Avocados! Recipes for leftover chicken and turkey. Sauerbraten and potato dumplings and Alfredo’s noodles. Cinnamon apples.

My favorite sections of The Fannie Farmer Cookbook are dessert recipes. I learn that “cottage pudding” is a classic American cake that can be frosted and/or filled. Fruit desserts include grunts and dowdies and dutch apple cake, cobblers and upside down cake. All of the recipes are made from scratch. I do like this book!

I am going to make Apple Dumplings. At first I thought that the “dumpling” would be boiled but no, these are kind of like a baked apple wrapped in shortcake-biscuit dough and doused with sauce.

Apple Dumplings Recipe

It’s up to me to decide the type of dough and the type of sauce. I choose a shortcake dough (p. 384) and the hard sauce (p. 402). Oh – I caught a mistake! The shortcake dough is on p. 484.

Shortcake Recipe

As these were baking, my daughter said these would be best with ice cream. So I didn’t make the following hard sauce, which is simply a frosting made from butter and powdered sugar.

Hard Sauce Recipe

I found that the shortcake recipe made just the right amount of dough for 5 small granny smith apples. You can adjust the amount of dough for the number of apples (e.g., servings) you desire, or you can use leftover dough to cook as biscuits.

Apple Dumplings
makes 5; best if you serve one per person!

Apples

  • 5 small tart apples
  • 1/2 cup sugar (I used white sugar; brown would be good too)
  • 1 t cinnamon
  • freshly grated nutmeg to taste
  • butter

Pare and core 5 small tart apples. Mix the sugar and spices.

apple preparation

Shortcake

  • 2 cups flour
  • 2 teaspoons baking powder
  • 1/2 teaspoon salt
  • 1 tablespoon sugar
  • a few gratings of nutmeg
  • 1/4 cup butter (unsalted)
  • milk: about 3/4 cup

Stir together the flour, baking powder, salt, sugar, and nutmeg. Cut in the butter with a pastry cutter or your fingers, or use a few pulses in a food processor.

Stir in the milk, little by little, until the dough holds together but is still soft. Turn out on a floured board (fold over a few times if necessary) and roll to 1/4-inch thickness.

Divide the dough into 5 equal pieces and roll each to a size that will wrap up and around one of the apples. My rolled dough wasn’t really a square, it was more free form.

apple dumpling preparation

Place an apple on a piece of dough and fill the apple with some of the sugar-spice mix. Dot the inside with a little butter. Fold the dough up from four opposing sides and pinch together over the top of the apple. Continue until you finish all the apples and dough.

Place the apples in a baking pan so they are not touching. I sprinkled some of the remaining sugar-spice mix on top of the dough and highly recommend this step.

Bake at 375˚ for about 45 minutes, until the dough is golden brown. Serve warm with ice cream.

Apple Dumplings

Great great great! These are delicious. So fun and different. We had never had anything like it before!

It will be interesting to compare The Fannie Farmer Cookbook with my 1906 edition of Farmer’s The Boston Cooking-School Cookbook. How much of the friendly style is Fannie’s or the revision author? What were the original recipes? A post to look forward to.

250 Cookbooks: Microwave Guide & Cookbook

Cookbook #147: Microwave Guide & Cookbook, General Electric Co., USA, 1979.

Microwave Guide & Coobook
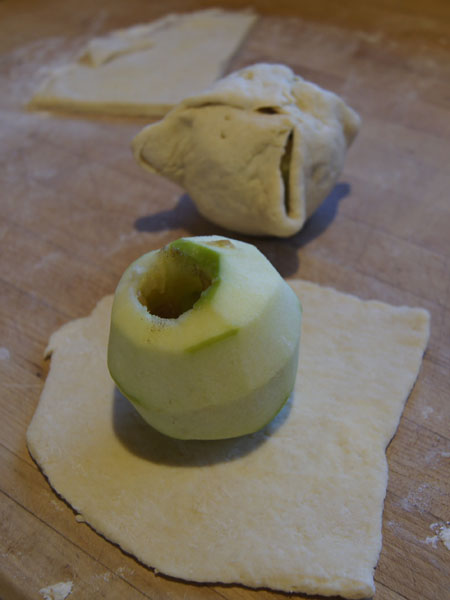
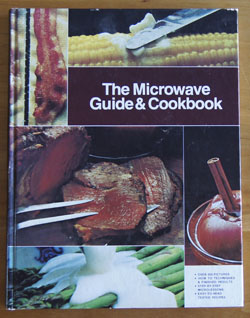
Who needs an instruction book for a microwave oven? You just put in your coffee cup or lunch, set the dial for a minute or two, and click start, right? And if you ever want to know how long to cook a particular food item, you just google it.

So were my thoughts as I sat down with this book. I started leafing through it. The very first pages describe how microwave ovens work. A magnetron in the microwave oven generates and transmits microwaves. “Microwaves” are high frequency (and short wavelength) radio waves. AM, FM and CB radiowaves are lower frequency (and higher wavelength) than microwaves. Your microwave oven is similar to a miniature broadcasting system! It is self contained – only the inside of the metal-lined oven sees the broadcast.

How do microwaves cook food? They agitate water molecules and cause them to vibrate and generate heat. Most food has plenty of water in it so it heats – and cooks. (And the air around the food does not get hot, so the food does not brown.)

On page 5 of The Microwave Guide & Cookbook, a potato is comparisonally cooked in a pan, an oven, and in a microwave. For each process, they recorded a “heat photo” or thermograph. This tickles my scientistific nerve! After 4 minutes, a microwaved potato is all yellow or hot, while it takes an hour for a potato in a conventional oven to show the same thermograph.

Twelve big pages show photos of foods that cook particularly well in a microwave; I find this practical, visual, and useful. This book recognizes the limits of microwave cooking, while reminding me that I could be using it for more foods than I currently do. A few pages describe microwave safe dishes and food coverings.

And then, in the defrosting section, a lovely photo of a block of ice partially thawed in a microwave:

microwaved block of ice

Isn’t that cool? I think this book is a keeper! I like reviewing the science behind my appliances and I like having good cooking references at home for those times when we don’t have the internet in our semi-rural area.

The Microwave Guide & Cookbook presents different foods in separate chapters: appetizers, meats, poultry, fish, eggs and cheese, sauces, pasta and rice, vegetables, breads, desserts, and jams. Each of the meat, poultry, and fish chapters begins with a description of how to defrost different forms of the food (e.g., details for hamburger, steaks, and roasts) and then gives cooking instructions and a few recipes. The recipes are often for illustration – the cook is encouraged and guided to adapt his or her own recipes to a microwave version.

What I learned or found useful:

In the ground meat section, I liked the instructions for defrosting. My current microwave oven has an autodefrost function that works miserably; now I have the knowledge to use a manual defrost mode more effectively.

In the steak section, they say you can grill a steak briefly to get the grill marks and flavor, then heat it up in the microwave at dinner time. Sounds like a good idea for a busy cook.

I found a ham and pork loaf recipe that might help me use up leftover ham and have an interesting filling for sandwiches.

Bacon can be microwaved on a plate covered with a paper towel.

Explicit instructions for cooking chicken are given: number (and size) of the chicken pieces; cooking power; cooking times; turning instructions. This cookbook has a microwave version of Mexican Chicken Casserole that I would like to compare and contrast with the two versions I have covered in this blog: one and two.

You can boil pasta in a microwave! Maybe we will (again) have an extended power outage and I will only have the use of my microwave oven when using our somewhat-limited backup generator system.

The egg section gives a good “microlesson” on how to microwave scrambled eggs and how to poach an egg. I could definitely learn from this. Hey, they have an egg and cottage cheese scramble, like I make on the stove top! Microwave oven users are given a strict warning NOT to microwave whole eggs in the shell. Oh boy, I learned this in lab. Back in the 70s I was working in a molecular biology lab. We had a microwave oven in the lab, ostensibly to liquify agar gel for bacteria plates. Well, one of our young lab helpers decided to microwave a whole egg in it. It burst loudly and violently! The lab stank for weeks.

The vegetable section is excellent and complete with tables and comments. I know I’ll refer back to this in the future.

Desserts. How to melt chocolate, make fudge, s’mores, custards, puddings, and pies. Brownies. Cakes in a microwave oven rise higher but are not brown; the texture is great, though, and frosting will cover any difference. Quickie chocolate sauce, butterscotch sauce, and cinnamon sugar sauce might come in handy and tasty.

With all these good ideas and learning lessons, what to choose to cook for this blog? Umm, I do love meatballs. Let’s try a microwave meatball recipe and compare and contrast with my usual stovetop method. How about Swedish Meatballs?

Swedish Meatballs recipe
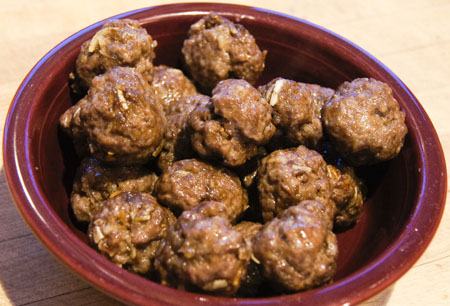
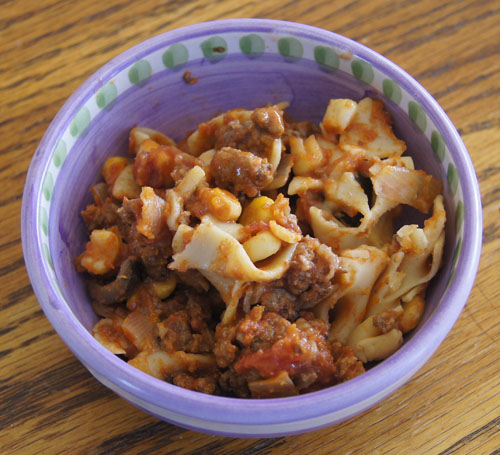
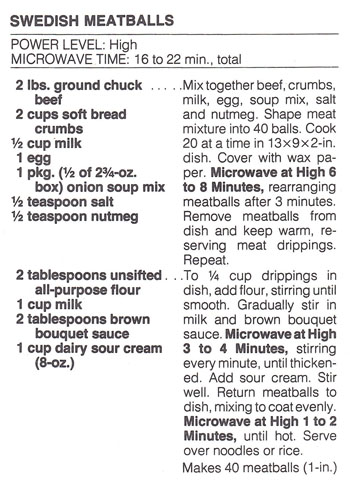
In the Microwave Guide & Cookbook, general instructions for microwave meatballs are given on the same page as the Swedish Meatballs recipe. I find these instructions useful:

microwaving ground beef meatballs
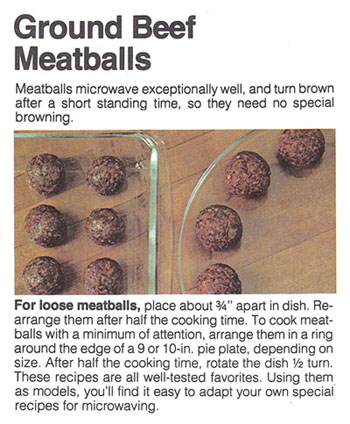
I halved the recipe for the two of us. I usually cook 12 ounces of meat for us – I cooked about 14 ounces this time and had a few meatballs left over. I didn’t have brown bouquet sauce (kitchen bouquet) so I left it out.

Microwave Sweedish Meatballs
serves about 2

  • about 14 ounces ground beef
  • 1 cup bread crumbs
  • 1/4 cup milk
  • 1/2 egg (whisk an egg, measure wieght or volume, use half)
  • 1/2 packet onion soup mix*
  • 1/4 teaspoon salt
  • 1/4 teaspoon nutmeg
  • 1 tablespoon flour
  • 1/2 cup milk
  • 1/2 cup sour cream

*Onion soup mix still comes with 2 packets per box. But, now the box weighs 2 oz. instead of the old 2 3/4 oz. I opened one packet and used about half of it for my version of the recipe.

Mix the ground beef, bread crumbs, milk, egg, onion soup mix, salt, and nutmeg. Form into 20 meatballs (I used a kitchen scale to get them all equal-sized).

Put the meatballs in a glass baking dish that fits in your microwave oven. (I used a 9×11-inch glass pan.) Cover with wax paper.

Microwave on high for 6-7 minutes (until done), rearranging the meatballs halfway through the cooking. (If you question whether or not they are done, you can gently cut an opening in one to check.)

Remove the meatballs from the baking dish and set aside. Add the flour to the drippings that remain in the baking dish and stir well, then gradually stir in the milk. Microwave at high for 3-4 minutes, stirring every minute, until the mixture is thickened. Add the sour cream and stir.

Stir the reserved meatballs into the sauce and mix to coat evenly. Microwave at high for 1-2 minutes, until hot. Serve over noodles or rice.

Here are the meatballs before cooking:

uncooked meatballs
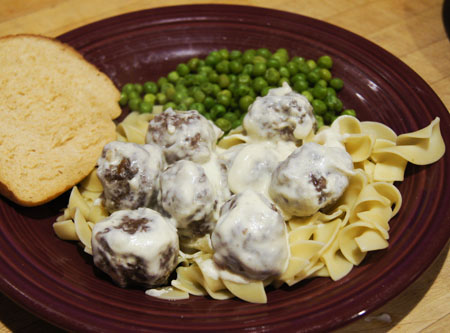
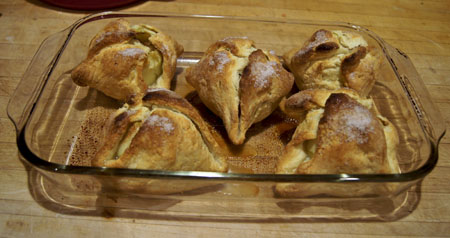
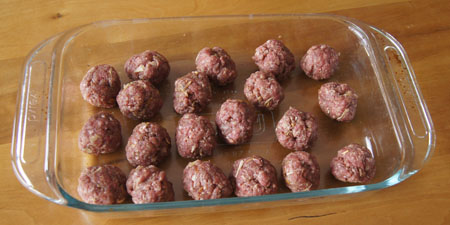
And here they are cooked:

cooked meatballs

Plated:

Microwave Swedish Meatballs

I got raves for this simple dish! It really was easy and fast, and tasted great. I didn’t have a splattered range top to clean either. I did kind of miss the good odor of browning meat. But other than that, I think these are just about as good as traditionally-cooked meatballs.

It would be easy to adapt any of my current meatball recipes to this microwave version: the rule is 20 meatballs from 14 ounces of meat baked on “high” in a microwave oven for 6 minutes. If I used a pound of meat, I might increase the cooking time a half minute or so. If you are cooking two pounds of meat, cook in two batches.

Success!

Note: I covered another microwave cookbook (that I didn’t like) and a bit of the history of microwave ovens in a previous post. I got my first microwave oven (a Whirlpool) in 1981 and it lasted 23 years. I’m currently on my second microwave oven, a combination convection-microwave JennAir.