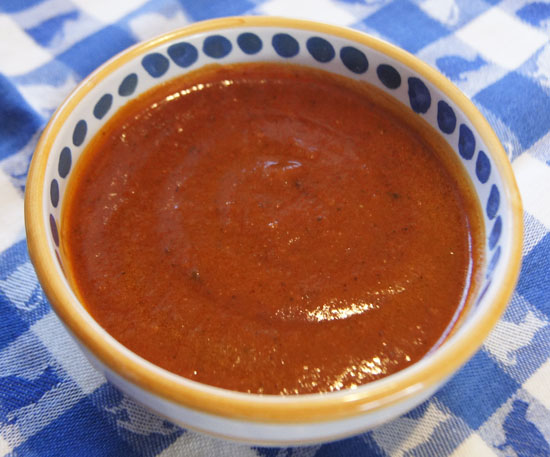
My last adventure in making enchilada sauce was in 2013. I made “Red Chile Sauce”, a sauce meant for enchiladas, according to a recipe in my 1972 Sunset Mexican Cook Book. The sauce I made captured the flavor that I wanted – a deep chili flavor similar to the canned enchilada sauces that I find on store shelves. It was just a bit, well, bitter or something, and it was thin. It was a big batch, and I eventually used it all up, but each time I cut the enchilada sauce with a good amount of canned tomato sauce and spices. I haven’t made it since. I went back to canned enchilada sauce.
Five years later, I am going through my browser bookmarks. I run across a blog post titled Homemade Enchilada Sauce on the Circle B web site. This site is authored by a woman about my own age who also grew up in the 1950s in Southern California. She too was on a quest for homemade enchilada sauce – as she put it, “a killer enchilada sauce”. After a couple years of search, she found a recipe in a cookbook on her own shelf, “Mexican Family Cooking”, a collection of “family recipes handed down from Mothers, Aunts and Grandmas”. (Oddly enough, she posted her enchilada sauce blog post about the same time I posted my Mexican Cook Book post.) Her sauce was a lot more successful! I was on the right track though – starting with dried chiles.
Here are the secrets. Begin as I did with a package of dried chiles. But, do not toast them, and do not use the chile cooking liquid to add back to the sauce. I think this is why mine tasted bitter – both the toasting and the adding the liquid back. After cooking and draining, blend the chiles with fresh water (and a lot of garlic!). Add sugar and a good amount of salt and season the sauce with chile powder and cumin. Add a tablespoon of tomato paste. Thicken the sauce with a roux made of cooking oil and flour. Let simmer awhile until the flavors blend.
Boy oh boy, this enchilada sauce is absolutely the best I have had – ever! It is just heavenly. Rich, red, thick, and spicy. It captures the essence of the canned enchilada sauces that we are used to, but it goes to a whole new level of goodness. It’s hard to believe I made a quart of this sauce and only used a tablespoon of tomato paste because it looks like there is a lot more tomato than than just that in it.
I can now type the recipe from memory. I cite the Circle B website as my reference. The recipe below is essentially that recipe, but I used olive oil instead of vegetable oil. I highly recommend olive oil in this, it made it extra rich tasting. Also, I added less water for a thicker sauce. I was also rather heavy-handed when I added the cumin and chile powder. And, I used a food processor instead of a blender.
I got my chiles at a local store, either Safeway (produce section) or a Mexican grocery. I had several bags in my pantry, as making enchilada sauce has haunted me. The type of chile is not specified on the bag, it just says “New Mexico Chile, 3 oz.”, and the brand is Badia. I don’t remember how long these have been in my pantry, so these dried chiles might have been a bit old. Nevertheless, they worked!
Everybody should have enchilada sauce this great. Come to my house and I’ll give you some!
Enchilada Sauce
Note: this recipe makes over a quart of enchilada sauce. When I tried doubling the sauce, I found it overwhelmed my food processor and strainer (and patience). So, my advice is to make one recipe at a time.
- 3-4 ounces dried Mexican chiles (see note above)
- enough water to cover the chiles in the pot
- 4 cloves garlic
- 1 1/2 tablespoon red chile powder
- 1 teaspoon cumin
- 1 tablespoon salt
- 1 tablespoon sugar
- 4-5 cups water
- 1/4 cup olive oil
- 5 tablespoons flour
- 1 tablespoon tomato paste (generous)
Take the seeds and any pith out of the dried chiles. You don’t have to be ultra-careful in removing every last seed.
Put the cleaned chiles in a medium pot and cover with water. Bring to a boil and simmer for 20 minutes.
Pour the chiles and their cooking water through a colander. (I used a regular colander, not a fine one.) Remember: you want the solids, not the liquid. Transfer the drained chiles to a food processor. Toss the cooking liquid and rinse the colander.
Add the garlic, chile powder, cumin, salt, and sugar to the chiles in the food processor. Add enough of the 4-5 cups of water for a good slurry to form. Process the mixture several minutes, until the particles are pretty fine.
Set up your rinsed colander over a big bowl. Pour through it the pureed chile mixture. Press the puree in the colander to get as much of the sauce through as possible, leaving behind any bits of chilis and seeds. Remember: this time, what goes through the colander. Rinse the food processor with some water and put this through the colander too.
In a good sized sauce pan, heat the olive oil. Add the flour and stir for several minutes over medium heat, until the flour just starts to show a bit of brown. Carefully add the tomato paste and stir for a minute. Then, carefully stir in the pureed, strained chile mixture. Add more of the 4-5 cups water until the thickness of the sauce is to your liking. I left mine pretty thick!
Heat and stir the sauce for 5-10 minutes minutes to blend flavors. Adjust the seasoning to your own taste – feel free to be creative! Add hot pepper powder (like cayenne) if you want your sauce with more kick.
Use immediately, or store in the refrigerator for a few days or the freezer for a lot longer.

 The trick to my chicken and beef stocks is not how they are made, but how they are stored. I put the stocks in wide mouth in