7-Layer Casserole

a not-too-pretty cooked casserole

This is the seventh of the seven recipe cards I pulled out of my old recipe box for a stretch of what I call “pandemic recipes”. Hey, the seventh and “7-Layer”! Total coincidence, I didn’t plan this out.

Layered casseroles are a class of convenience dishes that were popular in the sixties. I have a six-layer casserole recipe in my main dish recipe collection. Layered salads and dips were popular too – one that I remember used spinach. These dishes were popular not only at dinner, but for taking to get-togethers, like family gatherings. My mother (like so many others) did not have a job outside the home, but was a member of various sewing clubs, bridge clubs, and women’s clubs with lots of pot luck luncheons. The thought of going to a gathering inside someone’s home . . . who ever knew that that simple pleasure would have to be given up? Pandemics suck.

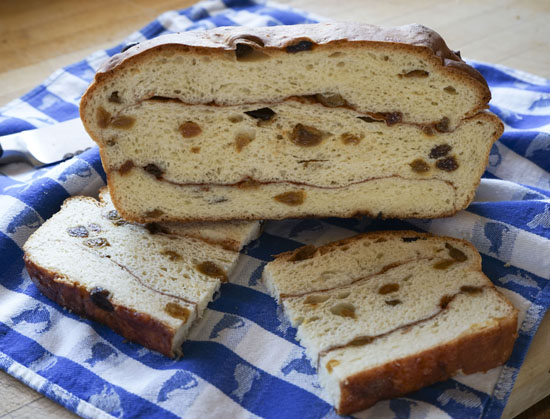
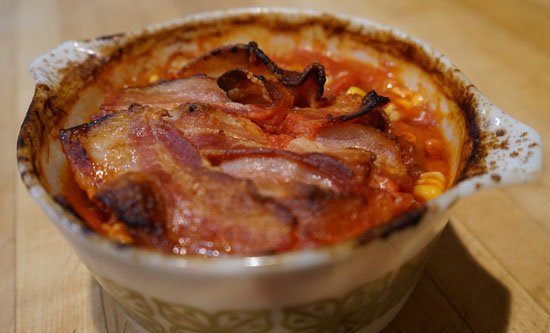
For this 7-Layer Casserole recipe, I will need rice, “whole kernel” (I assume I meant whole kernel corn), tomato sauce, onion, green pepper, ground beef, and bacon. I have all of these ingredients on hand, so I can make the casserole without a mask-faced trip to a store. Time to get cooking!
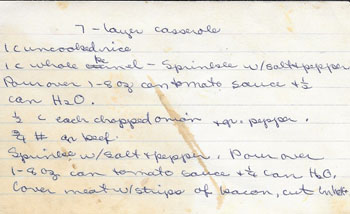
7-Layer Casserole

Put in a casserole:

  • 1 cup uncooked rice (*see my discussion below the recipe)
  • 1 cup whole kernel corn
  • salt and pepper

Pour over:

  • 1 8-ounce can tomato sauce
  • 1/2 can of water (4 ounces or 1/2 cup)

Add

  • 1/2 cup chopped onion
  • 1/2 cup chopped green pepper
  • 3/4 pound ground beef
  • salt and pepper

Pour over:

  • 1 8-ounce can tomato sauce
  • 1/4 can water (2 ounces or 1/4 cup)

Cover the casserole with:

  • bacon strips, cut in half

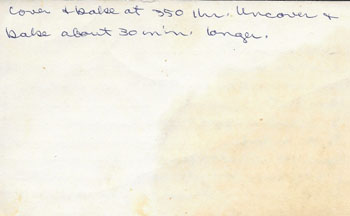
Cover the casserole and bake at 350˚ for 1 hour. Uncover and bake about 30 minutes longer.


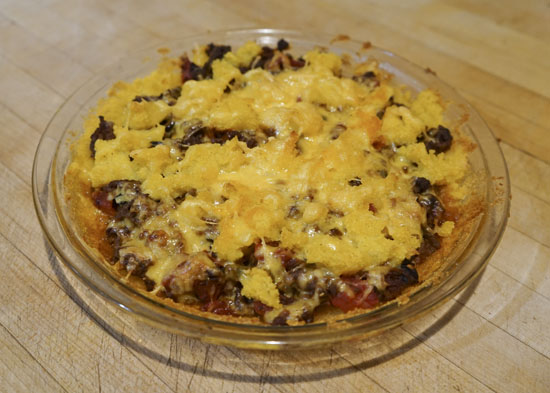
*The rice I chose to use in this casserole did not get done in the cooking time given in the recipe. In the 1960s, “rice” available to American cooks was just “white rice”. No choices! Today there are dozens of types of rice available in supermarkets. I used long-grained white rice. About an hour into the cooking time, I could tell that the rice was not getting done, so I added a bit of water and increased the oven temperature to 375˚. Finally, but quite a bit later, the rice was done.

Although the casserole had good flavors (bacon!), I doubt I’ll ever make it again, because of the rice issue. The assembly was nice, though, it took just a few minutes to put it all together. Give it a try, if you like, but be sure to choose rice that cooks in a short period of time.


Paprika Covered Casserole

My sixth of seven pandemic-inspired recipes! This one is in my handwriting on an index card, so I may have added it to my repertoire any time before a computer came into my life, which was the mid-1980s.

I don’t remember making this particular casserole, but I do have a recipe that I make a lot even now called “Sour Cream Noodle Bake”. Both have noodles, sour cream, cottage cheese, cheddar cheese, and hamburger. Sour Cream Noodle Bake includes tomato sauce, while Paprika Covered Casserole does not. Also, the Paprika Covered Casserole turns the hamburger into meatballs.

So I will make the Paprika Covered Casserole, and see if I like it better than my usual casserole, and/or if I can learn anything from the recipe.

Paprika Covered Casserole

  • 1/2 pound broad noodles
  • 8 ounces creamed cottage cheese
  • 1/2 cup grated Tilamook cheese (cheddar)
  • 1 cup sour cream
  • 1/2 cup milk
  • 2 1/2 teaspoons paprika
  • 1 pound ground beef
  • 3 tablespoons bread crumbs
  • 1 egg
  • 1 teaspoon salt
  • 2 tablespoons instant chopped onion (or 1 teaspoon granulated onion)
  • 1/8 teaspoon garlic powder
  • 1/8 teaspoon pepper
  • grated cheddar cheese and more paprika for top (optional)

Cook noodles in boiling water; drain. Combine cottage cheese and cheddar cheese. Blend sour cream with the milk and 2 teaspoons of the paprika.

Prepare meatballs by combining the ground beef, bread crumbs, egg, 1/2 teaspoon of the paprika, and the salt and pepper. If using instant chopped onions, let them stand in 2 tablespoons water for 8 minutes; if using granulated onion, just add it directly to the ground beef mixture. Shape into 1-inch meatballs (I suggest even smaller meatballs, perhaps 1/2 to 3/4 inch). Brown the meatballs in a skillet.

Place in a buttered casserole layers of noodles, cheese mixture, sour cream mixture, and meatballs. Repeat, ending with meatballs. (If you like, sprinkle additional cheddar cheese and some paprika on top. I did this, even though it was not in the original version.)

Bake at 350˚ 30 minutes, or until nice and bubbly. Serves 6-8.


This was good, but I doubt I’ll make it again. Making the meatballs was time-consuming, and in my opinion, not worth the trouble. Below is my favorite recipe for Sour Cream Noodle Bake, that I have decided I still like better.

Sour Cream Noodle Bake

  • 8 oz. egg or spinach noodles, cooked
  • 1 pound ground meat
  • 1 teaspoon salt, 1/4 teaspoon garlic salt, 1/8 teaspoon pepper
  • 8 oz. can tomato sauce
  • 1 cup cottage cheese
  • 1 cup sour cream (or yogurt)
  • 6 green onions, chopped
  • 3/4 cup grated cheddar cheese

Brown the meat, add spices and tomato sauce and simmer 5 minutes. Mix noodles, cottage cheese, sour cream, and onions.

In a greased 8″ square pan, layer half of the noodle mixture, then half of the meat mixture; repeat. Top with cheddar cheese. Cover lightly with foil and bake at 375˚ for 15 minutes, then remove the foil and bake 5-10 minutes more, until the cheese melts and browns.

Tamale Cheese Pie

Tamale Cheese Pie is another one of the seven old recipe cards I gathered during an hour of pandemic boredom spent perusing my ancient recipe box. I was making tamale pie way back in my earliest cooking days! It is still one of my favorite casseroles.

Tamale pie was a common type of casserole in the sixties and seventies in Southern California. A can of this, a can of that, some hamburger . . . bake in the oven for half an hour. This recipe, in my own handwriting, lists 15 ingredients, and this list and the directions cover the entire front and back of the card in tiny handwriting. What, did I really used to make tamale pie by consulting this lengthy recipe card? Nowadays I usually make this as a no-recipe recipe.

What’s a “no-recipe recipe”? It’s when you just cook from memory and substitute ingredients and spices according to your whim of the day. Kudos to Sam Sifton of the NY Times cooking site for labeling this way of cooking. I know I cook this way a lot, now it’s nice to know it is “okay”!

Here is my no-recipe recipe for tamale pie. First I cook the meat, sometimes hamburger and sometimes chicken or pork. I add onions and garlic and cumin and chili powder, fresh or canned tomatoes or Rotel, olives if I remember, bell peppers if I have them, maybe a can of green chiles, maybe some corn, and always cheese. I bring some water to a boil and add a half cup of cornmeal, then spread it on top of the meat mixture in a casserole dish. Top with cheese and bake until it looks done. (I might consult the recipe in this 2012 blog post.)

Now that I have my old Tamale Cheese Pie recipe card in hand, I think it will be fun to make it according to this fifty year old recipe. Take care of some more pandemic boredom!

And, maybe I’ll learn something!

Tamale Cheese Pie

  • 1 tablespoon oil
  • 1/3 cup chopped onion
  • 1/4 cup chopped green pepper
  • 1/2 teaspoon chopped garlic
  • 1 pound ground beef
  • 1 15 ounce can of tomatoes
  • 1/2 to 1 cup chopped olives
  • 1 to 1 1/2 tablespoon chili powder
  • 1 teaspoon salt
  • 1/2 to 1 teaspoon cumin
  • 1/2 teaspoon ground coriander
  • 1 1/2 cup water (*see note)
  • 10.5 ounce can condensed beef broth (*see note)
  • 1 cup cornmeal
  • 1 3/4 cup grated cheddar cheese

Cook the onions, green pepper, and garlic in the oil until soft, then add the ground beef and brown. Add the tomatoes and their liquid, olives, chile powder, salt, cumin, and coriander. Simmer 20 minutes.

Meanwhile, combine the water and beef broth with the cornmeal and cook 7-8 minutes over moderate heat, stirring, until very thick.

To assemble, spread half of the the cornmeal mixture over the bottom and sides of a 11 3/4 x 7 1/2 x 1 3/4 inch dish. Add the meat mixture and 1 1/2 cup cheese. Top with the remaining cornmeal mixture, then the remaining 1/2 cup cheese.

Bake at 350˚ 40-45 minutes, until cheese is melted and the cornmeal lightly browned. Serves 6-8.

*Note: I don’t keep condensed beef broth in my pantry. Instead, I make and freeze my own stocks, and that’s what I used when I made this tamale cheese pie. The 1 1/2 cups water plus a 10 ounce can of beef broth is 2 1/8 cups of liquid. I used broth plus water to total 2 1/8 cups.

**Note: Actually, I halved the recipe for the two of us, and baked it in a 9-inch pie pan. Why not? It’s Tamale Cheese Pie, after all! A full recipe calls for a pan that is 11 3/4 x 7 1/2 x 1 3/4 inches. Here is a great reference page for pan sizes, that helped me choose the proper size of pan for my modified recipe: Joy of Baking website.


Did I learn anything from the recipe card? Yes! We really liked this version of tamale pie. My no-recipe version usually turns out with a lot more liquid, and we both liked it better this new (old) way. I also liked the way the cornmeal mush is on both the top and the bottom of the dish. And, I liked the flavor of beef stock in the cornmeal mush.

Mexi-Chili Casserole

For the last several weeks, I have bought Fritos at the store in anticipation of making Mexi-Chili Casserole, the next recipe in my “pandemic seven”. Each of these weeks, when I went to make the casserole, the Fritos were gone.

The first bag disappeared during a spontaneous outdoor socially-distanced family gathering. I hadn’t been to the grocery store in over a week and suddenly had many mouths to feed. I prowled my pantry and freezer and found enough hot dogs and buns and dessert to feed us all, but I needed chips. Aha! I had bought a bag of Fritos for Mexi-Chili Casserole! So as we were grilling hot dogs, I produced the bag of Fritos . . .

. . . my husband’s eyes lit up. And a little later, my pregnant daughter has the bag of Fritos and is sitting on the couch, munching steadily away. She said, “Fritos have always been my favorite! I used to get them a lot in high school.” Her kids loved them too.

That Frito bag was gone! No Frito casserole that week. So the next time I get to the market, I buy another bag. One day that week I find my husband with the opened bag of Fritos, saying “these are like crack!” Okay, so I’ll buy another bag and try again the next week. “You may never get to make that Frito casserole you are planning . . . ” he says. So I am trying again. I bought two bags – they were 2 for 6 dollars. I hid one away.

Frito-essential Mexi-Chili Casserole is a typical 50s to 60s casserole. All it takes is a can of chili, a can of enchilada sauce, a can of tomato sauce, onion powder, sour cream, cheese and of course, Fritos. My recipe card is one that I typed before I left home to live on my own in the late 60s. I don’t make Mexi-Chili Casserole often. In fact, I can’t remember the last time I made it. I was always dieting.

In the fifties and sixties, home cooks found an abundance of canned and packaged products in grocery stores. A new, convenient, and quick way of cooking became the rage. Make a white sauce from scratch for a casserole? No, now the housewife could open a can of cream of mushroom soup instead. Take an hour to cook whole grain rice? No, now the housewife could use instant white rice. Cook vegetables? No, now there were canned varieties. Cook a fish? No, open a can of tuna and mix it with packaged pasta for a tuna casserole. (I discussed this before in my blog post on Eat, Drink and Be Healthy.)

Back to my Mexi-Chili casserole. The time finally arrived when I had a bag of Fritos and was in the mood to cook this casserole. It was so weird mixing together the canned ingredients. These days I usually make my own chile from scratch, add my own seasonings to a casserole, employ some vegetables other than “onion powder”, and don’t use a bag of chips as the starch. This should be fun.

Note: the bag of chips cost $3 and was 9 1/4 ounces. I know those 6-ounce bags of chips once cost 25¢.

Mexi-Chili Casserole

  • 1 x 6 ounce package Fritos (I used a scale to get the proper amount)
  • 2 cups grated Tilamook (cheddar) cheese
  • 1 x 15 ounce can of chili with beans
  • 1 x 15 ounce can enchilada sauce
  • 1 x 8 ounce can tomato sauce
  • 1 tablespoon dried onion
  • 1 cup sour cream

Reserve 1 cup Fritos and 1/2 cup cheese.

Combine remaining chips and cheese with the chili, sauces, and onion. Pour into an 11 x 7 x 2 casserole.

Bake uncovered at 350˚ for 20 minutes. Spread top with sour cream and cheese, and edge with the Fritos. Bake 5 minutes longer.


This casserole got me interested in “Fritos”. How long have they been around, and who invented them? Wikipedia to the rescue! Fritos have their own entry. They were created in 1932 by Charles Elmer Doolin. They are made from deep frying “extruded whole cornmeal”.

Frito Pie, similar to my Mexi-Chili Casserole, also has its own wikipedia entry. Basic Frito Pie is chili, cheese, and corn chips. The oldest known recipe using Fritos brand corn chips with chili was published in Texas in 1949, my year of birth! Frito Pie was sometimes served directly from a Frito bag, which was thicker than it is today.

Hamburger Enchilada Crepes

Another card I pulled out of my “antique” recipe box during these pandemic times is the recipe for Hamburger Enchilada Crepes. Gosh, I love these! I used to make them a lot, but somehow they have slipped my mind . . . for years!

I am a fan of crepes. This blog’s recipe index includes at least seven crepes recipes. I have my own way of making crepes: a spin in the blender for the batter, an hour rest and then another spin just before pouring a 1/3 cup portion into my old, cheapish crepe pan, and a flip to cook both sides of the crepe. Not traditional, perhaps, but it has worked for me for ages.

Back before I retired, I did a lot of my cooking for the upcoming work week on Sundays. This Hamburger Enchilada Crepes recipe lends itself well to that practice, as the crepes and filling can be made ahead of time and kept either in the refrigerator and probably (I think) in the freezer. The cheese sauce can be made while the stuffed crepes bake.

On a hunch, I checked my personal digital recipe document for Hamburger Enchilada Crepes. Aha! It’s there! I noted: “I just have to get this on disc before I lose the index card! I’ve been making these for years and would hate to lose the recipe.” So. My opinions of this great dish have not changed!

And now, I’ll share it with you. Happy pandemic cooking!

Hamburger Enchilada Crepes

Crepes

  • 1 1/2 cups milk
  • 2 eggs
  • 1 tablespoon oil
  • 1/4 teaspoon salt
  • 2/3 cup cornmeal
  • 1/2 cup flour

Put the milk, eggs, oil, and salt in a blender. Blend until smooth. Add the cornmeal and flour and blend 60 seconds.

When you are ready to make the crepes, heat a skillet or crepe pan on medium high. (My crepe pan is 8-inches in diameter.) Get the pan hot enough that when you hold your hand an inch above the surface, you can feel a lot of heat. Do not get the pan so hot that it smokes. Re-blend the crepe mixture just before you begin cooking the crepes. (In fact, you have to keep blending between making each crepe because the cornmeal settles.)

Spray some oil on the hot pan, and immediately pour in about 1/3 cup of the crepe mixture and tip the pan to cover the entire surface with batter. In about 20-30 seconds, it will be ready to flip. Cook the second side briefly, then remove the crepe from the pan and start another one cooking. This recipe makes about 6-8 crepes.

Filling

  • 1 pound hamburger
  • 1/2 cup chopped onion
  • 16 ounce can of refried beans
  • 1/2 cup taco sauce (or any type of salsa that you have on hand)

Cook the hamburger with the onion. Drain off any fat and add the refried beans and taco sauce. Stir to combine; remove from the stove.

I often use a can of plain pinto beans instead of refried beans. To the plain beans I add some cumin, chile powder, granulated garlic, cilantro, and salt to taste.

Sauce

  • 1 tablespoon margarine or butter
  • 3 tablespoons flour
  • 1 teaspoon chile powder
  • 1/4 teaspoon paprika
  • 1 1/2 cups milk
  • 1 cup grated cheddar cheese
  • 1/2 cup sliced olives

Melt the butter (or margarine) in a saucepan. Stir in the flour, chile powder, and paprika. Stir and cook this roux until the ingredients are well mixed. Gradually add the milk, stirring constantly. Cook until the sauce is smooth and thick and bubbly. Stir in the cheese and olives.

Assembly and Cooking

Lay a crepe on the breadboard, add some of the filling, and roll it up. Continue until all the crepes and filling are gone. Place the filled crepes in a shallow casserole or glass baking pan. Pour the sauce over the crepes (this can be done after the crepes have cooked awhile; see the *note below).

Bake at 375 degrees for 25 minutes.

*Note: I often make and fill the crepes and refrigerate or freeze them in the pan (without the sauce). Since the crepes may be partially frozen, or very cold, when I first put them in the oven, I bake them without sauce for awhile and add freshly made sauce sometime near the end of the cooking.

The original recipe says to serve with guacamole sauce topping, below. I rarely did, as these crepes are rich without it. You can see in my photo at the top of this post that I put the topping over some lettuce and served it with the crepes.

(Optional) Topping

  • 1 avocado
  • 1/4 cup sour cream
  • 2 tablespoons taco sauce


Cheese Potatoes

Weekends in my youth were often spent with our grandparents and aunts and uncles and cousins. Everyone would bring a dish to share, and we would gather around a cozy table and laugh and talk and enjoy the food. The kind of event we just cannot do today in pandemic times. But I have my memories.

Much of the food was fifties-style casseroles. Canned soups and sour cream were very popular ingredients in these casseroles, as in this one for Cheese Potatoes. It’s on another one of the seven recipe cards I pulled out of my old recipe box a few weeks ago.

Next to the recipe title is “Werdie” in parentheses. That’s my Aunt Werdie. She was the youngest of my father’s three sisters, and the one I knew best, the one I called “my favorite aunt”. Werdie’s given name was Werdna, which is Andrew spelled backwards – Andrew was my grandfather’s name. She lived to her late nineties and kept her mind and her pluck to the end!

So today I’ll make these memory-filled, comfort-food Cheese Potatoes. And enjoy every rich bite!

Cheese Potatoes

  • 10 medium potatoes, boiled and chopped into 1/4-1/2 inch chunks
  • 1 can cream of mushroom soup
  • 1 1/2 pound sharp cheddar cheese
  • 1/2 cube butter (4 tablespoons)
  • 1/4 cup chopped green onion
  • 1 pint sour cream

Melt butter, add cheese and soup. Add to the potatoes along with the onions. Fold in sour cream. Bake at 350˚ 45 minutes.

Note: For the two of us, I made one-third of a recipe and baked it in an 6×6-inch pan. I had leftovers – no problem!


Golden Cinnamon Loaf

golden cinnamon loaf

I have been reading old letters the last few days. Why? Pandemic times have tied me to this house ever so much more than pre-epidemic. Boredom finally led me to the task of sorting some dated items stuffed in boxes. I must get rid of all this clutter! But instead I get lost in my mother’s letters, my sister’s letters, a rare letter from my brother, some from my mother-in-law, my children’s yearly birthday cards, children’s Mother’s Day cards to me, my university transcripts, an old key to my parents’ home, magazine articles on old (once new) cars. Reading and remembering leave me untied from the present day. And that can be pleasant.

I pick up a card with kitties on the front and am taken back to when Mother was in her kitchen in California, writing to me in Colorado. She commented on photos I had sent: my daughter standing up for the first time, my son such a “good looking little boy”, the puppy who is now two dogs back. Mother would have been in her seventies when she wrote this letter.

And now I am in my seventies too.

So when later in the day I pull down my own old recipe box, I realize that it is just about an antique. I leaf through these old recipe cards. Some I recognize, some I don’t. Even though they are all written by my own hand. Even though I cooked them enough times and liked them enough to write the recipe on the card. What happened to that young me, was she a different person? How can I forget something so carefully written down?

Ah, time. What to do? I pull out seven cards that perk my interest. Some I remember, some I do not. But on the spot, I decide to make each of these recipes. Since I am tied to my house, my kitchen . . . might as well take a cooking tangent. Enjoy a blast from my past.

First I choose “Golden Cinnamon Loaf” – a yeast bread with lots of butter and sugar and cinnamon and golden raisins. All things I like! I probably stopped making it because I was always counting calories.

The recipe says to bake the loaf in a 2 quart casserole. My 8×8-inch glass pan says “2 quarts” on the bottom, and that is what I used to bake this bread. So, the “loaf” is double wide. One could probably bake it in two standard loaf pans instead, but I simply cut the loaf down the middle and then cut across the other way to make toastable bread slices. It is wonderful as cinnamon toast!

Golden Cinnamon Loaf

Soften 2 tablespoons yeast in 1/2 cup water.

Combine 1/3 cup sugar, 1/4 cup butter, and 1 teaspoon salt in 2/3 cups boiling water; allow to cool.

Transfer the yeast mixture and the sugar-butter-water mixture to the bowl of a stand mixer. Blend in:

  • 1 egg
  • 1 cup golden raisins
  • 3 1/2 to 4 cups all purpose flour

Add enough of the all purpose flour to make a soft dough. You do not need to knead this yeast bread, just beat it long enough and add enough flour to make the dough soft and well mixed.

Let the dough rise until light. Mine took maybe 45 minutes. While waiting for the dough to rise, butter an 8×8-inch glass pan, and combine:

  • 2/3 cup sugar
  • 2 teaspoons cinnamon

When the dough is light, stir it down. Sprinkle 3 tablespoons of the sugar-cinnamon mixture in the bottom of the buttered 8×8 pan. Add 1/3 of the dough and spread it out, then sprinkle it with 3 tablespoons of the sugar-cinnamon mixture. Add another 1/3 of the dough, spread it out, and sprinkle with the sugar-cinnamon mixture. Add the final 1/3 of the dough, but do not sprinkle it with sugar-cinnamon (the last of the sugar cinnamon mixture goes on top after the bread is cooked).

Let the dough rest about 1/2 hour. Heat the oven to 350˚.

Bake the loaf for 45-55 minutes, until golden brown. Brush with melted butter and sprinkle with the remaining sugar-cinnamon mixture.


July 4 Amid the Pandemic

John and I spend most of our days in our home six miles from Lyons, just the two of rattling around in our big house and yard. That’s why we got really excited when our daughter and her husband and two young children told us they were coming out for a CoVID-style visit on the Fourth of July. For a few hours, our social status will be raised from “isolation” to “distancing”.

The six of us enjoyed the outdoors: on the deck, in the pool, in spaced chairs under the trees. We cooked hot dogs and had chips and cold beers and sodas. We had a grand old time!

For the kids (and the adults!) I made cookies and parceled them out in pre-wrapped small bags. These were not everyday cookies, no, they were colorful red-white-and-blue Fourth of July cookies!

These cookies begin with a really good buttery-sugar dough. Then you divide it into three parts and mix red food coloring into one and blue to another. I had a fun swirling in the colors! I used a lot of food coloring to get the colors dark.

Red, White and Blue Pinwheel Icebox Cookies
adapted from the recipe on the Just a Taste website

  • 3 cups flour
  • 1/2 teaspoon baking powder
  • 3/4 teaspoon salt (use less if you use salted butter)
  • 1 cup (2 sticks) unsalted butter
  • 1 1/3 cup sugar
  • 2 eggs
  • 2 teaspoons vanilla
  • red and blue food coloring

Mix together the butter and sugar in an electric mixer. Add the eggs and vanilla and beat well, then add the flour, baking powder, and salt.

Divide dough into three portions. Leave one without food color, and add red and blue to the other portions, respectively. Use as much food coloring as it takes to get the colors you like, and I added a lot! I used the mixer to beat in the food coloring, and cleaned the mixer in between.

Press each of the three colors into a 4 x 4 inch square and cover with plastic wrap. Refrigerate for 30 minutes.

Rolling:

Take a 4-inch dough square and cut it in half, producing 2 rectangles. Do this with each color (blue, red, plain), so you have 6 rectangles.

Create 12 pieces of wax paper, each about 8 x 12 inches. Take rectangle of dough and put it between two pieces of wax paper, then roll the rectangle to about 6 x 10 inches (aim for ⅛ inch thick). The dough is such that you can move it around to make a true rectangle. You will have 6 rectangles between wax paper: 2 white, 2 blue, 2 red.

Take a red rectangle, still in the wax paper. Carefully pull the top layer of wax paper off. Peel the wax paper off one side of the white dough and lay it on top. Remove the wax paper.

Grab a blue rectangle and put it on top in the same way.

You can nudge the dough around a bit to get the sides of the colors to match. You may want to lightly roll the doughs to press together.

Start at the longer end of the rectangle and roll up. You will have 2 rolls. Refrigerate about 4 hours, then take them out and roll on the counter so they are round and not square.

Refrigerate again until you bake the cookies.

Slice the roll into ¼ inch thick cookies. Bake 10 minutes on parchment at 350˚.