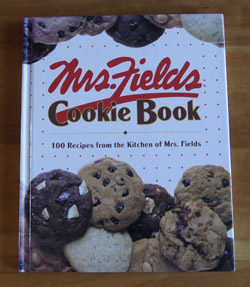
250 Cookbooks: Mrs. Fields Cookie Book

Cookbook #80: Mrs. Fields Cookie Book, Debbi Fields, Time-Life Books Inc., Alexandria, Virginia, 1992.

Mrs. Fields Cookie BookI went through a Mrs. Fields® cookie phase, like many Americans! I got this cookbook for myself, and have often drooled over the recipes.

Debbi Fields opened her first cookie store in Palo Alto in 1977. A store just for cookies was a new concept at the time. And it took off, as today there are many Mrs. Fields® franchises, and you can purchase them online.

The recipes are all excellent, the photos and layout great, and Debbi Fields presents a friendly introduction. I tried several of the recipes over the years, but kept the cookbook nice and clean.

I had no trouble finding a recipe to try. I note that most of the drop cookies are baked at 300˚ for about 20 minutes. Most of my personal cookie recipes call for a 375˚ oven for about 10 minutes. Mrs. Fields® recipes call for butter (not margarine) and are all from-scratch. In the introduction, Debbi states that the recipes call for “ingredients you have on hand.” Yeah, if you keep lots of different kinds of chocolate and vanilla chips on hand!

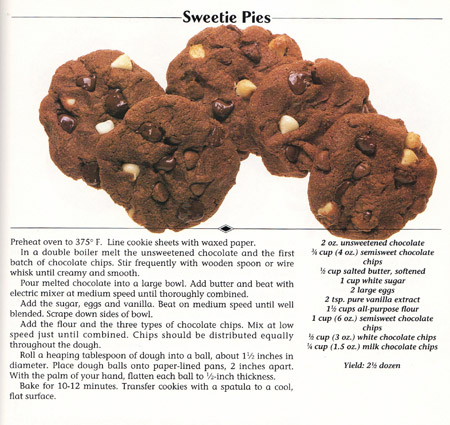
I decided to try “Sweetie Pies”.

Sweetie Pies RecipeI made them pretty much like the above recipe, just changing the ratios of the different types of chocolate chips and adding a bit more flour.

Sweetie Pies, a Mrs. Fields® cookie recipe, with slight variations

  • 2 ounces unsweetened baking chocolate
  • 3/4 cup semisweet chocolate chips
  • 1/2 cup salted butter, softened
  • 1 cup white sugar
  • 2 eggs
  • 2 teaspoons vanilla
  • 1 1/2 cups flour (plus 2 tablespoons if necessary)
  • 3/4 cup semisweet chocolate chips
  • 1/2 cup white chocolate chips
  • 1/2 cup milk chocolate chips

Melt the unsweetened chocolate with 3/4 cup semisweet chocolate chips, either in a double boiler or in the microwave.

Beat the butter with the melted chocolate, then add the sugar, eggs, and vanilla. Beat until well blended.

Add the flour and the three types of chocolate chips. Mix at low speed just until combined.

At this point, the original recipe says to “roll a heaping tablespoon of dough into a ball, about 1 1/2 inches in diameter.” Well, my dough was wet and sticky, so I added another 2 tablespoons flour and tried again. Still too sticky. So, I just dropped the dough onto parchment-lined half-sheet pans, then slightly flattened each cookie.

Bake at 375˚ for 10 minutes.

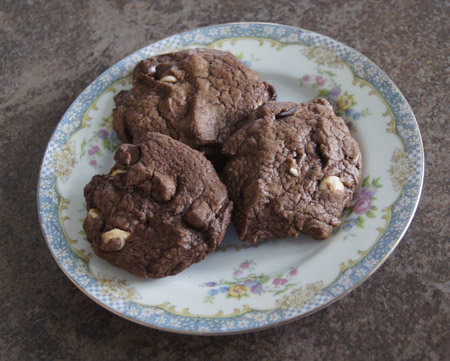
Sweetie PiesThese were delicious! It made almost exactly 2 1/2 dozen, as stated in the original recipe. But if I had made them using 1 1/2 inch balls of dough, my guess is that it would have made a lot less.

The reason I used more milk chocolate chips than called for is because I wanted more of a milk chocolate taste. I had to purchase these (and the white chocolate chips) specifically for this recipe and now I am left with partial bags of all three types of chips. Guess I’ll have to make these cookies again!

250 Cookbooks: All-Time Favorite Pies

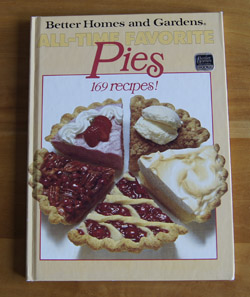
Cookbook #79: All-Time Favorite Pies, Better Homes and Gardens, Meredith Corporation, Des Moines, Iowa, 1983.

All Time Favorite PiesPies. I love pies but rarely make them because of the calories – I take my baking urges and use them to make breads instead. When I do make a pie, it’s usually a fruit pie made sans recipe, or a pie from the large collection of pie recipes on my mother’s index cards.

This cookbook has no markings in it, and I don’t know how it came to be on my bookshelves. Perhaps I bought it for myself in a moment of pie-longing. A whole clump of pages has come loose from the binding, but there are no food stains in this cookbook.

This week, though, I have and excuse to make a pie. My daughter and her family are visiting!

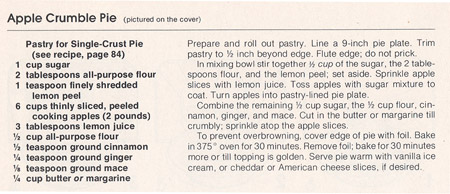
I open All-Time Favorite Pies and page through. The first recipe I see is the one I want to make! “Apple Crumble Pie” is sort of a French-style pie with a pastry crust, lots of apples, and then a seasoned crumb topping instead of a top pastry crust. I’ve never made an apple pie exactly like this, and it’s my choice for this blog.

But that’s not the only recipe I like in this cookbook. Cherry-Almond Tarts, Coconut Cream Pie, Fresh Fruit Tarts, Layered Pumpkin Chiffon Pie, and Fudge Chiffon Pie all look fun to try. All the recipes in this cookbook are they are from-scratch, always my preference. A few recipes call for canned fruits or a flavored jello, but that’s the furthest they get from “scratch”. This cookbook even includes a recipe for homemade mincemeat!

For the Apple Crumble Pie, I will need to make a pie crust. All-Time Favorite Pies offers a flour-shortening crust recipe, which is almost exactly the recipe I learned make in my mother’s kitchen. But I recently adopted a new pie crust recipe. That’s the one I’ll use in my version of Apple Crumble Pie. I also upped the amounts of cinnamon and ginger and substituted nutmeg for mace (because my little tin of mace was at least 10 years old!).

Apple Crumble PieBelow is my version of Apple Crumble Pie.

Apple Crumble Pie

  • pastry for single-crust pie (use your own, or use mine)
  • 1 cup sugar, divided (1/2 cup for apples, 1/2 cup for crumble)
  • 2 tablespoons flour
  • 1 teaspoons finely grated lemon peel
  • 3 tablespoons fresh lemon juice
  • 6 cups peeled and thinly sliced apples – I weighed out 2 pounds of whole apples and after peeling and slicing, it was indeed 6 cups
  • 1/2 cup flour
  • 1 1/2 teaspoons cinnamon, divided (3/4 teaspoon for apples, 3/4 teaspoon for crumble)
  • 3/4 teaspoon ginger
  • 1/2 teaspoon nutmeg (preferably freshly grated)
  • 1/4 cup butter

Roll out the pie crust pastry and fit it into a 9-inch pie pan. Trim and flute the edges.

Combine the apples with 1/2 cup sugar, 2 tablespoons flour, grated lemon peel, lemon juice, and 3/4 teaspoon cinnamon. Let the mixture stand in a bowl for a few minutes to macerate the apples.

Combine the 1/2 cup flour with 1/2 cup sugar and 3/4 teaspoon cinnamon and the ginger and nutmeg. Using a pastry cutter or even a food processor, cut in the butter until the mixture is crumbly.

Put the apples in the pie crust, then sprinkle the crumb mixture over the top.

Bake at 375˚ about an hour, until it is nice and brown.

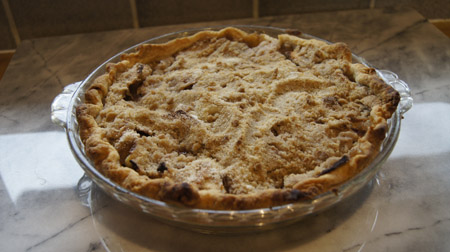
Apple Crumble PieVerdict: This pie is a hit! I served it with homemade vanilla custard ice cream. I loved the hint of lemon in the pie. This apple pie is absolutely yummy.

I did not cover the edge of the pie to prevent the crust from over-browning, as suggested in the original recipe. You can see in the photo that it is not too brown. Whew, I was glad I didn’t have to go to that extra step.


Favorites: Pie Crust

The pie crust recipe that I used for years came from my mother. Hers was always perfect. Mine always tasted great, but was always difficult for me to roll out without tearing. I just lack a certain patience, I guess (well, I know). I kept using her recipe out of – well, maybe a bit of loyalty, or an acceptance that they did taste very good in spite of their looks, or maybe a laziness to find a new recipe that worked for me.

My mother’s recipe for a single pie crust is:

  • 1 cup flour
  • 1/2 teaspoon salt
  • 1/3 cup Crisco
  • 2 tablespoons water

You mix the flour and salt then cut in the shortening using a pastry blender, sprinkle in enough water so that the dough just holds together, form into a ball, and roll out on a floured cloth. For a double crust, you mix the water with some of the flour first instead of sprinkling it in.
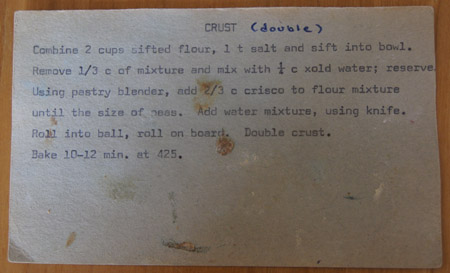
Mother's Crust Recipe

My well-used recipe card. I typed the crust recipe onto a 3×5 rectangle of colored paper when I left my parent’s home.

The above recipe is almost exactly the same as the recipe in All-Time Favorite Pies. That one uses a bit more flour and water, but is still a flour-salt-shortening-water pie crust recipe.

I never looked forward to making pie crust, it was more like planning for an upcoming battle.

Finally, I decided to take on the project of finding a new pie crust recipe. I searched the web for recipes and advice, and tried several different recipes, came on one that worked for me, then nudged the method until I was satisfied with the results. I make about 4 pies a year, so it took me a few years to come up with my final version!

My recipe is heavily based on one I found on Cook’s Illustrated, under the auspices of America’s Test Kitchen (and Christopher Kimball). Their recipe title is “Foolproof Pie Dough for a Single-Crust Pie” (dated 2007). I don’t want to step on any copyright toes, and give full credit for the development of this crust to Cook’s Illustrated! My version below just gives a couple nudges that help me make this dough perfect each and every time I use it.

The trick to this recipe is: Vodka!

Pie Crust
makes more than enough for a 9-inch crust

Note: this recipe can be doubled or fractionated – I have tried both variations with success. The amounts below make more than enough dough for a single crust, but that’s kind of nice because it gives some leeway for impatient dough-rollers. Or, take the extra dough, sprinkle with cinnamon and sugar, roll up, and bake 10 minutes at 375˚ for little treats. (That’s what my mother always let us do!)

  • 1 1/4 cup flour
  • 1/2 teaspoon salt (warning! if you do not use unsalted butter, you must use less salt!)
  • 1 tablespoon sugar
  • 6 tablespoons cold unsalted butter, cut into chunks
  • 1/4 cup cold Crisco (aka vegetable shortening), cut into 2-4 pieces (it’s gooey even cold, so “cutting” isn’t really the proper term here)
  • 2 tablespoons cold vodka (hey, just store some vodka in the freezer at all times!)
  • 2 tablespoons cold water (I put a few ice cubes in water for a few minutes, then measure the 2 tablespoons)

Get out your food processor. If you don’t have one, use a pastry blender or two knives instead. But the food processor really, really helps. I have never tried this crust without using a food processor.

Put 3/4 cup of the flour and all of the salt and sugar in in food processor and pulse a couple times just to mix.

Add all of the butter and vegetable shortening. Process for 10 seconds and check. It should look like “cottage cheese curds” and there should be “no uncoated flour”. If it is not yet to the cottage cheese point, pulse one or two times and re-check. In my experience, largish chunks of butter remaining in this dough are okay. It’s better to under-process than to over-process.

Open the food processor and scrape down the sides of the processor bowl. Add the remaining 1/2 cup flour and quickly pulse 4-6 times.

Remove the dough from the food processor and dump it into a regular bowl.

Mix the vodka and water. (Keep in mind that you might not need all of this vodka-water mixture.)

Sprinkle most of the vodka-water mixture over the dough. Using a rubber spatula, press the dough together until it sticks together and is “tacky”.

The exact amount of “tackiness” after the vodka/water is added isn’t terribly precise. The times I’ve tried this, it definitely wasn’t sloppy, and each time had a different degree of “holding together” when pressed against the sides of the bowl. Somewhere between sloppy and falling apart is best. Add the vodka/water slowly and if you add it all and still need more wetness, go with straight vodka. You want it to hold together so it will roll out easily, but too sloppy a dough creates a less-tender crust.

If you are a seasoned pie crust maker and the tacky mixture just seems too wet, know (from this chemist) that the vodka will evaporate and by the time you roll it out, it will no longer be tacky.

After mixing in the water/vodka, flatten the dough into a 4-inch disk, wrap in plastic, and refrigerate before rolling.

In my experience, this crust recipe works mixing together the night before, but take it out of the refrigerator an hour before rolling. It also works mixing the day-of, but make sure you put it in the refrigerator a couple hours before rolling.

Roll out on a lightly-floured cloth (like a flour sack cloth). When the crust is large enough to fit the pan, fold the cloth over to fold the dough, then gently transfer to the pie pan and fit and flute. Bake as directed in your pie recipe.

It rolls like a dream! Even I can do it!

I wrote myself a note on my final version of the new recipe: “And so with this, I leave behind Mother’s recipe for Crisco-flour-water-salt crust. That one was always flaky and wonderful, but this one rolls out in a manner more suited to my patience. It looks good, and tastes good. And, can be made ahead of time. And it means I now keep vodka in the freezer!”
Favorites: Beer Can Chicken

“We are having Beer Can Chicken for dinner.” “What’s that?” my daughter [who has been living abroad] asked.” “Well, you take a whole chicken and put it on a beer can and grill it.” “Do you . . . open the beer can?” “Yes!”

Beer can chicken recipes have been circulating amongst my Colorado friends for several years now. My recipe is based on one posted by the Culinary School of the Rockies (now Escoffier School of Culinary Arts, Boulder) in 2009. I tweaked it a bit, and have made it a lot!

I highly recommend Oskar Blues Old Chub as the beer for this recipe. I’m kind of partial to Oskar Blues, since this brewery started out in my town of Lyons. During the September floods in 2013, Oskar Blues helped our community with grants to businesses and individuals.

Oskar Blues was one of the first breweries to sell their microbrew in cans. Old Chub is a very hoppy IPA, and works great in this recipe.

Beer Can Chicken
serves about 4

  • 1 whole roasting chicken
  • 1 open 12-ounce can of beer, preferably a flavorful microbrew
  • 1 tablespoon brown sugar
  • 1 teaspoon each: garlic powder, onion powder, ground mustard powder, and chili powder
  • 1 teaspoon paprika – use smoked paprika if you have it
  • 1/2 teaspoon cayenne pepper
  • a couple tablespoons fresh herbs, if you have them on hand; I have used thyme, mint, basil, and oregano
  • salt and pepper to taste
  • olive oil

Rinse the chicken and pat it dry.

Mix the brown sugar with all the spices and herbs. Rub the chicken with some olive oil, then rub in the spices. Rub them in the cavity, under the skin that covers the breast, and on the outside of the chicken.

Preheat a gas grill to 350˚. The chicken needs to be cooked over indirect heat. My grill has 3 burners, so I set the first and third burners to medium high, and leave the middle burner off. Then the chicken has room in the middle to stand up without touching the gas grill cover when it is closed.

Hold the chicken upright (legs down) and place it on top of the beer can so that the can easily slides into the cavity. Use the legs to balance the chicken upright on the grill. (Yes, this can be a bit tricky the first time you do it!)

Close the lid. Grill the chicken at 350˚ for 1 hour to 1 hour 15 minutes. With my grill, I find that I need to check every 15 minutes or so to make sure that the grill is still at 350˚. The chicken is done when it is golden and at least 165 degrees.

Transfer the chicken (minus the beer can!) to a platter and serve!

250 Cookbooks: Recipes for Healthy Living

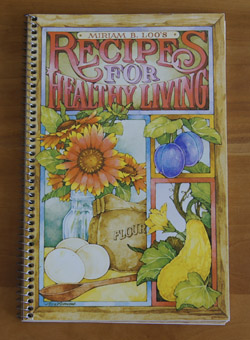
Cookbook #78: Recipes for Healthy Living, Miriam B. Loo, Current, Inc., Colorado Springs, Colorado, 1980.

Recipes for Healthy EatingPretty cover on this cookbook! I probably picked it up at a local book or gift store, since it was published in Colorado. I don’t think I have ever tried any of the recipes!

The book begins with several hints for healthy eating. Miriam Loo recommends using fructose instead of regular table sugar because it has fewer calories and tastes sweeter. Miriam likes tamari sauce instead of regular soy sauce because it has a stronger flavor. She also recommends triticale flour. This is a high protein, low gluten flour that was popular in the 80s. It is still available today from companies like Bob’s Red Mill, but I haven’t seen it called for in a bread/baking recipe in ages. And I read a lot of bread recipes!

Another of Miriam’s hints for healthy eating is safflower oil. According to Recipes for Healthy Eating, safflower oil “is the most polyunsaturated of the vegetable oils. Next in diminishing value are soybean, sunflower, corn, cottonseed, and sesame seed. The more polyunsaturated the oil, the better the cholesterol-lowering properties.” Safflower oil is still available, but it is no longer the darling of healthy eating enthusiasts, perhaps because canola oil has entered the food scene. Canola oil has less saturated fat than safflower oil, although canola (rapeseed) oil has had its own bad press. This Wikipedia article has a nice table of the saturated/polyunsaturated content of cooking oils.

I turn the pages of Recipes for Healthy Eating. Recipes for “Whole Breakfast Drink” and “Yogurt-Fruit Shake” resemble today’s smoothies. “Almond Crunch Cereal” is essentially granola. Recipes for “Crispy Oat Thins” and “Graham Crackers” look interesting, but even I am not ready to put in that amount of work just for crackers. Today’s supermarkets carry a good variety of whole grain, additive-free crackers.

Miriam’s hints for healthy eating continue throughout the book. She also has hints for saving money. “In mid-winter when milk prices soar, pull the zucchini milk from the freezer and laugh at the high prices as you substitute this milk in your baking.” Zucchini Milk! You take zucchini (from your garden, if you have one), pare them, then blend them and store in the freezer to use instead of milk in recipes. Talk about pinching pennies!

“Mock” cream cheese and sour cream dressings call for low-fat cottage cheese, buttermilk, and/or skim milk. A nice idea, but low-fat cream cheese and dressings are now available in the markets.

The recipes for lean-meat main dishes do not spark any enthusiasm on my part. In the vegetable section, mushrooms are touted as “calorie bargains in vegetables” because they only contain 64 calories per pound as opposed to one calorie apiece for sugar peas. Talk about pinching calories!

The quick breads and pie crust recipes are whole grain and low-fat. Nothing sparks my interest. “Zucchini-Lemon Pie”? Hmm.

I probably picked up this cookbook because I used to be obsessive about counting calories, and in the 80s, many low-fat and whole grain prepared foods (salad dressings, crackers, cereals) were not readily available in local markets. I am not that obsessive any more, I just get lots of exercise and keep (what I consider) healthy foods in the house.

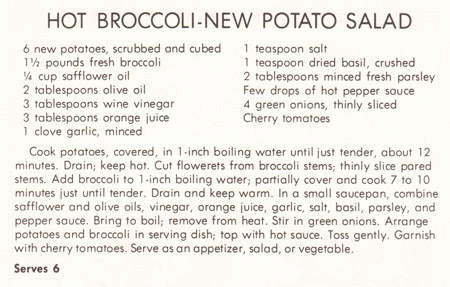
I will recycle this cookbook, but I need to cook a recipe for this blog. On this particular day, I plan to make beer can grilled chicken and I need a side dish to go with it. So I choose to try “Hot Broccoli-New Potato Salad”.

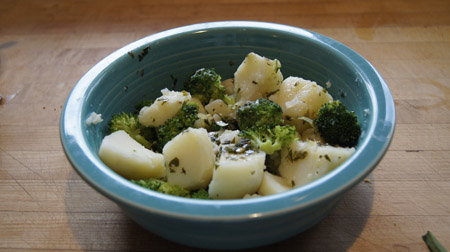
Broccoli Potato SaladI don’t have new potatoes and it’s not worth the gas money to drive the 12 mile round trip to the nearest store, so I will use russets (and peel them). I don’t have safflower oil, so I’ll use canola. Dried basil? I have fresh basil in my newly-established garden! I didn’t keep the broccoli and potatoes really hot before serving, they were more like room temperature and it tasted fine that way. The following is my version of this recipe.

Broccoli and Potato Salad
serves about 6

  • 3-6 potatoes, any variety, I used about 1 1/2 pounds
  • broccoli, about 1 pound
  • 1/4 cup vegetable oil
  • 2 tablespoons olive oil
  • 3 tablespoons wine vinegar
  • 3 tablespoons orange juice
  • 1 clove garlic, minced
  • salt to taste
  • 1 teaspoon dried basil, or fresh basil to taste
  • 2 tablespoons fresh parsley, chopped
  • hot pepper sauce, a few drops
  • 1/4 cup chopped green onions

Scrub the potatoes, and peel them if you like. Cut them into bite-sized chunks and cook until just tender.

Cut the broccoli into bite-sized pieces and cook until just tender. You can boil or steam the broccoli – your preference. I just got a microwave steamer so I used that.

Combine the oils, vinegar, orange juice, garlic, salt, basil, parsley, and pepper sauce in a saucepan and heat until just boiling.

Combine the potatoes, broccoli, green onions, and the heated sauce and toss. Serve!

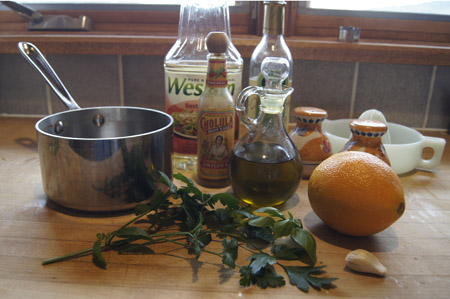
Here are my ingredients for the sauce.

ingredientsAnd here is the completed salad. At least part of it – I tossed in some steamed asparagus after I took this photo!

Broccoli Potato SaladThis was good, and I am likely to make it again. We all liked the flavor of the dressing/sauce. I’m not sure it’s really important to heat the sauce, next time I might mix it like a vinaigrette. And feel free to add any vegetables besides just the broccoli!