Cookbook #200: Boston Cooking-School Cook Book, F. M. Farmer, Little, Brown, & Co., Boston, 1906 edition, perhaps the 1911 revised printing.
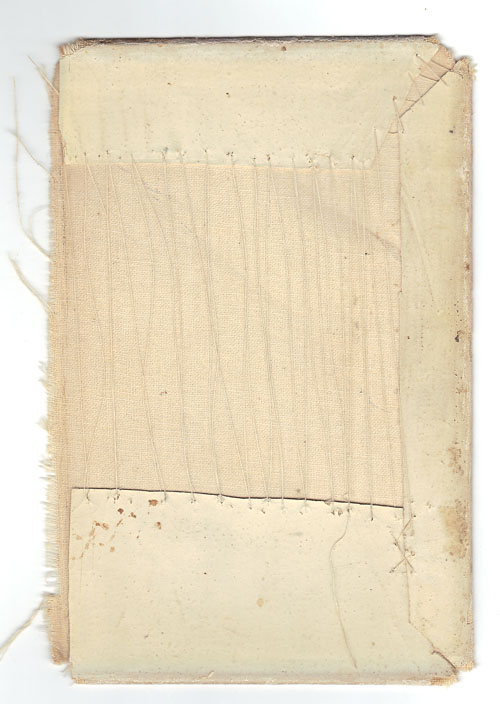
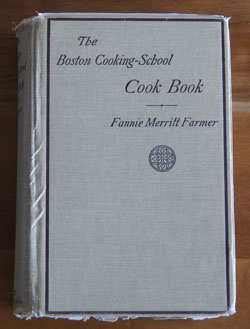 The Boston Cooking-School Cook Book is my second-oldest cookbook. It was published in 1906! I hold it in my hands in amazement. The pages are a little brittle, and some of them are falling out, but it’s in pretty good condition, considering. I obtained this book from the Ruth C. Vandenhoudt house when I was in my teens. Ruth had carefully jacketed the front and back covers with canvas cloth, hand sewing the flaps to keep the cover in good condition. I just discovered the good condition of the uncovered book this week, as I gingerly pulled the jacket off the front cover to reveal the 111 year old cover in near-perfect condition (see photo above). Here is how she jacketed the cover:
Fannie Merritt Farmer is the author of my 1906 edition of the Boston Cooking-School Cook Book. I learned about Fannie Farmer when I covered my 1965 Fannie Farmer Cookbook: “Fannie Farmer, born in 1857, was raised in a family that valued education, but could not attend school because of a crippling illness as a teen. So she started cooking at a boarding house at her parents home. Her interest in cooking took her to the Boston Cooking School, where she excelled as a student and eventually became school principal.” Please refer to my post on the Fannie Farmer Cookbook for my full discussion.
When was this book published?
My copy of the Boston Cooking-School Cook Book is missing the title page – including the publication date. About 5 years ago, I put myself into “sleuth mode” to figure out when it was published. My first guess was “1936”, but no, F. M. Farmer is listed as the author of Boston Cooking-School Cook Book editions only up to 1918 (Wikipedia, Boston Cooking-School Cook Book). Thus, my book is the 1896, 1906, or the 1918 edition.
To my amazement, Google/HathiTrust has full text digital versions of the1896, 1906, and 1918 editions online. Each page of each book was digitized and uploaded to the “cloud” so that nerds like me can read the entire book. I spent quite a bit of time perusing these fascinating books, searching for clues to match the printed edition in my hands to the proper edition year.
Brownies and War, I find, are enough to narrow down my edition. Brownies as we know them – chocolate-y bar cookies – were first made in the early 1900s:
“The earliest-known published recipes for a modern style chocolate brownie appeared in the Home Cookery (1904, Laconia, NH), Service Club Cook Book (1904, Chicago, IL), The Boston Globe (April 2, 1905 p. 34), and the 1906 edition of Farmer cookbook. These recipes produced a relatively mild and cake-like brownie.” (Wikipedia, accessed 2017)
My copy of the Boston Cooking-School Cook Book has a recipe for chocolate brownies on page 495. That narrows my edition to 1906 or 1918.
A careful read of the 1918 edition showed me that it has several references to war-time recipes (The Big One, or as we know it now, World War II). Here is an example:
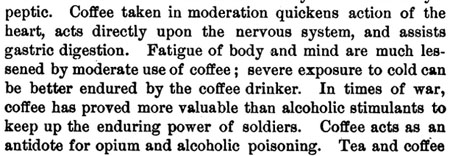
My copy does not have this same text in the coffee section. Therefore, I have the 1906 edition.
As extra confirmation, when I access Wikipedia today (2017) I find a Boston Cooking-School Cook Book entry. The entry lists the number of pages in each edition:
- 1st edition, 1896. 567 pp.
- 2nd edition, 1906. 648 pp.
- 3rd edition, 1918. 656 pp.
My copy has 648 pages, and this concurs with my prior research.
Each of the editions had revisions, for instance, the 1906 version that I found digitized online is noted as revised in 1911. Since I am missing the very first pages, I can’t be certain which revision (or which printing year) of the 1906 edition I have.
First sections of this book
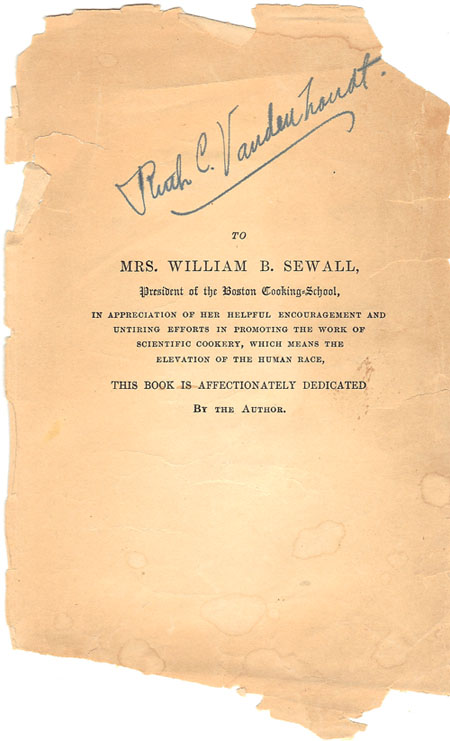
Below is the dedication page. It is no longer attached to the book. Note Ruth C. Vanderhoudt’s signature. As to the printed dedication, I like the phrase “scientific cookery”.
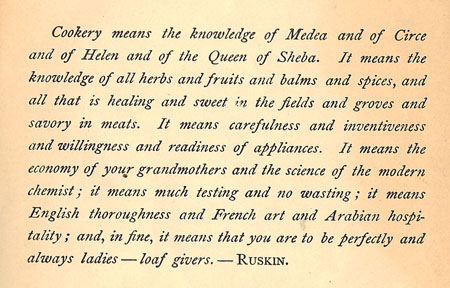
The next page prints this quote from “Ruskin”, probably John Ruskin, a “writer, art critic, draughtsman, watercolourist, social thinker” in the nineteenth century. I really like this quote.
In her preface, Fanny Farmer writes: “During the last decade much time has been given by scientists to the study of foods and their dietetic value, and it is a subject which rightfully should demand much consideration from all. I certainly feel that the time is not far distant when a knowledge of the principles of diet will be an essential part of one’s education. Then mankind will eat to live, will be able to do better mental and physical work, and disease will be less frequent.”
Boston Cooking-School Cook Book, 1906, is so special to me that I decide to go through the entire book. This may take a few weeks!
Chapter 1: Food
“Food is anything which nourishes the body.” I can tell from her discussion of the nutritive values of different foods shows that there was a good knowledge in 1906 of nutritive value of different types of foods. Listed are proteins (she spells protein “proteid”), carbohydrates, fats and oils, mineral matter, and water. The “daily average ration of an adult requires”:
4 1/2 oz. proteid
2 oz. fat
18 oz. starch
5 pints water
4.5 ounces of protein is 126 grams. My guess is that the protein value of a food is measured experimentally today, and her 4.5 ounces means a 4.5 ounce amount of a mostly-protein food, such as a steak.
The next sections of this chapter discuss water, salts, starch, sugar, gum, pectose, and cellulose, fats and oil, milk, butter, cheese, fruits, vegetable acids (acetic, tartaric, malic, citric, and oxalic), condiments (black pepper, cayenne pepper, ginger, cinnamon, cloves, vinegar, capers [capers in the US in 1906!], and horseradish), and flavoring extracts (vanilla, almond, and lemon). I revel in the chemical knowledge of this early twentieth century woman:
“Starch is a white, glistening powder; it is largely distributed throughout the vegetable kingdom, being found most abundantly in cereals and potatoes.”
And then she give a chemical test for starch:
“A weak solution of iodine added to cold cooked starch gives an intense blue color.”
We used potassium-iodide test paper strips in the CU Organic Chemistry Teaching labs! I also like her comment on condiments:
“Condiments are not classed among foods, but are food adjuncts. They are made to stimulate the appetite by adding flavor to food.”
A big class of today’s “necessary nutrients” is not listed in this book: vitamins. What the heck, didn’t they know about vitamins in 1906? This here chemist is surprised to find that the first vitamin – vitamin A – was discovered in 1913. (Wikipedia, accessed 2017.) And this from my own blog on a 1928 cookbook describing “vitamines”: Salads, Vegetables and the Market Basket.
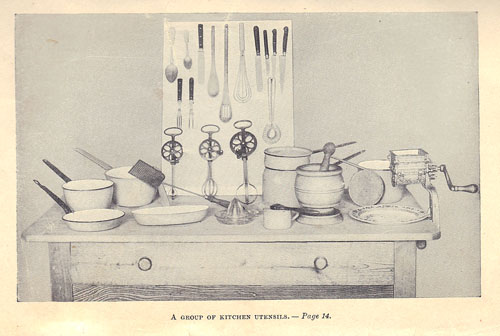
The book is illustrated with black and white photos. Here is the photo at the end of chapter 1:
Chapter 2: Cookery
“Cookery is the art of preparing food for the nourishment of the body. Prehistoric man may have lived on uncooked foods, but there are no savage races to-day who do not practise cookery in some way, however crude. Progress in civilization has been accompanied by progress in cookery.”
In 1906, cooking fuels included: kerosene, gas, wood, charcoal, and coal. (Gas ranges using piped gas were only limitedly available.) “Fire for cookery is confined in a stove or range, so that heat may be utilized and regulated.” “How to build a fire” is described in detail: Layer paper, small sticks or pine wood, hard wood, and then two shovelfuls of coal. Cover, and “strike with a match – sufficient friction is formed to burn the phosphorus, this in turn lights the sulphur, and the sulphur the wood – then aply the lighted match under the grate, and you have a fire.” The temperature of the fire is controlled with dampers.
Comment: Fannie Farmer really impresses me! She even tells us how matches work! As a woman career scientist, I love reading the work of women who came before me. I describe her writing style as “friendly scientific”.
The Cookery chapter continues ways of cooking, such as boiling, broiling, baking, braising, and frying. “How to bone a bird” and “how to measure”: teaspooons and tablespoons and measuring cups of regulation sizes were available, and she encourages their use: “Good judgment [sic], with experience, has haught some to maasure by sight; but the majority need definite guides.” Food is packed in ice to preserve it, or by a machine where compressed gas is cooled and then permitted to expand.” That’s a refrigerator she is describing. In 1906, many ways of preserving foods were used, including refrigeration, canning, sugar, drying, evaporation, salting, smoking, pickling, and packing in oil.
And more . . .
I have spent weeks on this already and have decided to publish the entry, but continue to add to it as time goes on. I have 50 more cookbooks to get through!
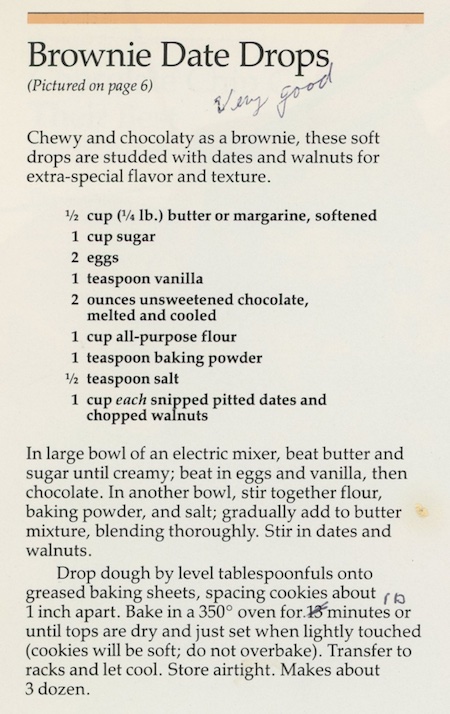
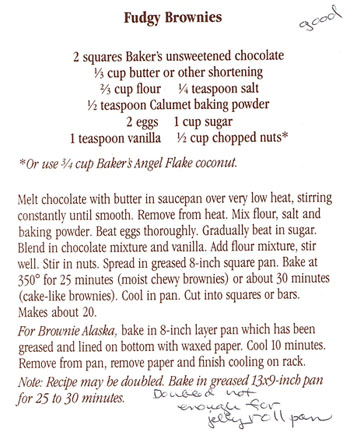
Brownies
The recipe that I want to cook for this blog is Brownies. It seems appropriate, since my 1906 edition is the first one to print the recipe. Before that time, there were no brownies! Hard to imagine life without these goodies.
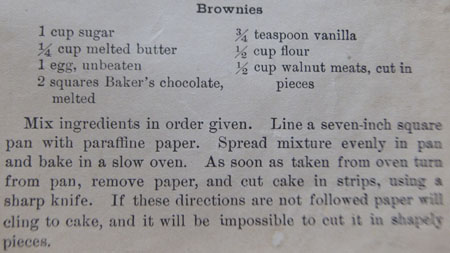 I made them pretty much like the recipe, except I didn’t line the pan with paraffine paper, I simply sprayed with cooking spray (with flour in it). A “square” of Baker’s chocolate is an ounce of unsweetened baking chocolate in todays packaging. A “slow oven” is explained in my oven temperature reference. They did not say how long to bake them! I baked them a little hotter than a “slow oven” at 350˚ for 20-25 minutes until a toothpick tested almost clean.
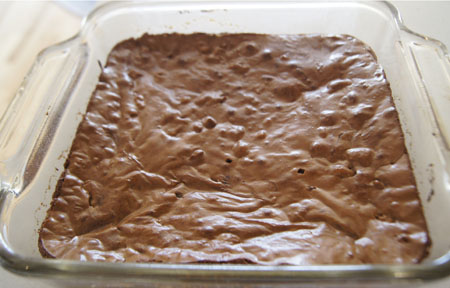 Yum!
Yum!

 I’ve saved this book for one of my last entries for this 250 Cookbooks blog because it is special to me. It was my mother’s, given to her by my brother and sister in 1986. Her notes are in it, some pages are stained with food, and many pages are falling out of the binding. I just love it!
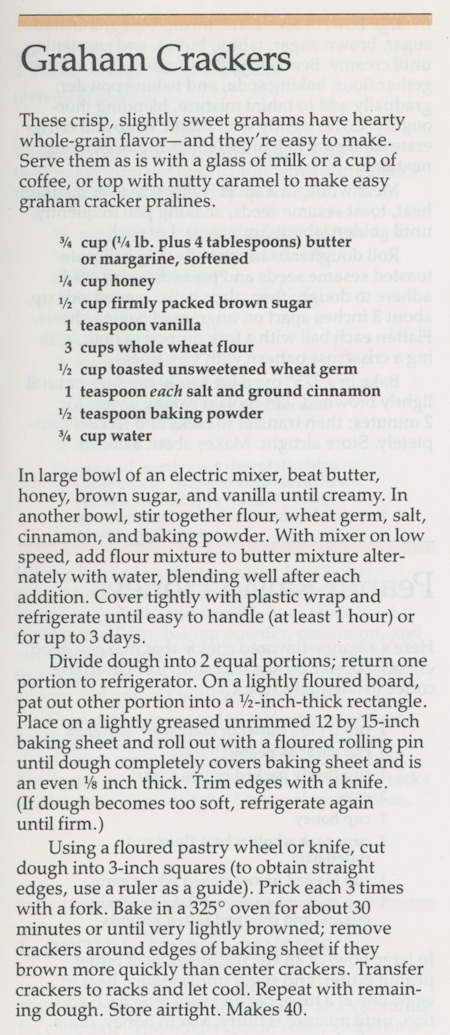
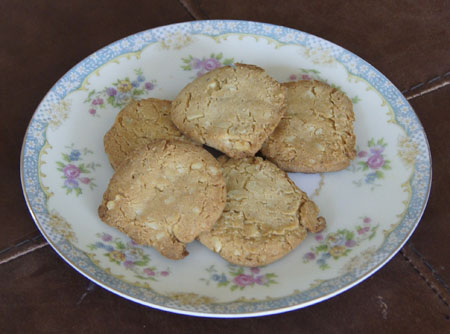
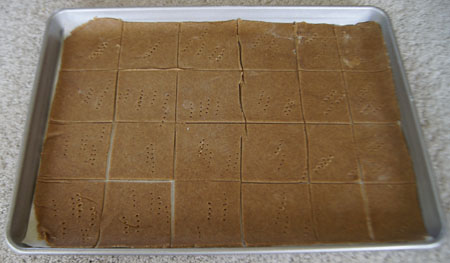 And here is a cooked one on a plate:
 Oh yes, there are not just 3 fork pricks in this cracker! Practicing “one-two-three” with a 4 year old sometimes doesn’t work. But who cares? These were actually delicious, although not all the adults liked them. I thought they were even better the next day, but I doubt the rest of the batch lasted that long – my grandson made sure that he put all his crackers in a bag to take home. I saved this one cracker in the photo above to be sure I had one to take of picture of the next day. Then I ate it!
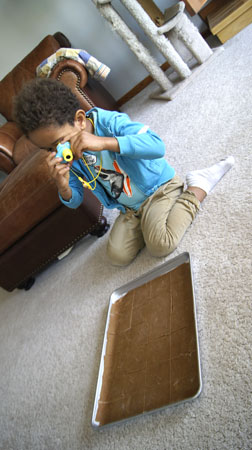
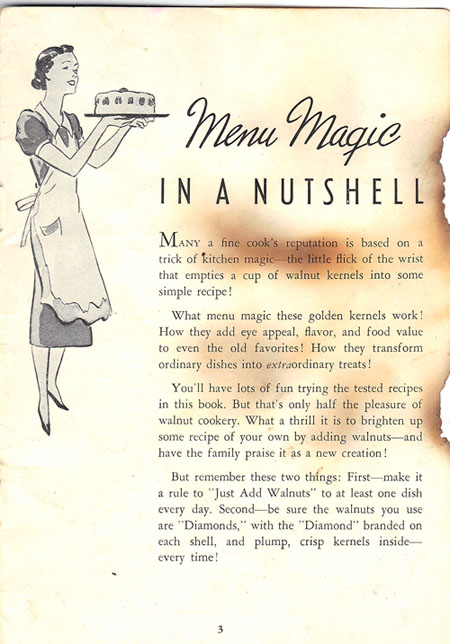
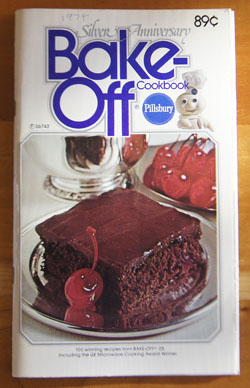 The Silver Anniversary Bake-Off Cookbook is one of the 22 cookbooks or cookbooklets on my shelves. The publication dates vary from 1959-2000, and most were my Mother’s. Some have good recipes, and some not-so-good recipes, but they reflect Americana of late twentieth century USA.
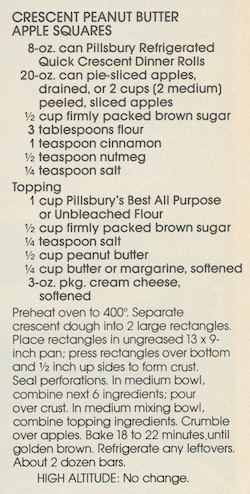
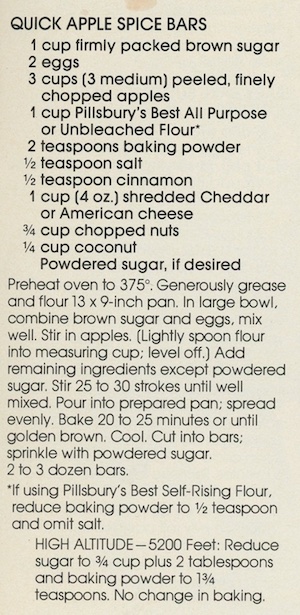 The fresh apples, cheese, nuts, and coconut in this recipe are all on our approved list of foods. Note that there is no butter or shortening in the recipe. The sugar? A no-no for us. I’ll wait to make these until we have company.
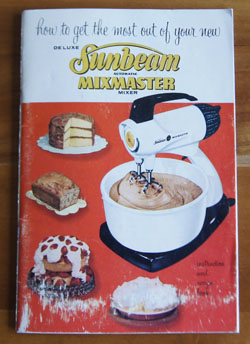
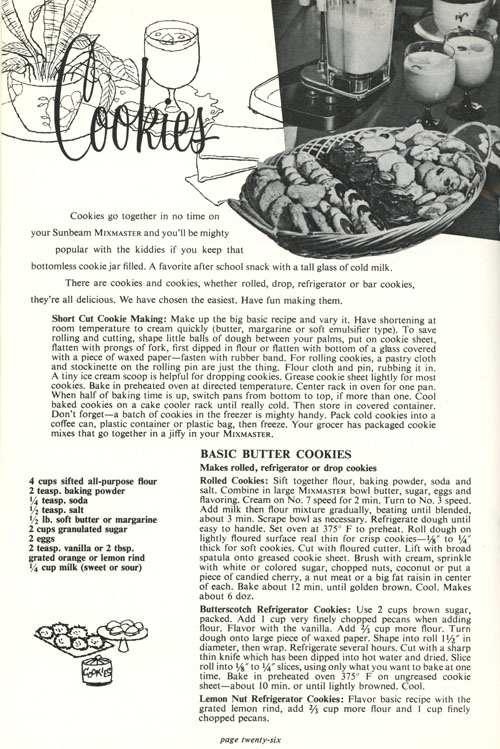
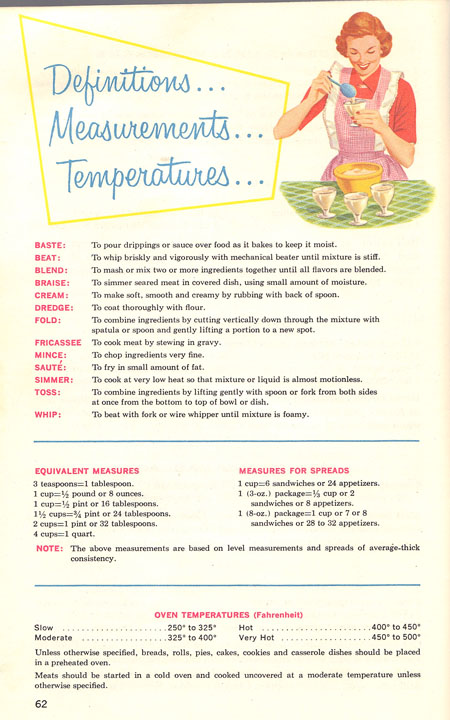
 Basic instructions for making cakes. I like the vintage black-and-white photos:
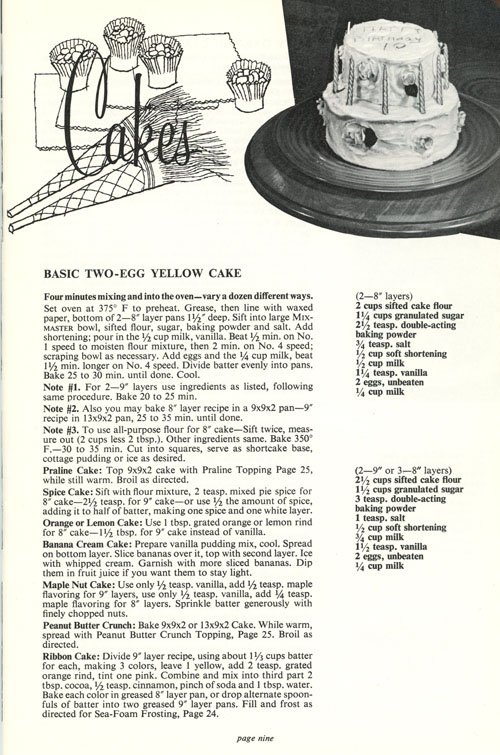 Loaf cakes:
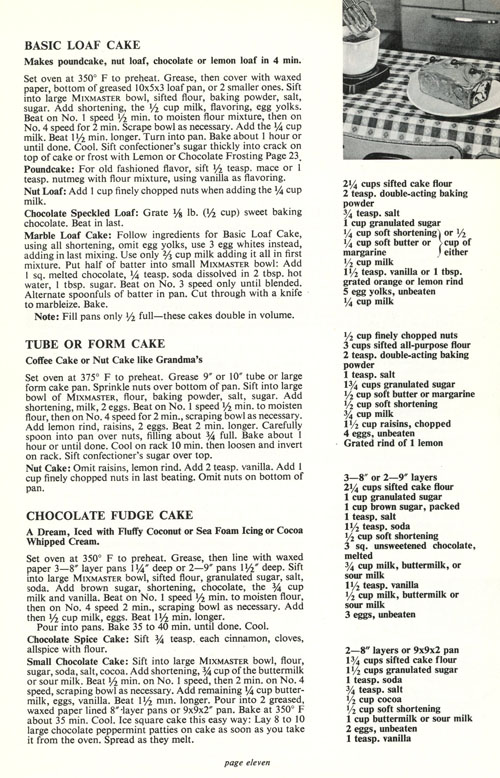
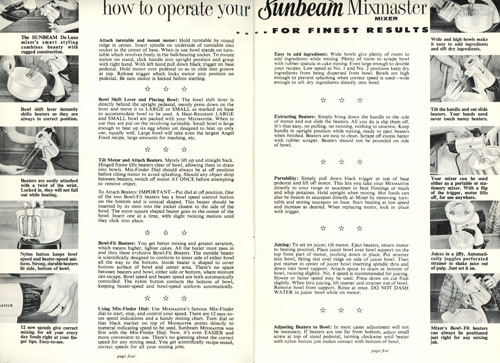
 I like the following page for the kitchen counter photo at the top of the page. And the text below suggests to use a Sunbeam electric fry pan for the pan cakes, a waffle iron for the waffles, and a blender as well as the mixmaster for the meat loaf.
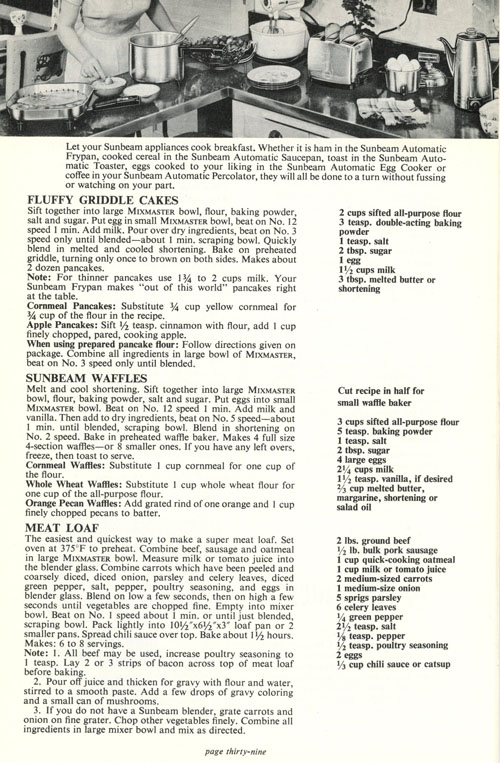 Finally, the back cover, showing all the available Sunbeam appliances in 1957. I made a similar scan of the back cover of
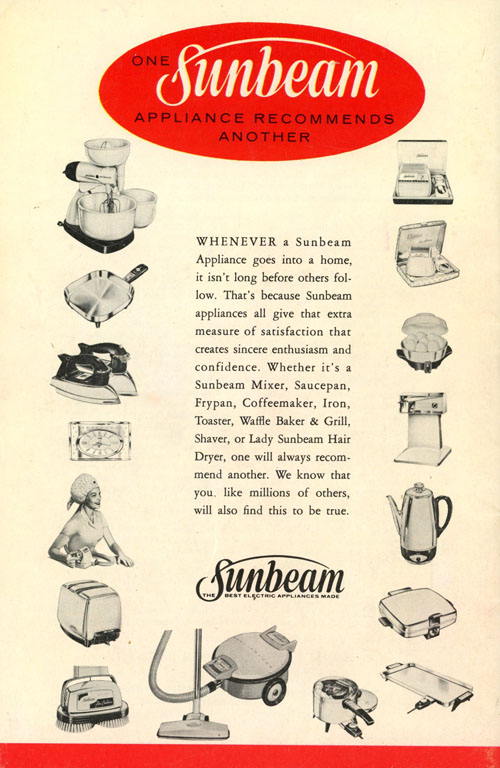
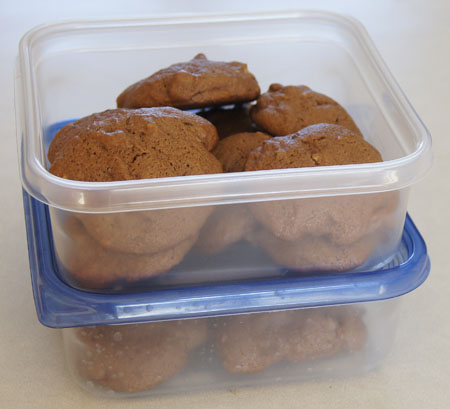
 These are tasty. I cooked them too long because I didn’t read my directions! I thought it was “12 minutes”, but it was “10 minutes”. I checked them at 12 and thought they weren’t brown enough, so I gave them another 2 minutes and they actually tasted burned. 10 minutes! They will not look real brown but will be done!
 This is one of four Hershey’s cookbooks in my cookbook database. I can’t find the publication date anywhere in my copy, but online photos and details of the same book on Amazon claim “1982” as the date.
 Mother did not mark any of the recipes! This is unusual for her, especially for cookie, pie, and cake recipes, which include all of the recipes in this cookbook.
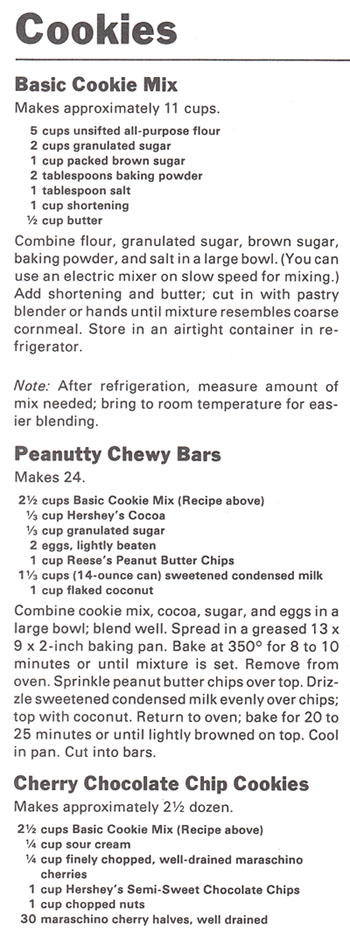
 I’m not sure I’ll always want to make “cookie mix” and then the cookies, so I made a half recipe of the mix, then measured it. It made enough for two different types (or batches) of cookies.
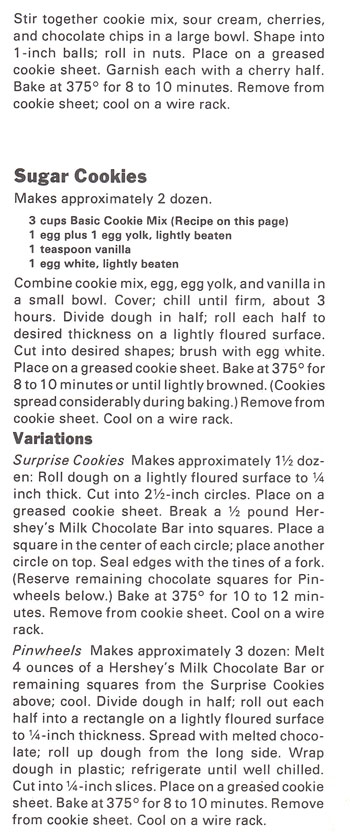
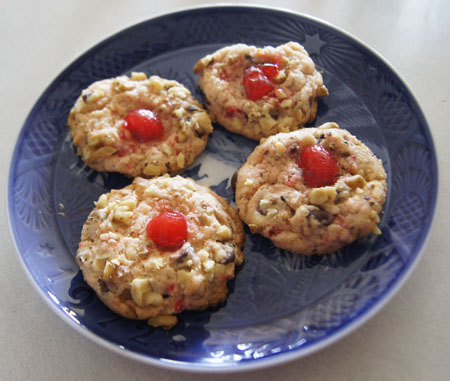 Wow, were these ever good! Very, very tender. I realized as I made the dough that this is how I make pie crust, by first combining the flour-sugar and shortening, then blending in the wet ingredients. Usually cookies are made by combining the sugar and shortening and any wet ingredients, then adding the dry ingredients. The result of the “Basic Cookie Dough” method is that the cookies taste tender, like pie crust.
 This is the second “Knudsen Recipes” cookbooklet that I have covered. I didn’t much like the recipes in the
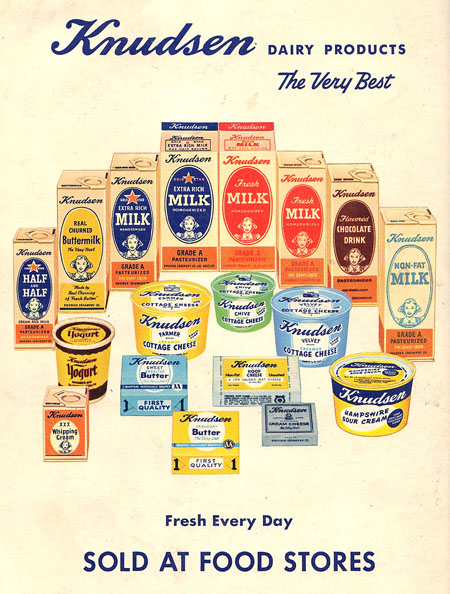
 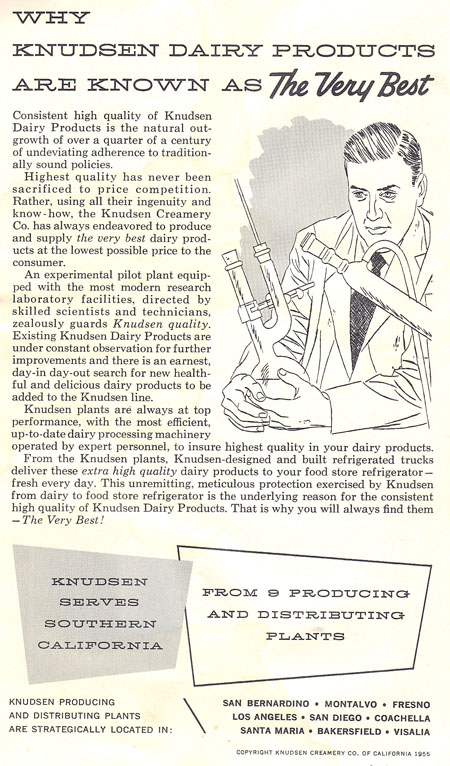 Facing the page of the male chemist is a photo of the cook (female, of course) using a Knudsen product. Note: “For the young bride whose kitchen ‘know how’ begins and ends with frying an egg . . . “. And this is good too: “Here you will find colorful photographs showing how to make foods more appetizing and table settings more attractive.”
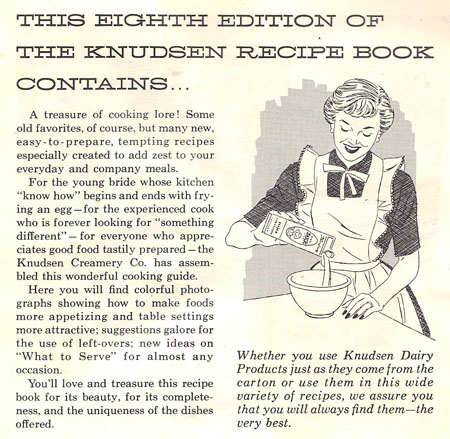

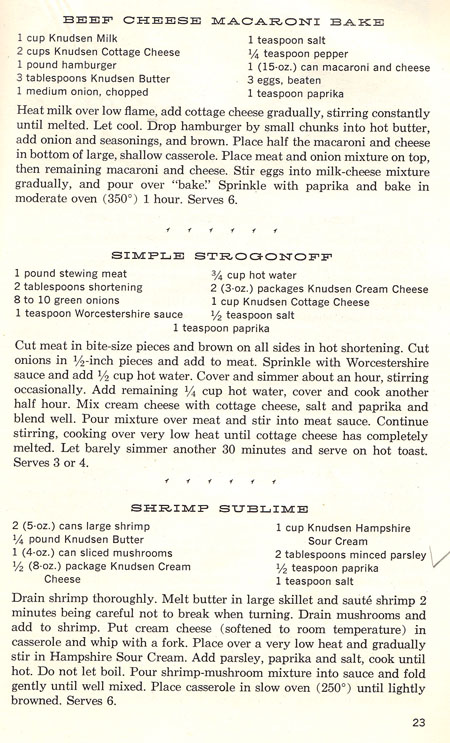 The “Crab and Shrimp Bake” (below) is made with cooked shrimp “cut in bits’ and crab meat, cottage cheese, sour cream, celery and onion and green pepper, and potato chips. I don’t know, does it sound good to you? I do think I’d probably like the “Chicken-Noodle Mix”.
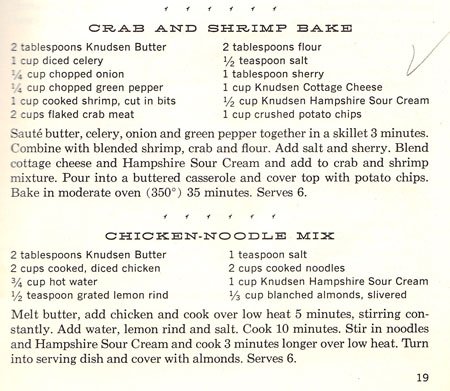
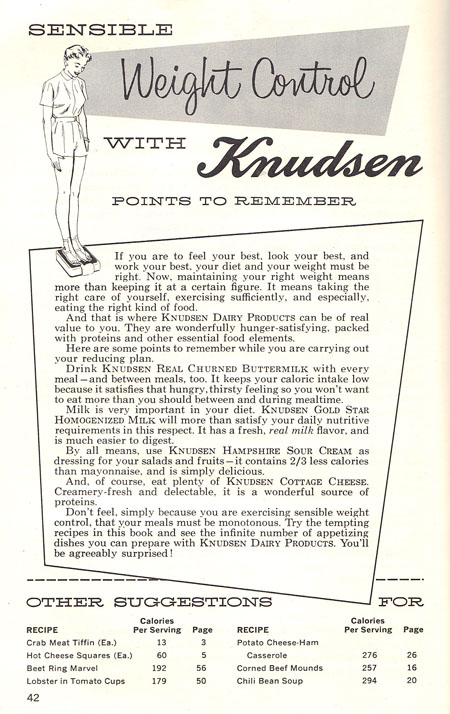
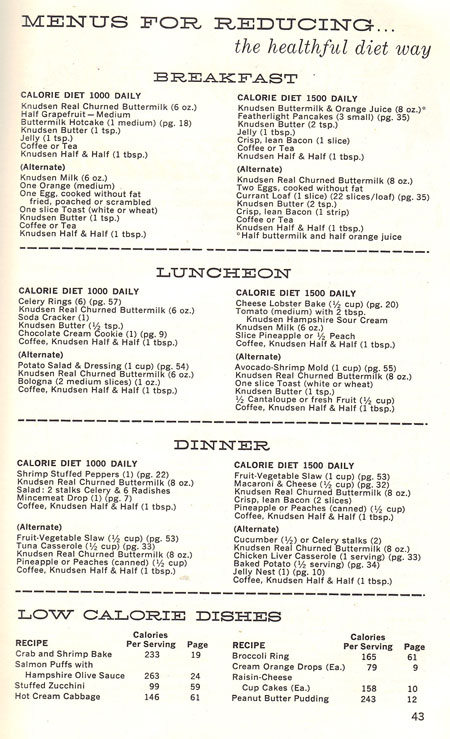 I like this excerpt below: “But first, you must learn the language of calories, a language anyone can pick up quickly.”
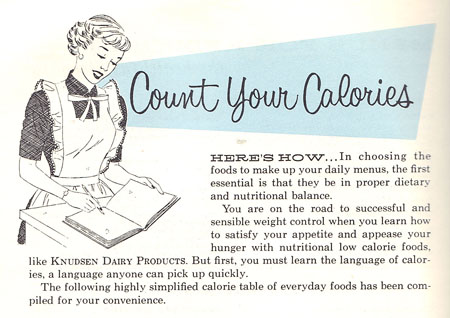
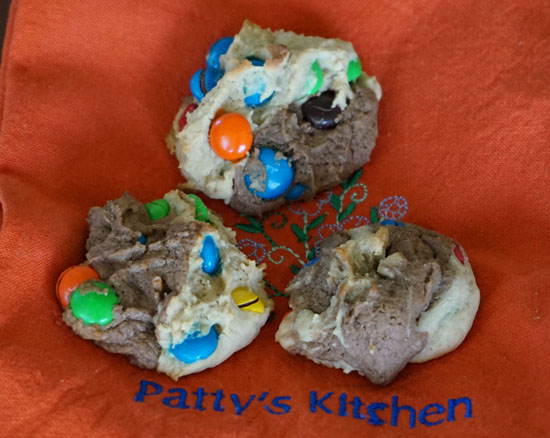
 This recipe is very similar to my recipe for
  These are excellent! I cooked the first batches 20 minutes, and I thought they were too crisp. The last batch I cooked only 10 minutes, and they were soft and chewy. We like the soft and chewy ones a lot better!
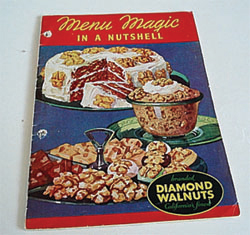

 Yes! These are sweet, crisp, and tasty. I had one, and wanted more!