250 Cookbooks: PastaMatic MX700

Cookbook #215: PastaMatic MX700, Simac, distributed by Lello Appliances Corp., NJ, circa 1998.
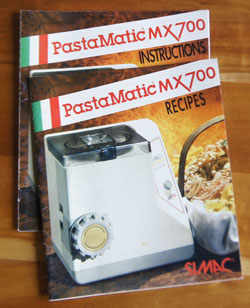
Pasta Matic MX700 cookbookMy Simac Pastamaker MX700 was a gift from my husband in 1998. I had been making my own pasta for  years, using a Kitchenaid mixer to mix the dough, and a manual Marcato pasta maker to roll the dough and form the noodles (see my post, the Pasta Cookbook). The Simac Pastamaker takes home pasta making to a whole new level. The dough is mixed right in the machine, then extruded through die sets into many different shapes: linguine, macaroni, capellini, small fettuccine, spaghetti, lasagne, and bucato.
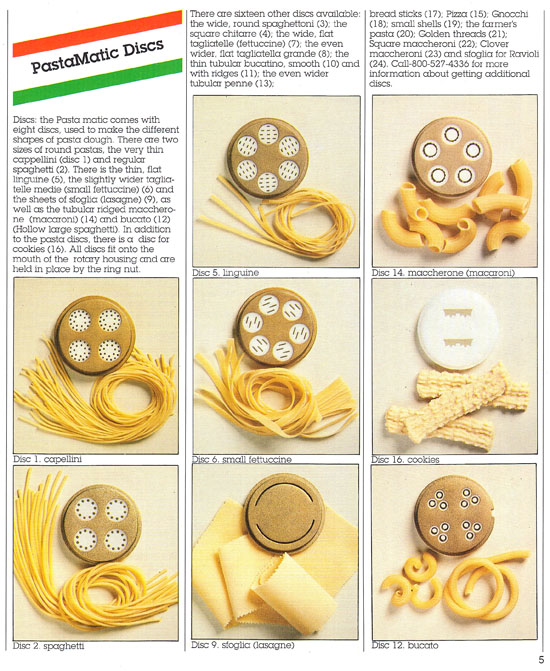
Simac discsIt’s a lot of fun! And time-consuming, yes. A decade or so ago I stored the Pastamaker down in the basement to make room for other things on my countertop. I don’t think I’ve used it since then. Now I have a great excuse to pull it back up, clean it, and make some great pasta. (I love retirement!)

The receipt for my PastaMaker says it cost $235, new, in 1998. Are they still for sale? Yes, but I am not sure the Simac is available new. Amazon lists the PastaMatic, but none are available right now, so I can’t tell if they are new or not. A used one is for sale on eBay for $106. Google lists them from $12 to $520. Chef Masterpiece has one for sale for $519.98 – sounds like it’s new, but it doesn’t say.

My guess is that a machine offered by Lello, the company that distributed the PastaMatic MX700 that I have, is the replacement for the Simac. This is the “Lello 2730 3000 Pro Pastamaster Pasta Maker”. It sells for $235 new (same price as mine 19 years ago!). Fabulous Pasta reviews this model. There is some competition for the Lello from extruding pasta makers by Phillips, Gourmia, Ronco, and Viante.

During my web searches, I found two useful sites.  On Pasta Recipes Made Easy, the author found a used Simac Pastamaker for $10 at a thrift shop (circa 2010). She gave the machine a favorable review, plus a link in case I ever lose my instruction booklet. On Toque Tips, I find instructions for using the Simac Pastamaker and a good article on making tomato sauce from fresh tomatoes.

My PastaMatic MX700 cookbook is actually three separate pamphlets. One is recipes, one is instructions, and one is an instruction card. I have a nice note to myself on the front of the instructions:
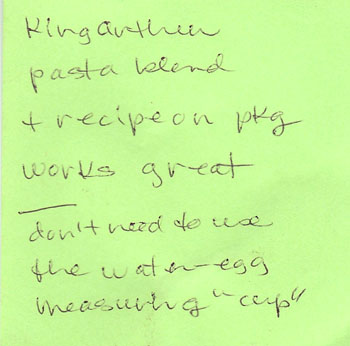
pasta noteMy note tells me that I used King Arthur Flour “pasta blend” the last time I made make the dough in the Simac. The reference to the water-egg measuring “cup” means that I used the package instructions for measuring the proper ratio of flour to egg-plus-water. The “cup” was  shipped with Simac; it’s a specialized plastic measuring cup with levels marked for water and egg. BUT: these markings do not correlate with ounces, milliliters, or even cups. I never wrote down the exact capacity of that “measuring cup”. Each time I wanted to make pasta in the Simac, I had to locate this single-purpose utensil. I’m glad I wrote that note to myself! – now I know the proper ratio of wet to dry ingredients and can use a regular standard measuring cup.

In my post Beard on Pasta , I used King Arthur Pasta Flour Blend to make my main-dish pasta (using my manual machine). Pasta Flour Blend is “a blend of golden semolina, durum flour, and King Arthur Unbleached All-Purpose Flour”.

Semolina is a durum wheat, but it is coarsely ground and not the best for pasta because it does not make a pasty dough. That’s why it is blended with other flours in recipes and in the Pastry Flour Blend. Myown  old-time basic pasta dough recipe is 3/4 unbleached flour and 1/4 semolina.

The recipes portion of PastaMatic MX700 includes:

  • egg pasta (eggs, water, bleached all-purpose flour)
  • water pasta (water, bleached all-purpose flour)
  • semolina pasta (eggs, water, 2 cups semolina flour, 1 1/4 cup bleached all-purpose flour)
  • spinach pasta (cooked spinach, eggs, bleached all-purpose flour)
  • watercress pasta (watercress instead of spinach)
  • tomato pasta (tomato paste, water, bleached all-purpose flour)
  • whole wheat pasta (water, whole wheat flour, bleached all-purpose flour)
  • egg white pasta (egg whites, bleached all-purpose flour)
  • egg yolk pasta (egg yolks, all-purpose flour)
  • buckwheat pasta (water, yeast, 1/4 pound buckwheat flour, 3/4 pound bleached all-purpose flour)
  • soba (water, eggs, salt, 2/3 pound buckwheat flour, 1/3 pound bleached all-purpose flour)

I’ve run across “buckwheat flour” in several of my previous posts on health food or vegetarian cookbooks. But until I looked it up, I never knew that buckwheat is not wheat at all. Wheat is a grass, and buckwheat is not a grass, instead, it is related to sorrel and rhubarb. It is high in nutrients and grinds to a coarse flour.

The above recipes for pasta specify “bleached all-purpose flour”. I thought this odd, until I learned that bleaching flour causes it to dry out faster, giving a more consistent water content from bag to bag. Simac wants the consumer to have the easiest time with their recipes, and this takes precidence over the healthy aspects of unbleached flour. Me, I am used to dealing with variations in the water content of flours, and I will stick with my unbleached all-purpose flour.

Which type of flour should I choose to make pasta for this blog? I decide to try durum wheat, so I ordered some from King Arthur Flour. I open the package to find a beautiful slightly yellow fine flour. I will use only this type of flour in my pasta.
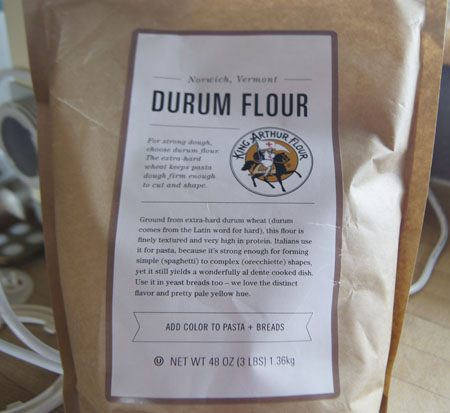
Durum flour packageI carry the Pastamaker upstairs and find the dies (hidden in a pottery jar upstairs). Some of the dies are crusted with dried dough. Oh, I remember, it’s hard to get the dough out of the tiny slits and holes. Sometimes they clog during use, or the dough doesn’t feed properly through them. Hmmm. I better set aside an afternoon for my re-experiment with my Pastamaker.
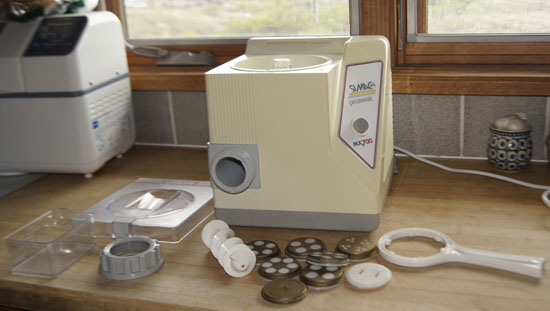
Simac PastamakerI decide to make macaroni, because I can make spaghetti and flat noodles any old time in my Marcato.

Note: Pasta made in the Simac Pastamaker is meant to be cooked right after it is formed, it directs me to do this right in the recipe booklet. When I make flat noodles or spaghetti using the manual Atlas pasta maker, I usually cook it, too, right away, but many (most?) people dry pasta before cooking.

I followed the recipe on the Pasta Magic KA Flour bag, substituting durum flour for the pasta magic mixture. This recipe has 4 eggs per 3 cups of flour; my old stand-by recipe has 2 eggs per 2 cups of flour.

Durum Pasta

  • 3 cups durum flour (16.4 ounces)
  • 4 eggs (I used jumbo yolk eggs and a couple had double yolks, this might have been too much egg)
  • 2-4 tablespoons flour
  • electric, extruding past machine
  • have ready a pot of boiling water

I debated whether or not to add salt or olive oil to the dough mixture. This time, I left both out.

Follow the manufacturer’s instructions for your pasta machine.

Put the flour in the bowl of the pasta machine and start the motor. Add the eggs slowly, then mix for 3 minutes. Simac says to check the dough at this point. You want the consistency to be walnut-sized lumps, but not sticky. The dough is too dry if it feels floury and is in small granules. The dough is too wet if it feels sticky in large smooth balls. Correct if necessary by adding up to a teaspoon of water or 3 tablespoons of flour. Let knead another 3 minutes, for a total of 6 minutes. (In another part of the Simac instructions, it says to knead for 8-10 minutes for any recipe.)

Switch your pasta machine to extrude. (At this point, I attach the wetted macaroni die.) As the pasta comes out of the die, use a sharp knife to cut it into your desired lengths.
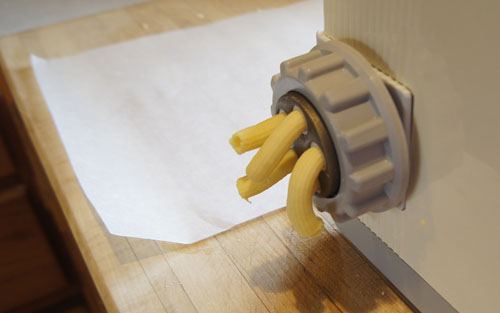
extruding macaroniBoil for 30 seconds and check for al dente; boil another 30 seconds if necessary. In Colorado, though, I cooked my macaroni for 3-4 minutes and it was perfect.

Okay, so now my report on how this actually worked for me today. First, my dough never formed walnut sized lumps. I carefully checked it, and it was neither grainy nor sticky, but it only formed large masses of dough. Thinking it too wet, I added more flour, to no avail. I added more water, to no avail. I was reluctant to keep the noisy machine running, plus it was hard to do so because a part on the lid of my pastmaker is broken, and I had to rubber-band it down to keep the dough lumps from opening the lid and turning the switch off.

This is nothing new, my memory tells me – this is what happens every time I have made pasta in the Simac. Now I remember why this machine is usually in the basement!

After 6-8 minutes, I decided to go ahead and extrude the dough. There is a small square hole in the bottom of the bowl that, when open, allows the dough to fall into the auger that feeds it up to and through the die. Well, I have to keep pushing the dough with the handle of a wooden spoon to get it into the hole, otherwise the mass of dough just passes over it, instead of dropping to the auger.

So I work, for probably half an hour, to get all the dough through the extruder. This means pressing down on the lid to make the motor run and extrude, then stopping it, taking off the lid and forcing a small chunk of dough into the hole, then restarting the machine. It was noisy, it took a long time.

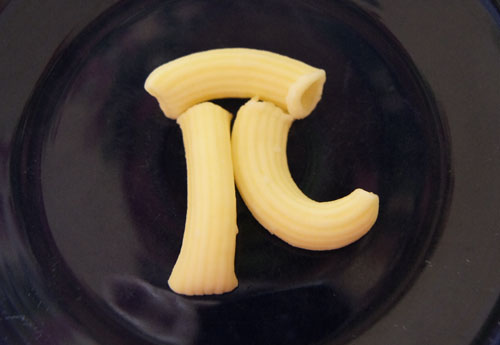
But, my pasta was perfect. I absolutely love the durum wheat macaroni. It is firm, it is pale yellow, it is chewy, it is tasty. It is perfect.
cooked macaroni

I was so involved in making this lovely durum macaroni that time just fell away. And by the time all the macaroni was extruded and cooked, I had a big mess on my hands – the pasta maker and counter top all covered with dough bits, the stove wet with pasta cooking liquid runover. And I still had to pull the macaroni into a dinner dish, “Macaroni and Cheese with Wine”. This is a great recipe from my cookbook Pasta: macaroni, very sharp cheddar cheese, sweet white wine, butter, mustard, eggs, half-and-half, chopped green chiles, and bread crumbs (page 123). This dish needs to bake 40 minutes and then rest 10 minutes. I’ve gotta rush to get it done.

It wasn’t until the macaroni dish had finished cooking and I was serving our salads that I remembered I still had to heat up the big slice of ham that I had purchased for our main dish. And it wasn’t until after dinner that I remembered that I had not made a dessert!

Ah, but it was all worth it. My own homemade durum wheat in rich macaroni and cheese was a delight. Absolutely.

250 Cookbooks: Sunbeam Controlled Heat Automatic Frypan

Cookbook #213: Sunbeam Controlled Heat Automatic Frypan, Sunbeam Corporation, Chicago, Illinois,1953.

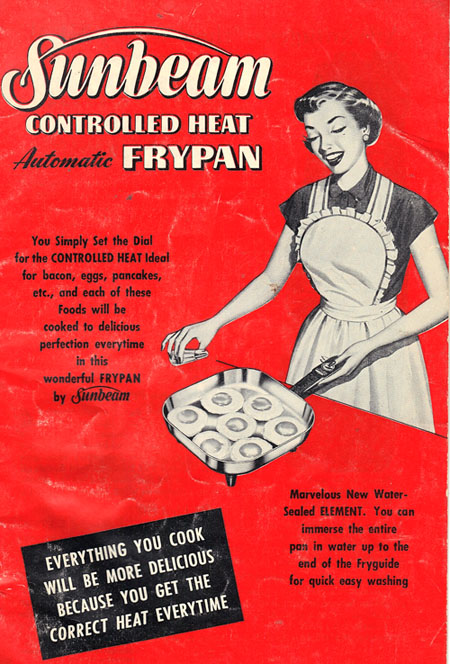
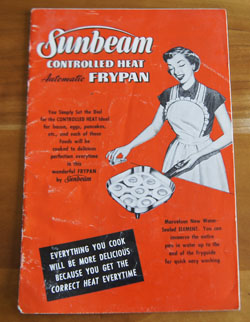
Sunbeam Controlled Heat Frypan cookbookI discussed electric fry pans in Hamilton Beach Automatic Heat Control Appliances, the recipe/instruction book for my fry pan. This booklet, Sunbeam Controlled Heat Automatic Frypan, was my mother’s. It must have come with her own fry pan – a Sunbeam model – in 1953. I wrote a note in my database: “I like the photo on the front”. Here is a close-up scan of the front cover:

Sunbeam Frypan

After 5 pages of instructions, there are about 12 pages of recipes. The first section is recipes for “Pan-broiling, Sauteing, Frying and Toasting Sandwiches”, including pan broiled steak, breaded steaks, meatballs, hash, lambburgers, salmon patties, omelet, fritters, corn fritters, potato patties, vegetables, and toasted (grilled) sandwiches.

The second section is recipes for using the fry pan with a lid. “Adjust dial to keep liquid just bubbling when light is on, a setting of about 200-240˚.” It includes recipes for pot roast, Swiss steak, stews, braised meat chops, veal rolls, chop suey, sukiyaki, meat balls, barbecued hamburger, chicken fricassee, scalloped potatoes, fried potatoes, hamburger macaroni casserole, fried chicken, baked beans, and frankfurter casserole.

All of the above recipes reflect the cooking of the mid-twentieth century. And in fact, many of these recipes are similar to what I cook today. But I fry in a good, heavy (shall I add expensive?) non-stick pan on the stove top, and I braise in good, heavy iron or enameled pots in the oven.

The next section is for baking cakes in the fry pan. No no no, that’s not for me. Packaged cake mixes, brownies, coffee cakes in the fry pan – and I really don’t think it would be easy to invert the fry pan and get these baked items out cleanly. I’ll stick to baking in the oven.

Other uses for the fry pan include popcorn, fudge, frying doughnuts, baked potatoes, cooking vegetables and cereal, heating baby foods, crisping crackers, defrosting, heating TV dinners (“frozen tray dinners”), baking frozen foods (including pizza), as a chafing dish, and for making white sauce. From this wide breadth of uses, it seems that a person could cook just about anything without a stove. This might work for staying in cabins, or for marginal housing arrangements. For us, we could use it in a power outage, since our backup generator gives us good but limited household power.

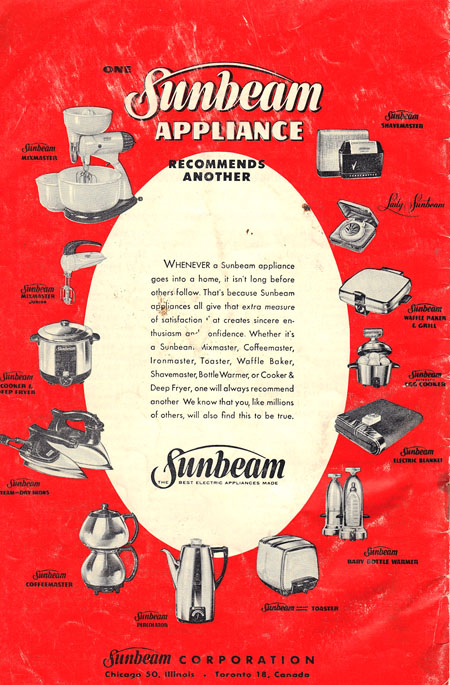
The back cover:

Sunbeam FrypanLook at all the Sunbeam appliances! Mixer (see my old Sunbeam mixer post), deep fryer (see my Sunbeam deep fat fryer post), irons, coffee pot, toaster, baby bottle warmer (interesting, since I just did a post on how to feed your baby), electric blanket, egg cooker, waffle maker, Lady Sunbeam razor, and shavemaster.
I am going to keep this cookbook. Not for the recipes, but for the nostalgia. Brings back memories.

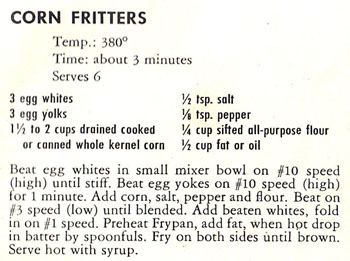
For this blog, I will make Corn Fritters.

Corn Fritters recipe

Hey, in the directions they spell egg yolks “yokes!” I almost didn’t catch that.

I am making these for just two, so will one-third the recipe. I am not about to get out the big frypan just to make a small batch of fritters! I choose a medium non-stick frypan. I know how big the frypan is, and 1/2 cup oil would cover the bottom, but not fill it to the depth of deep frying, so I adjust my amount of oil by that guideline. Instead of serving them with syrup, I’ll have them as a side dish with one of my favorites, Southwestern Chicken.

Corn Fritters
serves 2

  • 1 egg white
  • 1 egg yolk
  • 2/3 cup cooked corn (I used fresh corn)
  • 1 1/3 tablespoon flour
  • salt and pepper
  • vegetable oil

Beat the egg white until stiff. In a separate bowl, beat the egg yolk on high for about half a minute, then turn to low and add the flour and salt and pepper. Stir in the corn. Fold the egg white into the egg yolk mixture.

Heat a pan to medium hot. Add enough oil to nearly cover the bottom, maybe a couple tablespoons. (You could get by with less when using a good nonstick pan.)

Drop in the corn fritter batter by spoonfuls. Fry on both sides until golden brown.

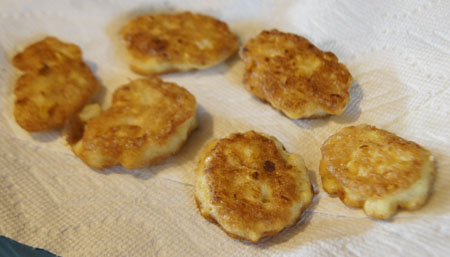
Corn Fritters I liked these! But, my dining partner wasn’t impressed. The Southwestern Chicken was enough for him. I think these would have been good with syrup, as suggested in the recipe. I would like them fried in less oil than I used. This is a good recipe for very easy corn fritters; I just need to figure out how to include them in a dinner – or breakfast – plan.
250 Cookbooks: Making Your Own Baby Food

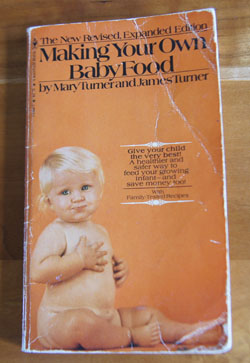
Cookbook #214: Making Your Own Baby Food, Mary Turner and James Turner, Bantam Books, NY, 1978.

Making Your Own Babyfood cookbook

I bought Making Your Own Baby Food when I was preparing to feed my first child his first solid foods. I think I probably bought this little paperback in a used book store.

I invite you to read my post Feed Me I’m Yours for more of my thoughts on the topic of homemade baby foods – I use my grandchildren as my test subjects!

In both books, the advantages of and recommendations for homemade baby foods pretty much agree with current advice given to new moms, except for the “no honey until a year old” rule. Also, some milk products and some foods known to be potential allergens are introduced more carefully these days (peanuts, for instance). Making Your Own Baby Food is a lot more serious than Feed Me I’m Yours, a book I described as “friendly and helpful”.

The introduction of Making Your Own Baby Food begins with the authors (a couple) relating how they began to study the nutritive value of foods when Mary Turner (the wife) was two months pregnant. They quickly changed their own diets, taking out the multiple daily sugary drinks. And then they delved a lot more into the subject of the foods we are offered by the food industries. They express their strong belief that the food industry does not necessarily produce food of good nutritional quality for its consumers, and more importantly, for baby foods. They back up their statements with bibliographic references. The print is small. Hence I call it a “serious” book. And I have to get out strong glasses to read it.

Part I is “Getting in Gear”. This section discusses how to start changing your diet for the better and how to prepare to nourish your unborn and then newborn child. Part II is “What You Should Kuow [sic] About the Baby Food Industry”. Here is a quote from this section:

“Foods that are specifically prepared for babies require separate consideration from all other foods as regards the use of food additives and toxicological risks. The reason for this is that the detoxicating mechanisms that are effective in the more mature individual may be ineffective in the baby. The Committee [WHO Committee] strongly urges that baby foods should be prepared without food additives, if possible. If the use of a food additive is necessary in a baby food, great caution should be exercised both in the choice of additive and in the level of use.” (excerpt from a 1962 World Health Organization publication)

Parts I and II are fully half of the book: this is not simply a recipe book.

Part III is “The Alternatives”. This section first discusses how to put in action a good nutrition plan for mom and baby, including breastfeeding. Breastfeeding is now quite common in the US (2017). But when I had my son in 1980, breastfeeding was only coming back as an upward trend, after a hiatus in the 1950s and 60s. For instance, my own mother was encouraged to use formula. Today breastfeeding in our area of America is encouraged – and they have human-milk banks for moms who are unable to breastfeed.

The discussion of how to transition from milk to solids begins: “Going from a diet made up entirely of milk to one which includes a few solids is an important step in an infant’s life.” And:

“Nutritionists state:

  1. Food should be nutritious.
  2. It should be accepable [sic] to the infant and its family.
  3. It should be possible to prepare without excessive effort.
  4.  It should be clean and prepared in clean surroundings.”

Next in “Part III: Alternatives” is “doing your own thing”. Parents are encouraged not to buy a big variety of foods for baby (apparently this was suggested by many pediatricians in1978), or to buy foods specifically labeled as “baby foods”. The theme of Making Your Own Baby Food is keep it simple, and to use foods you have on hand.

A few quotes from this section:

“The young baby and child are not known for their discriminating desire for gourmet foods.”

“Our parents and grandparents did not eat food until they were able to sit up at the table and nibble at small bits of food from a parent’s plate.”

“Keeping this in mind, you will learn in the pages ahead a number of simple recipes for baby food which parents are now using in their attempts to give their children more nutritious meals.”

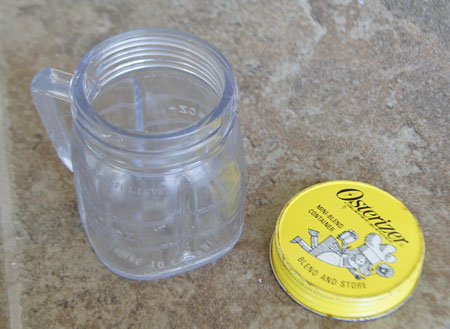
Supplies for making baby food are in the excerpt below. Blenders today can still be purchased for as low as $20, pretty amazing. I bought a mini-jar attachment for my old Osterizer, and I still own it – even the screw-top lid. Baby grinders are readily available.

suppliesHere is my Osterizer mini-jar:

Osterizer mini-jarIt still works with my current Osterizer blender. I should try it sometime!
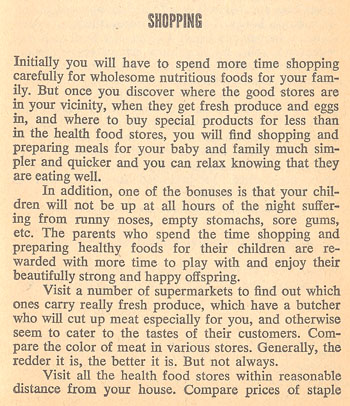
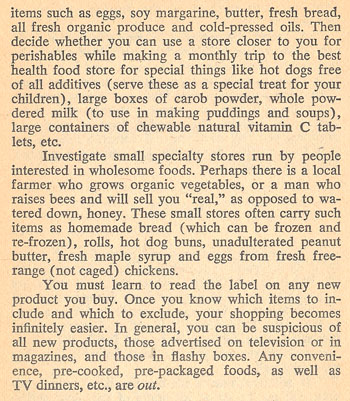
I got a kick out of the excerpt below on “Shopping”. Check out local stores? Yeah, I do that! I consider it a hobby. But then again, back in the 1970s some of the “health food” stores were pretty iffy. I remember several as dank with wooden floors, with organic produce that was spotty and marginal, and shelves stuffed with all sorts of odd and interesting items. Today’s markets such as Whole Foods are a couple generations bright and cleaner and are more comprehensive. (But they sure have a lot of flashy-packaged products.)

shoppingshoppingDid you catch that last paragraph? “In general, you can be suspicious of all new products, those advertised on television or in magazines, and those in flashy boxes.” Can one even find a package of food these days that is not in a flashy package??
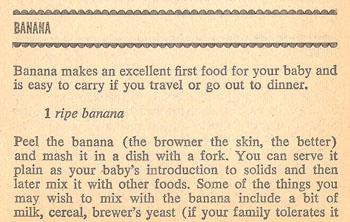
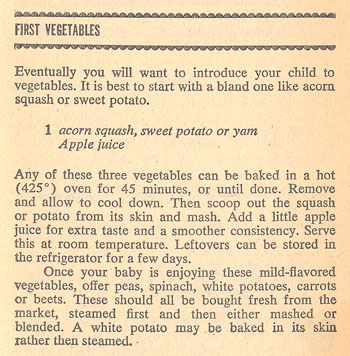
Part III gets – finally! – to the recipes. Only one-quarter of this book is recipes! I guess I’m a recipe sort of person.

The first recipe is “Banana”. banana recipe First vegetables include acorn squash. I mention this because when I was babysitting a couple weeks ago, my 7 month old ate acorn squash – so it can be my “recipe” for this blog. My daughter put an acorn squash in the oven, and I took it out 45 minutes later. All I did was take it out and let it cool, then fed some to little Kekeli. He liked it!

acorn squash

Here is a list of common ingredients in the recipe pages:

Fresh fruits, avocados, acorn squash, yams, carrots, potatoes, celery, green beans, milk, yogurt, cottage cheese, meats (purchased fresh from your local butcher), canned salmon (make sure it has no additives), barley, split peas, safflower oil, wheat germ, brewer’s yeast, Tigers milk, sesame seeds, coconut, powdered milk, peanut buttter, honey, raw sugar. Eggs are always specified as “eggs (raw)”. For flour, they suggest unbleached white flour OR use half soy and half whole wheat flours.

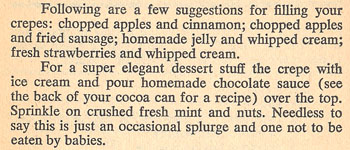
“Crepes” is one of the recipes. Below are some filling suggestions from Making Your Own Baby Food:

crepes fillingsI like this: “Needless to say this is just an occasional splurge and one not to be eaten by babies.”

The last section is the appendices. The suggested reading list (books) and the magazine bibliography (periodicals) and book and pamphlet lists are outdated (published by 1978) and not of much use to me. She included a bibliographic footnote list for each chapter. “Proposed Rules for Labeling Baby Foods” is a 10-page very small print reproduction of an article in the Federal Register, vol. 41, no. 174, September 7, 1976.

I did find it interesting to read Making Your Own Baby Food again. But, it this book will go into the recycle pile.

Update: one week later. I was fortunate enough to spend some time with my 8 month old grandson this week. We were at a park and fed him crackers and spaghetti. “What is this weird stuff” he seemed to be asking.

250 Cookbooks: Beard on Pasta

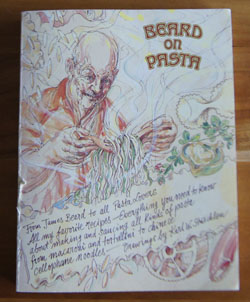
Cookbook #211: Beard on Pasta, James Beard, Alfred A. Knopf, NY, 1983.

Beard on Pasta cookbook

James Beard was a well-known and well-loved twentieth century American cook, author, teacher, and television personality. I covered his book Beard on Bread in my fifth 250 Cookbooks post, and he wrote many articles in my Encyclopedia of Cookery volumes. I enjoy his writing, and his wisdom. So I am happy to now cover Beard on Pasta.

“This is a book of good times to have with pasta.” So begins the introduction of Beard on Pasta. He continues: “I never get tired of pasta, any more than I get tired of bread.” I am the same way!

Noodles have a long history. Before refrigeration, wheat was mixed with water to make a paste that was dried to become “noodles”, and these could be stored at room temperature without spoiling. According to Beard, in early Bulgaria lumps of dried dough were carried by horsemen in their saddlebags and grated into pots of boiling milk at the end of the day’s ride. Records show that noodles were being sold in Greece as early as the fifth century. “Pasta in Italy probably started in the south, as part of that whole Mediterranean culture. We know that Romans grew wheat in Sicily.”

We tend to think of noodles as Italian, but pasta is a part of nearly every country’s cuisine. Noodles are made from wheat flour, rice flour, and mung bean, yam, potato, and cassava starches. Noodles are made in all shapes and sizes. Some noodles require boiling before adding to a dish, and some only need to be soaked in cold water.

A quote from Beard: “We’re Americans, with a whole melting pot of cultures behind us, and we don’t have to do things the classic Italian way. We can do as we please.” And: “this is not an Italian cookbook”.

The first chapter is “Observations”. Beard discusses commercial dried pastas, store-bought fresh pasta, equipment for making and saucing pasta, how to cook pasta, choosing portions, important ingredients (tomatoes, olive oil, cheese), and what to drink with pasta. I like the way he does not judge between store-bought or homemade pasta, and he does not judge between pasta-making methods such as hand made, manual machines, or electric pasta-extruding machines. I like to use my manual pasta maker for simple flat noodles and spaghetti and for filled pastas like ravioli. I own an electric Simac pasta machine that both kneads and extrudes the dough. I don’t use it a lot anymore, but it is great for making fresh macaroni.

Also in the “Observations” chapter is a section on flour. Me and flour have a long relationship and I pay close attention to this section. Beard writes that the recipes in this book were all prepared with all-purpose flour. But he states that the best flour for pasta is durum (hard-wheat) flour. Durum flour has more gluten in it (gluten is the sticky stuff), but was hard to find in the US when he wrote the book in 1983. All-purpose flour is a blend of hard and soft wheats. Semolina is made from durum wheat, but in the US, it is sold as a coarsely ground product, and does not make a good, pasty dough. I do use semolina when I make my own pasta dough, but I always mix it with all-purpose flour, in a ratio of about 1 part semolina to 3 parts all-purpose flour.

While it is still hard to find durum wheat and other specialty flours in my local stores, I discovered King Arthur Flour online a couple decades ago. Today I can order durum flour, artisan bread flour, french-style flour, high gluten flour, and a pasta flour blend from King Arthur Flour.

The next chapter is “Making Pasta”. This chapter describes how to roll, cook, and dry homemade pasta. (I talked a lot about how I make pasta in this post: The New Pasta Cookbook  – please refer to that post to learn about my method.) My age-old pasta dough recipe is 1 1/2 cups all-purpose flour, 1/2 cup semolina flour, 1/2 teaspoon salt, 1 tablespoon olive oil, 2 eggs, and 2-4 tablespoons water. Beard’s recipe is similar, but leaves out the semolina flour and the olive oil. He gives directions for making the dough by hand, as well as using a food processor or a mixer.

The rest of the chapters include recipes for different pasta dishes: Pastas in Broth, Mainly Vegetable, Fish and Seafood, Meats, Eggs and Cheese, Stuffed Pastas, Cold Pasta, Small Saucings, and Desserts. The only recipe I marked in this book is “Chilied Short Ribs over Corn Macaroni”. I almost made “Italian Sausage Salad” for this blog and will definitely make it some hot summer night (oddly enough, we are having a very cool August in Colorado). In the Desserts chapter, I discover a recipe for “Noodle Pudding”, with broad noodles, eggs, sugar, spices, apples, raisins, and apricots. This “famous Jewish specialty” really sounds like the elusive kuchen recipe that a college friend made for us all those years ago!

To sum up: this book is a great source for pasta recipes. It’s a keeper!

Now, what to make for this blog? Beard inspires me to be creative and trust my own judgement, to explore, to substitute ingredients, to use what is on hand in my household. So that is what I am going to do for this blog post.

First I’ll make my own pasta. I haven’t made pasta from scratch for a long time, maybe just  couple times since my December 2012 post on The New Pasta Cookbook. In that post, I show and discuss my manual pasta machine. Briefly, it rolls the dough into thin sheets, and then it cuts those sheets into flat noodles or spaghetti.

I have a bag of “Perfect Pasta flour blend” in my pantry. It is:

“a blend of golden semolina, durum flour, and King Arthur Unbleached All-Purpose Flour” (ordered online from King Arthur Flour)

Yes! It has the durum flour touted by James Beard. The problem is, the package should have been used by 2015 (and it’s 2017). It is still sealed, so I open the package and carefully look for bugs. None. I give it a big sniff: does it smell a little stale? Maybe, but I think it’s okay. The recipe on the package back is:

  • 3 cups Perfect Pasta Flour Blend
  • 4 large eggs
  • 2-4 tablespoons water
  • a little extra flour for the work surface

The directions say to mix in a food processor, bread machine, or by hand in a bowl. Bread machine?! Hey, I’ve never mixed pasta dough in a bread machine, I think I’ll try it!

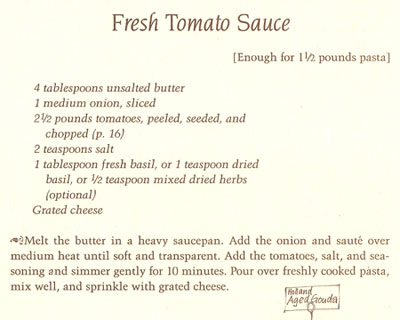
I have three beautiful, delicious summer tomatoes from the local produce stand. And I have basil, oregano, and thyme in my garden. I decide to make Beard’s Fresh Tomato Sauce:

Fresh Tomato Sauce recipeThe tomatoes need to be peeled, seeded, and chopped, and Beard has directions for this on page 16. In a class at the Auguste Escoffier School of Culinary Arts in Boulder, I was taught to cut out the top stem end of the tomato, score an X on the bottom, boil for 30 seconds, chill the tomato in an ice bath, peel the tomato, cut it in half, and then scoop out the seeds. Beard’s directions on page 16 of Beard on Pasta are much simpler. The tomatoes are boiled “as is” for 30 seconds, then you slice off the top, squeeze out the juice and seeds, peel the tomato, and chop it up. I tried Beard’s method and liked it. Here is my “Fresh Tomato Sauce”.
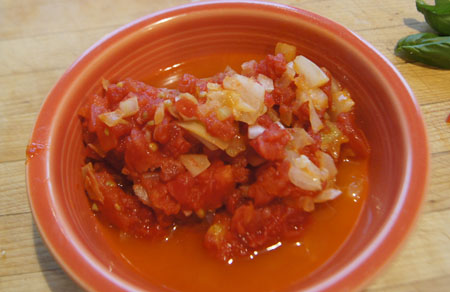
fresh tomato sauceI am inspired by Beard’s “Pasta with Beans” recipe on page 90. The ingredients are: white beans, bacon, onions, carrots, herbs, canned tomatoes, and elbow macaroni. I have some great home-cooked flageolet beans in my freezer. I have leftover ham to use instead of bacon. My daughter gave me a big zucchini from her garden. I have a good red pepper. Herbs I have in abundance! I’ll use the fresh tomato sauce (above). And, of course, I will have my homemade flat noodles.
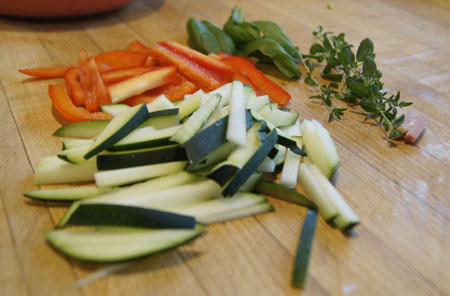
Here are the julienned zucchini and red pappers and herbs:

pasta veggies

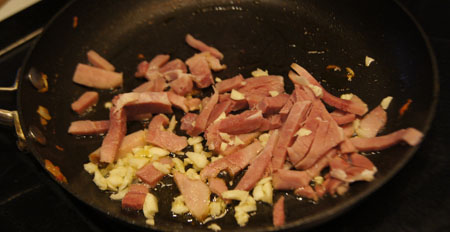
I saute the ham with some garlic:

ham and garlicBeard is big on cheese. But, I don’t have a lot of good, chunk Parmesan cheese in my refrigerator – and I’ve decided to make this meal with what I have on hand. I sniff all my cheeses, grate up the last (hard) chunk of Parmesan, add a bit of another sharp white cheese, and use the last of my pre-shredded Parmesan.
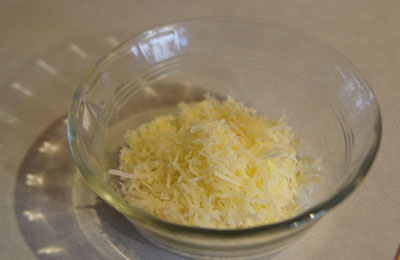
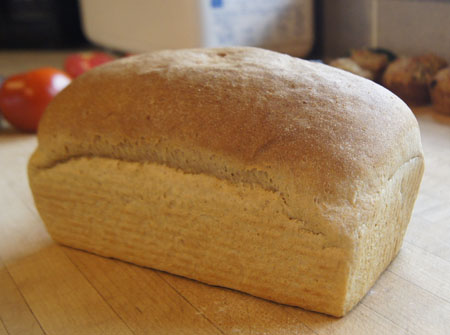
cheeseI made a loaf of My Daily Bread to go with the pasta:

wheat bread

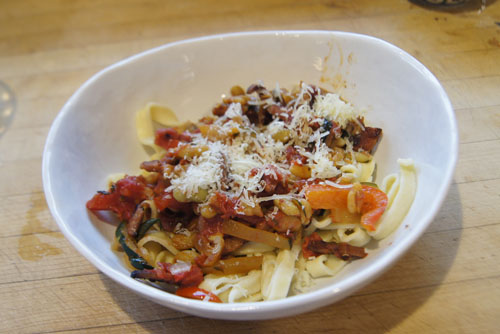
And here is my pasta dish:

pasta dish

It was absolutely delicious! So fresh and so full of flavor. The noodles were cooked al dente, and definitely a bit thick, and had just the right amount of chewiness. Such a great meal that we decided to open a bottle of red wine. Yum, what a treat on a Thursday night.

Thank you James Beard for encouraging me to be creative.

Note: I don’t think I’ll use the bread machine to knead the dough next time. The pasta dough was a bit too wet, and fell apart if I tried to get my manual pasta machine to roll it thinner than the “4” setting (“6” is the thinnest). Next time, I’ll go back to using my trusty Kitchen Aid mixer for the dough.