250 Cookbooks: Cuisinart Prep 11

Cookbook #186: Cuisinart Prep 11, Cuisinart, East Windsor, NJ, 2001.

Cuisinart Prep 11 cookbook
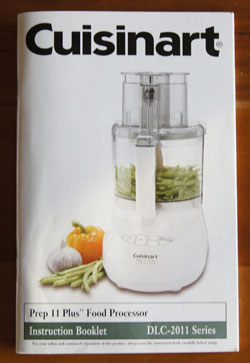
This is the instruction booklet for my first Cuisinart, a DLC-2011 series, that I gave to my daughter a year ago. It is still a working unit, although over the years I had some issues with the top and its attachment to the working bowl. (And now the blade has been recalled due to issues with the rivets in the blade falling apart.)

Included in this instruction booklet are about 40 recipes for appetizers, soups, breads, entrees, pizzas, sauces and dressings, sides, and desserts. The instructions for all recipes are excellent. I love the recipe for hummus – have made it many times. Although I have my own banana bread recipe, I read with interest the one in this booklet: finally a recipe that does what I came up with on my own. Why hand mash bananas? Use a processor, mix the bananas with other wet ingredients, and then fold in the mixed dry ingredients. I have used the pizza dough recipe, but not often. You can use the dough blade and the unit to knead yeast breads, but I rarely do.

The pesto recipe on page 43 is excellent and I have used it lots. As the instructions state, this pesto “is lower in fat than traditional pestos, and just as flavorable”. It makes a lot, but can be frozen (I’ve frozen it before in ice cube trays).

Creamy Chevre and Peppercorn Dressing catches my eye. This is a salad dressing with shallots, green peppercorns, lemon, vinegar, sour cream, and olive oil. I think I’ll make it for this blog! If I ever want to make my own mayonnaise using a food processor, I would use the recipe in this booklet.

I use a modified version of the french-cut green beans on page 54. Generally, I start with the chopping blade in place, then run the machine andI drop in a clove or two of garlic. I leave the garlic in the bowl, but remove the blade and insert the slicing disc and use it to process the green beans. Then I dump the lot into a sauce pan and saute in butter for a few minutes, add water and cook another few minutes, drain and serve.

I will definitely save this cookbook. I noted at least 10 recipes to try!

Below is the recipe for Creamy Chevre and Peppercorn Dressing.

Creamy Chevre Peppercorn Dressing recipe
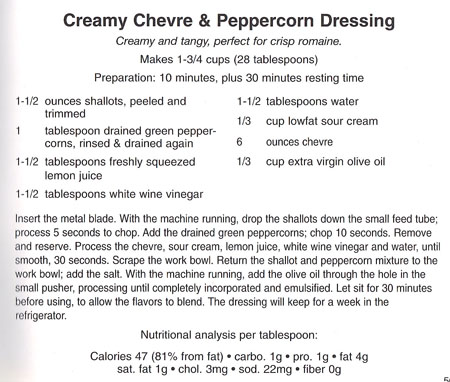
“Chevre” is more commonly called “goat cheese”, at least where we live. I have used green peppercorns before (ages ago), and they were packed in brine, as called for in the printed Creamy Chevre & Peppercorn Dressing recipe. According to my Food Lover’s Companion, “the green peppercorn is the soft, underripe berry that’s usually preserved in brine. It has a fresh flavor that’s less pungent than the berry in its other forms”. But all I could find on my venture to Whole Foods was a spice jar of hard, dried green peppercorns. I bought that jar, and soaked a few peppercorns in a mixture of salted hot water and vinegar for awhile, then drained. They were still pretty hard. Thinking they are sort of like capers flavor-wise, I used half a tablespoon of these peppercorns and half a tablespoon of capers. If you can’t find brined green peppercorns, I suggest substituting with a teaspoon of capers and then grind some fresh black peppercorns into the dressing to your own taste.

Creamy Goat Cheese Dressing
makes about 1 3/4 cups

  • 1 1/2 ounces shallots, peeled and roughly chopped (for me, this was one medium-sized shallot “clove”; you could substitute a portion of a regular onion)
  • 1 tablespoon drained and rinsed brined green peppercorns (or substitute as I suggested in the above paragraph)
  • 1 1/2 tablespoons freshly squeezed lemon juice
  • 1 1/2 tablespoons white wine vinegar
  • 1 1/2 tablespoons water
  • 1/3 cup sour cream
  • 1/4 teaspoon salt
  • 6 ounces goat cheese
  • 1/3 cup extra virgin olive oil

Insert the metal blade in a food processor. Start the machine, and drop the shallots down the feed tube; process 5 seconds. Add the green peppercorns and process 10 seconds. Scrape the mixture out of the bowl and reserve.

Add the lemon juice, vinegar, water, sour cream, salt, and goat cheese to the food processor bowl. Process until smooth, about 30 seconds. Scrape down the sides of the bowl and add the shallot/peppercorn mixture. Start the machine running, and slowly add the olive oil through the feed tube. Process until all the olive oil is added and incorporated.

Remove the dressing from the processor. Let stand at least 30 minutes for the flavors to blend. This dressing will keep for a week in the refrigerator.

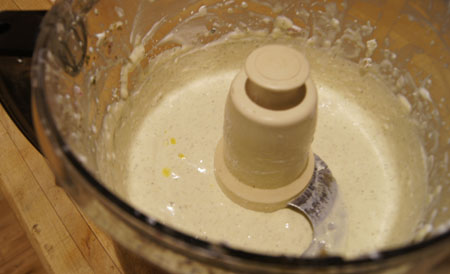
Below is a photo of my just-finished dressing, still in the processor. You can see I have a couple drops of olive oil still on top.

mixing dressing

I honestly didn’t think my husband would like this goat cheese dressing. So when I made up our salads, I only dressed mine, and told him he could make his own choice.

Goat Cheese DressingHe ended up choosing the goat cheese dressing, and he liked it! He even chose it the next night too.

Me? I love this dressing. It’s creamy and pungent and only about 50 calories in a tablespoon. It was even better the second night. I am using it for all of my salads until it is gone!

250 Cookbooks: Presto Pressure Cooker Recipe Book

Cookbook #185: Presto Pressure Cooker Recipe Book, National Presto Industries, Eau Claire, WI, 1970.

Presto Pressure Cooker Recipe Book cookbook

I saved this little booklet from way back in the early 1970s, when I got my first pressure cooker, a Presto. That cooker lasted until the late 1990s. It still semi-worked, but the gasket leaked and I don’t think I could find a new one. So I bought a Fagor pressure cooker, as I described in another blog post, Fagor Pressure Cookers. That pressure cooker also failed because of gasket issues. Currently, I own only an electric pressure cooker. It is a dream!

I looked carefully through the Presto Pressure Cooker Recipe Book to see if there are enough good recipes in it to warrant keeping it. Only one – Savory Chicken – catches my eye. So I will recycle the booklet.

I’ll get to that recipe later. As I write this, I have already made the recipe, and it was delicious! In fact, I was so impressed with my electric pressure cooker, that I have to rave about it a little. I cooked the chicken (10 minutes) and meat for a stew (16 minutes) sequentially one afternoon, for a total prep/cook time of maybe 45 minutes. Each recipe made enough for two meals. Each tasted great. Amazing.

I recently covered two methods of braising meats: slow cookers (crockpots) and clay pots. I also often braise meats in a covered range-top to oven casserole (like a LeCrueset). Each has its advantages and disadvantages. Braising in general includes:

  • a browning step in an open pan
  • a covered baking/heating step
  • a final heating step in an open pot to reduce the gravy

Slow cookers generally require a separate pan for the browning step. Most slow cooker recipes take 6-8 hours to cook, which can be good (you can be gone) or bad (often some ingredients in the dish are overcooked). Gravy reduction can be done right in the pot. If the slow cooker has a removable crock, it can be pretty easy to clean, especially if it fits in the dishwasher.

Clay pots do not allow browning/gravy reduction in the pot (but meats cooked in them brown anyway!). Cooking time is about an hour. I find taking the very hot clay pot out of the oven difficult. Gravy must be thickened in a different pan. The pot takes an overnight soak to clean.

LeCruesets allow stove top browning/gravy reduction and are easy to get out of the oven and to clean. Most recipes take a few hours in the oven (and smell delicious all the time!).

Electric pressure cookers are about the best in all of the braising steps. The unit is shaped like a slow cooker, with a light weight non-stick insert (easy to clean). You brown the meats right in the unit using a “browning” setting. Then, you add all the ingredients, seal the unit with the lid, and set the timer to however long you want to cook on high (or low) pressure. It heats up, hisses briefly, then settles into the  cooking time with just a tiny bit of hissing. Pressure is released slowly or quickly with the release knob. If the meat isn’t done enough, or if you want to add another ingredient like potatoes that need a short cooking time, the unit quickly gets back up to pressure. After the pressure cycle you take off the lid and set to the browning cycle to reduce the pan juices. Cook times are short! 15 minutes to cook stew meat! Clean-up is very easy, a quick wash in soapy water is all the insert needs.

(A note about the older style stove top pressure cookers. They allow browning and gravy reduction directly in the pan, and cooking/cleaning steps are short. But, the little pressure regulator/rocker hisses loudly during the cook time. To release the pressure, the heavy hot pot must be taken to the sink and run under cold water. And if the meat is not yet done or you want to add potatoes, it takes a long time to for the pressure cooker to heat up again.)

I found a great website with a lot of recipes for electric pressure cookers: Pressure Cooking Today. I love the author’s statement on the main page – Today’s pressure cookers aren’t the scary pressure cookers your mom used.” That’s exactly how I felt about my manual pressure cookers!

Here is the recipe for Savory Chicken, as printed in Presto Pressure Cooker Recipe Book.

Savory Chicken recipe

The version of this recipe, below, is my adaptaion of Savory Chicken for my electric pressure cooker.

Savory Chicken
serves about 4

  • 1 chicken cut into serving pieces (or buy already cut up)
  • 2 tablespoons olive oil
  • 1 teaspoon paprika
  • 1 small onion, chopped
  • 1 carrot, chopped
  • 1 14-ounce can diced tomatoes
  • salt and pepper to taste
  • 1 small can chopped or whole button mushrooms
  • half of a small can of chopped olives (use the entire can if you want)

Heat the oil in a pressure cooker set to “brown”. Add the chicken pieces and brown all sides. Add the paprika, onion, carrot, tomatoes, and salt and pepper. Cover and seal the pressure cooker. Set to high pressure, 10 minutes. Start the cycle.

Quick-release the pressure regulator. Open the pot and remove the lid. Add the mushrooms and olives. Again set to “brown” and reduce the pan juices to your desired thickness. (I needed the pressure cooker for another recipe, so I did this last step on the stove top.)

Savory Chicken
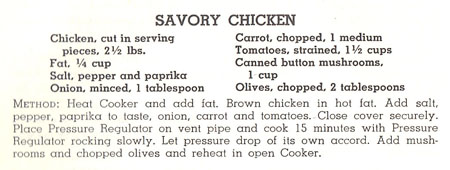
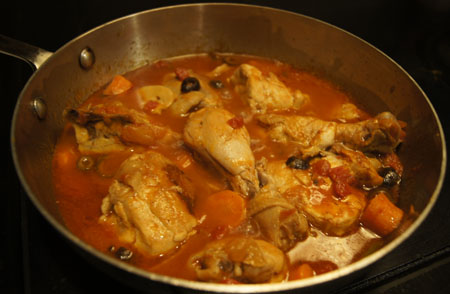
This tasted great! I served it over rice, but noodles would work well too. The chicken was juicy and tender and very flavorful.

250 Cookbooks: The Bakery

Cookbook #184: The Bakery, New and Improved Recipes, Zojirushi America Corporation, Bell, California (circa 1980s).

The Bakery cookbook

This is the recipe/instruction booklet that came with my first bread machine, a Zojirushi, sometime in the 1980s. I enjoyed kneading breads by hand, but it took too much time for a working mom – with the machine I made yeast breads a lot more. In fact, for a time I had two bread machines and used them simultaneously, often to make a “My Daily Bread” loaf and a breakfast bread loaf or a pizza dough. I also felt I needed two machines because if one broke, I would have a backup.

My first Zojirushi machine (I still have it) made upright loaves (note the photo of the cover, above). This older Zojirushi model is particularly great at kneading and baking 100% whole wheat bread. I also have another Zojirushi (Home Bakery Supreme). It bakes loaves shaped like traditional loaves baked in an oven. I rarely bake my breads in the machine, but if I do, I prefer the traditional shape. (I usually use the machine to knead and rise the bread dough, then bake the loaf in an oven.)

My copy of The Bakery is very well used. It is wrinkled and full of writing and stains and post-it notes. The center pages are falling out. After all these decades, I still keep it in my kitchen with other oft-used references. The Zojirushi recipe for “Buttermilk Wheat Loaf” is the basis for “My Daily Bread“, a white whole wheat bread. Other favorites are 100% Whole Wheat Bread, Raisin Bread, and Apple Oat Bread. I used to make the Pizza Dough a lot. This recipe uses beer for the liquid, and includes oilive oil. I usually made it with part whole wheat flour and baked the pizza on a hot stone. (These days, I make thin crust pizza using a no-knead recipe.)

I know that any recipe I try from The Bakery will turn out. For this blog, I choose to make “Honey Wheat Berry Bread”. It’s one of the recipes in the scan below – I wanted to illustrate the condition of this booklet so I scanned the entire page:

Honey Wheat Berry Bread recipe

Although the title is “Honey Wheat Berry Bread”, the ingredient list calls for “cracked wheat”. What is cracked wheat? It is milled whole wheat grains or “wheat berries”. Over the years I have purchased several different forms of cracked wheat, sometimes labeled “bulghur”or “bulgur”. Different milling produces small particles or large particles. Long-cooking cracked wheat is large particles, and is good as a hot cereal, or can be used as a side dish or salad. Quick-cooking bulgur is made from wheat that has been pre-cooked. This type is often used for salads, like Tabouli (see my post on the book Diet for a Small Planet.)  I once found a wheat product called burghul or cracked wheat, similar to something we had in Turkey. That burghul took a long time to cook and was big and chewy.

I search my pantry, and find that this is what I have on hand:

Wheat Berries

Cracked Wheat

The wheat berries are sproutable, and I have used them to make Sprouted Wheat Bread. The Bob’s Red Mill whole grain red bulgur consists of fairly large grain particles; the cooking instructions say to soak in boiling water for 1 hour before use in recipes.

I decide to use the Bob’s Red Mill bulgur for my bread. I’d prefer a quicker-cooking cracked wheat, since this type will probably be a bit chewy, but the store is a long ways away! To soften it a bit, I decide to add it directly to the milk and let it sit 30 minutes before the kneading process.

I goofed and used butter instead of oil, but it turned out to be a good “mistake” so I kept it in my recipe below. Below is how I made Honey Cracked Wheat Bread, based on The Bakery recipe.

Honey Cracked Wheat Bread
makes one large loaf (9×5-inch)

  • 1 1/4 cups milk
  • 2 tablespoons butter
  • 2 tablespoons honey (1.5 ounces)
  • 1/2 cup cracked wheat
  • 3/4 teaspoon salt
  • 3 1/3 cups bread flour (17.5 ounces, I used King Arthur Flour unbleached bread flour)
  • 2 teaspoons yeast

Combine the milk, butter, honey, cracked wheat, and salt. Let stand 30 minutes. (My Zojirushi has a pre-warm dough cycle, so I just put everything in the breadmaker and started the “pre-warm dough cycle”.

Add the flour and yeast and set the bread machine to a kneaded dough cycle with a rising step.

When the cycle is complete, take the dough out, form a loaf, and place it in a 9×5-inch loaf pan. Let rise until it crests the top of the pan, about 20-30 minutes.

Bake at 385˚ for 22-25 minutes, until golden brown.

Honey Cracked Wheat Bread
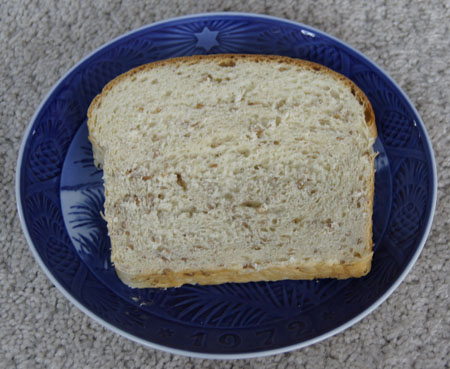
This bread has an excellent flavor and a pleasant crunchy-chewiness. Not too chewy as I feared. Great for sandwiches, toast, and with stews and spaghetti. A success!

250 Cookbooks: Extra-Special Crockery Pot Recipes

Cookbook #183: Extra-Special Crockery Pot Recipes, Lou Seibert Pappas, Bristol Publishing Enterprises, San Leandro, CA, 1975. A Nitty Gritty Cookbook.

Extra Special Crockery Pot Recipes cookbookI have 10 crock pot/slow cooker cookbooks! Crazy. I discussed the history of crock pots in a previous post: The Electric Slow Cooker Cookbook.

Extra-Special Crockery Pot Recipes is similar in design and layout to The Bread Machine Cookbook II, another “Nitty Gritty Cookbook”. These books are all about recipes – cleanly laid out and easy to follow.

I find lots of different ideas to try in Extra-Special Crockery Pot Recipes. The soups chapter includes the basics (French onion soup) and the slightly exotic (Caldo Xochitl). Next is salads. Salads in a slow cooker? At first I thought: cooked salads? But no, the recipes are for regular lettuce-type salads including leftover slow-cooked chicken or beef. I am often looking for “main dish salad” recipes in the hot summertime.

I’m not tempted by any of the recipes in the fish chapter – fish generally needs only a brief cooking. The poultry chapter includes the basics (poached chicken) and the unusual (Chicken and Cherries Jubilee). “Meats and Casseroles” has lots of ideas. It’s the longest chapter in the book, and I like a lot of the recipes: a wide range from the basic (Meat Balls Stroganoff) to the unusual (Choucroute Garni).

“Breads and Cakes”? Why bake bread in a slow cooker? “There are sometimes occasions when you may prefer not to heat the oven or perhaps you are at a location without an oven, when having a crockery pot makes baking possible.” I remember our relatively recent family reunion in California where the oven in the rental did not work, so we cooked a cake in the barbecue. But hey – we could have looked for a crock pot instead!
The fruits chapter gives recipes for cooked fresh fruit to be used in desserts or for breakfast. “Preserves” has a recipe for apple butter (already made it!) as well as orange marmalade and apricot pineapple jam and a couple chutneys. Beverages? Hot Spiced Cider, Swedish Glugg, and Hot Mulled Wine.

I decide to make Savory Swiss Steak for this blog. Wikipedia says “Swiss steak is meat, usually beef, prepared by means of rolling or pounding, and then braising in a cooking pot of stewed tomatoes, mushroom sauce, or some other sauce, either on a stove or in an oven.” That’s a pretty broad definition – and the recipe in Extra-Special Crockery Pot Recipes definitely falls within it. (I have made Swiss Steak for this blog before, but it was not a slow-cooked version.)

Savory Swiss Steak recipe

Round steak is a very lean meat (nice when you don’t want a fatty gravy) but it can be flavorless or tough. Hopefully this recipe makes it tender and tasty! I think I’ve tried this recipe before, since this page was marked when I pulled the book off the shelf.

Slow Cooker Swiss Steak
serves about 4

  • 1 1/2 pounds round steak
  • 1/4 cup flour
  • 2 teaspoons dry mustard
  • salt and pepper to taste
  • 2 tablespoons butter (or less)
  • 2 tablespoons oil (or less)
  • 1 onion, chopped
  • 2 carrots, chopped
  • 2 stalks celery, chopped
  • 1 16-ounce can diced tomatoes
  • 2 tablespoons Worchestershire sauce
  • 2 teaspoons brown sugar
  • fresh parsley (optional)

Cut the round steak into about 6 pieces. Mix the flour, dry mustard, and salt and pepper. Heat a frying pan and add half of the butter and oil. Dredge the steak in the flour mixture, then fry in the hot butter/oil until browned. (You might need to do this in a couple batches, it depends on the size of your frying pan.)

Remove the meat from the fying pan and put it in the crock pot. Put the rest of the butter and oil in the hot (now empty) frying pan, then add the onion, carrots, and celery. Cook until the vegetables are “glazed” or softened. Add the tomatoes, Worchestershire, and brown sugar; heat, scrapping up the fond. Transfer the entire mixture to the crock pot.

Cover and cook on low about 6 hours, or until the beef is tender. Serve over noodles, mashed potatoes, or rice, with some fresh parsley sprinkled on top (if you have it).

Swiss Steak
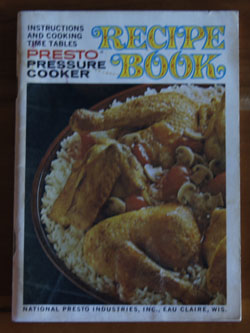
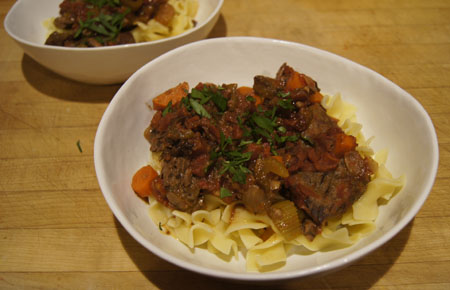
This was excellent! I will make it again. Very tasty and the meat was very tender. There was enough for two meals for the two of us (I froze half for later use).

250 Cookbooks: The Label Reader’s Pocket Dictionary of Food Additives

Cookbook #182: The Label Reader’s Pocket Dictionary of Food Additives, J. Michael Lapchick, 1993.

The Label reader's Pocket Dictionary of Food Additives

Such a long title for such a small booklet! It’s only 4 x 5.5 inches, and indeed could fit into a large pocket. Amazingly, you can still purchase this decades-old book online. From the reviews, it’s a popular little booklet.

I like to know what’s in the foods I eat. I cook from scratch as much as possible – homemade meals including from-scratch baked breads – partly because I can better control what we consume. I often read food labels. In this day and age it’s almost impossible to avoid food industry products (unless you live on a farm). The Pocket Dictionary of Food Additives is a great little reference for deciphering food labels, and the author thinks along the same lines that I do. Here, an excerpt from page 13:

“A certain trust is implied every time we pick a product off the shelf and put it in our grocery carts. We trust the label reads true. We also trust the ingredients are safe, sanitary, and desirable. But as we scan the list of ingredients and they become less and less familiar, we are asked to trust a little more. What about those ingredients we can’t even pronounce? Should we assume the products must be safe if they made it to the supermarket?”

Food additives (chemicals) are added for lots of reasons, for example, to make foods last longer on the shelf, have a better texture, have enhanced nutritive value, and have better flavor and color. Even hundreds of years ago, food additives such as salt were used to make foods last longer, but the list of available preserving chemicals was short. This all changed in the mid-twentieth century. According to the Pocket Dictionary of Food Additives, “in the 1900s, particularly after World War II, food manufacturers began to look for ways to market their fresh products nationwide. Products not only had to be fresh, but look and feel fresh, too. The manufacturers turned to chemical companies.”

Thus began the flow of chemicals, good and bad, into our food supply. Does the FDA protect us from dangerous food additive chemicals? I turn to page 20 of the Pocket Dictionary of Food Additives, wherein the author states “Today, a new additive first must pass tests required by the FDA. The tests are performed by the chemical manufacturer and evaluated by the FDA. If the results are accepted, the compound is granted a ‘regulated’ status and can be used in food. If the manufacturer wants to pursue a GRAS [Generally Recognized As Safe] rating, which may make it more enticing to food companies, it must publish the test results in certain journals and publications. Still, a GRAS status does not necessarily mean an additive is completely risk-free.” (This last statement is not explained further, but the author does state in earlier pages that several facets of his health improved when he eliminated food additives from his diet.)

An alphabetical list of food additives makes up the bulk of this book. Each entry includes a smiley-frowny face graphic:

PG to food aditives guide

Here is a typical food additive entry:

PG food additives sample page

I can’t cook a recipe from this book (there are none!). But here is an example of something this book would recommend eating, an organic apple! No additives at all.

apple

I will keep this booklet. I admit, though, that I am more likely to search the internet if I am curious about a chemical added to food. Or, I could download an appropriate phone app and have the information at the ready, in my pocket, at the grocery store.

Some thoughts on learning about food additives

My interests in chemistry, and in food, and in healthy eating, probably led me to buy this little book. But I might have purchased it as a reference for my work, when I was the coordinator for the organic chemistry teaching labs at CU Boulder. At the time, I wanted students to become familiar with chemicals they used in their everyday lives. So, I wrote an assignment for beginning organic chemistry lab students that involved reading food and household product labels and learning about the chemicals listed.

We hear so much about what is added to or gets into our foods and our water supplies. Sometimes it’s hard to separate unfounded cries of alarm from scientific fact. For this reason, I often like to go to scientific journal articles and read for myself, employing the research skills in biochemistry/chemistry learned in my long career. Reading a journal article as full text versions gives me an idea of how reliable and accurate the research is.

For instance, this week I came across a lay article entitled “Common Food Additive Promotes Colon Cancer In Mice“. The authors studied two food additives, polysorbate 80 (P80) and carboxymethylcellulose (CMC). Briefly, the researchers concluded that P80 and CMC can alter intestinal bacteria in a manner that promotes intestinal inflammation (e.g., inflammatory bowel disease, IBD), which in turn increases the risk of colorectal cancer. According to the Pocket Dictionary of Food Additives, P80 is okay (happy face) and is used as an emulsifier and a stabilizer in salad dressings, baked items, frozen dessert toppings, and pickled items. CMC is not in the booklet; Wikipedia states that it is an emulsifier used in various products such as ice cream.

I read the full text of the journal article:

Dietary emulsifier-induced low-grade inflammation promotes colon carcinogenesis. Emilie Viennois, Didier Merlin, Andrew T. Gewirtz and Benoit Chassaing, Journal of Cancer Research, 7 November 2016.

I first looked to make sure the authors did not have a conflict of listed: “none” is stated. This is good. The details of the methods and analyses sound solid to me. The study was done in mice, using doses similar to amounts of the chemicals commonly used in food industry products. My thoughts are that a mouse study might or might not translate to humans. Another question: just because doses used in mice are similar to amounts used in the food industry does not mean that we are actually ingesting these amounts of emulsifiers. All in all, the article convinced me to read the labels of the foods that I cook with and check for P80 and CMC, as well as other emulsifiers. Sounds like eliminating these chemicals from our diet might decrease inflammation in our intestines.