Cheese Potatoes

Weekends in my youth were often spent with our grandparents and aunts and uncles and cousins. Everyone would bring a dish to share, and we would gather around a cozy table and laugh and talk and enjoy the food. The kind of event we just cannot do today in pandemic times. But I have my memories.

Much of the food was fifties-style casseroles. Canned soups and sour cream were very popular ingredients in these casseroles, as in this one for Cheese Potatoes. It’s on another one of the seven recipe cards I pulled out of my old recipe box a few weeks ago.

Next to the recipe title is “Werdie” in parentheses. That’s my Aunt Werdie. She was the youngest of my father’s three sisters, and the one I knew best, the one I called “my favorite aunt”. Werdie’s given name was Werdna, which is Andrew spelled backwards – Andrew was my grandfather’s name. She lived to her late nineties and kept her mind and her pluck to the end!

So today I’ll make these memory-filled, comfort-food Cheese Potatoes. And enjoy every rich bite!

Cheese Potatoes

  • 10 medium potatoes, boiled and chopped into 1/4-1/2 inch chunks
  • 1 can cream of mushroom soup
  • 1 1/2 pound sharp cheddar cheese
  • 1/2 cube butter (4 tablespoons)
  • 1/4 cup chopped green onion
  • 1 pint sour cream

Melt butter, add cheese and soup. Add to the potatoes along with the onions. Fold in sour cream. Bake at 350˚ 45 minutes.

Note: For the two of us, I made one-third of a recipe and baked it in an 6×6-inch pan. I had leftovers – no problem!


250 Cookbooks: PastaMatic MX700

Cookbook #215: PastaMatic MX700, Simac, distributed by Lello Appliances Corp., NJ, circa 1998.

Pasta Matic MX700 cookbook
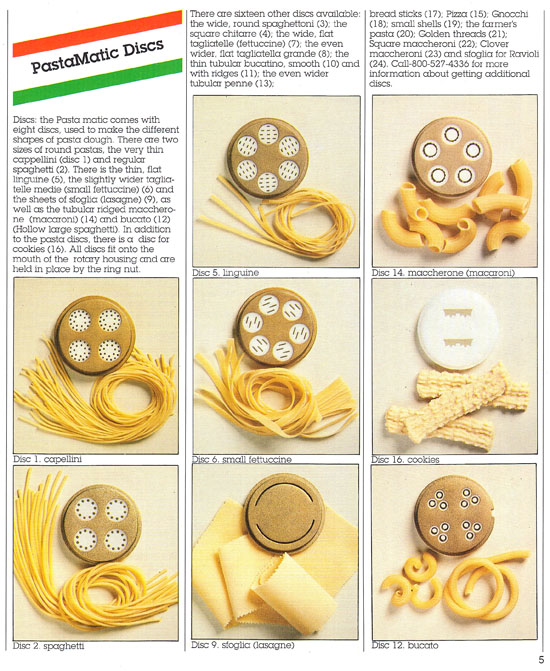
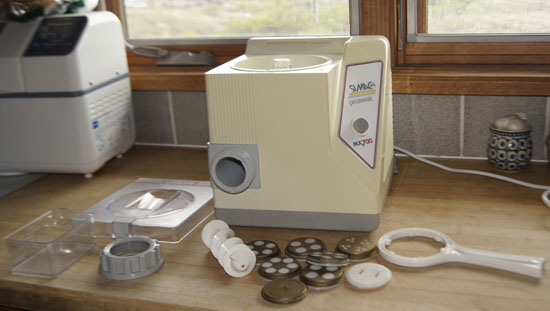
My Simac Pastamaker MX700 was a gift from my husband in 1998. I had been making my own pasta for  years, using a Kitchenaid mixer to mix the dough, and a manual Marcato pasta maker to roll the dough and form the noodles (see my post, the Pasta Cookbook). The Simac Pastamaker takes home pasta making to a whole new level. The dough is mixed right in the machine, then extruded through die sets into many different shapes: linguine, macaroni, capellini, small fettuccine, spaghetti, lasagne, and bucato.

Simac discsIt’s a lot of fun! And time-consuming, yes. A decade or so ago I stored the Pastamaker down in the basement to make room for other things on my countertop. I don’t think I’ve used it since then. Now I have a great excuse to pull it back up, clean it, and make some great pasta. (I love retirement!)

The receipt for my PastaMaker says it cost $235, new, in 1998. Are they still for sale? Yes, but I am not sure the Simac is available new. Amazon lists the PastaMatic, but none are available right now, so I can’t tell if they are new or not. A used one is for sale on eBay for $106. Google lists them from $12 to $520. Chef Masterpiece has one for sale for $519.98 – sounds like it’s new, but it doesn’t say.

My guess is that a machine offered by Lello, the company that distributed the PastaMatic MX700 that I have, is the replacement for the Simac. This is the “Lello 2730 3000 Pro Pastamaster Pasta Maker”. It sells for $235 new (same price as mine 19 years ago!). Fabulous Pasta reviews this model. There is some competition for the Lello from extruding pasta makers by Phillips, Gourmia, Ronco, and Viante.

During my web searches, I found two useful sites.  On Pasta Recipes Made Easy, the author found a used Simac Pastamaker for $10 at a thrift shop (circa 2010). She gave the machine a favorable review, plus a link in case I ever lose my instruction booklet. On Toque Tips, I find instructions for using the Simac Pastamaker and a good article on making tomato sauce from fresh tomatoes.

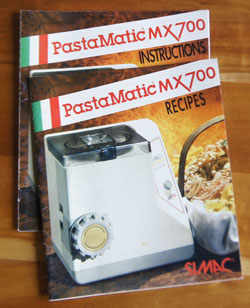
My PastaMatic MX700 cookbook is actually three separate pamphlets. One is recipes, one is instructions, and one is an instruction card. I have a nice note to myself on the front of the instructions:

pasta note
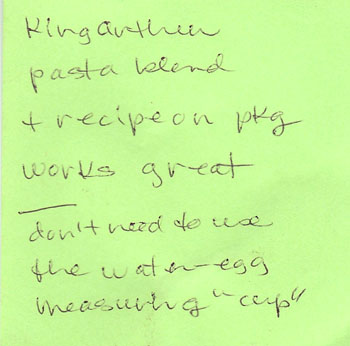
My note tells me that I used King Arthur Flour “pasta blend” the last time I made make the dough in the Simac. The reference to the water-egg measuring “cup” means that I used the package instructions for measuring the proper ratio of flour to egg-plus-water. The “cup” was  shipped with Simac; it’s a specialized plastic measuring cup with levels marked for water and egg. BUT: these markings do not correlate with ounces, milliliters, or even cups. I never wrote down the exact capacity of that “measuring cup”. Each time I wanted to make pasta in the Simac, I had to locate this single-purpose utensil. I’m glad I wrote that note to myself! – now I know the proper ratio of wet to dry ingredients and can use a regular standard measuring cup.

In my post Beard on Pasta , I used King Arthur Pasta Flour Blend to make my main-dish pasta (using my manual machine). Pasta Flour Blend is “a blend of golden semolina, durum flour, and King Arthur Unbleached All-Purpose Flour”.

Semolina is a durum wheat, but it is coarsely ground and not the best for pasta because it does not make a pasty dough. That’s why it is blended with other flours in recipes and in the Pastry Flour Blend. Myown  old-time basic pasta dough recipe is 3/4 unbleached flour and 1/4 semolina.

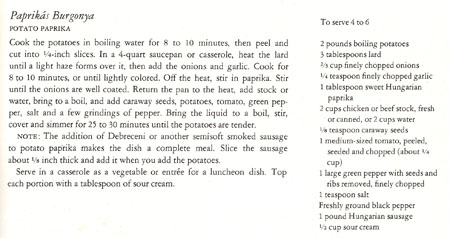
The recipes portion of PastaMatic MX700 includes:

  • egg pasta (eggs, water, bleached all-purpose flour)
  • water pasta (water, bleached all-purpose flour)
  • semolina pasta (eggs, water, 2 cups semolina flour, 1 1/4 cup bleached all-purpose flour)
  • spinach pasta (cooked spinach, eggs, bleached all-purpose flour)
  • watercress pasta (watercress instead of spinach)
  • tomato pasta (tomato paste, water, bleached all-purpose flour)
  • whole wheat pasta (water, whole wheat flour, bleached all-purpose flour)
  • egg white pasta (egg whites, bleached all-purpose flour)
  • egg yolk pasta (egg yolks, all-purpose flour)
  • buckwheat pasta (water, yeast, 1/4 pound buckwheat flour, 3/4 pound bleached all-purpose flour)
  • soba (water, eggs, salt, 2/3 pound buckwheat flour, 1/3 pound bleached all-purpose flour)

I’ve run across “buckwheat flour” in several of my previous posts on health food or vegetarian cookbooks. But until I looked it up, I never knew that buckwheat is not wheat at all. Wheat is a grass, and buckwheat is not a grass, instead, it is related to sorrel and rhubarb. It is high in nutrients and grinds to a coarse flour.

The above recipes for pasta specify “bleached all-purpose flour”. I thought this odd, until I learned that bleaching flour causes it to dry out faster, giving a more consistent water content from bag to bag. Simac wants the consumer to have the easiest time with their recipes, and this takes precidence over the healthy aspects of unbleached flour. Me, I am used to dealing with variations in the water content of flours, and I will stick with my unbleached all-purpose flour.

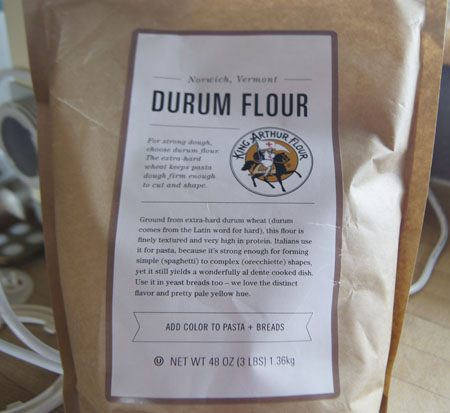
Which type of flour should I choose to make pasta for this blog? I decide to try durum wheat, so I ordered some from King Arthur Flour. I open the package to find a beautiful slightly yellow fine flour. I will use only this type of flour in my pasta.

Durum flour packageI carry the Pastamaker upstairs and find the dies (hidden in a pottery jar upstairs). Some of the dies are crusted with dried dough. Oh, I remember, it’s hard to get the dough out of the tiny slits and holes. Sometimes they clog during use, or the dough doesn’t feed properly through them. Hmmm. I better set aside an afternoon for my re-experiment with my Pastamaker.

Simac Pastamaker
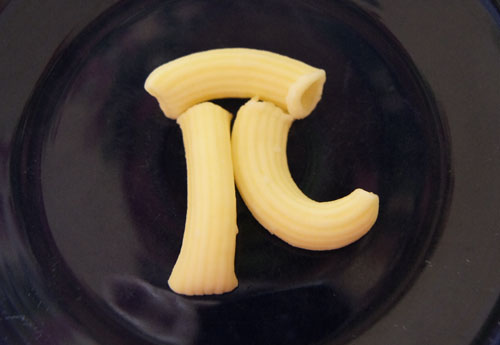
I decide to make macaroni, because I can make spaghetti and flat noodles any old time in my Marcato.

Note: Pasta made in the Simac Pastamaker is meant to be cooked right after it is formed, it directs me to do this right in the recipe booklet. When I make flat noodles or spaghetti using the manual Atlas pasta maker, I usually cook it, too, right away, but many (most?) people dry pasta before cooking.

I followed the recipe on the Pasta Magic KA Flour bag, substituting durum flour for the pasta magic mixture. This recipe has 4 eggs per 3 cups of flour; my old stand-by recipe has 2 eggs per 2 cups of flour.

Durum Pasta

  • 3 cups durum flour (16.4 ounces)
  • 4 eggs (I used jumbo yolk eggs and a couple had double yolks, this might have been too much egg)
  • 2-4 tablespoons flour
  • electric, extruding past machine
  • have ready a pot of boiling water

I debated whether or not to add salt or olive oil to the dough mixture. This time, I left both out.

Follow the manufacturer’s instructions for your pasta machine.

Put the flour in the bowl of the pasta machine and start the motor. Add the eggs slowly, then mix for 3 minutes. Simac says to check the dough at this point. You want the consistency to be walnut-sized lumps, but not sticky. The dough is too dry if it feels floury and is in small granules. The dough is too wet if it feels sticky in large smooth balls. Correct if necessary by adding up to a teaspoon of water or 3 tablespoons of flour. Let knead another 3 minutes, for a total of 6 minutes. (In another part of the Simac instructions, it says to knead for 8-10 minutes for any recipe.)

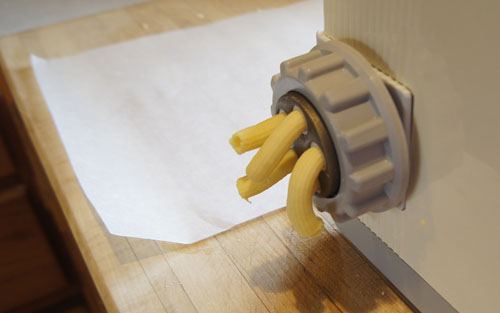
Switch your pasta machine to extrude. (At this point, I attach the wetted macaroni die.) As the pasta comes out of the die, use a sharp knife to cut it into your desired lengths.

extruding macaroniBoil for 30 seconds and check for al dente; boil another 30 seconds if necessary. In Colorado, though, I cooked my macaroni for 3-4 minutes and it was perfect.

Okay, so now my report on how this actually worked for me today. First, my dough never formed walnut sized lumps. I carefully checked it, and it was neither grainy nor sticky, but it only formed large masses of dough. Thinking it too wet, I added more flour, to no avail. I added more water, to no avail. I was reluctant to keep the noisy machine running, plus it was hard to do so because a part on the lid of my pastmaker is broken, and I had to rubber-band it down to keep the dough lumps from opening the lid and turning the switch off.

This is nothing new, my memory tells me – this is what happens every time I have made pasta in the Simac. Now I remember why this machine is usually in the basement!

After 6-8 minutes, I decided to go ahead and extrude the dough. There is a small square hole in the bottom of the bowl that, when open, allows the dough to fall into the auger that feeds it up to and through the die. Well, I have to keep pushing the dough with the handle of a wooden spoon to get it into the hole, otherwise the mass of dough just passes over it, instead of dropping to the auger.

So I work, for probably half an hour, to get all the dough through the extruder. This means pressing down on the lid to make the motor run and extrude, then stopping it, taking off the lid and forcing a small chunk of dough into the hole, then restarting the machine. It was noisy, it took a long time.

But, my pasta was perfect. I absolutely love the durum wheat macaroni. It is firm, it is pale yellow, it is chewy, it is tasty. It is perfect.

cooked macaroni

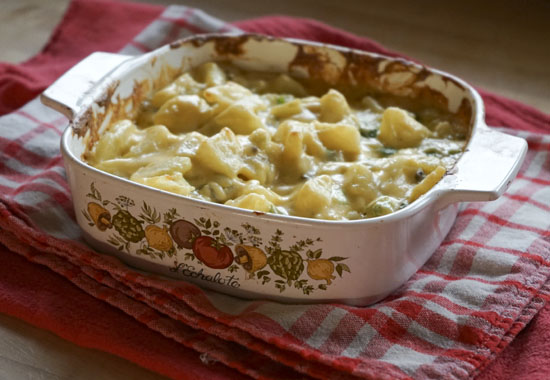
I was so involved in making this lovely durum macaroni that time just fell away. And by the time all the macaroni was extruded and cooked, I had a big mess on my hands – the pasta maker and counter top all covered with dough bits, the stove wet with pasta cooking liquid runover. And I still had to pull the macaroni into a dinner dish, “Macaroni and Cheese with Wine”. This is a great recipe from my cookbook Pasta: macaroni, very sharp cheddar cheese, sweet white wine, butter, mustard, eggs, half-and-half, chopped green chiles, and bread crumbs (page 123). This dish needs to bake 40 minutes and then rest 10 minutes. I’ve gotta rush to get it done.

It wasn’t until the macaroni dish had finished cooking and I was serving our salads that I remembered I still had to heat up the big slice of ham that I had purchased for our main dish. And it wasn’t until after dinner that I remembered that I had not made a dessert!

Ah, but it was all worth it. My own homemade durum wheat in rich macaroni and cheese was a delight. Absolutely.

250 Cookbooks: Sunbeam Controlled Heat Automatic Frypan

Cookbook #213: Sunbeam Controlled Heat Automatic Frypan, Sunbeam Corporation, Chicago, Illinois,1953.

Sunbeam Controlled Heat Frypan cookbookI discussed electric fry pans in Hamilton Beach Automatic Heat Control Appliances, the recipe/instruction book for my fry pan. This booklet, Sunbeam Controlled Heat Automatic Frypan, was my mother’s. It must have come with her own fry pan – a Sunbeam model – in 1953. I wrote a note in my database: “I like the photo on the front”. Here is a close-up scan of the front cover:

Sunbeam Frypan

After 5 pages of instructions, there are about 12 pages of recipes. The first section is recipes for “Pan-broiling, Sauteing, Frying and Toasting Sandwiches”, including pan broiled steak, breaded steaks, meatballs, hash, lambburgers, salmon patties, omelet, fritters, corn fritters, potato patties, vegetables, and toasted (grilled) sandwiches.

The second section is recipes for using the fry pan with a lid. “Adjust dial to keep liquid just bubbling when light is on, a setting of about 200-240˚.” It includes recipes for pot roast, Swiss steak, stews, braised meat chops, veal rolls, chop suey, sukiyaki, meat balls, barbecued hamburger, chicken fricassee, scalloped potatoes, fried potatoes, hamburger macaroni casserole, fried chicken, baked beans, and frankfurter casserole.

All of the above recipes reflect the cooking of the mid-twentieth century. And in fact, many of these recipes are similar to what I cook today. But I fry in a good, heavy (shall I add expensive?) non-stick pan on the stove top, and I braise in good, heavy iron or enameled pots in the oven.

The next section is for baking cakes in the fry pan. No no no, that’s not for me. Packaged cake mixes, brownies, coffee cakes in the fry pan – and I really don’t think it would be easy to invert the fry pan and get these baked items out cleanly. I’ll stick to baking in the oven.

Other uses for the fry pan include popcorn, fudge, frying doughnuts, baked potatoes, cooking vegetables and cereal, heating baby foods, crisping crackers, defrosting, heating TV dinners (“frozen tray dinners”), baking frozen foods (including pizza), as a chafing dish, and for making white sauce. From this wide breadth of uses, it seems that a person could cook just about anything without a stove. This might work for staying in cabins, or for marginal housing arrangements. For us, we could use it in a power outage, since our backup generator gives us good but limited household power.

The back cover:

Sunbeam Frypan
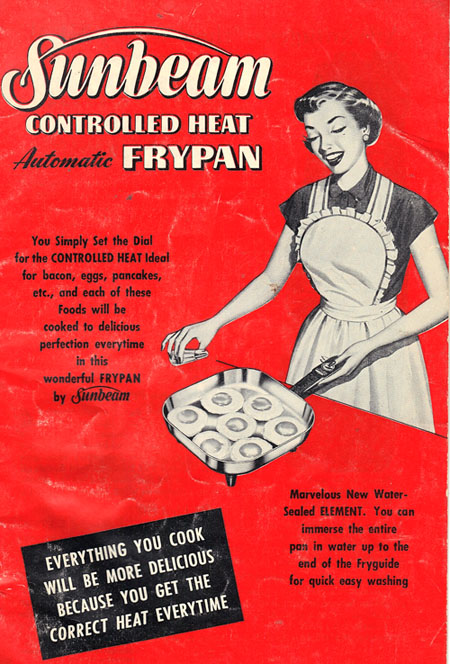
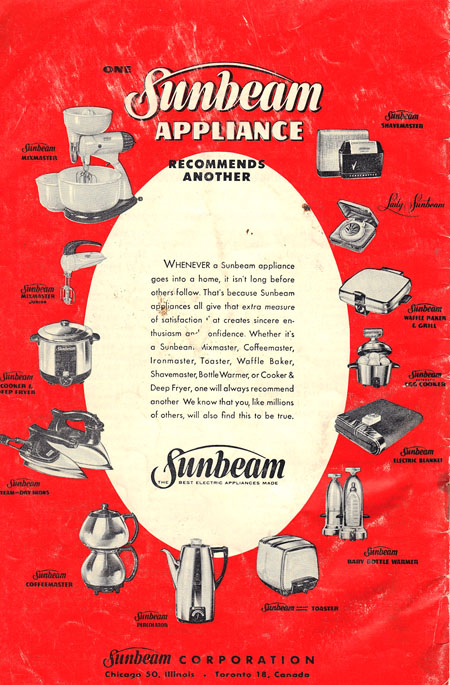
Look at all the Sunbeam appliances! Mixer (see my old Sunbeam mixer post), deep fryer (see my Sunbeam deep fat fryer post), irons, coffee pot, toaster, baby bottle warmer (interesting, since I just did a post on how to feed your baby), electric blanket, egg cooker, waffle maker, Lady Sunbeam razor, and shavemaster.

I am going to keep this cookbook. Not for the recipes, but for the nostalgia. Brings back memories.

For this blog, I will make Corn Fritters.

Corn Fritters recipe

Hey, in the directions they spell egg yolks “yokes!” I almost didn’t catch that.

I am making these for just two, so will one-third the recipe. I am not about to get out the big frypan just to make a small batch of fritters! I choose a medium non-stick frypan. I know how big the frypan is, and 1/2 cup oil would cover the bottom, but not fill it to the depth of deep frying, so I adjust my amount of oil by that guideline. Instead of serving them with syrup, I’ll have them as a side dish with one of my favorites, Southwestern Chicken.

Corn Fritters
serves 2

  • 1 egg white
  • 1 egg yolk
  • 2/3 cup cooked corn (I used fresh corn)
  • 1 1/3 tablespoon flour
  • salt and pepper
  • vegetable oil

Beat the egg white until stiff. In a separate bowl, beat the egg yolk on high for about half a minute, then turn to low and add the flour and salt and pepper. Stir in the corn. Fold the egg white into the egg yolk mixture.

Heat a pan to medium hot. Add enough oil to nearly cover the bottom, maybe a couple tablespoons. (You could get by with less when using a good nonstick pan.)

Drop in the corn fritter batter by spoonfuls. Fry on both sides until golden brown.

Corn Fritters 
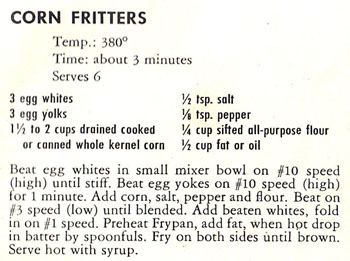
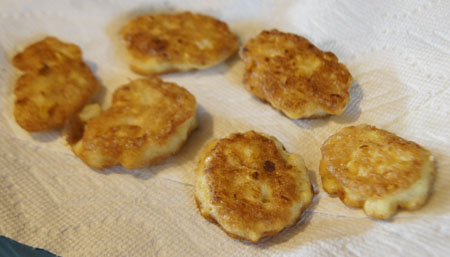
I liked these! But, my dining partner wasn’t impressed. The Southwestern Chicken was enough for him. I think these would have been good with syrup, as suggested in the recipe. I would like them fried in less oil than I used. This is a good recipe for very easy corn fritters; I just need to figure out how to include them in a dinner – or breakfast – plan.

250 Cookbooks: Salads, Vegetables and the Market Basket

Cookbook #193: Salads, Vegetables and the Market Basket, California Home Economics Association, Southern Section, 3rd ed., 1928.

Salads, Vegetables, and the Market Basket cookbook

Note:This cookbook is in the same series as Pastries and Desserts, 250 Cookbooks entry number 218.

This book was published in 1928! That means Salads, Vegetables and the Market Basket gives a glimpse into the kitchens of America when my own mother was not yet a teen. Here is the foreword:

foreword

This description of “vitamines” is interesting:

vitamines

A web search for Salads, Vegetables and the Market Basket only pulled up one relevant site, the bibliographic entry on the site “Food and Agriculture Organization of the United Nations (AGRIS)”. I did find full text of a related book: The California Home Economics Association, yesterday, today, and tomorrow, 1921-1961 in the digital library of Hathi Trust. I spent a bit of time perusing this history of the California Home Economics Association (CHEA) and the introduction of courses in “Home Economics” to the curriculum of California schools. An excerpt from the forward (note that the century is the twentieth):

CHEA1

(I discussed home economics in when I covered my mother’s text, General Foods Cookbook. I brushed on the topic in The Fannie Farmer Cookbook and Rice – 200 Delightful ways to serve it.)

Secondary schools in California had home economic classes in secondary schools as in the early 1900s:

CHEA2

College courses in home economics were introduced by 1909:

CHEA3
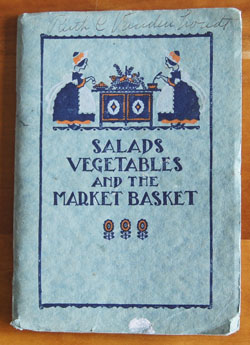
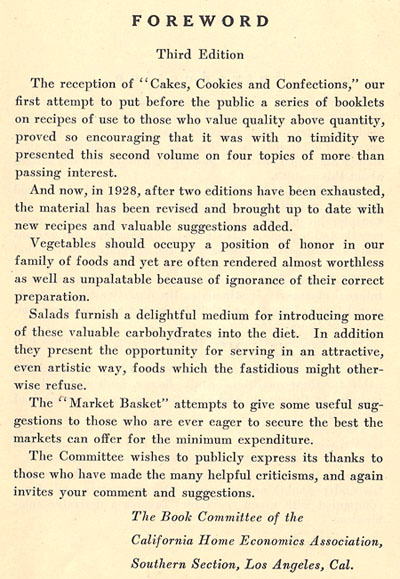
The following is the beginning of an appendix in The California Home Economics Association, yesterday, today, and tomorrow, 1921-1961. It dilineates the early introduction of home economics to California schools. Note the last entry on “hand and machine sewing”. I learned sewing (as well as cooking) in junior high in California in the 1950s.By the 1960s, American home kitchens are influenced by many changes: industrialization, urbanization, suburbanization, working mothers, a higher level of education, and automation.

CHEA4

(I puzzle over the phrase in the above excerpt: “Consider also, the family’s greater emphasis on consumption, less on production.”)

Salads, Vegetables and the Market Basket in my hands, I stand in my sunny kitchen and feel company with all the women who ever stood in their own kitchens, studying how to get the best food – the best health – for their children and spouses. And yes, I say women. I know that men are also cooks, but in the culture of my youth, the home was the where woman belonged. I am so thankful for my college education, and the chance to break some of womens’ bonds to the kitchen and engage in the scientific pursuit of chemistry, enjoying stretching my intellect, hobnobbing with Nobel laureats, studying in the lab where DNA was first synthesized and isolated, creating new experiments for organic chemistry students, creating web sites, and basically, enjoying the heck out of life. But I always come back to my kitchen for comfort.

What shall I cook from this book? The recipes are quite aged. Below are two pages of recipes for salad dressing. They do not include good directions for a true vinaigrette dressing. Cream cheese dressing made with cream cheese and a bit of vinegar does not entice me. Nor am I inclined to make a piquante salad dressing from cooked eggs, mustard, sugar, worcestershire, catsup, oil and vinegar – or potato, gelatin, and sylph mayonnaises (the last has mineral oil in it instead of vegetable oil).

Market BasketMarket BasketSome salads have fancy presentations, like Butterfly Salad, or Banana Canoes.Market Basket

Salads, Vegetables and the Market Basket includes many recipes for cooked vegetables, from broccoli to to collards to chayote to lentils to potatoes to tomatoes. Many times they are cooked in white or cheese sauces, butter and sugar, or baked covered with buttered bread crumbs. I can’t find anything I want to make!

Finally I come upon a recipe for Mint Glazed Carrots (second from the bottom in the scan below). If I cut down on the butter and sugar, these might be a good accompaniment for a meat and potatoes meal.

Mint Glazed Carrots recipe
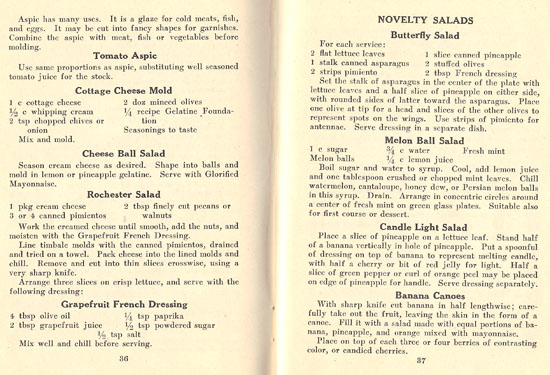
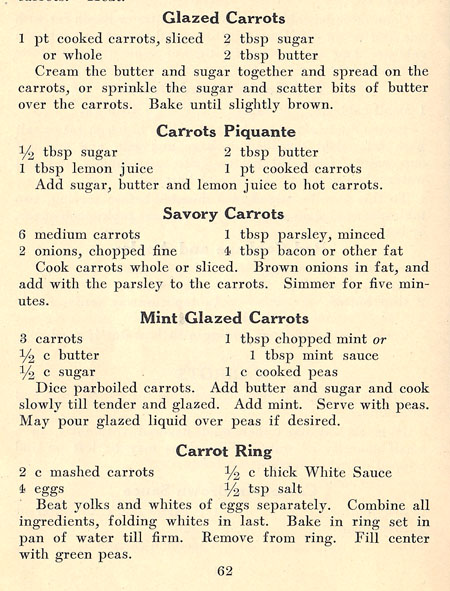
Glazed Carrots with Peas with Mint
serves two

  • 2 medium carrots, peeled and cut in half
  • 2 tablespoons butter
  • 2 tablespoons sugar
  • 1/2-1 tablespoon chopped fresh mint
  • 1 cup cooked peas (about)

Parboil the carrots: put in boiling, salted water, then simmer 10-15 minutes, just until barely fork tender. Dice the parboiled carrots.

Melt the butter in a pan and add the sugar, stir until incorporated. Using medium heat, cook and stir until the carrots are tender and glazed (they do not need to brown). Add the mint.

Scoop the carrots and mint out of the pan and put over cooked peas. (This way, you can leave some of the butter/sugar/calories in the pan.)

Glazed Carrots with Mint and Peas
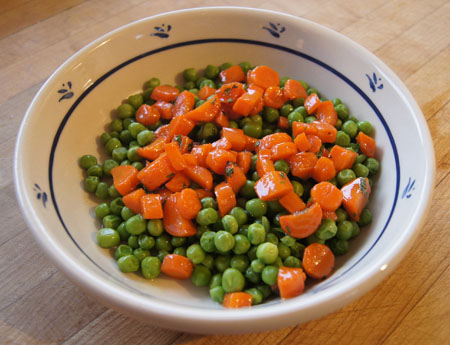
I thought these were good – hubby was less impressed. I love the colors and the bright mint flavor. Yes, they were a bit sweet, but I thought it nice for a change.

Ruth C Vandenhoudt

This name is handwritten on the cover of my copy of Salads, Vegetables and the Market Basket. This tells me that I acquired this cookbook from the Ruth Vandenhoudt house, back when I was a teen. My paternal grandmother was related to Ruth Vandenhoudt, and on Ruth’s passing, relatives were invited to her house to take things from the estate. I found books and books and books – old books with brittle pages and faded covers. A couple were gorgeous, most were just curious and aged. I still have many of these books.

250 Cookbooks: Fagor Pressure Cookers

Cookbook #162: Fagor Pressure Cookers, More than 50 Recipes, Fagor America, Inc., Lyndhurst, NJ., publication date not given.

Fagor Pressure Cookers cookbook

Fagor Pressure Cookers, More than 50 Recipes is the instruction/recipe booklet that came with the stove-top pressure cooker that I bought sometime in the 2000s. This cooker has one pressure lid that covers two sizes of nice, heavy pots. I bought it as a replacement for my old broken pressure cooker. Somehow I quickly broke this pressure cooker too! I ruined the gasket and/or pressure regulator, and the replacements I ordered did not fit. (Unusable as a pressure cooker, the pots as still usable as cooking pots.) A couple years ago, I bought an electric pressure cooker that works great. So, I can still use the recipes in this booklet, I’ll just have to adapt them to my new electric cooker.

Shall I keep this cookbook? It has “More than 50 recipes”. Let’s see if this booklet has enough good recipes to warrant saving.

The first recipe is for tomato sauce for pasta, with carrots, celery, garlic, 3 cups canned tomatoes, herbs, and wine. Hey, this is pretty much how I make stove-top sauce! But in a pressure cooker it only takes 10 minutes, not an an hour or two stove-top simmer. Maybe I’ll try that next time. I like the “German Potato Salad” with just 2 minutes cooking time! “Country Style Potatoes”, with mushrooms and onions, take only 3 minutes. This recipe for potatoes would go well with the grilled meat I have planned for dinner. “Everyone’s Favorite Meatball Stew” sounds good to me – given my love of meatballs in general. I have a Cornish hen in the freezer, so I might try the “Oriental-Style Cornish Hen” or “Cornish Hens Braised in White Wine”. “Mom’s Rice Pudding” would be a homey dessert.

But that’s it. I decide to make the Country Style Potatoes for dinner, scan copies of the other recipes, and recycle this booklet. It has served it’s purpose!

Country Style Potatoes
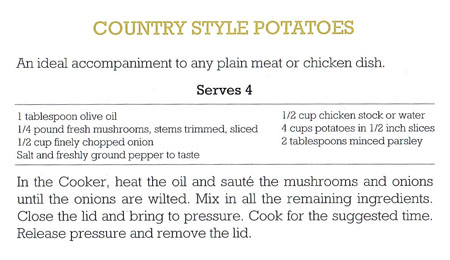
The “suggested time” in the above recipe is indicated by a little chart below each recipe. I perused the instruction pages of the booklet and figured out that I should set my current pressure cooker to “high”.

Country Style Potatoes
serves 2
this recipe is written for an electric pressure cooker

  • scant tablespoon olive oil
  • 1/4 pound sliced fresh mushrooms
  • 1/4 cup finely chopped onion
  • 2 cups potatoes cut into 1/2-inch slices
  • 1/4 cup water
  • 1-2 tablespoons chopped fresh parsley
  • salt and pepper to taste

Saute the mushrooms and onions in the pressure cooker (my cooker has a “saute” setting). Add the potatotes, water, parsley, and salt and pepper.

Close the lid and set to “high pressure” and set the timer for “3 minutes”. When the timer beeps, quick-release the pressure.

Voila!

Country Style Potatoes
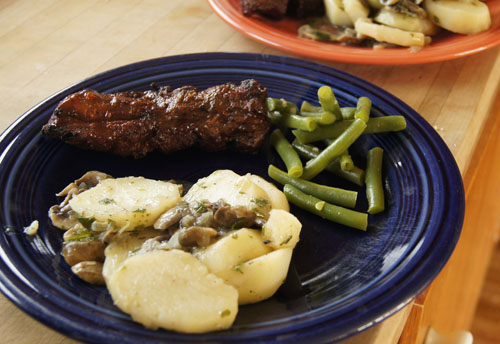
These were very good! And so fast and simple. I have to remember that it’s often worth the effort to carry the pressure cooker up from the basement. It really is time-saving, and clean-up is easy. I will make these again!

250 Cookbooks: Best in the West Barbecue Recipes

Cookbook #159: Best in the West Barbecue Recipes, Western Family, Inc., August 1958.

Best in the West Barbecue Recipes cookbook

What or who is or was “Western Family”, the publisher of this book? I found that it was a 1950s magazine about life in the western US. A few vintage issues are available through eBay and Amazon and other sources. If you google “Western Family Magazine 1958” you will be rewarded with the cover art of several issues – I’d copy some in here but don’t feel comfortable because of copyright issues.

Best in the West Barbecue Recipes is a small stapled-together booklet that must have been associated with the August 1958 magazine issue. And I think it was my grandmother’s, because there is a smidgeon of writing in it that looks like hers:

note in the Best in the West BBQ cookbook

I like the introduction page:

introductionI am surprised how much I like the recipes in this dated booklet! Many of them sound pretty good; albeit the instructions are often quite brief: “Pour the marinade over the ribs and marinate for at least one hour. Grill ribs over charcoal for 45-60 minutes, or until done, turning frequently and brushing with sauce.” Each recipe includes the name of the contributor, usually a “Mrs.” from a western state.

Note the barbecue grill in the photo of the cover of this cookbook (top of this page). That’s the kind of barbecue I grew up with. It was fairly flat and you spread the charcoal in a single layer and cooked on the grill right above the charcoal. I’m not even sure it had a cover. Simple but functional.

This all certainly brings back the sunny times in California in the 1950s: sitting on the wooden table and benches in the tree-shaded patio right off our kitchen, charcoal fire started, family friends gathering for a meal together, adults laughing with their cocktails, us kids being kids. It was a great place to grow up.

I decide to make Just-Right Barbecued Chicken:

Just Right Barbecue ChickenJust Right Barbecue Chicken 
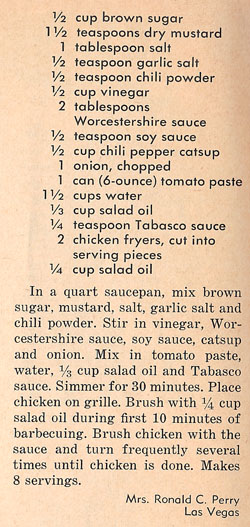
I haven’t cooked bone-in chicken pieces on a grill in ages. Below are the instructions given in this booklet for an old-style charcoal grill.

grilling instructions

What I like about the recipe for Just Right Barbecue Chicken is the included barbecue sauce. I made a few minor changes in the sauce recipe (more spices, less salt, chile sauce for “chili pepper catsup”) and to adapt the grilling instructions for my covered gas grill, I consulted my Weber Real Grilling cookbook. All changes are incorporated below.

Just-Right Barbecued Chicken
serves 2 – with leftovers!

  • 1/2 cup brown sugar
  • 1 1/2 teaspoons dry mustard
  • 1 teaspoon salt
  • 1/2 teaspoon garlic powder
  • 1 teaspoon chili powder
  • 1/2 cup vinegar (I used white vinegar)
  • 2 tablespoons Worcestershire sauce
  • 1 teaspoon soy sauce
  • 1/2 cup chile sauce
  • 1/2 large onion, chopped fine
  • 1 8-ounce can tomato sauce (or use 6-ounce can tomato paste and increase water to 1 1/2 cups)
  • 1 cup water
  • 1/3 cup vegetable oil
  • cut up frying chicken (I used 2 breasts, 4 legs, 3 thighs)
  • vegetable or olive oil for brushing chicken

Combine the sauce ingredients (1/2 cup brown sugar through the 1/3 cup vegetable oil) and simmer about 30 minutes. This makes enough for two chickens; I used less chicken so I had leftover sauce. Note: this sauce is not as thick as most modern barbecue sauces, but it works great.

Heat a gas grill on high until it’s good and hot, then turn off all but one burner. You want the temperature to be “medium” – I aim for 325-350˚ on the gas grill gauge.

Brush the chicken pieces with oil – I actually just put the chicken in a bowl and poured olive oil over them and rubbed it in. Put the pieces on the grill over indirect heat (and close the lid). Grill about 5 minutes and then turn and grill another 5 minutes until they have nice grill marks. Next, brush with the sauce. For the next 30 minutes or so, keep brushing with sauce and turning every 5-10 minutes, monitoring the grill temperature to keep it at medium. To test for doneness, I used an instant read thermometer, and when the chicken pieces read 150-160˚ I took them off the grill. (Some were done sooner than others.)

Just Right Barbecued Chicken
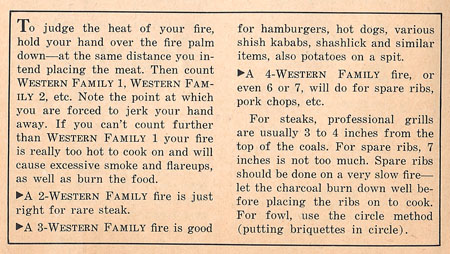
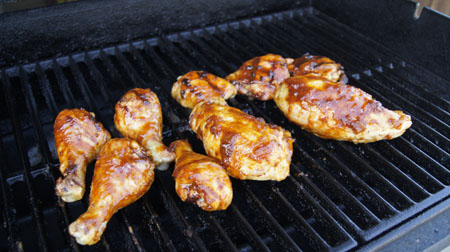
This chicken was really good! I will definitely grill chicken this way again. The sauce was perfect, and the chicken was juicy. It was just as good cold the next day!

To go with the chicken, I made “Western Potato Strip-Teasers”.

Western Potato Strip Teasers recipe

These potatoes are baked in foil the oven, and kept hot on the edge of the grill as the main dish is cooked. I made the potatoes pretty much as they said, except I used milk instead of cream and cheddar cheese instead of process American cheese.

Western Potato Strip-Teasers
serves 2

  • 2 good-sized potatoes (or several small, you need enough for 2 people)
  • 1 tablespoon butter, cut in small chunkl
  • salt and pepper
  • 2 tablespoons chopped fresh parsley, divided
  • 1/4 cup grated cheddar cheese
  • 1/4 cup milk

Take a piece of heavy-duty aluminum foil and shape it to form a baking dish.

Peel the potatoes and cut lengthwise strips as for French fries. Place in the aluminum foil baking dish. Dot the potatoes with butter, sprinkle with salt and pepper and cheese and 1 tablespoon of the parsley. Pour the milk over the mixture. Bring the edges of the foil up to cover the potatoes; seal alll edges to make a closed package (but do not flatten). Place it on a cookie sheet to make it easier to slip in and out of the oven.

Bake at 425˚ for 40-50 minutes, until the potatoes are done. Sprinkle with remaining parsley. If you like, you can take the foil package outside to your grill and keep the potatoes warm until dinner is ready.

Potato Strip Teasers

We both really liked these. I wanted “more!” I even ate some of the leftovers cold from the refrigerator the next day. And clean-up was really easy!

And what am I going to do with this little cookbook? I’m going to put it with my “old cookbooks” for the nostalgia. And maybe to cook another good old recipe sometime!

250 Cookbooks: Carousel of Cultures Cookbook

Cookbook #151: Carousel of Cultures Cookbook, Woodbury 1975-76, The Multicultural Committee, Woodbury Elementary School, Garden Grove, California, 1976.

Carousel of Cultures cookbook

I just returned from a fun visit to my sister’s lovely home in Southern California, so when my hand reached for this cookbook on the shelf yesterday, I smiled. My sister taught at Woodbury Elementary School and she gave me this cookbook way back when. In it are handwritten notes for me. I’m keeping this cookbook!

Carousel of Cultures Cookbook is a “community” cookbook, similar to my Lyons Elementary Cookbook. Teachers and parents at Woodbury Elementary contributed all of the recipes. The introduction reads: “This cookbook is our way of sharing the different ways food is enjoyed in the many cultures of our community.” Each section is illustrated with a drawing by one of the students.

student drawing

So many cultures joining together in Southern California in 1976! Below are the countries represented and a sample recipe title from each:

African (Fufu)
Chinese (Chinese Beef and Peppers)
English (Maids of Honour cakes)
French (Crepes with Creamed Seafood)
German (Sauerbraten)
Greek (Telley Savalas’ Lamb Pallakari)
Indian (Hurgha Kari)
Italian (Fettuccine)
Mexican (Pescado en Mantequilla)
Moroccon (Lamb Moroccan)
Philipino(Chicken a la Monja)
Polynesian (Crab Meat Polynesian)
Swiss (Chicken with Tomato Sauce and Bacon)
Spanish (Leg of Veal)
Turkish (Rice Pilav)
Russian (Karabakh Loby)
Sweden (Rye Bread)
U.S.A. (Company Stew)

I was surprised to see a recipe for the African dish “fufu” in this 1976 gathering of recipes. In 2010, we traveled to Togo, West Africa to visit our daughter in the Peace Corps. Her favorite food there was fufu. Of course we had never heard of it! Making fufu in Africa was a long and usually social project. The ingredients were plaintains (a less sweet banana usually eaten cooked) and yams. But the “yams” were not the orange sweet potatoes that we eat at Thanksgiving. No, these yams are large and long and white and starchy, and look like a root. (See my footnote on yams at the bottom of this blog entry.) For fufu, they are peeled and then boiled, then they are put in a huge wooden bowl and pounded with a large mallet for about an hour. Traditionally, the men take turns doing the pounding, and the women move the mixture around under the mallet between pounds. When the pounding is finished, the fufu has a consistency of sticky mashed potatoes. Here is a photo of authentic fufu prepared in Togo at a gathering of friends of my daughter in 2010:

making fufu

Here is the recipe for fufu from Carousel of Cultures:

Fufu recipe

I was surprised at how many recipes I’d like to try from this cookbook: a Greek lamb dish, French seafood crepes, sauerbraten, rice and bread puddings, fig nut bread, Greek nut cake, and one or all of the raw apple cakes. Spinach Salad, with notes from my sister, is a classic potluck dish that is worth saving. I like the almond cookies for a Chinese meal. My sister contributed a recipe for English Toffee Brownies and my mother contributed Frosty Lemon Pie. My sister’s mother-in-law contributed Chocolate Nut Balls.

family recipes

I decide to make “Rice Pilav” for this blog:

Rice Pilav recipe
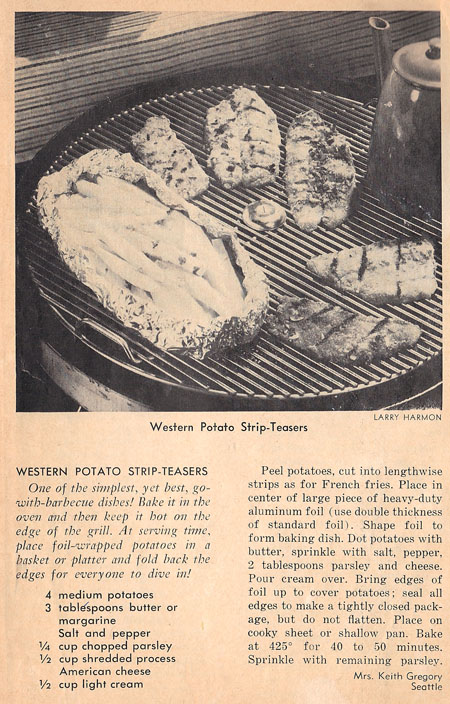
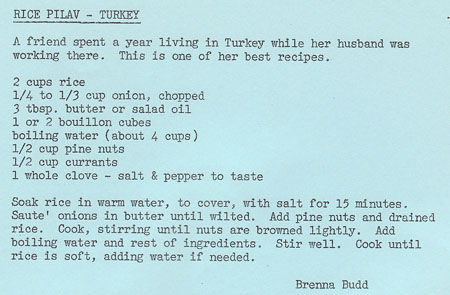
We traveled to Turkey a couple years ago and thoroughly enjoyed the food (and the trip!). We often had rice like this rice pilav on that trip.

Rice Pilav (Turkey)
serves about 4

  • 1 cup white rice
  • 1/2 teaspoon salt
  • 1 tablespoon butter
  • 1/4 cup chopped onion
  • 1/4 cup pine nuts
  • 2 cups boiling water and 1 cube bouillon OR mix and boil 1 cup water and 1 cup chicken stock
  • 1/4 cup currants
  • 1 whole clove, or a few shakes of ground cloves
  • salt and pepper to taste

Cover the rice and salt with hot tap water (this is not the boiling water indicated in the ingredient list). Let soak about 15 minutes, then drain.

Melt the butter and add the chopped onion; cook until the onion wilts. Add the pine nuts and the drained rice; cook and stir until the pine nuts are lightly browned. Add the boiling water/bouillon OR water/stock mixture, currants, clove, and salt and pepper. Cover and cook until the rice is soft, adding more water if necessary.

Rice Pilav

I served this with my own Lamb Stew with Cinnamon and it was delicious! Perfect combination of flavors.

Footnote about yams
(a note about the yams used in fufu)

In the US, yams and sweet potatoes are often called the same thing. In botanical terms, they are different species. True yams are seldom grown in the US, but around the world, over 150 species of yams are cultivated. Yams can range from potato-size to over 7 1/2 feet long and 120 pounds. The ones we saw in Togo were about a foot long, white to tan in color, and a couple inches in diameter. (Reference: Food Lover’s Companion)

250 Cookbooks: Woman’s Day Encyclopedia of Cookery, Volume 7

Cookbook #150: Encyclopedia of Cookery, Vol. 7, Kid-Moc, Woman’s Day, Fawcett Publications, NY, 1966.

Encyclopedia of Cookery Volume 7 cookbook
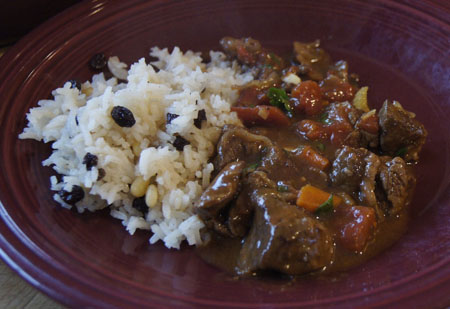
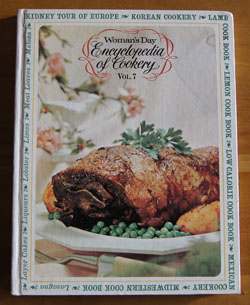
I have a set of twelve Encyclopedia of Cookery volumes and this is the seventh of that set – I covered the first six in previous posts. I’ve enjoyed all of them so far, and I happily open this one to learn curious and helpful information about foods from kid(ney) to moc(ha).

The entry for kidney begins with a story by of a woman who traveled through Europe with her kidney-loving husband. He believed the worth of a restaurant is revealed by how well they cook this organ meat. Well, I’m not a fan of kidneys as food. I used to eat this meat because some health food authors of the day touted its nutritional value (like Adele Davis). I gave up that idea long ago, although I used to make a decent “Steak and Kidney Pie”. Below is my own recipe card, written sometime in the 1970s.

Steak and Kidney PieSteak and Kidney PieSteak and Kidney Pie

The next entry that catches my eye is “kiss”. The Encyclopedia defines a kiss as “a small chewy mound-shape confection prepared with egg white and sugar”. A kiss also refers to a bite-size piece of candy, including commercially producte chocolate, usually wrapped in paper or foil. Yup, Hershey’s Kisses™!

One of my husband’s favorite meals is knackwursts (or knockwursts). He likes them served with sauerkraut and mustard. According to the Encyclopedia, “The name is of German origin, knack meaning ‘to crackle’ or ‘to make a noise when breaking’, and wurst means sausage”. Knockwursts are made from a recipe similar to hot dogs, except they have more garlic and are a lot bigger. Sadly, I’ve only rarely been able to find these in local markets since the 1970s.

I continue through the K’s and L’s. Korean cookery (Mother tried a recipe for “Korean Broiled Short Ribs” and didn’t like it), kumquat (these grew in our yard in Southern California where I grew up), Lamb Cook Book, lard. Lard is pork fat from “fat backs, clear plates, and leaf kidney fat which has been rendered [melted away from connective tissues] and clarified”. The Encyclopedia gives a recipe for lard pastry – I might try this someday, since “lard is particularly desirable in making flaky texttures in biscuits and pastry.”

I am not surprised that my mother lingered on the “layer cake” section. She tried the “Orange Gold Layer Cake” and declared it “delicious”. This is a cake with 8 egg yolks, orange juice, and orange rind in the batter, and a butter frosting made with orange juice, lemon, butter, egg yolk, and powdered sugar. Sounds good, and rich.

Lebkuchen (a spicecake of Germa origin and one of the oldest of cakes) and Lemon Cookbook. Lentils are one of the first plants whose seeds were used for food. “The lentil is extremely nutritious and is one of the staple foods of the Near East, where a dish called ‘Esau’s Dish of Lentils’ is still a favorite.” The story goes that Esau sold his birthright for bread and a “pottage of lentiles”.

Lobsters – the first English settlers to America bought lobsters for as little as a penny apiece! I learn that mace, a spice, is made from the arillode that covers the nutmeg seed. The mango tree is considered sacred in India. (I love mangoes but my body responds to them with a food allergy.) The manioc is a tropical plant also known as cassava, mandioc, or yucca. Maraschino cherries are made from sweet cherries that are “bleached, pitted, and steeped in a syrup made of sugar, water, a touch of oil of bitter almonds, and food coloring.”

Mother liked the “Basic Meat Loaf” on page 1125. I like the meat balls! This volume has a section on Midwestern Cookery that kind of intrigues me.  Mirepoix is the culinary term for a concentrate of diced carrot, onion, and celery cooked in butter – I use this mixture of vegetables a lot to begin sauces, now I have a fancy name for it. Mincemeat pies were a family tradition when I was a little girl. Those pies began with purchased mincemeat; this book has an 18th-century recipe for mincemeat from ground beef, apples, candied lemon and orange peels, citron, raisins, currants, orange and lemon juice and rind, beef suet, brown sugar, allspice, cinnamon, cloves, coriander, mace, nutmeg, bourbon, and rum.

The last entry is mocha. We know this as a mixture of chocolate and coffee, but it originally referred to a kind of coffee grown in the Yemen district of Arabia and exported from the port of Mocha on the Red Sea.

And what shall I make for this blog? I decide to make “Lentil Salad”.

Lentil Salad Recipe
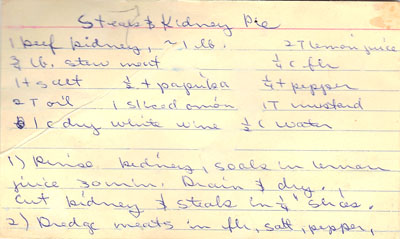
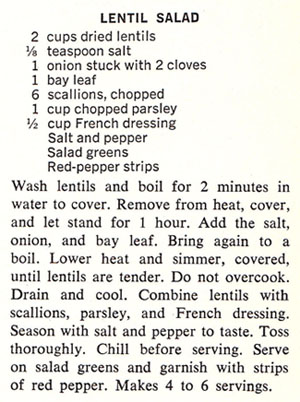
I’ve cooked lentils before, but not very often. I think this salad sounds tasty and fresh, and nutritious!

Lentil Salad
serves 2-4 as a side salad

  • 1 cup dry lentils
  • 1/4 teaspoon salt
  • 1/2 of a medium onion, chopped
  • 1 bay leaf
  • 2-3 green onions, chopped
  • 1/2 cup fresh parsley, chopped
  • 1/4 cup French dressing (bottled or *home made)
  • salt and pepper to taste
  • garnishes, such as lettuce, red pepper strips, chopped tomatoes

Wash the lentils, then put in a pot with the salt; cover with water and boil 2 minutes. Remove from heat, cover with a lid, and let stand for about an hour.

Add the onion and bay leaf and bring again to a boil. Lower heat and simmer, covered, until the lentils are tender, about 15-20 minutes. Check often – do not overcook! You want them tender but not mushy.

Drain the lentils (I used a strainer). Place them in a bowl and add the green onions, parsley, and French dressing. Season iwth salt and pepper.

Serve chilled or at room temperature. If desired, plate over salad greens and garnish with strips of red pepper.

*Keeping on the alphabetical theme of Kid-Moc, I used the Lemon French Dressing from page 1053 of this cookbook. Briefly, shake together 1/2 cup fresh lemon juice, 1 1/2 cups vegetable oil, 1 teaspoon dry mustard, 1 teaspoon paprika, a dash of cayenne, 1/2 teaspoon salt, and 1/4 teaspoon pepper.

Comments

I served the lentil salad alongside grilled lamb (keeping with the “L” theme!). Even my dining partner liked it! Not something I could serve every day, but it’s a good salad and nice to have in my repertoire.

Lentil Salad
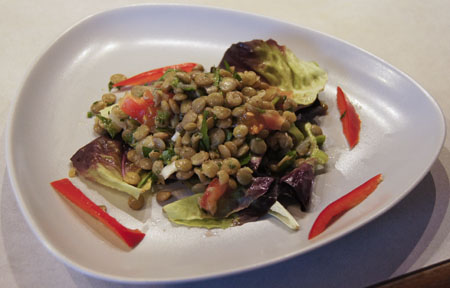
I liked the cooking method for the lentils because it didn’t get them too done. Note that I left the cloves out and used chopped onion, changes from the original recipe. This basic lentil salad could be varied tons of ways with different seasonings, vegetable additions, and dressings.

250 Cookbooks: Vegetariana

Cookbook #140: Vegetariana, Nava Atlas, The Dial Press, Doubleday & Company, Inc., Garden City, New York, 1984.

Vegetariana cookbook“A rich harvest of wit, lore and recipes” continues the title. Yup, that’s this book! It has sat too long on my shelf. I am entranced with the illustrations and quotes:

“Of Soup and Love, the first is best”
“Ther ought t’be some way t’eat celery so it wouldn’t sound like you wuz steppin’ on a basket.”
“In the early Greek and Roman eras, beans were widely used as ballots. Casting a white bean signified an affirmative vote, whereas a dark bean was a negaitve vote.”
“Training is everything. The peach was once a bitter almond; cauliflower is nothing but cabbage with a college education.”
“Ginger sharpneth the sight, and provoketh slothful husbands.”

As I turn the pages of Nava Atlas’s book, I get hung up on reading and pondering all these non-recipe “extras”. I can copy a few quotes and a bit of lore, but I can’t show you all the illustrations (copyright issues and/or laziness on my part). Happily, Amazon will let you view some of this book (click on ‘Look Inside’).

Shame-faced, I haven’t tried many (or any?) of the recipes. I have always meant to take a day a week and cook no-meat meals. But it never really happens (and I can only blame some of this on my partner-in-eating).

I turn to the Introduction. Atlas begins: “‘What on earth do you eat?’ was a question I was often asked when I first became a vegetarian in the early 1970s. Even then, a meatless diet was not as widespread and accepted as it is today.” As a child, she didn’t have to be urged to “finish your vegetables” but to “eat your meat”. Meat just didn’t appeal to her. “It was not until I was sixteen years old that I was ‘adult’ enough to assert my way in the kitchen and delare myself a vegetarian. At first, this decision was not met with cheers from the family.”

She is a delight. And informative: “Many of my generation believe that vegetarianism sprand up in the 1960s and blossomed into the new age of health consciousness of the 1970s. However the roots of vegetarianism run as deep as ancient India, classical Greece and Rome, and the Old and New Testiments of the Bible. More recently, but perhaps even more obscure is the story of the almost concurrent, widespread vegetarian movements in ninteenth-century America and England, attracting scores of pominent writers and reformers.”

So us hippie baby boomers weren’t so groundbreaking. Funny how each generation thinks they are the first to discover the world.

Happily, Nava Atlas is still writing, and enchanting us and sharing recipes. Do visit her website: VegKitchen with Nava Atlas.

Recipes in this book? Lusty Curried Peas, Vegetable Lo Mein, Buckwheat Noodles with Snow Peas, Herbed Wheat Berries, Barley and Blackeye Peas, Mozzarella Mashed Potato Pie, Mushroom Barley Soup, Potato Corn Chowder, Chocolate Chip Peanut Cake. All the recipes look easy to follow, are nicely seasoned, use fairly common ingredients – and many are interesting, even to non-vegetarians.

I choose to make “Swiss Cheese or Gruyère Pancakes”. Cheese goes right into the batter of these crepe-like pancakes. Atlas suggests serving them with “Summer Harvest Squash Saute” (butternut and summer squash and zucchini sauted in butter with wine, soy sauce and herbs), filled with steamed vegetables, or sauced with Onion and Garlic Sauce.

Gruyere Crepes recipeI plan to stuff them with steamed vegetables. I made a half recipe; since it is hard to “halve” an egg, I beat up two eggs, weighed the total, then used 3/4 of the amount (this translated to 75 grams of beaten egg.) The remaining egg went into scrambled eggs the next day.

These cook up like crepes, so that is what I am calling them in my version of this recipe, below.

Gruyere Crepes
makes about 6 crepes

  • 2 eggs, beaten, then remove 1/4 of the mixture for a later use
  • 3/4 cup milk
  • 1 tablespoon white wine
  • 1/4 cup flour
  • 2 tablespoons wheat germ
  • 1/4 teaspoon salt
  • 1/4 teaspoon paprika
  • 1/4 teaspoon mustard
  • 1 cup grated Gruyère cheese, firmly packed

Combine the eggs, milk and wine. Stir together the wheat germ, salt, paprika, and mustard, then add to the egg mixture. Stir in the cheese.

Heat a pan until a drop of batter or water sizzles when dropped on it. Turn the burner down to medium to medium-high because these crepes brown a bit easier than most due to the cheese in the batter. Add a little butter or non-stick spray, then pour about 1/4 cup of the batter into the pan and tilt the pan so the batter spreads. Cook until brown, then flip and briefly cook the other side. Continue until all the crepes have been cooked.

cheese crepesI served them with a medley of steamed vegetables. I would also love these wrapped around cooked, creamed or plain spinach.

filled cheese crepesI added cooked salmon to the meal to satisfy our non-vegetarian cravings. Later in the week I used one like a taco, filled with ham and tomatoes and lettuce. Delicious!

Vegetanaria is a keeper!

250 Cookbooks: Cooking of Vienna’s Empire

Cookbook #131: Cooking of Vienna’s Empire, Joseph Wechsberg and the Editors of Time-Life Books, Alexandria, Virginia, 1968, 1974, reprinted 1977. Foods of the World series.

Cooking of Vienna's Empire cookbookI looked forward to discovering another interesting author as I opened this cookbook, as I had discovered M. F. K. Fisher in the Cooking of Provinvial France and Emily Hahn in the Cooking of China. I wasn’t disappointed!

Joseph Wechsberg was born in Czechoslovakia in 1907. He took up the violin at age 7, studied music, and then law, worked as a musician on French ocean liners, played violin in Paris night clubs, was a reporter for a newspaper in Prague, and commanded a machine gun company on the Polish frontier. In 1938 he came to the US as a representative of the Czechoslovakian government; after the war broke out, he claimed assylum in the US and remained here until the 1970s. He passed away in Vienna in 1983.

Wechsberg worked at the New Yorker for decades, and contributed to numerous other magazines, including Gourmet Magazine. He was proficient in four languages, and authored many books of fiction and non-fiction. According to the Joseph Wechsberg website, he had some “raffish” occupations as a young man, and:

“He could scarcely have avoided becoming a reporter: he had an intense curiosity about how things worked and how people behaved; he was a natural absorber of sounds and sights and facts; he took nothing for granted; detail enchanted him. His private pleasures and his journalism largely overlapped.”

He had a love of good food. I can see that clearly as I read The Cooking of Vienna’s Empire. In chapter five, “The Influence of Czechoslovakia”, he writes of Marie, the cook in his family’s home: “She was born to cook as other people are born to write or paint. She was an instinctive cook. I never saw her read a cookbook, but her recipes had become part of her life, closely guarded from the curious and envious.”

Wechsberg’s Definition of a ‘Serious Eater’ (the New Yorker, 1949):

“My friends were ‘serious eaters’; they loved truly good food and scorned the snobbism of self-appointed ‘gourmets and one-dish amateur cooks. They didn’t consider themselves gourmets, but they would confide to each other, with the air of brokers divulging something hot in the market, the addresses of good restaurants.” (Aaron Mattis)

Happily, I have discovered another interesting culinary writer of the twentieth century. I plan to look up a few of his books. In the meantime, I am enjoy reading The Cooking of Vienna’s Empire. It is called a “coffee table book” (can’t help but think of Kramer of Seinfeld fame!). Alongside full page color photographs, Wechsberg describes the cooking of the Old Empire, Austria, Hungary, Czechoslovakia, and Yugoslavia (note the names/borders of these countries have changed). A whole chapter is devoted to the “Pastry Paradise”.

Searching for a recipe to cook for this blog, I know I would love to cook just about any recipe from this book – but they are pretty heavily laden with cream and butter and dumplings and sausages and . . . calories. Some recipes include fish or game that is not available here.

Then – “paprika” and “onions” and “lard” catch my eye:

“The foundation of modern Hungarian cooking is the use of lard, onions and paprika . . . Perhaps the most critical thing in Hungarian cooking, according to experienced cooks I have talked with, is the frying of onions. On this process depends the subtlety of color and flavor that lovers of such food expect. The onions are fried in lard – slowly and with great care. Paprika . . .  Hungarian cooking is famous for it – but it is nonsense to believe that any dish containing a handful of this strong red spice is good Hungarian food. Good cooks agreee that it should be used sparingly.”

I know that cooking and seasoning onions properly is the basis of a lot of dishes that I make, and I enjoy the process. I am interested in following this cookbook’s suggestions on preparing an onion-lard-paprika dish, so I choose to cook “Potato Paprika” for this blog.

Potatoes Paprika RecipeI made this pretty much as the recipe above.

Potato Paprika
serves 2-3

  • 1 1/2 pounds potatoes (I used russets but I suggest red or yukon potatoes)
  • 2 tablespoons lard
  • 1/2 cup finely chopped onions
  • 1 teaspoon finely chopped garlic
  • 1 tablespoon sweet Spanish or Hungarian paprika
  • 1 to 1 1/2 cups chicken or beef stock (or use water)
  • 1/8 teaspoon caraway seeds
  • 1 tomato, peeled, seeded and chopped
  • 1/2 of a green bellpepper, finely chopped
  • 1/2 teaspoon salt (or to taste)
  • pepper to taste

Boil the potatoes for about 10 minutes, then cool, peel, and cut into 1/4-inch slices. (They will not be totally cooked at this point.)

Heat the lard “until a light haze forms over it”, then add the onions and garlic. Cook over medium heat for 8-10 minutes, or until lightly colored. Off the heat, stir in the paprika. Stir until the onions are well coated. Return the pan to the heat, add 1 cup of stock (or water), and bring to a boil. Add the caraway seeds, potatoes, tomato, green pepper, salt, and a few grinds of black pepper. Simmer about 30 minutes, or until the potatoes are tender and the liquid evaporated. If the liquid evaporates before the potatoes are done, add more stock or water as necessary.

Here is my Potato Paprika, during the cooking. By the time I served this dish, most of the liquid had evaporated.

Potatoes PaprikaThese were good. To me, they had a hint of Middle Eastern flavors. I had a problem with my potatoes, since I chose big russets and the initial 10-minute cooking left them raw in the middle (as in, very hard). I had to cook my Potatoes Paprika a long time, almost an hour. I have changed my version of the recipe to reflect this suggestion.

Would I make these again? Yes. They are very flavorful and different from all my other recipes for potatoes. And I think they would be really good with sausages added, as the original recipe suggests.