Favorites: Pita Bread

Pita breads are easy to find in stores, but they can be thick or thin or have pockets or not. I like my pitas thin and with pockets. But store ones that are thin and have pockets usually fall apart when you fill them with a lot of stuff.

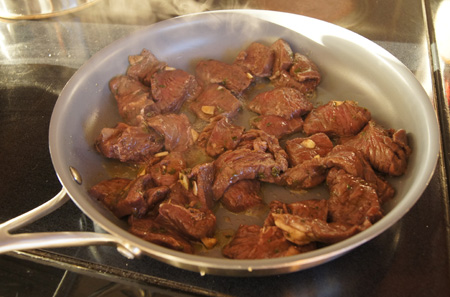
I recently made Beef Steak Pitas for this blog. The thick, pocket-less pita that I bought at a local Mediterranean market reminded me: I can make my own pitas!

Sometimes you just have to do it yourself to get it right. I made these last week and they turned out perfect. I enjoy the nutty taste and chewy texture that the whole wheat flour lends these breads. I like watching them puff up in the oven. I love taking out a hot one, cutting it in half, filling it with a slice of cheddar cheese, and ooh-ing and aah-ing at the experience.

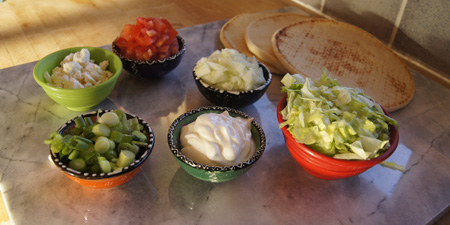
(I also like filling them with a lot of stuff. I also like that they store well, on the counter or in the freezer.)

In 1999, I wrote up my method for pita breads in my old blog (here is the history of that blog). Here is that post, along with my slightly updated recipe for pitas.

1999 post:

I was inspired to make these after a member of a news group I was reading, rec.food.baking, asked for suggestions as to how to get pita bread to bake with even crusts. No one else in the group was posting an answer, so I dug out my old recipe (it’s been at least 15 years since I tried these, back when I was baking with more whole grains than I do currently) and gave it a whirl. And yes, I did use a bread machine to do the dough, sorry, but I like the freedom it gives me, plus I’m busier than I used to be. The recipe works just as well if you do the kneading by hand, then let it rise until double, punch down and form the loaves.

I was amazed at how good they came out – nutty and chewy and utterly delightful. I get such a kick out of the way they puff up, but then I’m easily entertained. They make a great pocket for fillings, because they stay together much better than the store-bought cracker-like pitas. Most of these had even crusts top and bottom, though a couple were uneven: I have no explanation as to why, I thought I did them all the same. (Guess they were rebel pitas.)

Pita Breads
makes 10

  • 1 1/2 cups water
  • 1 teaspoon salt
  • 1/2 tablespoon sugar
  • 1 generous tablespoon olive oil (you can use any vegetable oil)
  • 2 1/4 cup all purpose flour
  • 2 tablespoons gluten flour (or regular flour)
  • 1 1/2 cups whole wheat flour (not white wheat flour)
  • 1/4 cup wheat germ
  • 2 tablespoons yeast

Mix in bread machine on the dough cycle, monitoring the dough after the first few minutes in the machine, adding a little more flour or water if necessary to keep a nice ball of dough. If you can, leave the dough a little bit wetter than you would for conventional loaves. When the cycle is complete, divide the dough into 10 pieces, knead each piece briefly, then roll each into a 6 inch circle. At this point, you may let them rise until puffy, about 20 minutes.

Put a heavy griddle on the bottom of your oven. If you have a gas oven, this really means on the BOTTOM; in an electric oven, you must use the lowest rack (take out the upper rack). Heat the oven and the grill to 425˚ for at least 15 minutes before you start baking the pitas. Place the loaves on the heated grill, a couple at a time, and bake for 6-8 minutes. They should puff up magically! If desired, you can then place them under the broiler to brown the tops.

Note: You can use a baking stone instead of a griddle.

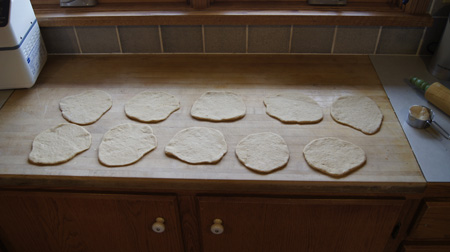
Here are my 10 little pitas, ready for the oven.

10 little pitasHere they are magically rising when I opened the oven to take a peek!

pitas rising
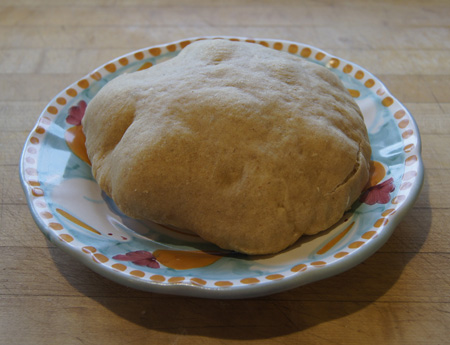
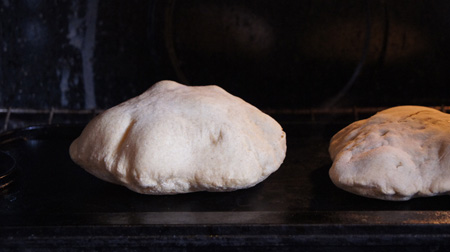
Here is one of the baked pitas. These actually kept their puffiness and I had to kind of squish them down before storing in plastic bags.

pita breadYum!

250 Cookbooks: Woman’s Day Encyclopedia of Cookery, Volume 5

Cookbook #104: Woman’s Day Encyclopedia of Cookery, Vol. 5, Fin-Gum. Woman’s Day, Fawcett Publications, NY, 1966.

Encyclopedia of Cookery Volume 5This is the fifth in a series of 12 food encyclopedia volumes. I discussed the first four volumes here: Volume 1, Volume 2,  Volume 3, and Volume 4.

“Finland is a land where the seasons and seasonal foods are savored. The winter is long, dark, and quiet, and people stay at home, with good music, and good books. . . . Finnish cookery is Scandinavian, but simpler and more austere.”

So begins Volume 5 of the Woman’s Day Encyclopedia of Cookery. Finnish cookery is followed by a complete section on fish, which includes great photos, a fish cook book, and forty fish sauces. James Beard contributed an article to this useful fish reference. Next comes flageolet (a small green bean), flake (a small, flat, thin loose piece of food which looks like a scale”), flan, flapjack, florentine (“a cooking method which uses spinach as its base), fluke (a fish), and flummery (a dessert). Fondue! Fondues are fun. They were very popular in the seventies and eighties, and we had beef fondue just a couple weeks ago.

Forks? In the 11th century, aristocrats used the fork more as a lark than as a method of serious eating. Frankfurters? An 8-page cookbook, including a photo of frankfurters swimming in a corn-cream sauce. The “Freeze” section includes basic rules for successful home freezing.

French cookery begins with a cute illustration and an article by James Beard. Fritters, frog’s legs (“if it is necessary to dress them, cut off the hind legs close to the body and wash them well in cold water – remove feet”). Fruits, including a good section on fruit tarts. Fudge, gallantine (boned cooked meat covered with aspic, as in “gallantine of eel”), game (bear chops, roast haunch of beaver, roast coot, Maryland muskrat, woodchuck in cream). Garnishes, German cookery, ginger, ginger beer, goulash, Greek cookery (especially, baklava), greens (kale is listed as a green to cook), guinea fowl (“the habits of guinea fowl are not always admirable, they are gregarious and polygamous, they make a lot of noise and lay their eggs in a casual and haphazard manner on the ground, they resist regimentation”), and lastly, gumdrop.

What to make for this blog? Hmmm. Under German cookery, my eyes fall on “kuchen”. Oh, that’s it! The word “kuchen” is a happy one for me. I always think first of a creamy and sweet noodle kuchen, full of eggs and cinnamon. In college a Jewish friend brought this kuchen to a party. After all these years, I still remember it with longing. (Today I can find sweet noodle kuchen recipes online, and yes, they are a traditional Jewish dish.)

The kuchen in the Encyclopedia of Cookery is not made with noodles, but I am trusting my favor with the word kuchen to draw me to a good recipe. According to this encyclopedia, kuchen means “cake” in German, and to “millions of Americans, kuchen, or coffeecake, is the basis for a typical Sunday morning breakfast. Kuchen dough is not too sweet or rich; it is rather the foil for luscious toppings.”

Here is the recipe from the book:

Kuchen RecipeThis kuchen dough recipe has eggs and butter, but not a whole lot of sugar. I agree with the Encyclopedia: it is neither too sweet nor rich.

I decide to cut the recipe in half, and I choose the apple topping variation. Then as I made the dough, I totally goofed. I read “yeast dough” and got it in my head that I would make this in my breadmaker. I had already thrown all the dough ingredients into my breadmaker before I realized my mistake. The dough was thin! Oops. I was supposed to scald the milk and use a mixer. What the heck, I’ll go for it, and see if it works. My breadmaker has a great dough cycle where it heats all the ingredients before beginning the kneading and rising cycles. Should work.

Apple Kuchen Coffeecake
makes one 9-inch cake

  • 5/8 cup milk
  • 1/4 cup melted butter
  • 1 egg yolk
  • 1/2 egg (I whisked one egg in a glass measuring cup and used half of it)
  • 2 tablespoons sugar
  • 1/2 teaspoon salt
  • 1 1/2 cups all purpose flour
  • a pinch of mace or cinnamon
  • grated rind of 1/4 lemon (approximate)
  • 1 1/2 teaspoons yeast

Add all of the ingredients to the bowl of a breadmaker. Set the cycle to “dough” with “pre-heat” and “rise”. This dough is runny: it will not form a big ball of dough.

(Non-breadmaker instructions: Heat the milk and cold butter until the butter melts, cool to lukewarm. Pour into a mixer bowl and add the rest of the ingredients. Beat for 5 minutes. Cover and let rise in a warm place for about an hour.)

Pour the dough into a buttered 9-inch cake pan. Let rise for about 30-45 minutes. (It should “double in bulk” but this is kind of hard to tell.)

Top with the topping:

  • 1 apple, peeled and thinly sliced
  • 3/8 cup sugar
  • 1 tablespoon flour
  • 1 teaspoon cinnamon
  • 1 tablespoon butter

Arrange the apple slices neatly on top of the risen dough.  Mix together the sugar, flour, and cinnamon and spread over the fruit.

Bake at 350˚ for 35 minutes.

Here is my kuchen after the second rising step, just before I put it in the oven:

kuchen unbakedAnd here it is, hot out of the oven:

Apple KuchenThis was delicious! It was good as-is, but if you like more apples on top, go for it. The original recipe says to leave the apples in quarter-apple chunks; this might be good too.

I took the above photo as soon as the kuchen came out of the oven. The real story is that as it cooled, it fell. And the falling made it even better: it had a creamy, eggy feel and sweet spicy flavor, reminding me of that noodle kuchen I had back in college.

Yum.

250 Cookbooks: Creme de Colorado Cookbook

Cookbook #103: Crème de Colorado Cookbook, The Junior League of Denver, 1987.

Creme de Colorado CBThis is one of my favorite cookbooks! I store it in my kitchen cabinet with other cookbooks that I use a lot (like my Joy of Cooking). I rely on it for the Denver Cheesecake that I make at Christmas. I love the Creamy Banana Coffee Cake, with bananas, cream cheese, spices, and pecans, baked in a bundt pan. It’s my reference for baklava. I have notes and scrap papers throughout this cookbook.

This cookbook is produced by the Junior League of Denver. To date, they have produced five Colorado cookbooks, and the Crème de Colorado is the second in the series. Beautiful color photos of Colorado landscapes grace the introductory pages of this full-sized hardcover cookbook. John Fielder is the photographer. You can check out his photography on his web page. He used to produce yearly calendars of Rocky Mountain National Park – I bought them every year – but those have been discontinued.

The Crème de Colorado Cookbook is a from-scratch cookbook, with a wide variety of good recipes. Many recipes tend to be high in calories. Butter, cream, and cheese are common ingredients. I use this cookbook more at holiday times than in every day cooking. But looking at the recipes today, I find many that I want to try that either are calorie-appropriate or could easily be made so with a few changes.

I decide to make “Scallop Crepes” for this blog. This recipe intrigues me because of the way the scallops are prepared. Briefly, the scallops are put in a hot stock for a few minutes and then removed. Thus, the scallops do not get overcooked but all of their juices are released into the stock. I have this big bag of scallops in the freezer that I bought on sale, and I have tried cooking scallops from this bag without success: I fried them, and they leaked liquid into the pan and got very tough. I am curious to try the method in Crème de Colorado to see if I can preserve the texture (and flavor) of these scallops.

Scallop Crepes recipeThe above recipe calls for whipping cream, and I’ll substitute it with milk to save calories. I want to serve these as small, appetizer-sized crepes, so I will make the crepes smaller. I will halve all amounts to serve three instead of six. Other than that, I plan to pretty much follow this recipe.

Scallop Crepes
serves 3 as a main dish, 4-6 as an appetizer

Crepes

  • 1/2 cup water
  • 1/2 cup milk
  • 2 eggs
  • 1/4 teaspoon salt
  • 1 cup flour
  • 2 tablespoons melted butter (optional, leave out for fewer calories)

Combine all crepe ingredients in a blender and mix well. Let stand an hour or so. Make 3-inch crepes in your favorite way. My way is this: I have a dedicated (old) crepe pan, I heat it to very hot, spray with non-stick spray, and immediately pour a small amount of batter onto the pan and roll the pan to distribute the batter. I cook both sides of the crepe about 15 seconds.) Crepes can be made ahead and extras can be stored in the refrigerator for a later dinner (or breakfast!).

Stock, scallops, and mushrooms

  • 3/4 cup chicken stock
  • 3/4 cup white wine
  • 2 green onions, cut roughly
  • 1 or 2 stalks celery, cut roughly
  • 1 bay leaf
  • whole peppercorns (about 5)
  • 1 pound bay scallops
  • 1/3 pound mushrooms, sliced

Combine the chicken stock, wine, green onions, celery, bay leaf, and peppercorns and heat to boiling. Simmer for 10-20 minutes, then pour through a strainer to remove the vegetables. Put the stock back into the pan and add the scallops and mushrooms and simmer 5 minutes (no longer!). Remove the scallops and mushrooms, either by straining or using a slotted spoon. Reserve the scallops and mushrooms. Boil the stock to reduce the volume to about 1/2 cup.

The sauce and filling

  • 2 tablespoons melted butter
  • 2 1/2 tablespoons flour
  • 5/8 cup milk (1/2 cup plus 1 tablespoon)
  • 1/2 cup reduced stock from the previous step
  • 1 egg yolk, lightly beaten
  • 1 teaspoon fresh lemon juice
  • salt to taste (about 1/4 teaspoon)
  • 1/2 cup shredded Swiss cheese

Melt the butter and stir in the flour. Stir for a minute or two, then stir in milk and reduced stock, cooking until bubbly. Keep stirring until smooth and a little thick.

Beat the egg yolk with a couple tablespoons of the milk, then beat in a spoonful of the hot sauce. Stir the egg yolk mixture into the hot sauce and heat until bubbly and thick. Remove from heat. Add lemon juice and salt.

Add a little over half of the sauce to the cooked scallops and mushrooms, along with half of the Swiss cheese. Gently mix, then fill the crepes and roll to enclose. Place the crepes in a lightly buttered or non-stick-sprayed pan. Cover with the remaining sauce and sprinkle with the remaining cheese. Bake uncovered at 425˚ for 10 minutes.

These were good! I added a bit more lemon juice to the sauce (and incorporated that change in my version of the recipe, above). I especially like these as appetizers, rather than a full meal, but that’s just my preference.

Scallop Crepes

250 Cookbooks: All-Time Favorite Beef Recipes

Cookbook #102: All-Time Favorite Beef Recipes, Better Homes and Gardens, Meredith Corporation, Des Moines, Iowa, 1977 (18th printing, 1983).

AllTimeFavoriteBeefRecCBMore ways to cook beef! Guess you know that I am not a vegetarian. I acquired this book in the mid-eighties, and it is a good example of American cookbooks of that decade. The contents include recipes for roast beef, pot roasts, steaks (expensive and less-expensive), meat loaves and meatballs, hamburger recipes, soups and stews, leftover roast beef, and variety meats.

I find it refreshing to open this (dated) cookbook and not be barraged with brand-name ingredients, nor to see packaged mixes as ingredients. Plain fare mostly, not terribly inspiring but some good comfort food recipes.

Paging through this book, I re-discover a recipe I’ve always liked for “Italian Bracioli” – round steak stuffed with onions and rolled up and baked in a tomato sauce. When I was a working mom, I relied on this type of recipe, since I could cook it on a Sunday and heat it up on a weekday. I also tried (and liked) the Spinach-Stuffed Flank Steak and the Oven Swiss Steak. So, I’ll keep this cookbook.

I decide to make “Greek-Style Sandwiches” for this blog. It calls for pita bread, which means I have an excuse to go to the Mediterranean Market on Bluff in Boulder, always an interesting trip (I love exploring shelves of foreign cuisine products).

Greek-Style SandwichesThe above recipe is (in my opinion) an “Americanization” of Greek cooking, so I am calling my version “Beef Steak Pitas”. Most Mediterranean cooking calls for lamb, fish, or chicken rather than beef, and yogurt instead of the sour cream dip with chives. I kept the beef, but I substituted plain yogurt for the sour cream dip, added green onions, and added feta cheese.

Pita breads vary widely. I bought Greek pitas from the Mediterranean store: they were huge and tasty but they did not have pockets. We found we could fold them carefully over the filling like a taco, but it was almost easier to eat them with a fork. Next time I’ll look for pita breads that have pockets. Or, make my own.

Beef Steak Pitas
serves 3-4

  • 1 pound sirloin steak
  • 1/2 cup red wine
  • 2 tablespoons olive oil
  • 1/2 teaspoon dry oregano (or use 1 tablespoon fresh oregano)
  • salt and pepper to taste
  • 1 1/2 cups chopped lettuce
  • 1 chopped tomato
  • 2 green onions, chopped
  • 1/2 of a cucumber, peeled, seeded, and diced
  • 1/2 cup crumbled feta cheese
  • 1/2 cup plain yogurt
  • pita breads

Slice the steak crosswise into thin strips, and then shorten the strips to about 1-inch pieces. Combine the wine, olive oil, oregano, and salt and pepper; add the meat, cover, and marinade up to 24 hours.

Drain the meat well, then fry in a hot pan for about 5 minutes. Meanwhile, ready the garnishes: lettuce, tomato, green onions, cucumber, feta cheese, and yogurt. (The amounts of these are approximate; add them to your personal tastes. A few hot peppers would be good on these too.)

If your pita is thick, microwave for a few seconds and place the meat and toppings on it and serve it like a taco. If your pita breads have good pockets, slice each pita in half and open each pocket and fill with the meat and garnishes.

meat for beef pitasI first sliced the meat into quarter-inch wide/two-inch long pieces before marinating, as directed in the original recipe (and as seen in the above photo). On tasting the cooked meat, I found it too chewy, so I chopped the meat into smaller pieces before serving. Next time I make these I’ll cut the steak into smaller pieces before marinating – I incorporated this change in my version of the recipe.

Beef PitasThese are very tasty, albeit a bit unwieldy with the thick pitas. The meat really has a great flavor, and they look so pretty on the plate with all the garnishes. I’ll make them again!