Flours and yeast

Aside

On this page:

Gluten flour


Vital wheat gluten, or what I usually call simply “gluten flour”, is a product made from the protein found in wheat. It improves yeast loaves by adding elasticity to the dough and bulk to the loaves. It looks like flour and is sold by companies like Arrowhead Mills, Bob’s Red Mill, and King Arthur Flour. Currently (2012), I find it in the bulk section of Safeway but not at Whole Foods. I found this bag at our local natural grocery store, Steamboat Mountain, in Lyons, Colorado. This great small store is packed with a great variety of natural foods.
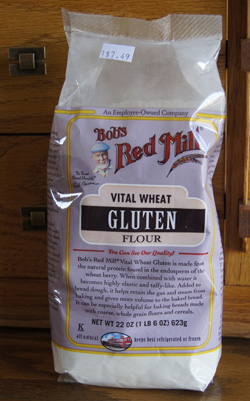
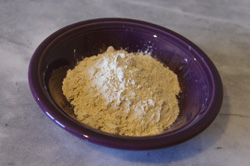
wheat gluten packageIf you are using white flour sold as “bread flour”, it will already have a high gluten content and you do not need to use wheat gluten in a recipe. But if you are using whole grain flour, I strongly suggest adding gluten flour to the loaf. I’ve mixed some wheat gluten in all of my yeast loaves since the 1970s. Back then, I could not find unbleached bread flour, so I used unbleached all-purpose flour and substituted some of the flour with vital wheat gluten. Today I include a third of a cup of wheat gluten per standard loaf of any yeast bread. It looks like any type of white flour, but it sure adds a lot to a loaf.
gluten flour

If you have never kneaded a loaf of bread, I suggest you start with making a loaf from vital wheat gluten. It quickly forms a springy and elastic dough! The loaf bakes up pretty bland, but it’s good kneading practice. It’s like doing a laboratory experiment. And the result is low-carb/high-protein.

Gluten Bread

From Beard on Bread.

  • 1 pkg yeast
  • 1 cup plus 2 tablespoons warm water
  • 2 1/3 cups vital wheat gluten
  • 1/2 teaspoon salt

Dissolve the yeast in the 2 tablespoons warm water. When it starts to bubble (“proof”), combine it with the additional cup of water. Stir in the flour and salt and knead thoroughly for 10-15 minutes. Roll the dough out and form into a loaf. Place in a greased or buttered 8x4x2-inch loaf pan and allow it to rise until doubled in bulk. This is a great low-carb/high protein bread. If you make 10 slices from a loaf, each slice has 110 calories, 20 g protein/slice, 6 g carb/slice. The recipe for gluten bred is below.

Bake at 350˚ for 50-60 minutes, until the loaf is nicely browned. Cool before slicing.

White whole wheat flour

White whole wheat flour is a product offered by King Arthur Flours. I’m not sure any other company sells this particular type of whole wheat flour. They claim that it is 100% whole wheat, just a different variety of wheat that is lighter in color and flavor than traditional whole wheat. I have found that it bakes up into a great, light-textured wheat loaf, even if you use it as the sole source of flour in the recipe (including the 1/3 cup gluten flour, of course).
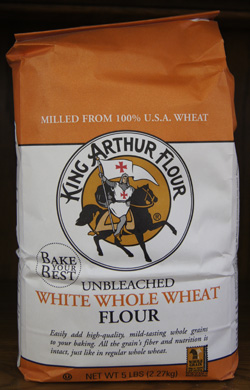
white whole wheat flourIn general, whole grains make a loaf of yeast bread heavy and dense. The “whole” little grains are sharp particles that cut into and burst the bubbles that yeast forms in a rising loaf of bread. White whole wheat flour is great in that it doesn’t seem to pop as many of the bubbles as traditional whole wheat flour, thus lending to a light loaf of bread.

Yeast


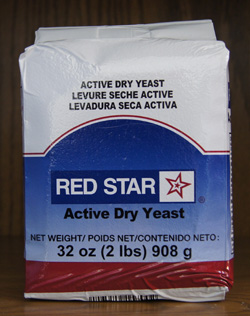
It is important that you know how your yeast will work in a recipe. This is especially important if you use a bread machine to knead and bake your loaves—something I rarely do, but still, I like to know my yeast. In my opinion, it’s best to buy a large quantity of yeast and “get to know it”. That is one reason not to purchase yeast in those little packets.

Another reason for me not to buy yeast in packets cost. I use a lot of yeast, and those packets get pretty pricey. Even by the jar, yeast is expensive. Over the years, the price kept creeping up, then one day I discovered that they sold yeast in one pound packages. I heard from someone that you could freeze yeast. So now, I buy a large package, put some in a small jar that I keep in the refrigerator, then I store the rest in a ziplock-type bag in the freezer. There came a time when I could no longer find the large packages in my local stores, so now I purchase 2-pound packages online for about $10.
yeast

Note: Each packet of yeast is about 2 1/2 teaspoons, or a little under a tablespoon.

Favorites: Tortilla Flat breads

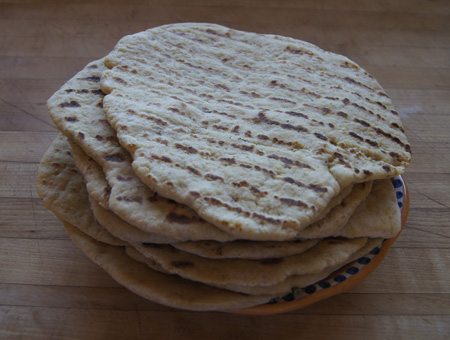
tortilla flat breads

Several years ago I ran across an interesting recipe in a King Arthur Flour catalog for yeast-dough tortillas. At the time, I had just taken a class in Middle Eastern cooking where I had learned a great way to make flat bread pizzas by cooking them on an indoor grill pan. The King Arthur recipe could be adapted to grill pan cooking, I thought. I just had to try it!

Now, a little bit about King Arthur Flour. This is a company that specializes in ingredients for baking. I learned about them through a “user group” in the late 90s. User groups preceded listserves and I guess, now, Facebook as a way of people with like interests to share ideas. Anyway, the consensus at that time was that King Arthur flours are the best for baking. I ordered them through the catalog, liked them, and eventually found that this brand of flour is sold at Whole Foods and now even Safeway. Today I only buy this brand of flour.

There are drawbacks to King Arthur flour recipes, though. This a company that sells baking ingredients (and related cookware), so their recipes often have a long list of different types of flours. They are, after all, trying to sell their products. I can forgive them for that. The take-home lesson is: Substitute when necessary. Feel free to use all-purpose flour for any of the specialized flours called for in a recipe.

Some of the specialized King Arthur flours or ingredients I have tried and now keep on hand. For instance, I like their “Hi-maize® Natural Fiber” because it adds fiber and lightness to loaves. In the recipe below, free to substitute it with all-purpose flour. I am a huge fan of gluten flour, but you can use all-purpose flour. I also have their Salsa Seasoning.

Cooked on a grill pan, these tortilla flat breads come out thick, unlike any tortillas that you find in stores. They are more like pita or naan bread. But the mixture of cornmeal, all purpose and whole grain flours, dry milk, and seasoning make these into a sensory sensation. They do take a bit of time to prepare, but if you are cooking for two you will have extras to freeze away, or if you have company you could make them ahead of time.

I usually serve them topped with beans and taco meat and cheese, popped into the microwave for a minute. Then lettuce and tomatoes and salsa. You can pick them up like a little pizza, or roll them like a taco, but they are soft so they are also cut-able with a fork.

This recipe makes 10 flat breads. They freeze wonderfully, and you can pull out a few for a very quick and impressive meal.

Tortilla Flat breads

This recipe is based heavily on the King Arthur Flour recipe for tortillas. I’ve written this for the bread machine; if you don’t have one, refer to the original recipe for kneading and rising instructions.

  • 1/2 cup cornmeal
  • 1 1/2 cups boiling water
  • 1 1/2 cups all-purpose or white whole wheat flour (or a mixture)
  • 1/2 cup barley flour or oat flour (I rarely keep oat flour around, so I process oatmeal in the food processor and measure a half cup)
  • 1/2 cup Hi-maize® Natural Fiber (from King Arthur Flour)
  • 2 tablespoons vital wheat gluten (I swear by this, but use all-purpose if you have to)
  • 2 tablespoons vegetable oil
  • 1/3 cup dry milk
  • 3/4 teaspoon salt
  • 1 1/2 teaspoons yeast
  • 1 1/2 teaspoons salsa seasoning, optional (from King Arthur Flour)

A good substitute for the salsa seasoning:

  • 1 teaspoon oregano (preferably Mexican oregano)
  • 1/2 teaspoon basil
  • 1/4 teaspoon chili powder
  • a few shakes of garlic and onion powders, maybe a few shakes of cumin

Place the cornmeal in the bucket of a bread machine. Pour the boiling water over it and stir a little. Let it cool for about 10 minutes.

Add the remaining ingredients and set the bread machine to the dough cycle (this should include both kneading and rising). Peek a few times as the bread is kneaded, and add a little flour if it is too sticky (looks wet), or a little water if it is too dry (if it is just a bunch of unconnected bread clumps). The dough should become elastic, but stay quite soft.

When the bread machine cycle is finished, take the dough out onto a floured bread board. Divide it into 10 balls.

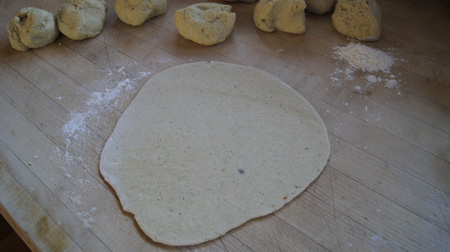
Heat a grill pan to medium-high heat. While it heats, start rolling the balls of dough into rough circles about 7-8″ in diameter. I usually start cooking the tortillas as soon as I have a couple rolled, then work rolling and cooking at the same time. If you want to roll them all out before you start cooking, you should cover the rolled ones to keep them from drying out.

roll out the tortillas

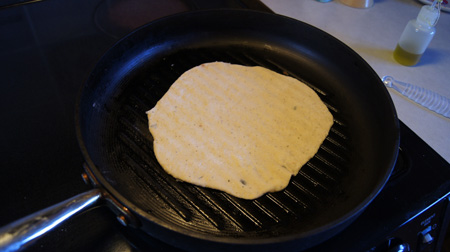
Your grill pan is ready when you hold your palm an inch above its surface and feel the heat coming off it. Don’t heat it until it smokes. Drop a little oil on the surface (I prefer olive oil) and brush it across the surface. Then put a tortilla on it and let the first side cook about a minute. The first side is done when you peek and see nice grill marks.

cooking the first side of the tortillaFlip the tortilla and cook the other side. Note the great grill marks!
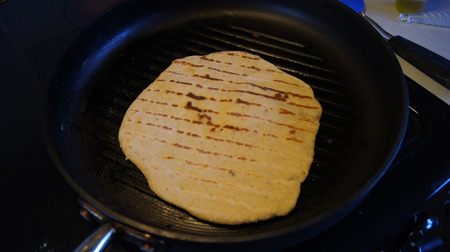
cooking the second sideContinue rolling and cooking until all the tortillas are cooked.
Used these topped with beans, spicy meats, cheese, lettuce, and salsa, like a tostada. Or wherever your imagination takes you!

250 Cookbooks: The Complete Oriental Cookbook

Cookbook #6: The Complete Oriental Cookbook. Edited by Isabel Moore and Jonnie Godfrey. Published by Marshall Cavendish Books Limited, London, 1979.

Complete Oriental Cookbook

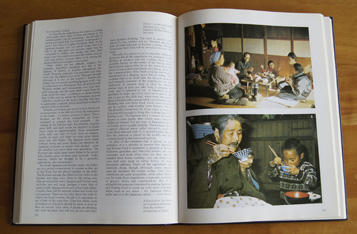
This is a large book with full page photos of many of the dishes. The cuisines of China, India, Japan, and Southeast Asia are each presented first with several pages of introduction, and then with many recipes. Since I threw away the book cover and thus the book looks pretty plain, I’ll share one of the pretty inside photos:

Complete Oriental Cooking

I think that this book was a gift to me, since I had an interest in Chinese cooking in the 1970s and some long-lost friend thought I would like it. I don’t think I tried a single recipe from this book in all these years! No recipes are dirty or written on, no scraps of paper mark any pages. Going through the book now, I can see why. The pictures are pretty, but the recipes don’t perk my interest. It’s like the editors gathered recipes, but never actually tried them.

This is a “coffee table book” and I think I’ll let someone else put it on their coffee table!

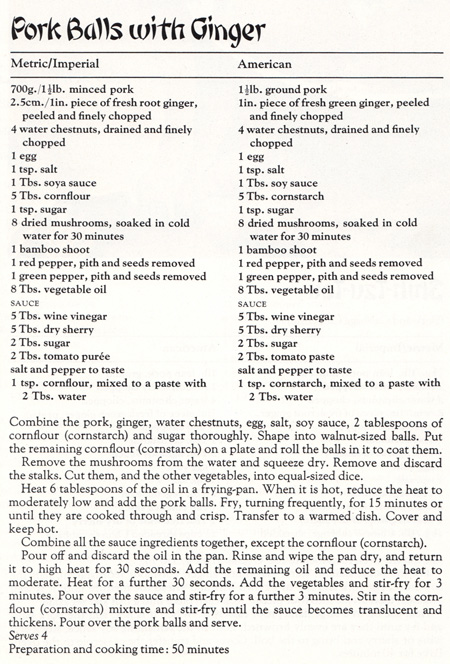
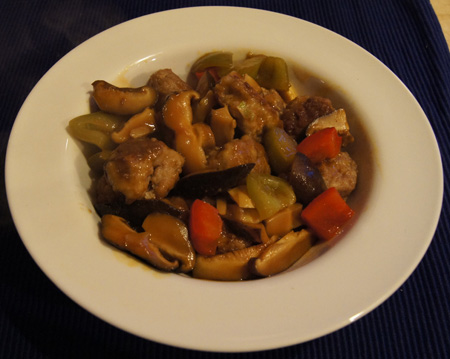
For the sake of this blog, I picked the following recipe titled “Pork Balls with Ginger”. I love meat balls, and especially pork meat balls made from well-raised pork. The water chestnuts and fresh ginger in the meatballs should perk up the texture and taste, and rolling the meatballs in cornstarch before frying should make them nice and crispy.

Recipe: Pork Balls with Ginger
2 stars


The recipe from this book is just too darned long to type into this blog. Plus you will note from my rating that it wasn’t that good and I don’t plan to make it again. So I scanned in the page. In fact, I might start doing this more often!Pork Balls with Ginger

What’s wrong with this recipe? The sauce and the vegetables. The sauce had too much sherry and when I tasted it before serving, it was yucky. To make it palatable (we needed to be able to eat the meal!) I poured some of the sauce down the drain and diluted it with soy sauce and water. I should have used fresh shitaki mushrooms — I used some dried ones that I found at the Asian Seafood Market and they tasted terrible. For the “bamboo shoot”, I found a can of whole bamboo shoots at the same market. I tried this because the sliced bamboo shoots that stores carry are pretty tasteless. The whole ones had more flavor, but still didn’t taste good. (They looked interesting, though.) Fresh vegetables are so much better, and I suggest substituting celery or carrots for canned bamboo shoots.Pork Balls with Ginger

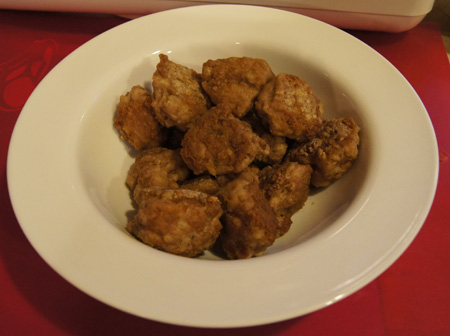
The pork meatballs were very good, though. Here is a recipe for enough meatballs for two people. When I make them again, I’ll use the Sweet and Sour Sauce from my own tried-and-true repertoire.

Pork Balls with Sweet and Sour Sauce
4 stars

(serves 2)

  • 3/4 pound ground pork, preferably from a store like Whole Foods
  • 1 tablespoon fresh ginger, chopped into fine dice
  • 1 1/2 tablespoons canned water chestnuts, chopped into fine dice
  • half of a whisked egg, or use 1 egg white
  • 1 tablespoon soy sauce
  • 1/4 teaspoon salt (optional)
  • 1/2 teaspoon sugar
  • 1 tablespoon cornstarch
  • Sweet and Sour Sauce (see below)

Combine all the above ingredients and make meatballs about the size of an in-shell walnut. Heat a non-stick pan and put maybe a quarter cup of oil into it. (That’s kind of a lot of calories, but you want the meatballs crispy, and when you are done frying, the oil is left in the pan.) Once the oil is hot, set the temperature at about medium to medium-high.

Put a couple tablespoons of cornstarch on a dish. Roll each meatball in the cornstarch, then add to the hot pan. Fry the meatballs for about 15 minutes, turning frequently. You want them “cooked through and crisp”. Remove with a slotted spoon to paper towels.

Pork Balls with Ginger

Sweet and Sour Sauce
(serves 2)

Here’s a sweet and sour sauce that I use a lot, albeit usually with a chicken dish. I’m sure it would work great with the Pork Balls with Ginger.

  • 3 tablespoons red wine vinegar
  • 1 small can pineapple chunks in juice, drain and save the juice
  • 3 tablespoons sugar
  • 1 1/2 tablespoons ketchup
  • 1 tablespoon cornstarch
  • vegetable oil
  • 1/4 of an onion, cut into largish chunks
  • red and/or green bell pepper chunks, to taste
  • (any other fresh veggie you like!)
  • 2 cloves minced garlic
  • 1/2 tablespoon grated fresh ginger

Whisk vinegar, reserved pineapple juice, sugar, ketchup, and cornstarch in bowl.

Wipe the oil from the pan that you used to cook the pork balls (or use a different pan). Add a little oil and the vegetables cook until softened, 4 to 6 minutes. Add pineapple chunks, garlic, and ginger and cook until fragrant, about 1 minute. Add vinegar mixture  and simmer until sauce is thickened, about 2 minutes. Serve over the hot Pork Balls with Ginger.

250 Cookbooks: Beard on Bread

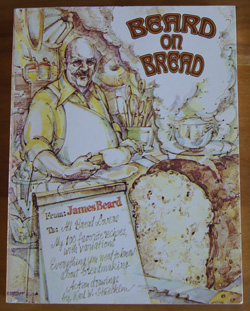
Cookbook #5: Beard on Bread, James Beard, 1974. Published by Alfred A. Knopf, NY.

Beard on Bread

I pulled this book off the shelf and happily tucked into it. Bread is my passion. I have baked at least a loaf a week for twenty-five years. My bread-making techniques have changed over the years, and I have learned from both successes and failures. I am still learning, and am always willing to try something new. But when I try a new yeast bread recipe from one of my 250 Cookbooks, I will not follow the recipe exactly as printed in the book. Instead I will incorporate my hard-earned bread-making knowledge.

Let me explain. First, I include “gluten flour” in all my loaves. This is a high-protein flour that gives a loaf its stretchiness as you knead it, and that gives a cooked loaf the structure to stay together rather than crumble apart. Gluten flour helps tremendously when you want to include whole grain flours in a recipe.

Second, I use a bread machine set on the “dough” cycle to knead my breads and take them through the first rise step. The machine does a great job of kneading, and I can go off and do other things. Maybe this is “cheating” in some people’s opinions, but in my years as a working mom, the bread just wouldn’t have been made if not for the bread machine. And the machine keeps the temperature perfect for the rising step, so I’ll know exactly when to come back and get the loaf ready to bake in my oven.

Reading James Beard’s introduction, I don’t think he would pooh-pooh bread machines (he wrote it before home bread machines were available). For instance, he writes that using a mixer with a dough hook is okay. I heartily agree with Beard’s love of bread: “Good bread is the most fundamentally satisfying of all foods; and good bread with fresh butter, the greatest of feasts.” He enjoys “. . . the sensual pleasure in smelling a yeasty loaf baking in the oven, the sense of accomplishment in offering a real bread at a meal – to say nothing of the knowledge that each loaf is full of goodness instead of being just a starchy filler.” He writes that including multiple flours and meals just to make a bread more nutritious fails if you end up with a loaf that has a terrible texture. I agree with this too.

I enjoyed re-reading his discussions of flours, kneading, and baking methods. Beard on Bread was one of the books I studied as I developed my own yeast bread techniques in the 70s and 80s. Making bread is an ancient art and most of his information is timeless.

The recipes in Beard on Bread begin with a basic white bread with his observations and notes. If you have never made a yeast bread from scratch, you could learn how to make bread from this book alone. I scanned this book cover-to-cover, lingering on many recipes. I like his historical notes on each type of bread. I noted about ten recipes for my own personal “to try” list. I was pleasantly surprised to find a section of quick breads; I had never thought to look in this book for that type of recipe. This book is a keeper!

I decided to make Sourdough Rye bread. It’s a little “out there” from my usual style of bread, so I might learn something. I’ve made sourdough bread in the past, from home-passed or purchased starter, but it’s kind of hard to keep a sourdough starter fed and growing, and eventually I always forget them and they dry up and die. This recipe calls for a simple starter that you begin from ingredients on hand 4 days before you make the bread. I can manage that – and it should be enough to add a touch of sourness to the bread. I also like the good proportion of rye flour in the recipe, and I like the addition of poppy as well as caraway seeds.

Recipe: Sourdough Rye
five stars


“This sourdough rye appeared in the columns of The New York Times several years ago. I tried it, made some changes in it, and discovered that it was one of the best recipes I have ever used. The bread has a nice crumb, slices well, and keeps extremely well. I enjoy it for sandwiches and find that, thinly sliced and well buttered, it’s delicious served with smoked fish and oysters or other shellfish.” [James Beard’s note.]

My note: The recipe below is for half the original recipe: it makes one loaf instead of two. Other changes from the original are the inclusion of gluten flour and the use of a bread machine.

  • 1 package active dry yeast (1 tablespoon)
  • 1 1/2 cups plus 1/4 cup warm water
  • 3 cups all-purpose flour, approximately
  • 1 cup rye flour
  • 1/3 cup vital wheat gluten
  • 1 teaspoon salt
  • 1 1/2 teaspoons caraway seeds
  • 3/4 teaspoon poppy seeds
  • 1 tablespoon melted butter
  • 1 1/2 tablespoon sugar
  • Cornmeal
  • 1 egg, lightly beaten with 1 tablespoon water

Four days ahead of breadmaking, prepare the “starter”. Combine 1 1/2 teaspoon yeast, 1 cup warm water, and 1 cup all-purpose flour in a plastic bowl or container. Cover tightly and let stand at room temperature for 2 days.

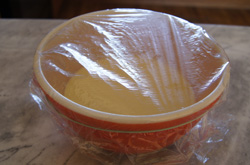
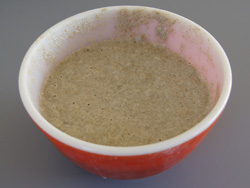
Note: I put it in a bowl and covered it with plastic wrap like this:

sourdough rye starter

After the 2 days at room temperature, put the starter in the refrigerator for at least another day.

The day before preparing the dough, combine 1/2 cup of starter, the rye flour, and 1 cup warm water in a bowl. Cover with plastic wrap and let stand at room temperature overnight. (Note: You will have more starter than you need for this recipe. If you want to keep it going, replenish with equal parts of warm water and flour, let stand again at room temperature, and then refrigerate. Continue the process each time you use some of it.)

Here’s how it looked the next day, just before I stirred it down:

sourdough rye overnight

The next day stir down the dough, then put it in a bread machine* and add rest of the yeast (1 1/2 teaspoons), dissolved in 2 tablespoons water, salt, caraway seeds, poppy seeds, butter, and sugar. Add 1/3 cup vital wheat gluten and 1/2 cup all-purpose flour. Set the bread machine to the “dough” cycle. Watch it as it kneads and add more all-purpose flour as necessary to keep the dough from being too sticky. You want it to form a nice, round ball of dough. I added enough flour so that it was still “tacky” feeling but not “sticky”. Leave the dough in the bread machine through the rise cycle.

*Hand kneading directions: Add the flour a little at a time, to make a stiff but workable dough. Knead for 10 to 12 minutes, then shape into a ball. Place in a buttered bwol, turning to coat the dough with the butter. Cover and let rise in a warm, draft-free place until doubled in bulk, about 2 hours.

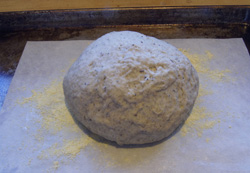
Take the risen dough out of the bread machine (or bowl, if you hand kneaded) and punch it down. Shape into a round loaf and place on a buttered baking sheet generously sprinkled with cornmeal.

formed loaf

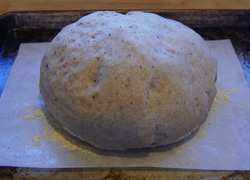
Cover and let rise again until doubled in bulk, about 1 hour (mine rose in 30 minutes in a 73˚ kitchen).

Here’s the risen loaf. You can see how much bigger it is compared to the last picture (above).risen loafBrush with the egg wash, and bake in a preheated 375˚ oven for 30 minutes, or until lightly browned and the loaves sound hollow when rapped with the knuckles. Cool, covered with towels to prevent the crust from hardening.
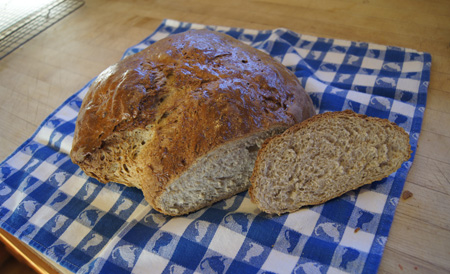
Here’s the baked loaf. I wish you could smell it too!

baked loaf

Next time I’ll be a little more careful when I form the loaf, you can see that it did not bake perfectly round. If I had been more careful, I would have had a prettier picture! Plus I cut the loaf when it was still kind of hot. But let me tell you, it tasted wonderful. We had it with a good homemade beef barley soup, and slices of cheese that melted into the warm bread.

Classic favorites: Angel Squares

My mother made these for us when we were kids and I loved them. This is one of the fifty or so very special recipes that I took with me when I moved out on my own.

I’m not sure I made these myself, ever. I’ve thought about them, and looked at the recipe card in my recipe file box. But on close inspection, I made several crucial typos, so I doubt I’ve made them.

Then I ran across the very original of the recipe in one of my 250 cookbooks (1964 Pillsbury’s Bake-Off). It is noted with my mother’s “Good” written next to it. I think it’s time to make them again!

The recipe below has two options for serving: the original, and an updated, lighter option. For us, I’ll make the light version. But I guarantee that the original recipe is very, very good!

Recipe: Angel Squares
three and a half stars

You can bake a half-recipe in an 8″x8″ pan for 35 minutes. Use 4 egg whites in a half-recipe.

Stir together:

  • 2 cups flour
  • 2 cups sugar
  • 2 teaspoons baking powder
  • 1 teaspoon salt

Blend in:

  • 1 cup hot milk (hot milk helps dissolve the sugar faster)
  • 1 teaspoon vanilla

Beat 2 minutes at medium speed (or 300 strokes with a spoon).

Beat:

  • 7 egg whites (1 cup)
  • 1/2 teaspoon cream of tarter

Beat until soft peaks form. Fold into batter, gently but thoroughly.

Turn into 13″x9″ inch pan, greased and floured on bottom. (I lined the bottom of the pan with parchment, sprayed with Pam, and dusted with flour.)

Bake for 35-40 minutes, until cake springs back when touched lightly in center. Cool.

Two options for serving:

Original: Cut the cake into 3×2-inch rectangles. Frost top and sides. Roll in 1 1/2 to 2 cups cashews or salted peanuts, finely chopped. (Peanuts were what my mother used.) Drizzle with chocolate glaze.

  • Butter frosting: In mixer, beat 1/4 cup butter, about 4 cups powdered sugar (1 pound), and 1 teaspoon vanilla. Blend in 5-6 tablespoons milk until spreadable. Add more powdered sugar if you get it too thin.
  • Chocolate glaze: Melt 2 5¢ Nestle’s Milk Chocolate Candy Bars, 2 tablespoons milk and 1 tablespoon butter over hot water. (I have no idea how big a 5¢ chocolate bar is compared to today’s chocolate bars. Sorry.)

Light version: Cut the cake into serving-size portions, and split in half through the middle. Top with softened frozen yogurt and fruit (such as sliced strawberries or peaches, or blueberries). Drizzle with a tiny bit of your favorite chocolate sauce if you want. Or use fruit and lite frozen topping (like Cool Whip). One-eighth of an 8″x8″ cake has about 200 calories and essentially no fat.

Recipe Comments

This is good for a non-fat cake. It tastes, predictably, quite sweet. I remember it as being a lighter, fluffier cake. That may be because I didn’t make any adjustments for high-altitude (we live at 5000 feet), or it may just be that I remember wrong. We had it both with strawberries and the next night, with sliced bananas and chocolate. Great!

250 Cookbooks: Bake-Off Recipes 1964

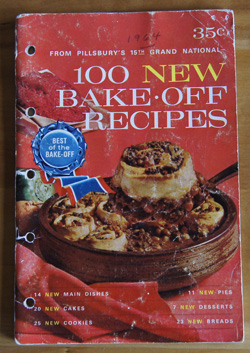
Cookbook #4: 100 New Bake-Off Recipes, from Pillsbury’s 15th Grand National. From Pillsbury, 1964.

Bake Off 1964

Now we come to one of the cookbooks that I treasure. This small cookbook/booklet was my mother’s, and has her notes written on many pages. The booklet is falling apart and food-stained. I turn the pages carefully. Look at the cover: it cost 35¢! I had to search to find the keyboard symbol for this almost-outdated money distinction. Cents!

A lot of my cookbooks were produced by Pillsbury’s. A quick search of my database tells me that they make up almost 10 percent of my collection. Most of these Pillsbury cookbooks are these small “Bake-Off” booklets that both I and my Mother collected. Every year home cooks were encouraged to send their favorite Pillsbury flour recipe to the contest, then the finalists gathered to cook and present their dishes. (In 1964, the Grand Prize of $25,000 was presented at an Awards Luncheon at the Beverly Hilton Hotel, announced by Art Linkletter and presented by Mrs. Edmund G. Brown, wife of California’s governor at the time.) Flour is in every recipe in this 1964 Bake Off booklet, and thus most are desserts.

What recipe shall I make from this treasure? My dilemma in finding recipes in this and a lot of my cookbooks will be one of calories: I usually forbid myself from baking sweets or cooking with large amounts of oil or butter. And my mother’s forte was sweets, from pies to cakes to cookies. She was the best baker I’ve ever known. Her main dishes were often casseroles, and those did not skimp on butter either. And somehow she managed to keep her weight down in spite of her liberal use of sugar and butter. But not me. I decided in my twenties that I would have to direct my baking to yeast breads, and my main dish recipes to low-fat options. (And that I would have to take up an exercise program so I could eat even that type of food.)

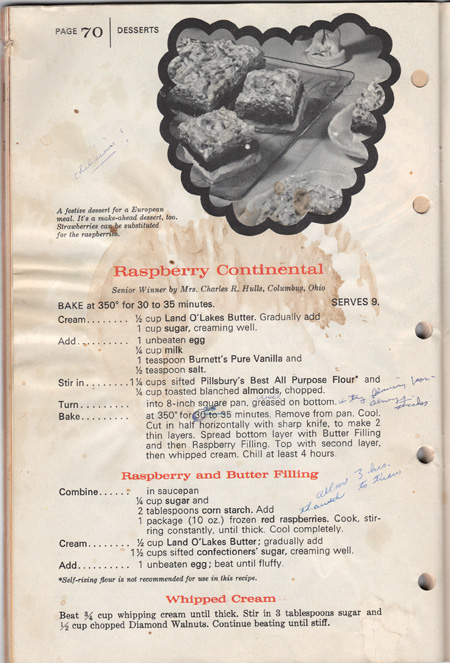
The recipe I would most like to make is “Raspberry Continental”. Mother wrote “delicious!” on this one, so I know it would be very good. But I cook for two people, and we just shouldn’t eat this. But you can make it:

raspberry continental

Other recipes Mother notes in this booklet are: Easy Hawaiian Torte (“good but nothing special”), Orange Dream Pie (“delicious”), Macaroonies (“good“), Lemon-y Layers (“good“), Macaroon Polka Dots (“very good”), and Cherry Marble Cake (“delicious“). Oh, and Angel Squares! I remember having these at home! This is an old favorite of mine. In fact, I typed the recipe onto an index card before I left home to go out on my own. So this cookbook is where it originated! Today Angel Squares even fit into my healthy eating plan, because they are basically an angel food cake baked in a 9″x13″ pan. (Of course you are supposed to cut it into squares and frost each square with butter frosting and roll in chopped peanuts and drizzle with chocolate. But that can be skipped for the calorie-conscious.)

My mother’s recipes have this curious “rating” system that my sister and I know without thinking. On her recipe index cards and in her books, when she tried a recipe that was worth keeping, she wrote a rating-comment on it. It goes like this, from least favorite to most favorite: good, good, very good, very good!, very good, delicious, delicious, delicious! (Sometimes she would toss in a “swell” or a “yummy” too, when she was having fun.)  It’s kind of like one-star to five-stars, in her quite individual way. Makes me smile.

I was going to try one of the main dishes from this cookbook, I even typed it into a draft. But I thought about it overnight, and no, it was a bad decision. That recipe just looked wrong. I don’t want another Beer and Cheese Soup entry, if I can help it. So I decided to throw caution to the wind and make cookies. Cookies! We can just eat a couple a night. It’s fitting and proper to choose a recipe that my mother tried and liked. I love coconut, so I chose this macaroon-type cookie.

Recipe: Macaroonies
four and a half stars


Junior Third Prize Winner by Judith Ann Carlson, Amery, Wisconsin.

Beat 2 eggs with 1/8 teaspoons salt until foamy. Gradually add 3/4 cup sugar; continue beating until thick and ivory colored, 5 to 7 minutes.

Fold in 1/2 cup Pillsbury’s Best All Purpose Flour and 1 tablespoon Land O’Lakes Butter, melted.

Stir in 2 cups flaked coconut [I used sweetened coconut], 1 cup (6 oz. pkg.) [they don’t sell this size package anymore] Nestle’s Semi-Sweet Chocolate Morsels, 1 teaspoon grated lemon or orange rind [I used orange rind] and 1 teaspoon Burnett’s Pure Vanilla.

Drop dough by rounded teaspoonfuls onto lightly greased and floured cookie sheets. Or do as I did: use a parchment-lined half-sheet pan without any oil or flour. (It’s easier and it works.)

Bake at 325˚ for 12-16 minutes until delicately browned. (I found that they needed the 16 minutes in my oven.) Cool 1 minute; remove from cookie sheet.

Recipe Comments

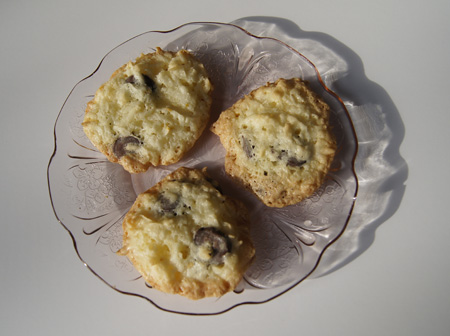
These turned out great, yummy and chewy and sweet. They were almost crispy the first day, and were softer and more like a macaroon the second day. I had half-a-one for breakfast-dessert!

Macaroonies

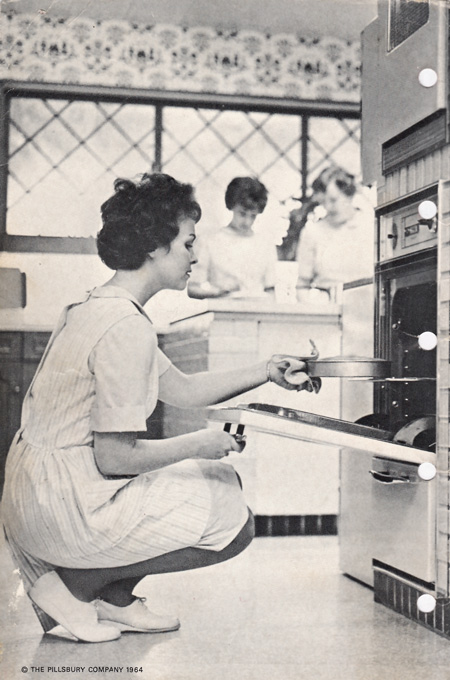
The following is a scan of the inside-front-cover of the booklet. This is how women dressed in the fifties and the sixties, the cute little shirtwaist dress, the white tennis shoes. I remember those days.

BakeOff64page


A trip to the Asian market.

I know better. But when I visit my favorite Asian market in Boulder I usually end up walking out with a few odd and unplanned items tucked in the plastic bag. I call it a “what the heck?” moment. Here we go:

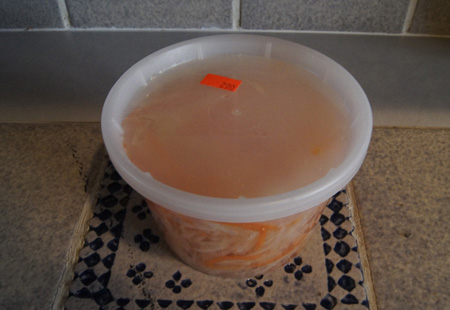
pickled daikon containerIt cost all of 2 dollars for this large container of pickled daikon and carrots! How could I resist?

In my defense (this time), I once was searching high and low for pickled daikon. That was several years ago when I took a home cook class from the Culinary School of the Rockies (now Escoffier Boulder) on Thai cooking. We were given a great recipe for Pad Thai that called for this unusual ingredient (among a lot of other things). I found fresh daikon in stores, but not pickled. So when I saw the container of pickled daikon (and carrots) next to the check-out stand, I couldn’t resist it. Even though long ago I had stopped searching for it. Even though I had no plans to make Pad Thai in the near future.

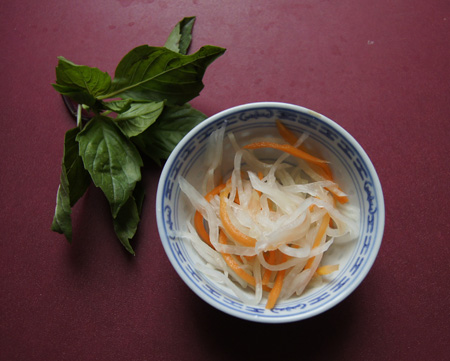
It does look pretty:

pickled daikon

That’s a little Thai basil next to the pickled daikon and carrots. It too is a deal, it only cost about $2.50 for a huge bag, about 4 ounces. That’s what local regular markets charge for 2/3 ounce of fresh herbs.

What is daikon? It’s a large Asian radish. What is Thai basil? Thai basil is similar to sweet basil, but it has a strong kick of a licorice-flavor aroma, sort of like fresh fennel leaves. It’s great in Asian cooking. For instance: I did a quick fry of chicken tenders, added red curry paste and coconut milk, and topped it off with some chopped Thai basil and lime. Perfect.

The Asian market that I like is called the “Asian Seafood Market”. It’s in Boulder, Colorado, on 28th Street, just north of Valmont. The lady who runs the store is always watching TV, often Korean soap operas. She always berates me about something. This time I had two limes in my basket. She said “Two limes? No two limes. Go get ‘nother. They are three limes, three limes for dollah.” I dutifully went for another. If I buy one or two baby bok choy, she just shakes her head, “not ‘nuf, you need lot.” If I ask where something is, or how to substitute for something I can’t find, she talks so fast and barely understandably that I just nod and do what she says.

The market is amazing. Packed with all sorts of cans and jars that look strange to American eyes. Usual and unusual frozen seafoods. All sorts of wrappers and noodles and rices. The produce section looks small, but is full of good herbs and vegetables. The fresh mint is excellent. I learned about Asian mangoes from the store-boss; I found them in her store years before I started seeing them in other local markets. (They call them “champagne” mangoes and I’d eat them today but I’m allergic.) She sells fresh bean sprouts by the pound, which is great, since I rarely use all of a package bought in a regular market. Near the counter is a display of Asian packaged snacks. Oh, and my masseuse swears by the eucalyptus oil that is behind the counter. (It clears the nasal passages.)

Go there, check it out, if you live in the Boulder area. It’s an adventure. Where else can you find non-bar-coded foodstuffs? That in itself is a trip back a couple decades. I checked, but wasn’t surprised that the store does not even have a web site. You can only experience this store in person.

And what did I do with the pickled daikon and carrots? Well, I cooked a couple tablespoons of chopped red onion, then added chopped baby bok choy, then salt and pepper. Then I topped it with a heaping tablespoon of the pickled mixture. Served it next to the above mentioned Thai chicken dish and rice. It was very good. It’s all gone, not even a photo to share with you.

250 Cookbooks: The Frugal Gourmet

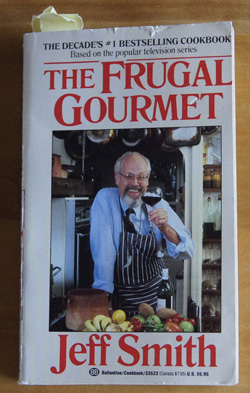
Cookbook #3: The Frugal Gourmet. By Jeff Smith, Ballantine Books, 1984.

Frugal Gourmet

I lied a little in my first 250 Cookbooks post: all 250 of the books are not on the shelf in the photo. The paperbacks and a pile of pamphlets are on the shelf above, the very old cookbooks still above that, and the ones I use a lot are downstairs in my kitchen or next to my computer. The Frugal Gourmet is a paperback and this reminded me that I needed to set things straight. It sits with on the shelf above.

I don’t think I purchased this book. I think that my daughter bought it second-hand, and it ended up with me. Maybe, maybe not, I should ask her. Anyway. Jeff Smith hosted a TV show on PBS called “The Frugal Gourmet” from 1983-1997. I may have seen a few of the episodes but could not be called a fan of the show. The cookbook that I own is a paperback version of the first of many books that Jeff Smith authored.

My copy of the paperback version of this book has several pages marked, but not in a way that I usually mark books. A post-it was torn in strips to mark recipes, and the same pages are dogeared. The marked recipes are certainly the type of food I cook – chicken crepes, Cuban black beans, homemade pasta and sauce, chicken stuffed with potatoes and olives, Boston baked beans, barbecued shrimp, red beans and rice, jambalaya, beef in burgundy, cassoulet, stuffed pork roast – but I’m not sure it’s me that marked them. The recipes look fine (but not terribly interesting). Searching today for a recipe to try, I can’t find much that stands out. I cook similar dishes without using a recipe.

So, basically, my everyday way of cooking overlaps with the author’s. A few direct quotes from the introduction, dated 1983:

“Our current economic bind also pushes us to think carefully about what it is we are cooking, and why. I dislike most instant food products not just because they lack flavor and fascination but because they are too expensive. Cooking from scratch is much less costly and is certainly much more fun for everyone in the household. But you must organize yourself and learn to cook seriously one day a week.”

I agree. I have always cooked from scratch. When I worked, I spent hours each Sunday preparing meals for the week. Jeff Smith also comments on how there is a growing interest in health and awareness of the dangers of food additives, and “we seem to be taking a much more serious view of our own responsibility for what we put into our bodies.” He claims that this is an “era in which most of us are burdened by stress.” He recommends a glass of wine and sharing a meal with friends and family. I’m all for that.

Smith states that frugal does not mean necessarily “cheap”. “It means that you use everything and are careful with your time as well as with your food products.” Gourmet does not mean “food snob”, it means a “lover of good food and wine.” He closes with “Eat well! I bid you peace.” Right on, Jeff Smith!

This is an okay cookbook. But for me, not many of the recipes are different from how I already cook; there are not many fresh new ideas. It is over twenty-five years old, after all. But I would happily recommend this book to someone who is just beginning to cook for family and friends. In fact, I’ll give it away to anyone who wants it. Even though the book’s recipes are old, they are good and could be added to a new cook’s repertoire.

I chose the following because as the days cool into fall, thoughts of soup and grilled cheeses sandwiches on sourdough bread fill my thoughts as I hike through the changing aspens, as I sit under our mountain ash all aglow in gold and red leaves.

Recipe: Beer and Cheese Soup
1 star

This recipe is for the law students at the University of Puget Sound. When I put this on the menu, they shouted, “Relevance at last!” It is delicious. You see, I don’t even waste stale beer. [Author’s note.]

1 cup carrots, chopped
1 cup celery, chopped
1 cup yellow onions, peeled and chopped
2 teaspoons peanut oil
6 cups Chicken Stock [the author has a recipe for Chicken Stock; I used my own]
1 cup cheddar cheese, grated
2 teaspoons flour
salt and pepper to taste
1/2 teaspoon dry mustard
1/8 teaspoon Tabasco or more to taste
1/8 teaspoon Worcestershire sauce
1 12-ounce bottle beer
parsley for garnish
Polish sausage or knackwurst (optional)

Saute the carrots, celery, and onions in the oil until lightly browned. Bring the soup stock to a boil, add the vegetables, and simmer for 45 minutes.

Dredge the cheese in the flour, and mix into the soup, stirring constantly until the mixture thickens. Keep stirring often until you serve.

Add the salt, pepper, mustard, Tabasco, and Worcestershire. Finally, add the beer, and stir until all is hot. Garnish with parsley, and serve.

You may add sliced cooked sausage to this soup; add just before serving.

Comments on Recipe

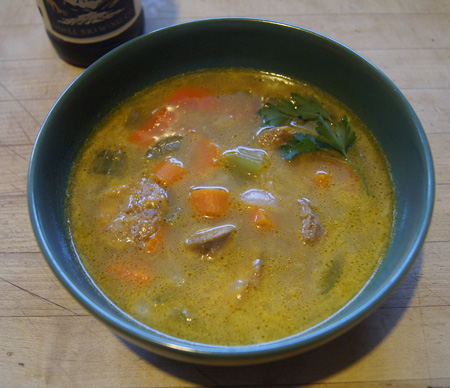
Well, when I started this, I told you that I would report my failures as well as my successes. This soup bombed. The flavor of the broth was terrible. But I think it might be my fault in choosing for the recipe a good, flavorful local Boulder microbrewery beer. Jeff Smith notes that he uses “stale beer”. I think I goofed by using good beer. I tasted the broth before adding the beer and it was pretty good. Afterwards it had a metallic, bitter, too-hoppy taste.

I think I chose this particular soup recipe because lately I’ve enjoyed cheese-soups out at restaurants. All is not lost, now I know how not to make a cheese soup. I was able to nearly finish my bowl of soup, but my husband said it “tastes terrible” and just ate the veggies and meat. Oh, forgot to mention, I did add some cooked Polish sausage that I found at Whole Foods. They were good.

If anyone out there decides to try this recipe in spite of my warnings, I suggest choosing a light-flavored beer. And let it go stale first.

Beer and Cheese Soup

(I am only putting this recipe in this 250 Cookbooks part of this blog, not in the recipe category listings. Only good recipes go there. Just so you know.)

Favorites: Hamburger Buns and BBQ Beef Sandwiches

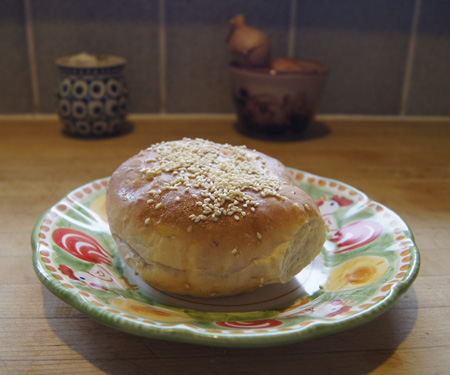
hamburger buns

I make my own hamburger buns. I’ve finally settled on a recipe that consistently yields what I consider the “perfect” bun: just the right size, texture, and taste. These are great for burgers and all sorts of cold and hot sandwiches.

I was wondering what to do with the leftover meat from my Cookbook #2 recipe, Colorado Chuck Steak on the Grill. I should make barbecue beef sandwiches! And they would be best on homemade hamburger buns, and thus I thought I’d share my burger bun recipe.

BBQ Beef Sandwiches

To make the sandwiches, just chop the leftover meat into small chunks, then lay on the sliced burger buns with some barbecue sauce – your own, or bottled – and onions, pickles, and any other condiments you favor.)

Hamburger Buns

My burger bun recipe is essentially from the King Arthur Flour website (accessed 2012), although I did make a few changes. But I always use King Arthur Flours; they are available at both regular and natural foods markets in my area.

I like to use a bun or muffin-top pan to bake the buns. This helps in a couple ways: it makes me flatten the dough to the proper size, and it gives the bottom of the buns a little rim around the edge. Before I had this pan, my burger buns turned out too high. I don’t like buying special-purpose cookware, but I made a rare exception in this case.

I always use a breadmaker to knead and rise the dough. You can knead it by hand and let it rise until double before forming rolls, if that is your preference.

Recipe: Hamburger Buns

3/4 cup water
1 egg
2 tablespoons oil
2 tablespoons sugar
2 tablespoons sesame seeds (mix in with the dough)
2 teaspoons yeast
1/2 teaspoons salt
11 1/2 ounces (2 3/4 cup) flour (bread flour if you have it, or all-purpose)
more seeds (such as sesame)

Mix in all ingredients breadmaker on dough cycle. When the cycle is complete, form into 6 buns. Make them pretty flat, because they poof up a lot as they rise and bake. You want them 4 inches in diameter before you let them rise. Use a bun pan if you have one.

Let rise until double, then bake at 375˚ for 10 minutes. Take out and brush the tops with a beaten egg (or egg white or use egg substitute), and sprinkle with sesame seeds (or other seeds). Return to oven and bake 5-8 min more, until golden brown. Take off the pan soon or the egg glaze can cause the buns to stick to the pan.

These can form big pockets, kind of like pita bread, especially if you use a high-gluten flour. I don’t think this matters. They are soft and make great sandwiches, not only for hamburgers.