250 Cookbooks: Sunset All-Time Favorite Recipes

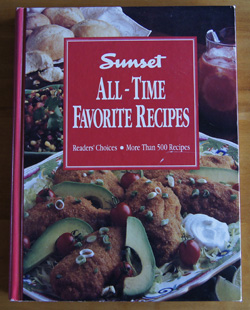
Cookbook #11: Sunset All-Time Favorite Recipes, Readers’ Choices. Sunset Publishing, 1993.

Sunset All Time Favorite Recipes

This one is going to be easy! I opened this volume of over 500 recipes and wanted to try at least half of them. I don’t have to write about how much I dislike a cookbook!

This is a cookbook I bought for myself. The recipes work right into my type of cooking. I’d say they lean towards Southwestern cooking, with lots of chiles and spices, fresh vegetables and fruits, light and practical recipes, as well as comfort foods. I went to the current Sunset Magazine website, and they still focus on “How to Live in the West” (US). That’s where I was born and raised—no wonder this cookbook “fits” me.

I have several pieces of paper marking pages in this book, and even a letter from my daughter. I’ve spent a lot of quality time with this cookbook. The book is well laid out with pleasing illustrations and rough-paper pages. I never wrote in this book, guess I felt it would be a shame to ruin the pages with my unreadable scrawl. There are not even any cooking stains in it. But I’ve used this cookbook a lot. Mostly as a reference for ideas, but a few of the recipes have become a part of my repertoire.

Special features that I have used as references include fish-cooking tips, sizzling stir-frys, and non-preachy lightening-up tips. The recipe content covers the gamut of appetizers to soups to poultry to vegetables to breads to desserts. Throughout, small insets offer historical tidbits and cooking insights. Nutritional information is given for each recipe.

One day a few years ago I re-shelved this cookbook and forgot about it. Well, I’m bringing it back downstairs and putting it within easy reach. It’s like finding an old friend.

For this blog, I chose the recipe “Sesame Chicken”. It uses boneless chicken breasts, a marvelous, low-fat convenience food. Grilled, baked, stuffed, sauted and sauced . . . chicken breasts lend themselves to so many different meals. Years ago we had to bone our own chicken breasts; later, as a working mom, I felt it was worth the money to buy them already boned. In the last decades of the twentieth century, these became available individually frozen in freezer bags. They are a staple in my freezer!

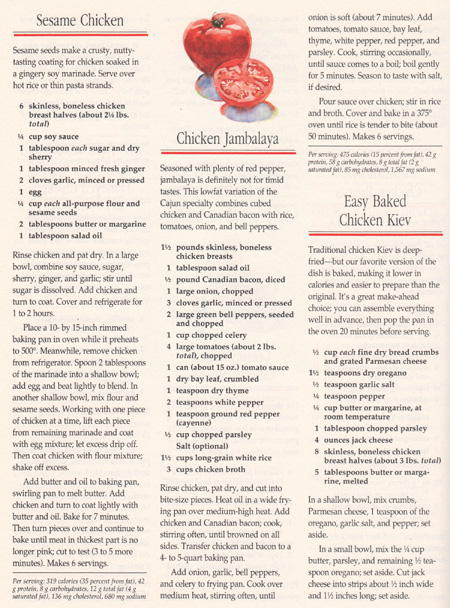
Here is the entire page that has the Sesame Chicken recipe. It’s a good example of the nice layout and illustrations in this cookbook.

Sesame Chicken Recipe from book

Sesame Chicken


I made this recipe for two people, with two chicken breasts. I made the original amount of marinade, though, as reflected in my recipe entry below. The chicken is baked really hot, for only 15 minutes. On busy work days, I’m sure you could start the chicken marinading in the morning. In fact, you could probably take frozen breasts out of the bag in the morning, rinse quickly with hot water, put in a ziplock bag with the marinade, set the bag in the refrigerator for the day, and the chicken would be ready to cook for dinner.

  • 2 boneless, skinless chicken breasts (12-14 ounces)
  • 1/4 cup soy sauce
  • 1 tablespoon sugar
  • 1 tablespoon sherry
  • 1 tablespoon minced fresh ginger (a rasper-grater works well)
  • 2 cloves garlic, minced
  • 1 egg
  • 2 tablespoons flour
  • 2 tablespoons sesame seeds
  • 1 tablespoon butter
  • 1 tablespoon vegetable oil (about)

Mix the soy sauce, sugar, sherry, ginger, and garlic. Marinate the chicken breasts in this marinade for 1 to 2 hours in the refrigerator.

Preheat your oven to 500˚ (this might take awhile!). Place a baking pan (such as a 10×15-inch half sheet pan) in the oven to preheat the pan, too.

Put 1 tablespoon of the marinade in a shallow bowl; add egg and beat lightly to blend. In another shallow bowl, mix flour and sesame seeds. One at a time, remove the chicken breasts from the marinade and coat with the egg mixture; let excess drip off. Then coat chicken with flour mixture; shake off excess.

Add butter and oil to the hot baking pan and swirl to melt butter. Add chicken and turn to coat lightly with butter and oil.

Bake for 7 minutes. Then turn pieces over and continue to bake until meat in thickest part is no longer pink, about 3-5 more minutes. (Cut to test or use an instant read thermometer, 165˚ is good.)

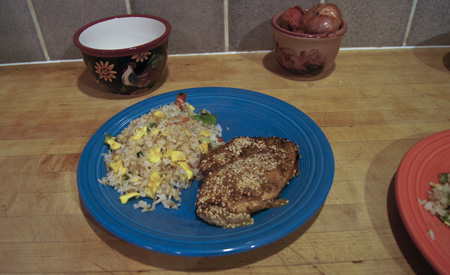
I served the Sesame Chicken next to homemade fried rice. We liked it, and I’ll make it again!

Sesame Chicken


250 Cookbooks: Bake-Off Recipes 1959

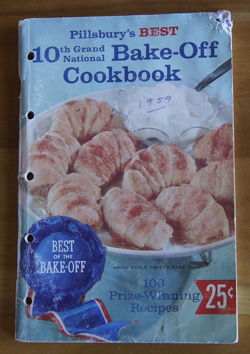
Cookbook #10: Pillsbury’s Best 10th Grand National Bake-Off Cookbook, 1959. From Pillsbury.

Bake Off 1959

This Bake-Off cookbook is in the same series as my Cookbook #4, so I’m not going to repeat the Bake-Off Cookbook background information. That was a 1964 cookbook, this one is five years older. You can see inflation in the price: this older one only cost 25¢, 10¢ less.

I like the nostalgic photos. Look at this woman’s hairdo:

hairdo

The cookbook has desserts, cookies, cakes, pies, breads, and main dishes. What impresses me about these early Bake-Off Cookbooks is that everything is made from scratch. Later ones rely on products like biscuit mix and packaged crescent rolls. The recipes highlight scratch (albeit brand name) ingredients: “Pillsbury’s Best All Purpose Flour”, “Morton Salt”, “French’s Vanilla Extract, “French’s Cinnamon”. I noted several cookie, dessert, and main dish recipes that I might try at a later date.

For this blog, I decided to try a cookie recipe. Mother marked several cookie recipes with her rating system, and I chose one of them. I love baking cookies, and used to make them weekly when the kids were little. There was a long stretch of years when I’d bake tons of Christmas cookies and send them to relatives. And at the end of each university semester I’d bake several kinds of cookies and take them to the Teaching Assistants that I supervised (I was the director of the Organic Chemistry Teaching Labs at CU Boulder).

Lately I’ve denied myself the simple pleasure of cookie-baking. In spite of our active retiree lifestyle, we just don’t need the extra, usually empty calories in cookies. But life is to be enjoyed whenever possible, and I’ve decided that cookies in moderation can fit into our eating plan. Cookies are small little parcels that can be enjoyed one at a time. Extras from a large batch can spend some time in the freezer before being savored. Even better, give some away to friends and relatives!

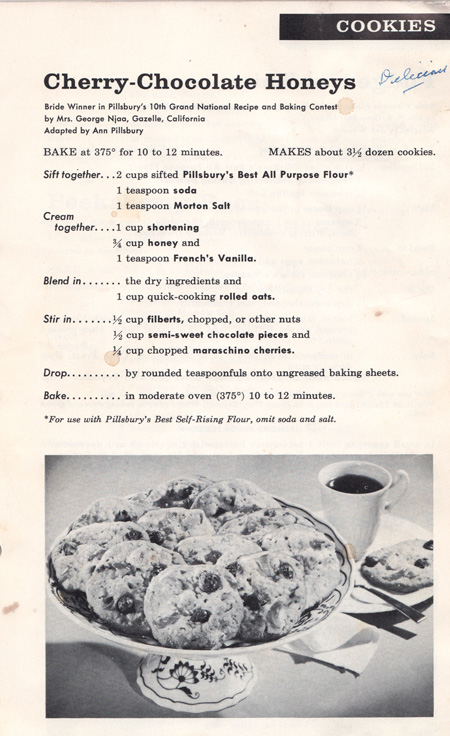
So, cookie time! Here is the original recipe for Cherry-Chocolate Honeys:

Cherry-Chocolate Honeys

My mother had tried these and marked the recipe Delicious. I smile at the cooking stains on the recipe. There is oatmeal and honey and filberts in them: semi-healthy ingredients. I started mixing them together and then did a double-take: There are no eggs! That’s unusual for a cookie recipe.

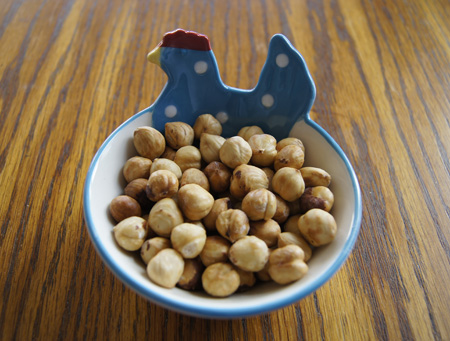
Filberts are now usually called hazelnuts. I found some at our local natural grocery, Steamboat Mountain. They had been refrigerated, so I decided to perk up their flavor with a roast in the oven. Fifteen minutes in a 350˚ oven made them golden brown, with the added benefit of making it easy to remove the dark brown husks.

hazelnuts

For the honey, I chose a flavorful local Colorado honey. The maraschino cherries were purchased from Whole Foods, and have no red dye, are preservative free, and have pure cane sugar. The vanilla I used is Madagascar Vanilla from the Savory Spice Shop in Boulder. I like using parchment-lined baking sheets – a new technique I incorporated into my cooking methods a couple years ago.

Cherry-Chocolate Honeys

  • 2 cups flour
  • 1 teaspoon baking soda
  • 1/2 teaspoon salt
  • 1 cup vegetable shortening
  • 3/4 cup honey
  • 1 teaspoon vanilla
  • 1 cup quick-cooking oatmeal
  • 1/2 cup filberts (hazelnuts), roasted at 350˚ for 15 minutes, then husked and chopped
  • 1/2 cup semi-sweet chocolate chips
  • 1/4 cup chopped maraschino cherries

Cream together the shortening, honey, and vanilla. Blend in the dry ingredients and the oatmeal. Stir in the nuts, chocolate chips, and maraschino cherries.

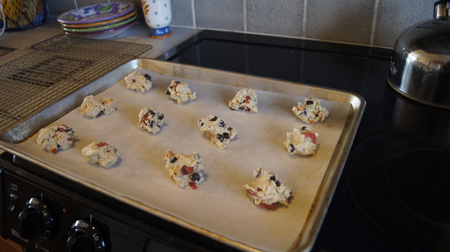
Drop by rounded teaspoonfuls onto ungreased baking sheets (or a parchment-lined half sheet pan). Bake at 375˚ for 10-12 minutes.

Cherry-Chocolate cookies before bakingAren’t these lovely?

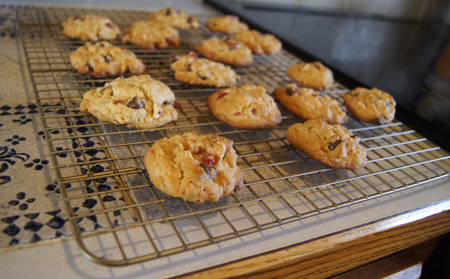
Cherry-Chocolate Honey Cookies

And they taste great, too!

250 Cookbooks: Encyclopedia of Cookery, Vol. 1

Cookbook #9: Woman’s Day Encyclopedia of Cookery, Vol. 1, A-Bea. Woman’s Day, Fawcett Publications, NY, 1966.
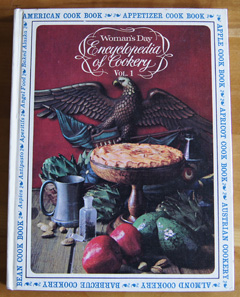
Encyclopedia of Cookery

This is the first in a series of 12 food encyclopedia volumes. They were my mother’s, so I will not part with them. But that’s not the sole reason that I now want to keep them.

Printed encyclopedias. Outdated tools? Today my first impulse when I have a question about (for instance) different types of apples, I open a web browser and enter my search terms. A plethora of links appears almost instantly, and I quickly scan the information that random people have uploaded to the internet. I have a (probably correct) answer, and then I jump to another website, or another task. That tidbit of information was fleeting. I probably will never see it again.

The web gives us quick answers, but we miss something, we miss the permanence of the written page. Print-published authors take a lot of time gathering their information, checking their facts, editing the text, polishing their photos. The next time I open this particular encyclopedia, the same information will be there, in my hands.

And when I took some time with this encyclopedia, which by definition gives “information on many subjects”, I found it full of not only information, but unexpected treats.

Let’s start with abalone, the first entry. This mollusk is described, including availability, calorie content, and basic preparation. Then several recipes are listed. This is the basic layout throughout the volume. Some information is dated, e.g., for abalone: “In the US, the fresh shellfish is limited to California. The law prohibits its shipment fresh to other parts of the country.” Interesting! It’s no longer true, but years ago, you could only have fresh abalone in California. The next entry is acorn squash, again with description and recipes. I learned that aioli is a thick sauce flavored with garlic. Definitions of the cooking terms “a la carte” and “a la grecque” and “a la king” are given, along with related recipes.

Then I came to a section titled “American Cooks are Good Cooks”. This section takes up a full third of the volume! I began reading the three page introduction to this section, written by a woman named Sophie Kerr. I’m sharing a few parts of this article so you, too, can enjoy it.

“A lot of talk goes round now and then to the effect that American cooks are way behind cooks of other lands when it comes to producing a first-rate meal, and that American food in general lacks the elegant subtlety of foreign dishes. I don’t know who started this nonsense, but nonsense it is, and it should be labeled so in large black letters. Actually, there is a great tradition in American cooking, and thousands of women have come to respect and perpetuate it.”

“. . . every housewife had her treasured recipes, which she wouldn’t give away even to her dearest friends. Those were the days of bake sales for church and charity, when the knowing ones lined up early to get some of Mrs. S-and-So’s pocketbook rolls, or Mrs. Whosis’ white cake with almond frosting, or Mrs. Query’s green-apple custard pie, and if the supply was gone when they got there, they screamed like Indians.”

Screamed like Indians! Boy, no one would write that today.

“Early in the 1900’s there appeared a new school of thought among American cooks. This was the era when careers for women were opening up in business and in the professions and arts, so certain groups, perhaps a little oversold on career stuff, proclaimed that it was menial to cook and that women now, for the first time, had their chance to come out of the kitchen. These groups made a noise considerably larger than their numbers warranted; but they did effect a slight hush-hush about recipes and good eating in general and particular. They said it wasn’t intellectual to be interested in food, and, of course, no woman likes to be publicly labeled as unintellectual. American cooking took something of a beating during this dark period; but it is cheering to remember that, in spite of all the shouting against them, there were plenty of sensible women who simply laid low and cooked better and better, confident that the tide would eventually turn.”

Enchanting. Sophie Kerr’s essay is followed by a collection of recipes from all fifty states. None of them caught my eye to try—Denver Sandwiches, Squaw Corn, Campfire Trout, Topeka Fried Chicken, Iowa Farm Ice Cream—but it’s interesting reading and has lots of photos. In fact, the entire volume is illustrated with full- and half-page photos, as well as drawings and decorative page borders.

I am going to remember this encyclopedia the next time I want to look up information about a particular food item or term. I know I’ll not only find the information I need, but also a history lesson, and maybe a chuckle or two. It’s an excellent source of historical recipes from the first half of the twentieth century in the US. However, I don’t find the cookbook very useful when searching for a recipe, because of the organization. Who would think to look for a recipe for green beans in the “A” section, under “Sauce Amandine”, in the almond section? (In the encyclopedia’s defense, though, a detailed index at the back of the last volume helps.) Another drawback is that the recipes were written before the invention of modern kitchen conveniences: immersion blenders, food processors, and microwave ovens to name a few.
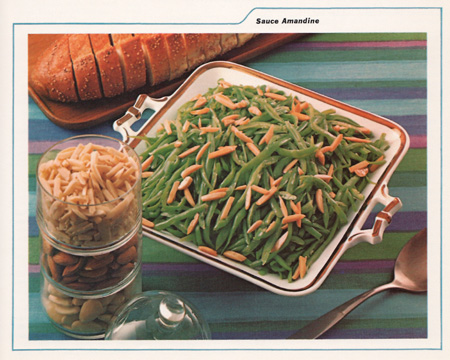
beans amandine

I decided to cook a recipe from the “Apple” section. I chose Apple Butter. Why? Well, as often happens, what I cook is determined by what needs to be used in my freezer or on my shelves. A couple months ago we were leaving for vacation and I had a lot of apples that wouldn’t keep until our return. So I cored them and cut them in chunks and froze them, thinking I’d make applesauce someday. Combined with a few aging apples on my counter, they would be great for apple butter.

I modified the recipe from the Encyclopedia of Cookery (below) quite a bit.
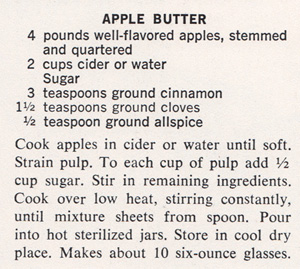
Apple Butter

I wanted to use my slow cooker, and I didn’t want to strain the apple mixture. Instead, I chose to blend the cooked mixture, so that I could incorporate all the flavor and fiber of the apple skins. I added ginger and nutmeg because I like apple butter spicy. Consulting one of my crockpot books and a couple online recipes to determine cooking times, I came up with a more or less original recipe, entered below.

Apple Butter


If possible, use a mixture of sweet and tart apples. This recipe makes 12 4-ounce jars.

  • 4-5 pounds unpeeled apples (about 10-12 apples), stemmed and chopped roughly
  • 2 cups apple cider
  • 1 cup white sugar
  • 1 cup brown sugar
  • 1 tablespoon cinnamon
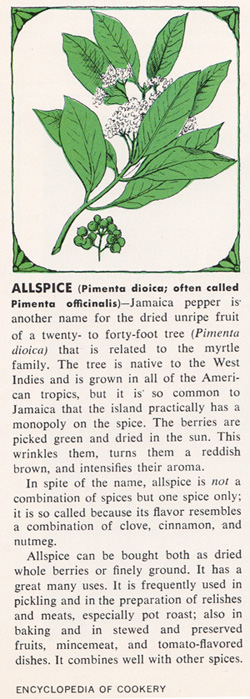
  • 1 teaspoon allspice* (see note below)
  • 3/4 teaspoon cloves
  • 1/2 teaspoon ginger
  • 1/4 teaspoon nutmeg
  • juice of 1/2 lemon

Combine all of the above ingredients (except the lemon) in a slow cooker. Cover and cook on low for about 10 hours. (This is convenient to do overnight.) At this point, you can let the mixture cool and process in batches in a food processor. Or, you can use an immersion blender to puree it right in the slow cooker.
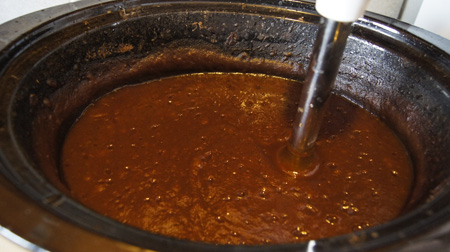
Apple Butter in Crockpot

(At this point I feel like a witch stirring her brew. Witchery, cookery . . . why is this cookbook series the encyclopedia of cookery? No wonder I feel so at home. Here is my blog entry from five years ago, back when I was a practicing witch . . . ahem, chemist . . . )

With the lid off, turn to temperature to high and cook for 1-3 hours, stopping when the apple butter is the thickness you prefer. And taste it, adding more spices if you like. I added the juice of half a lemon to lend it a little zip. It took 2 hours for my apple butter to come to the thick spreading consistency that I like.

The apple butter will keep in your refrigerator for up to a month. I decided to can it in small 4 ounce jars to keep and to give away.
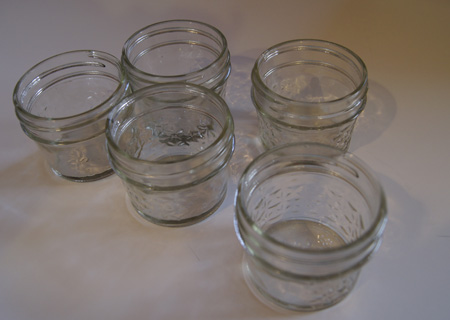
jarsI sterilized 12 of these cute little jars in boiling water, then filled them with the hot apple butter. Then I closed them with hot canning lids and set them upside down on the counter to cool.
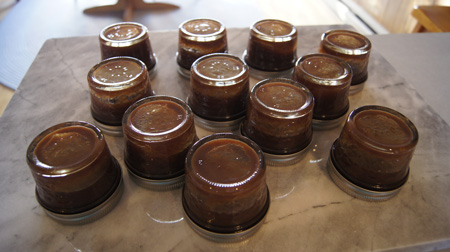
apple butter cooling

The whole process took awhile and it really made the house smell like apples and cinnamon, especially during the overnight cook. It was all worth it! This apple butter turned out very good, and we are still enjoying it, on toast, peanut butter sandwiches, and sweet potato biscuits (cooked as per this recipe but with half the baking powder).

Note: Allspice’s definition is conveniently in the same encyclopedia volume:
allspice

Favorites: Chicken Casserole

Sometimes I just have to share a weekday favorite. As I wrote to myself in my personal “recipes” document: “I make this a lot! It’s one of our comfort foods.” This recipe graduated from a little handwritten index card to permanent status on my computer(s). It’s Thanksgiving-timely since you can use leftover turkey instead of chicken. I can’t remember where I got the recipe; all I know is that I took the time to put write it on a recipe card sometime in the 80s. I liked it enough that I included it on the short list of main dishes in my 1990s blog.

This is a casserole that I know will taste good. I can make it and feel no pressure at all whether or not dinner will be a success. I like to make it in a deep, round casserole rather than a short square or rectangular dish. When I make it for the two of us, I use a little less than a can of soup, and nudge the amounts of the other ingredients down a bit.

Enjoy.

Chicken Casserole

Serves 3-4.

  • about 1-2 cups cooked rice, I often use a mixture of wild rice and brown rice
  • 2 cups cooked chicken (or leftover turkey)
  • 1/4 pound cooked fresh mushrooms (don’t use canned unless you have to)
  • 1 10 3/4 ounce can cream of mushroom soup mixed with 1/2 cup milk
  • 1 small can sliced black olives
  • 1 cup grated cheddar cheese
  • 1/2 cup sliced almonds

Use a 3 quart casserole. Put in rice, then chicken, then mushrooms, pour soup mixture over top. Add olives, then cheese, then almonds. Bake at 350 degrees 45 minutes or until hot.

250 Cookbooks: The New 365 Ways to Cook Hamburger and Other Ground Meat

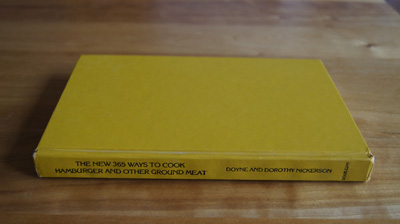
Cookbook #8: The New 365 Ways to Cook Hamburger and Other Ground Meat. By Doyne and Dorothy Nickerson, Doubleday & Company, Garden City, NY, 1983.

365 Ways to Cook HamburgerI think this book used to have a cover leaf, without it it looks so plain. But it is a plain little book. There aren’t any photos inside, although there are some pleasant drawn illustrations. The recipes are pretty plain too. Why did I buy it? Dunno. Guess I wanted hamburger ideas.
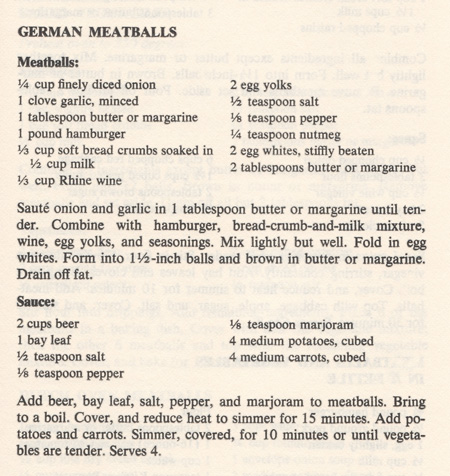
I don’t think I ever cooked anything from this book, although I had marked several pages. Those pages were for . . . meatballs! I am a huge fan of meatballs. I could eat meatballs once a week. They are right up there among my top comfort foods. I guess I already hinted at that when I chose to make the Pork Balls from cookbook #6. I like mushing the meat with the spices and egg, I like forming the meatballs, I love the aroma as they sizzle and cook in the pan. And I like the convenience of making extra, freezing them, and popping them into a sauce later for a quick meal. Oh, and I like stealing one as they sit on the counter to cool—hey, it’s important to taste them to make sure they are good!

The only recipe in this book I marked besides the ones for meatballs is one for gnocchi. I’ve tried several times in my life to make gnocchi from scratch, but nowadays I use the shelf-packaged product that you can find in most grocery stores.

Do I like this cookbook? It’s okay, but doesn’t have very many innovative ideas, nor are there commentaries to personalize the 365 recipes. The original publication date was 1958 and today, the recipes seem tired. Grilled hamburgers, skillet dishes, baked casseroles, soups, spaghetti meat sauce, tacos (with no seasoning other than salt), meat pies. If you have a hankering for a nostalgic hamburger pie with crescent rolls on top, this is your cookbook. It’s mostly basic hamburger cooking, the kind of cooking that doesn’t require a recipe. I could give this cookbook away and never miss it.

I chose German Meatballs, one of the recipes that I had marked years ago. I’m not sure if I tried this recipe before, but I doubt it because the cookbook is free of food stains and I didn’t write anything on the recipe. This recipe interests me because the onion is cooked before it’s added to the hamburger, there is white wine in the meatballs, the eggs are separated and the whites stiffly beaten. (I doubt that this will make the meatballs much different from ones made with whole, non-beaten eggs, but it’s worth a try.) I like the accompanying sauce, with beer, potatoes and carrots. I don’t have a recipe in my repertoire that is anything like this one. Sounds good for a winter dinner, as I watch the snow fall on a November day in Colorado.

German Meatballs

I had some problems cooking these meatballs. I could tell that the uncooked meatball mixture was much more liquid-y than I would normally choose, and sure enough, when I dropped the first couple meatballs into the hot pan, they flattened out like pancakes. Well, the dogs will like those! I added another generous half-cup of breadcrumbs to the meat mixture and that did the trick.

I tasted one of the cooked meatballs and said “yum!” As I had predicted, the high moisture content and egg whites in the meatballs made them light and almost delicate.

For the sauce, I recalled my Beer and Cheese Soup disaster, and substituted half of the beer with beef broth. As the sauce and meatballs and potatoes and carrots simmered together, I added more broth so that they would be covered.

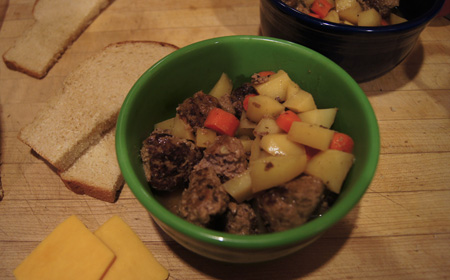
When the vegetables were done, I didn’t know quite how to serve the dish, since the sauce was thin. As written in the cookbook, there is no way this dish could be served over pasta or rice, nor could it be lain on a flat plate, because the “sauce” was just a runny liquid. So I thickened it with a little cornstarch and called it a “soup-stew”. I served it in big bowls with slices of My Daily Bread and cheese. It was really good! The broth suffused the potatoes and carrots with a hint of beer, marjoram, and bay leaf, and the meatballs were just about perfect.

Below is my revised version.

German Meatballs


Serves 3-4.

Meatballs:

  • 1/4 cup finely diced onion
  • 1 clove garlic, minced
  • 1 pound hamburger (I used 90% lean)
  • 1 cup soft bread crumbs soaked in 1/2 cup milk
  • 1/3 cup white wine
  • 2 egg yolks
  • 1/2 teaspoon salt (or to personal taste)
  • 1/8 teaspoon pepper
  • 1/4 teaspoon nutmeg
  • 2 egg whites, stiffly beaten

Sauce and vegetables:

  • 1 cup beer
  • 1 cup beef stock
  • 1/4 teaspoon marjoram
  • 1 large bay leaf
  • 4 medium potatoes, cubed (gauge the amount of potatoes and carrots to your diner’s appetites)
  • 4 medium carrots, cubed
  • salt and pepper to taste
  • 1 1/2 tablespoon cornstarch mixed with a little water or broth

Heat a small amount of oil (olive or vegetable) in a pan and saute the onion, sweating with a little salt, until soft. Add the garlic and cook for 30 seconds more. Combine with the hamburger, bread-crumb-and-milk mixture, wine, egg yolks, and seasonings. Mix lightly but well. Fold in egg whites.

Form into 1-inch balls and brown in a small amount of hot oil. These burn more easily than most meatballs, so watch the heat of the pan and turn the meatballs often. When they are all browned, drain off any fat.

Add the sauce/vegetable ingredients—except the cornstarch mixture—to the meatballs and bring to a boil. Cover, and reduce heat to simmer for 20-30 minutes. If you like, add more broth so that the meat and vegetables stay down in the liquid. This will make it more soup-like.

When the vegetables are tender, slowly and with stirring, add the cornstarch mixture to thicken the sauce. (You can add more cornstarch if you like it thicker.) Taste and adjust salt and pepper to your taste.

German MeatballsWe each finished our German Meatballs and wiped the bowls clean with bread!
My Daily Bread

slice of bread

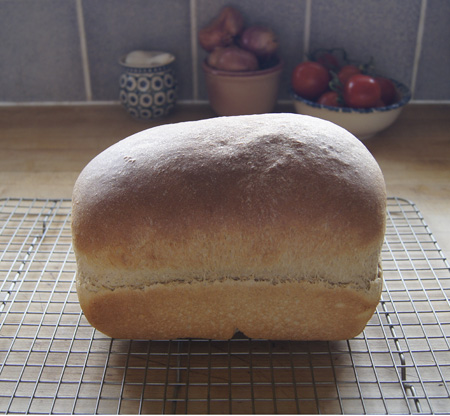
This is the bread I make every week for my sandwiches. Whole wheat and hearty but soft and pliable.

I am not going to try to teach you guys how to make yeast bread. Lessons for that skill are covered by a multitude of books, or passed on by family members or friends, or learned in a cooking class. But I will share my own methods and tips as I go along in this cooking blog. And a little philosophy.

I learned how to make bread soon after I was out on my own. I wanted to make cookies, pies and cakes, but couldn’t afford the calories. So I turned my love of baking to yeast breads. I remember when I was twenty-one and living in Huntington Beach, California. I was in the kitchen of a funky old house, kneading bread. Someone knocked at the door, and I went to answer with whole-wheat-dough-messy hands. It was Jehovah’s Witnesses, and they started giving me advice on how to make bread!

It was the 1970s, and I of course was bra-less, wearing beat-up jeans. Hippie time. My first loaves made from heavy wheat flour were dense and heavy and flat. But the smell, the smell! Freshly baked bread, even heavy bread, smells wonderful.

I grew up a little and moved to Colorado and got a real job. I continued to hone my bread making skills, gleaning knowledge from books and magazine articles and later, online communities. Like those Jehovah Witnesses, everyone had their opinions on how to make the best bread.

I learned how to combine flours to make a healthy and light loaf of bread. At first, I hand-kneaded my breads. Yes, there is a sense of accomplishment in this task, and the elastic, perfectly kneaded loaf feels good under your hands. But I’m not the most patient person. My results were inconsistent, but I kept going, I still kept baking.

I received as a gift a KitchenAid mixer in the 80s, and soon I employed it to knead bread. That made a huge difference in the consistent outcome of my bread loaves. I watched the bread as it kneaded and adjusted the flour and liquid as necessary to get a smooth, elastic loaf.

That went on for a decade or so. Then I was given a bread machine, and wow, was I hooked. Today I use a bread machine to knead most of my loaves of bread (there are no-knead breads too, but that’s another post). The machine controls kneading as well as rising factors; you can plan your time because you know exactly when it will be read to bake. I’m a chemist, and the more factors you can control in an experiment, the more you are able to play around with ingredients. I prefer to bake my loaves in a conventional oven, though. I just don’t like taking a loaf out of a bread machine and having to take out the little mixing paddles from the bottom of the loaf. Currently I am on my third bread machine, I wore out one, and I keep an older one in case I want to knead two kinds of bread at the same time!

Again bringing in my chemist-background lab experience, I weigh my flours and carefully measure the liquids. There is no better way to consistently get the proper liquid/flour proportions in a loaf. I also  watch a loaf as it kneads in the bread machine and add more flour or liquid as necessary. I still have occasional failures, when I experiment a little too much! But “My Daily Bread”, the recipe below, works for me week after week.

I am not going to force my method of bread making on anyone. I’ll give you tips, but no more. Take them or leave them. You can only learn how to make yeast bread by many tries, many failures, many successes. With practice, each person figures out their own way to make perfect bread. Each person works with currently available ingredients and equipment, societal fads, and their own preferences. Each person finds their own way, and their way is as good as any other, as long as it’s enjoyable.

Bread making is a journey, like life.

Here is my daily bread, my staple for sandwiches and toast. It is high in fiber, while still making a bread that slices for sandwiches and toast. I know my ingredients, so I am assured that there are no preservatives or excess sugars or fats. I trust this bread to keep me healthy, as well as provide great taste!

My Daily Bread

Two thin slices of this bread (60 grams) have about 100 calories.

  • 1 cup buttermilk
  • 1 tablespoon vegetable oil
  • 1 tablespoon sugar
  • 1/2 teaspoon salt
  • 1/2 teaspoon baking soda
  • 12 ounces flour (see below)
  • 1 tablespoon active dry yeast

Each week, I vary the types of flours that I use. I always use about 1/3 cup gluten flour, a half-cup of all purpose flour, and a large amount of white wheat flour (King Arthur Flour). Sometimes I include about a half-cup of oat or other whole grain flour, and a few tablespoons wheat germ, hi-maize high fiber flour, or flax seed meal. What is important is that the weight of the flours is 12 ounces. (If you add too much whole grain flour other than white wheat flour, the bread will not rise well and the cooked loaf will be dense.)

If I have leftover cooked hot cereal, barley, or rice, I sometimes add it too (about a half cup). But if I do, then I’ll watch closely as the bread kneads, and add a bit more flour if necessary.

Put all the ingredients in a bread machine and set to the dough cycle. Watch the dough as the machine kneads it. Sometimes a paddle will not rotate and needs some fixing. Sometimes the flours are too dry, and you see just lots of clumps instead of a ball of dough. If this happens, add more liquid by the tablespoon until it forms a ball. Sometimes the dough is too sticky; if this happens, add more flour by the tablespoon until the dough looks smooth and elastic. Most machines will knead and rise a loaf of bread in about 1 1/2 hours.

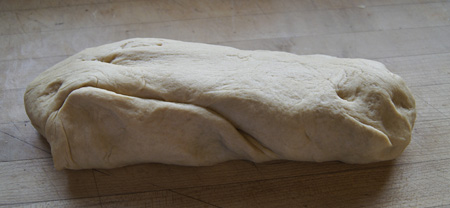
When the bread machine signals that it is done, remove the dough from the machine.

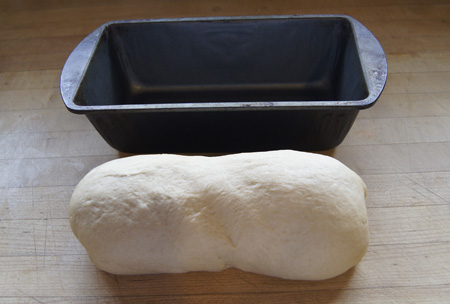
dough

Next, fold in thirds and push it around a little to re-distribute the yeast, then form it into an oblong that will fit into an 8 1/2 x 4″ loaf pan.

into pan

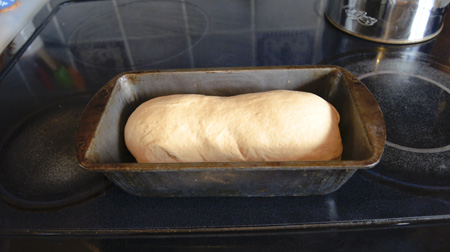
Place it in the loaf pan and set it in a warm and non-windy part of your kitchen. I usually put it on the top of the stove. Start preheating your oven to 385˚.

before rising

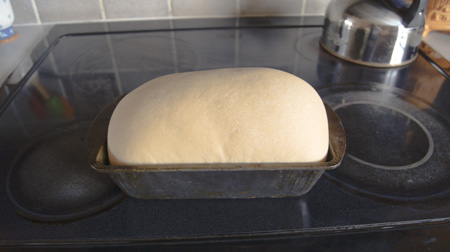
Let the loaf rise until it’s double in bulk, or until it has risen above the edges of the loaf pan. In the summer, this might take only 20 minutes. When my kitchen is cool in the fall or winter, it might take 45 minutes. Here’s a well-risen loaf:

risen

Bake at 385˚ for 20 minutes. Take it out and let it cool. It’s tempting, but if you cut it now and eat a hot slice, it really messes up the loaf for later neat-slicing. (I don’t always follow this rule <grin>)

baked loaf

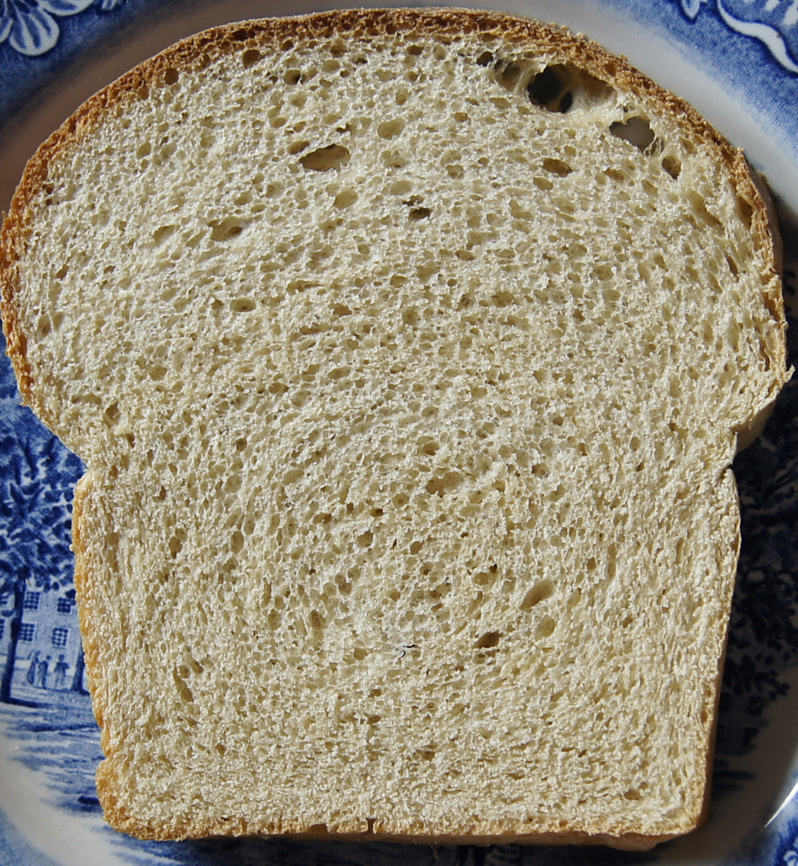
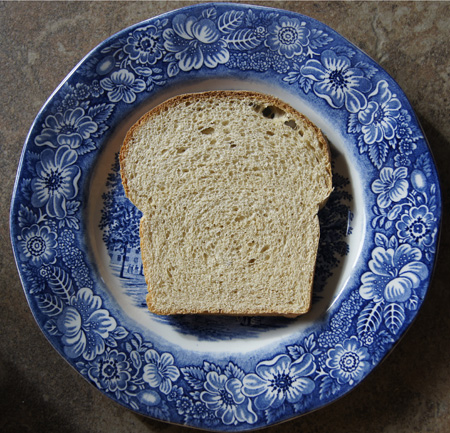
Here’s a close-up of the great crumb and texture of this bread. Click on this photo and it will get even larger:

slice of bread

I do love my bread! It’s great for sandwiches, and great for toast!

250 Cookbooks: Elena’s Secrets of Mexican Cooking

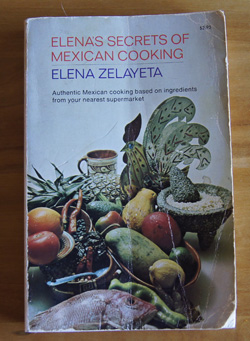
Cookbook #7: Elena’s Secrets of Mexican Cooking. By Elena Zelayeta, Doubleday & Company, Garden City, NY, 1958. “Authentic Mexican cooking based on ingredients from your nearest supermarket.”

Elenas Secrets of Mexican CookingI have been cooking “Mexican” food as long as I can remember. I grew up in Southern California in the 50s, and my mother made tacos, enchiladas, and miscellaneous Mexican-style casseroles quite often. Today I’d classify these as “Tex-Mex” or “Southwestern” cooking rather than true Mexican cooking. They relied heavily on chile powder, green chiles, salsa, taco seasoning packets, onions, bell peppers, sour cream, and lots of jack or cheddar cheese. My own Tex-Mex cooking today is usually put together recipe-free, using past experience to free-form a meal.
Elena’s Secrets of Mexican Cooking is likely the first cookbook that I purchased that talked seriously about the roots of Mexican cooking. It’s a wonderful and friendly book. In her preface, she discusses the influence of the Aztecs, Spanish conquerors, the European Emperor of Mexico in the 1860s (Maximilian) on the food of Mexico. She talks about different regional cooking in Mexico, and how Mexican dishes common in the southwestern US are little known in Mexico.

Elena herself was born in Mexico, but immigrated to San Francisco as a young girl, where she learned more about the cooking of Mexico from the cooks at her family’s inn. Quote: “Because of my many years in this country, I have learned what Americans like to eat. These recipes have been adapted to suit the palates of my American friends.”

In the introduction to this book, written by her friend, you find out that Elena became blind when her sons were young. That did not stop her from cooking: she learned how to use knives, blenders, bone chicken, make pastry, and even fry food in hot oil! Amazing, and inspiring.

I’m sure that I purchased this book because I wanted to expand my knowledge of Mexican cooking. And it did just that! Several pages are dirty and it is well-worn. I made notes on the tamales recipe, and tucked the recipe off the back of a Masa Harina package in the book. I also tucked a newspaper page of Mexican recipes in the book, including one for sopaillas.

Today, in 2012, I find this 1958 book useful (and I marked several more recipes to try), but a lot of the recipes use sort of unusual ingredients (pig’s head and feet, rabbit), or ingredients I’d rather purchase fresh (canned milk rather than fresh, canned tomatoes and canned tomatillos). One recipe calls for you to cook a bone-in chicken breast, and then bone it. Definitely not something I would do, with today’s abundance of boneless chicken breasts. Sliced cooked eggs are added to many dishes. Romano or Parmesan cheese is used often, while cheddar cheese is rarely used. Many recipes call for canned pimento—large red sweet pepper similar to red bell peppers—but I haven’t used these in years and don’t know if they are still readily available. Happily, taco seasoning packets are never called for. But where is the cilantro, Mexican oregano, fresh garlic, queso fresco, the black beans? Today, that’s the sort of ingredients I like in my Mexican-style food.

Today, many, many Mexican ingredients are available in our supermarkets. In 1958, Elena had to direct readers to some substitutions—this is a slight drawback because these substitutions are no longer necessary.

In conclusion, this book is still a pretty good reference for Mexican dishes. And it’s delightful reading, so I will keep this book!

I chose to cook “Tamale Pie with Red Chile Sauce”. This recipe uses masa, while my old standby tamale pie recipe uses cornmeal. Should be interesting. It also calls for lard. Lard has come back into some favor these days, since it is high in monosaturated fats that some believe have health benefits (google “lard nutrition” for current discussions). Finally, I have some cooked chicken that I need to use.

I know that I stated in my first 250 Cookbooks post that I would follow the recipes I found exactly as written. I realize now that was a bad idea. There is no sense tossing out my years of experience just to follow a recipe as written. So from now on, I’ll scan in the original recipe, and then type in the recipe as I actually made it. That way, if I feel that a recipe needs more flavor or whatever, I will do what I think should be done to make the it better. After all, each recipe is not only an experiment, it’s the meal I have planned that day for dinner! No sense eating something awful, or tossing it down the garbage disposal. If a recipe totally bombs, I will not type it in, and not include it in my recipe index.

Recipe: Tamale Pie with Red Chile Sauce

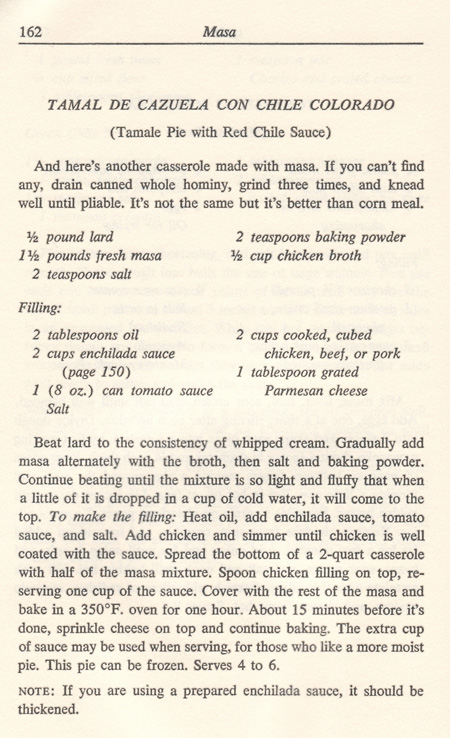
The original recipe is below. The “enchilada sauce on page 150” is: Wilt one chopped onion and 1/4 cup chopped green pepper in 1 tablespoon oil, then add 3 cups tomato sauce, 2 teaspoons chile powder, and salt to taste. (I had really hoped that this cookbook would give a recipe for an enchilada sauce that tasted really special. I’ll keep looking.)

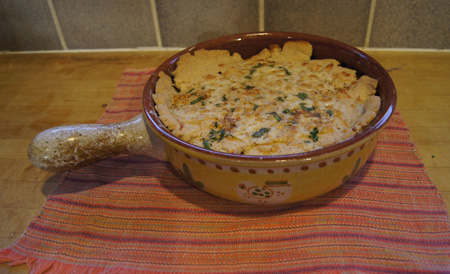
Tamale Pie

Results

Sadly, this recipe was a bust. I was so hoping it would work! The photo doesn’t look so bad, and we were able to eat our meal, but we didn’t go back for seconds, savor leftovers, nor will I make it again. The fault is largely my own. The big issue is that the recipe really called for fresh masa, not masa flour.

Elena's Recipe

Re-reading Elena’s book, I realize that fresh masa is a moist product. I have never seen it in a market. Right in the above recipe, she suggested grinding hominy to make it if it’s unavailable. My own notes in her book tell me that I tried making tamales from masa flour using another of Elena’s recipes calling for fresh masa, and that I had to add a lot more liquid than called for. I should have read all that before jumping into the recipe!

When I prepared Tamale Pie with Red Chile Sauce as above, I did add twice as much chicken broth to the dough as called for, because it looked dry. I should have added four times as much! The crust tasted okay, but it was heavy and dry. The filling was great, although I strayed from the recipe, adding corn, olives, a fresh tomato, and oregano, cumin, and fresh cilantro.

“I like your regular Tamale Pie a lot better!” said my husband. Me too. Here, I’ll share it with you. I’ve made it many, many times. You could easily substitute cooked chicken or pork for the ground meat.

Tamale Pie

  • 1/4 cup chopped onion
  • 1/2 cup chopped bell pepper
  • 1 pound ground beef
  • 1 teaspoon cumin
  • 1 teaspoon oregano, preferably Mexican oregano
  • 1 teaspoon basil
  • 2 teaspoons chile powder
  • fresh cilantro to taste
  • 1 15 oz. can (chopped) tomatoes (use fresh tomatoes if you have them)
  • about 3/4 cup corn, canned or frozen or even fresh
  • 1 small can whole olives (about 1 cup)
  • 1/2 to 1 cup tomato sauce
  • 1/2 cup cornmeal
  • 1 1/4 cup water
  • 1/2 teaspoon salt
  • 1/2 cup shredded Cheddar cheese

Cook the onion and green pepper until slightly soft, adding a little salt to help sweat the onions. Remove them from the pan and save. Brown the meat and drain any fat, then add the cooked onions/bell pepper back to the pan, along with the spices, tomatoes, corn, and olives. Add tomato sauce to your own taste. Simmer for about 10 minutes, and of course, taste it and adjust the seasonings! Feel free to be creative. When it suits your own tastes, spread it in a 1 quart casserole.

Combine the cornmeal, salt, and cold water in a saucepan. Cook and stir until thick, just a few minutes. Spread the cornmeal mixture evenly over beef. (For convenience, as a working person I used to freeze the casserole at this point for baking later in the week.)

Bake at 350° for 40 minutes. Sprinkle cheese over top and bake 5 minutes longer. Serves 3-4.