250 Cookbooks: Best in the West Barbecue Recipes

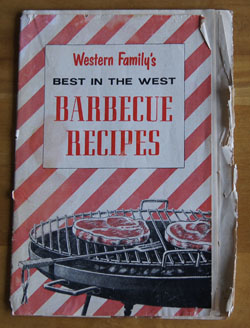
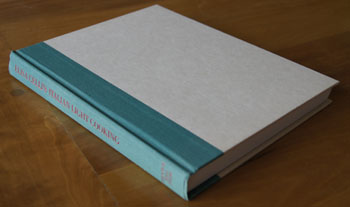
Cookbook #159: Best in the West Barbecue Recipes, Western Family, Inc., August 1958.

Best in the West Barbecue Recipes cookbook

What or who is or was “Western Family”, the publisher of this book? I found that it was a 1950s magazine about life in the western US. A few vintage issues are available through eBay and Amazon and other sources. If you google “Western Family Magazine 1958” you will be rewarded with the cover art of several issues – I’d copy some in here but don’t feel comfortable because of copyright issues.

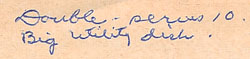
Best in the West Barbecue Recipes is a small stapled-together booklet that must have been associated with the August 1958 magazine issue. And I think it was my grandmother’s, because there is a smidgeon of writing in it that looks like hers:

note in the Best in the West BBQ cookbook

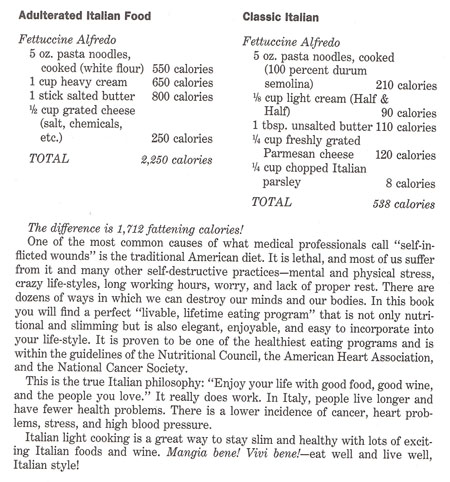
I like the introduction page:

introduction
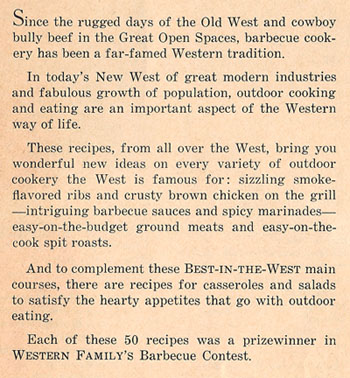
I am surprised how much I like the recipes in this dated booklet! Many of them sound pretty good; albeit the instructions are often quite brief: “Pour the marinade over the ribs and marinate for at least one hour. Grill ribs over charcoal for 45-60 minutes, or until done, turning frequently and brushing with sauce.” Each recipe includes the name of the contributor, usually a “Mrs.” from a western state.

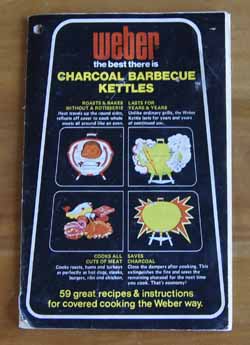
Note the barbecue grill in the photo of the cover of this cookbook (top of this page). That’s the kind of barbecue I grew up with. It was fairly flat and you spread the charcoal in a single layer and cooked on the grill right above the charcoal. I’m not even sure it had a cover. Simple but functional.

This all certainly brings back the sunny times in California in the 1950s: sitting on the wooden table and benches in the tree-shaded patio right off our kitchen, charcoal fire started, family friends gathering for a meal together, adults laughing with their cocktails, us kids being kids. It was a great place to grow up.

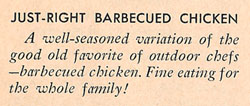
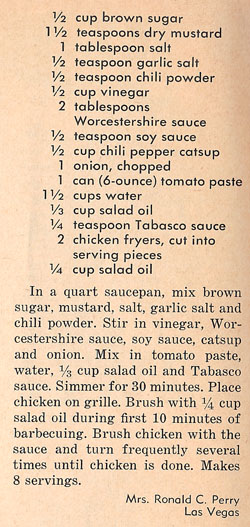
I decide to make Just-Right Barbecued Chicken:

Just Right Barbecue ChickenJust Right Barbecue Chicken I haven’t cooked bone-in chicken pieces on a grill in ages. Below are the instructions given in this booklet for an old-style charcoal grill.

grilling instructions

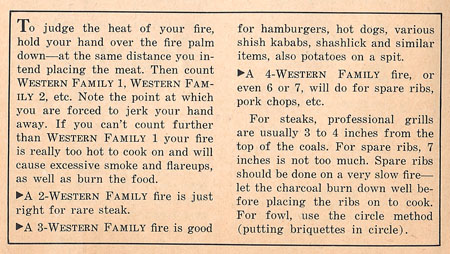
What I like about the recipe for Just Right Barbecue Chicken is the included barbecue sauce. I made a few minor changes in the sauce recipe (more spices, less salt, chile sauce for “chili pepper catsup”) and to adapt the grilling instructions for my covered gas grill, I consulted my Weber Real Grilling cookbook. All changes are incorporated below.

Just-Right Barbecued Chicken
serves 2 – with leftovers!

  • 1/2 cup brown sugar
  • 1 1/2 teaspoons dry mustard
  • 1 teaspoon salt
  • 1/2 teaspoon garlic powder
  • 1 teaspoon chili powder
  • 1/2 cup vinegar (I used white vinegar)
  • 2 tablespoons Worcestershire sauce
  • 1 teaspoon soy sauce
  • 1/2 cup chile sauce
  • 1/2 large onion, chopped fine
  • 1 8-ounce can tomato sauce (or use 6-ounce can tomato paste and increase water to 1 1/2 cups)
  • 1 cup water
  • 1/3 cup vegetable oil
  • cut up frying chicken (I used 2 breasts, 4 legs, 3 thighs)
  • vegetable or olive oil for brushing chicken

Combine the sauce ingredients (1/2 cup brown sugar through the 1/3 cup vegetable oil) and simmer about 30 minutes. This makes enough for two chickens; I used less chicken so I had leftover sauce. Note: this sauce is not as thick as most modern barbecue sauces, but it works great.

Heat a gas grill on high until it’s good and hot, then turn off all but one burner. You want the temperature to be “medium” – I aim for 325-350˚ on the gas grill gauge.

Brush the chicken pieces with oil – I actually just put the chicken in a bowl and poured olive oil over them and rubbed it in. Put the pieces on the grill over indirect heat (and close the lid). Grill about 5 minutes and then turn and grill another 5 minutes until they have nice grill marks. Next, brush with the sauce. For the next 30 minutes or so, keep brushing with sauce and turning every 5-10 minutes, monitoring the grill temperature to keep it at medium. To test for doneness, I used an instant read thermometer, and when the chicken pieces read 150-160˚ I took them off the grill. (Some were done sooner than others.)

Just Right Barbecued Chicken
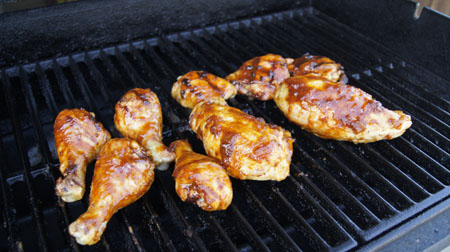
This chicken was really good! I will definitely grill chicken this way again. The sauce was perfect, and the chicken was juicy. It was just as good cold the next day!

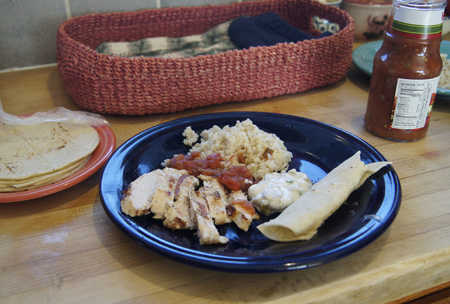
To go with the chicken, I made “Western Potato Strip-Teasers”.

Western Potato Strip Teasers recipe

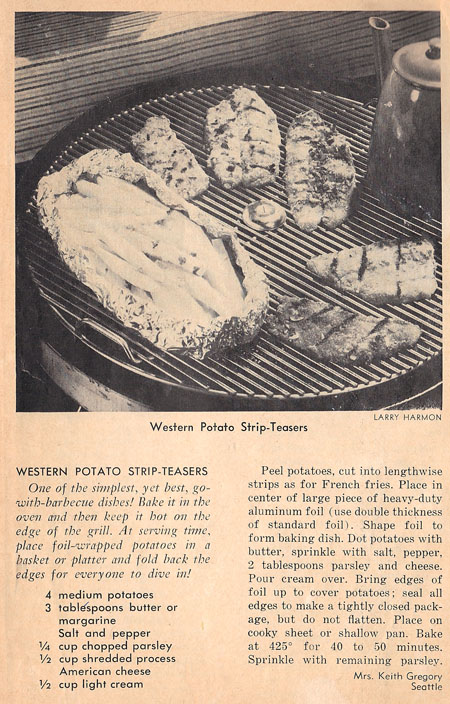
These potatoes are baked in foil the oven, and kept hot on the edge of the grill as the main dish is cooked. I made the potatoes pretty much as they said, except I used milk instead of cream and cheddar cheese instead of process American cheese.

Western Potato Strip-Teasers
serves 2

  • 2 good-sized potatoes (or several small, you need enough for 2 people)
  • 1 tablespoon butter, cut in small chunkl
  • salt and pepper
  • 2 tablespoons chopped fresh parsley, divided
  • 1/4 cup grated cheddar cheese
  • 1/4 cup milk

Take a piece of heavy-duty aluminum foil and shape it to form a baking dish.

Peel the potatoes and cut lengthwise strips as for French fries. Place in the aluminum foil baking dish. Dot the potatoes with butter, sprinkle with salt and pepper and cheese and 1 tablespoon of the parsley. Pour the milk over the mixture. Bring the edges of the foil up to cover the potatoes; seal alll edges to make a closed package (but do not flatten). Place it on a cookie sheet to make it easier to slip in and out of the oven.

Bake at 425˚ for 40-50 minutes, until the potatoes are done. Sprinkle with remaining parsley. If you like, you can take the foil package outside to your grill and keep the potatoes warm until dinner is ready.

Potato Strip Teasers

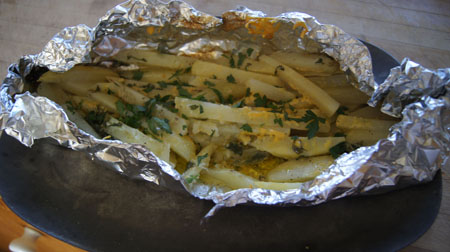
We both really liked these. I wanted “more!” I even ate some of the leftovers cold from the refrigerator the next day. And clean-up was really easy!

And what am I going to do with this little cookbook? I’m going to put it with my “old cookbooks” for the nostalgia. And maybe to cook another good old recipe sometime!

250 Cookbooks: Italian Light Cooking

Cookbook #154: Italian Light Cooking, Elisa Celli, Prentice Hall Press, Ny, Ny, 1987.

Italian Light Cooking cookbook

I haven’t opened this book in years! I bought it for myself, probably at The Peppercorn. One more venture into finding low-calorie recipes to cook, a common pastime until last year when I read The Big Fat Surprise by Nina Teicholz. (Which may have been a mistake!)

I like this book. Elisa Celli’s ideas for lighter cooking are pretty much like the Mediterranean diet of today: lots of fresh vegetables and fish, less red meats and cheeses, lots of “green olive oil”. (Green olive oil is extra virgin olive oil.) Celli also advocates for durum wheat pasta, which she claims is lower in calories than white flour pasta. She wrote several cookbooks in the late 1980s, and has a current presence on Facebook and YouTube.

Betsy Balsley wrote a review article of this cookbook in the November 1987 LA Times. It’s a good article, and says what I’d like to say – better! Here it is: Remembrance of Things Pasta: Cookbook Writer Elisa Celli Knows What Makes Good–and Bad–Italian Food.

What Celli calls “light” is not necessarily “low-calorie”. Celli feels that Americans add too much butter, cream, and cheese to pasta. In Italy, where she grew up, only small amounts of these heavy ingredients are added to the meals – her Italian food is “light” with lots of vegetables and herbs and fish and small amounts of lean meat. For the dieter, calorie values are clearly listed with each recipe.

(Some recipes do excede the allowance on a low-calorie diet.)

I chose three recipes to try: fettucini, a fish dish, and a dessert. The fettucini recipe comes from the introductory pages of this book and illustrates the Italian light way of cooking:

Celli's fettuccine

The fish is Pesce Positano, or Grilled or Baked Fish with Wine, Herb, and Garlic Sauce:

Grilled Fish Italian recipe

The dessert is Chocolate Raspberry Crema Alla Lynn. I chose this because I like chocolate had some leftover ricotta cheese in the refrigerator!

Chocolate Raspberry Crema recipe

Comments

The fettucini was delicious. It’s a simple recipe: cook the noodles and toss with a small amount of butter, half and half (you could use cream), Parmesan cheese, and parsley. However, I was not able to find a “durum semolina” pasta that had only 210 calories in 5 ounces. I stood in Whole Foods for a long time reading labels. I found several that were “100% durum”, but the lowest calorie value I could find was 500 calories in in 5 ounces. My fettucini dish was good, but not as low calorie as specified in Italian Light Cooking. (Online research reveals: both semolina and durum flours are made from durum wheat; semolina is the milled inner kernel of the wheat – endosperm – and it is a coarse-grind flour; durum is the milled grain, I think it’s everything except the endosperm but I’m not positive.)

*Note: A few weeks after I wrote this post, I found Paccheri at Whole Foods, made from “durum wheat semolina”. The calorie value is 150 calories per 56 grams, so about 375 calories in 5 ounces. Lower, but not as low as Italian Light Cooking specified.

Durum Pasta

The chocolate dessert tasted “almost good” – we both said that! This is probably due to my mis-interpretation of the measurement of chocolate. The recipe calls for “4 squares of unsweetened chocolate”. What’s in a “square”? My package of Baker’s unsweetened chocolate claims that 2 of the squares in their package (1 ounce) equals 1 square of past-packaging. I do not know what type of packaging Celli’s book meant, so I assumed it was “past-packaging” and I used 4 ounces, or 8 squares, of Baker’s chocolate. It was waaaayy too much chocolate. The dessert hardened quickly into a mass like a pile of hard and cold cookie. It tasted good but a little too bitter, and the mouth-feel was not good. (If I made this again, I would use 2 ounces of bittersweet chocolate.)

The fish was very good and the recipe as I prepared it is below. The drawback to this recipe is that we live in Colorado. Miles from any ocean. I only like fish purchased very fresh and that means very expensive. Wild caught fresh halibut was $27.99 per pound at Whole Foods. I do buy fish this expensive on occasion, since we rarely eat out (and usually save money by eating at home). But it’s really a ridiculous price.

Grilled Fish with Wine-Garlic Sauce
serves 2

  • 3/4 pound fish fillets (flounder, halibut, swordfish, bass, sole)
  • 2 tablespoons extra virgin olive oil
  • 1/4 cup dry white wine
  • 2 tablespoons freshly squeezed lemon juice
  • 1-2 cloves garlic, crushed
  • 1/2 teaspoon dry Italian seasoning (I added a little fresh basil too)
  • black pepper to taste
  • 1/4 cup chopped fresh Italian parsley

To make the sauce, whisk together all of the ingredients except the fish.

Put the fish on a piece of foil. Since you will be pouring the sauce over it, you need to make the foil boat-like. Pour most of the sauce on the fish and wrap the foil around it tightly. Save the rest of the sauce to pass at the table or to pour over the cooked fish before you serve it.

Prepare a hot grill (I use a gas grill). Put the foil-wrapped fish on the grill and cook on high direct meat for 3-4 minutes. Peek at the fish to see if it looks nearly cooked through; if it isn’t, cook a few minutes longer. Keep the fish very slightly underdone.

Serve immediately.

Italian Grilled Fish

I put my fish on top of the fettucini. It was very good! Well seasoned, and the halibut I used was yummy. My dining partner said it was almost “too healthy” tasting. I scarfed it up because I was starving. This is a nice way to cook fish on the grill, since you don’t have to worry about it burning, nor was there any mess to clean up.

250 Cookbooks: Chicken Cookbook

Cookbook #120: Chicken Cookbook, The Pillsbury Company, 1993.

Chicken CookbookI can see me standing at the check-out counter, flipping through this advertising cookbook, getting  hooked by many chicken-cooking ideas. So I tossed it in my basket along with a pile of groceries (kids at home) and paid the $2.75 (along with a lot for the groceries).

Advertising cookbooks – love ’em and hate ’em. Their history I discussed in a previous post. I haven’t bought one in 15 years – probably because I go to the internet these days for new cooking ideas.

Not sure yet if I’ll keep this one. I see several interesting ideas for cooking chicken, although I don’t like all of the ingredients. Packaged crescent rolls, prepared pie crusts, frozen fruits and vegetables, canned fruits and vegetables, canned soups. I am more of a “from scratch” person. Still, I can use the ideas in this cookbook and substitute fresh ingredients as I like.

I decide to make “Plum Barbecued Chicken Kabobs” for this blog. It’s summer, time to use the grill! I like kabobs, although I am not a huge fan of the basic bell pepper and onion and potato and meat skewers. This recipe for chicken kabobs has grapes alternated between the chicken pieces: this should add moisture and some good flavor. I’ve never used grapes on skewers before – sounds interesting.

Plum BBQ Chicken Kabobs recipeI can’t find any plum preserves! I checked several stores. Instead I bring home a jar of apricot preserves and also a jar of “plum sauce“, an Asian condiment. (I need the plum sauce anyway for a different recipe I am trying this week, one for grilled pork chops from my Weber’s Real Grilling book.) I’ll taste each and decide which to use in the Plum Barbecued Chicken Kabobs.

Chicken and Grape Kabobs
makes 4 kabobs, serves 2-3

  • 1/2 cup plum or apricot preserves
  • 2 tablespoons soy sauce
  • 2 tablespoons lemon juice
  • 1 tablespoon oil
  • 1/2 teaspoon dried sage, rubbed or leaves
  • 1 pound boneless skinless chicken breasts
  • 1 cup (about) of large red or black seedless grapes

Combine the preserves, soy sauce, lemon juice, oil and sage in a small bowl – this is the marinade.

Cut the chicken into 1-inch cubes. Combine with the marinade in a baggie and put in the refrigerator at least 1 hour.

Soak 4-5 bamboo skewers (or use metal ones). Remove the chicken from the marinade  – save the marinade for basting. Thread the chicken alternately with the grapes on the skewers.

Heat the grill to medium-high. Cook the kabobs for 10-15 minutes, until the chicken is done. Turn them often and baste several times with the reserved marinade. (Toss the marinade when done.)

Serve. I set out the Asian plum sauce but neither of us used it.

Chicken Grape KabobsThese were great! Tasty and moist with a nice sweetness from the grapes and the marinade. I served them over raisins-mandarin orange-lemon couscous with Parmesan toast. Success!

250 Cookbooks: Weber Charcoal Barbecue Kettles

Cookbook #116: Weber Charcoal Barbecue Kettles, Weber-Stephens Procuts Co., Arlington Heights, Illinois, circa late 1970s.

Weber Charcoal Barbecue Kettles“Pork tenderloin surprise packages on p. 15, but missing that page!” That is what I wrote in my database when I entered this small instruction and recipe booklet. And that recipe is all I think about now when I pick up this booklet to find a recipe for this blog! None of the other (remaining) recipes are anything I want to make.

What are pork tenderloin surprise packages? Well, as I recall, you take some bacon and wrap it around a thick slice of pork tenderloin topped with – something else – and toothpick it all together. You put it on the grill and cook it – at some temperature – until done. Cheese enters the picture at some point. We loved these back in the day but I haven’t made them in years.

On a hunch, I googled “pork tenderloin surprise packages” and hit the jackpot. I guess I’m not the only fan of this recipe! I found several very similar versions of the recipe online. Yay!

Here is a photo of the original recipe (1972 edition, not the same as my little booklet) from the Let’s Talk BBQ site. Visit that site for great photos of the steps for making Pork Tenderloin Surprise Packages! Cooks.com has a version that is a little easier to read. Saz’s site’s version suggests mozzarella cheese and specifies “indirect heat” and a cooking time of 55 minutes (not 45 minutes like the original) and a doneness temperature of 170˚. I like this version too; it suggests that you can cook them in the oven.

I am tickled to find the original recipe, but I still have some work to do: I need to work out how to cook these on a gas grill, both time and temperature.

I know that the bacon grease will drip off these little packages – so I begin by making sure the drip pan at the bottom of my gas grill is clean and wiping off some of the chunks of build-up on the inside of the BBQ. My grill top has a temperature gauge; while cooking these packages I will nudge the burners to get it to read 350-375˚. I’ll put them over indirect heat. Starting at 40 minutes, I will check the temperature of the pork with an instant-read thermometer. When the temperature is about 160˚, I’ll add the cheese to the top and check every couple minutes until the cheese is melted. Ready, set, go!

Here is my version of the recipe.

Pork Tenderloin Surprise Packages
this is written for one; multiply as necessary

These work best with the pork in a thick chunk. Pork tenderloins have both a skinny and a fat end. I found that I could cut a 2-inch thick slice from a skinnier end and flatten it to 1 1/2-inch if necessary.

  • 1 slice of pork tenderloin, 3-6 ounces (depending on appetite); thickness about 1 1/2-inch
  • seasoning (salt and pepper; but you barely need salt if the bacon is salty)
  • 2 slices bacon
  • 1 slice of cheese: aim for 1/4-inch thick
  • 1 slice of tomato: aim for 1/2-inch thick
  • 1 chunk of bell pepper
  • 1 slice of cheese (I used sharp cheddar)

Cross the two slices of bacon and put the pork tenderloin in the center. Add the onion, then tomato, then bell pepper. Fold the bacon ends in and secure with a toothpick.

Heat your gas grill to about 375˚. I did this by turning on all the burners to get the grill good and hot. Then, on my Weber gas grill with three burner strips, I set the front one to “high” and turned off the other two. I found that this maintained the 375˚ temperature for the duration of the cooking.

Put the pork packets on the grill over indirect heat: on my grill, I put them over the back two unlit burners. Close the BBQ.

After 40 minutes, begin checking the temperature of the pork tenderloin. Cook the meat to 160˚. (Mine took 45 minutes.) Add the slice of cheese to the top of the package and cook only until the cheese melts – about 5 minutes.

Serve!

Preparation steps:

These are really easy to make. I served them with artichokes and fresh sourdough bread.

surprise packagesSlice and stack! An X marks the spot.

surprise packagesAnd here is one of the grilled pork tenderloin surprise packages:

pork tenderloin surprise packagesYes these were fatty but who cares! The onion was soft-cooked, the tomato perfect, and the bacon – well, if you like bacon, you know that bacon makes everything taste great. I’m glad I found my old recipe and made these again. The missing pages from this booklet may show up tucked in one of my other cookbooks, but it doesn’t matter anymore, I have the recipe I want. Now I can recycle the remains of this booklet.

Favorites: Southwestern Grilled Chicken

I clipped this recipe back in the 80s from the Colorado Daily, the campus newspaper of the University of Colorado, Boulder. Me, a seasoned cook, using a recipe from a campus newspaper, a resource that targets the 18-24 year old crowd! But this is a great dish for families too. I included it on the short list of main dishes in my 1990s blog, and I still make it today, in 2013. It is simple, low-fat, and tasty.

The original recipe suggested serving with grilled or broiled green, red, and yellow bell peppers. Instead, I always serve it with a good, chunky salsa, rice, and warmed corn tortillas.

Southwestern Grilled Chicken
serves 3-4, depending on appetites

  • 8 oz. plain yogurt (Greek yogurt works great)
  • 1/4 cup chopped green onions
  • 8 oz. chopped green chiles (canned work fine)
  • 1 teaspoon cumin
  • 1/2 teaspoon salt
  • 1 tablespoon mayonnaise
  • 1 pound boneless chicken breasts (or chicken tenders)
  • hot salsa (your choice)
  • cilantro (optional)
  • cooked rice

I generally start this in the morning and let the chicken marinade all day, but a couple hours is sufficient.

Combine the yogurt, onions, chilies, cumin, and salt. Remove about 2/3 cup of this mixture, mix it with the tablespoon of mayonnaise, and set it in the refrigerator for later use (it’s a sauce for the cooked chicken).

Put the rest of the yogurt mixture in a bowl and add the chicken pieces. You can make the chicken extra tender by piercing it a lot with a sharp fork. Cover the bowl and set the chicken-marinade mixture in the refrigerator.

About a half hour before dinner time, remove the chicken from the yogurt marinade. Cook the chicken either in a broiler or on the grill:

  • broil about 5 minutes per side 4-5″ from an oven broiler set on high OR
  • grill over medium high direct heat, about 5 minutes per side

The chicken is done when an instant-read thermometer reads about 165˚. If you don’t have a thermometer, check for doneness by cutting into one of the pieces with a knife (it should no longer be pink inside).

Slice the chicken into 1/2″ thick pieces and plate it with the cooked rice. Sprinkle with chopped cilantro if you wish. Serve it with the reserved yogurt mixture and hot salsa. Warmed corn tortillas make a great addition!

Southwestern Grilled Chicken

250 Cookbooks: Tastes Great! Summer Salads and Barbecue

Cookbook #2: Tastes Great! Summer Salads and Barbecue. Published by Safeway Stores in 1989. (Opus Productions Inc.)

Tastes Great

Okay, time to choose my second cookbook. I close my eyes and reach out my left hand and my right hand, and lay each on a book. My eyes still closed, I explore each book: one is big and one is small. Since my last book was big, I choose the small one. I open my eyes.

Yuck, just a “supermarket” book. Published by Safeway Stores. This ought to be pretty boring. I open it and start reading. Hey, this recipe looks good . . . and this one too! In a few minutes I find almost ten recipes I am interested in. I am pleasantly surprised! I read the preface and find that the cookbook celebrates Safeway’s 65 anniversary. “Summer is a time for friends and family, warm weather, and most of all – great food.” And everything I need is available at Safeway. Sounds good.

In fact, the recipes do list ingredients that I keep in my pantry. I don’t have to go to the store to search for anything but perhaps the main ingredient, like the meat or chicken. A plus.

The barbecue section is geared to charcoal-type barbecues, but the authors tell me that “the cooking times and directions are for any type of barbecue, including today’s popular and widely used gas barbecues.” That’s friendly.

Will I use this cookbook again? Definitely. Besides several grilling recipes, I want to try a few of the salads: Chinese Chicken Salad, Summer Pea and Bacon Salad, and Fresh Basil Vinaigrette. I like that the recipe for Caesar Salad is just like the one in my Joy of Cooking, right down to letting a clove of garlic stand in olive oil for several hours, then using that garlic-olive oil to fry white bread for croutons. Good, basic down-to-earth cooking.

Recipe: Colorado Chuck Steak on the Grill
4 stars


A thick chuck steak is great barbecue family fare. Try this boneless chuck steak slow-cooked on the grill with a lid. Accompany with old-fashioned scalloped potatoes, fresh broccoli, and a loaf of Best-Ever Garlic Bread. [Cookbook authors’ note.]

1 4- to 5-lb. boneless chuck roast, cut 2″ thick
Spicy Red Wine Marinade (recipe follows)

Prepare the marinade. Place chuck steak in a shallow dish and cover with the marinade, turning to coat both sides. Cover and refrigerate 6 hours, turning once. Bring steak and marinade to room temperature while preparing coals to medium-hot, 45 minutes.

Place grill 6″ above coals. Oil grill. Place meat on grill, reserving all marinade. Place lid on barbecue, with the draft vents open. Cook steak, basting frequently with the marinade and turning with tongs, until done, about 30 minutes total cooking time. Make a tiny cut to check for medium-rare. Remove cooked steak from the grill, and place on a carving board. Allow meat to stand 10 minutes, then slice across the grain into thin slices. Heat any remaining marinade in a small pan on the grill, and spoon over servings, if desires.

Spicy Red Wine Marinade

1/3 cup salad oil
1 medium-sized onion, peeled and minced
1 large clove garlic, peeled and pressed
1 cup tomato-based chili sauce (hamburger-type, bottled)
2/3 cup dry red wine
1/4 cup red wine vinegar
2 Tbsp. Worcestershire sauce
1 Tbsp. horseradish (prepared, not creamed)
1/2 tsp. liquid smoke flavoring
1/4 cup brown sugar
2 bay leaves
1 Tbsp. each thyme and oregano leaves
1 Tbsp. cracked black peppercorns

Heat the salad oil in a saucepan over medium-high heat. Add the minced onion, and saute 1 minute. Stir in the remaining ingredients, bring mixture to a simmer, and cook over low heat uncovered for 25 minutes. Remove from heat, and cool to room temperature.

Comments on Recipe

I invited family over for this meal, since “A thick chuck steak is great barbecue family fare.” Personally, I might have given the recipe 3 stars, but my guests said “4 stars”. Probably there is a “politeness” bias in their 4 stars, but I’ll let it stand.

Cooking instructions are pretty brief: put the meat on a medium-hot charcoal grill and cook 30 minutes, turning and basting. I will pull in my years of experience with my particular gas grill and include them here, since it worked.

My grill has three burners. I preheated the grill by turning the front two burners to the highest setting until the thermometer in the grill’s lid registered 400˚F. Then, I turned the burners down to 75% heat, scrubbed the grill, and lay the meat on the grill over the front burners (direct heat). I left the meat over direct heat for 10 minutes, turning once and basting. Then I moved it to indirect heat (the back burner that I never turned on), keeping the temperature of the gas grill at 375˚, as much as possible.

I kept turning and basting every 5-10 minutes. After 20 minutes cooking time, I began testing for doneness. Instead of making a tiny cut to check this, I  used my instant-read thermometer. According to the chart that I use, the meat should be 125-135˚ for medium rare.

My total cooking time was 35 minutes. I meant to pull the meat off the grill at 135˚ internal temperature, but missed that point and pulled it at 140˚. Then I let it rest over half an hour. It was cooked perfectly, pink but not raw. The meat was very tasty. My only complaint was that the meat was a little chewy, even when cut into thin slices.

The marinade is unusual in that it was simmered before the meat was placed in it. The simmering made it thick and boosted the flavor. I was apprehensive grilling a chuck roast, because I usually braise them – long, slow, moist cooking to render them tender. I was surprised it turned out as well as it did. It’s a cheap cut of meat, and it’s always nice to have easy and inexpensive company main dish recipes in your repertoire.

And what to do with the leftovers? Barbecue beef sandwiches!