250 Cookbooks: Settlers’ Recipes and Remedies

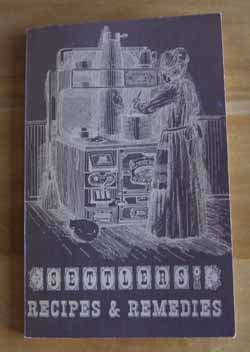
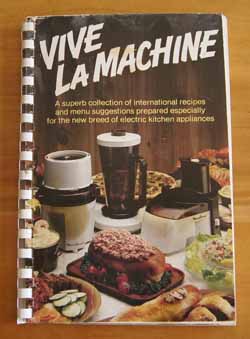
Cookbook #117: Settlers’ Recipes and Remedies, Historic Boulder, Inc., 1978.

Settlers Recipes and Remedies Cookbook“Hiccups are immediately stopped by giving a lump of sugar saturated with wine vinegar.”  “For a headache, peel and slice raw potatoes and bind them on the forehead in a cloth that reaches around the head.” “It will be bad weather if carrots grow deeper.”

Such is the lore of the first settlers in Boulder, Colorado. Settlers’ Recipes and Remedies includes small black and white photos of people and serving ware and  a store and historic homes in Boulder. There are quite a few recipes – some basic, some interesting, some odd – but few very are practical for today’s cooks. No oven temperatures! No cooking times!

I must have bought this book used in a bookstore in Boulder, since “$3.00” is written in pencil on the first page. I’ve never used it as a recipe source. I can’t find any information about it online, except that the Denver Public Library has a copy. Historic Boulder has a current website, but they don’t mention this book.

I will cook “Wild Bill Hickock’s Smothered Beefsteak” for this blog. You take a thin steak, smooth a bread stuffing on top, roll it up, and cook it til done. Good basic foodstuff. Then, I will recycle this book.

Beef Rolls recipeSteak Roll
serves 2

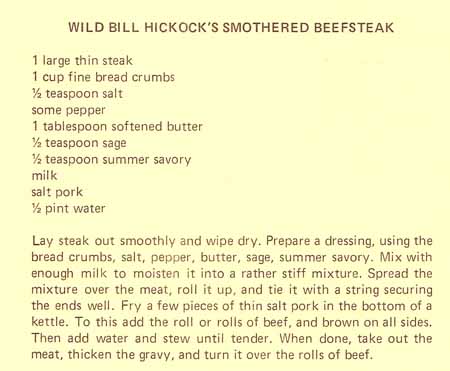
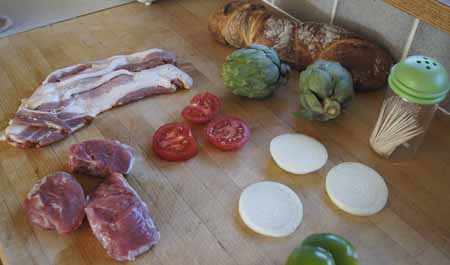
  • one thin-cut steak, sirloin or round, about 12 ounces
  • 1 cup fine bread crumbs
  • 1 tablespoon soft butter
  • 1/2 teaspoon sage
  • 1/2 teaspoon summer savory (or, use oregano or thyme)
  • salt and pepper
  • milk, about 1/4 cup
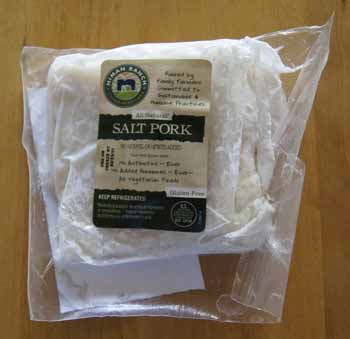
  • salt pork, about a tablespoon, chopped
  • beef broth, 1-2 cups, or use water
  • flour

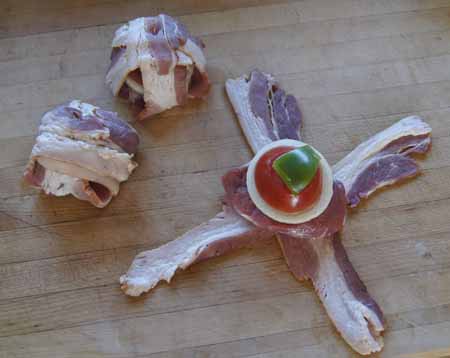
Lay the steak out on a breadboard and pound with a meat pounder/tenderizer until it is smooth and flat.

Put the breadcrumbs, butter, herbs, and salt and pepper in a bowl. Add enough milk to make a “stiff” mixture (one that hold together when pressed with your hands). Spread this mixture over the steak in an even layer.

Roll the steak (from either side, your choice) and tie with pieces of string. Set aside.

In a pot on the stove top, brown the salt pork. Add the steak roll and brown on all sides. Add beef broth (or water); the roll does not need to be submersed in liquid, just have the depth of liquid at about an inch. Cover the pot and simmer 1 1/2 – 2 hours. Check about every 30 minutes and add more broth or water if it is evaporating away.

The roll is done when it is knife-tender. Remove the roll from the pan and set aside. Add a tablespoon or two of flour to the gravy in the pot and mix in; add water until the gravy is as thick or thin as you like.

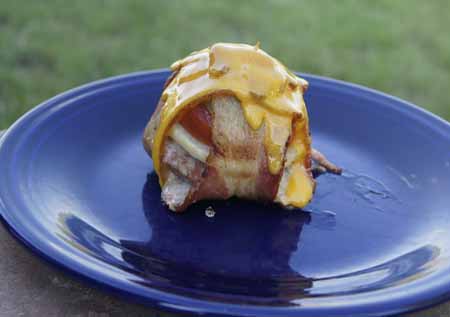
Slice the roll and serve with the gravy.

Beef Rolls
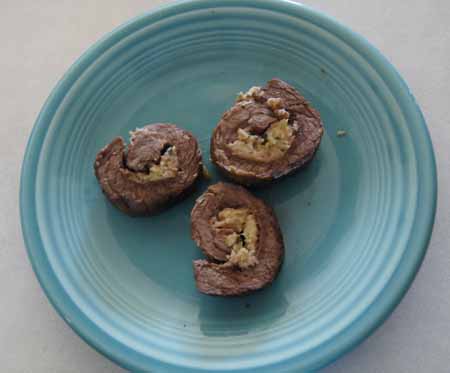
We liked these – good comfort food. They were excellent with mashed potatoes and peas!I think the salt pork added a lot of flavor. If you can’t find it, use a piece or two of bacon. I was able to find salt pork at Whole Foods. Part of the current movement to bring saturated fats back into the US diet, I guess!

Salt Pork

250 Cookbooks: Weber Charcoal Barbecue Kettles

Cookbook #116: Weber Charcoal Barbecue Kettles, Weber-Stephens Procuts Co., Arlington Heights, Illinois, circa late 1970s.

Weber Charcoal Barbecue Kettles“Pork tenderloin surprise packages on p. 15, but missing that page!” That is what I wrote in my database when I entered this small instruction and recipe booklet. And that recipe is all I think about now when I pick up this booklet to find a recipe for this blog! None of the other (remaining) recipes are anything I want to make.

What are pork tenderloin surprise packages? Well, as I recall, you take some bacon and wrap it around a thick slice of pork tenderloin topped with – something else – and toothpick it all together. You put it on the grill and cook it – at some temperature – until done. Cheese enters the picture at some point. We loved these back in the day but I haven’t made them in years.

On a hunch, I googled “pork tenderloin surprise packages” and hit the jackpot. I guess I’m not the only fan of this recipe! I found several very similar versions of the recipe online. Yay!

Here is a photo of the original recipe (1972 edition, not the same as my little booklet) from the Let’s Talk BBQ site. Visit that site for great photos of the steps for making Pork Tenderloin Surprise Packages! Cooks.com has a version that is a little easier to read. Saz’s site’s version suggests mozzarella cheese and specifies “indirect heat” and a cooking time of 55 minutes (not 45 minutes like the original) and a doneness temperature of 170˚. I like this version too; it suggests that you can cook them in the oven.

I am tickled to find the original recipe, but I still have some work to do: I need to work out how to cook these on a gas grill, both time and temperature.

I know that the bacon grease will drip off these little packages – so I begin by making sure the drip pan at the bottom of my gas grill is clean and wiping off some of the chunks of build-up on the inside of the BBQ. My grill top has a temperature gauge; while cooking these packages I will nudge the burners to get it to read 350-375˚. I’ll put them over indirect heat. Starting at 40 minutes, I will check the temperature of the pork with an instant-read thermometer. When the temperature is about 160˚, I’ll add the cheese to the top and check every couple minutes until the cheese is melted. Ready, set, go!

Here is my version of the recipe.

Pork Tenderloin Surprise Packages
this is written for one; multiply as necessary

These work best with the pork in a thick chunk. Pork tenderloins have both a skinny and a fat end. I found that I could cut a 2-inch thick slice from a skinnier end and flatten it to 1 1/2-inch if necessary.

  • 1 slice of pork tenderloin, 3-6 ounces (depending on appetite); thickness about 1 1/2-inch
  • seasoning (salt and pepper; but you barely need salt if the bacon is salty)
  • 2 slices bacon
  • 1 slice of cheese: aim for 1/4-inch thick
  • 1 slice of tomato: aim for 1/2-inch thick
  • 1 chunk of bell pepper
  • 1 slice of cheese (I used sharp cheddar)

Cross the two slices of bacon and put the pork tenderloin in the center. Add the onion, then tomato, then bell pepper. Fold the bacon ends in and secure with a toothpick.

Heat your gas grill to about 375˚. I did this by turning on all the burners to get the grill good and hot. Then, on my Weber gas grill with three burner strips, I set the front one to “high” and turned off the other two. I found that this maintained the 375˚ temperature for the duration of the cooking.

Put the pork packets on the grill over indirect heat: on my grill, I put them over the back two unlit burners. Close the BBQ.

After 40 minutes, begin checking the temperature of the pork tenderloin. Cook the meat to 160˚. (Mine took 45 minutes.) Add the slice of cheese to the top of the package and cook only until the cheese melts – about 5 minutes.

Serve!

Preparation steps:

These are really easy to make. I served them with artichokes and fresh sourdough bread.

surprise packagesSlice and stack! An X marks the spot.

surprise packagesAnd here is one of the grilled pork tenderloin surprise packages:

pork tenderloin surprise packagesYes these were fatty but who cares! The onion was soft-cooked, the tomato perfect, and the bacon – well, if you like bacon, you know that bacon makes everything taste great. I’m glad I found my old recipe and made these again. The missing pages from this booklet may show up tucked in one of my other cookbooks, but it doesn’t matter anymore, I have the recipe I want. Now I can recycle the remains of this booklet.

250 Cookbooks: Pasta

Cookbook #115: Pasta, The Good Cook Series, by the Editors of Time-Life Books, Time-Life Books, 1982.

Pasta CookbookThis is a great reference for anyone who loves to make – or eat – pasta. The photos of pasta varieties and preparation are gorgeous and helpful. I am sure I used this book when I was learning the techniques of making fresh pasta. The information is this book is still applicable, and I will definitely keep it!

Recipes in this book? My note to myself about this book is “most of the recipes are rather high calorie, have lots of cream, or include frying”. In my older age I am a bit more lax on (good) fats in my diet, especially having just read “The Big Fat Surprise”. I will keep this book out for awhile, and explore the recipes I noted before: macaroni and cheese, stuffed pasta, dumplings, gnocchis, pasta pies, fried noodles, and oriental pastas.

The first half of this book is all about making, cooking, and saucing pasta. The second half is an “Anthology of Recipes”. I was sort of surprised that this is collection of previously published recipes – not ones developed specifically for this book. The recipes were written by world-renowned chefs or copied from out-of-print or foreign books. It is a very interesting collection to peruse.

For this blog? I’ll make one of the macaroni and cheese recipes. I don’t make macaroni and cheese a lot. Granted, it’s a great comfort food – but it doesn’t often fit in my menu plans. We almost always eat meat at dinner, and macaroni and cheese is a bit too rich as a side dish. When I do make it, I make a white sauce plus cheese, then fold in cooked macaroni. A few times I have made the macaroni from scratch using my pasta machine, and it was really delicious. (This was a good main dish when my daughter was in a vegetarian phase.)

The recipe I choose to make from the Pasta cookbook is a baked variety. It is rich with cheese, but not the added butter of a white sauce. The suggested macaroni is whole wheat, so, added fiber and lower glycemic index. I plan a meal of grilled sirloin steak, steamed broccoli, and “Mom’s Macaroni and Cheese”.

Mom's Mac and CheeseMom's Mac and CheeseNote the credit for this recipe: “Julie Jordan, Wings of Life”. Here is an interview-article on Julie Jordan (Cabbage Town Chef), a woman of about my age who ran a vegetarian restaurant. She mentions “Mom’s Mac and Cheese” in the interview. I love the way she writes in the above recipe: “lots of parsley”. Yes! Cooking is not about following a recipe to a tee.

Here is the whole wheat macaroni I found in a local store:

whole wheat macaroniI made a few small modifications. Below is my version.

Baked Macaroni and Cheese with Whole Wheat Noodles
serves 4

  • 1/4 pound whole wheat macaroni
  • 1/2 pound extra sharp cheddar cheese, grated
  • 1 1/4 cups hot milk
  • 1/2 cup bread crumbs (preferably from whole wheat bread)
  • 1 small onion, chopped very fine
  • 2 tablespoons finely chopped bell pepper
  • parsley (to taste, maybe 1/4 cup chopped)
  • 1/2 teaspoon salt
  • 2 eggs, beaten
  • paprika

Cook the macaroni according to the package directions. Do not overcook it: it needs to be done but still firm.

Put the bread crumbs and cheese in an appropriately-sized casserole and pour the hot milk over the mixture. Add the onion, bell pepper, “lots of parsley”, and salt. Stir in the eggs, then mix in the cooked macaroni. Sprinkle with paprika.

Bake at 350˚ for about 30 minutes, until the top of the casserole is golden brown. Serve!

Baked Whole Wheat Macaroni and CheeseYum. This macaroni and cheese earned a thumbs up from both of us. I will make it again!

250 Cookbooks: Vive La Machine

Cookbook #114: Vive La Machine, Moulinex Products, Inc., editor Sue Spitler, published by Marketing Communications International, USA, 1977.

Vive La Machine CB“A superb collection of international recipes and menu suggestions prepared especially for the new breed of electric kitchen appliances.”

And what is the “new breed” of kitchen appliances? Food processors: counter-top machines that shred, slice, chop, and puree foods. They became available for home cooks in the US sometime in the 1970s. I got my first one in the 80s. It was a “La Machine”. Hence I own this cookbook!

But alas, that old La Machine bit the dust. It did a pretty good job of shredding: I used it a lot to grate cheese, zucchini and carrots. The slicer worked okay but it was often easier to slice small amounts of vegetables with just a knife. You had to hold a bowl under the spitter-shute because the shredded/sliced foods came flying out. I liked the nice small bowl with a spinning blade for dicing vegetables and grinding meats. A drawback of the  La Machine was that it was hard to clean, since the dirty parts were not immersible.

But the big issue with my La Machine was the funky connection of the top to the bottom.  I had to buy new parts at least once. I eventually replaced it with a Cuisinart brand food processor.

I kind of like this Vive La Machine cookbook. The recipes rely on freshly grated and chopped foods, thus recipes are from-scratch and up my alley.

For this blog, I choose to make “Fudge Brownies”.

Fudge Brownies RecipeI am going to re-name these “Chocolate Zucchini Brownies”. They are chocolaty, but not really fudgy.

My version is below: I halved the recipe and made a couple small changes.

Chocolate Zucchini Brownies
makes an 8×8-inch pan of brownies

  • 1 1/4 cups flour
  • 1/3 cup cocoa
  • 1 1/2 teaspoons baking powder
  • 3/4 teaspoon baking soda
  • 1/2 teaspoon salt
  • 3/4 teaspoon cinnamon
  • 6 tablespoons butter (3/8 cup)
  • 2 eggs
  • 1 teaspoon vanilla
  • 1 cup sugar
  • 3 tablespoons milk
  • 1 cup shredded zucchini, lightly packed (about 1 medium zucchini, whatever that is)
  • 1/2 cup chopped walnuts

In a bowl, stir together the flour, cocoa, baking powder, baking soda, salt, and cinnamon. Set aside.

In a mixer, blend well the butter, eggs, vanilla, and sugar. Add the milk and mix in. Add the flour mixture and mix on low speed until smooth. Add the zucchini and nuts.

Pour into a greased (I used non-stick spray) 8-inch square baking pan. Bake at 350˚ for 35-45 minutes, or until it tests done with a toothpick.

Chocolate Zucchini BrowniesThis recipe is a keeper! Yes I already have about a dozen great brownie recipes, but this one needs to be put in my repertoire. These are kind of light and fluffy and are especially moist. If no one told you zucchini was in them, I doubt you would guess. And the cinnamon – the cinnamon! It adds a . . . je ne sais quoi touch . . . never leave out the cinnamon.

These brownies fell just a little bit in the center of the pan. Since we live at 5400 feet, next time I will apply my high-altitude baking suggestions to see if it helps. Doesn’t matter a lot, these taste yummy!


Favorites: Sukiyaki

One of my college roommates was Japanese, and she wrote out this recipe for Sukiyaki for me:Sukiyaki RecipeWhen we cooked in our on-campus apartment, we made this in my electric fry pan. She was a very neat person (I, on the other hand, can tend to be slovenly) and put neat little piles of the different ingredients – meat, veggies, tofu, noodles – in different sections of the pan. I always loved this meal. And the memories of our times together, including visits to her aunt’s house in Southern California.

I just re-discovered my electric fry pan and was inspired to dig out my old recipe card. I actually found it! Here is how I prepared Sukiyaki last Saturday, here in the year 2015.

Sukiyaki
serves 2

  • 9 ounces beef tenderloin or sirloin, cut into small strips
  • a couple green onions, cut into 1-inch pieces
  • bamboo shoots, about half a can
  • yam noodles (fresh, from an Asian market, or maybe a local supermarket)
  • water cress (one small bunch; could use spinach)
  • mushrooms, sliced (I used fresh shitakes)
  • tofu, about 10 half-inch chunks
  • sauce: 1/4 cup sugar, 1/4 cup soy sauce, 1/2 tablespoon mirin (rice wine, or use sherry), 1/2 cup water

Heat a large electric fry pan to 360˚ (or use a large, flat skillet on your stove top). Add a few tablespoons vegetable oil and fry the meat until brown. Push the meat to a corner of the pan. Lower the heat to 320˚ and add the sauce. Put the green onions, bamboo shoots, noodles, water cress, mushrooms, and tofu in separate piles in the pan. Continue to heat until all the ingredients are hot. Serve!

Sukiyaki