250 Cookbooks: Jane Brody’s Nutrition Book

Cookbook #43: Jane Brody’s Nutrition Book. Jane Brody, W. W. Norton & Company, NY, NY, 1981.

Jane Brody Nutrition Book
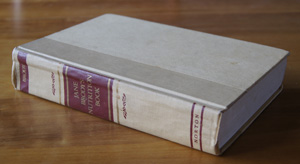
This isn’t really a “cookbook”, but I entered it into my database, and it does have a few recipes, so I’m calling it part of the “250”. You can see both wear and food spots on this cookbook. It’s a great reference for an important component of cooking: Nutrition. My goal for years has been to pack as much nutrition as I can stand into the calories I consume. This book helps me with that goal. I used to refer to it all the time, although I’ve sort of forgotten about it lately.

Granted, this cookbook was published in 1981, and now it’s 2013. But I believe that this is still a good and complete reference for basic nutrition facts. If you want to know about vitamins, protein requirements, food additives, salt, or the different types of fats, Jane Brody’s book will answer your questions – and countless more. If you want to build a healthy basic diet for yourself, the facts are in this book. A large part of the book is devoted to finding a balanced, low-calorie diet for your family. However, some of the newer topics, like celiac disease, are not covered.

Jane Brody became the author of the NY Times Personal Health column in 1976. Her undergraduate degree is in biochemistry (a chemist like me!), and she backs up her articles with professional journal references. As a science writer, she interprets food and health science for the layperson. When I picked up my copy of Jane Brody’s Nutrition Book to begin this blog entry, I had no idea whether or not she was still alive, much less writing. Happily, I found that she still writes the NY Times Personal Health column, and better yet, all the articles are online. In fact, as of today, 3686 of those articles are readily available! Once again, I am very happy that I am doing this blog. I have re-connected to one of my nutrition gurus. Plus she is an exercise nut and now includes many articles applicable to aging (she is about 10 years older than I am).

Here’s the link to Jane Brody’s articles:

As an aside, I’d like to mention another resource for nutrition fact and theories, a course from the Great Courses called Nutrition Made Clear. I listened to this 36-lecture course while commuting to work a few years ago, and still refer to the pdf course document for specifics on current recommendations for vitamins and minerals.

I decided to try “Potato Kugel” from the “Is it Healthy to be a Vegetarian” section of this book. I have a longing for kugels in general. Way back in college, a friend brought a traditional Jewish kugel to a party. It had noodles and was sweet: I had never had anything like it before and loved it. To this day, I have never made a sweet kugel for myself, but just the mention of “kugel” gets pings of longing zooming around my brain.

This kugel is based on grated potatoes, carrots, and eggs and is baked like a casserole in the oven. Kind of sounds like an easy way to make a potato-pancake-like meal. I am always looking for potato side dishes, as my dining partner (unlike Jane’s husband) does not appreciate grain side dishes (bulghur, quinoa, farrow, etc.). I’ll cut the recipe in half but otherwise I’ll make it as written.
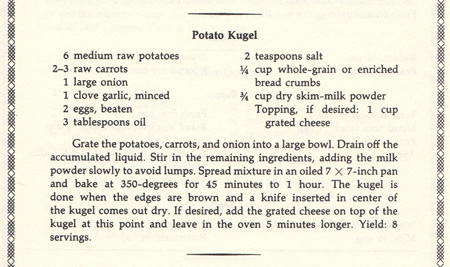
 Potato Kugel RecipePotato Kugel
serves 3-4 as a side dish

  • 3 medium potatoes
  • 1 large carrot
  • 1/2 onion
  • 1 small clove garlic, minced
  • 1 egg, beaten
  • 1 1/2 tablespoons oil
  • 1/2 teaspoon salt
  • 1/4 cup bread crumbs (preferably whole wheat)
  • 3/8 cup dry milk powder
  • 1/2 cup grated cheese for the top (optional)

Grate the potatoes, carrots, and onion into a large bowl. Drain off the accumulated liquid. Stir in the remaining ingredients. Spread in a non-stick sprayed (or oiled) pan*. Bake at 350˚ for 45 minutes, or until the edges are brown and the egg set. You can put the optional grated cheese on top during the last 5 minutes of baking.

*I used a small LeCreuset pan, about 4 1/2 x 7-inches, it holds 2 1/2 cups.

Comments

I used a food processor for the garlic, potatoes, carrots, and onion. First, I started the chopper blade running, and dropped in the clove of garlic. Then I changed to the larger-sized grater and ran through the potatoes, carrots, and onion.

There was very little liquid to pour off. I briefly put the grated mass in a colander and pressed on it, but I don’t think this step is necessary.

It just fit into my LeCreuset pan. To me, it looked like it would serve two people, not 3-4. Here it is before baking:

Potato Kugel before bakingBut after 40 minutes in the oven, it had puffed up nicely:

baked Potato Kugel
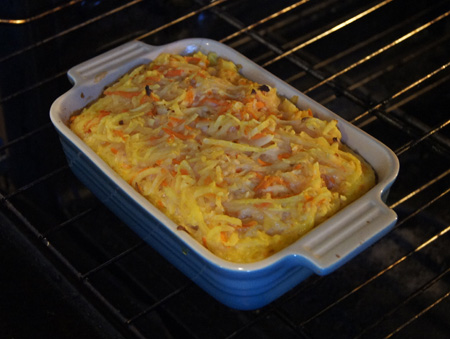
I put some cheese on top and put it back in the oven for 5 minutes, but it looks prettier in the above photo.

This is a dense potato dish, it is much more filling that I thought it would be. I dished up one-third of it to each plate, and it was a lot to eat (as a side dish). It had a good texture and a strong onion taste, both of which I liked. In fact, I could eat this a lot. My dining partner said it was fine – but wasn’t interested in having it a lot. He likes my scalloped potatoes better.

So this dish gets a half-thumbs up.

250 Cookbooks: Cookies, Bars, Brownies

Cookbook #42: Cookies, Bars, Brownies (Pillsbury Classic Cookbooks). The Pillsbury Company, Minneapolis, MN, 1994.

Cookies, Bars, BrowniesI know why I stopped baking cookies: They just taste too good! I made the Hearty Apple Cookies from this cookbook and ate one and wanted MORE! Now, why can’t plain brown rice do that for me? Or carrots? Or tofu? Life’s not fair.

I have already discussed Pillsbury cookbooks/booklets in this blog, a few of the Bake-off Cookbooks and one of my favorites, Simply From Scratch. I have over 20 Pillsbury booklets. This particular one I am not going to keep. I had marked only one recipe in it, and this week as I paged through the booklet, only one other recipe stood out as one that I wanted to try: “Hearty Apple Cookies”. I like these because they include ingredients that have some nutritive value: whole wheat flour, raisins, nuts, apples, and oatmeal.

Hearty Apple CookiesI want to make some changes in this recipe. First, about the “whole wheat flour” called for in the recipe. I keep three types of whole wheat flour in my pantry:

  • whole wheat flour (traditional, sold my many manufacturers)
  • white whole wheat flour (King Arthur Flour; sometimes in supermarkets)
  • whole wheat pastry flour (in supermarkets, sometimes in the bulk section)

I decided to use whole wheat pastry flour in these cookies. Next, I have some great golden raisins or sultans that I bought for the Butterscotch Oatmeal Raisin Cookies, and I want to use these instead of dark raisins. Instead of apple juice, I’ll use boiled cider (from King Arthur Flour). This packs a lot more apple punch than mere apple juice. It’s great stuff:

boiled ciderFor the oatmeal, I’ll use rolled oats from Bob’s Red Mill. These are particularly good oats, big and fluffy:

rolled oatsI assembled my ingredients:

cookie ingredientsAnd prepared the cookies as per the above scanned-in recipe. I thought that they flattened out too much as they baked. They definitely looked a lot flatter and more spread out than the photo that is next to the scanned recipe. The reason for this is either (1) type of flour (2) amount of flour or (3) choice of butter over margarine. I tried adding some all-purpose flour to the remaining batter, and it worked. That batch baked up like the cookies in the photo. But both flat and tall cookies taste equally good!

In the recipe below, I include the additional flour so that the cookies look a little better when cooked. I photographed both kinds to let you know what I’m talking about.

Hearty Apple Cookies
makes 4 dozen cookies

  • 1 1/3 cups firmly packed brown sugar
  • 1/2 cup butter
  • 1 egg
  • 1 cup finely chopped, peeled apple
  • 1/4 cup apple juice or boiled cider
  • 2 cups whole wheat pastry flour
  • 1/2 cup all-purpose flour
  • 1 teaspoon baking soda
  • 1 teaspoon cinnamon
  • 1/2 teaspoon salt
  • 1 cup raisins (regular or golden)
  • 1 cup chopped nuts
  • Topping: 1/2 cup rolled oats, 1/2 cup brown sugar, 1/2 teaspoon cinnamon, 1/4 cup butter, melted

Beat the brown sugar with the butter until light and fluffy; add egg and blend well. Beat in apple and apple juice.

Combine flours, baking soda, cinnamon, and salt, then add to the batter and mix until the flour is incorporated. Stir in raisins and nuts.

Combine the topping ingredients in a small bowl. Drop cookie dough by heaping teaspoonfuls 2 inches apart on parchment-lined baking sheets (or greased cookie sheets). Top each with some of the topping and press gently into the cookie.

Bake at 375˚ for 10-12 minutes, or until the edges are golden brown. Cool a minute on the pan before removing to wire racks.

The original recipe made excess topping so I cut down the amounts in my version of the recipe (above). These cookies are moist and get softer on storage. Next time I bake these I will decrease the brown sugar to 1 cup as suggested in the cookbook for bakers at high altitude (over 3500 feet).

ready to bakeIt was a little hard to get the topping to stick to the dough.

Here are the cookies from the first batch, before I added more flour to the recipe. They are pretty spread out and kind of floppy when you pick them up.

first batch of cookiesHere’s a comparison of cookies from the first batch and cookies baked after I added more flour to the batter. The more-flour cookies baked up taller and smaller and they held their shape when you picked them up. They also stored better: I was able to stack them up in a bowl and they didn’t stick together. Both batches tasted the same. Very apple-y and sweet and chewy and yummy!

flat and tall cookies

250 Cookbooks: Complete Guide to Home Canning, Preserving and Freezing

Cookbook #41: Complete Guide to Home Canning, Preserving and Freezing. United States Department of Agriculture, Dover Publications, Inc., NY, 1973.

Complete Home Canning CBPublisher’s note: “This book is made up of seven pamphlets originally published as a consumer service of the USDA. The valuable practical information which they contain is gathered together here for the first time in book form to provide a permanent work of reference which can be distributed among the general public.”

This is indeed a great permanent reference, even though it was published in 1973. (It only cost $2.50!) Safe canning facts do not change with the years. I’ve used this book a lot, you can see the food marks on the cover. The book kind of plops open at “Making Pickles and Relishes at Home”, and that’s what I am going to do – make dill pickles!

I used to put up tomatoes, hot salsa, jam, and pickles each year. I’d go to local vegetable stands and buy vegetables and fruits by the bushel. Why? So that I’d know the ingredients in my food, and I enjoyed doing it. Believe it or not, in the late 1970s it was hard to find good hot salsa. I used to send jars of canned goods off to family members at Christmas.

But it’s been awhile. Nowadays I only put up jam, and usually I only make small batches. (I recently had lots of fun making apple butter for this blog, though.) I got excited when I pulled this book from the shelf. It’s August, and Colorado’s farmers’ markets have so much fresh produce to offer. I now have an excuse to go to the Boulder Farmers’ Market – an adventure! You never know what you are going to find, and just watching the people is entertaining.

I need to back step just a bit before I get started on my adventure and the recipe for dill pickles. I want to overview the contents of this book.

The Complete Guide to Canning, Preserving, and Freezing has seven sections:

  • Home canning of fruits and vegetables (I used this section for tomatoes)
  • Home canning of meat and poultry (never used)
  • Making pickles and relishes at home (used a lot)
  • How to make jellies, jams, and preserves at home (a good reference)
  • Home freezing of fruits and vegetables (rarely used)
  • Home freezing of poultry (never used for reference)
  • Freezing meat and fish in the home (never used for reference)

The freezing sections are the least useful to me. I mean, if I want to freeze a chicken, I buy it from a store and toss the package in the freezer. There are some strange instructions in the poultry freezing section. For instance, they describe how to make chicken sandwiches and freeze them in heavy waxed paper. I’d never do that.

I’ll stick to the good parts of this book. Such as, the recipe for dill pickles. I  scanned in the recipe (below), but the section also includes several pages of straightforward information on handling the jars and the cucumbers, a table for adjustment to high altitude, and how to store the pickles. I add necessary details in my own version of the recipe.

The original recipe calls for some sugar; I left it out on purpose. I like sour dills.

Dill Pickles RecipeDill Pickles
this recipe is for a small batch of about 3 three pounds of small cucumbers; yields 3 1-quart jars

  • 3 pounds cucumbers, 3-5 inches in length
  • 5% brine (3/4 cup salt per gallon of water; I made one gallon)
  • 2 cups white vinegar
  • 1/4 cup salt
  • 3 cups water
  • 2 tablespoons whole mixed pickling spice
  • whole mustard seed: 2 teaspoons per quart jar
  • dill: 3 heads fresh dill per jar, or 1 tablespoon dill seed per jar

Wash the cucumbers thoroughly, scrubbing with a vegetable brush. Put them in a plastic bucket (or a glass container) with enough brine to cover and let them stand overnight. I covered the bucket lightly with a towel.

Get your jars ready. Bring a very large pot of water to a boil: it needs to be taller than your quart-sized canning jars. Wash a few quart canning jars (I needed 3 but washed 5), then put them in the boiling water for 5-10 minutes to sterilize them. Carefully remove the jars from the boiling water and drain them. I was lucky to find my old jar grabber in the basement, it’s in one of the photos below. Keep the water boiling because you need it again.

While the jars sterilize, tie up the pickling spices in a little square of cheesecloth. Combine the vinegar, salt, and water in a pot and drop in the tied-up pickling spices. Bring to a good rolling boil. I let it boil awhile to encourage the spices to release some color and flavor into the mix.

Drain the brine off the cucumbers. Put some dill in each of your sterilized jars, then pack in several cucumbers, add more dill and some mustard seed, then pack until full with cucumbers.

Take the pickling spices out of the boiling vinegar-salt-water mixture, then pour it into the jars to cover the cucumbers.

Close the jars. I use two-piece metal jar caps. One piece is a flat metal lid with rubber-sealer around the bottom rim. The other piece is a metal screw band. Place the flat piece on the jar, then screw the metal band down tight by hand to hold the sealing compound against the glass. This lid has enough “give” to let air escape during processing. They do not need to be tightened further after processing.

Immerse the filled and covered jars of cucumbers in the very large pot of boiling water. My pot was very full, so I had to remove some water as I added the last two jars.

Bring the water back to boiling as quickly as possible. Start to count the processing time when the water returns to boiling, and continue to boil gently and steadily for 20 minutes (sea level) or 25 minutes (5000 ft).

Remove the jars and set them upright to cool.

Here’s my cucumbers in the brine for their overnight soak:

cucumbers in brine Drained cucumbers and the rest of the ingredients:pickle ingredientsBoiling the pickling mixture:

pickling liquid

Pickles-to-be packed in the jars with the dill and mustard seed:packed cucumbers

In the photo below, I have poured in the pickling mixture and firmly capped the jars.pickles_forbathBelow, they are in the pot of boiling water:

pickles inbathHere, after the hot-bath treatment, you can see that the cucumbers look like pickles now, less bright green and more yellow-olive-green.pickles after bathI can’t wait to try these. But I have too! They need time for the seasonings to soak into the cucumbers and make them true pickles. I processed these on a Sunday and next Thursday I’ll put a jar in the refrigerator and on Friday I’ll try them.

It’s Friday, and here are the pickles. Yes, these are great! I’ll make them again.

dill pickles

250 Cookbooks: George Foreman Lean Mean Fat Reducing Grilling Machine Cookbook

Cookbook #40: George Foreman Lean Mean Fat Reducing Grilling Machine Cookbook. George Foreman and Connie Merydith, Pascoe Publishing, Rocklin, CA, 2000. (Salton, Inc.)

George Foreman Grill CookbookThis is another cookbook I thought I’d toss. But it has some good ideas in it. There are about 175 recipes, mostly for seasoning different meats for the grill. A few of those are enticing enough to try. Plus it’s a low-fat way to cook, and nutrients are listed with each recipe. So I’ll keep this cookbook.

My first big question was: “Did I throw away the George Foreman grill?” I haven’t used it in years, and had put it aside to give away. I clomped down the stairs to the basement to search. And, there it was, under a shelf. Yay. And I even found the drip trays that came with it. So I’m good to go for trying a recipe from this book.

Why was I ready to get rid of this appliance? Because it is a pain in the neck to clean. The grill surfaces are not detachable, so I have to prop the whole grill up in the sink and rinse with soapy water. It is non-stick, and that helps, but still, it’s awkward to clean. The book says this about cleaning: “Your plastic grilling spatula and a wet sponge will safely remove any food particles.” I wish it were that easy. Also, I use my outdoor gas grill a lot for grilling, even in the winter. Clean-up is so much easier.

Why will I keep this appliance? Well, I have the room for it in the basement. And I’d like to try it for panini-type sandwiches. And the recipe I tried (below) took just a couple minutes to cook – such a quick and easy dinner. I’m ready to play with this grill a little, maybe I’ll come up with an easier way to clean it. And I’ll try a few more recipes from the cookbook, even if I end up using my gas grill to cook them.

I searched today (in 2013) and found that George Foreman grills are still publicized and sold. One model of the new ones has removable grill plates that can be put in the dishwasher. See? I wasn’t the only one who complained about clean-up issues.

George Foreman Grill

For this blog, I decide to make “Poor Boy Steak Sandwiches”. The recipe calls for chuck steak, and I’d just seen it on sale in an ad from a local store. I like the green chiles and tomatoes added to the meat in the second half of the cooking; this will make the sandwich filling tasty and moist.

Poor Boy Steak Sandwich recipeI was able to find some good, whole wheat deli rolls in the Whole Foods bakery section. These made the sandwiches great. You can see them in the photo below. They are probably “club” rolls; they are about 3 inches wide are thick enough to hold up to a big juicy filling.

I cooked one 14-ounce steak for the two of us. There was some left over, and on a hungrier day, my dining partner might have gone back for seconds. But on this night, the doggies loved their dinner a little more than usual.

Poor Boy Steak Sandwiches
serves 2-3; this recipe is intended for a George Foreman type grill

  • 1 large chuck steak, maybe 14 ounces
  • salt and pepper
  • 1 4-ounce can diced green chiles
  • 1 small tomato, diced
  • mustard, mayonnaise, and ketchup
  • 2-3 large sandwich buns, toasted
  • slices of red onion

Preheat a Foreman grill for 5 minutes. Meanwhile, slice the steak in thin strips across the grain and remove any fat.

Place the steak strips in the grill and sprinkle with salt and pepper. Put a drip tray at the bottom of the grill to catch the drippings. Grill for 2-3 minutes. Dump the green chiles and tomatoes on top of the meat and grill another 2 minutes.

Toast the buns and spread them with mustard and mayonnaise to your own tastes. Pile the meat mixture into the bun and top with sliced onions. Serve with ketchup.

Here is the cooked meat mixture:

Poor Boy Steak FillingAnd here is a filled sandwich, served with some cooked baby potatoes:

Poor Boy Steak SandwichThey were good. These would be even better with a New York or ribeye steak, but then the sandwich would no longer be “poor” as those are usually expensive cuts of meat. Sliced thinly, the chuck steak worked fine. It has lots of flavor and maybe fewer calories, and is definitely cheaper.

This is an amazingly fast dinner or lunch to put together. If you slice the steak while the grill heats, the sandwiches will be on the table in less than 10 minutes.