250 Cookbooks: Pillsbury’s Bake Off Dessert Cook Book

Cookbook #248: Pillsbury’s Bake Off Dessert Cook Book, The Pillsbury Company, USA, 1968, 2nd printing, 1971.

Pillsbury Bake Off Dessert cook book
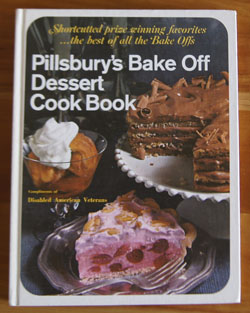
Pillsbury’s Bake Off Dessert Cook Book is the last and grandest of my Pillsbury Bake-Off cookbooks. All of the others are small booklets but this one is hard-cover bound and 144 pages long. It includes recipes from “Eighteen years of Pillsbury Bake Offs”, updated with “short-cuts and the use of convenience food ingredients where possible”. (I discuss Pillsbury Bake-off cookbooks/recipe magazines more thoroughly in my blog post covering the 1964 Bake-Off Cookbook.)

This is one of Mother’s cookbooks, but she has no written notes in it. Two places in the book are marked with small scraps of paper (pages 123 and 127). I’m kind of surprised at this, because she was such a Bake-off Cookbook fan. And I was hoping for a few more memorable notes from her, as I get to the last of her cookbooks in this 250 Cookbooks blog.

The first chapter is “Desserts Warm From The Oven”. Hmmm, sounds right up my alley. Peach Melba Special looks good: peaches and red raspberries with ginger topped with batter and baked. How about Applecots, apple halves stuffed with apricots and wrapped in dough and baked. Or Caramel Apple Pudding, a “pudding cake” with 1 1/2 cups fresh apples and 1/2 cup chopped almonds. What’s a pudding cake? It’s a cake made by placing a wet or dry batter in a pan, adding a boiling water sauce on top, and baking in the oven. Pudding cakes are one of my favorite desserts! Why? They are simple, often contain fruit, and are served hot with ice cream. Homey goodness.

I found two more recipes I like in the Desserts Warm From The Oven chapter. Apple Peanut Spoon Dessert calls for 4 cups of apples and has peanut butter in the topping. Baked Apple Cuplets are peeled whole apples topped with a cake-like batter and baked in custard cups.

The next chapter is “Family Dessert Favorites”. I like the Quick Banana Buns, an unusual banana dessert made from dough laced with mashed bananas cooked as buns, then filled with sliced bananas and whipped cream.

The final three chapters are “Pies, Pies, And More Pies”, “Make-Ahead Pies and Desserts”, and “Conversation Piece Pies And Desserts”. Hey – no chapters for pies and cookies! There are a few cake-type recipes in the other “Dessert” chapters, but that is all.

Mother was great at making pies, and I am surprised she marked none of the pie recipes. I think almost all of the pie recipes Pillsbury’s Bake Off Dessert Cook Book sound great. I just don’t make pies often because they are so full of calories. (And if I want to make a pie, I use one of my mother’s recipes.)

Many, but not all, of the recipes in Pillsbury’s Bake Off Dessert Cook Book call for “short-cut” ingredients, such as refrigerated rolls, canned pie filling, cake mixes, and canned fruits. For instance, one recipe calls for “peanut butter refrigerated quick caramel rolls with nuts”. I doubt these could be found in markets today – fifty years since the publication of this book. (Besides, I prefer to cook from scratch.)

It’s not until page 136 that I find the recipe I want to make for this blog: “Cherry Honeys”.

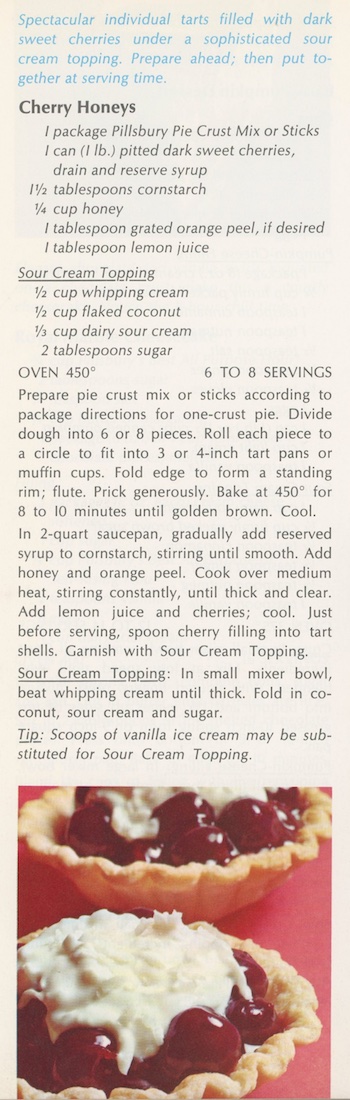
Why do I like this? Because it has fruit and honey in it, and I can cut calories by using Cool Whip® instead of whipping cream. Sour cream and coconut are folded into the whipped cream – an unusual and tasty-sounding twist. The serving sizes are small and designated so we can stay on our “diet” and still have these. Of course, I’ll make my own pie crust instead of purchasing pie crust mix. Plus, they should look really cute and pretty!

And I have to admit, I get to buy something new to make these: tart pans. I have quiche pans of many sizes, custard cups, many sizes of ramekins, small and large donut pans, bun pans, bundt pans, small and large spring form pans, cake pans, popover pans, lava cake pans, muffin pans – but NO mini tart pans!

Cherry Honeys
makes 6

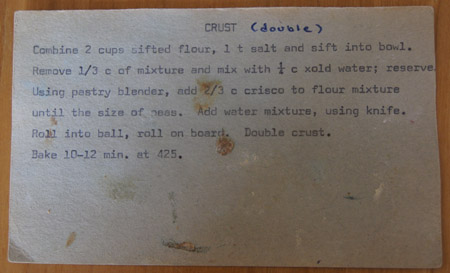
  • crust for single-crust pie
  • 1 can (16 ounces) pitted dark sweet cherries
  • 1 1/2 tablespoons cornstarch
  • 1/4 cup honey
  • 1 tablespoon grated orange peel
  • 1 tablespoon lemon juice
  • 1/2 cup whipping cream (or use a light whipped cream alternative)
  • 1/2 cup flaked coconut
  • 1/3 cup sour cream
  • 2 tablespoons sugar

Divide the dough into 6 pieces. Roll each into a circle to fit 4-inch tart pans. Fit them into the pans, forming a standing rim, and flute the edges.

Bake at 450˚ for 8-10 minutes, or until golden brown. Cool.

Drain the cherries and save the juice. Add the cornstarch to the juice and mix well, then add the honey and orange peel. Cook over medium heat, stirring until the mixture is thick and clear. Remove from heat and add the cherries and lemon juice. Cool.

Beat the whipping cream until thick, then fold in the coconut, sour cream, and sugar.

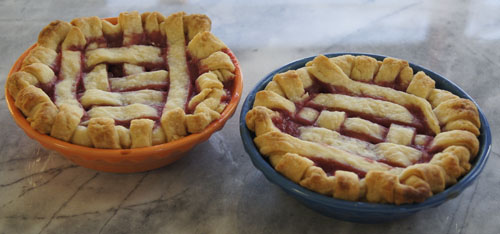
Just before serving, spoon the cherry filling into the tart shells and garnish with the whipped cream mixture.

Cherry Honeys
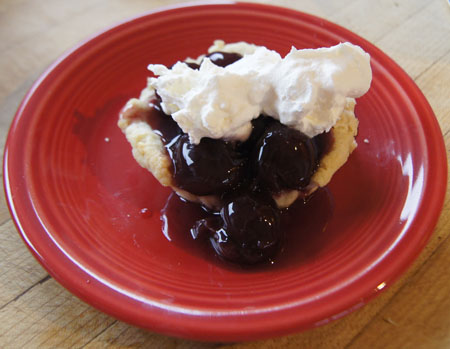
These were excellent. Except for the crust, they aren’t terribly rich. The next night, I made another batch of the cherry mixture and served them with ice cream. Yum!


Favorites: Julie’s Cherry Pie

I had a craving for cherry pie this week. I pulled out my old recipe card and figured I had better save it in a better format before it was totally ruined.

Julie's Cherry PieJulie's Cherry PieThis is a great cherry pie. I copied it from my mother’s collection when I left home in the 70s. Why is it called “Julie’s” cherry pie? I have no idea. My husband has a sister named Julie, but I was making this pie before we met. Cherry pie is probably my husband’s favorite pie! He always insists that I make criss-crosses of crust strips on top.

The crust recipe on this card calls for Crisco and half and half. It is a good, tender crust, but these days I prefer my newer crust recipe that uses Crisco, butter, and vodka.

As for the tart cherries, the easiest to find are canned cherries. But I have used fresh-picked (when very lucky!) or fresh-frozen cherries as well in this recipe. (Not sure where I got the cherry juice in those instances, but I’m pretty sure today that cherry juice is sold separately somewhere.)

This weekend, I made this pie as two small pies. We split one pie on Saturday and still had another for the next night. Mini-sized desserts works well for the two of us – here are a couple other mini-dessert recipes on a previous blog entry.

Double the recipe and bake in a 10-inch pie pan. (If you use a 9-inch pie pan, it might run over.) My small pie “pans” are fiesta ware 6-inch slanted side oven-safe dishes, a little over 1 3/4-inch deep.

Julie’s Cherry Pie
makes 2 small pies

  • one recipe pie crust (use 1 1/4 cup flour)
  • 1 can tart cherries; 14.5 oz. size
  • scant 1 cup sugar
  • 3 tablespoons corn starch
  • 1 cup cherry juice
  • a few drops red food coloring (you can leave this out)

Drain the cherries, reserving juice.

Combine the sugar and corn starch in a pan, then slowly stir in 1/2 cup of the cherry juice. Bring to a boil, stirring constantly, then simmer and stir a couple minutes. It doesn’t get real thick or real clear, but it’s okay.

Remove from heat and add the red food coloring (if using) and the drained cherries. Cool.

Divide the crust dough into 3 nearly equal portions. Roll out 2 of them and fit into 2 small pie pans. Divide the cherry mixture between the two pans.

Roll the rest of the dough and cut into strips. Put the strips in a criss-cross pattern on each pie. Trim the crusts, roll under and flute.

Bake at 425˚ for 10 minutes and then at 350˚ for 30 minutes.

Julie's Cherry PiesBoy these are good. A little ice cream on top? Sure. Absolutely heavenly.

250 Cookbooks: All-Time Favorite Pies

Cookbook #79: All-Time Favorite Pies, Better Homes and Gardens, Meredith Corporation, Des Moines, Iowa, 1983.

All Time Favorite PiesPies. I love pies but rarely make them because of the calories – I take my baking urges and use them to make breads instead. When I do make a pie, it’s usually a fruit pie made sans recipe, or a pie from the large collection of pie recipes on my mother’s index cards.

This cookbook has no markings in it, and I don’t know how it came to be on my bookshelves. Perhaps I bought it for myself in a moment of pie-longing. A whole clump of pages has come loose from the binding, but there are no food stains in this cookbook.

This week, though, I have and excuse to make a pie. My daughter and her family are visiting!

I open All-Time Favorite Pies and page through. The first recipe I see is the one I want to make! “Apple Crumble Pie” is sort of a French-style pie with a pastry crust, lots of apples, and then a seasoned crumb topping instead of a top pastry crust. I’ve never made an apple pie exactly like this, and it’s my choice for this blog.

But that’s not the only recipe I like in this cookbook. Cherry-Almond Tarts, Coconut Cream Pie, Fresh Fruit Tarts, Layered Pumpkin Chiffon Pie, and Fudge Chiffon Pie all look fun to try. All the recipes in this cookbook are they are from-scratch, always my preference. A few recipes call for canned fruits or a flavored jello, but that’s the furthest they get from “scratch”. This cookbook even includes a recipe for homemade mincemeat!

For the Apple Crumble Pie, I will need to make a pie crust. All-Time Favorite Pies offers a flour-shortening crust recipe, which is almost exactly the recipe I learned make in my mother’s kitchen. But I recently adopted a new pie crust recipe. That’s the one I’ll use in my version of Apple Crumble Pie. I also upped the amounts of cinnamon and ginger and substituted nutmeg for mace (because my little tin of mace was at least 10 years old!).

Apple Crumble PieBelow is my version of Apple Crumble Pie.

Apple Crumble Pie

  • pastry for single-crust pie (use your own, or use mine)
  • 1 cup sugar, divided (1/2 cup for apples, 1/2 cup for crumble)
  • 2 tablespoons flour
  • 1 teaspoons finely grated lemon peel
  • 3 tablespoons fresh lemon juice
  • 6 cups peeled and thinly sliced apples – I weighed out 2 pounds of whole apples and after peeling and slicing, it was indeed 6 cups
  • 1/2 cup flour
  • 1 1/2 teaspoons cinnamon, divided (3/4 teaspoon for apples, 3/4 teaspoon for crumble)
  • 3/4 teaspoon ginger
  • 1/2 teaspoon nutmeg (preferably freshly grated)
  • 1/4 cup butter

Roll out the pie crust pastry and fit it into a 9-inch pie pan. Trim and flute the edges.

Combine the apples with 1/2 cup sugar, 2 tablespoons flour, grated lemon peel, lemon juice, and 3/4 teaspoon cinnamon. Let the mixture stand in a bowl for a few minutes to macerate the apples.

Combine the 1/2 cup flour with 1/2 cup sugar and 3/4 teaspoon cinnamon and the ginger and nutmeg. Using a pastry cutter or even a food processor, cut in the butter until the mixture is crumbly.

Put the apples in the pie crust, then sprinkle the crumb mixture over the top.

Bake at 375˚ about an hour, until it is nice and brown.

Apple Crumble PieVerdict: This pie is a hit! I served it with homemade vanilla custard ice cream. I loved the hint of lemon in the pie. This apple pie is absolutely yummy.

I did not cover the edge of the pie to prevent the crust from over-browning, as suggested in the original recipe. You can see in the photo that it is not too brown. Whew, I was glad I didn’t have to go to that extra step.


Favorites: Pie Crust

The pie crust recipe that I used for years came from my mother. Hers was always perfect. Mine always tasted great, but was always difficult for me to roll out without tearing. I just lack a certain patience, I guess (well, I know). I kept using her recipe out of – well, maybe a bit of loyalty, or an acceptance that they did taste very good in spite of their looks, or maybe a laziness to find a new recipe that worked for me.

My mother’s recipe for a single pie crust is:

  • 1 cup flour
  • 1/2 teaspoon salt
  • 1/3 cup Crisco
  • 2 tablespoons water

You mix the flour and salt then cut in the shortening using a pastry blender, sprinkle in enough water so that the dough just holds together, form into a ball, and roll out on a floured cloth. For a double crust, you mix the water with some of the flour first instead of sprinkling it in.

Mother's Crust Recipe

My well-used recipe card. I typed the crust recipe onto a 3×5 rectangle of colored paper when I left my parent’s home.

The above recipe is almost exactly the same as the recipe in All-Time Favorite Pies. That one uses a bit more flour and water, but is still a flour-salt-shortening-water pie crust recipe.

I never looked forward to making pie crust, it was more like planning for an upcoming battle.

Finally, I decided to take on the project of finding a new pie crust recipe. I searched the web for recipes and advice, and tried several different recipes, came on one that worked for me, then nudged the method until I was satisfied with the results. I make about 4 pies a year, so it took me a few years to come up with my final version!

My recipe is heavily based on one I found on Cook’s Illustrated, under the auspices of America’s Test Kitchen (and Christopher Kimball). Their recipe title is “Foolproof Pie Dough for a Single-Crust Pie” (dated 2007). I don’t want to step on any copyright toes, and give full credit for the development of this crust to Cook’s Illustrated! My version below just gives a couple nudges that help me make this dough perfect each and every time I use it.

The trick to this recipe is: Vodka!

Pie Crust
makes more than enough for a 9-inch crust

Note: this recipe can be doubled or fractionated – I have tried both variations with success. The amounts below make more than enough dough for a single crust, but that’s kind of nice because it gives some leeway for impatient dough-rollers. Or, take the extra dough, sprinkle with cinnamon and sugar, roll up, and bake 10 minutes at 375˚ for little treats. (That’s what my mother always let us do!)

  • 1 1/4 cup flour
  • 1/2 teaspoon salt (warning! if you do not use unsalted butter, you must use less salt!)
  • 1 tablespoon sugar
  • 6 tablespoons cold unsalted butter, cut into chunks
  • 1/4 cup cold Crisco (aka vegetable shortening), cut into 2-4 pieces (it’s gooey even cold, so “cutting” isn’t really the proper term here)
  • 2 tablespoons cold vodka (hey, just store some vodka in the freezer at all times!)
  • 2 tablespoons cold water (I put a few ice cubes in water for a few minutes, then measure the 2 tablespoons)

Get out your food processor. If you don’t have one, use a pastry blender or two knives instead. But the food processor really, really helps. I have never tried this crust without using a food processor.

Put 3/4 cup of the flour and all of the salt and sugar in in food processor and pulse a couple times just to mix.

Add all of the butter and vegetable shortening. Process for 10 seconds and check. It should look like “cottage cheese curds” and there should be “no uncoated flour”. If it is not yet to the cottage cheese point, pulse one or two times and re-check. In my experience, largish chunks of butter remaining in this dough are okay. It’s better to under-process than to over-process.

Open the food processor and scrape down the sides of the processor bowl. Add the remaining 1/2 cup flour and quickly pulse 4-6 times.

Remove the dough from the food processor and dump it into a regular bowl.

Mix the vodka and water. (Keep in mind that you might not need all of this vodka-water mixture.)

Sprinkle most of the vodka-water mixture over the dough. Using a rubber spatula, press the dough together until it sticks together and is “tacky”.

The exact amount of “tackiness” after the vodka/water is added isn’t terribly precise. The times I’ve tried this, it definitely wasn’t sloppy, and each time had a different degree of “holding together” when pressed against the sides of the bowl. Somewhere between sloppy and falling apart is best. Add the vodka/water slowly and if you add it all and still need more wetness, go with straight vodka. You want it to hold together so it will roll out easily, but too sloppy a dough creates a less-tender crust.

If you are a seasoned pie crust maker and the tacky mixture just seems too wet, know (from this chemist) that the vodka will evaporate and by the time you roll it out, it will no longer be tacky.

After mixing in the water/vodka, flatten the dough into a 4-inch disk, wrap in plastic, and refrigerate before rolling.

In my experience, this crust recipe works mixing together the night before, but take it out of the refrigerator an hour before rolling. It also works mixing the day-of, but make sure you put it in the refrigerator a couple hours before rolling.

Roll out on a lightly-floured cloth (like a flour sack cloth). When the crust is large enough to fit the pan, fold the cloth over to fold the dough, then gently transfer to the pie pan and fit and flute. Bake as directed in your pie recipe.

It rolls like a dream! Even I can do it!

I wrote myself a note on my final version of the new recipe: “And so with this, I leave behind Mother’s recipe for Crisco-flour-water-salt crust. That one was always flaky and wonderful, but this one rolls out in a manner more suited to my patience. It looks good, and tastes good. And, can be made ahead of time. And it means I now keep vodka in the freezer!”

Favorites: Fresh Peach Pie

Peach fest 2013! Another of my long-time favorite peach recipes.

This is my mother’s recipe. The peaches are not baked, they are just laid in a baked crust. It’s best eaten the day you make it, so have company over!

This is the pie to make when you have lots of perfectly ripe peaches, peaches so good that they barely need a pie to make them better.

Fresh Peach Pie

  • 2 1/2 – 3 pounds fresh peaches
  • 2 tablespoons lemon juice
  • 2 1/2 tablespoons cornstarch
  • 1 cup sugar
  • 1/2 cup water
  • 1 baked pie crust (9-inch)
  • whipped cream

Mash enough of the peaches to make 1 cup of pulp (save the rest for slicing into the pie). Combine pulp, sugar, cornstarch, and water and cook until thick. Cool.

Slice the rest of the peaches and put in a baked 9-inch pie shell. Sprinkle with the lemon juice. Pour cooked mixture over fresh peaches in pie shell.

Serve with whipped cream.