250 Cookbooks: Cooking of Japan

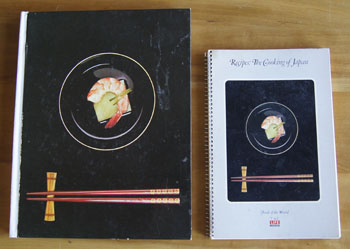
Cookbook #161: Cooking of Japan, Rafael Steinberg and the editors of Time-Life Books, Time-LIfe Books, NY, 1969. Foods of the World series; sixth printing, revised 1976.

The Cooking of Japan cookbook

Once again, I look forward to discovering another interesting author as I open this Foods of the World cookbook, just as I discovered M. F. K. Fisher in the Cooking of Provinvial France, Emily Hahn in the Cooking of China, and Joseph Wechsberg in Cooking of Vienna’s Empire. So, who is Rafael Steinberg?

The information page of Cooking of Japan tells us that Rafael Steinberg first went to the Orient as a correspondent during the Korean War. “Later he was a Time correspondent in Tokyo and London, and he spent several years as Newsweek’s Tokyo bureau chief. He is the author of Postscript from Hiroshima, a book about survivors of the nuclear bombing.” In the first chapter, he writes of his first trip to Japan: “as soon as I set foot on the good ship Hikawa-maru in Seattle – oh yes, airplanes were invnvented but they weren’t flying the Pacific – I was confronted with what the passengers called ‘The Choice.’ You could either have a full Western meal or a full Japanese one. I asked for Japanese food, got it three thimes a day and stuck to it for all 21 days of the voyage to Yokohama.”

The above brief excerpt illustrates Steinberg’s writing style (readable! engaging!). His writings are so important that Columbia University Libraries/Information Services’ Rare Book & Manuscript Library acquired the papers of “Rafael Steinberg, a distinguished author and foreign correspondent whose dispatches from Korea, Japan, and elsewhere, provide a unique eyewitness perspective on U.S. foreign relations during the height of the Cold War.” The Columbia University site goes on to say “Described by the New York Times in 1966, as ‘one of the most knowledgable American journalists in Japan,’ he reported on life, death, culture, and politics in key hotspots around the world during some of the most tumultuous events of the 1950s and 1960s. . . . his intuition and quick grasp of events showed brilliantly in reporting on subjects that ranged from diplomacy and disarmament talks to a world heavy-weight boxing championship bout and the cuisines of Asia.”

I feel lucky to have one of the works of this author in my hands to read and enjoy. History and food and the culture of another country. Perfect combinations.

I love the photos in the Cooking of Japan. It’s enjoyable to leaf through the pages and gaze at the artful food presentations, and learn about the culture of Japan. To actually cook many of the recipes in my own kitchen presents a few obstacles. For one, many include raw fish. Here in Colorado fresh sushi fish is very expensive. Plus I have some reservations about buying and consuming raw fish. Other ingredients beyond fish are also hard to find. For instance, to make a dipping sauce for noodles, you need mirin (sweet sake), katsuobushi (dried bonita), and  kombu (dried kelp). Almost each recipe presents a shopping challenge.

Finally, I am not a patient and artful cook. I try! I don’t mind spending hours in the kitchen, but when it comes to meticulously arranging foods, I am inept. And arrangement is a big thing in Japanese food.

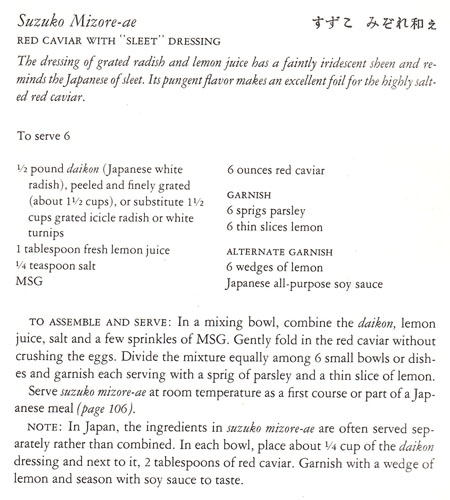
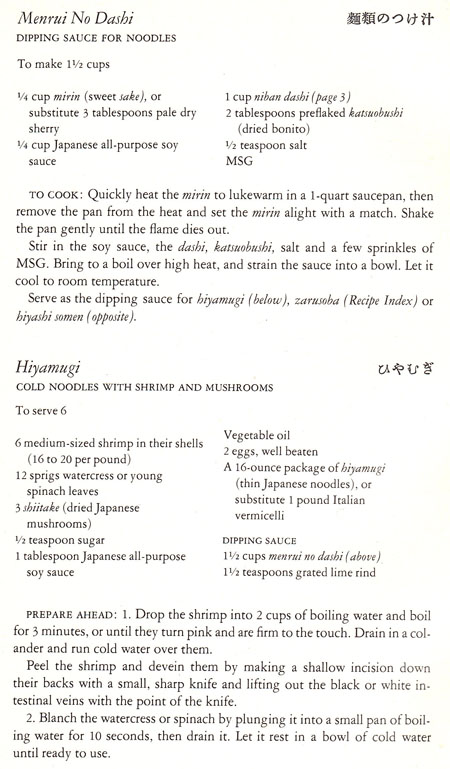
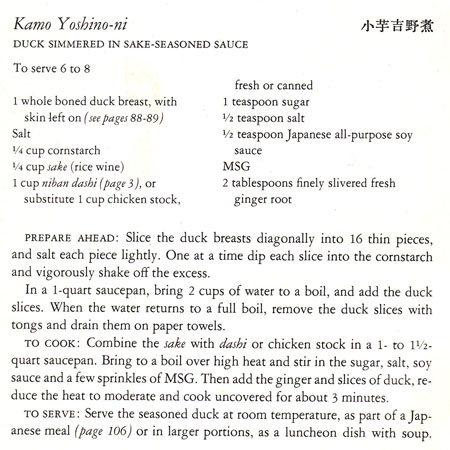
I choose three recipes to try for this blog: Red Caviar with “Sleet” Dressing, Cold Noodles with Shrimp and Mushrooms (and a dipping sauce), and Duck Simmered in Sake-Seasoned Sauce.

Red Caviar with Sleet DressingDipping Sauce and Noodles recipeDuck Simmered in Seasoned Sauce

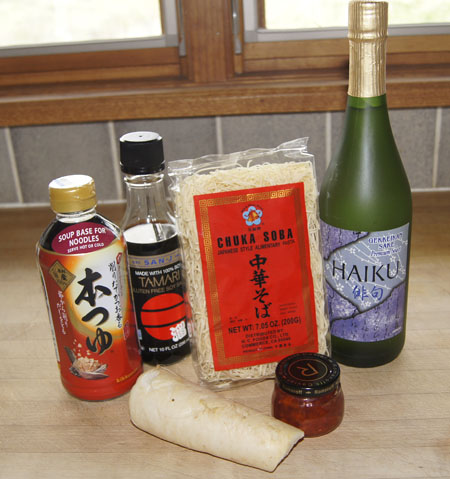
I set off to my favorite Asian Seafood Market with a long list of ingredients. I so enjoy searching the loaded shelves of this market! The lady shopkeeper chides me for not visiting her store in such a long time. I smile and say I’ve been busy with grandkids. I find many of the ingredients on my list, but decide to buy a pre-made Japanese dipping sauce for the noodles and forgo the bonita flakes and kelp. I put Japanese soy sauce, mirin, and soba noodles in my basket. And daikon (radish), ginger, and some big long green beans (not in my recipes, but they look so cool). Much to the pleasure of the shopkeeper, I picked up a package of shrimp wrapped in noodles with a little sauce from the tray at the check-out counter. “Very good!” she exclaims.

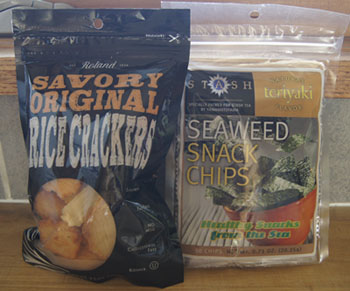
That was fun! But I’m still missing a few items, so I have to shop some more. I find sake at the Liquor Mart, and duck breasts and red caviar (salmon roe) at Whole Foods. I was surprised to find dried bonita flakes at Whole Foods – didn’t buy them but did pick up some packaged Japanese snacks. I also bought fresh shitake mushrooms and watercress.

ingredients for a Japanese meal

Japanese snacksI had fun cooking my Japanese dishes and worked as best as I could to artfully arrange them on our plates:

Japanese meal

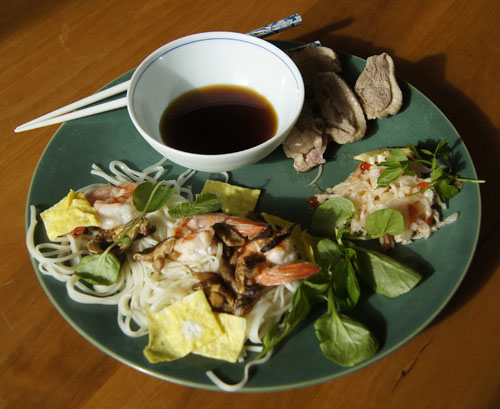
The meal was great. I thought the duck a little chewy – probably should have thinly sliced breast from a whole duck. Everything else was bright and tasty.

I’m not writing my own versions of these recipes into this blog. I made so many changes as I cooked each recipe that it’s hard to renumerate. And, although the meal was delicious and I learned a lot and got a lot of new ideas, I don’t plan to cook these recipes again.

250 Cookbooks: McCall’s Cook Book

Cookbook #160: McCall’s Cook Book, by the Food Editors of McCall’s, McCall Corporation and Random House Inc., 13th printing, NY, 1963.

McCall's Cook Book

My McCall’s Cook Book falls apart in my hands as I open it. The binding is held together with green tape. The pages are almost water-logged and have quite a few stains. I had this book in California before we moved to Colorado in 1973, so I probably bought it (or was it a gift?) when I was attending UCI or at my first job. After all these years, it still resides in the cabinet next to my stove. And I still use it!

McCall’s Cook Book was my first very own thick, comprehensive cookbook. It precedes the other aged cooking tome I keep in the kitchen: Joy of Cooking. McCall’s is the kind of cooking I grew up with, and to this day, I am very comfortable with this book. The Joy of Cooking has a lot of character and bossiness, but McCall’s makes me feel at home. Both books belong in my kitchen!

McCall’s used to be a women’s magazine. On Wikipedia, I learn that that McCall’s was one of the Seven Sisters, “a group of magazines which have traditionally been aimed at married women who are homemakers with husbands and children, rather than single and working women.” I remember all of these magazines so well (and I don’t let myself buy them anymore, too many recipes in my files!):

  • Better Homes and Gardens
  • Good Housekeeping
  • Family Circle
  • Redbook
  • Woman’s Day
  • Ladie’s Home Journal
  • McCall’s

McCall’s magazine ceased publication in 2002, and today McCall’s is best know as a brand of sewing pattern.

I’ve always used this cookbook as a reference for cooking methods and times, and for researching how to cook something new. The yeast bread section is well used! A couple of the recipes I marked: Ginger-Sugar Cookies and McCall’s Best Cheesecake (I notes to use deli cream cheese if possible). The Sweet-and-Sour Pork recipe is one of my favorites. In this recipe, the pork is battered and deep fried. It is delicious that way, but I usually cook pork chunks unbattered in a little oil (to save calories). But the recipe for the sweet-and-sour sauce is right on in its balance of vinegar and sugar. I’ve referred to it tons of times.

Lasagna! I associate lasagne with this cookbook. I first cooked McCall’s lasagne while still living in California. Though I was a fledgling cook, it came out absolutely wonderful. I remember it as my first dish that I could always count on to “wow” my diners. Let’s see, where is that recipe? I check the index for “lasagne”. No, it’s not in the “L”. Now I remember, this cookbook has a quirky index. I put on my thinking cap and recall that the lasagna recipe is in the “International Cookery” section. Sure enough, when I look under “Italian” in the index, I find “baked Lasagna”.

This recipe for lasagna (below) is what I call a “full-on lasagna recipe”. It uses none of the shortcuts I often employ these days, like no-bake noodles, sauted ground meat, and a quick can of tomato sauce and herbs. In this recipe, you boil regular packaged noodles, a time consuming process, but I think it makes a better lasagna than the no-bake noodles. And this lasagna recipe has wonderful meatballs, sauted briefly and then simmered a long time with canned tomatoes, tomato paste, onion, garlic and herbs to make the sauce. Finally, the requisite mozzarella, ricotta, and Parmesan cheeses.

Baked Lasagne recipe

Yes! This is what I want to make for this blog. The recipe says it serves six, so I’ll make it in two pans and have some to share with my son and his wife and their new baby!

Baked Lasagna
serves 6

meatballs

  • 1 pound hamburger
  • 2 tablespoons finely chopped onion
  • 1 clove garlic, finely chopped
  • 2 tablespoons chopped fresh parsley (or use 1 tablespoon dried parsley)
  • 1 teaspoon dried oregano
  • 1/2 teaspoon dried basil
  • 3/4 teaspoon salt
  • 2 tablespoon grated Parmesan cheese
  • 1 egg

tomato sauce

  • olive oil to saute meatballs (a couple tablespoons)
  • 1/4 cup chopped onion
  • 1 clove garlic, finely chopped
  • 2 tablespoons chopped fresh parsley (or use 1 tablespoon dried parsley)
  • 1 28-ounce can diced tomatoes
  • 1/2 cup water
  • 2 6-ounce cans tomato paste, or use 2 12-ounce cans tomato sauce and skp the 1/2 cup water
  • 2 teaspoons dried oregano
  • 1 teaspoon dried basil
  • 1 teaspoon garlic powder
  • 1/8 teaspoon cayenne pepper
  • 1 teaspoon salt (or, salt the sauce “to taste”)
  • black pepper to taste

the rest of the ingredients

  • 1/2 of a 1-pound package of lasagne noodles
  • 1 pound mozzarella cheese, chopped into dice or grated
  • 1 pound ricotta cheese
  • 1 cup grated Parmesan cheese

Combine all meatball ingredients and toss lightly to mix well, then make about 30 3/4-inch meatballs.

Heat the olive oil in a large saucepan. Brown the meatballs on all sides, then remove them from the pan and reserve.

Pour some of the grease out of the pan, if you like. Then, add the onion, garlic, and parsley and saute until tender, about 5 minutes. Add the rest of the sauce ingredients and stir together. Then, add the meatballs. Simmer, uncovered, about 1 1/2 hours, stirring occasionally.

While the sauce simmers, boil the lasagna noodles according to the package directions. Drain and rinse with a little water. Handle carefully, as sometimes they like to fall apart.

Set out a 9×13-inch baking dish. (I used one 8×8-inch dish and one a bit smaller; there was plenty of sauce and noodles and cheeses to fill both dishes.) I like to put a smear of tomato sauce down first onto the baking dish, under the first layer of noodles. Alternatively, you can lightly grease the bottom of the baking dish.

Layer half the ingredients, in this order: lasagna noodles, mozzarella, ricotta, tomato sauce with meatballs, and Parmesan cheese; then repeat.

Bake 30-35 minutes at 350˚, or until cheese is melted and lasagna is heated through. (The directions do not say to cover the lasagna, but I usually do cover it with foil, until the last 10 minutes or so of baking.)

Baked Lasagna
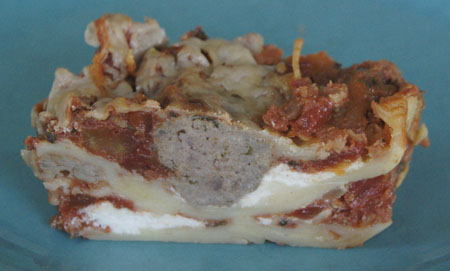
This lasagna was “a cut above” and “amazing”, comments from my millenium-age son and his wife. I give it a big “yum”!

250 Cookbooks: Best in the West Barbecue Recipes

Cookbook #159: Best in the West Barbecue Recipes, Western Family, Inc., August 1958.

Best in the West Barbecue Recipes cookbook

What or who is or was “Western Family”, the publisher of this book? I found that it was a 1950s magazine about life in the western US. A few vintage issues are available through eBay and Amazon and other sources. If you google “Western Family Magazine 1958” you will be rewarded with the cover art of several issues – I’d copy some in here but don’t feel comfortable because of copyright issues.

Best in the West Barbecue Recipes is a small stapled-together booklet that must have been associated with the August 1958 magazine issue. And I think it was my grandmother’s, because there is a smidgeon of writing in it that looks like hers:

note in the Best in the West BBQ cookbook

I like the introduction page:

introduction
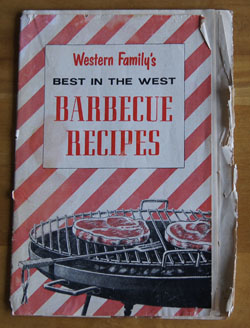
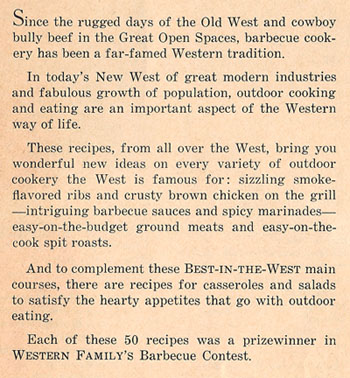
I am surprised how much I like the recipes in this dated booklet! Many of them sound pretty good; albeit the instructions are often quite brief: “Pour the marinade over the ribs and marinate for at least one hour. Grill ribs over charcoal for 45-60 minutes, or until done, turning frequently and brushing with sauce.” Each recipe includes the name of the contributor, usually a “Mrs.” from a western state.

Note the barbecue grill in the photo of the cover of this cookbook (top of this page). That’s the kind of barbecue I grew up with. It was fairly flat and you spread the charcoal in a single layer and cooked on the grill right above the charcoal. I’m not even sure it had a cover. Simple but functional.

This all certainly brings back the sunny times in California in the 1950s: sitting on the wooden table and benches in the tree-shaded patio right off our kitchen, charcoal fire started, family friends gathering for a meal together, adults laughing with their cocktails, us kids being kids. It was a great place to grow up.

I decide to make Just-Right Barbecued Chicken:

Just Right Barbecue ChickenJust Right Barbecue Chicken 
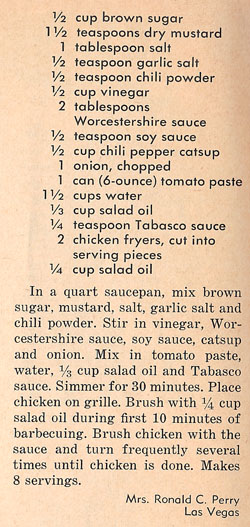
I haven’t cooked bone-in chicken pieces on a grill in ages. Below are the instructions given in this booklet for an old-style charcoal grill.

grilling instructions

What I like about the recipe for Just Right Barbecue Chicken is the included barbecue sauce. I made a few minor changes in the sauce recipe (more spices, less salt, chile sauce for “chili pepper catsup”) and to adapt the grilling instructions for my covered gas grill, I consulted my Weber Real Grilling cookbook. All changes are incorporated below.

Just-Right Barbecued Chicken
serves 2 – with leftovers!

  • 1/2 cup brown sugar
  • 1 1/2 teaspoons dry mustard
  • 1 teaspoon salt
  • 1/2 teaspoon garlic powder
  • 1 teaspoon chili powder
  • 1/2 cup vinegar (I used white vinegar)
  • 2 tablespoons Worcestershire sauce
  • 1 teaspoon soy sauce
  • 1/2 cup chile sauce
  • 1/2 large onion, chopped fine
  • 1 8-ounce can tomato sauce (or use 6-ounce can tomato paste and increase water to 1 1/2 cups)
  • 1 cup water
  • 1/3 cup vegetable oil
  • cut up frying chicken (I used 2 breasts, 4 legs, 3 thighs)
  • vegetable or olive oil for brushing chicken

Combine the sauce ingredients (1/2 cup brown sugar through the 1/3 cup vegetable oil) and simmer about 30 minutes. This makes enough for two chickens; I used less chicken so I had leftover sauce. Note: this sauce is not as thick as most modern barbecue sauces, but it works great.

Heat a gas grill on high until it’s good and hot, then turn off all but one burner. You want the temperature to be “medium” – I aim for 325-350˚ on the gas grill gauge.

Brush the chicken pieces with oil – I actually just put the chicken in a bowl and poured olive oil over them and rubbed it in. Put the pieces on the grill over indirect heat (and close the lid). Grill about 5 minutes and then turn and grill another 5 minutes until they have nice grill marks. Next, brush with the sauce. For the next 30 minutes or so, keep brushing with sauce and turning every 5-10 minutes, monitoring the grill temperature to keep it at medium. To test for doneness, I used an instant read thermometer, and when the chicken pieces read 150-160˚ I took them off the grill. (Some were done sooner than others.)

Just Right Barbecued Chicken
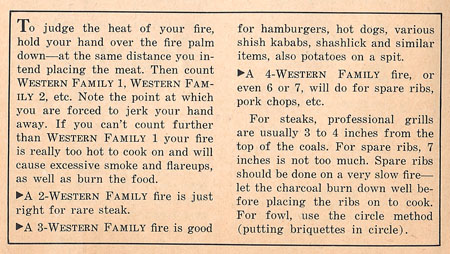
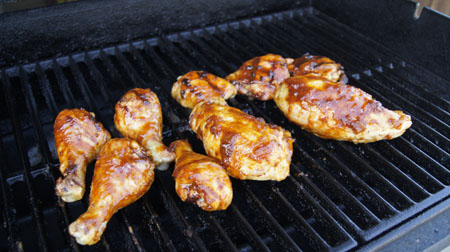
This chicken was really good! I will definitely grill chicken this way again. The sauce was perfect, and the chicken was juicy. It was just as good cold the next day!

To go with the chicken, I made “Western Potato Strip-Teasers”.

Western Potato Strip Teasers recipe

These potatoes are baked in foil the oven, and kept hot on the edge of the grill as the main dish is cooked. I made the potatoes pretty much as they said, except I used milk instead of cream and cheddar cheese instead of process American cheese.

Western Potato Strip-Teasers
serves 2

  • 2 good-sized potatoes (or several small, you need enough for 2 people)
  • 1 tablespoon butter, cut in small chunkl
  • salt and pepper
  • 2 tablespoons chopped fresh parsley, divided
  • 1/4 cup grated cheddar cheese
  • 1/4 cup milk

Take a piece of heavy-duty aluminum foil and shape it to form a baking dish.

Peel the potatoes and cut lengthwise strips as for French fries. Place in the aluminum foil baking dish. Dot the potatoes with butter, sprinkle with salt and pepper and cheese and 1 tablespoon of the parsley. Pour the milk over the mixture. Bring the edges of the foil up to cover the potatoes; seal alll edges to make a closed package (but do not flatten). Place it on a cookie sheet to make it easier to slip in and out of the oven.

Bake at 425˚ for 40-50 minutes, until the potatoes are done. Sprinkle with remaining parsley. If you like, you can take the foil package outside to your grill and keep the potatoes warm until dinner is ready.

Potato Strip Teasers

We both really liked these. I wanted “more!” I even ate some of the leftovers cold from the refrigerator the next day. And clean-up was really easy!

And what am I going to do with this little cookbook? I’m going to put it with my “old cookbooks” for the nostalgia. And maybe to cook another good old recipe sometime!

250 Cookbooks: American Pie Celebration, Volume II

Cookbook #158: American Pie Celebration, Volume II, Crisco, 1990.

American Pie Celebration cookbook

Short and sweet! This little booklet looks to be full of great pie recipes. Here is the intro page, and my mother’s note of when she ordered this booklet and her comment “pies look great!”

intro page

Mother obviously tried the crust recipe on page 6. She was probably honing her skills, since she made the best pie crusts ever.

Classic Crisco Crust

Mother didn’t mark any of the pie recipes in this booklet, either as “good” or “don’t make again”. So I choose to make a strawberry rhubarb pie. So, short and sweet, here is the pie I’ll make:

Rhubarb Strawberry Dessert Pie
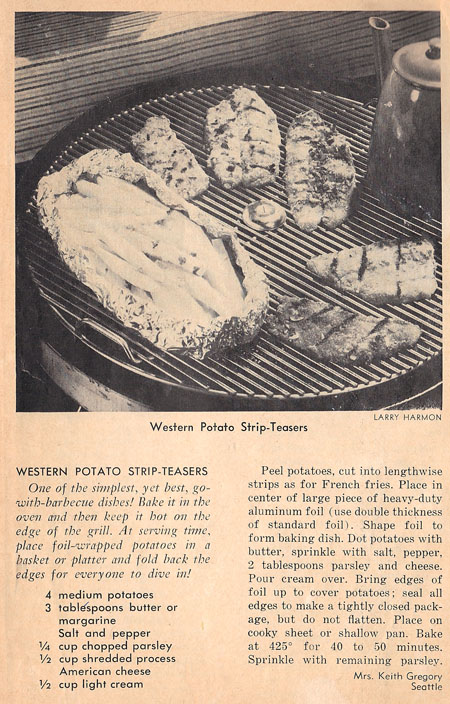
I had an easy dinner planned, so I made my pie crust in the morning, then settled happily in to prepare the filling in the afternoon. Boy, it was a lot of work, or at least, a lot of time! I washed my fresh organic rhubarb and cut it into half-inch pieces and filled my 2-cup measure (10 ounces). Then I put it in a saucepan and added the 1 cup sugar and heated. What? Where is the liquid? It’s just rhubarb and sugar. I double-checked the recipe – yup, that’s what they said! I kept heating on medium high heat until the sugar melted and the rhubarb released moisture and became mushy. Here is a photo after the cornstarch, egg yolks, and cream was added, and the mixture cooked to thick-ness:

cooked rhubarbOn cooling, it got a little thicker.

Here are the sliced strawberries. I had a 16 ounce package of strawberries; it took almost the entire package to fill the 2-cup measure.

sliced strawberries
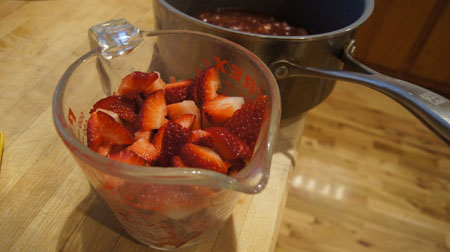
It didn’t take long to cook the strawberries, sugar, and cornstarch:

cooked strawberries
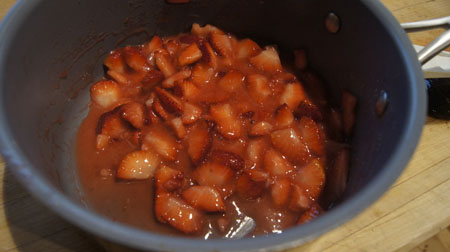
I mixed the cream cheese, powdered sugar, and Cool Whip. I whipped the egg whites and sugar and cream of tartar. Finally, I am ready to assemble the pie. Here are all the prepared mixtures:

ingredients for strawberry rhubarb dessert pie
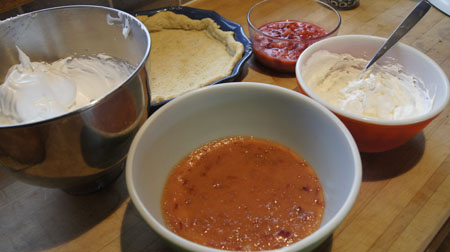
And here is the baked pie:

Strawberry Rhubarb Dessert Pie
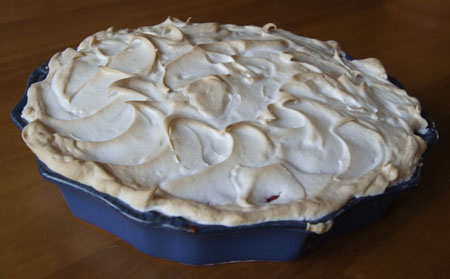
Looks beautiful, doesn’t it? But it was a disaster when we cut our pie “slices”. It was just a runny mess inside. Not at all like it was supposed to be. And I paid careful attention to each step! We ate our portions – it tasted sweet and fruity and definitely satisfied our sweet tooths. But I tossed the rest of the pie the next day.

This cookbook will be recycled!