250 Cookbooks: The Settlement Cook Book

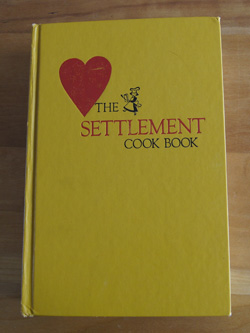
Cookbook #28: The Settlement Cook Book. The Settlement Cook Book Company, 3rd edition, Simon and Schuster, NY, 1976.

The Settlement Cook BookMy copy of The Settlement Cook Book is in nearly mint condition. None of the recipes in this book look familiar, or are marked or used (e.g., no food stains). I forget why or when I bought it. Why is it on my shelf, and why have I never used it?

Okay, time to settle in with this Settlement book and figure out what it is about.

I begin with the preface. The Settlement Cook Book “all started in Milwaukee, Wisconsin, around the turn of the century.” At that time, “there were vast migrations of people from Europe seeking freedom and a better life…” A group of volunteers organized classes in American life and ways, the English language, citizenship, sewing, and cooking. These classes were held at a neighborhood house called “The Settlement”.

Mrs. Simon Kander (Lizzie Black Kander) was in charge of the cooking classes. So that her students wouldn’t have to copy recipes from a blackboard, she decided to have them printed. In April 1901, a 174-page book titled “The Way to a Man’s Heart . . . The Settlement Cook Book” was produced. The profits from sales of the book were put back into the Settlement House project. Seventy-five years later (1976) one and three-quarters million copies of The Settlement Cook Book in revised and expanded versions had been sold.

This cook book has a ton of recipes. It’s long – 757 pages, including an index of about 100 pages. The book has tips on menu planning, illustrations on the cuts of meat, cooking term definitions, weights and measures, and here, on infant feeding:

“Usually a newborn is allowed to rest for the first 12 hours after birth. Then he is offered sweetened water. His first drink is prepared by measuring 3 ounces of water (6 tablespoons) into a bottle. Add one teaspoon of sugar and shake gently to dissolve. Put the nipple on and boil the entire bottle and contents for 10 to 20 minutes.”

Well, that’s a good illustration of how dated this book is. Following are some more examples of instructions and recipes in The Settlement Cookbook.

“Fried Eggs” tells you how to fry an egg, and the next recipe is how to cook bacon. In a later chapter are instructions on how to make ice cream sundaes and root beer floats. I seem to have been born already knowing how to cook eggs and bacon and make sundaes and floats, and don’t need these recipes. Advice is given for serving drinks at midday: drinks notable for their smoothness are Clover Leaf (gin, strawberries, lime, egg white) or Pink Lady (gin, apple brandy, lime, grenadine, egg white) cocktails. If you need to start a wood fire, you can find instructions on page 646. The book also tells you how to wash dishes by hand. And how to arrange dishes on a buffet table.

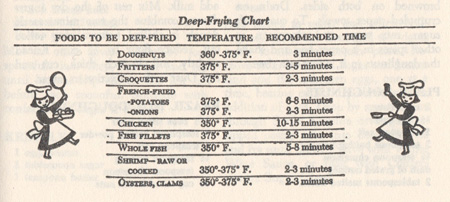
deep-frying chart

This chart is typical of the many useful charts throughout the book.

The entree recipes are typical Americana: lots of casseroles prepared by opening soup, bean, and vegetable cans and mixing with some sort of meat. A “Chicken Stroganoff” recipe is made from cooked chicken, canned mushrooms, and cream of mushroom soup. Boring, and not as good as my own good stroganoff. “Southern Spaghetti” has pasta, bacon, onions, raw beef, kidney beans, peas, tomatoes, mushrooms, green peppers … it serves 15 people! How about a baked trout loaf, or tuna a la king? There are many recipes for cookies, cakes, and pies but they are pretty basic, nothing like the Pillsbury Bake-Off recipes.

This book could be used by someone researching the history of American cooking in the first six or seven decades of the twentieth century. But the recipes hold little interest to me. If this book had been in my family for years, I might be “tied” to it, but that isn’t the case. I will take The Settlement Cook Book to a local library or used book store for recycling.

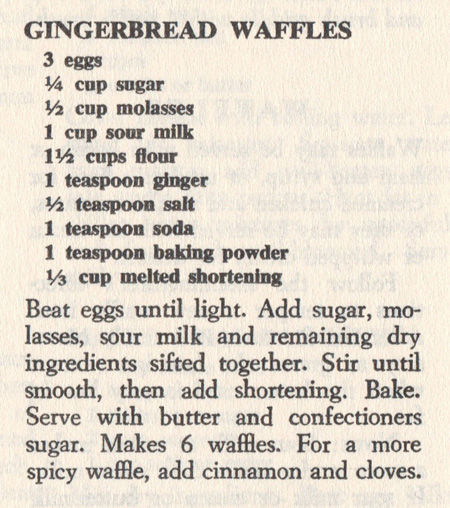
I still need to cook a recipe from this book, that’s my “deal” with myself. Page after page I turn, shaking my head at recipe after recipe. I finally settle on a breakfast item: “Gingerbread Waffles”.

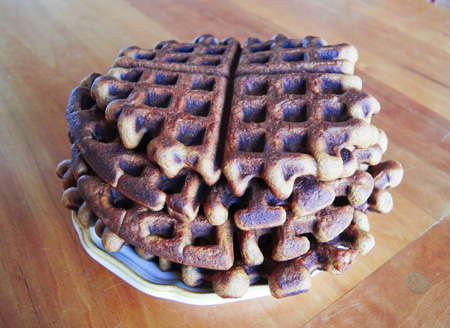
Gingerbread Waffle RecipeThese turned out pretty good. As suggested in the recipe, I added a teaspoon of cinnamon (but not cloves). I used vegetable oil instead of melted shortening. And I served them with maple syrup (and fried eggs) and they were quite tasty. They tasted like, well, gingerbread. But they weren’t very light. I won’t make them again, and thus I won’t enter this recipe into my recipe index.

Gingerbread WafflesIf you want to try the recipe, follow the scanned-in directions (above), but separate the eggs. Put the yolks in the batter with the other liquid ingredients, then beat the egg whites until stiff and fold them in gently at the last minute. “Sour milk” can be made by putting a teaspoon of vinegar in a cup of milk; my suggestion is to use buttermilk instead, and oil instead of melted shortening.

Settlement Cook BookUpdate May 2013: After I posted about the Settlement Cookbook, a woman from the Jewish Museum Milwaukee contacted me and asked me if I would like to donate the book to their archives. She said “I can promise it will be loved!” So, I sent it off to it’s new home, and feel really good about it.

250 Cookbooks: Pillsbury’s Bake-Off Recipes 1963

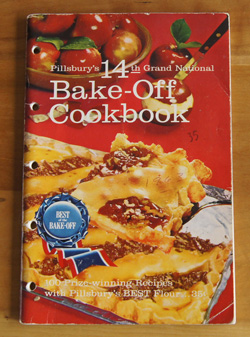
Cookbook #27: Pillsbury’s 14th Grand National Bake-Off Cookbook. From Pillsbury, 1963.

Bake-Off CookbookThis is another of my mother’s Bake-Off Cookbooks. So far I’ve done two Bake-off years: 1964 (Cookbook #4) and 1959 (Cookbook #10). I refer you to the 1964 blog post for a more thorough discussion of these booklets and an explanation of Mother’s rating system for recipes.

In one of the bake-off cookbooks I found a favorite recipe that I had copied for myself after I left home: Angel Squares in the 1964 booklet. And in the odd Spry booklet I found (and scanned) the recipe for Tom Thumb Bars. So as I page through this booklet, I wonder if I will find another old favorite …

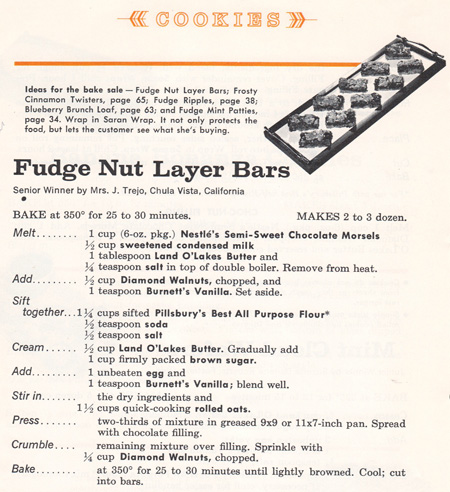
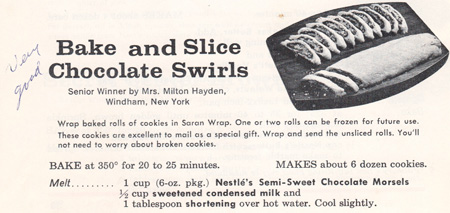
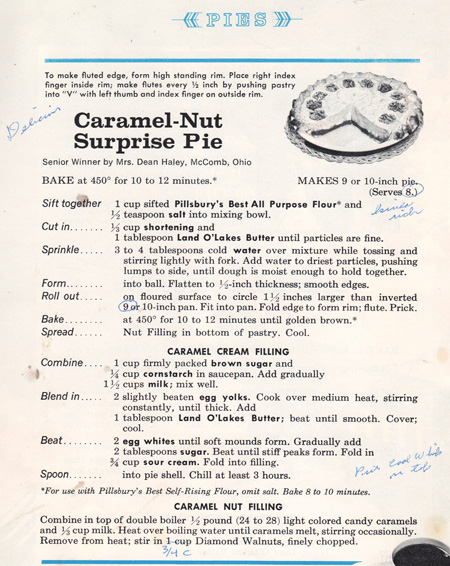
Here are the recipes Mother marked as tried: Lemon Luscious Pie, Caramel-Nut Surprise Pie (“kinda rich”), Treasure Chest Bars (with a note to check out the Jim Dandies in the 10th Bake-off), Bake and Slice Chocolate Swirls, Butterscotch Best Cake, Apple-Scotch Cake, English Toffee Cake, Cherry Streusel Special, Sunshine Dream Bars, … Fudge Nut Layer Bars … I know those! Mother called them “Fudge Nut Bars”, and they are one of my favorite cookies. I have the recipe on a card! Here is the original:

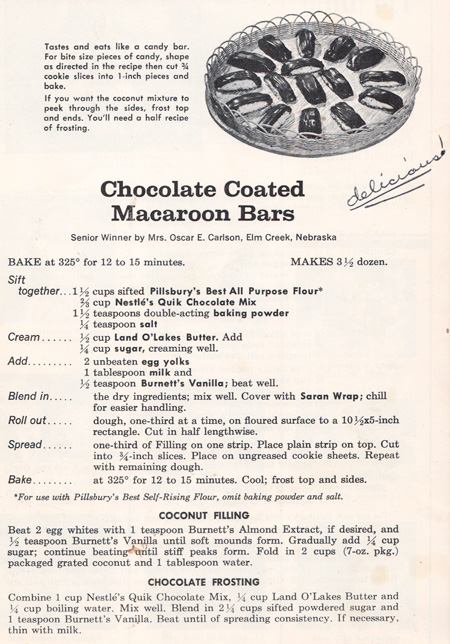
Fudge Nut BarsOne recipe is marked as double-underlined “delicious!” by none other than: me! The recipe is for “Chocolate Coated Macaroon Bars”. I seem to remember making a cookie that tastes just like a Mounds Bar, and I think this must be the recipe.

Chocolate Macaroon Bars

I wrote the “delicious!” on this recipe decades ago.

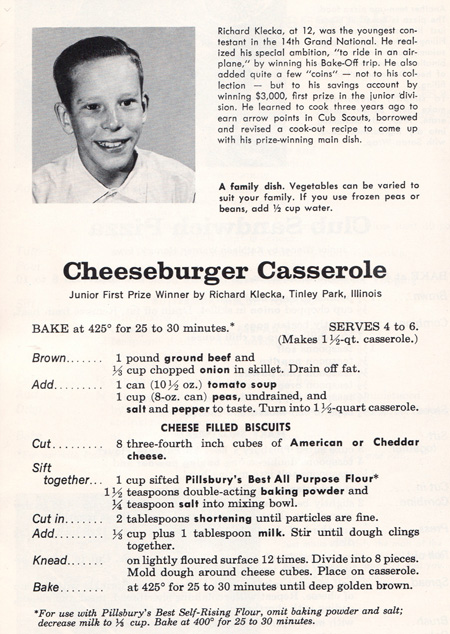
I’m tempted to try the recipe for “Cheeseburger Casserole”. In it a mixture of hamburger, tomato soup, peas, and onions is topped with chunky-cheese-filled homemade biscuits. What great comfort food! Maybe some day when I hanker for a guilty pleasure I’ll make it for dinner. But not this week. (Here’s an updated version of the recipe below.)

Cheeseburger Casserole

The biscuits on top have large chunks of cheese baked right in them!

I decide to try the “Bake and Slice Chocolate Swirls”. Cookies are a better idea because extras are easy to give away or freeze.

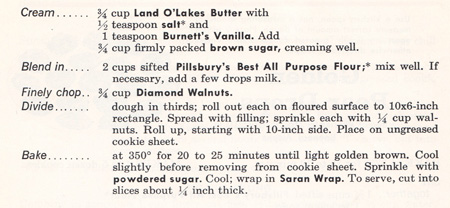
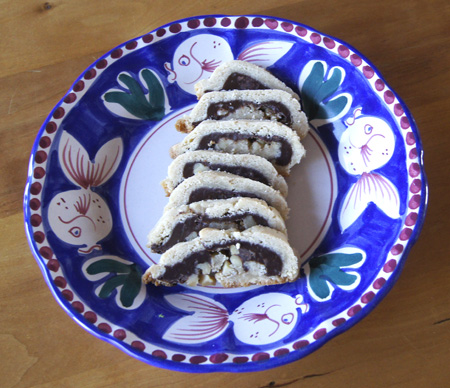
Chocolate SwirlsChocolate SwirlsBake and Slice Chocolate Swirls

  • 1 cup semi-sweet chocolate chips
  • 1/2 cup sweetened condensed milk
  • 1 tablespoon shortening
  • 3/4 cup butter
  • 1/2 teaspoon salt
  • 1 teaspoon vanilla
  • 3/4 cup brown sugar
  • 2 cups flour
  • 3/4 cup walnuts, chopped

Combine the chocolate chips, sweetened condensed milk, and shortening and heat in the microwave (or on the stove top) until the chips melt. Cool slightly.

Cream the butter with the salt, vanilla, and brown sugar. Blend in the flour and mix well. Add a little milk if the dough does not hold together (I added about a tablespoon of milk).

Divide the dough in thirds. Roll each third out on a floured surface to a 10×6-inch rectangle. Spread with filling and sprinkle with the walnuts. Roll up, starting with the 10-inch side. Place the three rolls on a cookie sheet.

Bake at 350˚ for 20-25 minutes until light golden brown. Cool slightly before removing from cookie sheet. Sprinkle with powdered sugar. Cool; wrap in plastic wrap.

To serve, cut into slices about 1/4-inch thick.

Chocolate SwirlsThese are indeed, “very good”. I’m not surprised: how can you go wrong with cookie dough and chocolate and nuts?

I just have to share one more page from this book. Below is a pie recipe that has a caramel layer topped with a cream layer. My mother says it’s “kinda rich”. Cracks me up. (I still wonder how she made so many pies and cakes and cookies and still kept her weight down.) Note that in spite of the fact that it’s kinda rich, she still put cool whip on top. Ah, those were the days.

Caramel-Nut Surprise Pie

Favorites: Lemon Poppy Seed Muffins

“Muffins are one of my favorite breakfast foods. You can bake up a batch on the weekend, freeze them, and microwave one for breakfast direct from the freezer.”

The above was written by me for my 1990s blog, and it’s still true! I have over 40 muffin recipes in my personal “Muffins” document!

I published this recipe for Lemon Poppy Seed Muffins in my old 1990s blog. I call this recipe “my own”, since I pooled several recipes and tweaked the ingredients until we all thought them perfect.

I don’t make these muffins a lot any more. They come with a pretty high calorie and fat content (about 225 calories/muffin), and it’s hard to eat just one of these. And today I choose butter over margarine, and usually try to use a vegetable oil instead of butter. Saturated fats and all that. Finally, I like my breads to pack more of a fiber and nutrient wallop, and these muffins offer little of either.

I save these muffins for special occasions, when we have company or when I’m in the mood to through caution to the wind. Or when I commit to extra 10 minutes on the stair climber.

I guarantee, these are great muffins.

Lemon Poppy Seed Muffins

  • 2 cups flour
  • 1 teaspoon baking soda
  • 1 teaspoon baking powder
  • 1/4 teaspoon salt
  • 1/2 cup margarine
  • 3/4 cup sugar
  • 2 eggs
  • 2/3 cup sour cream
  • 1/4 cup lemon juice (preferably fresh)
  • 1 teaspoon vanilla
  • 3 tablespoons poppy seeds
  • 1 teaspoon grated lemon peel

Stir together flour, baking powder, baking soda, and salt. Cream margarine and sugar until fluffy, then add eggs one at a time. Add flour mixture alternately with sour cream, lemon juice, and vanilla; beat until blended. Fold in poppy seeds and lemon peel.

Put into 12 muffin cups and sprinkle tops with sugar if desired. Bake at 375˚ for 18-20 minutes.

muffins

250 Cookbooks: Diamond Walnut Recipe Favorites

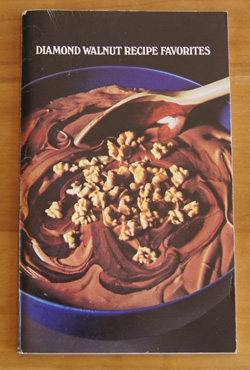
Cookbook #26: Diamond Walnut Recipe Favorites. Diamond Walnut Growers, Stockton, CA. No publication date given.

Diamond Walnut Recipe Favorites CBThere is no date in this booklet, but my guess is that it was printed sometime in the 80s or 90s. It was my mother’s. Since it was produced by the Diamond Walnut Growers (in California, where I grew up), I think it is mostly a gathering of recipes that had appeared on the packages of Diamond Walnuts over the years.

My mother did not mark a single recipe in this book. I had a hard time finding a recipe to cook since most are high in calories (even the few entrees). I’m not going to keep this book, it will go to the recycle pile. Someone might appreciate it. The recipes are not bad, they just aren’t very different from the many cookie, cake, and bread recipes that I already have.

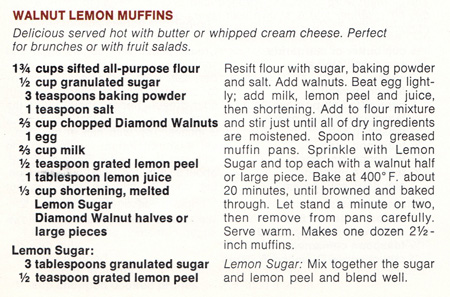
I decided to make the “Walnut Lemon Muffins”. I will substitute vegetable oil for the melted shortening, add vanilla, and add a bit more lemon juice and rind. Also, I learned from Alton Brown’s Good Eats that sugar is to be treated as a liquid, so I added it to the wet instead of the dry ingredient mixture.

Walnut Lemon MuffinsWalnut Lemon Muffins

  • 1 3/4 cups flour
  • 1 tablespoon baking powder
  • 1/2 teaspoon salt
  • 1/2 cup sugar
  • 1 egg
  • 2/3 cup milk
  • 1 teaspoon grated lemon peel
  • 2 tablespoons lemon juice
  • 1 teaspoon vanilla
  • 1/3 cup vegetable oil
  • 2/3 cup chopped walnuts
  • topping: 2 tablespoons sugar mixed with 1/2 teaspoon grated lemon peel (to top the muffins)
  • optional: 12 whole walnuts for the tops of the muffins

Prepare 12 muffin cups, either by lining the cups with paper muffin cups, or by spraying a non-stick pan with non-stick cooking spray. Heat the oven to 400˚.

Stir together the flour, baking powder, and salt.

Beat the egg lightly, then add the sugar and beat well. Mix in the milk, vanilla, 1 teaspoon lemon peel, lemon juice, and oil. Stir in the dry ingredients just until all of the dry ingredients are moistened, then add the walnuts. Do not over mix.

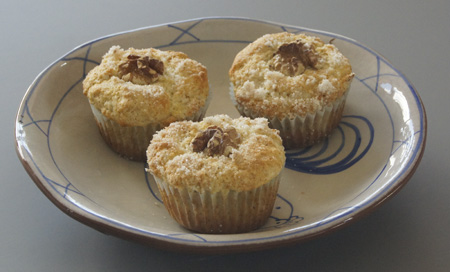
Put into the prepared muffin cups. Sprinkle the muffins with the sugar-lemon peel mixture and then top each with a walnut half. Bake at 400˚ for about 20 minutes, until browned.

Walnut Lemon MuffinsThese are very good! We had them (first) for Sunday breakfast. Even with my extra lemon, they aren’t very lemony-tasting, but the walnuts make them great. Don’t skip the lemon-sugar topping – it really brightens the flavor and appeal of these muffins.

These reminded me of how much I like my own Lemon Poppyseed Muffins. It’s a recipe I tweaked until perfect, then added to my old 1990s Blog. It includes 1/4 cup of lemon juice, and they are definitely lemony-tasting.

250 Cookbooks: The Soybean Cookbook

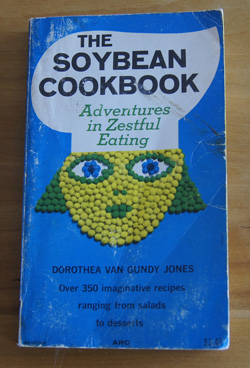
Cookbook #25: The Soybean Cookbook, Adventures in Zestful Eating. Dorthea Van Gundy Jones, ARC Books, NY, Fourth ARC Printing, July 1971. ©The Devin-Adair Company, 1963. Soybean CookbookI pull The Soybean Cookbook off the shelf, and sigh at the images that flash through my mind: a much younger version of me gleefully boiling pots of soybeans, trying to get them cooked soft enough to eat, and then trying to get them seasoned into a hot chile so we could stand eating them. The picture of myself that comes to mind is me as the crazy chemist in tattered blue jeans in the kitchen of our trailer. Well I was a crazy chemist, but this is me as a crazy kitchen chemist. I was determined to make those soybeans palatable. And I knew I wanted to do this because one of the current health-fads was the soybean: high in quality protein and other nutrients and perhaps able to stave off coronary disease and maybe even cancer.
Eventually I gave up trying to cook whole soybeans. Much to the relief of my partner, I’m sure. By the time our kids came along, soybeans were no longer a staple in my kitchen.

I take the small paperback that is The Soybean Cookbook to my favorite chair and settle in. What the heck can I find to cook from this cookbook? Perhaps to avoid looking at the soy recipes, I start reading the title page, prefaces, and the chapter on the history of soybeans. Hey, there is a mystery here!

Mildred Lager and Dorothea Van Gundy Jones

On the book’s title pages, the author is given as Dorothea Van Gundy Jones, the copyright date is 1963, and my copy is the 4th printing, 1971.

Two prefaces come after the table of contents. The first preface is titled “preface to the first edition” and the author is “Mildred Lager”. Who is Mildred Lager? She is not listed on the title page.

The second preface is titled “preface to the revised edition” and the author is Dorothea Van Gundy Jones. She does not mention Mildred Lager in her preface.

Hmm.

The first chapter is titled “History of the Soybean”. The author writes: “The father of one of the authors, T. A. Van Gundy, became interested in the nutritional value of soybeans while attending the World’s Fair in San Francisco in 1915, where they were featured in the Oriental exhibits.”

Okay, so Dorothea Jones admits that the book has more than one author, who I figure must be Mildred Lager.

Time to google “Mildred Lager”. Here is what I found.

Mildred Lager (1900-1960) was one of the pioneers of the natural foods and soyfoods movement in Los Angeles. She encouraged soybean use through recipe books, a heath food store, and a radio program. She also was the president of the Health Food Dealers of Southern California and the vice-president of the National Dietary Association. (Reference, SoyInfo Center website: Mildred Lager – History of Her Work With Soyfoods and Natural Foods in Los Angeles.)

A little digging on the SoyInfo Center reveals:

  • 1960 Jan. 25 – Mrs. Edwin S. Jones (Mildred Lager), age 59, dies at her home at 4114 Warner Boulevard, Burbank, California. She leaves her husband, Edwin S. Jones.
  • 1960 Aug. 7 – Edwin S. Jones (age 69) marries Dorothea Van Gundy (age 57). It is her first, his third. They revise and update Mildred Lager’s books, then both work hard for many years to keep them in print – in part as a source of family income.

So Mildred Lager’s married name was “Mrs. Edwin Jones”, she died in 1960, and a half year later her husband married Dorothea Van Gundy. More from the SoyInfo Center:

“After Mildred’s death, in August 1960, Ed Jones married Dorothea Van Gundy, a former sweetheart, and encouraged her to revise Mildred’s soyfoods book and bring it out under a new title, The Soybean Cookbook, which subsequently became a best-seller.” “In 1981 Mildred’s fine book The Useful Soybean, was very difficult to find (it should be reissued), but The Soybean Cookbook was widely available.”

Mystery solved! Mildred Lager wrote The Useful Soybean which fell out of print, and Dorothea revised and updated it as The Soybean Cookbook. I think it’s fitting that she includes Mildred’s preface and it all makes sense now.

(Reference: Mildred Lager: Work with Soyfoods in Los Angeles – download the entire book here.)

Interesting points from the prefaces

Here is a quote from Mildred Lager’s preface in The Soybean Cookbook:

“For many years I had the privilege of being on a crossroad of nutrition, working with every phase of the healing art. That was when soybeans were literally thrust upon me. I experimented with them as a food, secured various soy products for special diets, made up recipes, and taught the use and cooking of soybeans when they were practically unknown. In 1942, when the beans came into the limelight as a war emergency food, a collection of my recipes was published under the title of 150 Ways To Use Soybeans. In 1945 McGraw-Hill published my complete book on soybeans, their story as well as recipes, called The Useful Soybean.”

Note the publication date of Mildred Lager’s first soybean cookbook: 1942. My previous post in this 250 Cookbooks blog was about Aunt Jenny’s odd cookbook praising the merits of Spry, a solid vegetable shortening, a book also published in 1942. Two totally different takes on war-time cooking. (I’d go with the soybeans as the best choice for nutrition.)

Mildred Lager continues:

“I believe that proper nutrition and common-sense living are man’s best medicine. I also believe that science cannot equal the Master Chemist and that therefore natural foods are better than the refined.”

Master Chemist! I love that! By the capitalization, we all know (hint, hint) who or what she is talking about. And the “chemist” reference speaks to me in itself, as that was my career. (Besides being a cook/witch stirring a bubbling pot.)

Dorothea Van Gundy Jones’ preface does not speak to me as does Mildred’s. She writes that new methods have been worked out for removing “too-positive soy flavor”, and adds that no pepper or hot spices are included in the recipes because of their “irritating effect on the delicate tissues in the digestive tract”. (This tells me why I don’t like many recipes in this book: I like spicy foods.)

What I learned

The “health food craze” in the US did not begin with the hippies in the 60s. The pioneers of healthy eating were at work long before the first young man grew his hair long, before the first young woman burned her bra.

Soybean history

If you have a real interest in the history of the soybean, by all means go to the SoyInfo Center, an amazingly comprehensive and accessible website (accessed 2013). The bullets listed below are only the topics discussed by the authors in the chapter on soybean history.

  • Soybeans are one of the oldest crops grown by man. They are mentioned in Chinese records from  beyond 2000 BCE.
  • Although the authors give 1804 as the year that soybeans were brought to the US, the SoyInfo Center differs, stating that the earliest known references to soyfoods in America were by Samuel Bowen. He brought soybeans to Georgia, where they were first planted in 1765. (SoyInfo Center)
  • W. J. Morse is sometimes called the “father of the soybean”. (SoyInfo Center)
  • J. A. LeClerc, a research worker connected to the USDA, helped promote soybeans.
  • In 1920, the American Soybean Association was organized.
  • Henry Ford saw the possibility of the use of soybean plastics in the automobile industry (SoyInfo Center)
  • T. A. Van Gundy is the father of Dorothea Jones. Mr. Van Gundy developed palatable soy products and went into business selling them. (SoyInfo Center)
  • H. W. Miller was a missionary doctor in China soy milk and infant feeding (SoyInfo Center)
  • Clive M. McCay, a professor of nutrition at Cornell Univeristy, and his wife “did much research and experimental work to find palatable ways of incorporating soybeans into the American diet. They made a real contribution in popularizing this little-known and highly valuable protein food.” (SoyInfo Center)

The recipes

Okay, I have stated that I am not a fan of cooked whole soybeans, but the book uses products other than whole beans, such as tofu, ground beans, sprouted beans, soy flour, and soy milk, with recipes from salads to desserts. Surely I can find something to cook, some recipe to try.

I frown at recipe after recipe. Soybean burgers and loaves, soy souffle, soy-stuffed bell peppers, tofu casserole . . . all with very few seasonings other than salt, pepper, and MSG (!). Finally, in the baked good chapter, I find a recipe for “Fruit Nut Bread”. Soy milk and soy flour are used in the batter for this yeast-leavened quick bread. It’s low in fat and high in protein. I’m going to add cinnamon to it, though!
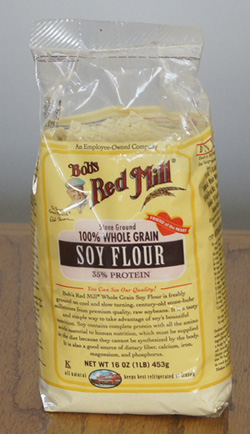
soy flour

this soy flour is simply “powdered soybeans”
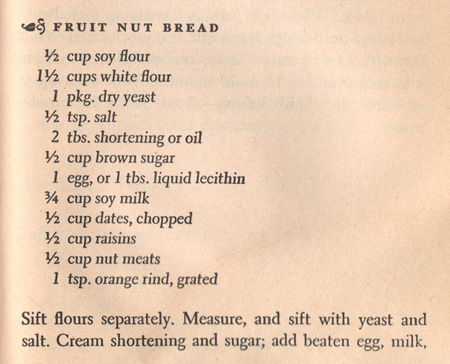
reciperecipeFruit Nut Bread

  • 1/2 cup soy flour
  • 1 1/2 cups all-purpose flour
  • 1 pkg. dry yeast
  • 1/2 teaspoon salt
  • 1 teaspoon cinnamon
  • 2 tablespoons vegetable oil (or shortening: you can use Spry!)
  • 1/2 cup brown sugar
  • 1 egg
  • 3/4 cup soy milk (plain or vanilla-flavored)
  • 1/2 cup dates, chopped
  • 1/2 cup raisins
  • 1/2 cup chopped nuts (I used walnuts)
  • 1 teaspoon grated orange rind

Mix the flours, yeast, salt, and cinnamon.

Cream the vegetable oil and sugar; add the egg and then the soy milk, mixing well. Add the fruits and nuts and orange rind, then add the dry ingredients and mix well.

Place in a well-oiled 8″x4 1/2″ loaf pan. Bake at 350˚ for 50-60 minutes, until it tests done with a toothpick.
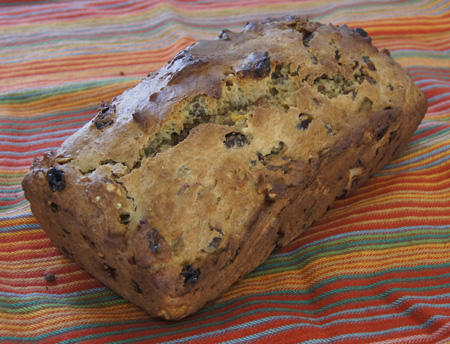
Fruit Nut Bread

The loaf is a bit broken and lopsided, but it tasted really good. We had it at breakfast, and it’s a lot like a fruit cake. It’s dense, but flavorful. No one would guess that it has soy in it. And it’s full of protein while being relatively low in fat. A slice of this bread along with a scrambled egg and milk kept my appetite at bay for hours.

I thought it odd to add the dry, undissolved yeast to the batter and cook the bread immediately. Throughout The Soybean Cookbook, yeast is used in this manner instead of baking powder or baking soda, and I don’t understand why. Author’s preference? Anyway, if I try this again, I would dissolve the yeast in a little of the soy milk, warmed, then add it to the batter. Then I would let the loaf rest in a warm place to rise until it lightens a bit before baking. That way, it might be lighter and less dense.
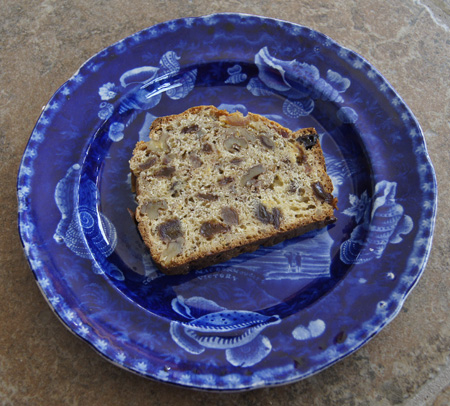
Fruit Nut Bread

 Shall I keep this book?

I am going to keep the book, but mostly for its historical value. I don’t mean it’s worth any amount of money, it’s that it was one of the important books that helped incorporate soybean products into American cuisine.

I decided to go on a field trip and find how many soy products I could easily find at three local markets. Tofu was easy to find, it’s everywhere. I like tofu, plain or in stir fries or added to breads. Soy milk, too, is prevalent, both shelf-packaged and refrigerated. I bought a carton of fresh vanilla-flavored soy milk and found that I really like it. There is also soy coffee creamer. And soy ice cream. Soy flour was only in 2 of the 3 stores that I searched. All three stores had edamame (green soybeans) in the frozen section; I’ve had edamame before, but had forgotten about it. I brought some home and put a handful in a soup and it was great. I picked up some tempeh and tried it; I’m not much of a tempeh fan. I had to really search to find dry soybeans, but did find them at the third store. Soy crisps! I like these little high protein crackers that stave off hunger. (Beyond the mentioned soy products, I’m sure if I looked at the labels of packaged foods, I’d find soy listed as an ingredient in a lot.)

This has been a good exercise for me. I started this blog thinking that I was no longer a “soybean nut”. But I was wrong. I may not begin with whole soybeans, but I use soy products all the time. And now that I have rediscovered soy, I plan to re-incorporate soy flour, milk, and edamame into my weekly breads and meal plans.

Mildred Lager would be proud.
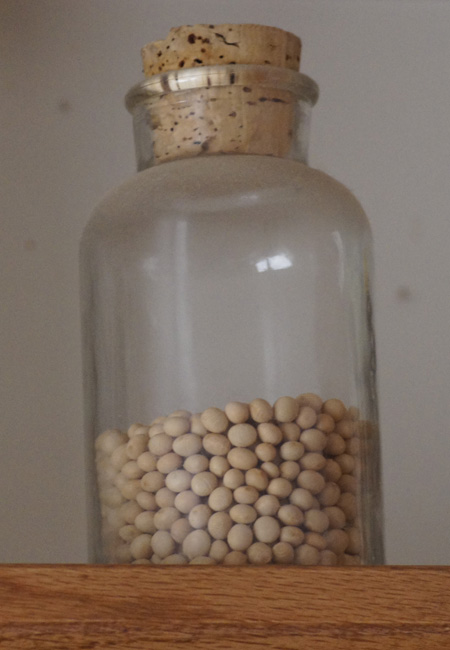
old soybeans

This dusty jar of soybeans has been on my soffit for probably 20 years – I thought to look up there when I was looking for dried soybeans – crazy me – they were hiding in plain sight!

250 Cookbooks: Good Cooking made Easy

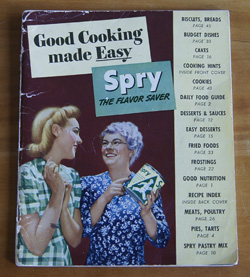
Cookbook #24: Good Cooking made Easy. Spry, the flavor saver. Lever Brothers Company, Cambridge, Massachusetts, 1942. Featuring advice and recipes from Aunt Jenny. Good Cooking made EasyThe time is 1942. The cookbook is Good Cooking made Easy, featuring Spry, a vegetable shortening.

“Today, we are bending every effort to make a strong, invincible America. The buoyant health of every man, woman, and child . . . of every member of every  household . . .  is an important link in our country’s strength. It is our patriotic duty to feed our families well . . . to serve nourishing food in our homes daily.”

So you have a real job to do in your country’s defense . . . to see that your family gets good food and plenty of it . . . to choose the right foods . . . prepare them so that they will be both appetizing and delicious. It is not enough for food to be wholesome, nutritious, well-balanced . . . food must also look good, taste good.

That is where all you good cooks step in and take over. You know that reliable recipes are important in helping you turn out dishes that are attractive, good to eat. You rely upon pure, wholesome ingredients for making good, nourishing foods. Healthful breads and biscuits . . . hearty main-dish casseroles . . . light, delicate cakes . . . tender, flaky pies – these are some of the stand-bys that will help you serve satisfying, balanced meals.

To keep the body in good running order, include each of these nutrients in the diet, daily.

1. Proteins [yada yada]

2. Fats and carbohydrates provide energy for work and play; also furnish bodily warmth. Chief sources: vegetable shortening [Spry], butter, animal fats, cereals, breads, potatoes, sugar. Fats are the richest source of energy, by weight giving more than twice as many calories as carbohydrates or proteins. A pure 100% fat supplies over 4000 calories per pound; provides quick and lasting energy.”

Ah yes. I do need to eat vegetable shortening to help furnish bodily warmth. One cup of Spry will furnish all the calories I need in a day! What a refreshing idea! I like being told to eat pies and cakes. I’m tired of the current litany pushing fresh, local, organic fruits and vegetables.

Of course, something is a bit “off” with this cook-booklet. But it’s not only the nutrition advice, it’s the comments throughout the booklet. Here are scans of several pages from the booklet.

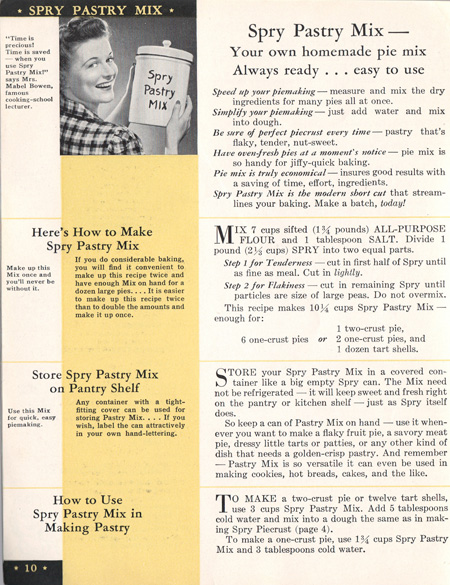
page 10

“Store your Spry Pastry Mix in a big empty Spry can. It need not be refrigerated – it will keep sweet and fresh right on the pantry shelf…”

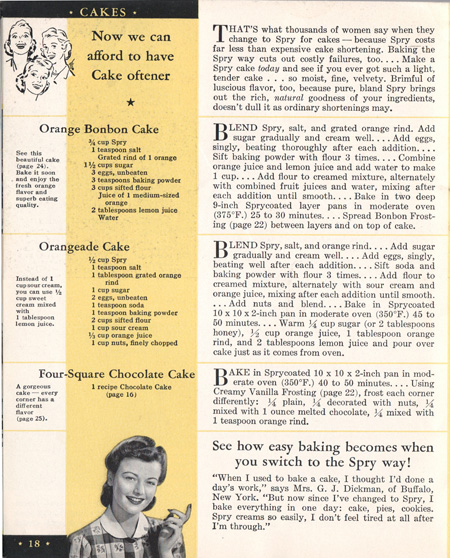
page 18

“Now we can afford to have Cake oftener.” “…pure, bland Spry brings out the rich, natural goodness of your ingredients, doesn’t dull it as ordinary shortenings may.” “Spry creams so easily, I don’t feel tired at all after I’m through.”

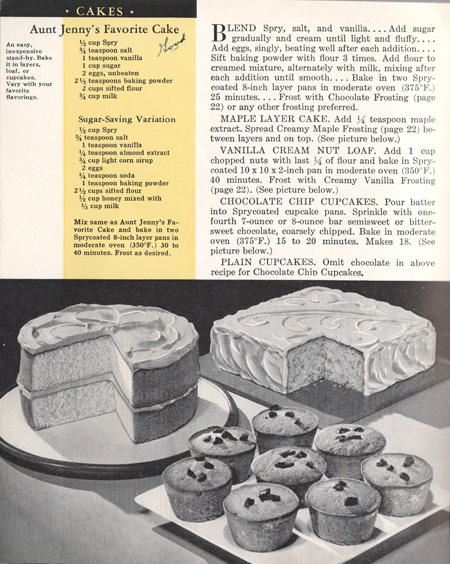
PAGE 18

Note my mother’s “Good” on this recipe. Also note the photos of perfect cakes and muffins.

page 33

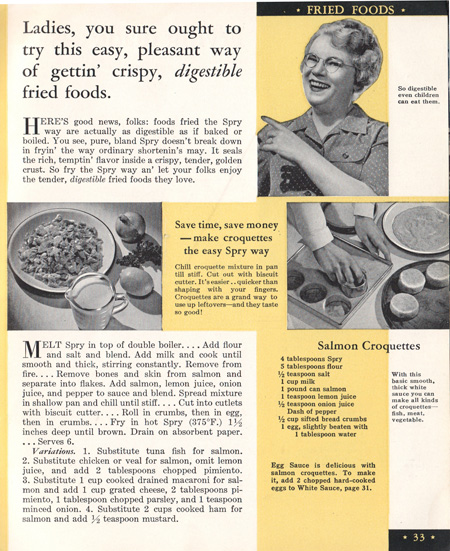
Here is Aunt Jenny herself! She says: “Here’s the good news, folks: foods fried the Spry way are actually as digestible as if baked or broiled.” and “So digestible even children can eat them.”

“Even children can eat them???” This is just such a strange statement.

page 44

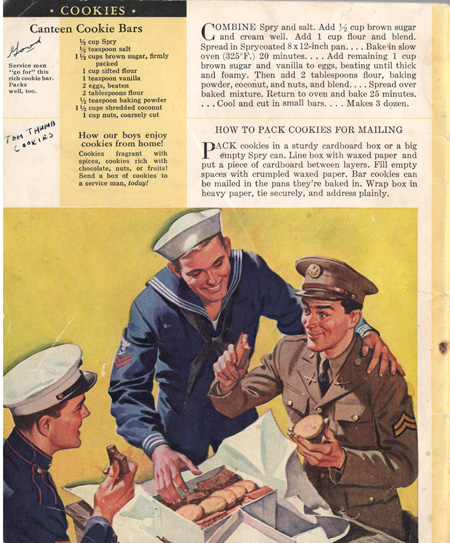
“Pack cookies in a sturdy cardboard box or a big empty Spry can.” Be sure to “address plainly.” Isn’t the illustration great?
This is the original source of my mother’s Tom Thumb Bar cookie recipe.

(The mark on the right side of the above page is a food stain.)

inside front cover

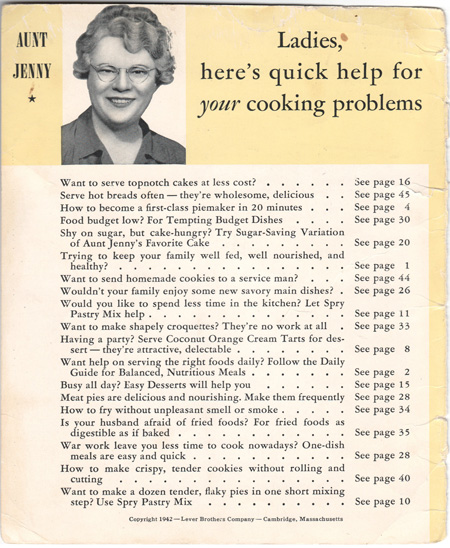
“Is your husband afraid of fried foods?”

I turned to web searches to find out more about the origins of this booklet. In 1936, Lever Brothers began producing Spry, a solid vegetable shortening. Spry competed with Procter and Gamble’s Crisco®. Lever Brothers waged an ad campaign, including an advertising character named “Aunt Jenny”. Aunt Jenny (Edith Spencer in real life) was the host of a radio show called Aunt Jenny’s Real Life Stories. This show ran for two decades, beginning in 1937. As the narrator, Aunt Jenny told a person’s story over several days, in a soap opera fashion. Aunt Jenny included in each episode a recipe for an entree or baked good made with Spry, and she lauded the merits of Spry from her personage as a wise and friendly older woman. Several printed booklets of Spry recipes were published with Aunt Jenny’s comments included. This advertising campaign greatly improved Spry’s percentage of the vegetable shortening market.

You can read more about Spry and Aunt Jenny in Wikipedia. Wikipedia calls her “almost bizarrely enthusiastic”, and that’s exactly the feeling I got reading this booklet. Ghosttraveller, a collector of moldy cookbooks and other Americana has a photo of my cook-booklet and a fun discussion of Spry and Aunt Jenny. Old-Time Radio has a short article on the radio program. (All websites accessed 2013.)

By the 1970s Spry was no longer available in the US. I am old enough to remember Spry, although Crisco® was what we had in our kitchen when I was growing up.

Now, back to business. What recipe shall I cook from this booklet? It has recipes for everything from main dishes to breads to desserts. Gosh, 1942! My mother was a new bride then and only 26 years old! She marked several recipes. One of those recipes – Canteen Cookie Bars – made it into her repertoire as “Tom Thumb Bars”; I remember these well from childhood.

I decide to try Spicy Oat Cookies. My mother wrote a “Good” next to the recipe, and they have a modicum of healthiness by including oatmeal, peanuts, and raisins.

Here’s a scan of the original recipe. Note the food stains!

GCME recipeI’ll make them almost like the recipe. I’ll use Crisco® instead of Spry, and I’ll cut the salt in half. I think that molasses is included because sugar was rationed during World War II.

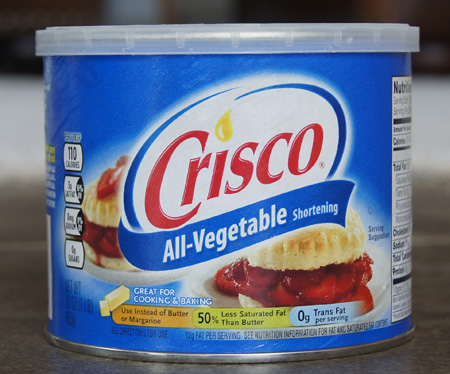
Note that in the recipe below I give weight measurements for the shortening and the molasses. I find it a lot more convenient to weigh these directly into the mixing bowl, that way you don’t have to scrape gooey shortening or molasses out of a measuring cup. Note that Crisco® also has statements indicating it’s a healthy food:

Crisco

Another part of the label reads: “Excellent source of ALA Omega-3 fatty acid”

Spicy Oat Cookies

  • 1/2 cup solid vegetable shortening such as Crisco® (3 1/2 ounces)
  • 1/2 teaspoon salt
  • 2 teaspoons cinnamon
  • 1/2 cup sugar
  • 1/2 cup molasses (5 1/2 ounces)
  • 1 egg
  • 1/2 teaspoon baking soda
  • 1 1/2 cups flour
  • 1/4 cup milk
  • 1 1/2 cups oatmeal (regular, not old-fashioned or instant)
  • 1/2 cup chopped peanuts
  • 1 cup raisins

Mix the vegetable shortening with the salt and cinnamon, then add the sugar and molasses and beat until light and fluffy. (Use a stand mixer.) Add the egg and beat well. Combine the baking soda with the flour, and with the mixer on low, add to the creamed mixture. Beat only until it’s all mixed in. Add milk, oatmeal, peanuts, and raisins and mix on low until combined.

Drop dough from a teaspoon on a parchment-lined baking sheet. (You can use greased cookie sheets if you prefer.) Bake at 350˚ for 12-14 minutes. Makes about 3 1/2 dozen.

These are excellent cookies! If they last long enough, we’ll pack them along with us on our next hike – they make great little energy bar-cookies.

Spicy Oat Cookies


250 Cookbooks: Prize-Winning Beef

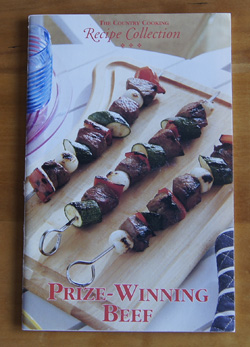
Cookbook #23: Prize-Winning Beef. The Country Cooking Recipe Collection; Reiman Publications, Mary Beth Jung, editor, Greendale WI, 1993. Prize-Winning Beef

This little booklet of 32 recipes was part of my mother’s collection. Most of the recipes sound okay, but they are not very innovative. The recipes seem to be more from the 1950s or 60s than the 1990s. There are recipes for country ribs, beef meatballs, nachos, flank steak, southwest stew, chile, and the like; I already have my own ways of cooking most of these. A couple of the recipes are calorie-laden with the addition of pastry.

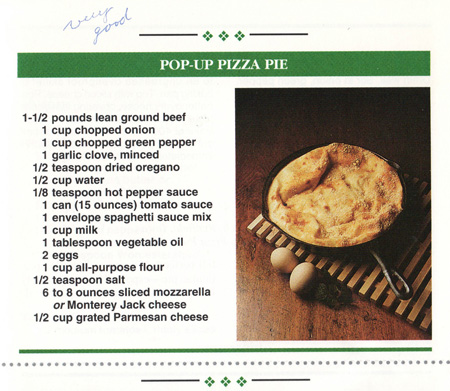
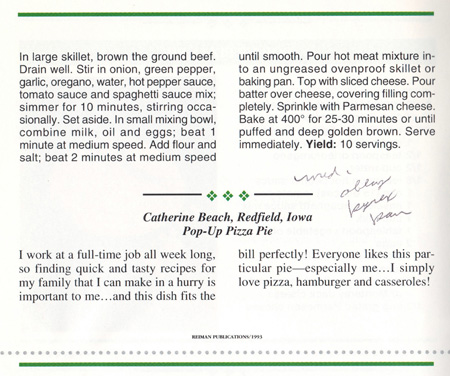
My mother marked one recipe: “Pop-up Pizza Pie”. She wrote that it was “very good”, so I decided to try that recipe for this 250 Cookbooks blog. Last weekend I tried another recipe from this booklet; it was for barbecue beef and it turned out well – I plan to add it to my personal recipe collection and might share it here eventually. But I am going to recycle the booklet itself. It has served its purpose.

The original recipe, below, supposedly serves 10 people. I will cut the recipe in half for the two of us. I expect I will have leftovers!

Pop-Up Pizza Pie RecipePop-Up Pizza Pie RecipeNote that the original recipe calls for “one envelope spaghetti sauce mix”. This means one of those small seasoning packets that once were so popular. I don’t keep any of these in my pantry. Since I want the dish to taste as close as possible to the original recipe, I searched online and found that several websites have posted recipes for spaghetti sauce mix. Most of these recipes include cornstarch, sugar, herbs and spices. I checked the labels of packaged spaghetti sauce mix in the supermarket and they too include cornstarch, sugar, and spices – I think I am on the right track.

But which spice recipe to follow? Then, just in time, one of the cooking blogs that I follow, Lynn’s Kitchen Adventures, posted a recipe for “Homemade Spaghetti Seasoning Mix“. Yay! I made up a batch of spice mix following her recipe. I suggest you do too. It’s an excellent seasoning mix that puts a spaghetti sauce on the table in a flash.

Pop-up Pizza Pie


Serves about 3.

  • 3/4 pound lean ground beef
  • 1/2 cup chopped onion
  • 1/2 cup chopped green pepper
  • 1 clove garlic, minced
  • 1/2 cup roughly chopped mushrooms (optional)
  • 1/4 teaspoon oregano
  • dashes of hot pepper sauce
  • 1 8-ounce can tomato sauce
  • spaghetti sauce mix (choose one from the following three options:
  • 1/2 cup milk
  • 2 teaspoons vegetable oil
  • 1 egg
  • 1/2 cup flour
  • 1/4 teaspoon salt
  • 4 ounces grates mozzarella cheese
  • 1/4 cup grated Parmesan cheese

Brown the ground beef and drain well. Stir in onion, green pepper, garlic, oregano, water, hot pepper sauce, tomato sauce and spaghetti sauce mix; simmer for 10 minutes, stirring occasionally.

In a small bowl, combine milk, oil, and eggs; beat 1 minute at medium speed. Add flour and salt; beat 2 minutes at medium speed.

Put the hot meat mixture in an oven-proof pan or casserole. A 9-inch round pan or an 8×8-inch square pan works well. Top with the mozzarella cheese. Pour the batter over the cheese, covering the filling completely. Sprinkle with Parmesan cheese.

Bake uncovered at 400˚ for 25 -30 minutes or until puffed and deep golden brown. Serve immediately.

Pop-Up Pizza Pie Comments

Well. I was wrong, we hardly had any leftovers! We started eating and I said “I like this!” and my husband said “very good!” Hey, that’s what my mother wrote on the recipe! I went back for seconds and wanted more. I will definitely make it again. This is a good “comfort food” entree.

250 Cookbooks: Healthy Homestyle Cooking

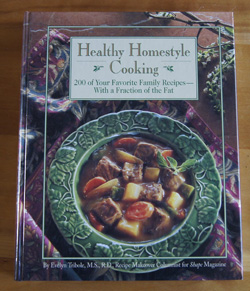
Cookbook #22: Healthy Homestyle Cooking. Evelyn Tribole, Rodale Press, Emmaus, Pennsylvania, 1994.

Healthy Homestyle CookingThis is another of my low-calorie cookbooks. Several pages are neatly dog-eared, noting recipes that still look interesting to me today, although I’ve never tried them. A page with a recipe for falafel is marked with a newspaper-clipped recipe for “Hummus Patties”. I love falafel (made from garbanzos), but they are usually fried in a lot of oil and so I avoid them because of calories. Both recipes I just re-found call for cooking in a minimum amount of oil in a non-stick pan. A great idea.

This is a useful cookbook, and I ask myself: Why is it that I haven’t I used it in ages? I think I know what happens. I buy a cookbook and read it and try recipes for a few weeks or months, then the cookbook gets covered with papers and forgotten and eventually re-shelved. Doing this 250 Cookbooks blog is great for me, personally, because the project is forcing me to re-discover books that have a lot of good ideas.

The good ideas in this book are lower-calorie versions of many common home-cooked meals: pot pies, lasagna, chicken divan, enchiladas, carrot cake, brownies, and lots more. Each recipe has a personal note and pointers on how to reduce calories. And as a bonus, the book is nicely illustrated with many full-page color photos.

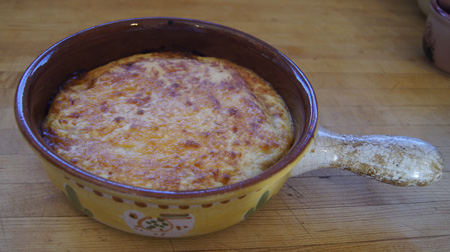
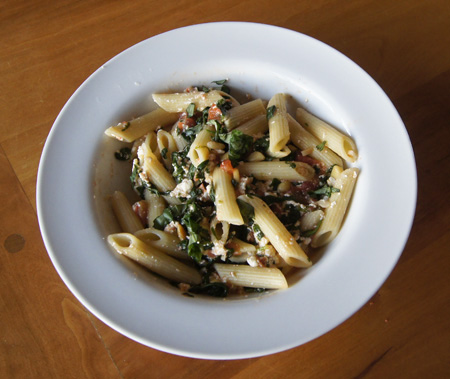
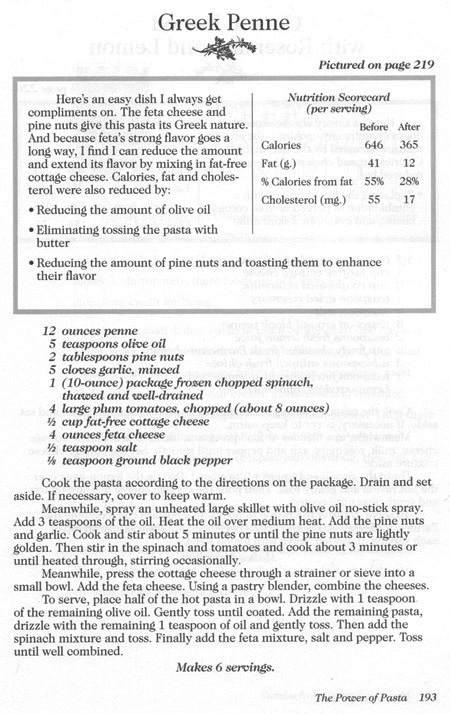
I’m going to try “Greek Penne”. It’s one of the pages that I had dog-eared. This is a vegetarian dish, and I decided to try it on a night when I just have me to cook for. I’m looking forward to this easy-to-prepare dish of penne, tomatoes, spinach, pine nuts, and feta. It’s interesting that the tomatoes are just barely cooked: I just took a cooking class at Escoffier Boulder where we made a dish including barely-cooked tomatoes called “Concasse”.

The original recipe is below. I plan to change the recipe a little: I’ll peel and seed the tomatoes and use fresh spinach, and add a little fresh basil.

Greek PenneGreek Penne


This recipe serves about 6 people, depending on appetites.

  • 12 ounces penne pasta
  • 5 teaspoons olive oil (or to taste)
  • 2 tablespoons pine nuts
  • 5 cloves garlic, minced
  • 10 ounces frozen spinach, thawed and drained (or use fresh spinach, see below)
  • 4 tomatoes, peeled, cored, and chopped
  • 1/2 cup cottage cheese (non- or low-fat for less calories; substitute with feta if you wish)
  • 4 ounces feta cheese
  • salt and pepper to taste

Cook the pasta; drain and set aside.

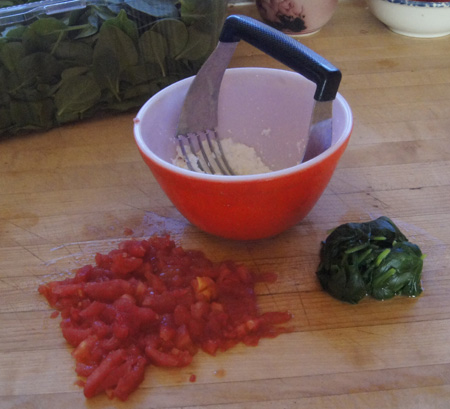
Press the cottage cheese through a strainer into a small bowl. Rap the strainer against the top of the bowl to get all the cottage cheese into the bowl. You could also put the cottage in a small blender, but the texture is kind of nice if you use a strainer. Add the feta cheese to the cottage cheese and mash up with a fork (or pastry blender). Set aside.

Cook and stir the pine nuts and garlic in a small amount of olive oil in a pan large enough to hold the entire finished dish. Cook until the pine nuts are lightly golden – watch carefully as it doesn’t take very long. Then stir in the spinach and tomatoes and cook for about 5 minutes, until heated through.

The pasta is probably cool by now, so add it to the tomato-spinach mixture and heat and mix gently until it is serving temperature. Add olive oil and salt and pepper to taste. Finally, add the feta cheese mixture and gently mix. Serve with a little chopped fresh basil, if you wish.

Greek PenneComments

This was very good, and I’ll make it again. My following comments concern only the calorie-cutting suggestions.

The author states that the original recipe had 646 calories per serving, the new version has 365 calories. The calorie value of the original recipe must include a huge amount of butter/oil per serving. The best cutting of calories comes from not tossing the pasta with butter – duh. I think the nit-picking of using non-fat cottage cheese to cut the feta is a little obsessive.

Feta cheese: 4 ounces of feta has 320 calories, 200 of which are from fat. Per serving, that’s about 55 calories (33 from fat). If you don’t care about an extra few calories per serving, use a little more feta and skip the cottage cheese, because it isn’t going to change the overall calorie content very much.

Pine nuts have a lot of calories! But just a few go a long way.

Pine nuts: 2 tablespoons weigh 1/2 ounce, and according to Nutrient Facts this amount has 90 calories (mostly fat-calories). Divided amongst 6 people, that’s only 15 calories per serving. I’d say, add more pine nuts if you want.

Spinach

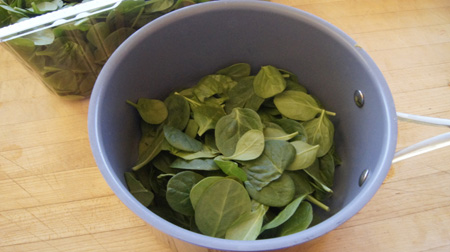
I cooked my own spinach. First, I weighed out the proper number of ounces (I was cooking for one, recall) and put it in a large sauce pan:

spinachI added about a half-cup of water and set the pan over high heat, covered. When it came to a boil, I removed the pan from the heat, drained and chopped the spinach. Look how much it cooked down:

cooked spinachOf course, it’s easier to use frozen spinach, but the fresh spinach tasted really good.

250 Cookbooks: Sunset Cook Book of Breads

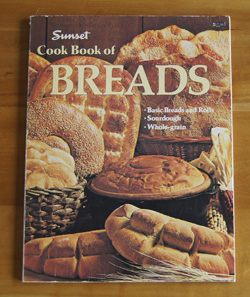
Cookbook #21: Sunset Cook Book of Breads. By the Editors of Sunset Books and Sunset Magazine, Lane Publishing Co., Menlo Park, California, 1978.

Sunset Cook Book of BreadsI opened this book and immediately knew I’d keep it. I found many recipes I wanted to try. It was published 35 years ago, so that’s pretty amazing. Why haven’t I marked it up and tried a bunch of these recipes?
Oh, I see. I gave this cookbook to my mother Christmas 1979, she wrote a note to that effect on the inside front cover. She was more interested in baking pies and cookies and casseroles than breads. I was always the one with a passion for yeast breads.

I organize all the recipes that I clip from magazines, newspapers, and other sources by entering them in a database I began in the 1990s. (Over 800 entries!) Thinking that several recipes in this Sunset Cook Book of Breads look familiar, I checked that database. Sure enough, ten of this cookbook’s recipes are referenced there. So before I gave the cookbook to my mother back in 1979, I must have copied several pages of recipes to try, and I still have those copies today.

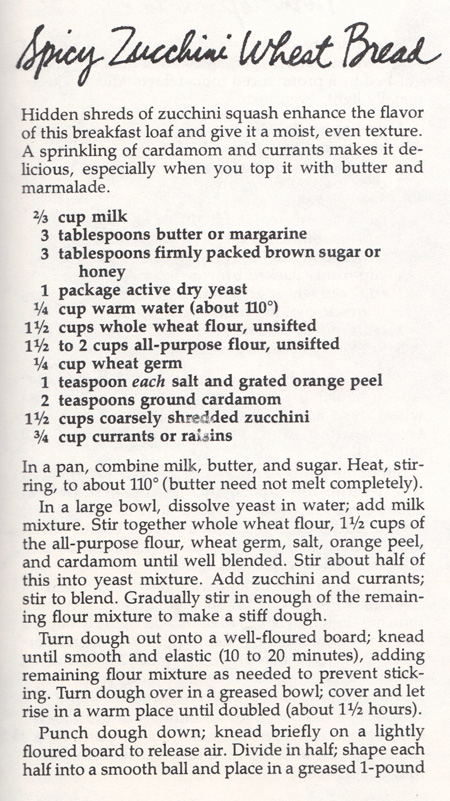
The bread recipe I will bake this week is “Spicy Zucchini Wheat Bread”. It is not one of the recipes I copied all those years ago, but it appeals to me now. I like incorporating vegetables in breads; the zucchini will add fiber and nutrients and keep the loaf moist. I like the inclusion of whole wheat four and wheat germ too. Cardamom is the spice: Wow! Cardamom usually pops up in ethnic cuisines, not American bread cookbooks from the 70s. I’m tempted to substitute with cinnamon, but I’ll stay with the cardamom. Live dangerously.
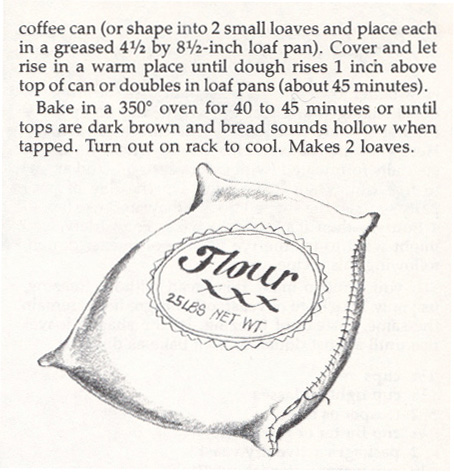
Here is the original recipe:

reciperecipe I will use my bread machine and write my own version of the recipe incorporating my changes. If you don’t have a bread machine, follow the original version for mixing and rising.

Spicy Zucchini BreadSpicy Zucchini Wheat Bread

  • 1 cup milk
  • 3 tablespoons butter
  • 3 tablespoons honey
  • 1 1/2 cup (7.5 ounces) whole wheat flour
  • 2 1/4 cup (10.5 ounces) bread flour (or use all purpose flour mixed with 2 ounces/1/4 cup gluten flour)
  • 1/4 cup wheat germ
  • 1/2 teaspoon salt
  • 1 t grated orange peel
  • 2 teaspoons cardamom
  • 1 1/2 cup grated zucchini
  • 3/4 cup currants or raisins
  • 1 tablespoon yeast

Combine all ingredients in the bread machine and set to the dough cycle. (The dough cycle should mix and rise the dough.) Check the dough during the first few minutes of mixing to make sure that the dough is coming together into ball of dough; add a little more flour or water as necessary.

Take the risen dough out of the bread machine. Form into 2 loaves and place in lightly greased 4 1/2 x 8 1/2-inch loaf pans. Let rise until the dough is 1/2-1 inch above the rims of the pans.

Bake at 375˚ for 30 minutes.

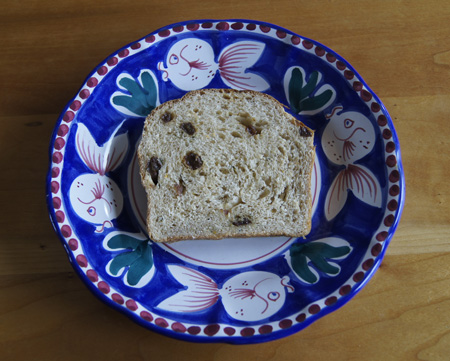
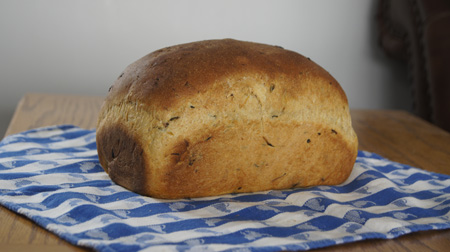
Spicy Zucchini BreadThis bread turned out great, and I will definitely make it again. I like it best toasted with a little light cream cheese or jam or apple butter.

Favorites: Shui Mai

The “Shui Mai” that I make are little pork-shrimp dumplings encased in a wonton wrapper, steamed, and served with a soy sauce-based dipping sauce. The spelling of “shui mai” varies according to the country or region of origin, and the Americanization thereof. In general, they are bite-sized dumplings served on small plates.

There are a lot of recipes already on the web for shui mai. I’m not offering a particularly special recipe – I’m just encouraging everyone to make shui mai because they are GOOD!

My recipe for shui mai entered my repertoire in the1970s. I learned of these treats from The Chinese Cookbook by Charles Claiborne and a clipped recipe from a magazine, way before shui mai (and pot stickers) became popular out and about. I made them just the other night when trying out the recipe for Chinese Asparagus Salad. Once again they were wonderful!

You need a steamer, either the electric kind or the stacked-bamboo type that sits in a wok. Shui mai take a little time to make but are worth every minute.

Shui Mai


This recipe makes about 40 dumplings and serves about 4 people. Usually, I serve shui mai as part of a meal, perhaps with a stir fry and rice. They aren’t a meal in themselves, they are dim sum, a “small plate” food. If you make too many, they are great the next day!

  • 1/2 lb ground pork (use a fresh, quality ground pork)
  • 1/2 lb raw shrimp, chopped into small pieces but not ground
  • 1/4 cup minced water chestnuts
  • 1/4 cup finely chopped mushrooms (preferably shitake)
  • 1/4 cup finely chopped green onions
  • 1 tablespoon soy sauce
  • 1 tablespoon dry sherry or Chinese rice wine (optional)
  • 1 teaspoon cornstarch
  • 1/2 teaspoon sugar
  • wonton skins (you need about 40 skins)
  • 1 egg beaten with 1 tablespoon water
  • dipping sauce (recipe follows)

Combine the filling ingredients. Brush a wonton skin with the egg-water mixture, then place about a teaspoon of filling in the center. Press together opposite corners of the square to make a packet. (See the photo of finished shui mai.)

Place the filled dumplings in a steamer. I use an electric steamer and I usually spray the plastic trays with Pam to prevent sticking.

Steam 20-25 minutes (in steamer).

Dipping Sauce

  • 1/2 cup soy sauce
  • 1 tablespoon rice vinegar
  • 1 teaspoon minced garlic
  • 1/2 teaspoon grated fresh ginger
  • 1/2 teaspoon sugar
  • a few drops hot chile oil (or use 1 tablespoon Thai sweet chili sauce, or pepper flakes)
  • sesame oil to taste (optional)
  • 2 green onions, chopped fine
  • 1 tablespoon chopped cilantro (optional)

Chinese mealThe shui mai are at about 4 o’clock on the plate, with the dipping sauce in the center. There are many ways to gather in the sides of the wonton skins to form these dumplings; feel free to be creative. Round skins (gyozo) can also be used. And of course, you can vary the ingredients.