250 Cookbooks: 1989 Best-Recipes Yearbook

Cookbook #50: 1989 Best-Recipes Yearbook. Better Homes and Gardens, Meredith Corporation, Des Moines, Iowa, 1989.
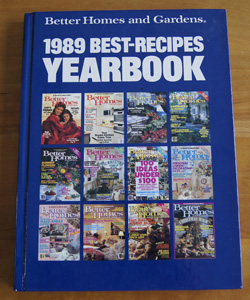
1989 Best Recipes YearbookAdmissions of a recovering recipe clipper . . .

I bought this cookbook in 1989. Back then I loved to buy women’s magazines and pore over the recipes. But I could not just let the magazines go straight to the recycling bin, I held onto old issues until I first clipped recipes to try. Eventually it got done. Eventually I read each clipped recipe and entered its information into a database. Eventually the cut up magazine went into the recycling bin. The clipped recipe went into a file folder. I still have these file folders and the database. That project is now finished.

Tired of my compulsive recipe-clipping addiction, I vowed never again to buy a women’s magazine. That was in about the early 1990s. I have stayed true to my vow. But, as a leftover, I have this book of Better Homes and Gardens magazine recipes.

I will now recycle this book. In the whole dang book, not a single recipe is marked by me. Although I did have a post-it with a seafood dinner plan on it, tucked on a page with a recipe for shrimp in a tarragon, garlic, sun-dried tomato vinaigrette recipe. I now have a much better version of a shrimp vinaigrette in my repertoire, so I can let this go.

The layout of this book glares at me like the glossy magazines I used to pore over. Promises of great food shown in fancy dining layouts with happy people. But the recipes in this book are mediocre. Today I saved only a couple recipes, one for a sweet-potato-chocolate swirled quick bread, and one for a seasoned ground meat mixture over home-cooked polenta.

And what did I decide to cook from the pages of this soon-to-be-discarded cookbook? “Orange Streusel Muffins”. I’m always up for another muffin recipe. Muffins are part of my daily eating plan! And these are a tiny bit unusual, with a jammy surprise inside.Orange Streusel MuffinsThe above version says to make 12 muffins. As I was filling the muffin cups, I felt that I needed to fill them a little fuller, so I only made 8 muffins. My new 12-muffin tin from King Arthur Flour is great – it does not require any grease or paper liners and does not complain when I leave a few of the muffin cups unfilled. Next time, I’ll add more marmalade, so I incorporated this, too, into my version, below.
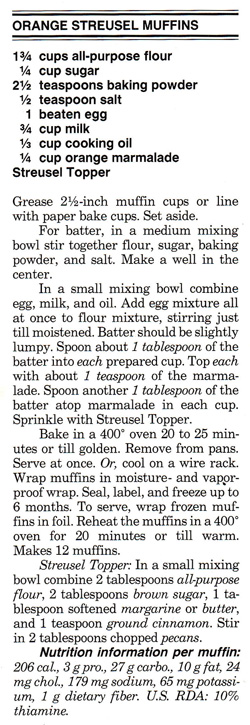
Orange Streusel Muffins
makes 8 muffins

Muffins

  • 1 3/4 cups flour
  • 1/4 cup sugar
  • 2 1/2 teaspoons baking powder
  • 1 egg
  • 3/4 cup milk
  • 1/3 cup oil
  • 1/4 cup (or more) orange marmalade

Streusel topping

  • 2 tablespoons flour
  • 2 tablespoons brown sugar
  • 1 tablespoon softened butter
  • 1 teaspoon cinnamon
  • 2 tablespoons chopped pecans

Stir together the flour, sugar, baking powder, and salt. Set aside.

Beat together the egg, milk, and oil. Combine wet and dry mixtures, stirring just until moistened.

Spoon a generous tablespoon of the batter into 8 muffin cups, then put a generous teaspoon of marmalade on top of each. Next, spoon another generous tablespoon of the batter atop the marmalade in each cup. Finally, sprinkle with Streusel topping.

Bake at 400˚ for 20-22 minutes or until golden. Cool in the pan a few minutes, then remove to a wire rack to cool completely.
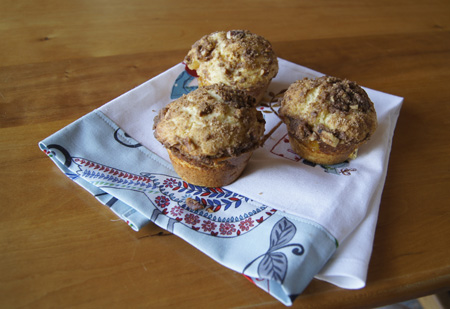
Orange Streusel MuffinsYes, these are good. My dining partner loved the built-in jam. I liked warming them briefly in the microwave so the marmalade was warm. We both wanted: More marmalade!

My breakfast, awaiting only eggs and coffee:
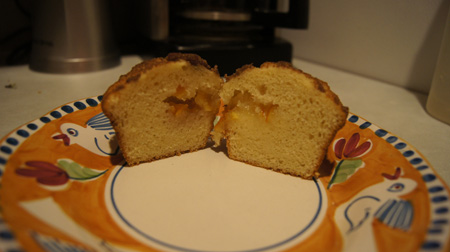
Orange Streusel MuffinsThese satisfied my New Year’s resolution: Everyday, I should eat something that makes me say “wow, I just have to have another bite!”

My kitty helping me to set up the shot:
Tori and the muffins

Hey, this is my 50th cookbook! I’m 20% of my way through this project!

Favorites: Cheater’s Chiles Rellenos

My “real” recipe for chile rellenos calls for deep frying the rellenos. They are wonderful, but I rarely make them because of the fat calories the frying adds to the dish (not to mention the time-consuming and messy process of deep frying the egg-battered stuffed chiles).

Instead, I make this cheater’s version a lot. This recipe is from my own index card collection and probably entered my repertoire in the 1970s.

Cheater’s Chiles Rellenos
serves 4

  • 6 eggs, separated
  • 1 tablespoon flour
  • 1/4 teaspoon salt
  • 1 4-oz. can green chilies, diced
  • 1/2 lb. Jack cheese, sliced thin or grated
  • salsa or a spicy diced tomato sauce like rotel
  • optional: sour cream

Beat egg whites until soft peaks form. Beat egg yolks lightly, add flour and salt and mix until smooth. Fold in whites until well blended. Turn half the mixture into a greased 12x8x2-inch baking dish. Cover with chiles and cheese. Top with remaining egg mixture.

Bake at 325˚ about 25 minutes. Top with salsa and sour cream.

Half a recipe: I made a half recipe and baked it in a 4 1/2 x 6 1/2 x 1 1/2-inch small Le Creuset baking dish. I baked it at 350˚ about 25 minutes. It puffed up over the top of the baking dish and turned out pretty and perfect.

250 Cookbooks: Bon Appétit Best Entertaining Recipes

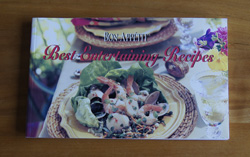
Cookbook #49: Bon Appétit Best Entertaining Recipes. Bon Appetit, The Condé Nast Publications, Inc., NY, NY, 2004.

Best Entertaining RecipesThis cookbook came my way because I subscribed to the Bon Appetit magazine for several years. It was probably a bonus book for renewing my subscription.

I’d like to throw this cookbook away. Why? Because the content is such a jumble of types of recipes. “Entertaining” encompasses everything from appetizers to desserts, and every cuisine imaginable. Here’s what the authors say in the introduction:

“This collection brings together some of Bon Appetit’s very best entertaining recipes, organized by course for easy mixing and matching to help you design one-of-a-kind menus and unforgettable parties.”

I’m not a big party or entertaining cook. Most frequently, I’m looking for a “dinner for two” menu. But this cookbook is still useful to me, because a lot of the recipes have a little flare to perk up a Saturday night meal. I still find ideas in this cookbook, so I’ll keep it.

Here is a list of recipes in this book that I might try. Pet Peeve Alert! These are many-word recipe titles, yes the descriptions are nice, but I think many-word-titles are pretentious.

  • Cherry Tomato Polenta Tartlets with Basil Mayonnaise
  • Roasted Beef Tenderloin Wrapped in Bacon
  • Mahogany Beef Stew with Red Wine and Hoisin Sauce
  • Proscuitto-Stuffed Pork Tenderloin with Mushroom Sauce
  • Julienne of Sesame Carrots and Celery Root
  • Summer Rice Salad with Feta, Citrus, and Mint
  • Spinach and Radicchio Salad with Mushrooms and Cashews

There are also a lot of desserts, but I’m pretty happy with my current dessert repertoire.

For this blog, I decide to try “Romaine Salad with Chipotle Dressing and Warm Queso Fresco”. I am looking for a tasty and color-contrasting side dish for a Mexican meal. My menu plan includes shredded-beef enchiladas (using my own homemade enchilada sauce) and cheater’s chile rellenos. This green salad with a Mexican flare fits the bill.

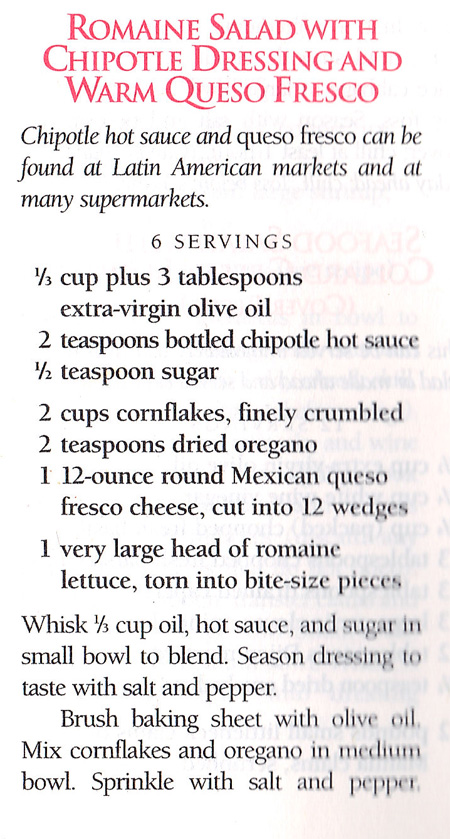
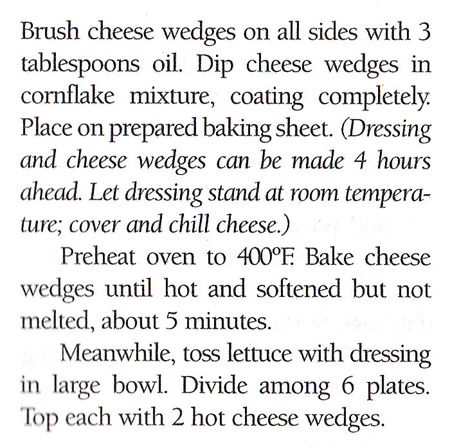
Here is the original recipe:

Romain SaladRomaine SaladI made a few changes in the original, and am shortening the name. Below is my version.

Romaine Salad with Warm Queso Fresco
serves 2, but easily multiplies

  • 2 ounces Mexican queso fresco cheese, cut into 4 wedges
  • 1/2 cup cornflakes, finely crumbled
  • 1 teaspoon dried Mexican oregano
  • olive oil for brushing the cheese
  • 2-3 tablespoons extra-virgin olive oil (for the salad dressing)
  • 1 teaspoon bottled hot sauce (I used Cholula)
  • 1-2 teaspoons lime or lemon juice
  • dash of salt and sugar
  • romaine lettuce, torn into bite-size pieces, enough for 2 people
  • optional: tomato and avocado slices

Mix the cornflakes and oregano and season with salt and pepper to taste. Brush each cheese wedge on all sides with olive oil, then roll each in the cornflake mixture, coating completely. Place on a lightly oiled baking sheet and bake at 400˚ for about 5 minutes. The cheese wedges should be hot and softened but not melted.

Meanwhile, whisk together the oil, hot sauce, lime juice, salt and sugar in a small bowl. Toss with the romaine and plate. When the cheese wedges are ready, put them on the romaine salad, along with avocado and tomato slices (if desired).

Note: you can coat the cheese wedges and make the salad dressing ahead of time and pop the cheese in the oven just before serving. This is great if you are entertaining.

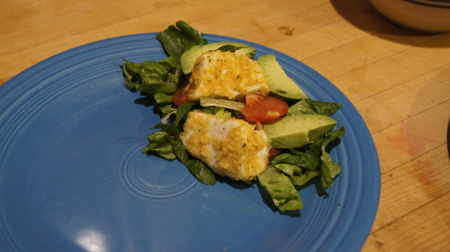
My photo of the salad is below. Yes, the plate is half-empty! My hot enchiladas and chile rellenos were still in the oven.

Romaine Salad with Warm Queso FrescoI’ll make this little salad again. I like queso fresco, and it’s easy to find in most any supermarket these days. It was easy, and added just the flare that I wanted to my Mexican meal.

250 Cookbooks: Country Cakes

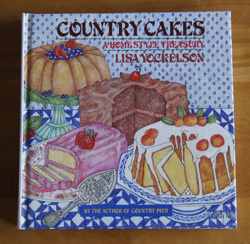
Cookbook #48: Country Cakes, A Homestyle Treasury. Lisa Yockelson, Harper and Row, Publishers, New York, 1989.

Country CakesIt’s good to be back to my cooking blog! The townspeople of Lyons, and myself in the Lyons outskirts included, are beginning to recover physically and mentally from the September flood. Time to again take up my favorite pastimes.

And what a sweet way to do it: Country Cakes! This book was a present from my aunt and uncle to my mother for Christmas, 1989. My mother always wrote these remembrances on the inside cover of her cookbooks. It’s almost Christmas again, and I smile thinking of my mother.

I first picked this cookbook from the shelf looking for a recipe for a very rich cake to make on a small scale for one of our good meals during the holidays. You see, both our kids are off in other parts of the world this Christmas, and our own brothers and sisters are in California and Hawaii. So there’s just us two. But it’s still Christmas, and we can eat something very, very rich on Christmas, that’s the rule.

To my surprise, this cookbook does not have many over-the-top rich cake recipes. Instead, it has recipes for a lot of cakes that are right up my healthy alley. Apples, bananas, nectarines, blueberries, sweet potatoes, carrots, raisins, and nuts abound as ingredients in Lisa’s recipes. Sure, the cakes are still high in calories, but they pack some nutritional punch. On the downside, the recipes call for butter rather than a “healthy” oil, and are generous with it; they use regular flour instead of whole wheat. On the upside, these cakes will taste great.

Each day, you should eat at least a bite of something that makes you stop whatever you are doing and say “wow!” That’s my new year’s resolution.

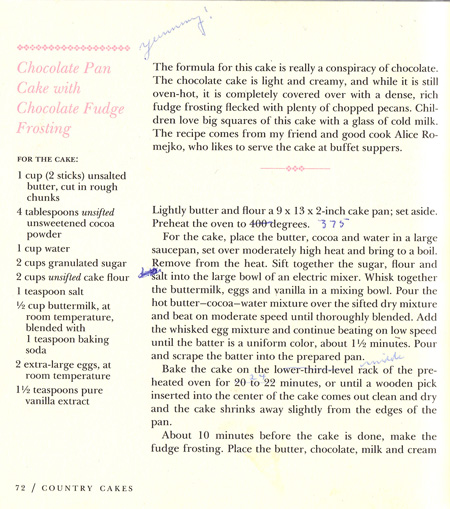
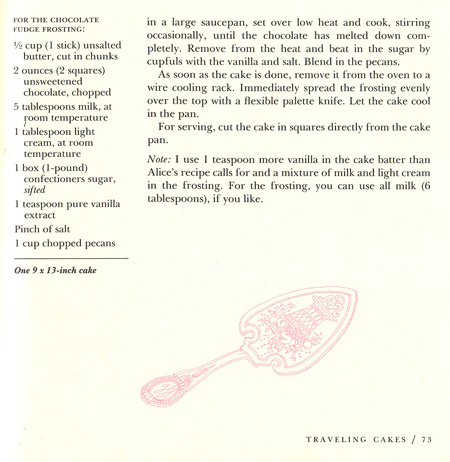
Mother tried and liked “Chocolate Pan Cake with Chocolate Fudge Frosting”. This is one of the recipes in the book that is very rich. (But it’s not my choice for this blog.)

Chocolate Pan CakeChocolate Pan CakeThe book has a cute layout, with each recipe covering two pages, decorated with illustrations. Each recipe is introduced with a friendly note.

Almost each cake in this book is made with a basic procedure: “the fat, usually butter, is beaten for several minutes before a measure of sugar is added in stages and thoroughly combined; eggs and flavorings are then mixed into the batter completely; finally, a sifted or stirred  mixture, which contains leavening and salt and any spices being used, is added to the batter alternately with a liquid, such as milk, buttermilk or cream.” I learned this method in my mother’s kitchen, and every from-scratch cake baker to this day still uses it. Easy as cake!

The categories of cakes in this cookbook include: back porch cakes, coffee cakes, traveling cakes, upside-down, cakes, pound cakes, fresh fruit picnic cakes, little cakes, and cake and ice cream. I want to try the Marbled German Chocolate Cake, Coconut Layer Cake, Peach Upside-Down Cake, Blueberry Gingerbread, Raspberry Coffee Cake, Banana Coconut Coffee Cake – and more!

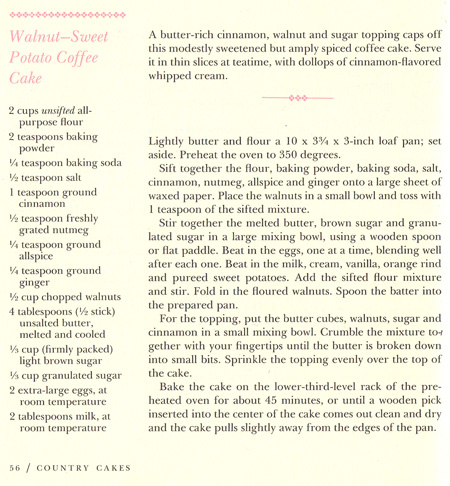
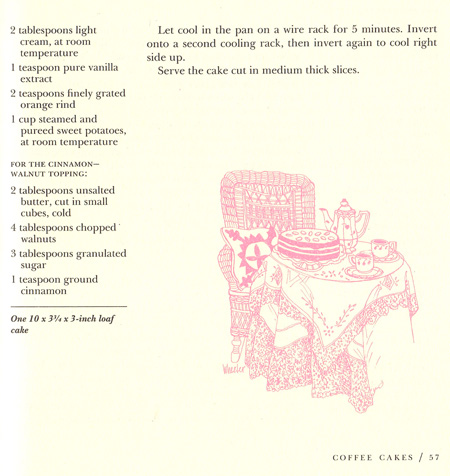
I had a sweet potato lurking in my potato bin that was asking to be cooked, so I decided to try the “Walnut-Sweet Potato Coffee Cake”. Instead of a rich dessert cake, this should be a sweet, moist and fragrant treat for these cold holiday mornings.

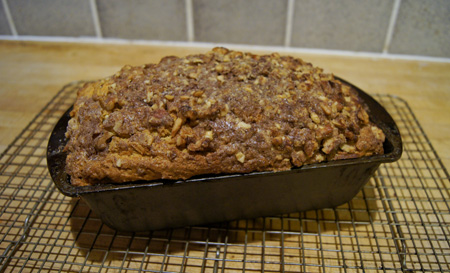
Walnut-Sweet Potato CakeWalnut-Sweet Potato CakeI would call this a “quick bread” rather than a cake. The distinction? In my mind, I think of quick breads as breads baked in a loaf pan and intended for breakfast or snacking. But I won’t quibble.

This recipe calls for a 10 x 3 1/4 x 3-inch loaf pan. I have tons of loaf pans, but none that size. I went to a local kitchenware store and couldn’t find one there either. A quick web search pulls up only 10 x 5-inch loaf pans. (Why did the author choose such an unusual pan?) So, I did a volume calculation and decided to use an 8 x 4 1/2-inch loaf pan, although I knew this size might be a touch too small.

 Walnut-Sweet Potato Coffee Cake


For the cake:

  • 2 cups flour
  • 2 teaspoons baking powder
  • 1/4 teaspoon baking soda
  • 1/2 teaspoon salt
  • 1 teaspoon cinnamon
  • 1/2 teaspoon nutmeg (freshly grated if possible!)
  • 1/4 teaspoon allspice
  • 1/4 teaspoon ginger
  • 1/2 cup chopped walnuts
  • 4 tablespoons unsalted butter (if you use salted butter, cut the added salt in half)
  • 1/3 cup firmly packed brown sugar
  • 1/3 cup sugar
  • 2 eggs
  • 1/4 cup milk
  • 1 teaspoon vanilla
  • 2 teaspoons finely grated orange rind
  • 1 cup cooked sweet potatoes, pureed (I probably used 1 1/4 cups)

For the topping:

  • 2 tablespoons unsalted butter, cut into small cubes
  • 1/4 cup finely chopped walnuts
  • 3 tablespoons sugar
  • 1 teaspoon cinnamon

Cook the sweet potato and mash or puree it; measure 1 (generous) cup. Lightly grease and flour a 9 x 5-inch loaf pan. Turn on the oven to 350˚.

Sift (or stir) together the flour, baking powder, baking soda, salt, cinnamon, nutmeg, allspice and ginger.

Combine the topping ingredients, crumbling the mixture together with your fingers until the butter is broken own into small bits. Set aside.

Melt the 4 tablespoons butter and place it in a large bowl. Use a spoon or a hand mixer to beat in the sugar and the brown sugar. Add the eggs, one at a time, blending well after each. Add the milk, vanilla, orange rind, and sweet potatoes. Stir in the flour mixture and the 1/2 cup walnuts.

Turn the batter into the prepared loaf pan. Sprinkle the topping evenly over the top, pressing it gently down into the batter.

Bake at 350˚ for about 45 minutes, or until it tests done with a toothpick or cake tester. Let cool in pan at least 5 minutes before removing to a wire rack (see my note on inverting the cake in my comments).

Walnut-Sweet Potato Cake

Comments

This coffee cake is delicious. I baked it in a smaller loaf pan, though, and the topping fell off when I inverted it onto the cooling rack. It did not look pretty! In my version of the recipe, above, I suggest using a larger loaf pan and pressing the topping into the batter before baking. And then, after cooking, carefully cover the cake with perhaps foil while inverting it to get it out of the pan.

I might try this in a square pan next time. That way, I could serve it right out of the pan and avoid the inverting step. A crumbly topping is always going to fall off when a cake is inverted! Another option is to skip the topping and cook it in a smaller loaf pan. Tough decision, because the cinnamon-walnut-sugar topping gives a burst of flavor, making me say “wow!”.


Bookmark

Bookmark: I have to step back from this project that I started October 2012. So I am marking my place and will come back to carry on my reading and writing when I have time.

What happened? The floods, the Lyons floods. We are fine but I’ve taken up volunteering to help in the recovery. Much more important than this cooking blog. My cookbooks will wait.

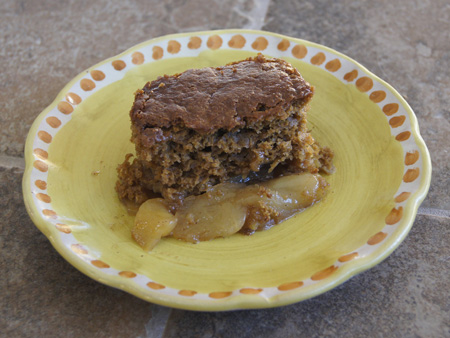
But I made a great dessert last night that I want to share. It’s Apple Gingerbread Cobbler. I’ve been making it for years and it is sort of low in fat (plenty of sweet, though). From my desserts document: “This recipe was clipped from a magazine in the seventies. It is good, homey, and different. I thought it wouldn’t “go over”, but it did!”

Apple Gingerbread CobblerApple Gingerbread Cobbler

  • 4 medium apples, pared, cored, and sliced (4 cups)
  • 1 cup water
  • 1/2 cup packed brown sugar
  • 1 T lemon juice
  • 1/2 – 1 teaspoon cinnamon (it called for 1/4 teaspoon but I like a lot)
  • 1 egg
  • 1/2 cup buttermilk
  • 1/4 cup molasses (2 3/4 ounces)
  • 2 tablespoons oil
  • 1 cup flour
  • 1/2 teaspoon baking soda
  • 1/2 teaspoon baking powder
  • 1/4 teaspoon salt
  • 1/2 teaspoon ginger
  • 1/4 teaspoon nutmeg (freshly ground is wonderful)
  • 2 teaspoon cornstarch plus 1 tablespoon water

Combine apples, brown sugar, 1 cup water, lemon juice, and cinnamon. Cover and cook till apples are tender. Beat (whisk) together sugar, egg, buttermilk, molasses, and oil. Stir together flour, baking soda, baking powder, spices, and salt. Add to egg mixture and mix till smooth.

When the apples are tender, take them off the heat, then combine the cornstarch and 1 tablespoon cold water. Stir into apple mixture. Pour into 8×8-inch baking pan.

Spoon gingerbread mixture atop the apples. Bake in 350° oven 30 minutes.


250 Cookbooks: Crock-Pot Cookbook

Cookbook #47: Crock-Pot Slow Electric Stoneware Cooker Cookbook. Rival, Kansas City, Missouri. No publication date given.

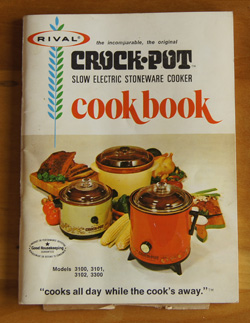
Crock-Pot CookbookThis small pamphlet is the original instruction book that came with my mother’s first Crock-Pot. My guess is that it was published about 1972, based on the research I did on Crock-Pots for my Electric Slow Cooker Cookbook post on slow cooker apple butter. Rival Crock-Pots were first introduced to the American public in the early 1970s.

I enjoy this passage entitled “A note from our Rival Home Economist”, on the inside cover of the booklet:

“In all my years of experience I have never enjoyed such interesting and rewarding months as those spent testing this revolutionary slow cooker!

All of us are mighty interested in nutrition, flavor and economy. Well, you’ll certainly get the best of all three with your Rival “Crock-Pot.” Better flavor than you could ever get by boiling or frying. Slow “Crock-Pot” cooking is an excellent way to retain more vitamins, juices and minerals. You’ll be thrilled at the tender, tasty meals you can serve, using less expensive meats. “Crock-Pot” cooks all day for about 3 cents. What better way to conserve electricity – and save food money, too!

Forget about watching meals as they cook. Forget about that little question: “Will everything and everybody be ready at the same time?” Enjoy yourself while your “Crock-Pot” turns out perfect meals – unattended. Imagine this: during tests I actually simmered chicken and vegetables continuously for 30 hours – of course, far longer than necessary – yet they were still intact and actually good.

You will love having the “Crock-Pot” in your kitchen. It promises to be quite a change from what you’re used to. For enjoyment at its best, as a starter, may I suggest pot roast or Swiss steak. Just don’t be afraid to leave it alone for 10 hours. With the “Crock-Pot” in the kitchen, you don’t have to be there.

The recipes in this book represent the many categories of foods you can prepare with ease and confidence. Because the “Crock-Pot” is so versatile, you’ll want to adapt some of your own favorite recipes. I’ve prepared a guide to make things simpler for you.

Have fun cooking with your “Crock-Pot” Slow Cooker! For whatever you use it, it will save you time and give you better flavor.”

-Marilyn Neill, Home Economist, Rival Manufacturing Co.

The whole pamphlet is written in this friendly style: it was fun to read! When I first retrieved it from my bookshelf, I thought I’d try a recipe and then recycle it, but in the end I decided it was interesting, friendly, nostalgic, and useful enough to keep. It has a still-useful guide for adapting your current recipes to slow-cooker versions, and several interesting recipes. My mother made notes on the Boeuf Bourguignon recipe, Coq au Vin, and Pot Roast of Beef recipes. Currently, my “go-to” cookbook for slow-cooking is Cover and Bake (from Cooks Illustrated); I will tuck this little cookbook-pamphlet inside that book and enjoy it again.

I decided to try “Boeuf a la Flamade”, or “Beer Braised Beef. Briefly, a beef stew. And I have been making beef stews for years, sometimes on the stove top, sometimes in a covered casserole, sometimes in a slow cooker. I generally brown the meat first, to add flavor. This recipe does not call for a browning step. What the heck, it’s worth a try, and saves time and a messy pan. I like the inclusion of bacon and beer: how can you go wrong with that combination?

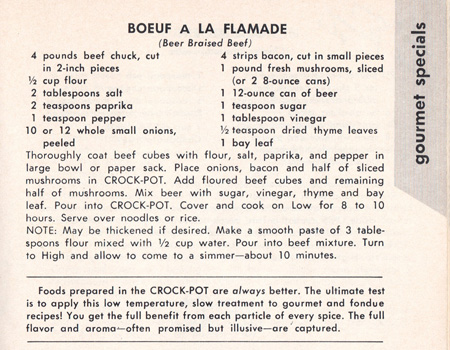
Here is the original recipe:

Beer Braised BeefI think that a pound of mushrooms is overkill, so I will use only the 8-ounce package that I have in the refrigerator. I like to use a cross-rib roast for stew meat, and the one I bought is only 3 pounds, so my version of the recipe reflects this change. I’ll use less salt, too.

Beer Braised Beef
serves about 4

  • 3-4 pounds cross rib or chuck roast, cut in 2-inch pieces and trimmed of fat
  • 1/2 cup flour
  • 1-2 teaspoons salt
  • 2 teaspoons paprika
  • 1/2 teaspoon pepper
  • 3 strips bacon, cut in small pieces
  • 10-12 whole small onions, peeled*
  • 1/2 pound fresh mushrooms, sliced
  • 12 ounces beer
  • 1 teaspoon sugar
  • 1 tablespoon vinegar
  • 1/2 teaspoon dried thyme or use a few sprigs of fresh thyme
  • 1 bay leaf

Mix the flour, salt, paprika, and pepper in a bowl and roll the beef cubes in it until they are all well-covered. Put the onions, bacon, and half of the mushrooms in your slow-cooker, then add the floured beef cubes. (I added the floured cubes and also the rest of the flour mixture because we like our stews thick.) Add the rest of the mushrooms. Mix the beer with the sugar and vinegar and add to the pot. Add the thyme and bay leaf.

Cover and cook on low for 7-9 hours. Check at 7 hours because it will probably be done.

*An easy way to peel small onions is to put them in boiling water for three minutes, then drain and rinse with cold water. Cut off the ends and the peel will pop right off.

Comments

I set my slow cooker to “low” and checked it at 7 1/2 hours and it was done: the meat was tender,  the gravy thick, and it was starting to stick to the pot. Perhaps today’s slow cookers have a different low setting, or maybe it’s just mine. Anyway, I suggest checking the stew after it has cooked 7 hours on low.

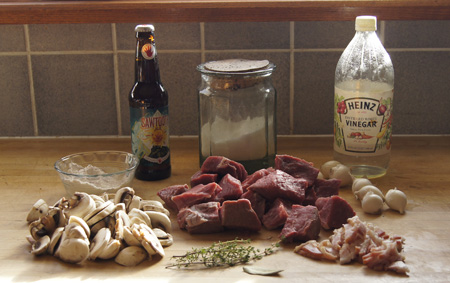
Here’s my prep:

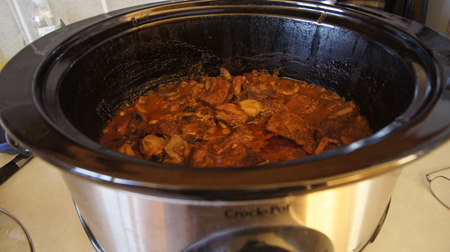
Beer Braised BeefAnd here is the stew:

Beer Braised BeefThis turned out great, and I will make it again. The bacon gives it a flavor reminiscent of “little piggies”, a dish I make from round steak slices rolled around pieces of bacon. I like this recipe because it does not include carrots and potatoes, vegetables that in my opinion get overcooked in the slow cooker. To save calories, you could fry the bacon first and pour off the fat before combining with the meat. I served it over mashed potatoes; it would also work great over rice or noodles. This recipe made enough for two meals for the two of us; I froze half for a quick and yummy meal sometime in the future weeks.

Below is a scan of the back cover of this small cookbook. I like it because it shows my first crock pot in the upper left photo, the exact same color and size. Also note the phrase “makers of Click ‘n Clean CAN-O-MATICS”.

Crock Pot Cookbook

250 Cookbooks: Spices of the World Cookbook by McCormick

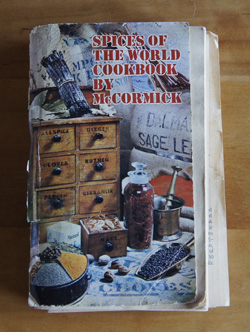
Cookbook #46: Spices of the World Cookbook by McCormick. Mary Collins, Home Economics Director of McCormick. Produced for McCormick by Penguin Books, first published 1969, my copy is reprinted 1972.

Spices of the World

The Spices of the World Cookbook was one of my favorites for years. My copy is old and tattered and many of the pages are falling out. But I only marked one recipe and there are few food stains on it, so I probably used it mostly as a reference or for ideas. Since it is produced by the spice company, McCormick, the recipes are all nicely seasoned. It’s an interesting cookbook to have around, but it is not a current favorite of mine.

The recipe I used a lot – and will use again – is the one for pickle relish. I so enjoyed making dill pickles a few weeks ago that I’d like to make relish too.

For this blog, I chose a recipe for Waldorf Salad. I remember these from childhood, but I’m not sure I have ever made one myself. I originally planned this to accompany focaccia sandwiches prepared in my Foreman’s grill. But the weather had another plan. It rained, and rained. Lyons, Colorado flooded, and we lost power, so no grill pan sandwiches.

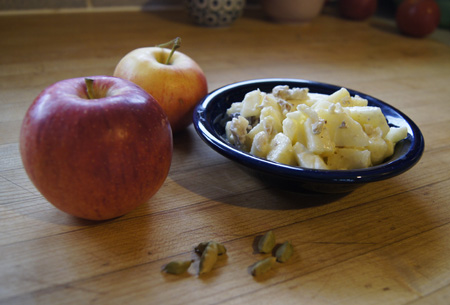
In spite of our power outage and then the flooding and destruction of the roads to anywhere from where we live, I forged ahead with the Waldorf Salad. Luckily the batteries in my camera were charged, and the salad was a simple preparation requiring only a knife, no power equipment!

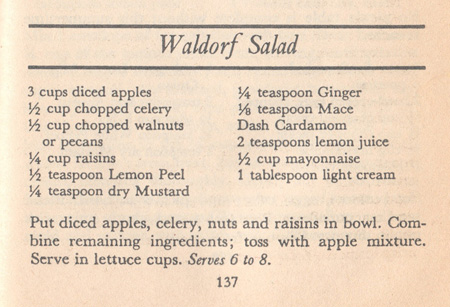
Here is the original recipe, scanned in from the book:

Waldorf Salad RecipeI made a half recipe and it lasted us for a couple days. It stored fine in the refrigerator.

Waldorf Salad
serves about 4

  • 1 1/2 cups diced apples
  • 1/4 cup chopped celery
  • 1/4 cup chopped walnuts
  • 2 tablespoons raisins
  • 1/4 teaspoon freshly grated lemon peel
  • 1/8 teaspoon dry mustard
  • 1/8 teaspoon ginger
  • dash of mace
  • dash of cardamom
  • 1 teaspoon lemon juice
  • 1/4 cup mayonnaise (I used low-fat mayonnaise)

Put all the ingredients in a bowl and mix. Taste and adjust seasonings, if necessary.

Comments

This was good. What really made it spring to life was the cardamom. I did not have ground cardamom, but I did have cardamom seeds, so I grated a little of one seed into the salad. My mace was ancient; fresh mace would probably have made it even better.

I will definitely make this salad again. It’s a nice salad to accompany sandwiches, and is also a good treat at any time.

Waldorf Salad

Favorites: Fresh Peach Pie

Peach fest 2013! Another of my long-time favorite peach recipes.

This is my mother’s recipe. The peaches are not baked, they are just laid in a baked crust. It’s best eaten the day you make it, so have company over!

This is the pie to make when you have lots of perfectly ripe peaches, peaches so good that they barely need a pie to make them better.

Fresh Peach Pie

  • 2 1/2 – 3 pounds fresh peaches
  • 2 tablespoons lemon juice
  • 2 1/2 tablespoons cornstarch
  • 1 cup sugar
  • 1/2 cup water
  • 1 baked pie crust (9-inch)
  • whipped cream

Mash enough of the peaches to make 1 cup of pulp (save the rest for slicing into the pie). Combine pulp, sugar, cornstarch, and water and cook until thick. Cool.

Slice the rest of the peaches and put in a baked 9-inch pie shell. Sprinkle with the lemon juice. Pour cooked mixture over fresh peaches in pie shell.

Serve with whipped cream.


Favorites: Sour Cream Peach Muffins

I’ve been making these for years. I probably clipped the recipe from a magazine or newspaper.

Inspiration for adding this recipe today is from my September 2013 Just Peachy post. It’s time for a peach fest!

Sour Cream-Peach Muffins
makes 12 muffins

  • 1 cup chopped peaches
  • 1 cup sour cream (or yogurt)
  • 1 egg
  • 1/4 cup margarine or butter, melted (or use vegetable oil)
  • 1 tablespoon baking powder
  • 1/4 teaspoon baking soda
  • 1/4 teaspoon salt
  • 2 cups flour
  • 1/4 to 1/2 cup sugar (depending on sweetness of peaches)

Mix peaches, sour cream, and egg, stir in margarine. Combine dry ingredients, then stir into the wet ingredients just until blended.

Put into 12 muffin cups and bake at 375˚ for about 35 minutes, or until golden and tops spring back when gently touched in the center.

250 Cookbooks: Just Peachy

Cookbook #45: Just Peachy Peach Cookbook. Judith Ann Bosley, L. E. B. Inc., Boise, Idaho, 1993.

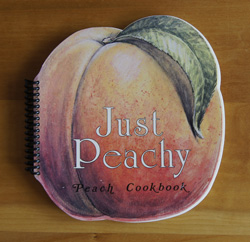
Just Peachy CookbookThis cute little cookbook is one of my favorites. For the shape and the title and the memories, probably more than the recipes. I bought it at the fruit stand in Lyons back in the 1990s, when there used to be a fruit stand in Lyons. Each July through September, the fruit stand purveyors regularly brought peaches over the pass from their orchards on the western slope (of the Rockies), peaches that were tree-ripened and delicious. Peach varieties ripen at different times, so first we’d get flamin’ furies, then redhavens, reginas, rozas, red globes, suncrests, and finally cresthavens. That was the sad time, because it meant the season was at its end.

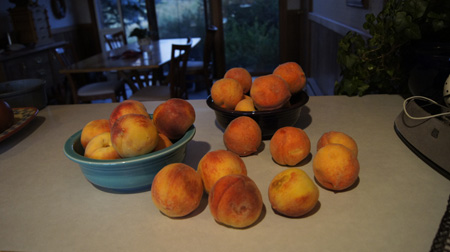
I love peaches. Mostly I like them plain and natural. So juicy that you have to go outside to eat them. This year, I searched out the best Colorado peaches at county Farmers Markets and natural food stores. My first were in August. They greeted me with their aroma early one Sunday morning:

peachesOf course I bought more than we could eat right away (that’s just the way I am) but that doesn’t worry me. When I get too many, it’s time for a peach fest: peaches over ice cream, peach cobbler, peach pie, peach crisp, peach jam, and peach muffins. Thanks to my Just Peachy cookbook, I have added a new recipe to my peach repertoire: Peach Bread. That recipe is below.

Just a few quick notes on the other recipes in this cookbook. Many are for desserts that I probably won’t make, but I noted and might try recipes for: coffee cake, oatmeal muffins, peaches and pork tenderloin with cilantro in tortillas, peach glazed cornish hens, peach chutney, and peach butter.

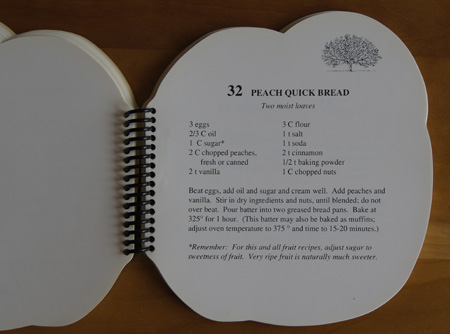
Here is the peach bread recipe that I am basing my own on. This photo illustrates the cute layout of the book:

Peach Bread RecipeI am cutting the recipe in half, substituting brown for white sugar, and using half whole wheat pastry flour instead of all white flour.

Peach Bread
makes one 8×4-inch loaf

  • 1/3 cup oil
  • 1/2 cup brown sugar
  • 2 small eggs
  • 1 teaspoon vanilla
  • 1 cup chopped fresh peaches (2 or 3 peaches)
  • 3/4 cup all-purpose flour
  • 3/4 cup whole wheat pastry flour (or use all all-purpose flour)
  • 1/2 teaspoon salt
  • 1/2 teaspoon baking soda
  • 1/4 teaspoon baking powder
  • 1 teaspoon cinnamon
  • 1/2 cup chopped nuts

Beat the oil with the sugar a minute or two on high, then add the eggs, one at a time, beating well after each addition. Add the vanilla, then mix in the peaches with the mixer on low.

Stir together the dry ingredients, then add with the nuts to the batter, mixing on low speed and only until all of the flour is incorporated.

Bake in a greased and floured 8×4-inch loaf pan for 1 hour or until the bread tests done. Let cool a few minutes in the pan before removing to cool on a wire rack.

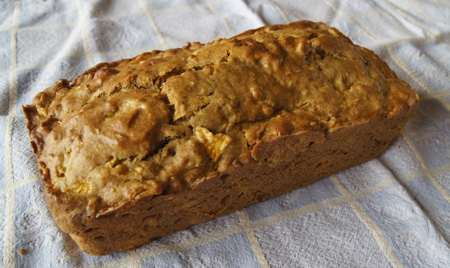
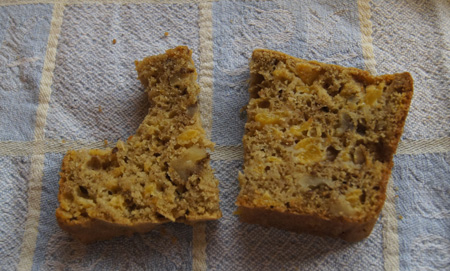
Peach BreadThis was excellent . . . enough said.

Peach BreadNote added June 2014:

I had some nectarines that needed to be used in cooking. So, I made this recipe for Peach Bread, substituting nectarines for peaches and baking as muffins. It made 8 muffins, and I baked them for 22 minutes at 375. Very good!