Favorites: Pork with Paprika and Mushrooms

Time to write down a recipe for something that I have always cooked without a recipe. It’s something that I just “throw together”. But this one needs to be shared, it’s that good and simple.

I used to take inexpensive cuts of meat and cook them for hours in onions, seasonings, and stock. When tender, I’d stir in a bit of sour cream and serve over noodles or rice. Comfort food. In the last several years, my old method for making this dish gravitated towards the recipe below. Instead of tough meat, I use pork tenderloin. This version only takes about 30 minutes prep and cooking time.

My husband asks: “What is that dish you are making?” and I never know what to call it. It emerged from my repertoire unnamed. Is it a stroganoff? A goulash? A paprikash? I really don’t know. All I know is that it’s very good, easy, and low-calorie (especially if you use non-fat yogurt).

You might already make something like this, but if not, try this easy recipe. I’ve named it “Pork with Paprika and Mushrooms”.

Pork with Paprika and Mushrooms


Serves 2.

  • 9-11 ounces pork tenderloin, cut into 1/8-1/4-inch round or scallop-shaped pieces
  • 1 small onion
  • 1/2 red bell pepper, sliced (optional)
  • 2 teaspoons paprika
  • 2 tablespoons flour
  • 1 cup chicken broth
  • 3-4 ounces mushrooms (about 4 large), sliced
  • 3 tablespoons sour cream or Greek non-fat yogurt
  • noodles (3 ounces dry will serve 2 people)

Halve the onion, then cut into slices. Saute in a little hot olive oil (add the bell pepper slices too if you are using them). When it begins to soften, add the pork tenderloin and cook a few minutes, until all the pieces are browned on all sides. Add the paprika and flour and stir until the flour is incorporated, then stir in the chicken broth and mushrooms. Season with salt and pepper to taste.

Simmer the mixture, covered or uncovered, for about 20 minutes. While it simmers, cook some noodles. Currently, I like pappardelle noodles. These are wide, long noodles, usually sold dry and nested. Fettuccini would work well too, or short, wide noodles.

When you are almost ready to serve, stir in the sour cream and gently heat for a minute or two. To serve, spoon the pork mixture over the noodles.

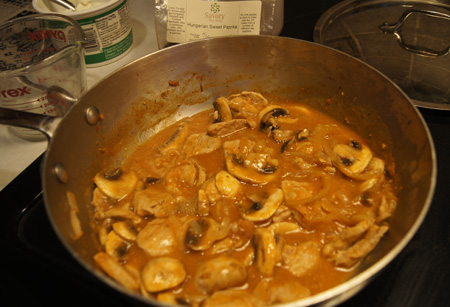
Here’s how it looks just before you add the sour cream/yogurt. You want a small amount of thick gravy, since the sour cream will thin this sauce.

Pork Paprika

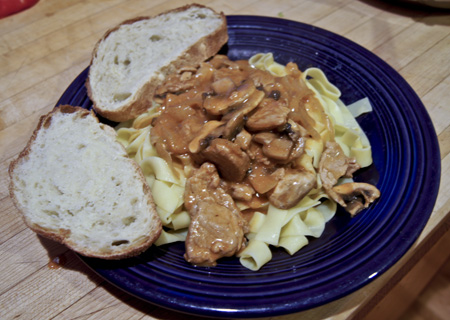
Here it is, plated.

Pork Paprika


1990s blog and Favorites: Mexican Pizza

Mexican PizzaThis Mexican Pizza is a bit unusual, in that the dough itself has several flavorings. I clipped the recipe from a magazine decades ago, and made changes over the years as my own cooking methods developed.

For many years, I cooked this as an 16-inch round pizza on either a cookie sheet, a perforated pizza pan, or a pizza stone, baking at 425˚ for 20 minutes. Lately, though, I’ve been making small, individual pizzas and rolling the dough thinner and baking at 475˚ for 15 minutes. We like it both ways, so I’ll give directions for both methods.

Each time I make this pizza, I vary the toppings. Be creative! Chorizo is often one of my choices. It’s a Mexican-style sausage. Often local stores carry locally-produced chorizo and every company that makes it seems to use a different recipe. Some are very spicy, some are very fatty. I always cook it first and blot with paper towels to get the fat off. And taste it to make sure it’s not too hot.

Mexican Pizza
Full-size baking method


One pizza serves 3-4 people.

Dough:

  • 3/4 cup water
  • 1 teaspoon sugar
  • 1 minced clove garlic
  • 1/4 cup finely chopped onion
  • 1/2 teaspoon salt
  • 1 teaspoon paprika
  • dash cayenne
  • 1 tablespoon oil
  • 1 2/3 cup all-purpose flour
  • 1/2 cup masa
  • 1 tablespoon yeast

Necessary toppings:

  • 12 ounce can tomato sauce seasoned to taste with cumin, chile powder, red pepper flakes, basil (fresh is best), and oregano (preferably Mexican oregano) – I like to simmer this mixture for about 15 minutes
  • 12 ounces Jack cheese
  • 4 ounces mozzarella cheese

Suggested toppings:

  • green onions or cooked red or yellow onions (I like to cook the onions until they wilt, and then add about 1/2 teaspoon each cumin and chile powder)
  • chopped, canned green chiles
  • chopped, cooked green or red bell peppers
  • chopped, cooked tomatoes
  • chopped cilantro
  • olives
  • chorizo or hamburger: cooked and wiped with paper towels to get some of the fat off

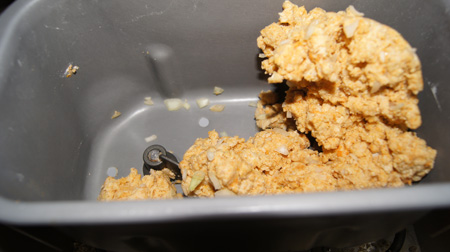
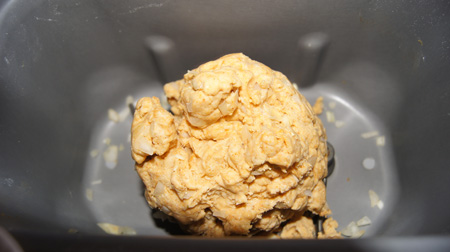
Put the dough ingredients in the bread machine. Set the machine to “dough” cycle. (The cycle should knead the dough and then rise it.) Watch the dough carefully during the first five minutes, and add more flour or more water if necessary to make a good ball of dough in the bread machine. (Example photos below.)

(If you don’t have a bread machine, knead the dough until it’s smooth, then let rise until double in bulk and continue with the recipe below.)

When the machine signals that the dough is done, take it out of the bread machine. Roll into a 16 inch circle about 1/4 inch thick. Lightly oil a pizza pan or a cookie sheet and place the dough on it. Top with seasoned tomato sauce, then the cheeses, then pick and choose from the suggested ingredients (or come up with your own ideas).

Bake at 425 degrees for 20 minutes.

Mexican Pizza
Small-pizza baking method

This baking method is more complicated but we like these personal, crispy pizzas. It’s tricky because you need to assemble each pizza on a pizza peel and then slide onto the hot baking stone, and thus can only do one at a time. If you are making small pizzas for more than two people, I suggest you use a parchment-lined half-sheet pan instead of the baking stone. If you have 2 such pans, you could bake all four small pizzas at once.

Preheat a baking stone in the oven at 475˚ for 30 minutes.

When the dough is finished rising, cut it into 4 pieces. Roll each into 7-8″ circle. Sprinkle some corn meal or semolina flour on a pizza peel. One at a time, place the small pizza rounds on the pizza peel. Top with seasoned tomato sauce, then the cheeses, then the vegetables and meat. Transfer to the oven and bake 15 minutes.

My stone fits two small pizzas at a time. You can only prepare one pizza on the peel at a time, so I put them into the oven staggered. Just use a timer and remember which one you put in first. When the first two are done, do the same with the second two.

They have to cool a little before you eat them, and by the time you do eat them, you are ready for seconds and the next two pizzas are done. I always make all 4 small pizzas for the two of us. Yes, we have leftovers. Yes, we eat them cold. And yes, we each try to get to them first. Dibs!

Making small pizzas: photos

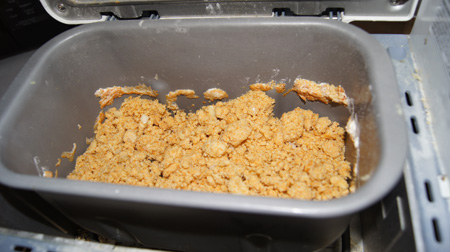
First, the dough. I know my bread machine, and usually, after 5 minutes a dough with the correct amount of moisture will begin clumping. Mine had not begun clumping:

doughSo I dripped in about 2 tablespoons of water, checked after a few minutes, and it looked right. Starting to clump:

dough

Here it is near the end of the kneading cycle: SONY DSC

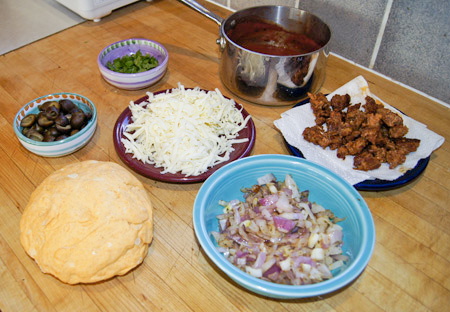
In the photo below, the dough is finished and my sauce (in the pan), cheese, and toppings are shown mise en place. I chose red onions, butcher counter fresh chorizo, whole olives cut in half, and cilantro as toppings – and the jack and mozzarella cheeses of course. I like to saute my onions in a tiny amount of oil, salt to sweat, and then when they are soft, sprinkle with Mexican oregano, cumin, and hot chile powder. I was told in cooking class that one reason to cook onions before using in a dish is to make them more amenable to taking up seasonings. It works: these seasoned onions are very good on their own, and definitely perk up the pizza.

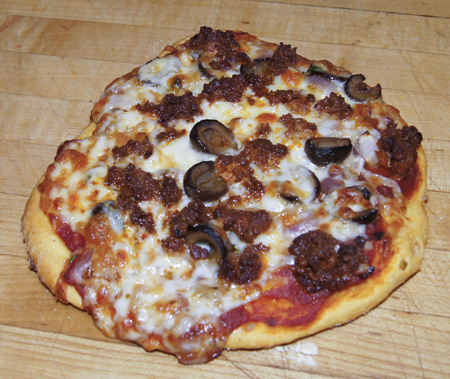
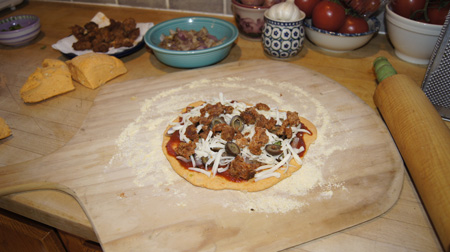
pizza ingredientsHere is a small pizza on the pizza peel, ready to go into the oven. The cooked pizza is at the top of this page.

ready to cook

1990s blog and favorites: Botched-Up Cassoulet

CassouletI call this “Botched-up Cassoulet” because I do know that a cassoulet is a famous French entree that if prepared according to tradition, is complicated and takes days to prepare. I have an e-mail from a “fellow food fiend” who describes making this dish:

I have been cooking for three days. First I made a complicated true French cassoulet including sausage, lamb and duck. I even bought these wonderful white beans that I can only get in the Bay Area. When we were there over the weekend I stocked up. I wish you could see these beans, they are so beautiful I can barely stand to cook them. They look nothing like beans in a bag.

I looked up “cassoulet” in my authoritative cookbook, The Best International Recipe (from Cook’s Illustrated, Christopher Kimball). Sure enough, a cassoulet recipe is offered: flageolet beans, boneless pork shoulder, garlic pork sausages, and confit duck legs. The duck confit alone takes over a day to make. And the authors admit that even this is a toned down version, appropriate for a home cook. (But we all know, hint hint, that a true cassoulet can only be made by a properly trained chef.)

I offer instead a tasty version that is very good and can be relatively low in fat. While being high in fiber and nutrition. And being very easy to make. The original recipe is from one of my slow cooker cookbooks. I’ve made this tons of times and included it on the short list of recipes in my 1990s blog. It’s yummy, even to my non-bean-loving dining partner.

Botched-Up Cassoulet (crock pot method)


1990s note by me: A true European “cassoulet” is, I believed, baked in a special ceramic casserole under special conditions. I remember reading about it once. It is one of those esoteric topics that true chefs like to go on at length about. Here is my version. Do not be afraid to substitute anything, just keep the total liquid to the amounts specified.

Serves 2-3 people.

  • 15 oz. can navy beans*
  • 8 oz. can tomato sauce
  • 2 carrots cut into 1/2 inch pieces
  • 1 stalk celery, cut into 1/2 inch pieces
  • 1/2 cup chopped onion
  • 1 clove garlic, minced
  • 1 bay leaf
  • 1/2 teaspoon basil (use a tablespoon of fresh basil if you have it)
  • 1/2 teaspoon oregano
  • 1 cup water plus 1 teaspoon chicken bouillon (or use chicken stock)
  • about 1 cup chicken, cooked or not
  • about 3/4 cup ham or sausage

Put it all in the crock pot and cook on low 10-12 hours.

*Navy beans are those small white beans, often sold as Great Northern beans. Instead of using canned, you can buy them dry, soak overnight, and boil, with salt to taste, until done.

Non-crock pot method

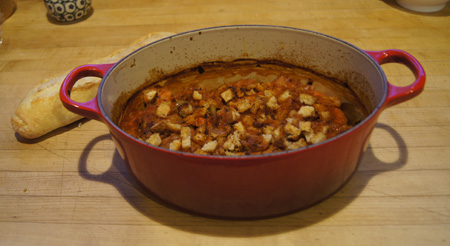
You might note that the photo at the top of this page reveals that I cooked the cassoulet in a Le Creuset rather than a slow cooker. Sometimes I prefer to cook it this way. Part of the problem is that my current slow cooker is pretty big and a meal for two people gets lost in it. So, the following is my method for baking the cassoulet in a covered casserole. I like to cook the onions first, and the Le Creuset allows me to do that on the stove top and then add the rest of the ingredients for the baking step.

Directions: Use the same ingredients as listed in the slow cooker method, above. Begin by cooking the onions until they are soft, then add the garlic and cook 30 seconds. (If your casserole cannot be used on the stove top, you can skip this pre-cook step.) Combine all of the ingredients in the casserole and cover it. (My choice for chicken is bone-in, skinned thighs. I used three of these chicken thighs along with a half-cup of ham for the two of us when cooking the cassoulet in the photo.)

Bake at 325˚ for two hours. Then, uncover, turn the oven up to 400˚, and cook for about another 20 minutes. Check a couple times during this uncovered baking period; it’s time to take it out of the oven when most – but not all – of the liquid has evaporated.

This is extra good with some bread crumbs on top. So if you want to, roughly shred  enough sourdough bread to make about 3/4 cup crumbs. Saute these large crumbs in a small amount of butter. Put on the uncovered casserole in the last 15 minutes of the baking time.

Read the introduction to my 1990s cooking blog for background information.


Preserved Lemons

Preserved Lemons

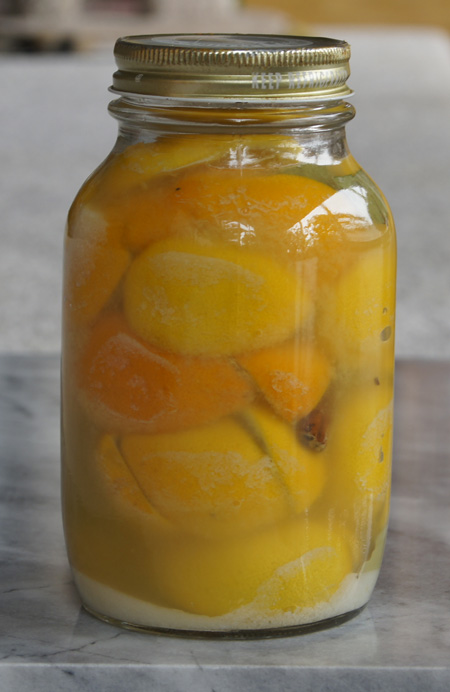
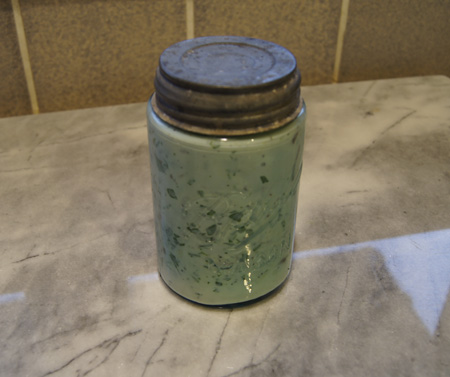
My Chicken Tagine calls for Preserved Lemons. They are really easy to make and keep at room temperature for a year. And they look pretty!

I took a Mediterranean Cooking Workshop at the Culinary School of the Rockies (now Escoffier). That’s where I got the recipe below. They in turn credit Joanne Weir’s book, From Tapas to Meze, and her recipe can be found online. I am re-writing this in my own words.

Preserved Lemons

  • 6-10 Meyer lemons (or smallish regular lemons)
  • 1/2 cup salt, preferably kosher
  • 2 cinnamon sticks
  • 4 bay leaves

Take each lemon and cut from the top to within one-half inch of the bottom, then do again, so that you are have four pieces still joined at the bottom. (This is the traditional way of making preserved lemons.)

Place a tablespoon of the salt in the bottom of a very clean 1-quart canning jar. Pick up each cut lemon, sprinkle the inside with a generous amount of salt, then put it in the jar. Continue sprinkling with salt and packing the lemons into the jar. After you have a few lemons in the jar, add the cinnamon sticks and bay leaves, tucking them between the lemons.

Pack as many lemons as possible in the jar. The juice should squish out and fill all the spaces. If the jar is packed with lemons but the juice isn’t at the top, add some fresh lemon juice so that the juice level is almost to the top of the jar.

Cap the jar with a lid. This recipe does not call for sterilization of the jar or the cap or the preserved lemons.

Store the jar at least 3 weeks before you use the preserved lemons. They do not need to be refrigerated and keep a year at room temperature, according to the original author of this recipe.

Using preserved lemons

Remove a lemon from the brine and discard the pulp, so that you are left only with the peel. Rinse the peel before use. Chop into fine dice and use in tagines, salads, or anything that calls for lemon zest.

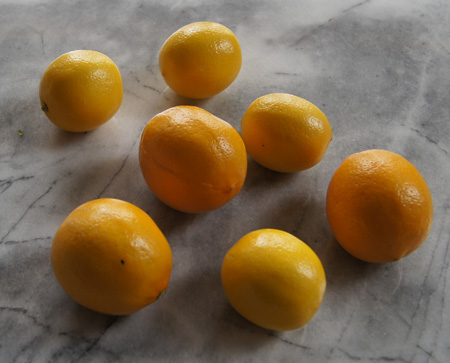
I found Meyer lemons at two different stores. One store sold large ones that almost looked like oranges, while the other store sold small yellow ones. I used some of each when I made this batch of preserved lemons; I like the contrast of the colors in the jar. Meyer lemons are less tart than regular lemons. I was once given a present of preserved lemons made from regular lemons and they added a more tangy taste to my dishes. But the Meyer lemons are so pretty, I couldn’t resist them.

Meyer lemons

250 Cookbooks: The Art of Salad Making

Cookbook #20: The Art of Salad Making. Carol Truax, Doubleday & Company, Garden City, NY, 1968.

The Art of Salad Making

This is a friendly and well-written book. The author does know her salads: dressings, green salads, pasta and potato salads, chicken and meat salads, molded salads, fruit salads, salads from around the world. I think I bought this cookbook so that I would have a good reference for home-made salad dressings. But I’ve had it for over 40 years and I’ve never made any of the recipes. That says something. Looking through this book today, not a single recipe pops out at me. I pretty much know the basic information that Carol Truax presents, and already have my own takes on most types of salads and dressings.

I think a salad cookbook needs to have lots of large and color photos. Green salads can be gorgeous! This book has a few line drawings but no photos. And looking past the printed page, contemporary, upscale restaurants offer fascinating green salads – I learn a lot when we go out to eat. These salads are way more imaginative than the ones this little book offers. It’s too outdated for my tastes, and no longer has much to teach me. I will recycle this book.

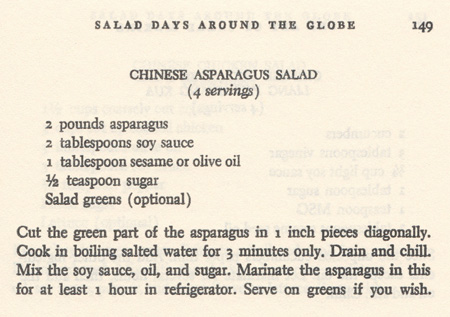
I do need to cook one recipe from The Art of Salad Making before I place it in the recycle pile. I plan to make shui mais and a stir-fry for our Saturday night dinner, so I search the index for an Oriental-style salad. Here’s one: “Chinese Asparagus Salad”. Quick and easy, but a little different from what I usually do. Green asparagus is just what I’m looking for to complete my Oriental meal.

I don’t remember ever having asparagus at a Chinese restaurant. I don’t think of it as “Chinese” vegetable. I was surprised when I looked up “asparagus” on Wikipedia and found that China is the world’s largest producer of asparagus, where it is known as lu sun. I learn something new every day.

Here’s the recipe:

Chinese Asparagus SaladChinese Asparagus Salad


This version serves 2 people.

  • 1 pound asparagus
  • 1 tablespoon soy sauce
  • 1/2 tablespoon olive oil
  • 1/4 teaspoon sugar

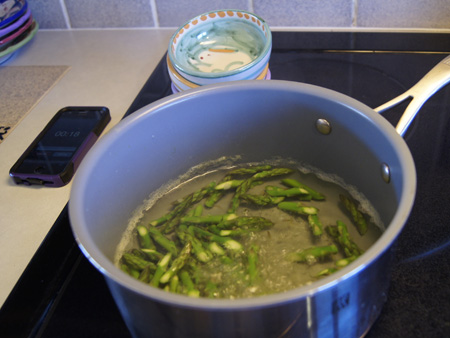
Cut the tips of the asparagus on the diagonal into 1 inch pieces. We don’t like the tough stalks of asparagus, so I only got 2 pieces per asparagus stalk. Bring some salted water to a boil and cook the asparagus 3 minutes.

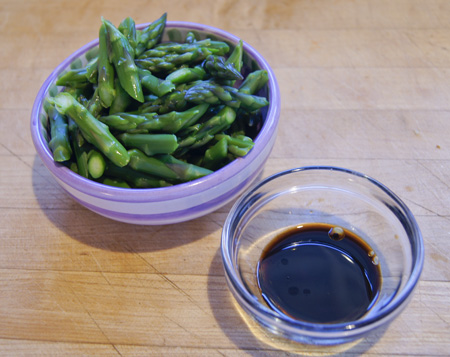
cooking asparagusDrain the asparagus and rinse with cold water so that it stops cooking. Combine the soy sauce, oil, and sugar.

Chinese Asparagus Salad makingsMarinate the asparagus in the soy sauce mixture for at least an hour. Serve over greens.

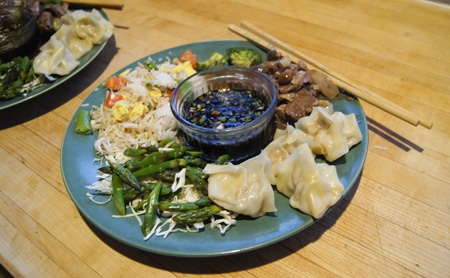
Here is one of our pretty dinner plates:

Chinese mealThe asparagus is plated over shredded cabbage. Then, clockwise from the asparagus: fried rice; stir-fried beef tenderloin with shitakis, broccoli, and onions; shui mais. In the center is the dipping sauce for the shui mais. I should share my recipe for shui mai. Soon!

250 Cookbooks: Menu Melodies

Cookbook #19: Menu Melodies. All Souls Mothers Club, about 1959. Menu Melodies CookbookI decided to try one of the “community” cookbooks in my collection. Often, community groups ask each member to donate a recipe, then they compile them into a book and make copies to sell as a fundraiser. Eight community cookbooks made it into my collection.

Menu Melodies, All Souls Mothers Club fell into my hands. Literally. I reached into the shelf and gingerly put my hand on this old, spiral bound book. The cover is falling off. Maybe this is not the cookbook I want to deal with this week. But then … I carefully gathered it up and sat back on the bed. Where did this cookbook come from? The very first page is “The Kitchen Prayer“. On the inside cover is scrawled a “213” area code phone number and “$11.35” and “Mack”. Ah, this was my mother-in-law’s book. So I tucked a pillow behind my back and settled in to go through the 178 pages. Handwritten pages. Did my mother-in-law contribute a recipe to this cookbook? I turn the pages, one by one.

I’m not sure she would have contributed a recipe. My mother-in-law, who I called by her nickname, Puvy, claimed no passion for cooking. But miraculously, each time we sat down at her table, we enjoyed a wonderful home-cooked meal. Simple and good. I remember her humming as she cooked, pots of chicken and potatoes simmering. She could easily and recipe-less put together a great pie crust, while I still struggle rolling out a dough that will not fall apart.

She did not have a shelf of hundreds of cookbooks. She loved parties and dancing and people and talking – food was a second thought, necessary, but not the focus of a gathering. Puvy did not collect “things” like cookbooks, she gave things away. She was the most generous person I have ever met. If you liked a pan or book of hers, you might just be taking it home that night. That’s probably how I acquired Menu Melodies. She was not into acquiring possessions, she hated to shop, she was not materialistic. A breath of fresh air in this culture. Sigh. I wish I could still learn from her, but sadly, she passed away last July. But, her spirit and her genes live on: I see her good traits in my own daughter.

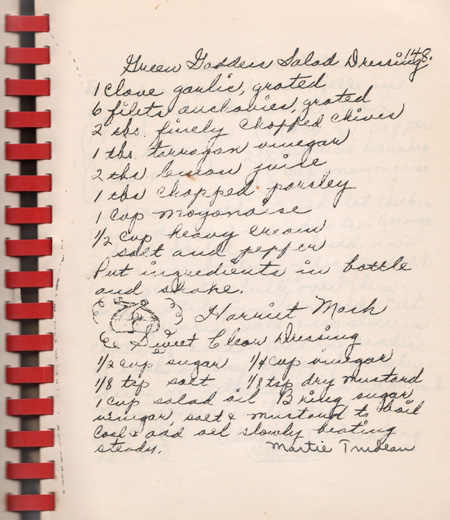
Aha!! Here it is, on page 148: “Green Goddess Salad Dressing” signed “Harriet Mack”. She did contribute a recipe! I recognize her handwriting.

I take the book to my husband: “Do you recognize this?” “What?” “This recipe, look at the name.” “Oh, hmm, yeah, that’s ma’s.” We are both sort of amazed that she contributed a recipe. I ask him about “All Souls”, and he said it was the name of the school that he went to from about 2nd to 5th grade. “You mean, the one near Alhambra, where we did the walk-to-school a couple years ago?” He replied “yes”. “Do you remember your mother ever making Green Goddess Dressing?” “No” he replied.

“All Souls” was (and is) a Catholic school run by St. Therese’s, in Alhambra, California. In 2011 we walked the route that he, guided by his older sisters, took from home to school and back, just to prove the round trip was as long as he has always claimed: at least three miles. He was just a little kid; his sisters a few years older. (Coincidentally, I grew up within 20 miles of Alhambra, in Sun Valley.) So we walked the route, me with my camera and he with his GPS. We arrived at St. Therese’s:

St. Therese's

Church of Saint Therese, Carmelite Fathers

All Souls school

All Souls, Catholic School at St. Therese’s

And how far is St. Therese’s from his home? 1.5 miles, so 3 miles round trip, just as he had always claimed. (And it crossed large and busy streets.) I was impressed: It was a long distance for three young children to walk each day.

John at All Souls

peeking into the past

Back to the present and Menu Melodies, produced by All Souls Mothers Club. I am not surprised Puvy was a member of this club; she was such a social person. The recipes reflect the era: the 1950s in Southern California. Most dishes are prepared from scratch, no one worries about butter and calories, lots of cookie and cake and pie recipes, molded salads, casseroles (dried-beef, rice and lamb, veal birds, enchiladas, liver a la king, creamed chicken), soups and more. Many of the recipes serve a lot of people, designed either for large families or luncheons and pot lucks.

Here is the recipe my mother-in-law contributed, and that I will make:

Green Goddess Salad DressingNote that there are two recipes on the page. The lower recipe is also in her handwriting, although “Martie Trudeau” signed it. I went back through the book and found several more recipes in Puvy’s handwriting, although each time, someone else signed them. Her distinctive “r” and the small circle she used to dot “i” tell the story. That’s her: she was both a hard worker and willing to help others.

Note the drawing of the turkey leg about mid-page in the above recipe. Throughout this handwritten book are cute little drawings. I scanned in several pages and will put them at the bottom of this blog post. Take some time to peruse them and marvel at the fun and community and work that went into this cookbook.

Green Goddess Salad Dressing

  • 1 clove garlic, finely chopped
  • 6 fillets anchovies, finely chopped
  • 2 tablespoons finely chopped chives (or use the tops of green onions)
  • 1 tablespoon tarragon vinegar (or use white wine vinegar and 1/4 teaspoon dried tarragon)
  • 2 tablespoons lemon juice
  • 1 tablespoon chopped fresh parsley
  • 1 cup mayonnaise
  • 1/2 cup heavy cream
  • salt and pepper

Put ingredients in bottle and shake.

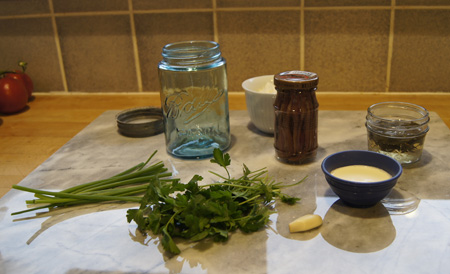
The dressing is delicious! My photos are below. First, the ingredients:

ingredients for the dressing

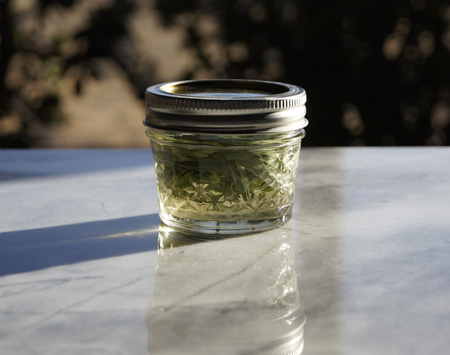
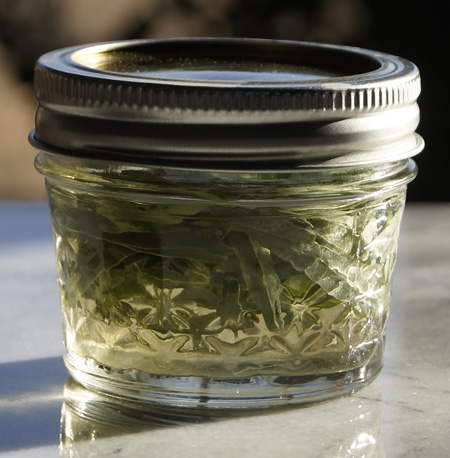
I didn’t have any tarragon vinegar. So, I got some fresh tarragon and put it in a jar and covered it with white wine vinegar and let it sit for a day. Then I couldn’t decide which photo perspective I liked better.

tarragon vinegartarragon vinegarHere is the finished dressing.

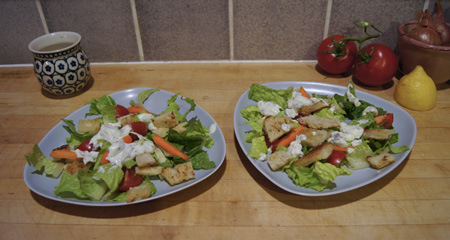
Green Goddess DressingGreen Goddess SaladsThis dressing was particularly good on a romaine-based salad with fresh croutons. I made the croutons by browning sourdough bread cubes in extra virgin olive oil infused with garlic.

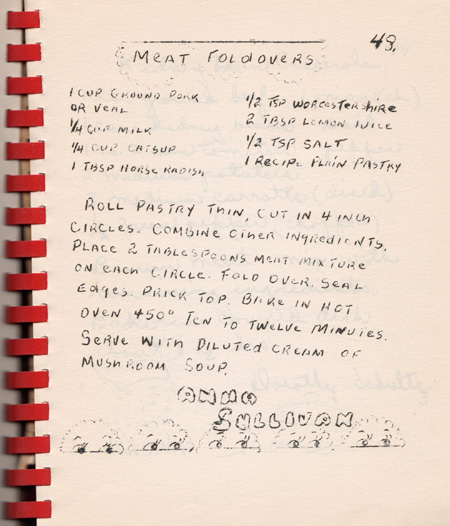
Below are several more pages from Menu Melodies.

MenuMel48

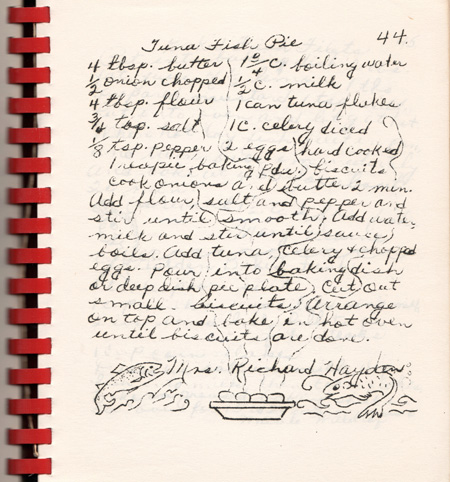
Tuna Pie! That certainly is a classic 50s casserole.MenuMel44 MenuMel43 MenuMel1 MenuMel90 MenuMel59

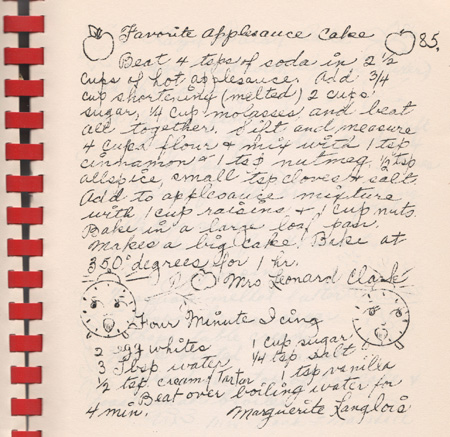
This one makes “a big cake”:

Menu Melodies

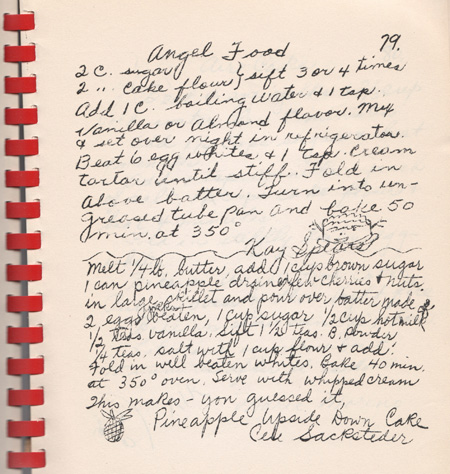
The lower recipe on the page just below has no title. Then at the end, the author writes: “This makes – you guessed it, Pineapple Upside Down Cake.”

Menu MelodiesJust as a postscript: I can’t find many spelling errors in this cookbook!

Chicken Tagine

This recipe became part of my repertoire in 2006. I combined a recipe clipped from a magazine and class notes from the Mediterranean cooking class that I took at the Culinary School of the Rockies (now Escoffier). Input from my daughter’s Moroccan boyfriend and his family helped too. The recipe is now fine-tuned and tested enough to share. I have to tame down the olives and saffron to suit my dining partner; I’m giving options for those (like me) who love these ingredients.

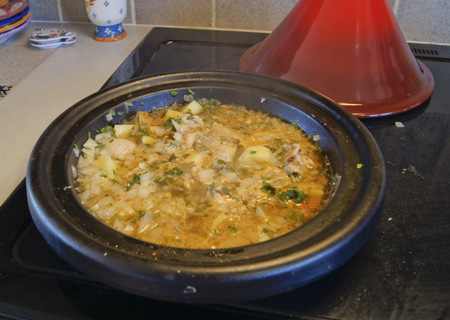
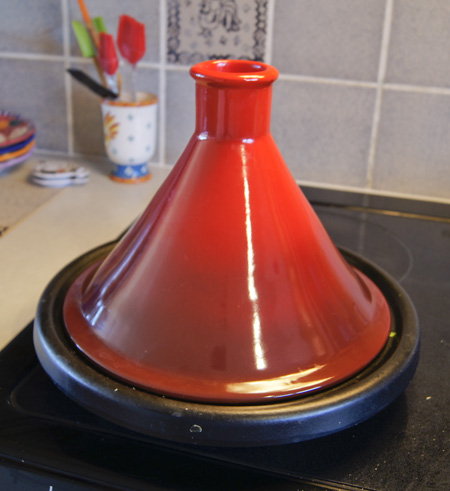
A “tagine” is basically a stew. It gets its name from tagine, a traditional pot with origins in North Africa. A tagine is a flat cooking dish with a lid that has tall, sloping sides. It is meant for long, slow cooking of meats, allowing time for the meat to tenderize, while the cooking liquid constantly condenses on the lid and drops back into the pot. Authentic tagines are earthenware and colorful. I would have loved for my daughter to bring me one home from her travels, but they are a little too big to fit in a backpack. Instead, I purchased a westernized one made by LeCreuset. It has a cast iron base (good for browning meats) and a stoneware lid.

TagineMy tagine recipe can be cooked just as well in any heavy, lidded stove top pan, or baked in the oven in a stove-top-to-oven casserole. When we made a lamb tagine in cooking class, we cooked it both ways, and none of us could tell a difference.

About the olives. My first choice are the big, green “Greek” olives, probably from a market’s open deli section. Do not use the bottled “Spanish olives” used for martinis. Do not use stuffed olives. Greek olives might be called Ionian, Nafplion, or “cracked green”. (Here’s the Cooks Thesaurus reference on olives.) You can use kalamata olives; these are smaller and purplish-black, but they are almost as good in this dish, and are good jarred, so you don’t have to make a special trip to the store. The original recipe called for 2 cups of olives; I cut this down to 1/2 cup so that I could serve it to my dining partner. I’ll usually add more to my own serving, although they are best cooked into the sauce, as they help thicken the dish.

About the “preserved lemons”. This is a Moroccan specialty. They are difficult to find in local stores, but are pretty easy to make. I was given some at my cooking class, and later by some Moroccan friends. But I’ve substituted plain lemons as in the recipe below and find they work fine (at least for this non-connoisseur).

Chicken Tagine


This serves about 4-5 people. It can easily be cut in half for 2-3 people.

  • 8 large boneless, skinless chicken thighs, skinned and cut into big chunks
  • 3/4 cup onion, chopped
  • 2 cloves garlic, minced
  • salt (to taste)
  • 1/2 cup cilantro, minced
  • 1/2 cup parsley, minced
  • 1 teaspoon cumin
  • 1 teaspoon ginger
  • 1 teaspoon paprika
  • 1/4 teaspoon saffron (optional)
  • 1/2 teaspoon pepper (or to taste)
  • 2 average-size potatoes; Yukon golds work well but any will do
  • 2 cups water or chicken stock
  • 1/2 cup Greek green olives (Ionian or Nafplion)
  • 1/4 cup fresh lemon juice (about 1 lemons-worth of juice)
  • grated peel of 1/2 lemon (or use 1/2 of a Moroccan preserved lemon, peel only, chopped fine)
  • 1 1/2 tablespoon cornstarch dissolved in a little water
  • chopped fresh cilantro and parsley for garnish

Cook onions in a small amount of olive oil until they wilt, salting to sweat, then add the garlic and stir for 30 seconds. Add the chicken and stir for several minutes, then add the cilantro, parsley, cumin, ginger, paprika, saffron, pepper, potatoes, and stock.

Simmer, covered, about an hour. (Or, bake in a 350˚ oven, covered, for an hour.) Add olives, lemon juice, and lemon peel. Slowly and with stirring, add the cornstarch and water. Simmer a few minutes until it thickens. Taste and adjust seasonings.

Sprinkle with a little chopped fresh cilantro and parsley and serve over couscous or rice.

Chicken TagineThis is one of my new comfort foods!

250 Cookbooks: The Electric Slow Cooker Cookbook

Cookbook #18: The Electric Slow Cooker Cookbook. Barbara Bean, Henry Regnery Company, Chicago, Illinois, 1975.
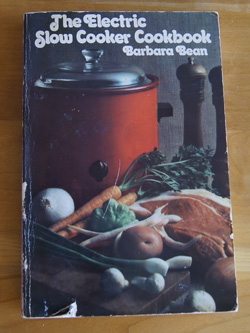
The Electric Slow Cooker CookbookI have eleven crock pot/slow cooker cookbooks – guess that says something! Three are copyright 1975. Let’s see, where were we then. We moved to Colorado in 1973, so we were living in Boulder. I was in my first years as a working young woman, and interested in the current healthy-style trends. I used the crock pot to cook beans or inexpensive cuts of meat while I was at work (or at play, thinking back …).

Crock pots (as we know them) had not yet been invented when I grew up. Out of curiosity, I google-searched news articles employing date limits and found the first mention of “crock pot” in 1973. A “crock pot” was demonstrated at a church gathering by a “Mrs. Fred Jones”, and a bride-elect was presented with “an electric crock pot and a lily corsage accented with red roses”. A more traditional search of the web pulled up a Wikipedia entry and another interesting website that discuss the history of the electric crock pot. Its predecessor was the “Naxon Beanery All-Purpose Cooker” developed by the Naxon Utilities Corporation of Chicago. In 1970, Rival bought Naxon and the rights to the Beanery, upgraded the appliance, and called it the Crock-Pot®. The PetitChef website has a graphic of crock pots from different eras. My first one looked just like the “1971” version.

My use of a crock pot has ebbed and flowed over the years. I tried a lot of recipes; some failed, some worked. I used to use the crock pot a lot for my own version of refried beans. I would buy dry pinto beans, soak them, then cook them in the crock pot with a bunch of seasonings. When done, I would mash them with an electric hand mixer while still in the pot. This way, I would have “refried” beans without any fat. In the early 70s, I also cooked soy beans for a soy bean chile.

I consider a slow cooker an essential tool for my kitchen, even if it sometimes sits for months without use. I’m now on my third slow cooker. My first one was a Rival CrockPot® (it got a crack in it), my second one was a “Crock Watcher” by Hamilton Beach (it has a removable crock; the switch wore out). My newest has a timer and a removable cooking crock. Recently, I had a lot of fun using it to make Apple Butter.

The best thing about a crock pot meal? Walking into the kitchen after a long day day at work or play, and finding the house suffused with the aroma of something delicious simmering and ready to be dished up.

What I don’t like about the crock pot is that with the wrong recipe, it can turn a mixture of meat, vegetables, and liquid into an amorphous mass. I’ve learned to choose my recipes carefully. It’s good for breaking down tough, inexpensive cuts of meat, like round steak or chuck roast, turning them into tender and tasty stews and stroganoffs (try it for my Lamb Stew with Cinnamon). I have a good recipe for game hens in a slow-cooker and a great cassoulet  recipe. I’m sure I’ll come across other crock pot favorites when I go through the rest of my cookbooks, and I’ll share those that have become favorites. And, I’ll try to branch out as I go through these eleven crock pot cookbooks.

And I am branching out with my recipe choice from this cookbook: Duck!

Yes, duck. That other poultry. We’ve had it at restaurants a few times but I’ve only cooked it once or twice. So trying this recipe is a bit of a stretch for me. Good exercise!

The duck recipe is not the only recipe that I might eventually try out of this cookbook. I noted about six that look interesting. Years ago, I tried the recipe for Teriyaki Chicken and wrote notes on it. The recipes in this 1975 cookbook are a bit dated, perhaps, but I think they stand the test of time as “comfort foods”. One would not see their simple titles on a recipe in a fancy restaurant, but in my kitchen, after a cold winter day spent outdoors in the Colorado high country? Yes, they have their place. I am going to keep this cookbook. You can see from the photo (at the top of this entry) that it is well-worn.

The recipe I will try is “Duck Bayou”. I think that duck will hold up well in the slow cooker; it probably will retain some texture after a long cook. And it has a distinct flavor to bring to the dish.
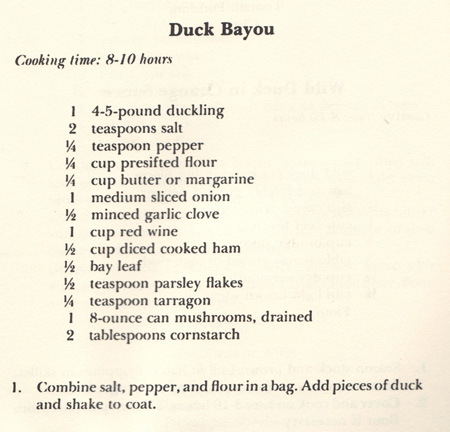
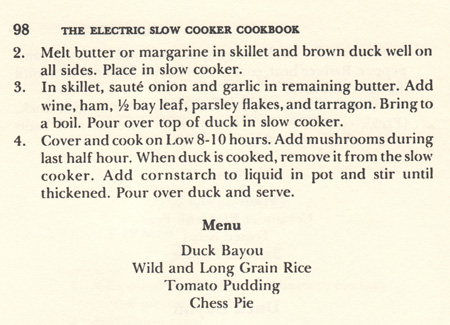
Duck BayouDuck BayouRecipe Comments

The dish turned out to be a success. I probably will cook it again, and I think it’s interesting enough to share. I did run into some issues, though, both at the store and in the cooking.

First, duck can be hard to find. I was lucky to find three leg-thigh pieces at the counter at our local groovy store. They had frozen whole (and expensive) ducks in the freezer display, but I’m cooking for two, and that was too much; I didn’t want to cook an entire duck for two people. I wrote the following recipe for two people, and if you have more to serve, buy a whole duck and cut it into pieces yourself.

Second, the recipe said to cook for 8-10 hours on low. I checked my duck at 6 hours, and found that the liquid was almost evaporated and the duck was starting to char. I immediately removed the food from the cooker.

The problem with the cooking time might be that the original recipe was written for a tall, round slow cooker. Mine is large and oval-shaped. Also, I downsized the recipe but still used a large slow cooker. Two approaches fix the problem: less cooking time and more liquid.

I made a few other changes as I cooked this recipe: more herbs, chicken stock, extra wine added at last step, fresh mushrooms. My modifications are incorporated in the version below.

Duck Bayou

This recipe is written for 2-3 people, depending on appetites. Double the recipe (using a whole duck) and it will serve 4-6 people.

  • 3 pieces of duck (breasts or leg-thighs)
  • 1 teaspoon salt
  • 1/4 teaspoon pepper
  • 1/2 cup flour
  • oil or butter for frying the duck
  • 3/4 of a medium onion, chopped
  • 1 clove garlic, chopped fine
  • 1 cup red wine, divided
  • 1/2 – 1 cup chicken stock or water
  • 1/2 cup diced ham
  • 1 bay leaf
  • 1 tablespoon chopped fresh parsley, or 1 teaspoon dried parsley
  • 1/2 teaspoon tarragon (dried, more if you have fresh tarragon)
  • 1 cup sliced or chopped fresh mushrooms
  • 1 tablespoon cornstarch

Carefully trim the fat and any excess skin from the duck pieces. Duck skin tends to pack a lot of fat.

Combine the flour, salt, and pepper in a paper bag. Add pieces of duck and shake to coat.

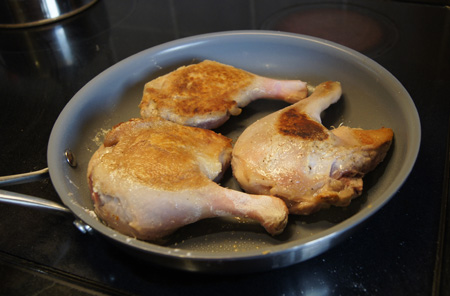
Put a small amount of oil (I used olive oil) or butter in a frying pan. Add the duck pieces and brown well on all sides. Place in slow cooker.

In the same pan, saute the onion until it wilts, then add the garlic and saute 30 seconds. Add 3/4 cup wine, 1/2 cup stock (or water), ham, bay leaf, parsley, and tarragon. Bring to a boil. Pour over top of duck in slow cooker.

Cover and cook on the low setting for 6 hours. (If you double the recipe and have a tall, round slow-cooker, it can probably cook for 8 hours, but check it at 6 hours and add more stock if necessary.)

Remove the duck from the slow cooker. Add 1/4 cup red wine to the cooker. If there is only a small amount of sauce in the cooker, add some chicken stock until you have at least a cup of sauce. Add the mushrooms to the slow cooker and turn the heat to high. Cook about 10 minutes, until the mushrooms are done. Taste the sauce and add a bit more salt, pepper, tarragon, and/or parsley to taste.

Dissolve the cornstarch in a small amount of water, then add to the sauce. Cook on high until the sauce thickens.

(If you prefer, you can pour the sauce into a pan and cook the mushrooms and thicken the sauce on the stove top.)

Serve the duck with the sauce; rice is a good accompaniment. I served it over a white-brown-wild rice medley.

Here are the duck pieces browning. Actually, the main purpose of this photo is to show off my new, “green” non-stick pan:
browning the duck piecesHere is the cooked dish. The photo is here for proof that I actually cooked the recipe; it isn’t really very pretty. But it tasted good!
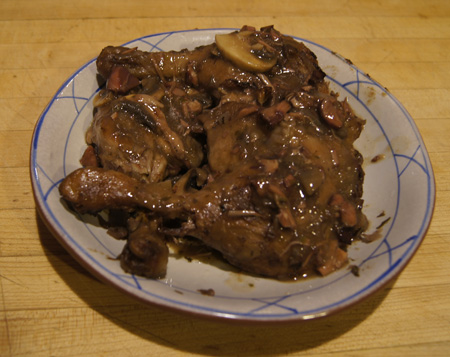
Duck Bayou (cooked)


Apple Oat Bread

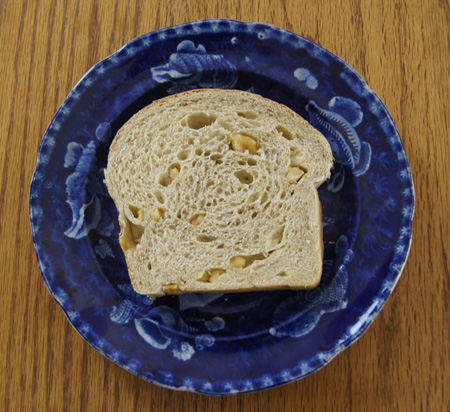
apple breadApple Oat Bread is a great bread for toast and for peanut butter sandwiches. It’s been a favorite of mine for twenty years. The recipe originated in the small booklet that came with my first bread machine.

I thought about making this bread a couple weeks ago – I craved it. But alas, I didn’t have any dried apples in the house. I put “dried apples” prominently on my next shopping list. I tried the groovier store first (Whole Foods), but only found some brownish ones in the bulk section. No problem, I’ll get them at the regular store (Safeway). But they had no packaged or bulk dried apples. Only some “apple chips” that had been fried in oil.

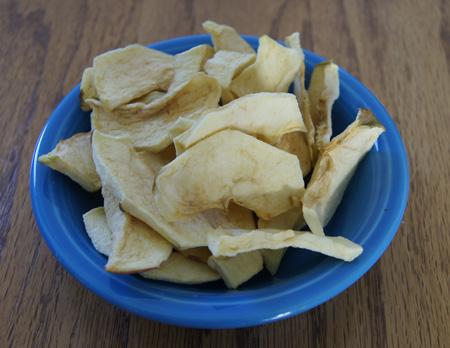
Okaaay. Guess I’ll have to make my own. So I purchased a few fresh apples. The next day I used my dehydrator to dry them …

dried apples… and the next day I made Apple Oat Bread. It was worth it all! My recipe is below. Please refer to my post “My Daily Bread” for my methods of kneading, rising, and baking yeast breads, as well as information on flours and measuring.
Apple Oat Bread

  • 1 cup apple juice
  • 1 1/2 tablespoons butter
  • 1 teaspoon sugar
  • 1/2 teaspoon salt
  • 3/4 teaspoon cinnamon
  • 1/3 cup dried apples, chopped into the size of raisins
  • 12 ounces bread flour (about 2 1/4 cup)
  • 1/2 cup oatmeal (quick works best)
  • 2 1/2 teaspoons yeast

Put all the ingredients in a bread machine and set to the dough cycle. Most machines take about 1 1/2 hours to knead and rise the dough. Some machines have the option to add ingredients like raisins late in the kneading process; this is not really necessary for dried apples because they will hold up okay through the kneading process.

When the bread machine is done, remove the dough from the machine and set it on a bread board. Fold it over a few times, then form into a loaf. Put it in an 8 1/2″ x 4″ loaf pan and set it in a warm place to rise until it is above the edges of the loaf pan. (See My Daily Bread for reference.)

Bake at 385˚ for 22 minutes.

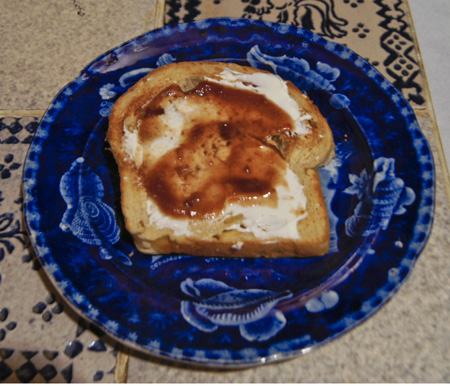
It’s yummy toasted with cream cheese and Apple Butter! Toasting brings out the cinnamon, permeating the whole house with its wonderful aroma.

Apple Oat Bread toasted

Lamb Stew, with Cinnamon

Lamb Stew with Cinnamon

I created this recipe! And I wrote it down, pretty amazing for me, but maybe not so much since this happened during the last two years, so I had the time since I wasn’t working. I wrote the introductory paragraphs then too.

(2011) This all began with a trip to the Savory Spice Shop on the Boulder mall. I brought home the most wonderful cinnamon that perfumed the house for days. I would come in from outside and think “cinnamon, I must use it in a dish other than a dessert!” In the meantime, I put it in a dessert and muffins. Once I ate a re-heated cinnamon-laden muffin for breakfast, and then hours later, in different clothing and hands washed, I was in the last 5 minutes of a 30 minute stint on the ellipticals at the rec center, and very sweaty, and suddenly I smelled cinnamon wafting around my head! I shook my head in amazement.

So back to the idea for a main dish with cinnamon. I thought back to the Mediterranean cooking class I took a few years ago. Cinnamon was in a chicken dish, and a ground lamb dish. I was thinking more of a stew. So I googled lamb and cinnamon and stew, and found a recipe that I based the following recipe on, with changes in spices made from the cooking class recipes.

Was the recipe a success? Yes! Did I get my cinnamon “fix”? Yes I did. Just the sort of complex flavor mix that I was looking for. Mixed with the lamb aroma, the cinnamon itself wasn’t recognizable as pure cinnamon, but it added a complexity that was simply super. The hint of cayenne picked up the flavor to perfection.

This recipe serves two, generously. Since one of my pet peeves is the restaurant tradition of serving the same serving size to a small woman as a large man, I am reluctant to state the number of servings with a pretension of accuracy. It would serve one guy and two women, is my guess. It serves the two of us with some left over, enough for lunch the next day or for the doggies.

Lamb Stew, with Cinnamon


Serve this over rice or couscous. Flatbreads (naan) make a nice addition too.

  • 1 pound boneless lamb stew meat, cut into chunks
  • olive oil or vegetable oil
  • 1 carrot, diced
  • 1 stalk celery, diced
  • 3/4 of a medium onion, sliced thin
  • 3 cloves garlic, chopped
  • 1/2 t cinnamon
  • 1/4 t cumin
  • a few shakes each of: nutmeg, allspice, cloves, and red (cayenne) pepper (watch the cayenne – not too much! really, just a couple shakes!)
  • salt and pepper to taste
  • a couple bay leaves
  • 3 T flour
  • 1 cup of diced, canned tomatoes – about 3/4 of a 14-oz. can
  • 1/2 cup white wine
  • 1/2 cup chicken stock
  • chopped parsley to taste

Brown the lamb in batches in a little hot oil in a pot on the stove. Don’t crowd it; if you put too many of the lamb cubes in at once, they won’t brown as well. As they brown, remove the lamb cubes from the pan and set them in a bowl.

In the same pot that you browned the lamb in, saute the carrots, celery, and onion in a little oil until soft, adding a little salt to help sweat the vegetables. Add the garlic and the spices and salt and pepper and continue to cook and stir for a couple minutes. Add the lamb back to the pot. Add the flour and stir until it’s incorporated. Finally, add the tomatoes, wine, and stock. (Feel free to add a bit more stock if it looks too thick.)

Cover and simmer for at least 2 hours, probably more like 2 1/2 hours. Check periodically; add more stock if it’s too thick, and check the lamb to see if it’s done. You want the lamb to be falling-apart tender, and it takes awhile. (This could be done in a crock pot. I’d suggest 7-8 hours on low.)

Before serving, add some chopped fresh parsley (if you remember! I always forget).

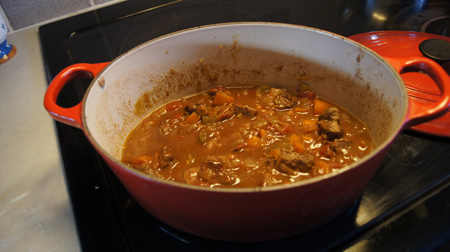
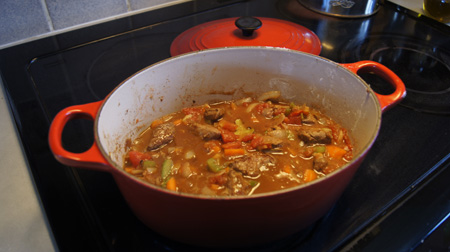
The photo on the top of this post is of the cooked stew. The photo below is before the long simmering step. By the end of the cooking, the celery and onions meld into the sauce and the spices. This really is good, I’ve made it three times and someday I’m sure it will be listed in my “favorites”!
Lamb Stew with Cinnamon, before simmering