250 Cookbooks: Good Cooking made Easy

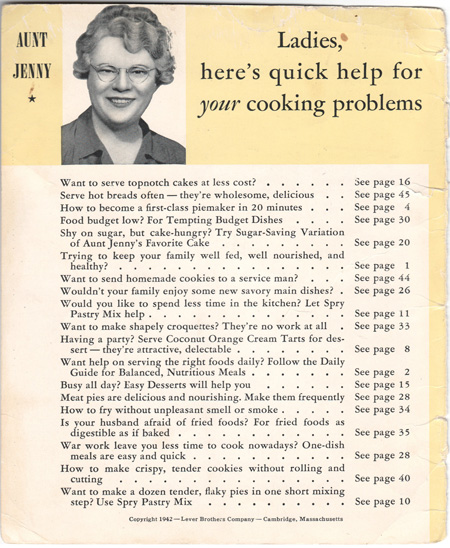
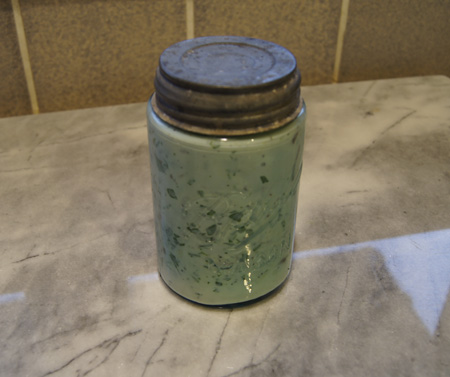
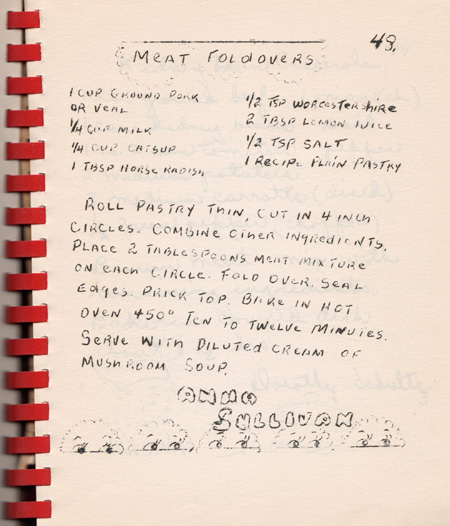
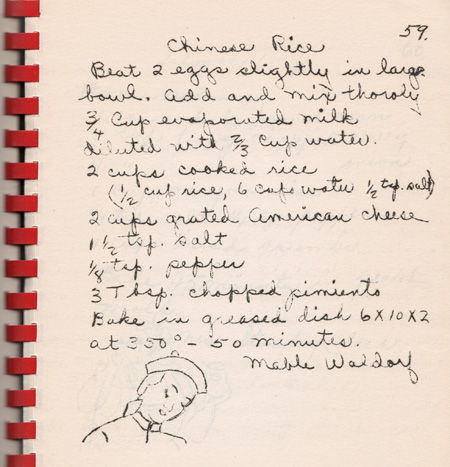
Cookbook #24: Good Cooking made Easy. Spry, the flavor saver. Lever Brothers Company, Cambridge, Massachusetts, 1942. Featuring advice and recipes from Aunt Jenny. Good Cooking made EasyThe time is 1942. The cookbook is Good Cooking made Easy, featuring Spry, a vegetable shortening.
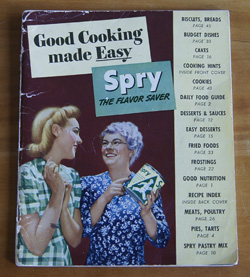
“Today, we are bending every effort to make a strong, invincible America. The buoyant health of every man, woman, and child . . . of every member of every  household . . .  is an important link in our country’s strength. It is our patriotic duty to feed our families well . . . to serve nourishing food in our homes daily.”

So you have a real job to do in your country’s defense . . . to see that your family gets good food and plenty of it . . . to choose the right foods . . . prepare them so that they will be both appetizing and delicious. It is not enough for food to be wholesome, nutritious, well-balanced . . . food must also look good, taste good.

That is where all you good cooks step in and take over. You know that reliable recipes are important in helping you turn out dishes that are attractive, good to eat. You rely upon pure, wholesome ingredients for making good, nourishing foods. Healthful breads and biscuits . . . hearty main-dish casseroles . . . light, delicate cakes . . . tender, flaky pies – these are some of the stand-bys that will help you serve satisfying, balanced meals.

To keep the body in good running order, include each of these nutrients in the diet, daily.

1. Proteins [yada yada]

2. Fats and carbohydrates provide energy for work and play; also furnish bodily warmth. Chief sources: vegetable shortening [Spry], butter, animal fats, cereals, breads, potatoes, sugar. Fats are the richest source of energy, by weight giving more than twice as many calories as carbohydrates or proteins. A pure 100% fat supplies over 4000 calories per pound; provides quick and lasting energy.”

Ah yes. I do need to eat vegetable shortening to help furnish bodily warmth. One cup of Spry will furnish all the calories I need in a day! What a refreshing idea! I like being told to eat pies and cakes. I’m tired of the current litany pushing fresh, local, organic fruits and vegetables.

Of course, something is a bit “off” with this cook-booklet. But it’s not only the nutrition advice, it’s the comments throughout the booklet. Here are scans of several pages from the booklet.
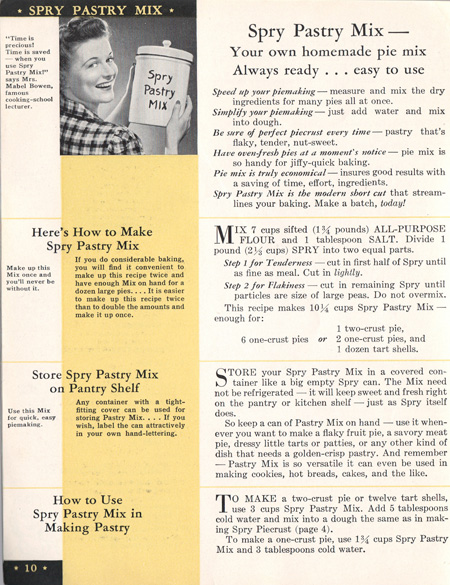
page 10

“Store your Spry Pastry Mix in a big empty Spry can. It need not be refrigerated – it will keep sweet and fresh right on the pantry shelf…”
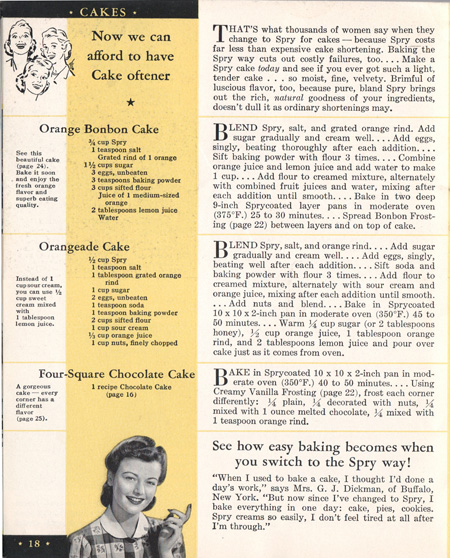
page 18

“Now we can afford to have Cake oftener.” “…pure, bland Spry brings out the rich, natural goodness of your ingredients, doesn’t dull it as ordinary shortenings may.” “Spry creams so easily, I don’t feel tired at all after I’m through.”
PAGE 18

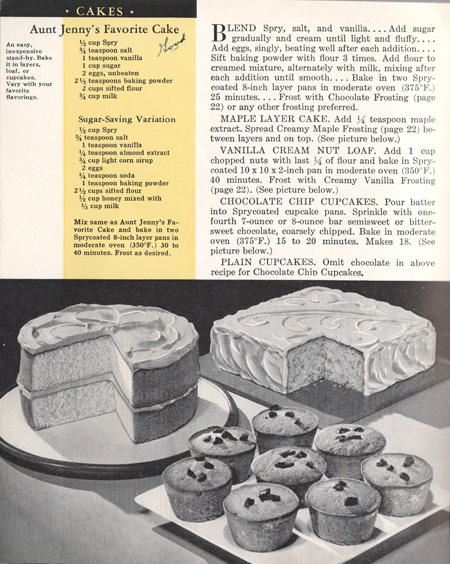
Note my mother’s “Good” on this recipe. Also note the photos of perfect cakes and muffins.

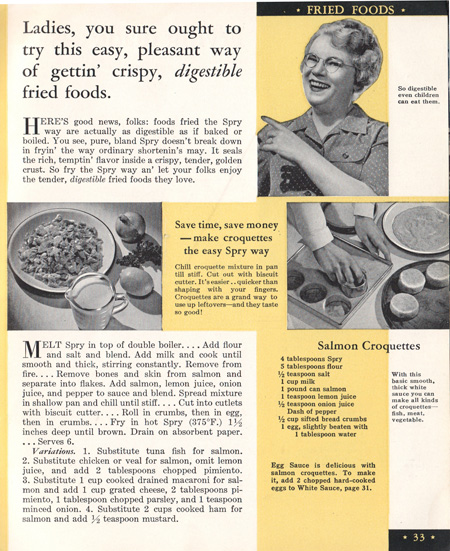
page 33

Here is Aunt Jenny herself! She says: “Here’s the good news, folks: foods fried the Spry way are actually as digestible as if baked or broiled.” and “So digestible even children can eat them.”

“Even children can eat them???” This is just such a strange statement.

page 44

“Pack cookies in a sturdy cardboard box or a big empty Spry can.” Be sure to “address plainly.” Isn’t the illustration great?
This is the original source of my mother’s Tom Thumb Bar cookie recipe.

(The mark on the right side of the above page is a food stain.)

inside front cover

“Is your husband afraid of fried foods?”

I turned to web searches to find out more about the origins of this booklet. In 1936, Lever Brothers began producing Spry, a solid vegetable shortening. Spry competed with Procter and Gamble’s Crisco®. Lever Brothers waged an ad campaign, including an advertising character named “Aunt Jenny”. Aunt Jenny (Edith Spencer in real life) was the host of a radio show called Aunt Jenny’s Real Life Stories. This show ran for two decades, beginning in 1937. As the narrator, Aunt Jenny told a person’s story over several days, in a soap opera fashion. Aunt Jenny included in each episode a recipe for an entree or baked good made with Spry, and she lauded the merits of Spry from her personage as a wise and friendly older woman. Several printed booklets of Spry recipes were published with Aunt Jenny’s comments included. This advertising campaign greatly improved Spry’s percentage of the vegetable shortening market.

You can read more about Spry and Aunt Jenny in Wikipedia. Wikipedia calls her “almost bizarrely enthusiastic”, and that’s exactly the feeling I got reading this booklet. Ghosttraveller, a collector of moldy cookbooks and other Americana has a photo of my cook-booklet and a fun discussion of Spry and Aunt Jenny. Old-Time Radio has a short article on the radio program. (All websites accessed 2013.)

By the 1970s Spry was no longer available in the US. I am old enough to remember Spry, although Crisco® was what we had in our kitchen when I was growing up.

Now, back to business. What recipe shall I cook from this booklet? It has recipes for everything from main dishes to breads to desserts. Gosh, 1942! My mother was a new bride then and only 26 years old! She marked several recipes. One of those recipes – Canteen Cookie Bars – made it into her repertoire as “Tom Thumb Bars”; I remember these well from childhood.

I decide to try Spicy Oat Cookies. My mother wrote a “Good” next to the recipe, and they have a modicum of healthiness by including oatmeal, peanuts, and raisins.

Here’s a scan of the original recipe. Note the food stains!

GCME recipeI’ll make them almost like the recipe. I’ll use Crisco® instead of Spry, and I’ll cut the salt in half. I think that molasses is included because sugar was rationed during World War II.

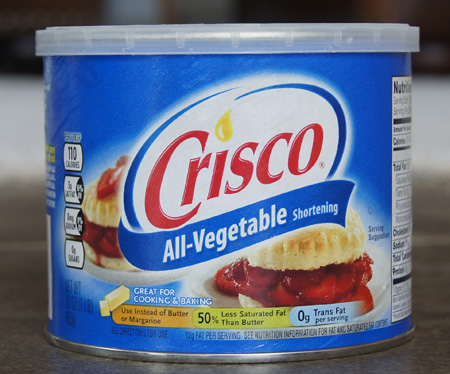
Note that in the recipe below I give weight measurements for the shortening and the molasses. I find it a lot more convenient to weigh these directly into the mixing bowl, that way you don’t have to scrape gooey shortening or molasses out of a measuring cup. Note that Crisco® also has statements indicating it’s a healthy food:

Crisco

Another part of the label reads: “Excellent source of ALA Omega-3 fatty acid”

Spicy Oat Cookies

  • 1/2 cup solid vegetable shortening such as Crisco® (3 1/2 ounces)
  • 1/2 teaspoon salt
  • 2 teaspoons cinnamon
  • 1/2 cup sugar
  • 1/2 cup molasses (5 1/2 ounces)
  • 1 egg
  • 1/2 teaspoon baking soda
  • 1 1/2 cups flour
  • 1/4 cup milk
  • 1 1/2 cups oatmeal (regular, not old-fashioned or instant)
  • 1/2 cup chopped peanuts
  • 1 cup raisins

Mix the vegetable shortening with the salt and cinnamon, then add the sugar and molasses and beat until light and fluffy. (Use a stand mixer.) Add the egg and beat well. Combine the baking soda with the flour, and with the mixer on low, add to the creamed mixture. Beat only until it’s all mixed in. Add milk, oatmeal, peanuts, and raisins and mix on low until combined.

Drop dough from a teaspoon on a parchment-lined baking sheet. (You can use greased cookie sheets if you prefer.) Bake at 350˚ for 12-14 minutes. Makes about 3 1/2 dozen.

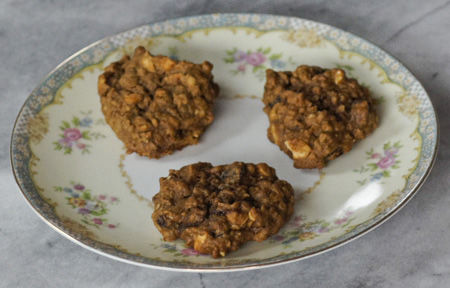
These are excellent cookies! If they last long enough, we’ll pack them along with us on our next hike – they make great little energy bar-cookies.

Spicy Oat Cookies


250 Cookbooks: Prize-Winning Beef

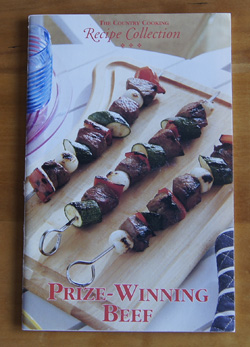
Cookbook #23: Prize-Winning Beef. The Country Cooking Recipe Collection; Reiman Publications, Mary Beth Jung, editor, Greendale WI, 1993. Prize-Winning Beef

This little booklet of 32 recipes was part of my mother’s collection. Most of the recipes sound okay, but they are not very innovative. The recipes seem to be more from the 1950s or 60s than the 1990s. There are recipes for country ribs, beef meatballs, nachos, flank steak, southwest stew, chile, and the like; I already have my own ways of cooking most of these. A couple of the recipes are calorie-laden with the addition of pastry.

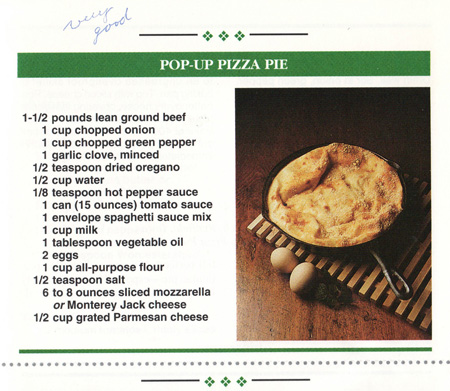
My mother marked one recipe: “Pop-up Pizza Pie”. She wrote that it was “very good”, so I decided to try that recipe for this 250 Cookbooks blog. Last weekend I tried another recipe from this booklet; it was for barbecue beef and it turned out well – I plan to add it to my personal recipe collection and might share it here eventually. But I am going to recycle the booklet itself. It has served its purpose.

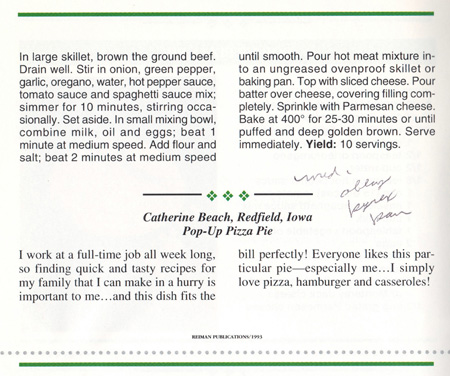
The original recipe, below, supposedly serves 10 people. I will cut the recipe in half for the two of us. I expect I will have leftovers!

Pop-Up Pizza Pie RecipePop-Up Pizza Pie RecipeNote that the original recipe calls for “one envelope spaghetti sauce mix”. This means one of those small seasoning packets that once were so popular. I don’t keep any of these in my pantry. Since I want the dish to taste as close as possible to the original recipe, I searched online and found that several websites have posted recipes for spaghetti sauce mix. Most of these recipes include cornstarch, sugar, herbs and spices. I checked the labels of packaged spaghetti sauce mix in the supermarket and they too include cornstarch, sugar, and spices – I think I am on the right track.

But which spice recipe to follow? Then, just in time, one of the cooking blogs that I follow, Lynn’s Kitchen Adventures, posted a recipe for “Homemade Spaghetti Seasoning Mix“. Yay! I made up a batch of spice mix following her recipe. I suggest you do too. It’s an excellent seasoning mix that puts a spaghetti sauce on the table in a flash.

Pop-up Pizza Pie


Serves about 3.

  • 3/4 pound lean ground beef
  • 1/2 cup chopped onion
  • 1/2 cup chopped green pepper
  • 1 clove garlic, minced
  • 1/2 cup roughly chopped mushrooms (optional)
  • 1/4 teaspoon oregano
  • dashes of hot pepper sauce
  • 1 8-ounce can tomato sauce
  • spaghetti sauce mix (choose one from the following three options:
  • 1/2 cup milk
  • 2 teaspoons vegetable oil
  • 1 egg
  • 1/2 cup flour
  • 1/4 teaspoon salt
  • 4 ounces grates mozzarella cheese
  • 1/4 cup grated Parmesan cheese

Brown the ground beef and drain well. Stir in onion, green pepper, garlic, oregano, water, hot pepper sauce, tomato sauce and spaghetti sauce mix; simmer for 10 minutes, stirring occasionally.

In a small bowl, combine milk, oil, and eggs; beat 1 minute at medium speed. Add flour and salt; beat 2 minutes at medium speed.

Put the hot meat mixture in an oven-proof pan or casserole. A 9-inch round pan or an 8×8-inch square pan works well. Top with the mozzarella cheese. Pour the batter over the cheese, covering the filling completely. Sprinkle with Parmesan cheese.

Bake uncovered at 400˚ for 25 -30 minutes or until puffed and deep golden brown. Serve immediately.

Pop-Up Pizza Pie Comments

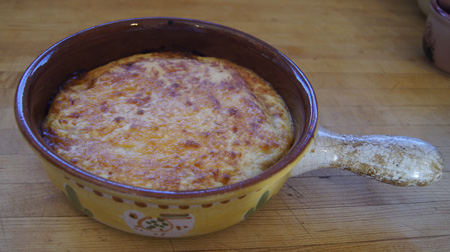
Well. I was wrong, we hardly had any leftovers! We started eating and I said “I like this!” and my husband said “very good!” Hey, that’s what my mother wrote on the recipe! I went back for seconds and wanted more. I will definitely make it again. This is a good “comfort food” entree.

250 Cookbooks: Healthy Homestyle Cooking

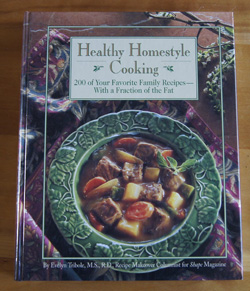
Cookbook #22: Healthy Homestyle Cooking. Evelyn Tribole, Rodale Press, Emmaus, Pennsylvania, 1994.

Healthy Homestyle CookingThis is another of my low-calorie cookbooks. Several pages are neatly dog-eared, noting recipes that still look interesting to me today, although I’ve never tried them. A page with a recipe for falafel is marked with a newspaper-clipped recipe for “Hummus Patties”. I love falafel (made from garbanzos), but they are usually fried in a lot of oil and so I avoid them because of calories. Both recipes I just re-found call for cooking in a minimum amount of oil in a non-stick pan. A great idea.
This is a useful cookbook, and I ask myself: Why is it that I haven’t I used it in ages? I think I know what happens. I buy a cookbook and read it and try recipes for a few weeks or months, then the cookbook gets covered with papers and forgotten and eventually re-shelved. Doing this 250 Cookbooks blog is great for me, personally, because the project is forcing me to re-discover books that have a lot of good ideas.

The good ideas in this book are lower-calorie versions of many common home-cooked meals: pot pies, lasagna, chicken divan, enchiladas, carrot cake, brownies, and lots more. Each recipe has a personal note and pointers on how to reduce calories. And as a bonus, the book is nicely illustrated with many full-page color photos.
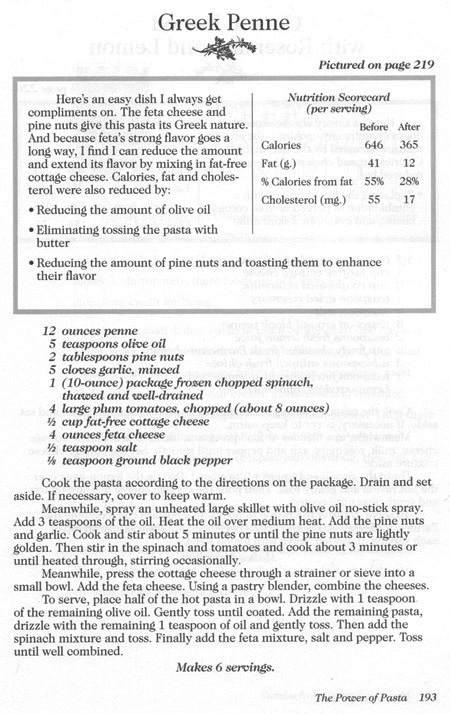
I’m going to try “Greek Penne”. It’s one of the pages that I had dog-eared. This is a vegetarian dish, and I decided to try it on a night when I just have me to cook for. I’m looking forward to this easy-to-prepare dish of penne, tomatoes, spinach, pine nuts, and feta. It’s interesting that the tomatoes are just barely cooked: I just took a cooking class at Escoffier Boulder where we made a dish including barely-cooked tomatoes called “Concasse”.
The original recipe is below. I plan to change the recipe a little: I’ll peel and seed the tomatoes and use fresh spinach, and add a little fresh basil.

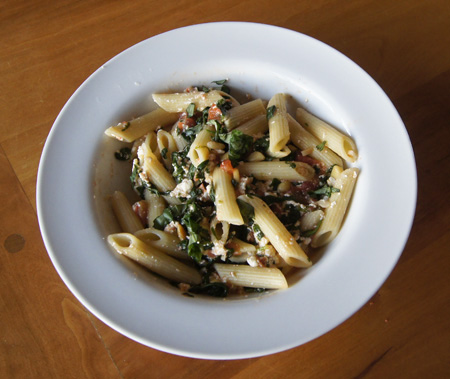
Greek PenneGreek Penne


This recipe serves about 6 people, depending on appetites.

  • 12 ounces penne pasta
  • 5 teaspoons olive oil (or to taste)
  • 2 tablespoons pine nuts
  • 5 cloves garlic, minced
  • 10 ounces frozen spinach, thawed and drained (or use fresh spinach, see below)
  • 4 tomatoes, peeled, cored, and chopped
  • 1/2 cup cottage cheese (non- or low-fat for less calories; substitute with feta if you wish)
  • 4 ounces feta cheese
  • salt and pepper to taste

Cook the pasta; drain and set aside.

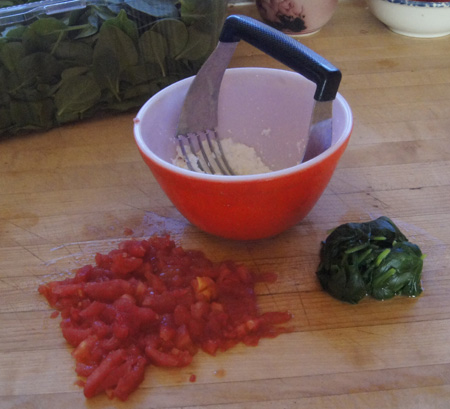
Press the cottage cheese through a strainer into a small bowl. Rap the strainer against the top of the bowl to get all the cottage cheese into the bowl. You could also put the cottage in a small blender, but the texture is kind of nice if you use a strainer. Add the feta cheese to the cottage cheese and mash up with a fork (or pastry blender). Set aside.

Cook and stir the pine nuts and garlic in a small amount of olive oil in a pan large enough to hold the entire finished dish. Cook until the pine nuts are lightly golden – watch carefully as it doesn’t take very long. Then stir in the spinach and tomatoes and cook for about 5 minutes, until heated through.

The pasta is probably cool by now, so add it to the tomato-spinach mixture and heat and mix gently until it is serving temperature. Add olive oil and salt and pepper to taste. Finally, add the feta cheese mixture and gently mix. Serve with a little chopped fresh basil, if you wish.

Greek PenneComments

This was very good, and I’ll make it again. My following comments concern only the calorie-cutting suggestions.

The author states that the original recipe had 646 calories per serving, the new version has 365 calories. The calorie value of the original recipe must include a huge amount of butter/oil per serving. The best cutting of calories comes from not tossing the pasta with butter – duh. I think the nit-picking of using non-fat cottage cheese to cut the feta is a little obsessive.

Feta cheese: 4 ounces of feta has 320 calories, 200 of which are from fat. Per serving, that’s about 55 calories (33 from fat). If you don’t care about an extra few calories per serving, use a little more feta and skip the cottage cheese, because it isn’t going to change the overall calorie content very much.

Pine nuts have a lot of calories! But just a few go a long way.

Pine nuts: 2 tablespoons weigh 1/2 ounce, and according to Nutrient Facts this amount has 90 calories (mostly fat-calories). Divided amongst 6 people, that’s only 15 calories per serving. I’d say, add more pine nuts if you want.

Spinach

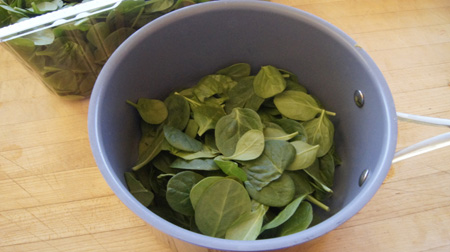
I cooked my own spinach. First, I weighed out the proper number of ounces (I was cooking for one, recall) and put it in a large sauce pan:

spinachI added about a half-cup of water and set the pan over high heat, covered. When it came to a boil, I removed the pan from the heat, drained and chopped the spinach. Look how much it cooked down:

cooked spinachOf course, it’s easier to use frozen spinach, but the fresh spinach tasted really good.

250 Cookbooks: Sunset Cook Book of Breads

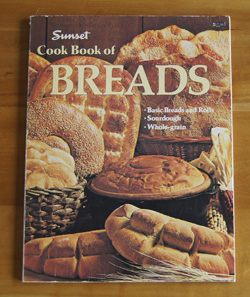
Cookbook #21: Sunset Cook Book of Breads. By the Editors of Sunset Books and Sunset Magazine, Lane Publishing Co., Menlo Park, California, 1978.

Sunset Cook Book of BreadsI opened this book and immediately knew I’d keep it. I found many recipes I wanted to try. It was published 35 years ago, so that’s pretty amazing. Why haven’t I marked it up and tried a bunch of these recipes?

Oh, I see. I gave this cookbook to my mother Christmas 1979, she wrote a note to that effect on the inside front cover. She was more interested in baking pies and cookies and casseroles than breads. I was always the one with a passion for yeast breads.

I organize all the recipes that I clip from magazines, newspapers, and other sources by entering them in a database I began in the 1990s. (Over 800 entries!) Thinking that several recipes in this Sunset Cook Book of Breads look familiar, I checked that database. Sure enough, ten of this cookbook’s recipes are referenced there. So before I gave the cookbook to my mother back in 1979, I must have copied several pages of recipes to try, and I still have those copies today.

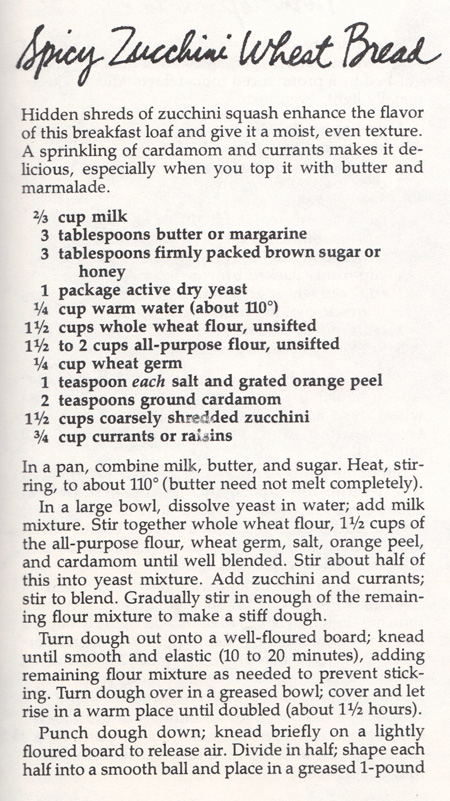
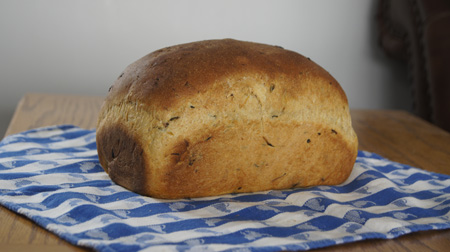
The bread recipe I will bake this week is “Spicy Zucchini Wheat Bread”. It is not one of the recipes I copied all those years ago, but it appeals to me now. I like incorporating vegetables in breads; the zucchini will add fiber and nutrients and keep the loaf moist. I like the inclusion of whole wheat four and wheat germ too. Cardamom is the spice: Wow! Cardamom usually pops up in ethnic cuisines, not American bread cookbooks from the 70s. I’m tempted to substitute with cinnamon, but I’ll stay with the cardamom. Live dangerously.

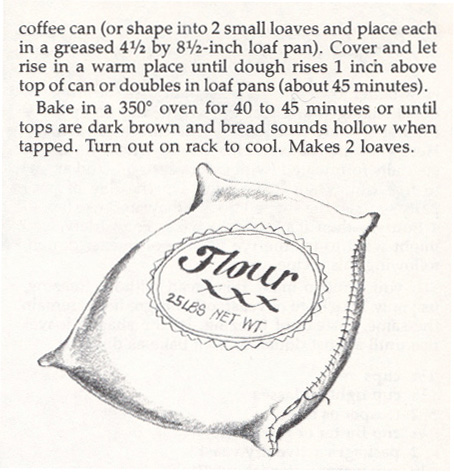
Here is the original recipe:

reciperecipe I will use my bread machine and write my own version of the recipe incorporating my changes. If you don’t have a bread machine, follow the original version for mixing and rising.

Spicy Zucchini BreadSpicy Zucchini Wheat Bread

  • 1 cup milk
  • 3 tablespoons butter
  • 3 tablespoons honey
  • 1 1/2 cup (7.5 ounces) whole wheat flour
  • 2 1/4 cup (10.5 ounces) bread flour (or use all purpose flour mixed with 2 ounces/1/4 cup gluten flour)
  • 1/4 cup wheat germ
  • 1/2 teaspoon salt
  • 1 t grated orange peel
  • 2 teaspoons cardamom
  • 1 1/2 cup grated zucchini
  • 3/4 cup currants or raisins
  • 1 tablespoon yeast

Combine all ingredients in the bread machine and set to the dough cycle. (The dough cycle should mix and rise the dough.) Check the dough during the first few minutes of mixing to make sure that the dough is coming together into ball of dough; add a little more flour or water as necessary.

Take the risen dough out of the bread machine. Form into 2 loaves and place in lightly greased 4 1/2 x 8 1/2-inch loaf pans. Let rise until the dough is 1/2-1 inch above the rims of the pans.

Bake at 375˚ for 30 minutes.

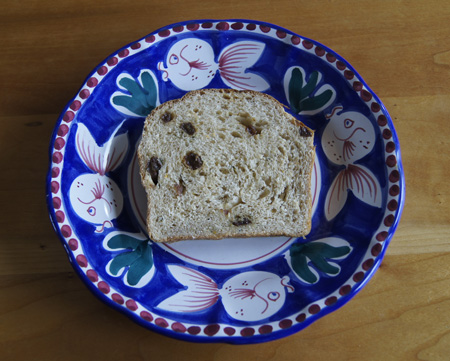
Spicy Zucchini BreadThis bread turned out great, and I will definitely make it again. I like it best toasted with a little light cream cheese or jam or apple butter.

250 Cookbooks: The Art of Salad Making

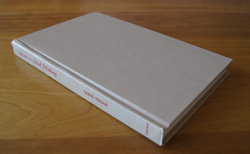
Cookbook #20: The Art of Salad Making. Carol Truax, Doubleday & Company, Garden City, NY, 1968.

The Art of Salad Making

This is a friendly and well-written book. The author does know her salads: dressings, green salads, pasta and potato salads, chicken and meat salads, molded salads, fruit salads, salads from around the world. I think I bought this cookbook so that I would have a good reference for home-made salad dressings. But I’ve had it for over 40 years and I’ve never made any of the recipes. That says something. Looking through this book today, not a single recipe pops out at me. I pretty much know the basic information that Carol Truax presents, and already have my own takes on most types of salads and dressings.

I think a salad cookbook needs to have lots of large and color photos. Green salads can be gorgeous! This book has a few line drawings but no photos. And looking past the printed page, contemporary, upscale restaurants offer fascinating green salads – I learn a lot when we go out to eat. These salads are way more imaginative than the ones this little book offers. It’s too outdated for my tastes, and no longer has much to teach me. I will recycle this book.

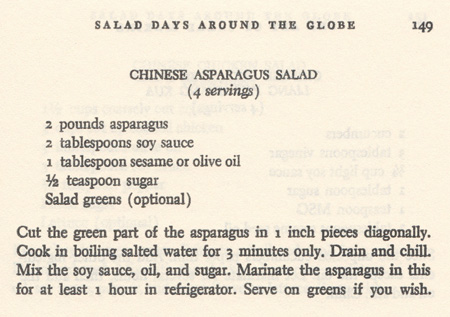
I do need to cook one recipe from The Art of Salad Making before I place it in the recycle pile. I plan to make shui mais and a stir-fry for our Saturday night dinner, so I search the index for an Oriental-style salad. Here’s one: “Chinese Asparagus Salad”. Quick and easy, but a little different from what I usually do. Green asparagus is just what I’m looking for to complete my Oriental meal.

I don’t remember ever having asparagus at a Chinese restaurant. I don’t think of it as “Chinese” vegetable. I was surprised when I looked up “asparagus” on Wikipedia and found that China is the world’s largest producer of asparagus, where it is known as lu sun. I learn something new every day.

Here’s the recipe:

Chinese Asparagus SaladChinese Asparagus Salad


This version serves 2 people.

  • 1 pound asparagus
  • 1 tablespoon soy sauce
  • 1/2 tablespoon olive oil
  • 1/4 teaspoon sugar

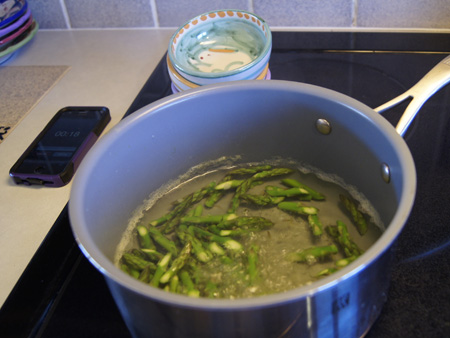
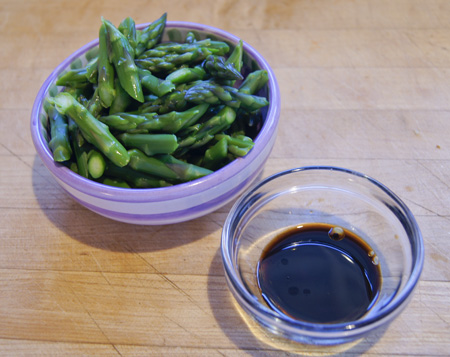
Cut the tips of the asparagus on the diagonal into 1 inch pieces. We don’t like the tough stalks of asparagus, so I only got 2 pieces per asparagus stalk. Bring some salted water to a boil and cook the asparagus 3 minutes.

cooking asparagusDrain the asparagus and rinse with cold water so that it stops cooking. Combine the soy sauce, oil, and sugar.

Chinese Asparagus Salad makingsMarinate the asparagus in the soy sauce mixture for at least an hour. Serve over greens.

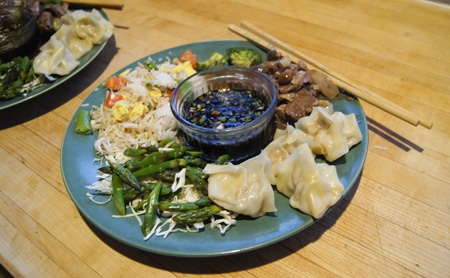
Here is one of our pretty dinner plates:

Chinese mealThe asparagus is plated over shredded cabbage. Then, clockwise from the asparagus: fried rice; stir-fried beef tenderloin with shitakis, broccoli, and onions; shui mais. In the center is the dipping sauce for the shui mais. I should share my recipe for shui mai. Soon!

250 Cookbooks: Menu Melodies

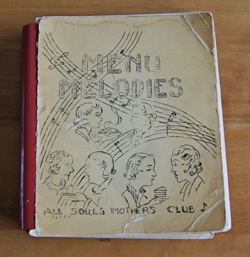
Cookbook #19: Menu Melodies. All Souls Mothers Club, about 1959. Menu Melodies CookbookI decided to try one of the “community” cookbooks in my collection. Often, community groups ask each member to donate a recipe, then they compile them into a book and make copies to sell as a fundraiser. Eight community cookbooks made it into my collection.

Menu Melodies, All Souls Mothers Club fell into my hands. Literally. I reached into the shelf and gingerly put my hand on this old, spiral bound book. The cover is falling off. Maybe this is not the cookbook I want to deal with this week. But then … I carefully gathered it up and sat back on the bed. Where did this cookbook come from? The very first page is “The Kitchen Prayer“. On the inside cover is scrawled a “213” area code phone number and “$11.35” and “Mack”. Ah, this was my mother-in-law’s book. So I tucked a pillow behind my back and settled in to go through the 178 pages. Handwritten pages. Did my mother-in-law contribute a recipe to this cookbook? I turn the pages, one by one.

I’m not sure she would have contributed a recipe. My mother-in-law, who I called by her nickname, Puvy, claimed no passion for cooking. But miraculously, each time we sat down at her table, we enjoyed a wonderful home-cooked meal. Simple and good. I remember her humming as she cooked, pots of chicken and potatoes simmering. She could easily and recipe-less put together a great pie crust, while I still struggle rolling out a dough that will not fall apart.

She did not have a shelf of hundreds of cookbooks. She loved parties and dancing and people and talking – food was a second thought, necessary, but not the focus of a gathering. Puvy did not collect “things” like cookbooks, she gave things away. She was the most generous person I have ever met. If you liked a pan or book of hers, you might just be taking it home that night. That’s probably how I acquired Menu Melodies. She was not into acquiring possessions, she hated to shop, she was not materialistic. A breath of fresh air in this culture. Sigh. I wish I could still learn from her, but sadly, she passed away last July. But, her spirit and her genes live on: I see her good traits in my own daughter.

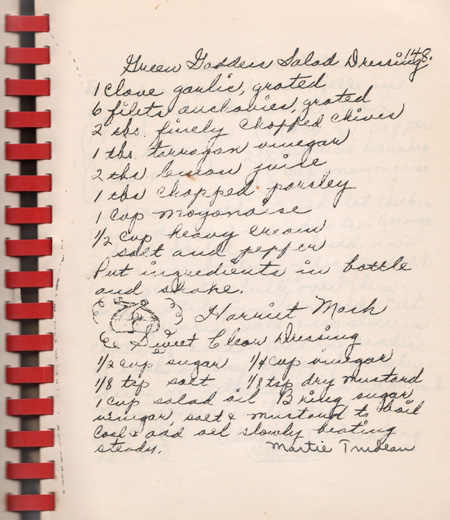
Aha!! Here it is, on page 148: “Green Goddess Salad Dressing” signed “Harriet Mack”. She did contribute a recipe! I recognize her handwriting.

I take the book to my husband: “Do you recognize this?” “What?” “This recipe, look at the name.” “Oh, hmm, yeah, that’s ma’s.” We are both sort of amazed that she contributed a recipe. I ask him about “All Souls”, and he said it was the name of the school that he went to from about 2nd to 5th grade. “You mean, the one near Alhambra, where we did the walk-to-school a couple years ago?” He replied “yes”. “Do you remember your mother ever making Green Goddess Dressing?” “No” he replied.

“All Souls” was (and is) a Catholic school run by St. Therese’s, in Alhambra, California. In 2011 we walked the route that he, guided by his older sisters, took from home to school and back, just to prove the round trip was as long as he has always claimed: at least three miles. He was just a little kid; his sisters a few years older. (Coincidentally, I grew up within 20 miles of Alhambra, in Sun Valley.) So we walked the route, me with my camera and he with his GPS. We arrived at St. Therese’s:

St. Therese's

Church of Saint Therese, Carmelite Fathers

All Souls school

All Souls, Catholic School at St. Therese’s

And how far is St. Therese’s from his home? 1.5 miles, so 3 miles round trip, just as he had always claimed. (And it crossed large and busy streets.) I was impressed: It was a long distance for three young children to walk each day.

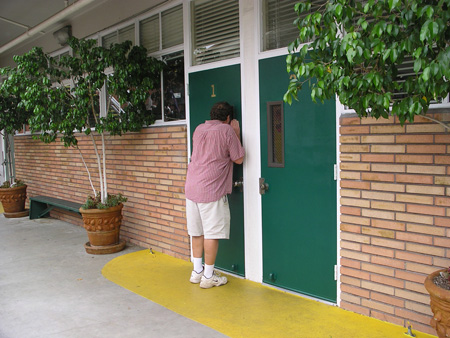
John at All Souls

peeking into the past

Back to the present and Menu Melodies, produced by All Souls Mothers Club. I am not surprised Puvy was a member of this club; she was such a social person. The recipes reflect the era: the 1950s in Southern California. Most dishes are prepared from scratch, no one worries about butter and calories, lots of cookie and cake and pie recipes, molded salads, casseroles (dried-beef, rice and lamb, veal birds, enchiladas, liver a la king, creamed chicken), soups and more. Many of the recipes serve a lot of people, designed either for large families or luncheons and pot lucks.

Here is the recipe my mother-in-law contributed, and that I will make:

Green Goddess Salad DressingNote that there are two recipes on the page. The lower recipe is also in her handwriting, although “Martie Trudeau” signed it. I went back through the book and found several more recipes in Puvy’s handwriting, although each time, someone else signed them. Her distinctive “r” and the small circle she used to dot “i” tell the story. That’s her: she was both a hard worker and willing to help others.

Note the drawing of the turkey leg about mid-page in the above recipe. Throughout this handwritten book are cute little drawings. I scanned in several pages and will put them at the bottom of this blog post. Take some time to peruse them and marvel at the fun and community and work that went into this cookbook.

Green Goddess Salad Dressing

  • 1 clove garlic, finely chopped
  • 6 fillets anchovies, finely chopped
  • 2 tablespoons finely chopped chives (or use the tops of green onions)
  • 1 tablespoon tarragon vinegar (or use white wine vinegar and 1/4 teaspoon dried tarragon)
  • 2 tablespoons lemon juice
  • 1 tablespoon chopped fresh parsley
  • 1 cup mayonnaise
  • 1/2 cup heavy cream
  • salt and pepper

Put ingredients in bottle and shake.

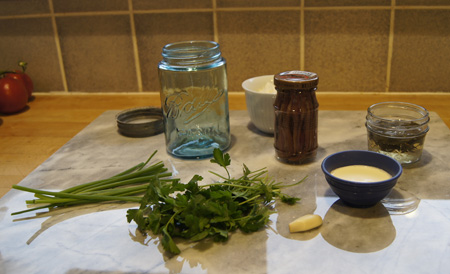
The dressing is delicious! My photos are below. First, the ingredients:

ingredients for the dressing

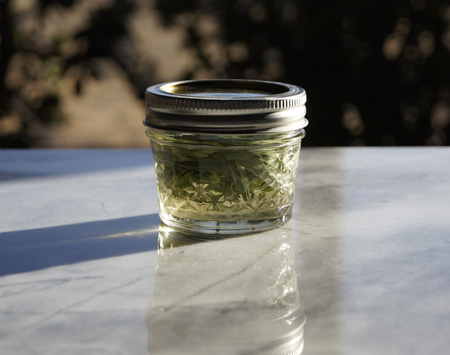
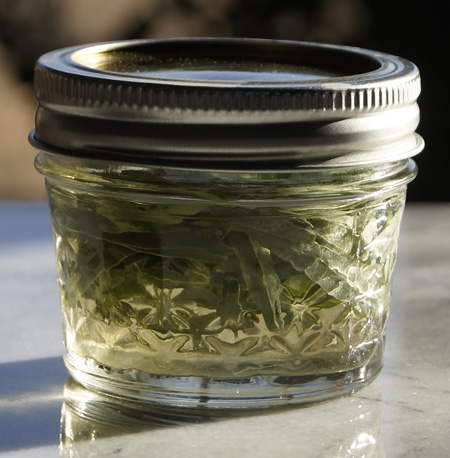
I didn’t have any tarragon vinegar. So, I got some fresh tarragon and put it in a jar and covered it with white wine vinegar and let it sit for a day. Then I couldn’t decide which photo perspective I liked better.

tarragon vinegartarragon vinegarHere is the finished dressing.

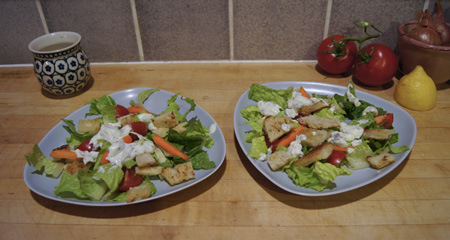
Green Goddess DressingGreen Goddess SaladsThis dressing was particularly good on a romaine-based salad with fresh croutons. I made the croutons by browning sourdough bread cubes in extra virgin olive oil infused with garlic.

Below are several more pages from Menu Melodies.

MenuMel48

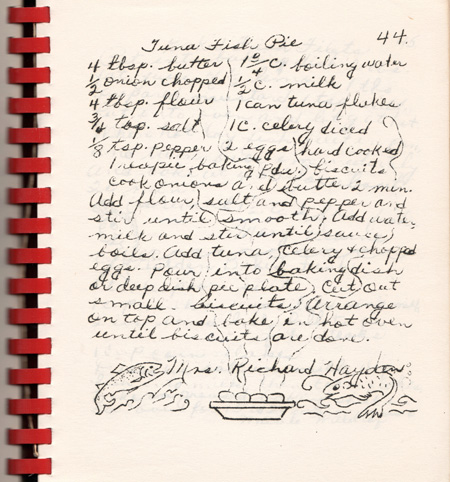
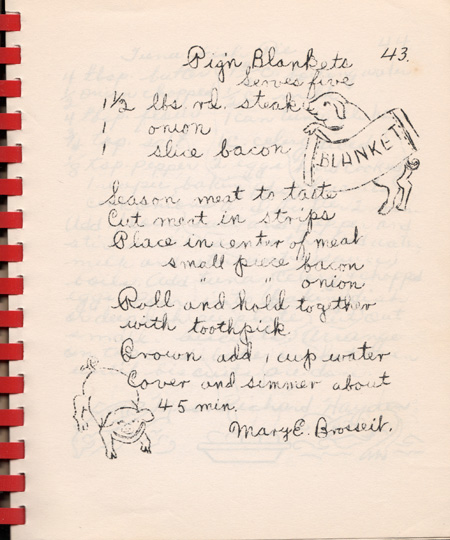
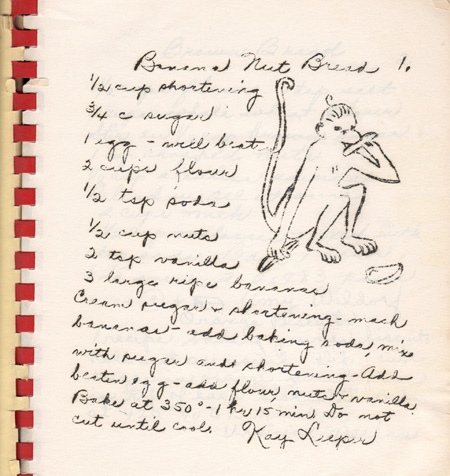
Tuna Pie! That certainly is a classic 50s casserole.MenuMel44 MenuMel43 MenuMel1 MenuMel90 MenuMel59

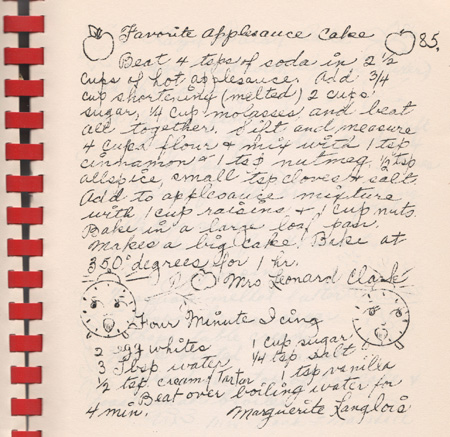
This one makes “a big cake”:

Menu Melodies

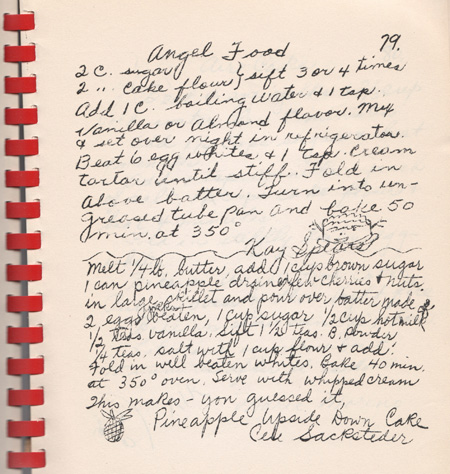
The lower recipe on the page just below has no title. Then at the end, the author writes: “This makes – you guessed it, Pineapple Upside Down Cake.”

Menu MelodiesJust as a postscript: I can’t find many spelling errors in this cookbook!

250 Cookbooks: The Electric Slow Cooker Cookbook

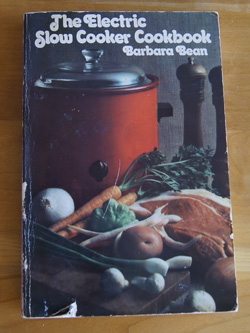
Cookbook #18: The Electric Slow Cooker Cookbook. Barbara Bean, Henry Regnery Company, Chicago, Illinois, 1975.

The Electric Slow Cooker CookbookI have eleven crock pot/slow cooker cookbooks – guess that says something! Three are copyright 1975. Let’s see, where were we then. We moved to Colorado in 1973, so we were living in Boulder. I was in my first years as a working young woman, and interested in the current healthy-style trends. I used the crock pot to cook beans or inexpensive cuts of meat while I was at work (or at play, thinking back …).

Crock pots (as we know them) had not yet been invented when I grew up. Out of curiosity, I google-searched news articles employing date limits and found the first mention of “crock pot” in 1973. A “crock pot” was demonstrated at a church gathering by a “Mrs. Fred Jones”, and a bride-elect was presented with “an electric crock pot and a lily corsage accented with red roses”. A more traditional search of the web pulled up a Wikipedia entry and another interesting website that discuss the history of the electric crock pot. Its predecessor was the “Naxon Beanery All-Purpose Cooker” developed by the Naxon Utilities Corporation of Chicago. In 1970, Rival bought Naxon and the rights to the Beanery, upgraded the appliance, and called it the Crock-Pot®. The PetitChef website has a graphic of crock pots from different eras. My first one looked just like the “1971” version.

My use of a crock pot has ebbed and flowed over the years. I tried a lot of recipes; some failed, some worked. I used to use the crock pot a lot for my own version of refried beans. I would buy dry pinto beans, soak them, then cook them in the crock pot with a bunch of seasonings. When done, I would mash them with an electric hand mixer while still in the pot. This way, I would have “refried” beans without any fat. In the early 70s, I also cooked soy beans for a soy bean chile.

I consider a slow cooker an essential tool for my kitchen, even if it sometimes sits for months without use. I’m now on my third slow cooker. My first one was a Rival CrockPot® (it got a crack in it), my second one was a “Crock Watcher” by Hamilton Beach (it has a removable crock; the switch wore out). My newest has a timer and a removable cooking crock. Recently, I had a lot of fun using it to make Apple Butter.

The best thing about a crock pot meal? Walking into the kitchen after a long day day at work or play, and finding the house suffused with the aroma of something delicious simmering and ready to be dished up.

What I don’t like about the crock pot is that with the wrong recipe, it can turn a mixture of meat, vegetables, and liquid into an amorphous mass. I’ve learned to choose my recipes carefully. It’s good for breaking down tough, inexpensive cuts of meat, like round steak or chuck roast, turning them into tender and tasty stews and stroganoffs (try it for my Lamb Stew with Cinnamon). I have a good recipe for game hens in a slow-cooker and a great cassoulet  recipe. I’m sure I’ll come across other crock pot favorites when I go through the rest of my cookbooks, and I’ll share those that have become favorites. And, I’ll try to branch out as I go through these eleven crock pot cookbooks.

And I am branching out with my recipe choice from this cookbook: Duck!

Yes, duck. That other poultry. We’ve had it at restaurants a few times but I’ve only cooked it once or twice. So trying this recipe is a bit of a stretch for me. Good exercise!

The duck recipe is not the only recipe that I might eventually try out of this cookbook. I noted about six that look interesting. Years ago, I tried the recipe for Teriyaki Chicken and wrote notes on it. The recipes in this 1975 cookbook are a bit dated, perhaps, but I think they stand the test of time as “comfort foods”. One would not see their simple titles on a recipe in a fancy restaurant, but in my kitchen, after a cold winter day spent outdoors in the Colorado high country? Yes, they have their place. I am going to keep this cookbook. You can see from the photo (at the top of this entry) that it is well-worn.

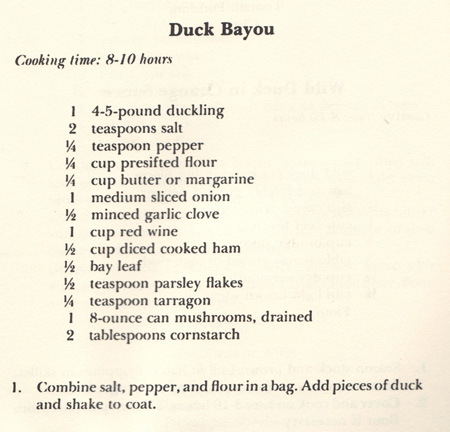
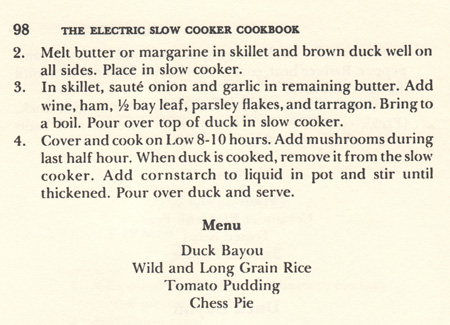
The recipe I will try is “Duck Bayou”. I think that duck will hold up well in the slow cooker; it probably will retain some texture after a long cook. And it has a distinct flavor to bring to the dish.

Duck BayouDuck BayouRecipe Comments

The dish turned out to be a success. I probably will cook it again, and I think it’s interesting enough to share. I did run into some issues, though, both at the store and in the cooking.

First, duck can be hard to find. I was lucky to find three leg-thigh pieces at the counter at our local groovy store. They had frozen whole (and expensive) ducks in the freezer display, but I’m cooking for two, and that was too much; I didn’t want to cook an entire duck for two people. I wrote the following recipe for two people, and if you have more to serve, buy a whole duck and cut it into pieces yourself.

Second, the recipe said to cook for 8-10 hours on low. I checked my duck at 6 hours, and found that the liquid was almost evaporated and the duck was starting to char. I immediately removed the food from the cooker.

The problem with the cooking time might be that the original recipe was written for a tall, round slow cooker. Mine is large and oval-shaped. Also, I downsized the recipe but still used a large slow cooker. Two approaches fix the problem: less cooking time and more liquid.

I made a few other changes as I cooked this recipe: more herbs, chicken stock, extra wine added at last step, fresh mushrooms. My modifications are incorporated in the version below.

Duck Bayou

This recipe is written for 2-3 people, depending on appetites. Double the recipe (using a whole duck) and it will serve 4-6 people.

  • 3 pieces of duck (breasts or leg-thighs)
  • 1 teaspoon salt
  • 1/4 teaspoon pepper
  • 1/2 cup flour
  • oil or butter for frying the duck
  • 3/4 of a medium onion, chopped
  • 1 clove garlic, chopped fine
  • 1 cup red wine, divided
  • 1/2 – 1 cup chicken stock or water
  • 1/2 cup diced ham
  • 1 bay leaf
  • 1 tablespoon chopped fresh parsley, or 1 teaspoon dried parsley
  • 1/2 teaspoon tarragon (dried, more if you have fresh tarragon)
  • 1 cup sliced or chopped fresh mushrooms
  • 1 tablespoon cornstarch

Carefully trim the fat and any excess skin from the duck pieces. Duck skin tends to pack a lot of fat.

Combine the flour, salt, and pepper in a paper bag. Add pieces of duck and shake to coat.

Put a small amount of oil (I used olive oil) or butter in a frying pan. Add the duck pieces and brown well on all sides. Place in slow cooker.

In the same pan, saute the onion until it wilts, then add the garlic and saute 30 seconds. Add 3/4 cup wine, 1/2 cup stock (or water), ham, bay leaf, parsley, and tarragon. Bring to a boil. Pour over top of duck in slow cooker.

Cover and cook on the low setting for 6 hours. (If you double the recipe and have a tall, round slow-cooker, it can probably cook for 8 hours, but check it at 6 hours and add more stock if necessary.)

Remove the duck from the slow cooker. Add 1/4 cup red wine to the cooker. If there is only a small amount of sauce in the cooker, add some chicken stock until you have at least a cup of sauce. Add the mushrooms to the slow cooker and turn the heat to high. Cook about 10 minutes, until the mushrooms are done. Taste the sauce and add a bit more salt, pepper, tarragon, and/or parsley to taste.

Dissolve the cornstarch in a small amount of water, then add to the sauce. Cook on high until the sauce thickens.

(If you prefer, you can pour the sauce into a pan and cook the mushrooms and thicken the sauce on the stove top.)

Serve the duck with the sauce; rice is a good accompaniment. I served it over a white-brown-wild rice medley.

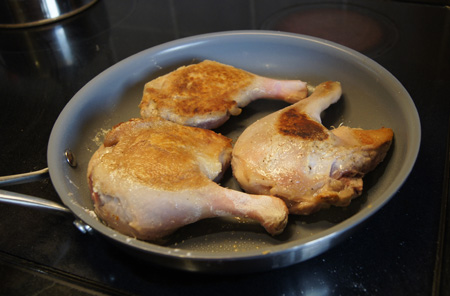
Here are the duck pieces browning. Actually, the main purpose of this photo is to show off my new, “green” non-stick pan:

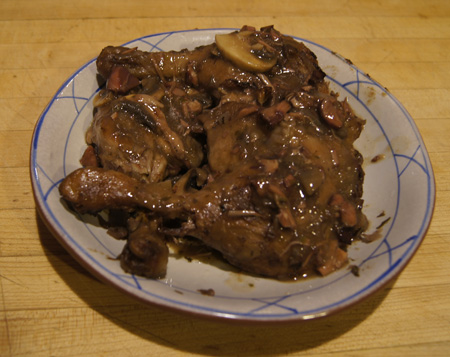
browning the duck piecesHere is the cooked dish. The photo is here for proof that I actually cooked the recipe; it isn’t really very pretty. But it tasted good!

Duck Bayou (cooked)


250 Cookbooks: Whirlpool Micro Menus Cookbook

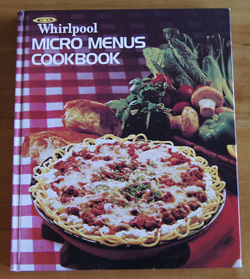
Cookbook #17: Whirlpool Micro Menus Cookbook. Better Homes and Gardens, Meredith Corporation, 1979. (Whirlpool trademarks property of Whirlpool Corporation, Benton Harbor, Michigan.)

Whirlpool Micro Menus CB

This one’s easy! I’m not going to keep this cookbook. But it did bring back some memories.

My mother’s brother – my Uncle Lee – got one of the very first microwave ovens. I remember that it was expensive. It must have been in the 1960s, since I was still living at home. We shook our heads at my uncle’s foolishness for wasting his money on such an unproven product. My family all thought my uncle was looney anyway; this was just another in a litany of “bad decisions” he had made.

Researching the web today, I find that the first microwave ovens produced for home counter top use were the Amana “Radaranges” (and this link), in 1967. During the 1970s, microwave ovens steadily declined in cost and many American families decided to buy one. Most people raved about how convenient they were. Not everyone was convinced, though. For instance, me. At the time I was heavily into “natural” cooking, and I just didn’t trust them. In 1975, articles like this one reported that the FDA recalled thousands of microwave ovens due to radiation leakage. Health food nuts claimed they caused cancer and blindness and who knows what else.

My sister, a few years older than me and a working mom at the time, got a microwave oven. Hmm, she and her kids seemed okay. Safety regulations were put in place, and finally even I was convinced of the ovens’ safety. Perhaps partly because I was working in a lab where we used one to melt agar for bacterial plates (and heat up our lunches, right on the lab bench). I think we had the university periodically test the lab’s microwave oven for leakage, although my memory is a bit sketchy. I do remember that our lab helper put an unpeeled hard boiled egg in the microwave and it exploded and made a horrible and stinky mess.

In 1981 we built our own home. To help finance this endeavor, I went back to work full time, even though my firstborn was only six months old. The one thing I demanded was “a microwave oven to save time in cooking”. And so we bought a Whirlpool microwave oven. It had manual controls, nothing digital, and it lasted over 23 years, until I replaced it (even though it sort of worked) with a microwave-convection oven in 2004.

I bought the Whirlpool Micro Menus Cookbook just after I got that first microwave oven. Today I have three such books, and I’ll keep the one that has the best guides for microwaving different types of foods. This book is not the one I will keep – I peeked at my other microwave books and I like their guidelines better.

The book goes a little overboard in the use of the microwave in cooking meals. It begins with cooking a meal of meat loaf, twice baked potatoes, broccoli with cheese sauce, and a pudding, all in the microwave. The microwave is used for every step, even cooking the onions for the meat loaf. That’s a ton of microwaving steps. These days most of us use the microwave only for thawing foods, heating leftovers and burritos, melting cheese, boiling water and the like – not for entire meals.

I searched the book for a recipe to try. Most recipes are the conversion of current (1970s) American standbys to microwave cooking. While searching, I found a post-it and an index card tucked next to the cookbook’s recipe for cinnamon rolls (the microwave can be used in the rising step of yeast breads). The index card is handwritten in my own writing, and I recognize the recipe as my mother’s one for cinnamon rolls. I had been looking for that recipe just last December! I am so happy to have found this recipe!

My blogging is successful. I don’t really expect more than a handful of people to ever read this, but on a personal level, I have accomplished something. I have found a lost and treasured recipe. And, I am getting rid of cookbooks! Just yesterday I pushed in the bookend to close the gaps on the bookshelf.

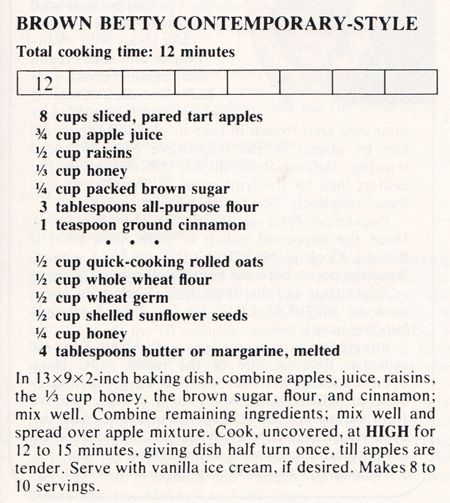
Okay. So the recipe I tried is “Brown Betty Contemporary-Style”. This recipe seems a little out of place in this cookbook, since it includes honey, oatmeal, whole wheat flour, wheat germ, and sunflower seeds; most of the recipes do not include seeds and whole grains. This dessert takes less than 15 minutes to cook. One of my most common Saturday night two-person desserts is some sort of fruit crisp, cobbler, betty, crumble, or buckle. Briefly, these are baked fruit desserts, topped with a mixture of flour, spices, and a little butter or other fat.

The recipe is below. I am not going to include it in my recipe index because I would not make it again as it is written.

Brown Betty I did like the flavor and texture of this dessert. The honey and sunflower seeds made it taste like a healthy cookie or energy bar. But the top of the “betty” was pale and unappetizing. (I served it with frozen vanilla yogurt to cover it up.) Next time, I would bake this in a conventional oven for at least 30 minutes. That way, it should look better, have more crunchiness, and fill the kitchen with the aroma of cinnamon and apples as it bakes. I am adding it as a “work in progress” to my personal recipe file.
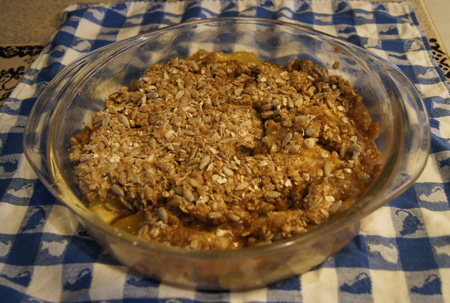
Apple Brown Betty

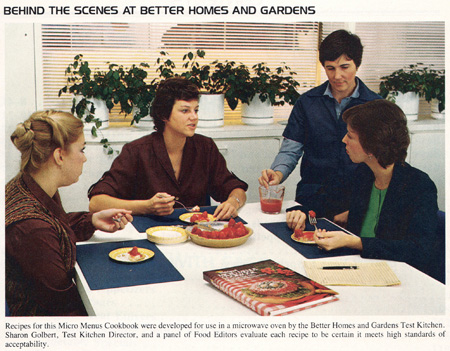
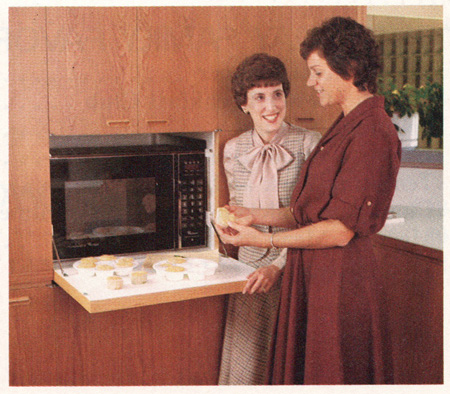
Here are some nostalgic photos from this book. I love looking at how the women dressed in past decades. This book went to press in the late 1970s – note the dresses and hairdos. (Wasn’t me! I was in blue jeans and favorite T-shirts and my hair was long and uncoiffed.) Compare and contrast these photos with those in the 1964 Bake-Off Recipes cookbook.

Whirlpool Micro MenusWhirlpool Micro Menus

250 Cookbooks: Eating Light

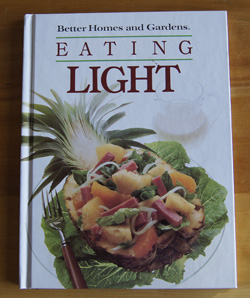
Cookbook #16: Eating Light. Better Homes and Gardens, Meredith Corporation, Des Moines, Iowa, 1985.

Eating Light

This is another low-calorie cookbook that I picked up in the 1980s. I remember that I frequently bought the “women’s magazines” like Better Homes and Gardens during that time, so it doesn’t surprise me that I purchased a book with the same name.

This cookbook is similar to the magazine: glossy, and produced by a company rather than an individual. The recipes have long names and pretty pictures, but not many tempt me to try them. Years ago, I probably picked up some ideas on low-calorie cooking from this book, but today, I find it “old hat”. Not very interesting. Also, they put the nutrition information in the appendix, rather than with each recipe, which I find inconvenient.

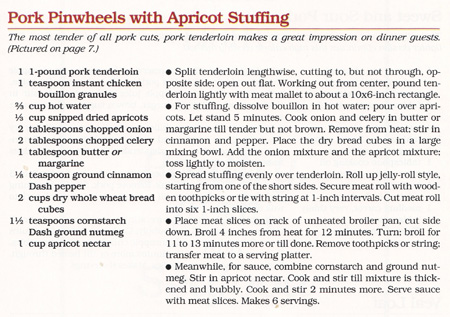
I decided to try “Pork Pinwheels with Apricot Stuffing”. I like pork tenderloin, and I like apricots. It’s a new idea (to me) to use dried apricots in a stuffing for pork. And I think the pinwheels might look pretty, and hopefully I’ll be able to add another pork tenderloin recipe to my repertoire.

There is only one other recipe in this book that looks interesting, so I’ll copy that recipe and give this cookbook away.

Pork PinwheelsComments

These turned out pretty good, at least when I made some changes. I’ll type in the recipe below. But first I’ll rant, with a what’s wrong with this recipe discussion.

This recipe makes “6 servings”. Those are dang small servings. Each person would only get about 2 1/2 ounces of pork. Generally a serving of pork is 4 ounces. For the two of us, I weigh out 9-10 ounces of pork for a meal. (The nutrition information on the package of pork tenderloin that I bought states that 4 ounces has 130 calories and 23 grams of protein!)

The nutrition information (at the back of the book) states “191 calories” per serving. Using the information on the packaging of the ingredients, I come up with more like 160 calories per 1/6 of the recipe. And note that I don’t use too many significant figures: it’s silly to say “191 calories” when there so many variables when one actually prepares the recipe. Bread, for instance, has a quite variable calorie content. (I used My Daily Bread so I know exactly how many calories it has.)

The recipe slips in unnecessary calories by employing both butter and apricot nectar. Butter has 100 calories per tablespoon (Nutrient Facts) and can be eliminated by using a non-stick pan (and a tiny amount of olive oil) to wilt the onion and celery. Surprisingly, a can of apricot nectar has 200 calories. And it contains “high fructose corn syrup, apricot juice concentrate, apple juice concentrate”. If/when I make this again, I’ll try to find a better juice choice at Whole Foods.

The recipe calls for “1 pound” of pork tenderloin. Ground meat might be sold in exact 1 pound packages, but the same is not true for pork tenderloin. The one I used weighed 14 3/4 ounces. I went ahead and used it (even though I aim at 9-10 ounces) because to roll up the meat, a certain mass is required. I had leftovers, but the dogs didn’t mind. Be aware, though, that this recipe does not scale down well to only two people.

Broiling is called for in this recipe. But, it does not state whether to set the broiler to high or low. I tried 5 inches from the broiler and the low setting; the pinwheels were burning within 2 minutes. Luckily I checked! I don’t know what kind of broiler they used but mine simply did not work. I changed my oven to “bake”, as reflected in my typed recipe below. I don’t think that using a broiler rack is necessary. The book states that broiling with a rack is a great method because it allows the fat to drip off; my opinion is that pork tenderloin has very little fat in it to drip off. I’d skip it next time.

All that said, the meal was a success. The pinwheels were pretty and the cinnamon was a nice addition. If you want to try these, use my recipe below.

Pork Pinwheels with Apricot Stuffing


With one pound of pork tenderloin, this would serve about 3 people. Adjust the amounts of all ingredients according to the number of people you are feeding and the weight of the purchased pork tenderloin.

  • 1 pound pork tenderloin
  • 2/3 cup chicken broth
  • 1/3 cup finely chopped dried apricots
  • 2 tablespoons chopped onion
  • 2 tablespoons chopped celery
  • 1/8 teaspoon cinnamon
  • salt and pepper to taste
  • 2 cups dry whole wheat bread cubes (about 1/4-inch cubes)
  • 1 1/2 teaspoons cornstarch
  • dash nutmeg
  • 1 cup apricot nectar (try to find one that does not have high fructose corn syrup; perhaps you can find fresh apricot juice)

Heat the broth to almost boiling. Pour it over the apricots and let stand for at least 5 minutes while you prepare the vegetables.

Cook the onion and celery in a tiny amount of olive oil in a non-stick pan until the onion wilts; salt to taste and to sweat the onion. Add the cinnamon and pepper, then add this and the apricot mixture to the bread cubes.

Split the tenderloin lengthwise, cutting to, but not through, the opposite side. Open it out and pound it lightly with a meat mallet until it is about 10 inches by 6 inches. Spread the stuffing evenly over the tenderloin. Roll up jelly-roll style, starting from one of the short (6-inch) sides.

Secure the meat roll with toothpicks or tie with string at 1-inch intervals. Then, cut the meat roll into six 1-inch slices.

Carefully place the meat slices in a lightly greased or Pam-sprayed baking pan. [“Cut side down”? For four of the slices, both sides are cut. Another recipe-rant.]

Baking: I suggest a quick broil on low for a minute or two to brown the tops of the pinwheels. Then, bake these at 400˚ for about 20 minutes. Check with an instant-read thermometer; about 150˚ internal temperature is good. I served these with sides of double-stuffed potatoes and vegetables.

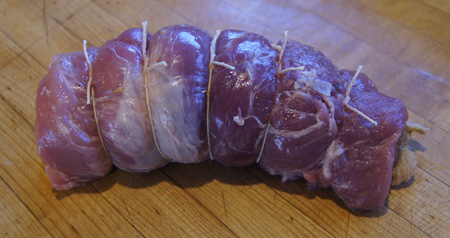
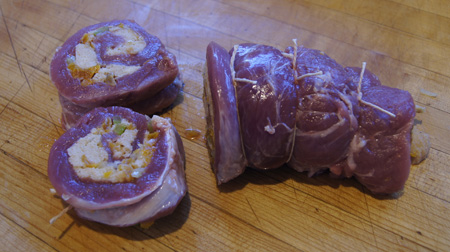
Below is a photo of the pork roll. It’s so bulbous! Toothpicks might work better, since the string kind of squished it and left a mark on the pinwheels after they were cooked.

pork roll before cuttingHere it is after I cut two pinwheels. I only cut five in all because I started with a little less than a pound of tenderloin.
cut pinwheelsThe pinwheels, cooked and plated:

cooked pinwheels

Pretty good!

250 Cookbooks: Baking Without Fat

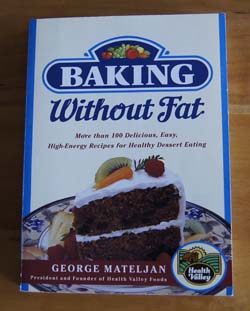
Cookbook #15: Baking Without Fat. George Mateljan, Health Valley Foods, Inc., Villard, NY, 1996. Baking Without Fat

I like cakes and muffins and quick breads. In order to fit these treats into a healthy eating plan, I always keep my eye out for recipes that are low calorie or low fat, and that add nutritional punch. Hence I picked up Baking Without Fat in the late 1990s. I think I found it on a cold and hungry January day, near the check-out counter at McGuckins in Boulder. (I am always watching calories in January!)

The author of this book is George Mateljan, founder of Health Valley Foods. A Google search reveals that he sold that company and now runs a not-for-profit called The George Mateljan Foundation for the World’s Healthiest Foods. He is the author of a book titled “The World’s Healthiest Foods” (2006).

I admit, I don’t remember cooking any recipe from Baking Without Fat. The recipes call for ingredients I do not keep on hand – for instance, frozen concentrated apple juice, and baby food jars of carrots, sweet potatoes, or prunes. Reading the recipes now, I know I am going to have to go to the store to make any of the recipes in the book.

I take some time to read the introductory chapters. Matelian explains some of the functions of fat in baking. Fat adds a creamy texture and pleasing mouth feel, acts as a carrier for flavor, and can alter the way the flavor is perceived. Fat makes baked goods moist and tender. To make baked goods taste good without fat, the author and others at Health Valley Foods spent “hundreds of hours” in the kitchen to develop a “whole new method” of baking. Here is the basic plan:

  • use nonfat dairy products instead of full-fat ones
  • substitute pureed fruit for fat
  • use egg whites instead of whole eggs
  • highlight natural flavors to make up for the lack of fat

Well, it’s worth a try. I’m a bit hesitant because I’ve clipped and tried a few recipes employing these same strategies over the years, and usually have not been happy with the results. I do like my my Irresistable Low-Fat Brownies but those use non-fat sweetened condensed milk – not pureed fruit – to provide a good mouth feel. Pureed fruit would be a healthier choice because it will add nutritional punch.

The baby food purees called for in the recipes do not appeal to me. I was pleasantly surprised to find that Mateljan gives instructions for making your own purees from apples, apricots, carrots, prunes, pumpkins, and sweet potatoes. This will add more cooking time, but I’m retired! Instead of sugar, the recipes are sweetened with fruit juice concentrates, honey, maple syrup, and molasses. Whole grain flours are advised. Cheesecakes and frostings employ non-fat yogurt and/or yogurt cheese. Fruit crisps are topped with non-fat granola. This all sounds great to my healthy-food conscience, but do these recipes have a chance of tasting good?

For this blog, I chose the recipe “Coco Garden Cake”, which includes chocolate, carrots, zucchini, applesauce, honey, and spices. Mateljan states that pan size is important for good baking results, so I go ahead and make a full recipe for the just two of us. I might have to waste some, but heck, this is like a chemistry experiment! So I gathered the many, many ingredients for this recipe (including a huge jug of honey) and went for it.

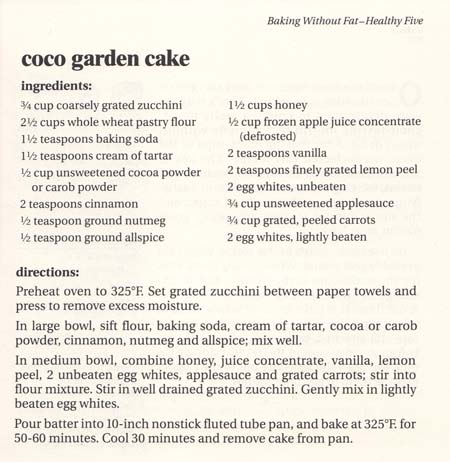
Coco Garden Cake Recipe

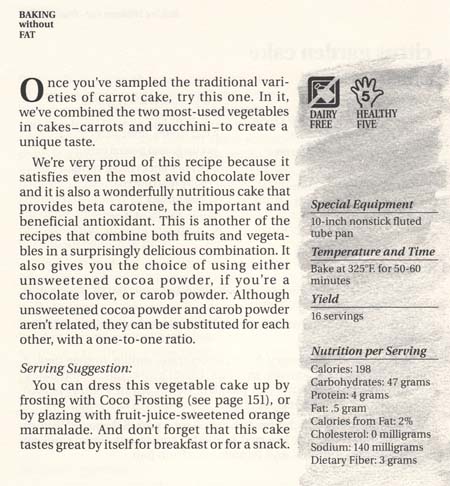
CocoGardCakeRec2 Note the two book excerpts (above). For each recipe in this book, the recipe is on the right page, and a discussion of the recipe, including nutritive information, is on the left. This makes the book feel friendly and personal, like the author really cares that each recipe is well-received.
Coco Garden Cake

  •  3/4 cup coarsely grated zucchini
  • 2 1/2 cups whole wheat pastry flour
  • 1 1/2 teaspoons baking soda
  • 1 1/2 teaspoons cream of tartar
  • 1/2 cup unsweetened cocoa powder
  • 2 teaspoons cinnamon
  • 1/2 teaspoon nutmeg
  • 1/2 teaspoon allspice
  • 1 1/2 cups honey
  • 1/2 cup frozen apple juice concentrate (defrosted)
  • 2 teaspoons vanilla
  • 2 teaspoons finely grated lemon peel (the rind from one lemon)
  • 2 egg whites, unbeaten
  • 3/4 cup unsweetened applesauce
  • 3/4 cup grated, peeled carrots
  • 2 egg whites, beaten to soft peaks

Preheat the oven to 325˚. Set the grated zucchini between paper towels and press to remove excess moisture.

Stir together the flour, baking soda, cream of tartar, cocoa powder, cinnamon, nutmeg, and allspice.

In another bowl, combine the honey, juice concentrate, vanilla, lemon peel, 2 unbeaten egg whites, applesauce, and grated carrots. Stir this mixture to combine (I used the hand mixer to beat the other 2 egg whites, then used the same beaters to combine the honey mixture). Combine the honey mixture with the flour mixture and the drained zucchini and the beaten egg whites. Gently but thoroughly fold the mixtures together; be careful not to over mix.

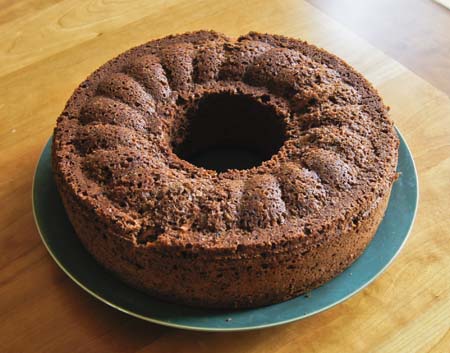
Pour batter into a 10-inch nonstick fluted tube pan and bake at 325˚ for 55-60 minutes. Cool at least 30 minutes before removing from the pan.

Cocoa Garden Cake

Comments

The above photo is not too impressive; I had a little trouble with the cake sticking to my non-stick pan. Honestly, when I took my first bite of this cake, served as our dessert after a Saturday night dinner, I thought it was a failure. Neither of us commented on it at the time, either favorably or non-favorably. But the next day, I took a little bite mid-day and then had to have another bite. The texture is moist and tender, it’s sweet but not too sweet, and the flavors of chocolate and spices are wonderful. When dessert time rolled around again, my dining partner opted for the cake instead of a low-fat yogurt ice cream cone. I did too. Hmm, this cake is really good! I think it’s better the second day.

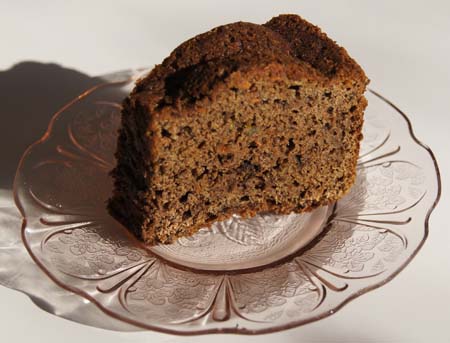
And even better the third day, when I decided to take more photos, to show the good texture of the cake. The slice below is 1/16 of the cake, so about 200 calories; it’s a nice hefty chunk of cake for that many calories. (I should have this for breakfast!) I kept grabbing cake crumbs as I was trying to make the “perfect” slice for my photo. That’s when I decided to enter this recipe officially in this blog. It is good! And I’ll try more recipes from this book in the future.

Slice of Cocoa Garden Cake