250 Cookbooks: Simply from Scratch Recipes

Cookbook #146: Simply from Scratch Recipes, Pillsbury Kitchens, The Pillsbury Company, USA, 1977.

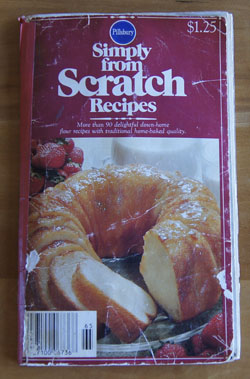
Simply From Scratch cookbook

I have two copies of this cookbook listed in my 250 cookbooks database, so in my obsessive-compulsive manner I have to cover it twice! Bear with me, it’s worth covering twice. It has great recipes!

The first copy I covered was the one I gave to my mother, and this one in my hands now is my own copy. I used it so much that I had to tape the cover back together. The pages fall out as I turn them.

Every recipe I’ve tried from this cookbook has turned out. It’s my go-to book for potato chive rolls and one-rise monkey bread.

But the recipe I love and have used the most is the one for “Blueberry Muffins”. I must have made them a zillion times over the last 40 years! They have the perfect combination of blueberries and oats and orange juice and are simple to make.

In fact, I am going to make them this week for this blog. (I have to redeem myself to my husband after my “sawdust” malt syrup bran muffins, although I loved them.)

Blueberry Muffins

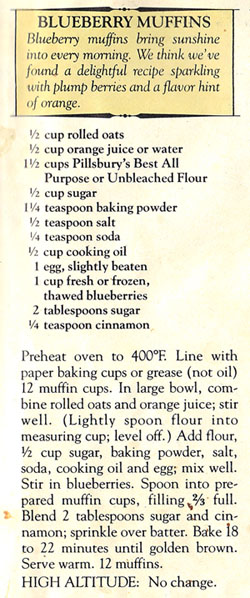
I made these exactly like the recipe this week. Sometimes I mix the dry ingredients together and the wet ingredients together, then combine the two mixtures just before putting them in the oven. (That’s the method recommended by most chefs.) In Simply from Scratch Recipes, the muffin ingredients are just mixed in a big bowl, without regard to wet and dry ingredients.

Blueberry Muffins
makes 12 smallish muffins

  • 1/2 cup oatmeal (I used quick oatmeal)
  • 1/2 cup orange juice or water (I used fresh orange juice)
  • 1 1/2 cups flour
  • 1/2 cup sugar
  • 1 1/4 teaspoons baking powder
  • 1/2 teaspoon salt
  • 1/4 teaspoon baking soda
  • 1/2 cup vegetable oil
  • 1 egg, lightly beaten
  • 1 cup blueberries, either fresh or thawed frozen berries
  • 2 tablespoons sugar plus 1/4 teaspoon cinnamon (topping, optional)

In a large bowl, combine the oatmeal and orange juice and stir. Add the flour, sugar, baking powder, salt, baking soda, oil, and egg and mix well. Stir in the blueberries.

Prepare a 12-muffin standard size tin by lightly greasing, spraying with non-stick spray, or lining with paper baking cups. Fill them 2/3 full. If desired, sprinkle the cinnamon-sugar mixture on top.

Bake 15-22 minutes at 400˚ until golden brown.

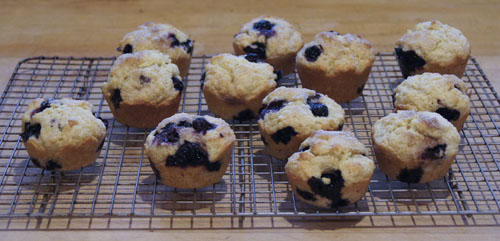
Blueberry MuffinsGreat again! The simple mixing method worked fine. I liked the cinnamon-sugar on top: sometimes I skip that step. Sometimes too I try to cut calories by decreasing the sugar and oil. But this time, I made them as they were meant to be. And they were delicious.

Ingredients: Malt syrup and powders

Malt is the flavor in delights like Whoppers and Ovaltine and malted milk shakes. This flavoring is derived from malted, or sprouted, grains. Malted grains have been used since ancient times in beer brewering, whiskey, and cooking.

I recently re-discovered barley malt extract as an ingredient in breadmaking. I had to learn about the different ways I can currently get malt flavor and benefits into my cooking and I am sharing what I learned!

Malt syrup (or “extract”, made from barley)

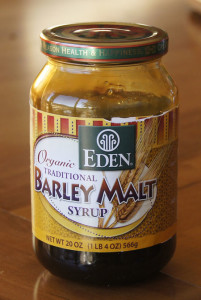
Barley Malt Syrup

Common malt syrup is made from sprouted barley. (Other grains can also be malted.) Malt syrup adds color and flavor and shelf life when used in baked goods, especially yeast breads. You might find it in a local supermarket or homebrew supply, or you can purchase it online from King Arthur Flour. Malt syrup is very sticky and thick. I find it a lot easier to weigh out an amount of malt syrup than to use a measuring spoon: 1 tablespoon = 21 grams.

You can read more about malt syrup in my post, Blue Ribbon Malt Extract cookbook.

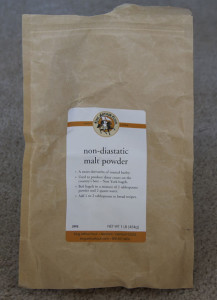
Malt powder

Malt powder is a dried version of malt syrup. It is definitely an easier product to use than malt syrup! I don’t think it adds the same color to a recipe as the syrup, nor does it give an extra moistness to a loaf of bread. I use it in bagel boiling liquid and sometimes in the bagels themselves.

Diastatic vs non-diastatic

King Arthur Flour sells both diastatic and non-diastatic malt powder. What’s the difference?

“Diastatic” means that the product contains active enzymes. The malting/sprouting process of barley develops several different enzymes that break starches into simple, fermentable sugars. The malting process can be halted at different times, leading to different ratios of enzyme to sugars in the resultant malts. The activity of these enzymes can be measured and is called the diastatic power.

Brewers usually want a diastatic malt and the higher the diastatic power the better (usually).

Diastatic malt powder is good for bread making. It helps the bread rise because it adds active enzymes (trust me! I’ve tried it!), improves the texture, lends a subtle rich flavor, and gives loaves a browner crust. It’s available as diastatic malt powder from King Arthur Flour. The company does not specify the diastatic power of their preparations.

The malt syrup on the King Arthur site is touted for improved bread flavor and shelf life. They do not specify if the syrup is diastatic or non-diastatic.

Non-diastic malt powder is also available from King Arthur Flour. This is a malt without active enzymes. They suggest to use it in bagels, both in the dough and in the boiling water.

malt powder

Malted milk powder

Years ago malted milk powder was popular and readily available. You could make your own milk shakes! Malted milk powder contains malt powder AND milk powder.

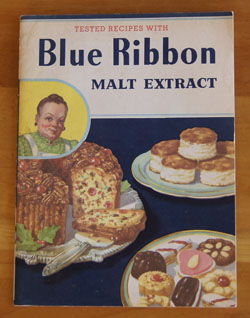
250 Cookbooks: Blue Ribbon Malt Extract

Cookbook #145: Blue Ribbon Malt Extract, Premier Malt Products, Inc., Peoria Heights, Illinois, 1951.

Blue Ribbon Malt Extract cookbook

How did this booklet get into my collection? I am clueless. I just wrote a couple posts about bagels and touched on the ingredient “malt syrup” – so not surprisingly, Blue Ribbon Malt Extract caught my eye when I searched for a book to cover this week.

What is malt syrup? I found online that malt syrup is (generally) made from barley. The barley is soaked in water just until it sprouts and then it is dried – a process called malting. The sprouting process develops several different enzymes that break starches into sugars.  Malt syrup is mostly the sugar maltose, along with complex carbohydrates and a bit of protein (and some vitamins, see below). It’s about half as sweet as sugar.

The opening section of Blue Ribbon Malt Extract reads:

“Blue Ribbon Malt Extract is a valuable addtion to the diet, and a delightful means of bringing new taste to everyday cooking. Its use in bread, for instance, will decrease the leavening time, and produce a larger, lighter loaf of better texture, deeper crust, and more appetizing appearance. Bread and other goods baked with Blue Ribbon Malt Extract will also keep their freshness and tastiness much longer.”

Except for bagels, I’ve rarely seen malt syrup called for in breads. And, I don’t remember malt syrup being touted as a health food supplement. But sure enough, wikipedia states that it was used as a nutrition enhancer for children in England in the first half of the twentieth century. It tastes better than cod liver oil (given for the same purpose) but it tastes a lot better. A tablespoon serving has 10% RDA niacin, 6% vitamin B6, and 6% riboflavin (source: WolfAlph). (In The House at Pooh Corner, malt syrup was Tigger’s favorite food!)

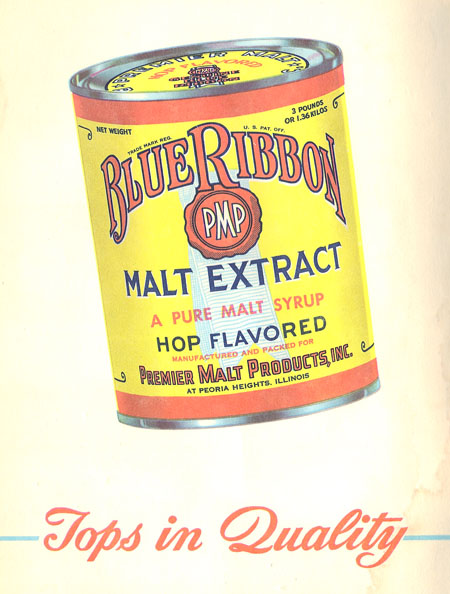
In all the recipes in this book, only a small amount of malt syrup is called for, like teaspoons and tablespoons. Please carefully study the photo below, taken from this cookbook, of a can of Blue Ribbon Malt Syrup:

Malt Extract

3 pounds of malt syrup in a can! Now, that’s a lot when you use so little for each recipe or for nutrition! What did people do with all that malt syrup?

Beer. The answer is beer. I figured this out by googling “malt syrup” and finding almost all of the hits leading to homebrewing sites. I also liked the following, a current review of this book on Amazon:

“If you wrote to the Blue Ribbon company [in the 1950s] and asked for recipes, they would send you this [book] . . . wonder of wonders, a few weeks later you would get a letter. The envelope had no return address. You opened it up, and there was a single typed sheet with home brew recipes. That was what you really wanted. You could then happily brew to your heart’s content.”

During prohibition, people used malt extract in their recipes for homebrew. Note that this book was published in 1951, decades after prohibition was repealed: homebrewing was still illegal in the US until 1978. The company that produced Blue Ribbon Malt Extract had to keep a low profile. (Modern Pabst Blue Ribbon beer is connected with Blue Ribbon malt extract. If you want to read more: Premier Malt Products and Pabst Blue Ribbon.)

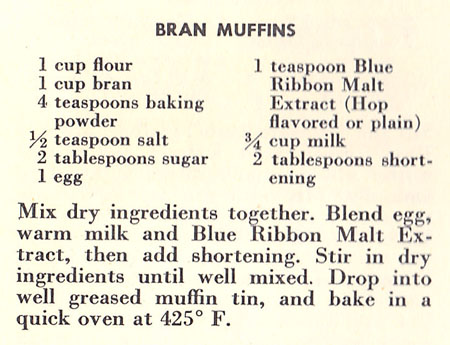
Back to my cookbook, Blue Ribbon Malt Extract. I decided to make Bran Muffins for this blog post.

Bran Muffins recipe

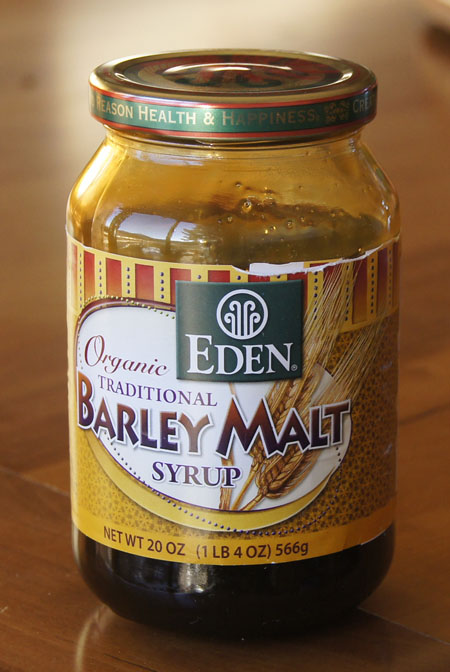
I searched local stores and found malt syrup at Whole Foods (but nowhere else):

Barley Malt Syrup

Since I want a good feel for the flavor of malt syrup in baked goods, I decided to use 3 tablespoons of the syrup instead of just 1 teaspoon. The jar of malt syrup says to use 1 tablespoon less liquid for each 4 tablespoons of malt syrup in a recipe, so I have adjusted the recipe for this amount.

Malt Syrup Bran Muffins
makes 8 muffins

  • 1 cup flour
  • 1 cup wheat bran
  • 4 teaspoons baking powder
  • 1/2 teaspoon salt
  • 2 tablespoons sugar
  • 1 egg
  • 3 tablespoons malt syrup (60 grams)
  • scant 3/4 cup milk (measure 3/4 cup and remove 1 tablespoon)
  • 2 tablespoons vegetable oil

Mix the flour, bran, paking powder, and salt and stir together. Blend the sugar, egg, malt syrup, milk, and oil and whisk until well mixed. Combine the wet and dry ingredients just until mixed.

Fill 8 greased muffin cups with the batter. Bake at 425˚ for 15-18 minutes.

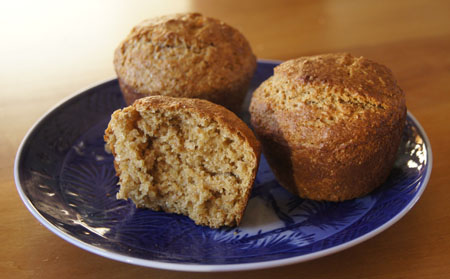
Malt Syrup Bran Muffins

The original recipe said to drop into “a well greased muffin tin”. I assume that means 12 muffins, but as I filled the muffin cups, I decided that 8 muffins was the proper amount. No time was specified; I tried 20 minutes and I think it was a little too long. I incorporated these changes in my version of this recipe, above.

And how did these taste? I broke one open right out of the oven and devoured it. The fragrence and taste of the malt syrup was subtle but definitely there. I found these to be really filling. I ate one before a workout and believe they gave me lots of energy! I really enjoyed these muffins.

But my husband? “They taste like sawdust.” Sigh. You will have to judge them for yourself.

1990s blog: Basic New York Water Bagels

I totally enjoy my own homemade bagels. I wrote this note in the 1990s and it is still true today:

I make these a lot! I like them for sandwiches. I think, but I’m not sure, that using malt syrup makes them better; you can find it in a beer brewing supply store. If you can’t find it, don’t worry about it!

These days (2016) I use malt powder that I purchase online from King Arthur Flour. It is more subtle than the malt syrup that I used to use, and not as sweet (so I add a little sugar). But no worries, if you want to try these but have no malt, just use sugar instead.

I like these bagels so much that I wrote about these in my other blog. Geeky food-obsessed me.

The following recipe is pretty much as I wrote it for my 1990s food blog. The recipe is adapted from The Best Bagels are Made at Home by Dona Z. Meliach. Please refer to my recipe for “Oat Bagels with Pumpkin Seeds” for photos of how to form bagels and a photo of the package of malt powder that I use.

Basic New York Water Bagels
makes 8-10 bagels

  • 1 1/8 cup water
  • 1 tablespoon oil
  • 2 tablespoons diastolic malt powder AND 1 tablespoon sugar OR 2 tablespoons malt syrup OR 2 tablespoons sugar
  • 3/4 teaspoon salt
  • 2 teaspoons yeast
  • 16 ounces bread flour (3 1/3 cups)*

*I highly recommend using bread flour rather than all purpose flour for all yeast breads. Please see my reference page on yeast and flours.

Mix in breadmaker on a dough cycle with a rising step. Or, by hand until you have a stiff dough, then let rise until double and punch down.

Divide into 8-10 equal pieces. (I like bigger bagels so I usually make 8.) I like to use a kitchen scale: The total weight of the dough is usually about 800 grams, so it’s 100 grams per bagel.

Form into bagels: press each piece into a flat round, poke a hole in the center, then enlarge the hole by placing one hand on the inside and one on the outside and rolling the dough between your hands until you have a big, smooth ring. (If you don’t get the inside hole quite big, when the dough rises and cooks, you won’t have a hole in your bagel. That’s why I say to put your hand inside the bagel; the hole needs to be that big.) Photos here.

Let the formed bagels rise 20 minutes. Bring some water to a boil in a saucepan and add malt syrup (2 tablespoons) or powder (1 tablespoon) or sugar (1 tablespoon) in it. Preheat the oven to 400 degrees.

When the water is boiling briskly, place the risen bagels in it a couple at a time and boil 30 seconds on each side.

(After rising, the top of the bagel is smoother than the bottom. So that the baked bagel has a smooth top, I always flip the bagel as I put it in the water. In other words, I pick up a risen bagel, turn it over and place it in boiling water. After 30 seconds, I turn it. After another 30 seconds, I take it out of the boiling water.)

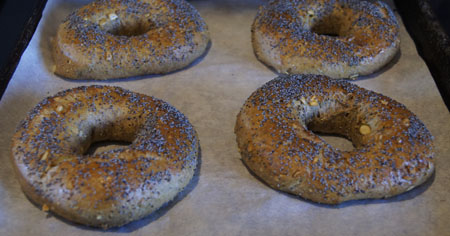
Remove the boiled bagel to a rack to drain. Continue until all the bagels are boiled. Brush the bagels with egg wash (1 egg beaten with 1 T water) and sprinkle with poppy or sesame seeds. Bake 18-22 minutes at 400 degrees.

NY bagels

Read the introduction to my 1990s cooking blog for the history of this category of my blog.

breads

250 Cookbooks: The Best Bagels are Made at Home

Cookbook #144: The Best Bagels are Made at Home, Dona Z. Meilach, Bristol Publishing Enterprises, San Leandro, CA, 1995.
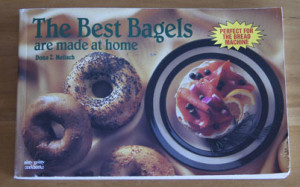
The Best Bagels are Made at Home cookbook

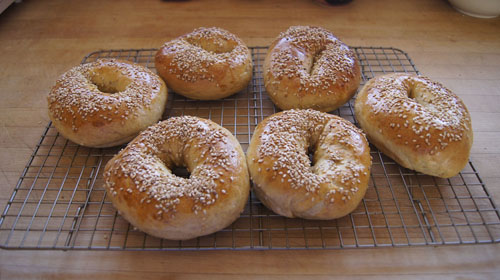
I am quite proud of my homemade bagels. Below is a 2012 photo of my “Basic New York Water Bagels“, my most-used recipe in The Best Bagels are Made at Home. I’ve made these tons of times! I modified the recipe just a bit, and will share it with you in a different post.
NY bagels

These bagels are lighter than store- or shop-bought bagels and absolutely wonderful.

Bagels are made from a yeast dough. They take a few more steps than a basic loaf of bread: instead of just slapping the dough into a bread pan and then the oven, you have to divide it into pieces, form each piece into a bagel, boil each in hot water, and glaze with an egg mixture and topping. Only then do they go into the oven.

But note: I have taken the time to make these many, many times. It’s worth it!

Who taught me how to make bagels? I learned from this cookbook. Dona Meilach clearly explains all the steps in bagel-making. I had tried to make them a few times before I got this cookbook, but met only with miss-shapen masses of baked dough – I found forming the dough into a bagel shape nearly impossible. Luckily I bought this book, studied and practiced, and now can make these any time I want!

Meilach begins with a little bagel history. What we know as the American bagel came with the Polish immigration in the late 1800s, and were popular among the Polish Jews who settled in New York. Between 1910 and 1915, the Bagel Bakers’ Local #338 union was formed. Apprentices of this union eventually moved to different parts of the US, and the popularity of bagels spread. (In one of my own 1941 cookbooks, The Bread Basket, I found a recipe for “bagles”.) In the early 1950s, bagels were handed out at the intermission of a Broadway comedy called Bagels and Yox. Soon after, popular women’s magazines ran recipes for “bageles”. And now, bagels are an institution in the US, as we all know!

Bagel history is followed by “Directions for Making Bagels”, pages 12-31. This is an especially helpful section. The six steps of bagel making – dough mixing (bread machine encouraged) and first rise, shaping, second rise, boiling, glaze, and baking – are described in detail. Next, Meilach discusses ingredients. Of note, she advises the reader to use bread flour for its high gluten content and recommends malt syrup in bagels. Her claim is that it “helps give bagels their unique appeal, malt assists with bfowning, and feeds the yeast.” Malt syrup can be hard to find. I once bought it from a store that sold beer brewing supplies; later I found it at a health food store. Currently, I use malt powder that I buy from King Arthur Flour and supplement it with a little sugar. But you can always use molasses or sugar instead.

The bulk of this book is recipes for different bagels, about 200 different kinds! The ingredients for each variety is laid out at about one per page. Useful as it is, this organization is also a tiny bit inconvenient because the recipes themselves do not give the times for the second rise and boiling and baking or even the oven temperature. Whenever I try a new recipe from this book, I have to fish back through the first 19 pages for the necessary specifics.

Okay. Critical step in bagel preparation, shaping. Meilach describes several methods for forming bagels:

  • the hole in the middle method
  • the hula hoop around the finger method
  • the rope method
  • bagel cutter method

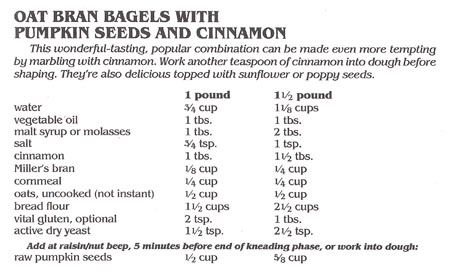
I tried several of these before I settled on a modification of the “hula hoop around the finger” method. Photos of how I do this are below, in the recipe that I chose for this blog, I “Oat Bran Bagels with Pumpkin Seeds and Cinnamon”.
Oat Bran Pumpkin Seed Bagels recipe

My version is below, pretty much the same, with the complete directions included. Note that “Miller’s bran” is wheat bran – it’s not critical to the recipe so you can leave it out if you don’t have any.

Oat Bagels with Pumpkin Seeds
makes 8 bagels

  • 1 1/8 cups water
  • 1 tablespoon oil
  • 1 tablespoon sugar*
  • 2 tablespoons malt powder*
  • 3/4 teaspoon salt
  • 1 tablespoon cinnamon (yes, a tablespoon! or even more if you like!)
  • 1/4 cup wheat bran
  • 1/4 cup cornmeal
  • 1/2 cup oatmeal (I used the quick-cooking kind)
  • 2 1/2 cups bread flour (10 5/8 ounces)
  • 1 tablespoon gluten
  • 2 1/2 teaspoons yeast
  • 5/8 cup raw or roasted pumpkin seeds

*You can substitue the “1 tablespoon sugar plus 2 tablespoon malt powder” with 2 tablespoons molasses or 2 tablespoons sugar.

Combine all of the ingredients EXCEPT the pumpkin seeds in a breadmaker set on a dough cycle with a rising step. Add the pumpkin seeds when the machine “beeps” for additions, or mix them in after the bread has risen. (If you add them at the start, they will be ground to tiny bits.)

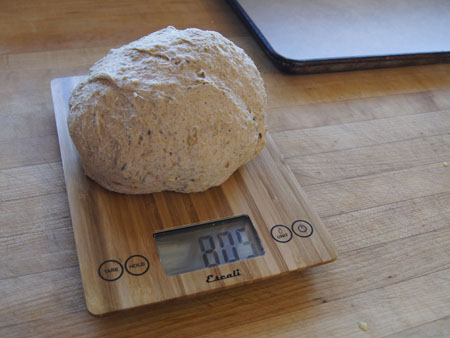
When the breadmaker cycle is done, take the dough out. Fold it a few times, then weigh it. Mine weighed 809 grams.
bagel dough

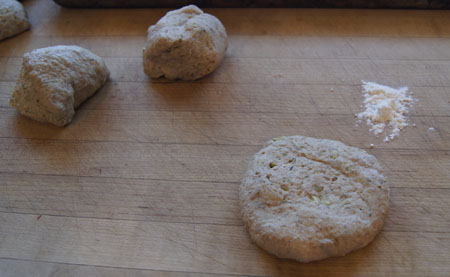
Divide the dough into 8 pieces – mine were about 100 grams each. (You could make 10 bagels if you want smaller bagels.) Flatten each to a circle, as shown below. I have a little flour on my breadboard in case things get sticky.
flattened bagel dough

Poke a hole in the center of the flattened circle.
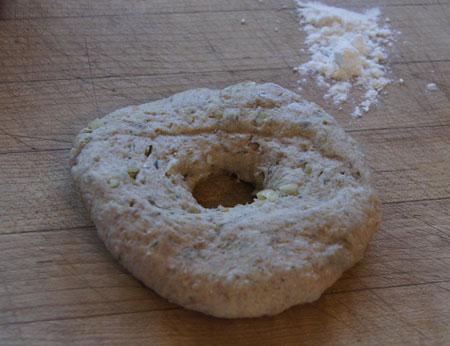
poke a hole in the dough

Now, pick up the bagel dough. You can put it on your finger and swirl it around, or put a few fingers in the center and stretch and pull and smooth the dough until it is a nice bagel shape. With one hand inside the hole, I kind of roll the bagel between my palms to smooth it. Leave a hole a bit bigger than a bagel-hole that you are used to in purchased bagels. The bagel will rise in all directions in the next steps, and the hole will get smaller.
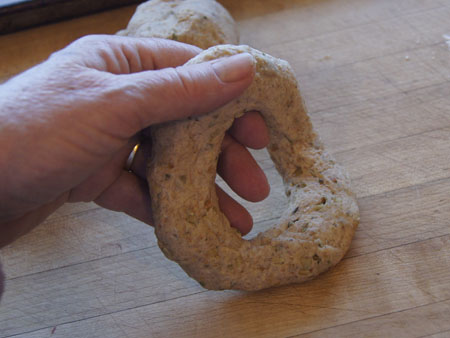
formed hole

Place the smoothed bagel on a lightly greased surface or on parchment and let rise 20-30 minutes.
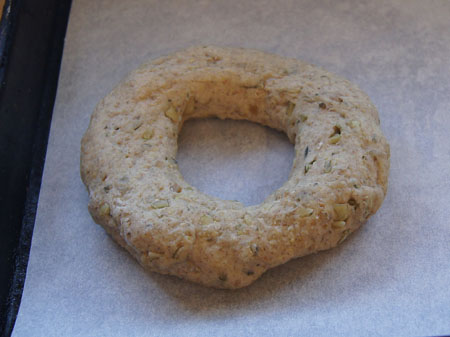
formed bagel

My kitchen was a bit cool, and this dough has a lot of bubble-popping bran in it, so I let my bagels rise about 40 minutes.
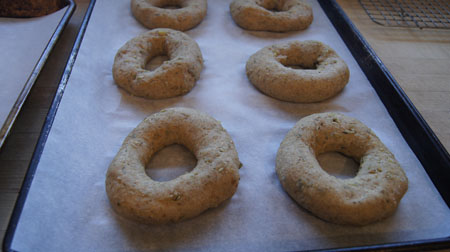
bagels risen

While the bagels rise, bring a pot of water to a boil. Add a tablespoon of malt powder (or use a tablespoon of sugar). Have ready an egg wash (1 egg whisked with 1 tablespoon water) and your choice of seeds for the top (I chose poppy seeds).

Take a bagel and put it in the boiling water, flipping it so that you put the top side down (this gives smoother looking baked bagels). Set a timer and boil 30 seconds, then turn it over, add another flipped bagel, and boil another 30 seconds. Remove the first bagel and turn the second and add another – continue until all the bagels are boiled.

If the instructions in the above paragraph are hard to follow, just do this: boil each bagel 30 seconds on each side!
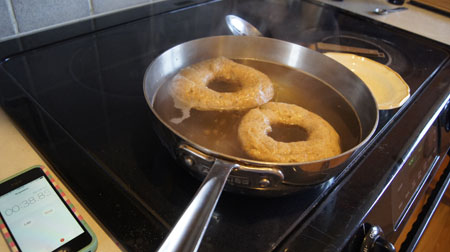
bagels boiling

Set each boiled bagel on a rack. Brush with the egg wash and sprinkle with seeds.
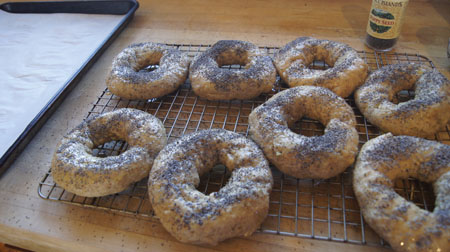
bagels ready for the oven

Bake at 400˚ for 20 minutes.
Oat Pumpkin Seed Bagels

I ate one right out of the oven! Boy was it good. Next day I had one with cream cheese and jam for breakfast. Deli meat and cheese and lettuce and tomato for lunch. Gotta make some more!
 

250 Cookbooks: All-Time Favorite Casserole Recipes

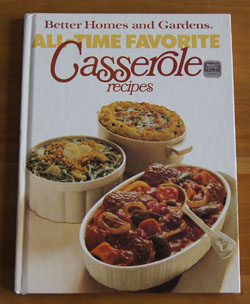
Cookbook #143: All-Time Favorite Casserole Recipes, Better Homes and Gardens, Meredith Corporation, Des Moines, Iowa, 1977.

AllTimeFavoriteCasserolesCB

A history of casserole-fear lurks in my household. Tuna casseroles prepared by my husband’s immediate family gave casseroles a bad name, as I discussed in a previous post, The ABC of Casseroles. Bottom line, for years I called a casserole dish by its ingredients rather than “such-and-such-casserole”.

On the other hand, I had a lot of good-tasting casseroles from my own mother’s kitchen in the 50s and 60s. Casseroles were great for gatherings, and leftovers made an easy meal the next day. Granted, many of the casseroles of that era relied on canned soups and vegetables; many were calorie-laden with rich creams and cheese. But delicious? Yes!

So I pulled All-Time Favorite Casserole Recipes from the shelf with mixed feelings. A good or a bad casserole book? And whose book was this? Mine, I guess. Published in 1977. No notes in it at all. Hmmm.

I turn the pages. The first recipe is “Sunday Chicken-Rice Bake”. Cream of mushroom soup, dried onion soup mix, canned mushrooms, frozen peas and carrots. I used to love a chicken-rice casserole made by my father’s mother – maybe this is the recipe! I continue through the pages, and find that about every fourth recipe interests me. Granted, many rely on food products I would rather avoid, like canned soups and vegetables and too much butter, but light makeovers could straighten that out. I like this cook book!

The chapters are: For the Family, For One or Two Servings (perfect for us!), For Entertaining, International Specialties, and Rounding Out the Meal.

I found a gem in the “For Entertaining” chapter: Tetrazzini Crepes.

This is a recipe for crepes filled with a turkey-ala-king-like mixture. In tetrazzini crepes, the mixture includes olives and cheese and sherry. Don’t I already make something like that? I searched my computer for “tetrazzini” but found nothing. Not ready to give up, I searched for “crepes” in my poultry recipe documents. “Turkey Crepe Casserole” has steamed vegetables in a white sauce, no that’s not it . . . “Tetrazini Crepes” – that’s it! I spelled tetrazzini with only one “z”. I do have a saved recipe for tetrazzini crepes in my repertoire!

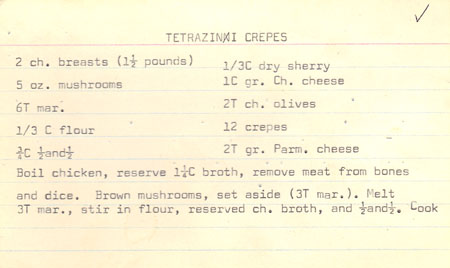
I gleefully read my own Tetrazzini Crepes recipe. Here is the note I wrote to myself in my recipe document:

“This recipe is from one of my own recipe cards, typed on a lined 3×5-inch card. This indicates that it probably dates it to the 1970s. I made it again in 2012 and decided the recipe is a keeper! I’m not sure of the origin of the recipe, whether I found it myself or if I got it from Mother. I don’t remember it well, so I didn’t make it a lot, although I’m often looking for chicken or turkey crepe recipes. I think I forgot about it.”

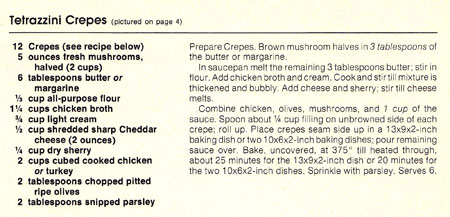
The recipe typed on my recipe card is nearly word-for-word the recipe in All-Time Favorite Casserole Recipes. Here is the book version:

Tetrazzini Crepes recipe

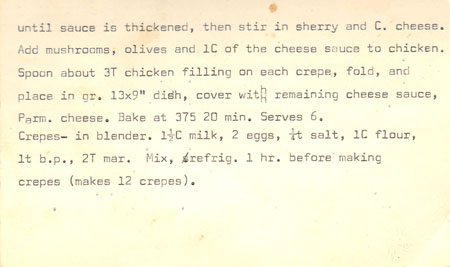
Here is the front and back of the recipe card that I typed in the 1970s:

Tetrazzini Crepes recipeTetrazzini Crepes recipe

Tetrazzini Crepes calls for leftover turkey, but you can always use cooked chicken instead. The sauce is a cheese sauce like you would use for macaroni and cheese, but with sherry added. Some of the sauce is reserved for the top of the crepes, and some is mixed with the turkey and olives and fresh mushrooms. (What is “tetrazzini”? An American dish named after the Italian opera star Luisa Tetrazzini.)

I made some changes to the recipe sometime over the years. The last time I made it, I made the full recipe of sauce and olives and crepes, but only used half the amounts of chicken and mushrooms. I used milk instead of cream in the sauce. For a meal for the two of us, I filled five crepes for the meal, and saved the rest of the crepes for another use (like blueberry crepes!).

I can hardly wait to make this again!

Tetrazzini Crepes
serves 2

  • 1/2 recipe crepes, below (I always make a full recipe and use the extras elsewhere)
  • 3 ounces fresh mushrooms, sliced (about 1 cup)
  • 3 tablespoons butter
  • 1/4 cup flour
  • 3/4 cup milk
  • 3/4 cup chicken broth (or water)
  • 1 cup grated cheddar cheese (more than the original recipe!)
  • 1/4 cup dry sherry
  • 1 cup chopped cooked turkey or chicken*
  • 2 tablespoons sliced olives
  • grated Parmesan cheese (optional)

*If you want to, you can start with one uncooked chicken breast (bone-in or boneless). Boil it in water until done, then remove the chicken from the bones (if necessary) and dice it. You can even reserve the cooking water as “chicken broth”.

Brown the mushrooms in a small amount of butter (or cook them dry until the moisture comes out). Transfer them to a bowl, then add the olives and chopped cooked turkey or chicken. Set aside.

Melt the 3 tablespoons butter in a sauce pan, stir in the flour and cook until the flour is absorbed. Slowly add the chicken broth and cook until the sauce thickens, then add the milk. Add more of one of the two liquids if necessary to make it the sauciness you want. Stir in the sherry and the cheddar cheese and heat just until the cheese melts. (This makes about 2 cups sauce.)

Add half the sauce to the reserved mushroom-olive-turkey mixture. Stir together, then use this filling to generously fill 5 crepes. Place the crepes in a lightly greased baking dish. Cover them with the other half of the cheese sauce (you may not use all of it, but we like things saucy). If you like, you can sprinkle with a little Parmesan cheese.

Bake at 350˚ for 15-20 minutes (just until bubbly).

Crepes
“full recipe”

  • 1 1/2 cups milk
  • 2 eggs
  • 1/4 t salt
  • 1 C flour

Mix in blender, let stand 1 hour before making crepes. Makes 12 crepes.

(I discuss how I cook crepes in this post.)

Comments

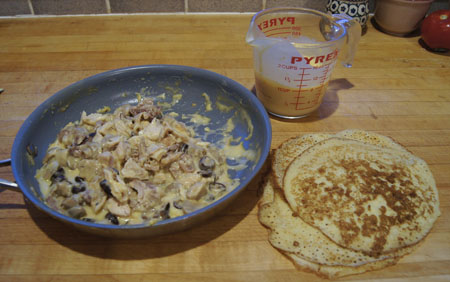
These were as good as I remembered! Here is the cheese sauce mixture re-heating in the pan. I usually heat the mixture a bit because the turkey might be cold from the refrigerator.

tetrazzini crepe prep

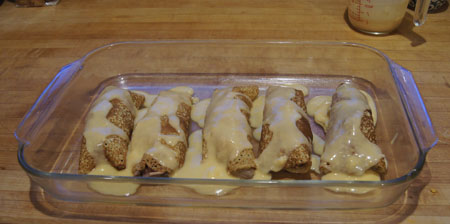
Here are the filled crepes before baking. This shows how much sauce I used on top. Plus, they are prettier at this step than when cooked!

tetrazzini crepe prep

We both scarfed these up. I had some fresh, hulled English peas from Trader Joe’s that I cooked and served beside them. With bread and salad, an excellent meal.

I was curious to see what I could find about this casserole book on the web. I found that I could buy it for one penny on Amazon. Better Homes and Gardens published 18 cookbooks in the “All Time Favorites” series (circa 1970-1990); I have 3 of these books. I covered “All Time Favorite Pies” in this post. I also found that Better Homes and Gardens keeps an Our Best Recipes website. This would be a good place to search for a new casserole recipe to beat the mid-week doldrums. Some of the website’s recipes still include canned soups, but many include interesting ingredients and combinations.

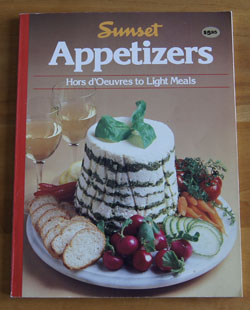
250 Cookbooks: Appetizers, Hors d’Oeuvres to Light Meals

Cookbook #142: Appetizers, Hors d’Oeuvres to Light Meals, Sunset Books, Lane Publishing Co., Menlo Park, California, 1984.

Appetizers Sunset cookbook

My recipe repertoire is wanting in the appetizer category. Usually I focus on a full meal, and don’t want people filling up on snacks and killing their appetites. But some appetizers are dang tasty! How can I fit these into a balanced eating plan?

How about a whole meal of different small plates or appetizers? Some protein, some vegetables, some richness. I’ve done this a time or two and it is fun. This holiday season, in the limbo area between Christmas and New Years, I decided to entertain with just such a meal.

I pulled Appetizers, Hors d’Oeuvres to Light Meals from the shelf for ideas. A bit hesitant at first with a 30 year old appetizer book in hand, to my surprise I actually like the recipes in this cookbook! I don’t think I have ever looked at this book before (it came from my mother’s collection). The photographs in this Sunset book are great, too.

The chapters are:

“Light Bites” (Simple crisp nibbles, marinated vetetables, bite-size vegetable and fruit combinations)
“Dips, Spreads and Pates” (Hot and cold dips, meat, seafood and cheese spreads, meat and vegetable pates and terrines)”Appetizers from the Oven” (Breads and pastries, tarts, turnovers and quiches, baked vegetable appetizers)
“Substantial Snacks” (Meats, poultry, fish and shellfish)
“Salad, Soup and Pasta” (Composed and mixed green salads, hot and cold soups, fresh, light pasta combinations)

I marked many recipes to try: mini bagels, cheese twists, cheese herb pretzels (all these are from-scratch doughs), spinach dip, sugar snaps, chili peanuts (from raw Spanish peanuts), shitake spinach soup, carrot soup, potato pancakes with apples and goat cheese, dried tomatoes (how to make your own dried tomatoes), shrimp avocado salad, crab puffs, baked shrimp, and falafel meatballs and mushrooms.

Mother only marked one recipe: “Shrimp Dip”, made from cream cheese, sour cream, greeen onions, and cooked shrimp (she used canned shrimps). She called it “Delicious”. My parents often got together with their friends for cocktail parties, and these sour cream-cream cheese based dips were popular in that era. My favorite was a clam dip.

One more plus for this cookbook. A lot of the recipes can be made ahead or at least a lot of the prep work can be done the day before. I find this book friendly and helpful!

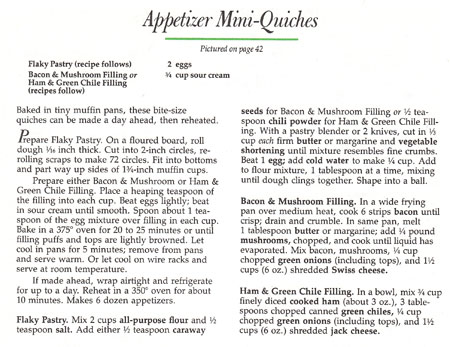
I decide to make Appetizer Mini-Quiches for this blog.

Mini Quiches recipe

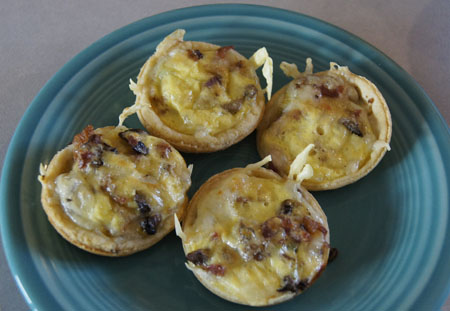
These should smell wonderful coming out of the oven, bacon and cheese in a home-made pastry. Yes they will take a little fuss, but I’ll use the help of my “girls” (daughter and daughter-in-law) and it will be fun. I made the filling the day before, and cut the recipe in half. Below is my version.

Mini-Quiches
makes about 30

Filling:

  • 3 strips bacon
  • 2 ounces mushrooms, chopped
  • 2 tablespoons green onions, chopped
  • 3 ounces grated Swiss cheese
  • 1 egg
  • 3/8 cup sour cream

Pastry:

  • 1 cup flour
  • 1/4 teaspoon salt
  • 1 1/3 ounces butter, chilled and cut in chunks
  • 1 1/8 ounces solid vegetable shortening, chilled and cut in chunks
  • 1/4 teaspoon caraway seeds
  • 1 egg, beaten and mixed with a tablespoon water

Cook the bacon; remove from pan and crumble. Leave a little of the bacon fat in the pan, then cook the mushrooms in it. Combine the bacon, mushrooms, green onions, and Swiss cheese.

Beat the egg and add the sour cream. Set the bacon mixture and the egg mixture aside while you prepare the pastry.

Put the flour and salt in a food processor and pulse a couple times to mix. Add the butter and shortening and pulse 6-10 times, until the mixture resembles fine crumbs. Pour into a bowl, then add the egg-water mixture a little at a time, mixing into the dough with a fork or your hands until the dough clings together. (You probably won’t need all of the egg-water mixture.)

Have ready a muffin pan – or “pans” if you have more than one. The bottom of each of my muffin tins measures about 1 3/4-inches. I did not grease the pan.

Roll the dough about 1/8 to 1/16-inch thick. Use a 2-inch biscuit cutter to cut circles of dough, and put the circles in the muffin pan cups. Continue re-rolling scraps of dough until the pastry is used up.

I had help rolling these out! We made about 28 cut-outs.

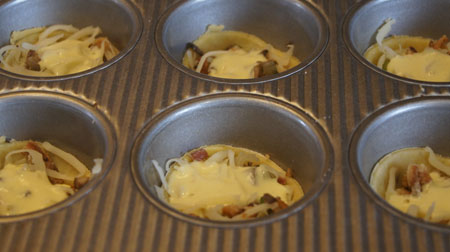
Divide the bacon mixture on top of the pastry in the pans. Then, spoon about 1 teaspoon of the egg-sour cream mixture on top of the bacon mixture. Here they are ready to bake.

Mini Quiches

Bake at 375˚ for 20-25 minutes, until the filling puffs and the tops are lightly browned.

Mini Quiches

These were so good it was hard to get them onto a serving plate before they were all eaten! A winning recipe.

Note that these can be varied easily, for instance, the original recipe has a variation of ham, green chiles, green onions, and jack cheese. You can make these ahead of time and reheat in a 350º oven for 10 minutes.

250 Cookbooks: Best You Can Bake Chocolate Desserts

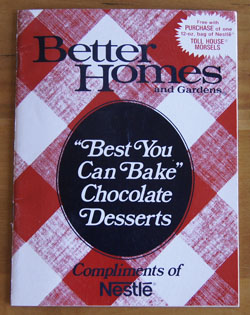
Cookbook #141: Best You Can Bake Chocolate Desserts, Better Homes and Gardens, The Nestle Co., Inc., 1983.

Best You Can Bake Chocolate Desserts cookbook

“Free with purchase of one 12-oz. bag of Nestlé® Toll House® Morsels” reads the text in a white burst on the front of this booklet. Another manufacturer’s advertising booklet. Who needs one more book of recipes for cookies, cakes, pies, desserts and candy? Not I. But it’s in my hands, and it was my mother’s . . . so I’ll find something to bake from it.

I am surprised to find the original recipe for Chocolate-Covered Cherry Cookies as the first recipe of this booklet. These are my “signature” cookies, and I wrote about them three years ago in December 2012. I wondered back then where I clipped the recipe – now I know that it might have been from the back of a bag of Nestlé chocolate chips! My recipe for these cookies has evolved from the original – I use more frosting to make them totally decadent.

It’s kind of cute how the chapters in this booklet are named: Celebrated Cookies, Classy Cakes and Pies, Festive Desserts, Cookies Especially for Kids, Sweet and Fancy Candy. I’ll keep this cookbook, heck, it doesn’t take up much space.

I decide to make “Oatmeal Chippers” for this blog. This recipe has a lot of oatmeal in it – twice as much oatmeal than flour. It has peanuts in it, different from my usual choice of walnuts for chocolate chip cookies. I can see a need for these cookies in my repertoire!

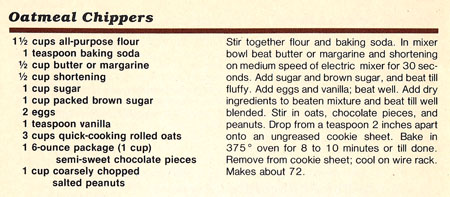
Oatmeal Chippers recipe

Oatmeal Chippers

  • 1/2 cup butter (salted is okay)
  • 1/2 cup vegetable shortening
  • 1 cup sugar
  • 1 cup brown sugar
  • 2 eggs
  • 1 teaspoon vanilla
  • 1 1/2 cups flour
  • 1 teaspoon baking soda
  • 3 cups oatmeal (the quick kind)
  • 1 cup (6 ounces) semi-sweet chocolate chips
  • 1 cup coarsely chopped salted peanuts (not dry roasted)

Beat the butter and shortening for 30 seconds. Add the sugar and brown sugar and beat until fluffy. Add the eggs and vanilla and beat well. Stir together the flour and baking soda and then add this mixture to the beaten mixture. Beat until well blended. Stir in the oatmeal, chocolate chips, and peanuts.

Drop by teaspoonfuls on ungreased baking pans. (I always line my pans with parchment.) Bake at 375˚ for 8-10 minutes.

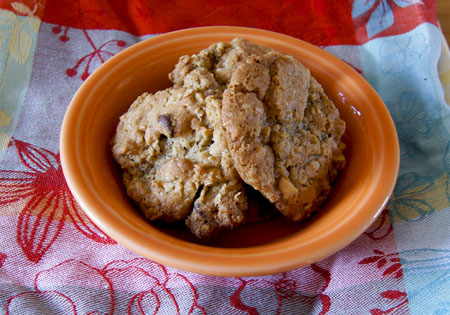
Oatmeal Chippers

These are delicious! The oatmeal gives these a light and crisp texture. And the peanuts and chocolate? Yum. A good change-of-pace chocolate chip cookie.

250 Cookbooks: Vegetariana

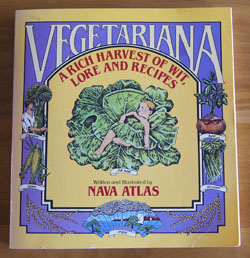
Cookbook #140: Vegetariana, Nava Atlas, The Dial Press, Doubleday & Company, Inc., Garden City, New York, 1984.

Vegetariana cookbook“A rich harvest of wit, lore and recipes” continues the title. Yup, that’s this book! It has sat too long on my shelf. I am entranced with the illustrations and quotes:

“Of Soup and Love, the first is best”
“Ther ought t’be some way t’eat celery so it wouldn’t sound like you wuz steppin’ on a basket.”
“In the early Greek and Roman eras, beans were widely used as ballots. Casting a white bean signified an affirmative vote, whereas a dark bean was a negaitve vote.”
“Training is everything. The peach was once a bitter almond; cauliflower is nothing but cabbage with a college education.”
“Ginger sharpneth the sight, and provoketh slothful husbands.”

As I turn the pages of Nava Atlas’s book, I get hung up on reading and pondering all these non-recipe “extras”. I can copy a few quotes and a bit of lore, but I can’t show you all the illustrations (copyright issues and/or laziness on my part). Happily, Amazon will let you view some of this book (click on ‘Look Inside’).

Shame-faced, I haven’t tried many (or any?) of the recipes. I have always meant to take a day a week and cook no-meat meals. But it never really happens (and I can only blame some of this on my partner-in-eating).

I turn to the Introduction. Atlas begins: “‘What on earth do you eat?’ was a question I was often asked when I first became a vegetarian in the early 1970s. Even then, a meatless diet was not as widespread and accepted as it is today.” As a child, she didn’t have to be urged to “finish your vegetables” but to “eat your meat”. Meat just didn’t appeal to her. “It was not until I was sixteen years old that I was ‘adult’ enough to assert my way in the kitchen and delare myself a vegetarian. At first, this decision was not met with cheers from the family.”

She is a delight. And informative: “Many of my generation believe that vegetarianism sprand up in the 1960s and blossomed into the new age of health consciousness of the 1970s. However the roots of vegetarianism run as deep as ancient India, classical Greece and Rome, and the Old and New Testiments of the Bible. More recently, but perhaps even more obscure is the story of the almost concurrent, widespread vegetarian movements in ninteenth-century America and England, attracting scores of pominent writers and reformers.”

So us hippie baby boomers weren’t so groundbreaking. Funny how each generation thinks they are the first to discover the world.

Happily, Nava Atlas is still writing, and enchanting us and sharing recipes. Do visit her website: VegKitchen with Nava Atlas.

Recipes in this book? Lusty Curried Peas, Vegetable Lo Mein, Buckwheat Noodles with Snow Peas, Herbed Wheat Berries, Barley and Blackeye Peas, Mozzarella Mashed Potato Pie, Mushroom Barley Soup, Potato Corn Chowder, Chocolate Chip Peanut Cake. All the recipes look easy to follow, are nicely seasoned, use fairly common ingredients – and many are interesting, even to non-vegetarians.

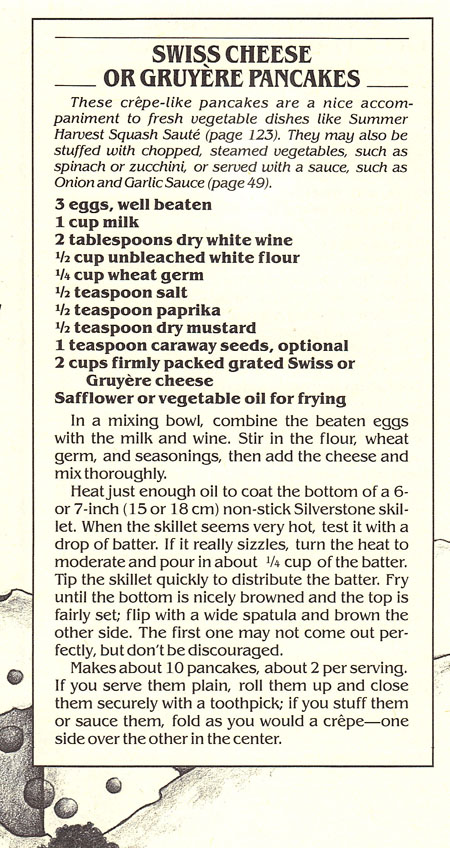
I choose to make “Swiss Cheese or Gruyère Pancakes”. Cheese goes right into the batter of these crepe-like pancakes. Atlas suggests serving them with “Summer Harvest Squash Saute” (butternut and summer squash and zucchini sauted in butter with wine, soy sauce and herbs), filled with steamed vegetables, or sauced with Onion and Garlic Sauce.

Gruyere Crepes recipeI plan to stuff them with steamed vegetables. I made a half recipe; since it is hard to “halve” an egg, I beat up two eggs, weighed the total, then used 3/4 of the amount (this translated to 75 grams of beaten egg.) The remaining egg went into scrambled eggs the next day.

These cook up like crepes, so that is what I am calling them in my version of this recipe, below.

Gruyere Crepes
makes about 6 crepes

  • 2 eggs, beaten, then remove 1/4 of the mixture for a later use
  • 3/4 cup milk
  • 1 tablespoon white wine
  • 1/4 cup flour
  • 2 tablespoons wheat germ
  • 1/4 teaspoon salt
  • 1/4 teaspoon paprika
  • 1/4 teaspoon mustard
  • 1 cup grated Gruyère cheese, firmly packed

Combine the eggs, milk and wine. Stir together the wheat germ, salt, paprika, and mustard, then add to the egg mixture. Stir in the cheese.

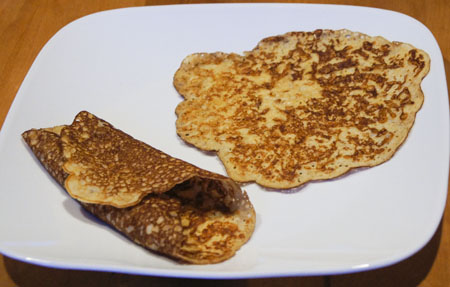
Heat a pan until a drop of batter or water sizzles when dropped on it. Turn the burner down to medium to medium-high because these crepes brown a bit easier than most due to the cheese in the batter. Add a little butter or non-stick spray, then pour about 1/4 cup of the batter into the pan and tilt the pan so the batter spreads. Cook until brown, then flip and briefly cook the other side. Continue until all the crepes have been cooked.

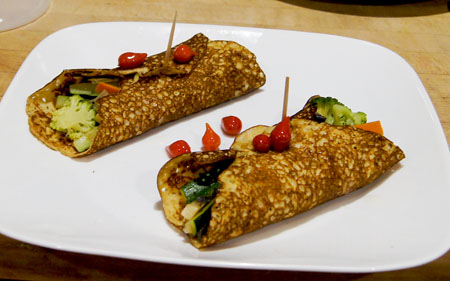
cheese crepesI served them with a medley of steamed vegetables. I would also love these wrapped around cooked, creamed or plain spinach.

filled cheese crepesI added cooked salmon to the meal to satisfy our non-vegetarian cravings. Later in the week I used one like a taco, filled with ham and tomatoes and lettuce. Delicious!

Vegetanaria is a keeper!

250 Cookbooks: FYI Chem Recipe Book

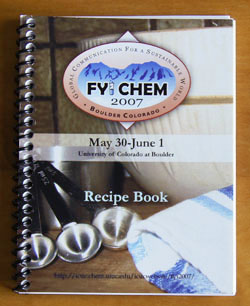
Cookbook #139: FYI Chem Recipe Book, Second FYI Chemistry Conference: Global Communication for a Sustainable World, University of Colorado, Boulder, 2007.

FYI Chem CookbookThis delightful small book is a keepsake from the  second FYI Chemistry Conference, held at CU Boulder in the spring of 2007. I was still working then, and although I didn’t attend the conference, Dr. Margaret Asirvatham – a long-time colleague – gave me this book. (I’m not sure that the International Center for First-Year Undergraduate Chemistry, ICUC, the sponsor of the event, is currently active, since the url listed in the book says “server not found”.)

Conference participants contributed recipes from their homelands for this cookbook. Like many a group of university chemistry teachers, they came from all over the world: India, Israel, Italy, Peru, Mexico, the US, Greece, and Spain.

This is a geeky international chemistry version of a community cookbook!

I know I have made one recipe from this cookbook: Chicken Curry. This is one of Margaret’s recipes, and it was really good. I will make it again for this blog! A few of the other recipes I’d like to try are: Easy Rice Pilaf (baked with vermicelli), Vada (yellow split peas), Dolmadakia (stuffed grape leaves), Traditional Andalusian Gazpacho, Tacos Dorados de Pollo (shredded chicken fried in tortillas), Pinza (a traditional Italian cookie) and Chocolate-Mint Cookies (peppermint frosting!).

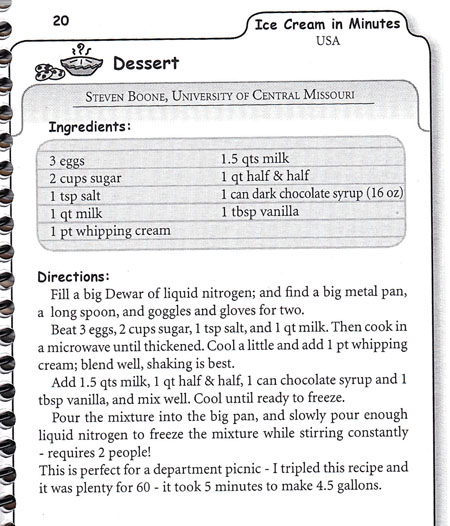
And here is my favorite ice cream recipe, although I can’t make it at home!

fast ice creamLiquid nitrogen! Since I was in the chem building for most of my working life, I’ve had this ice cream a lot. The undergraduate chemistry club liked to make it on “mole day” (celebrated on October 23), plus it worked it’s way into other parties and events.

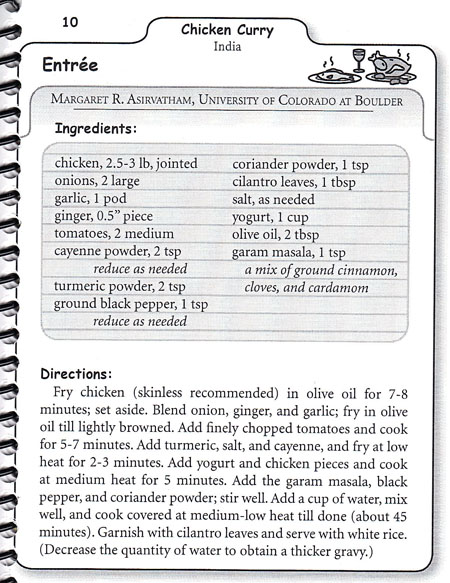
Here is Margaret’s recipe for Chicken Curry.

Chicken Curry RecipeThis recipe calls for bone-in chicken pieces, and I have made it that way before. This time, I want to use some boneless chicken thighs instead. This makes eating the sauced-chicken easier (plus I have some boneless thighs in the freezer). I didn’t have fresh ginger, so I used ground ginger from a jar. My husband sees turmeric and sees yellow – and hates it. So, I left it out. When he asked what I was cooking for dinner, I said “spiced chicken over rice”. If I had said “curry”, he would have hated it. So. Below is my version of this dish.

Note: Don’t leave out the cayenne, garam masala, or coriander. Otherwise, this is just another chicken dish. The spices make it special.

Chicken Curry
serves 2-3

  • 12-14 ounces boneless skinless chicken thighs or breasts (or use bone-in pieces)
  • olive oil for frying
  • 1 smallish onion, chopped
  • 1 clove garlic, diced
  • 1/4-inch fresh ginger, diced OR use 1/2 teaspoon ground ginger
  • 1 medium or large tomato, diced
  • optional: 1 teaspoon turmeric powder
  • 1/4 – 1 teaspoon cayenne (to your own taste)
  • 1/2 teaspon garam masala
  • 1/2 teaspoon coriander powder
  • 1/2 cup plain yogurt
  • salt (to taste)
  • black pepper (to taste)
  • fresh cilantro leaves to taste (optional)

Cut the chicken into bite-sized chunks and fry in a little hot oil. Remove from the pan and set aside. Fry the onion (and fresh ginger, if you are using it) in a little hot oil until it softens and is lightly brown. If you are using ground ginger, sprinkle it over the onions as they cook. Add the garlic and stir about half a minute.

Add the chopped tomato and cook 5-7 minutes. Add the turmeric (if using) and cayenne and cook at low heat for a few more minutes, then add the yogurt, garam masala, coriander powder, and salt and pepper. Stir well.

Add the chicken back to the sauce, stir, and then cook for about 30 minutes (more if you are using bone-in pieces). Serve over rice with cilantro leaves sprinkled on top if you like.

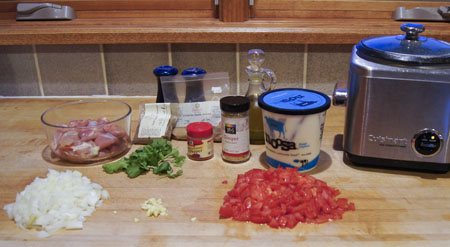
This did take quite a gathering of ingredients:

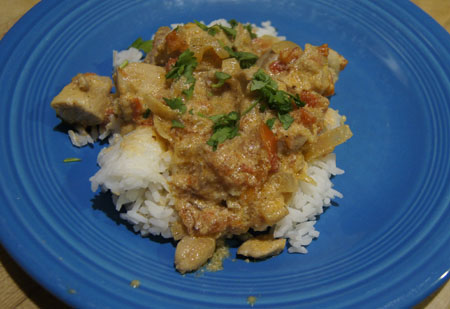
chicken curry ingredientsThe final dish:

chicken curryI loved this curry! My hubbie went back for seconds, so he liked it too (I never told him it was curry).

Another success in my kitchen lab!