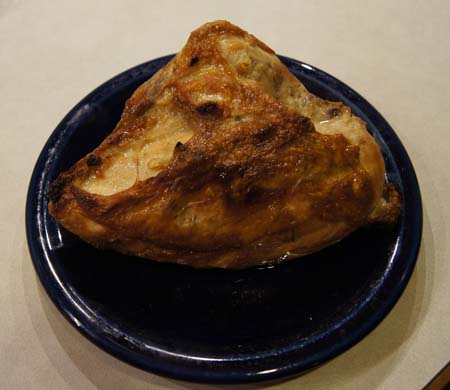
1990s blog and Favorites: Mexican Pizza

Mexican PizzaThis Mexican Pizza is a bit unusual, in that the dough itself has several flavorings. I clipped the recipe from a magazine decades ago, and made changes over the years as my own cooking methods developed.

For many years, I cooked this as an 16-inch round pizza on either a cookie sheet, a perforated pizza pan, or a pizza stone, baking at 425˚ for 20 minutes. Lately, though, I’ve been making small, individual pizzas and rolling the dough thinner and baking at 475˚ for 15 minutes. We like it both ways, so I’ll give directions for both methods.

Each time I make this pizza, I vary the toppings. Be creative! Chorizo is often one of my choices. It’s a Mexican-style sausage. Often local stores carry locally-produced chorizo and every company that makes it seems to use a different recipe. Some are very spicy, some are very fatty. I always cook it first and blot with paper towels to get the fat off. And taste it to make sure it’s not too hot.

Mexican Pizza
Full-size baking method


One pizza serves 3-4 people.

Dough:

  • 3/4 cup water
  • 1 teaspoon sugar
  • 1 minced clove garlic
  • 1/4 cup finely chopped onion
  • 1/2 teaspoon salt
  • 1 teaspoon paprika
  • dash cayenne
  • 1 tablespoon oil
  • 1 2/3 cup all-purpose flour
  • 1/2 cup masa
  • 1 tablespoon yeast

Necessary toppings:

  • 12 ounce can tomato sauce seasoned to taste with cumin, chile powder, red pepper flakes, basil (fresh is best), and oregano (preferably Mexican oregano) – I like to simmer this mixture for about 15 minutes
  • 12 ounces Jack cheese
  • 4 ounces mozzarella cheese

Suggested toppings:

  • green onions or cooked red or yellow onions (I like to cook the onions until they wilt, and then add about 1/2 teaspoon each cumin and chile powder)
  • chopped, canned green chiles
  • chopped, cooked green or red bell peppers
  • chopped, cooked tomatoes
  • chopped cilantro
  • olives
  • chorizo or hamburger: cooked and wiped with paper towels to get some of the fat off

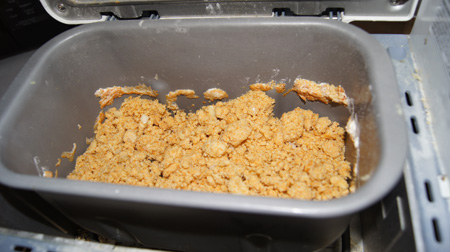
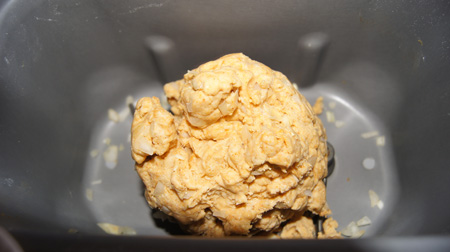
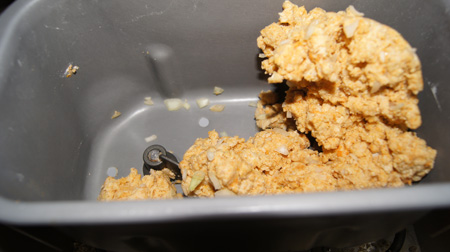
Put the dough ingredients in the bread machine. Set the machine to “dough” cycle. (The cycle should knead the dough and then rise it.) Watch the dough carefully during the first five minutes, and add more flour or more water if necessary to make a good ball of dough in the bread machine. (Example photos below.)

(If you don’t have a bread machine, knead the dough until it’s smooth, then let rise until double in bulk and continue with the recipe below.)

When the machine signals that the dough is done, take it out of the bread machine. Roll into a 16 inch circle about 1/4 inch thick. Lightly oil a pizza pan or a cookie sheet and place the dough on it. Top with seasoned tomato sauce, then the cheeses, then pick and choose from the suggested ingredients (or come up with your own ideas).

Bake at 425 degrees for 20 minutes.

Mexican Pizza
Small-pizza baking method

This baking method is more complicated but we like these personal, crispy pizzas. It’s tricky because you need to assemble each pizza on a pizza peel and then slide onto the hot baking stone, and thus can only do one at a time. If you are making small pizzas for more than two people, I suggest you use a parchment-lined half-sheet pan instead of the baking stone. If you have 2 such pans, you could bake all four small pizzas at once.

Preheat a baking stone in the oven at 475˚ for 30 minutes.

When the dough is finished rising, cut it into 4 pieces. Roll each into 7-8″ circle. Sprinkle some corn meal or semolina flour on a pizza peel. One at a time, place the small pizza rounds on the pizza peel. Top with seasoned tomato sauce, then the cheeses, then the vegetables and meat. Transfer to the oven and bake 15 minutes.

My stone fits two small pizzas at a time. You can only prepare one pizza on the peel at a time, so I put them into the oven staggered. Just use a timer and remember which one you put in first. When the first two are done, do the same with the second two.

They have to cool a little before you eat them, and by the time you do eat them, you are ready for seconds and the next two pizzas are done. I always make all 4 small pizzas for the two of us. Yes, we have leftovers. Yes, we eat them cold. And yes, we each try to get to them first. Dibs!

Making small pizzas: photos

First, the dough. I know my bread machine, and usually, after 5 minutes a dough with the correct amount of moisture will begin clumping. Mine had not begun clumping:

doughSo I dripped in about 2 tablespoons of water, checked after a few minutes, and it looked right. Starting to clump:

dough

Here it is near the end of the kneading cycle: SONY DSC

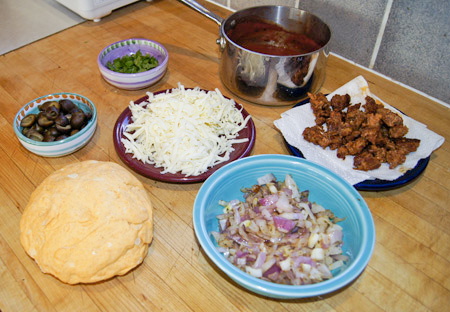
In the photo below, the dough is finished and my sauce (in the pan), cheese, and toppings are shown mise en place. I chose red onions, butcher counter fresh chorizo, whole olives cut in half, and cilantro as toppings – and the jack and mozzarella cheeses of course. I like to saute my onions in a tiny amount of oil, salt to sweat, and then when they are soft, sprinkle with Mexican oregano, cumin, and hot chile powder. I was told in cooking class that one reason to cook onions before using in a dish is to make them more amenable to taking up seasonings. It works: these seasoned onions are very good on their own, and definitely perk up the pizza.

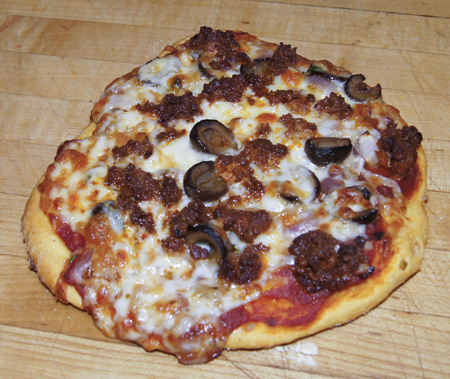
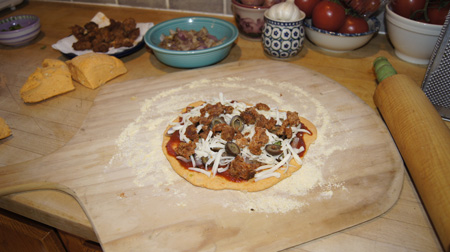
pizza ingredientsHere is a small pizza on the pizza peel, ready to go into the oven. The cooked pizza is at the top of this page.

ready to cook

1990s blog and favorites: Botched-Up Cassoulet

CassouletI call this “Botched-up Cassoulet” because I do know that a cassoulet is a famous French entree that if prepared according to tradition, is complicated and takes days to prepare. I have an e-mail from a “fellow food fiend” who describes making this dish:

I have been cooking for three days. First I made a complicated true French cassoulet including sausage, lamb and duck. I even bought these wonderful white beans that I can only get in the Bay Area. When we were there over the weekend I stocked up. I wish you could see these beans, they are so beautiful I can barely stand to cook them. They look nothing like beans in a bag.

I looked up “cassoulet” in my authoritative cookbook, The Best International Recipe (from Cook’s Illustrated, Christopher Kimball). Sure enough, a cassoulet recipe is offered: flageolet beans, boneless pork shoulder, garlic pork sausages, and confit duck legs. The duck confit alone takes over a day to make. And the authors admit that even this is a toned down version, appropriate for a home cook. (But we all know, hint hint, that a true cassoulet can only be made by a properly trained chef.)

I offer instead a tasty version that is very good and can be relatively low in fat. While being high in fiber and nutrition. And being very easy to make. The original recipe is from one of my slow cooker cookbooks. I’ve made this tons of times and included it on the short list of recipes in my 1990s blog. It’s yummy, even to my non-bean-loving dining partner.

Botched-Up Cassoulet (crock pot method)


1990s note by me: A true European “cassoulet” is, I believed, baked in a special ceramic casserole under special conditions. I remember reading about it once. It is one of those esoteric topics that true chefs like to go on at length about. Here is my version. Do not be afraid to substitute anything, just keep the total liquid to the amounts specified.

Serves 2-3 people.

  • 15 oz. can navy beans*
  • 8 oz. can tomato sauce
  • 2 carrots cut into 1/2 inch pieces
  • 1 stalk celery, cut into 1/2 inch pieces
  • 1/2 cup chopped onion
  • 1 clove garlic, minced
  • 1 bay leaf
  • 1/2 teaspoon basil (use a tablespoon of fresh basil if you have it)
  • 1/2 teaspoon oregano
  • 1 cup water plus 1 teaspoon chicken bouillon (or use chicken stock)
  • about 1 cup chicken, cooked or not
  • about 3/4 cup ham or sausage

Put it all in the crock pot and cook on low 10-12 hours.

*Navy beans are those small white beans, often sold as Great Northern beans. Instead of using canned, you can buy them dry, soak overnight, and boil, with salt to taste, until done.

Non-crock pot method

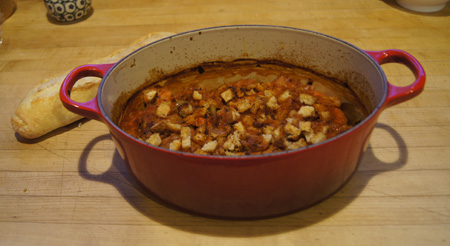
You might note that the photo at the top of this page reveals that I cooked the cassoulet in a Le Creuset rather than a slow cooker. Sometimes I prefer to cook it this way. Part of the problem is that my current slow cooker is pretty big and a meal for two people gets lost in it. So, the following is my method for baking the cassoulet in a covered casserole. I like to cook the onions first, and the Le Creuset allows me to do that on the stove top and then add the rest of the ingredients for the baking step.

Directions: Use the same ingredients as listed in the slow cooker method, above. Begin by cooking the onions until they are soft, then add the garlic and cook 30 seconds. (If your casserole cannot be used on the stove top, you can skip this pre-cook step.) Combine all of the ingredients in the casserole and cover it. (My choice for chicken is bone-in, skinned thighs. I used three of these chicken thighs along with a half-cup of ham for the two of us when cooking the cassoulet in the photo.)

Bake at 325˚ for two hours. Then, uncover, turn the oven up to 400˚, and cook for about another 20 minutes. Check a couple times during this uncovered baking period; it’s time to take it out of the oven when most – but not all – of the liquid has evaporated.

This is extra good with some bread crumbs on top. So if you want to, roughly shred  enough sourdough bread to make about 3/4 cup crumbs. Saute these large crumbs in a small amount of butter. Put on the uncovered casserole in the last 15 minutes of the baking time.

Read the introduction to my 1990s cooking blog for background information.


Chicken Tagine

This recipe became part of my repertoire in 2006. I combined a recipe clipped from a magazine and class notes from the Mediterranean cooking class that I took at the Culinary School of the Rockies (now Escoffier). Input from my daughter’s Moroccan boyfriend and his family helped too. The recipe is now fine-tuned and tested enough to share. I have to tame down the olives and saffron to suit my dining partner; I’m giving options for those (like me) who love these ingredients.

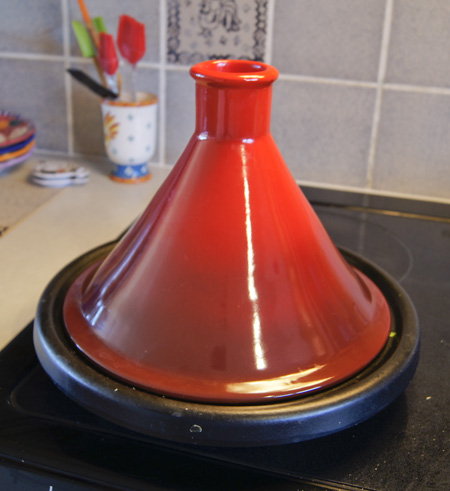
A “tagine” is basically a stew. It gets its name from tagine, a traditional pot with origins in North Africa. A tagine is a flat cooking dish with a lid that has tall, sloping sides. It is meant for long, slow cooking of meats, allowing time for the meat to tenderize, while the cooking liquid constantly condenses on the lid and drops back into the pot. Authentic tagines are earthenware and colorful. I would have loved for my daughter to bring me one home from her travels, but they are a little too big to fit in a backpack. Instead, I purchased a westernized one made by LeCreuset. It has a cast iron base (good for browning meats) and a stoneware lid.

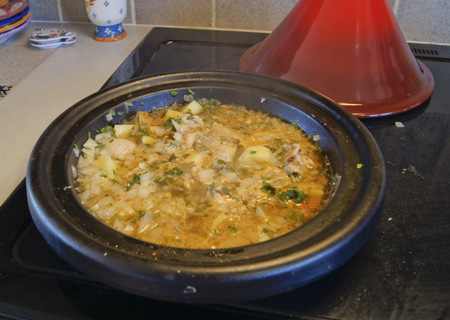
TagineMy tagine recipe can be cooked just as well in any heavy, lidded stove top pan, or baked in the oven in a stove-top-to-oven casserole. When we made a lamb tagine in cooking class, we cooked it both ways, and none of us could tell a difference.

About the olives. My first choice are the big, green “Greek” olives, probably from a market’s open deli section. Do not use the bottled “Spanish olives” used for martinis. Do not use stuffed olives. Greek olives might be called Ionian, Nafplion, or “cracked green”. (Here’s the Cooks Thesaurus reference on olives.) You can use kalamata olives; these are smaller and purplish-black, but they are almost as good in this dish, and are good jarred, so you don’t have to make a special trip to the store. The original recipe called for 2 cups of olives; I cut this down to 1/2 cup so that I could serve it to my dining partner. I’ll usually add more to my own serving, although they are best cooked into the sauce, as they help thicken the dish.

About the “preserved lemons”. This is a Moroccan specialty. They are difficult to find in local stores, but are pretty easy to make. I was given some at my cooking class, and later by some Moroccan friends. But I’ve substituted plain lemons as in the recipe below and find they work fine (at least for this non-connoisseur).

Chicken Tagine


This serves about 4-5 people. It can easily be cut in half for 2-3 people.

  • 8 large boneless, skinless chicken thighs, skinned and cut into big chunks
  • 3/4 cup onion, chopped
  • 2 cloves garlic, minced
  • salt (to taste)
  • 1/2 cup cilantro, minced
  • 1/2 cup parsley, minced
  • 1 teaspoon cumin
  • 1 teaspoon ginger
  • 1 teaspoon paprika
  • 1/4 teaspoon saffron (optional)
  • 1/2 teaspoon pepper (or to taste)
  • 2 average-size potatoes; Yukon golds work well but any will do
  • 2 cups water or chicken stock
  • 1/2 cup Greek green olives (Ionian or Nafplion)
  • 1/4 cup fresh lemon juice (about 1 lemons-worth of juice)
  • grated peel of 1/2 lemon (or use 1/2 of a Moroccan preserved lemon, peel only, chopped fine)
  • 1 1/2 tablespoon cornstarch dissolved in a little water
  • chopped fresh cilantro and parsley for garnish

Cook onions in a small amount of olive oil until they wilt, salting to sweat, then add the garlic and stir for 30 seconds. Add the chicken and stir for several minutes, then add the cilantro, parsley, cumin, ginger, paprika, saffron, pepper, potatoes, and stock.

Simmer, covered, about an hour. (Or, bake in a 350˚ oven, covered, for an hour.) Add olives, lemon juice, and lemon peel. Slowly and with stirring, add the cornstarch and water. Simmer a few minutes until it thickens. Taste and adjust seasonings.

Sprinkle with a little chopped fresh cilantro and parsley and serve over couscous or rice.

Chicken TagineThis is one of my new comfort foods!

250 Cookbooks: Eating Light

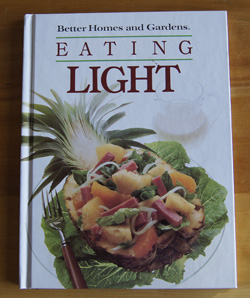
Cookbook #16: Eating Light. Better Homes and Gardens, Meredith Corporation, Des Moines, Iowa, 1985.

Eating Light

This is another low-calorie cookbook that I picked up in the 1980s. I remember that I frequently bought the “women’s magazines” like Better Homes and Gardens during that time, so it doesn’t surprise me that I purchased a book with the same name.

This cookbook is similar to the magazine: glossy, and produced by a company rather than an individual. The recipes have long names and pretty pictures, but not many tempt me to try them. Years ago, I probably picked up some ideas on low-calorie cooking from this book, but today, I find it “old hat”. Not very interesting. Also, they put the nutrition information in the appendix, rather than with each recipe, which I find inconvenient.

I decided to try “Pork Pinwheels with Apricot Stuffing”. I like pork tenderloin, and I like apricots. It’s a new idea (to me) to use dried apricots in a stuffing for pork. And I think the pinwheels might look pretty, and hopefully I’ll be able to add another pork tenderloin recipe to my repertoire.

There is only one other recipe in this book that looks interesting, so I’ll copy that recipe and give this cookbook away.

Pork PinwheelsComments

These turned out pretty good, at least when I made some changes. I’ll type in the recipe below. But first I’ll rant, with a what’s wrong with this recipe discussion.

This recipe makes “6 servings”. Those are dang small servings. Each person would only get about 2 1/2 ounces of pork. Generally a serving of pork is 4 ounces. For the two of us, I weigh out 9-10 ounces of pork for a meal. (The nutrition information on the package of pork tenderloin that I bought states that 4 ounces has 130 calories and 23 grams of protein!)

The nutrition information (at the back of the book) states “191 calories” per serving. Using the information on the packaging of the ingredients, I come up with more like 160 calories per 1/6 of the recipe. And note that I don’t use too many significant figures: it’s silly to say “191 calories” when there so many variables when one actually prepares the recipe. Bread, for instance, has a quite variable calorie content. (I used My Daily Bread so I know exactly how many calories it has.)

The recipe slips in unnecessary calories by employing both butter and apricot nectar. Butter has 100 calories per tablespoon (Nutrient Facts) and can be eliminated by using a non-stick pan (and a tiny amount of olive oil) to wilt the onion and celery. Surprisingly, a can of apricot nectar has 200 calories. And it contains “high fructose corn syrup, apricot juice concentrate, apple juice concentrate”. If/when I make this again, I’ll try to find a better juice choice at Whole Foods.

The recipe calls for “1 pound” of pork tenderloin. Ground meat might be sold in exact 1 pound packages, but the same is not true for pork tenderloin. The one I used weighed 14 3/4 ounces. I went ahead and used it (even though I aim at 9-10 ounces) because to roll up the meat, a certain mass is required. I had leftovers, but the dogs didn’t mind. Be aware, though, that this recipe does not scale down well to only two people.

Broiling is called for in this recipe. But, it does not state whether to set the broiler to high or low. I tried 5 inches from the broiler and the low setting; the pinwheels were burning within 2 minutes. Luckily I checked! I don’t know what kind of broiler they used but mine simply did not work. I changed my oven to “bake”, as reflected in my typed recipe below. I don’t think that using a broiler rack is necessary. The book states that broiling with a rack is a great method because it allows the fat to drip off; my opinion is that pork tenderloin has very little fat in it to drip off. I’d skip it next time.

All that said, the meal was a success. The pinwheels were pretty and the cinnamon was a nice addition. If you want to try these, use my recipe below.

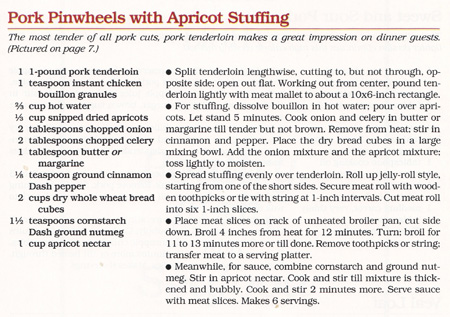
Pork Pinwheels with Apricot Stuffing


With one pound of pork tenderloin, this would serve about 3 people. Adjust the amounts of all ingredients according to the number of people you are feeding and the weight of the purchased pork tenderloin.

  • 1 pound pork tenderloin
  • 2/3 cup chicken broth
  • 1/3 cup finely chopped dried apricots
  • 2 tablespoons chopped onion
  • 2 tablespoons chopped celery
  • 1/8 teaspoon cinnamon
  • salt and pepper to taste
  • 2 cups dry whole wheat bread cubes (about 1/4-inch cubes)
  • 1 1/2 teaspoons cornstarch
  • dash nutmeg
  • 1 cup apricot nectar (try to find one that does not have high fructose corn syrup; perhaps you can find fresh apricot juice)

Heat the broth to almost boiling. Pour it over the apricots and let stand for at least 5 minutes while you prepare the vegetables.

Cook the onion and celery in a tiny amount of olive oil in a non-stick pan until the onion wilts; salt to taste and to sweat the onion. Add the cinnamon and pepper, then add this and the apricot mixture to the bread cubes.

Split the tenderloin lengthwise, cutting to, but not through, the opposite side. Open it out and pound it lightly with a meat mallet until it is about 10 inches by 6 inches. Spread the stuffing evenly over the tenderloin. Roll up jelly-roll style, starting from one of the short (6-inch) sides.

Secure the meat roll with toothpicks or tie with string at 1-inch intervals. Then, cut the meat roll into six 1-inch slices.

Carefully place the meat slices in a lightly greased or Pam-sprayed baking pan. [“Cut side down”? For four of the slices, both sides are cut. Another recipe-rant.]

Baking: I suggest a quick broil on low for a minute or two to brown the tops of the pinwheels. Then, bake these at 400˚ for about 20 minutes. Check with an instant-read thermometer; about 150˚ internal temperature is good. I served these with sides of double-stuffed potatoes and vegetables.

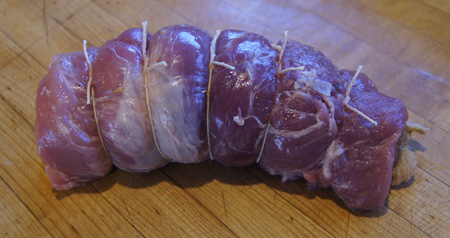
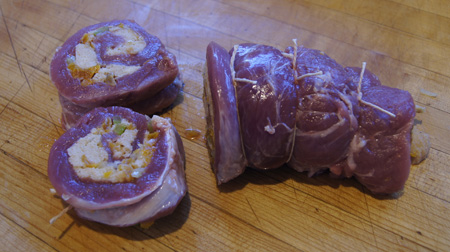
Below is a photo of the pork roll. It’s so bulbous! Toothpicks might work better, since the string kind of squished it and left a mark on the pinwheels after they were cooked.

pork roll before cuttingHere it is after I cut two pinwheels. I only cut five in all because I started with a little less than a pound of tenderloin.

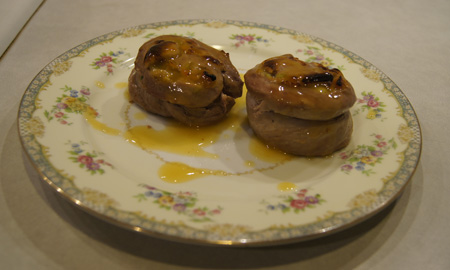
cut pinwheelsThe pinwheels, cooked and plated:

cooked pinwheels

Pretty good!

Favorites and 1990s Blog: Beef Jardiniere Crepes

This favorite recipe for leftover beef in crepes was in my 1990s blog. I’m listing it in both categories because unlike the cookie recipes, which I can  make only rarely, I make this recipe a lot.

I love to make crepes. They are so pretty and yummy. They do take a chunk of time, though, since I always mix them and then let the batter sit for at least an hour before cooking. And pan-cooking the crepes is time-intensive, at least for about 10-15 minutes. This all means that (for me) the time chosen to make crepes is traditionally a slow, leisurely pocket of time, a Sunday afternoon, a time with nothing pressing.

Crepes can be made ahead of time and stored in the refrigerator for several days. For Beef Jardiniere Crepes, I used to make the crepes, filling, and sauce on Sunday, and then on a weekday quickly put them all together and bake. Then it was a 30-minute weekday meal, and delicious and low calorie.

I have watched Alton Brown make crepes on TV, and read about them elsewhere. I make them a little different. I cook both sides, and rarely are my crepes “lacy”. If crepes are lacy, all the good moist filling leaks out. And I really don’t understand why one would only cook one side. Maybe mine are thicker. Maybe mine are better.

I do use a pan sold specifically for crepes. I bought it years ago and it looks like it. It is a cheap, light, non-stick pan with shallow sides. Any 8-10″ non-stick pan will do. To save calories, I lightly coat the pan with non-stick spray (instead of butter) before cooking each crepe. Details on my method are in the text and photos below.

Beef Jardiniere Crepes


I make these a lot. They are yummy, on the low-calorie side, have lots of veggies, and use up leftover roast beef. Plus I just like crepes. [Note to myself in my personal recipe file.]

This recipe serves about 4.

Crepes:

  • 2 eggs
  • 1 cup milk
  • 3/4 cup flour
  • 1/2 teaspoon baking powder
  • 1/4 teaspoon salt

Filling:

  • 1 pound leftover cooked beef, chopped into 1/4-1/2″ dice
  • 1 1/2-2 cups beef broth
  • 1/2 cup chopped onion
  • 1/2 cup chopped celery
  • 3/4 cup chopped carrots
  • 1/2 teaspoon dried basil or fresh basil to taste
  • 1/2 teaspoon dried sage or fresh sage to taste
  • salt and pepper to taste
  • 1 tablespoon cornstarch mixed with 1/4 cup water

Sauce:

  • 1 1/4 cup reserved cooking liquid
  • 1 tablespoon catsup
  • 1 tablespoon red wine (optional, but good)
  • 1/8 teaspoon garlic powder
  • salt and pepper to taste
  • parsley, fresh or dried, to taste
  • 1 tablespoon cornstarch

Place all crepe ingredients in a blender and blend until smooth, stopping and scraping down a couple times, about 1-2 minutes. Let stand at least one half hour before making the crepes, then blend briefly again.

(At this point, you can jump down to making the filling while the crepes rest.)

Heat a non-stick skillet on medium high until a drop of water sizzles when put in the pan. Or, hold your hand an inch above the pan and see if noticeable heat is coming off it. I keep my pan on a setting between 8 and 9 (with 10 being the highest setting). Give the pan a quick spray with something like Pam (do this before cooking each crepe). Measure out about 1/3 cup crepe batter. Hold the pan in one hand and quickly pour the batter into the pan and rotate the pan so that the batter covers the pan. Cook only 10-20 seconds, until golden brown on the bottom. Then, flip and cook the other side. Continue until all crepes are cooked. (Makes 8-10 crepes.)

Cook the onion, carrots, and celery in a small amount of butter or olive oil until the onion wilts, then add the chopped roast beef and the broth and cover and cook 15 minutes.

Pour off 1 1/4 cup of the vegetable-beef cooking liquid and reserve for the sauce. If too much of the liquid has cooked away, make up to this volume with more beef broth. You want to leave a little liquid behind in the vegetable-beef mixture too, so that it is saucy.

Add the 1 tablespoon cornstarch mixed with 1/4 cup water to the vegetable-beef mixture and cook over medium high heat until the mixture thickens. Remove from heat and set aside.

Combine all the sauce ingredients except the cornstarch. If the mixture is cool, you can add the cornstarch directly to it; otherwise, stir the cornstarch into a little water first and then slowly stir it into the sauce. Cook the sauce until thick – this takes just a few minutes.

Note: We like our sauces fairly thick. If I see that the sauce is not thickening as much as I like, I’ll add more cornstarch. This is an individual preference so feel free to make changes.

Fill crepes with vegetable-beef mixture, cover with foil, and bake at 375° for 15-20 minutes. Serve with the heated sauce.

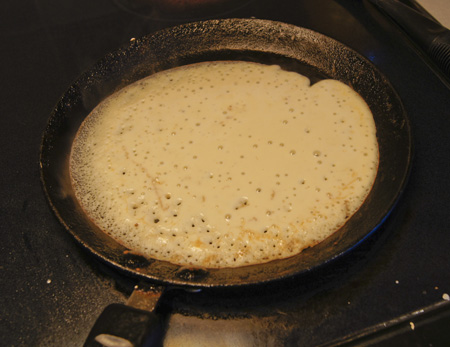
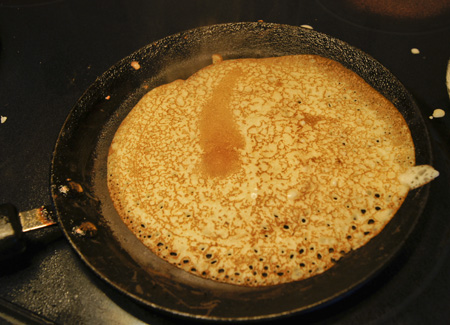
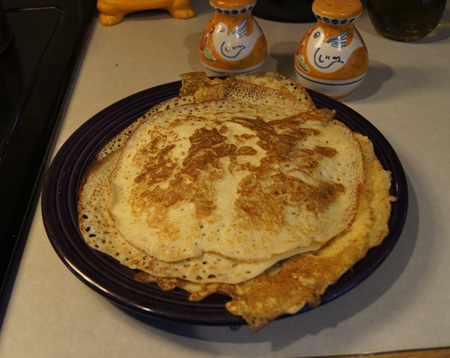
Below is a photo of a crepe just about ready to be turned. See the how the edges are golden brown. And I wasn’t kidding when I said my crepe pan was old and worn – but it works great. crepesNow the second side cooks:

crepes

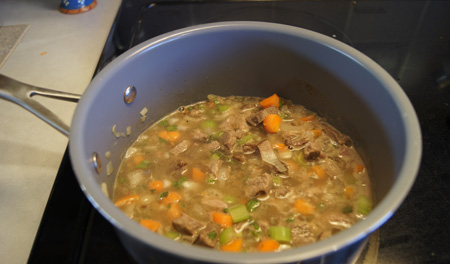
 A pile of crepes:crepesThe beef and vegetables cooking:

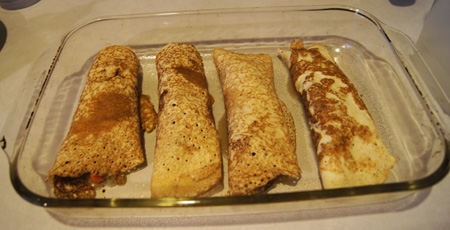
beef and vegetable fillingThe filled crepes waiting to be covered and baked. I usually have a little extra filling that I put over the top of the filled crepes, it makes them look prettier.

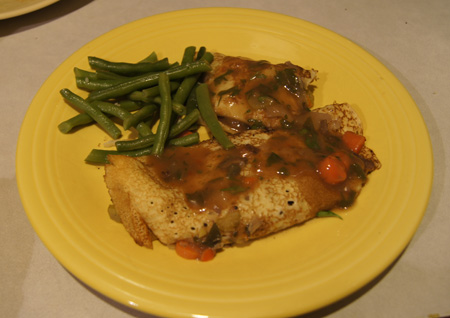
filled crepesI wasn’t going to take another photo of the prepared crepes or I wouldn’t have chosen the yellow plate. But plated, they looked so pretty (we both commented on them) that I just couldn’t resist. Below is my one-and-a-half crepe serving, my calorie-allotted amount. It was very good.

plated crepesI usually have some leftover crepes. I don’t mind, I like them for breakfast. Sometimes I fill them with cottage cheese, sprinkle with a little cinnamon, roll up and cook in a non-stick pan for a few minutes. Kind of like healthy crepes suzette. Or I just heat them up and drizzle with syrup. Or we have them for dessert, filled with blueberries. Can’t go wrong having too many crepes about.

Favorites: Italian-Style Turkey Cutlets

I found this recipe somewhere in a magazine or newspaper way back when: meaning, before I started writing down where and when I got a recipe. It has stood the test of time; I still make it today and I made it when the kids were here too. This recipe is for four people, although now I halve the recipe for just the two of us.

If you can’t find thin turkey breast cutlets, slice a whole breast horizontally. These are best when the crunch-to-juicy-turkey ratio is large.

Today, I generally chop a fresh tomato or two for this dish, since I halve the recipe and who wants half a can of tomatoes leftover. I also use fresh thyme and basil to taste. If you keep the amount of frying oil low and don’t add more mozzarella cheese, this is a great low calorie meal.

Italian-Style Turkey Cutlets

  • 4 turkey breast cutlets or fillets (about 1 1/4 pound for 4 people)
  • 1 egg white
  • 1 tablespoon Dijon-style mustard
  • 1 cup bread crumbs (you will have some leftover)
  • 1/4 cup chopped onions or shallots
  • 1 clove garlic, chopped fine
  • fresh or canned tomatoes (about 2 cups)
  • herbs to taste (thyme, basil, oregano, or an Italian mix)
  • 1/4 cup grated mozzarella cheese

Cook the onion in a saucepan until it wilts, then add garlic and cook 30 seconds. Add the tomatoes and fresh or dried herbs to taste. Salt and pepper to taste. Let this mixture simmer at least twenty minutes while you prepare the turkey cutlets.

Pound turkey cutlets to about 1/4″. If they spread out into huge pieces, cut them into smaller ones. Beat the egg white in one shallow bowl and put the bread crumbs in another shallow bowl. Shake some dry Italian seasoning mix and salt and pepper onto the bread crumbs and mix in.

Slather the Dijon mustard over the pounded turkey cutlets. Then dip them in the egg white, then roll in the bread crumbs.

Heat a non-stick pan until it feels nice and hot when you hold your hand an inch above it. Then drop in a little oil (olive oil is great) and spread it around. Add the breaded cutlets and cook 4-5 minutes on each side until golden. As they cook, heat the broiler in your oven.

Remove the cutlets from the pan and place them on a baking sheet or broiler pan. Divide the grated mozzarella cheese among them, then put them under the broiler and watch carefully until the cheese melts.

Plate the finished cutlets and spoon on some of the sauce. Cooked noodles are a great accompaniment, and a little fresh Parmesan doesn’t hurt!

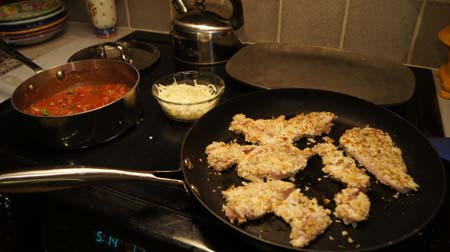
Here’s a photo of the tomato sauce simmering and the cutlets frying. I use the pan in the back for the broiling step. This whole meal goes together in about 30 minutes. It’s a great meal for a workday. (Or a busy retirement day.)

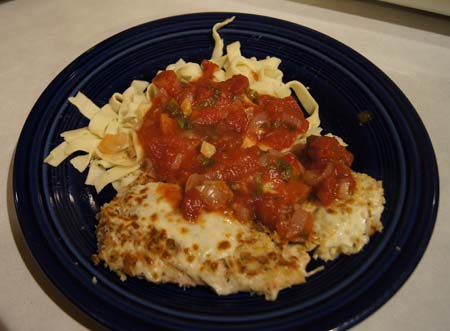
turkey cutletsHere is the plated meal. I used my own homemade noodles, prepared in a big batch the week before and stored in the freezer. Making the agnolotti from the New Pasta Cookbook a few weeks ago really inspired me to get out my manual pasta maker more often and make my own noodles. Something good has come from my travel through my 250 cookbooks!

turkey cutlets

250 Cookbooks: Weight Watchers 365-Day Menu Cookbook

Cookbook #14: Weight Watchers 365-Day Menu Cookbook. Weight Watchers International, Inc., New American Library Books, 1981.

WW 365 Day Menu CB

This is one of the many diet cookbooks that I purchased over the years. Diets, a fitting topic to cover for a January post, eh? I’ve never taken part in a Weight Watchers program, but I believe that they encourage a good, balanced eating program. So, over the years I picked up a couple of their cookbooks, to get ideas for recipes.

About half of this particular cookbook is taken up by meal plans. As the title indicates, it plans your meals for 365 days – an entire year. I scanned through these menus and they left me uninspired. Then I scanned the rest of the book, which contains recipes for the dishes in the menus. Again, I was uninspired.

Some ingredients are just weird. Like, they call for you to boil skinned chicken necks and backs, to make a dish that is “filling and easy on the budget”. No no no, I’d never do that. Another recipe directs you to whip evaporated skim milk for 15 minutes to make a low-fat dessert. 15 minutes! Maybe that will help burn off calories. But no thank you, if I want a light, calorie-controlled dessert, I’ll buy one of the convenient frozen diet-type desserts that are available today. One recipe calls for “1/3 cup plus 2 teaspoons orange juice”. Now that simply doesn’t make sense. The same recipe calls for “18 ounces vanilla flavored dietary frozen dessert”. I don’t even know where to find that. A salad dressing recipe has a few seasonings added to “1 tablespoon plus 1 teaspoon olive oil and 1 tablespoon white wine vinegar” and serves 4 people for 42 calories a serving; again, exact measuring is called for and each person gets only 1/2 tablespoon of dressing on their salad. Another recipe calls for artificial sweetener and 1/2 teaspoon curacoa extract (what’s that?).

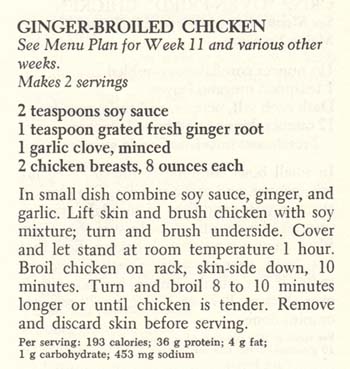
The recipes are a bit nutty on calorie content. For instance, in the recipe I chose (below), it states to use chicken breasts that are “about” 8 ounces each, and gives the calorie content as “193”. Why such a specific calorie value for an estimated ingredient? Today we are so fortunate to websites like Nutrient Facts, where I can quickly look up “chicken breast, meat only, cooked, roasted” to learn that 4 ounces of roasted chicken breast has 180 calories.

This is a cookbook that I will recycle. I found a recipe to try in this book, but only one. This cookbook might work for someone who has no imagination and likes to follow recipes obsessively and likes to think that they know exactly how many calories they are taking in. But that person is not me.

I visited the current Weight Watchers website, and I still think it is a good program. Currently they use some sort of point system to help people make good food choices, and they encourage people to eat fruits and vegetables and whole grains (although they don’t give a lot of details on the website, it’s more like a come-on). They offer encouragement to dieters through online or face-to-face support groups. (I looked at some of the recipes on the current web site, and was again uninspired. Just saying.)

The recipe I chose to try is “Ginger-Broiled Chicken”. I like this simple recipe because it uses freshly grated ginger in a garlic-soy sauce mixture that rubbed under the skin of chicken breasts. The chicken breasts rest at room temperature for an hour before broiling. (This is  unusual, most recipes today direct you to re-refrigerate chicken marinades as soon as possible.) I think the chicken will cook more evenly if it starts the oven broil at room temperature rather than cold. Finally, only after the chicken is cooked is the skin removed. Thus the chicken should stay moist during cooking, and you can remove the higher calorie skin before eating to reduce calories. This might be a good recipe for my repertoire of chicken recipes (currently, there are almost 50 pages of recipes in my personal chicken recipe document!).

Ginger-Broiled Chicken

Ginger-Broiled Chicken

  • 2 teaspoons soy sauce
  • 1 teaspoon fresh ginger, grated
  • 1 clove garlic, minced
  • 2 bone-in, skin-on chicken breasts, about 8 ounces each

Combine the soy sauce, ginger, and garlic and rub this mixture under the skin and all around each chicken breast. Let stand 1 hour at room temperature.

Set your oven’s broiler to a “low” setting and preheat a few minutes. Place the chicken skin side down on a rack in a pan, then put the pan in the oven about 5 inches from the broiler. Close the oven door.

Broil the chicken 10 minutes on the first side. Turn the chicken pieces, then broil another 8-10 minutes. If your chicken pieces are larger than 8 ounces each, it might take another 5 minutes to finish them. They are done when they are nicely browned and about 160˚ when checked with an instant-read thermometer.

Comments

These actually turned out great! The chicken breasts that I purchased were more like 14 ounces each, so I grated a bit more ginger and minced more garlic and soy sauce. The original recipe states only “broil chicken” with no oven settings or specifics such as how far to have the chicken from the broiler. My electric oven has two broiler settings, high and low, and I chose the low setting. I took a tape measure to measure the distance that I placed them from the broiler. It worked, so I incorporated these instructions in my version of the recipe (above).

Here is a photo:

Ginger-Broiled Chicken

It’s lovely and browned, right? I served them with the golden skin still on. The original recipe is dour and directs you to take the skin off. Why not let the diners at least enjoy the look of the browned chicken? I took the skin off before eating it, but I say, let each diner make their own decision. This chicken was moist, tender, wonderfully flavored with ginger and garlic and lightly salted from the soy sauce. I’d make Ginger-Broiled Chicken again!

250 Cookbooks: The New Pasta Cookbook

Cookbook #13: The New Pasta Cookbook. Joanne Glynn, Tormont Publications, Montreal, Canada, 1993.
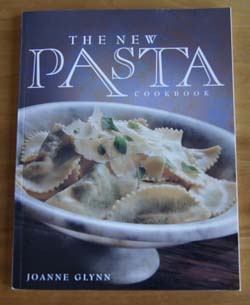
New Pasta Cookbook

Pasta is one of my favorite foods. Sometime in the early 1980s I bought a manual pasta maker, and sometime in the 1990s I received as a gift an electric pasta machine. I must have picked up The New Pasta Cookbook around the time I got the electric pasta machine. I don’t think I’ve ever made any recipe from this book, it’s clean and has no notes written in it.

This is a glossy cookbook with lots of photos, including pretty pictures of many different types of pasta. Some recipes use ready-made pasta, others include instructions for making the pasta from scratch. Lots of interesting variations on pasta sauces and pasta dishes are included. But for some reason, I just don’t “bond” with this book. The author doesn’t write personal notes, either in a foreword or with the individual recipes. Many recipes seem high calorie, although no nutrition information is included. I don’t like the layout of the recipes.The recipes have long names: “Fresh Carrot Pasta with Cream and Mint”, “Spicy Ricotta Agnolotti in Herb Leaf Pasta”, “Sauce of Leeks, Gruyere, and Cream”. Why do I mention this? A pet peeve. Long recipe names are distracting and pretentious, in my opinion.

It took me several times of going through this book to find a recipe I wanted to try. I chose one of the long-name recipes: “Seafood Agnolotti with Coriander and Zucchini”. Agnolotti is a filled pasta, similar to ravioli, but these are folded-over circles instead of filled squares. The recipe calls for preparing the pasta from scratch. The filling is a mixture of fish, shrimp, ricotta, spinach, fontina cheese, and coriander (cilantro). The sauce is light, just zucchini and butter: sounds good, but my eating partner likes heavy sauces and he is not a fan of zucchini. I will make a regular tomato sauce to sauce the agnolotti, and I will also prepare a variation on the zucchini sauce.

I have set myself up for a long task: pasta from scratch, a filling, and two sauces to prepare. I will have to focus carefully on the sauces, since I will be going off-recipe so that I can create something both of us will enjoy. Here is what lies ahead for me:

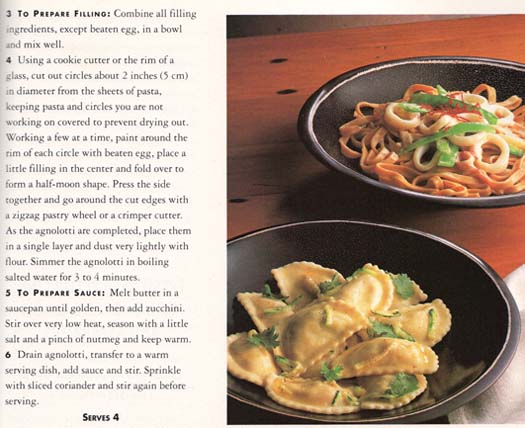
Agnolotti Rec1Agnolotti Rec2

It’s a Wednesday afternoon. I find my old manual pasta maker, dust off the cobwebs (literally). I used to use it a lot!  I remember making pasta at least once a month when the kids were little. I’d make a full batch and freeze extra noodles for quick mid-week meals. Where did I find the time, raising kids and working full time? And why did I stop making fresh pasta? I think I stopped because stores now offer fresh pastas that are almost as good. I also use no-bake lasagne noodles (Barilla); soaked in hot water, these make a quick lasagne or can be rolled to make manicotti.

But I seem to recall that homemade, fresh pasta just can’t be beat. And now I have the time to see if my memory is correct.

The Project

I am first going to describe how I prepared this dish, and then I will write down the recipe as I revised it.

Freshly mixed pasta dough needs to rest 30 minutes to an hour before it can be rolled out. So the first thing I do is prepare the pasta dough. I use the recipe that I was given at a cooking demonstration when I first bought my manual pasta maker:
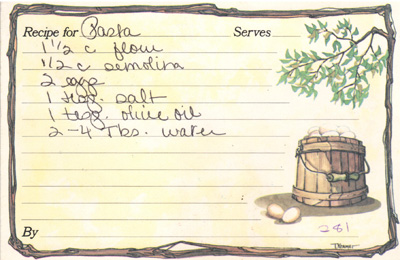
Pasta Recipe

I like semolina flour in my pasta dough, and I know this recipe works. I’m not going to all this work using an untried dough recipe. I put the flours, salt, eggs, olive oil, and a couple tablespoons of water in my big stand mixer, and start it mixing on a low speed. Then I add more water in small portions until the dough almost holds together. This is a judgement call, and I was pleased that it all came back to me, I just “knew” when it was right. This day, I added 3 tablespoons of water.

I took the dough out of the mixer and pressed it into a big ball. Then I covered it with plastic wrap and set it on the counter to rest. In the photo, you can see how the dough “almost” holds together.
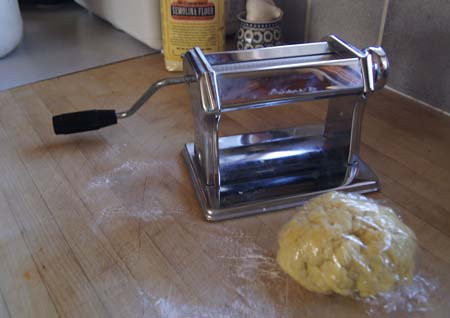
Agnolotti 2

Time to start the filling. Note that the New Pasta Cookbook’s recipe calls for poached fish and cooked shrimp, but gives no instructions for either task. I decide to poach the seafoods in hot water seasoned with lemon, cilantro, wine, and salt. I brought this mixture to a boil:
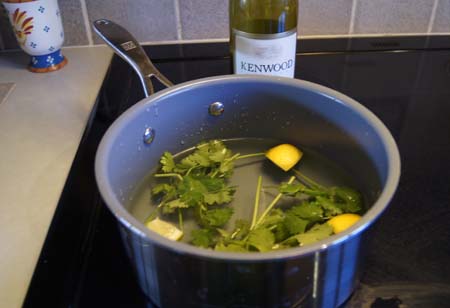
Agnolotti 1

I added the fish to the pot and covered it, then removed it from the heat. After two minutes, I added the shrimp (shrimp should never be overcooked). I waited another two minutes, then strained the mixture through a colander. When cool enough to handle, I picked out the fish and the shrimp, chopped them into small pieces, and put them in a bowl.

Next, I cooked the spinach. Spinach really cooks down. I put half of a 5-ounce package of fresh spinach in a pot and added a little water, brought it to a bowl, then turned off the heat. In a few minutes it was done. I drained it through a colander, squeezed out most of the liquid, and chopped the spinach (it measured about 1/4 cup). I added it to the bowl with the fish and shrimp, then I added the remaining filling ingredients.

By this time, at least 30 minutes had passed, so it’s time to roll the pasta. Boy, this all comes back to me! This is fun, pushing the dough through the pasta roller. My pasta maker has six settings. I started on setting 1 (thickest) and pushed one-quarter of the dough through, turning the crank. Then I folded that piece in two and rolled it through once more. Next I changed to setting 2 and rolled it through once, setting 3 once, and so on all the way to setting 5. By this time, the sheet of dough was quite large, so I chopped it in half and put each piece through setting 6. After I rolled all the dough in this manner, I had 8 thin sheets of dough. I covered them with plastic wrap to keep them from drying out too much.
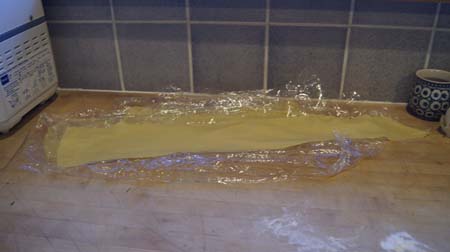
Agnolotti 3

Time to fill and cook the agnolottis. I start a pot of water boiling as I lay the first sheet of pasta out on my counter. I take my very ancient biscuit cutter and start cutting out circles. I have to push down very hard because it’s not very sharp!
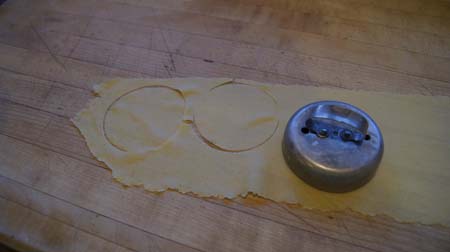
Agnolotti 4

I use my fingers to spread an egg wash on each circle, then add a small amount of filling, then fold the agnolottis over and crimp with a fork.
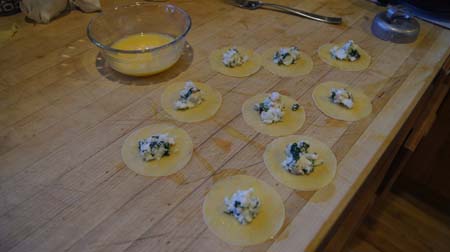
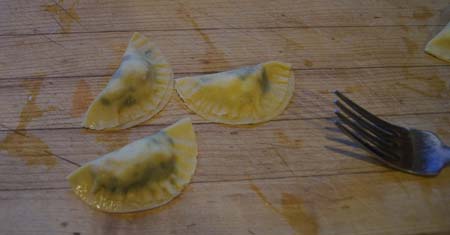
Agnolotti 5Agnolotti 6

I quickly learned that I couldn’t use too much filling or the dough would crack when folded. I also learned that the agnolottis like to stick to the bread board, so I transferred them to a lightly floured parchment paper.

Once I had about a dozen agnolottis formed, I put them in boiling, salted water. They took about 4 minutes to cook.

I just had to try one! I carefully removed one with a slotted spoon and when it was still almost too hot, I put it in my mouth. Agnolotti 8
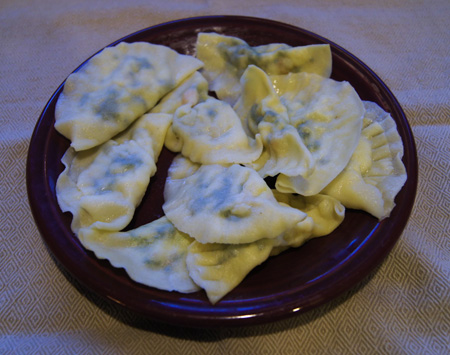
Absolutely heavenly! Perfect perfect perfect! The photo doesn’t do them justice, though.

Okay! Time to cook the rest of the little pastas. Now I can rest easy, I know they will make a great meal.

What happened, though, is that I cooked a lot of them, then got tired. I had enough for about three people when I stopped cooking the agnolottis. I had thought I’d make extra for another meal, but I had been in the kitchen for three hours and enough is enough. I froze about half the dough sheets for a future meal. I did a calculation, and I figure that if I had made the recipe according to the one in the cookbook, I would have enough for 8 people, not 4 as stated in the recipe. I had a lot of filling left over, but oh well. There is also a lot of wasted dough, since cutting circles leaves a lot of unusable dough pieces. (Square raviolis make better use of a sheet of dough. Ravioli is more environmentally proper. Ha.)

While I was making the agnolottis, I also prepared a baked tomato sauce. The New Pasta Cookbook has a recipe for this, and it appealed to me because I could just pop it in the oven and forget about it.
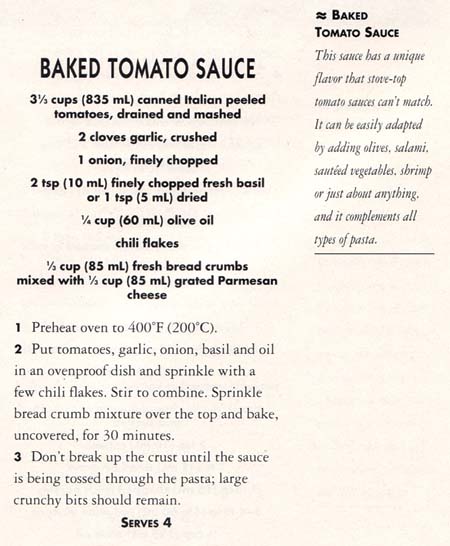
Baked Tomato SauceI followed this recipe almost as written. I didn’t drain the tomatoes; I used an immersion blender to crush them; I chopped the onion, garlic, and basil in a mini-chopper. It turned out great:
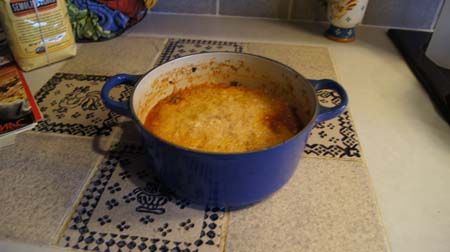
Baked Tomato SauceI finished the pasta and the tomato sauce about an hour before meal time. Just before we ate, I quickly sauted julienned zucchini and a mixture of mushrooms in a little butter.
To serve, I lay the agnolotti on each plate, then put a little sauce and zucchini-mushroom mixture on and around the pastas.

When I sat down to eat, I shoveled in about three pastas and then stopped to breathe. They were that good. Delicate, bursting with flavor, and perfectly complemented with my two sauces.

These were so successful that I will keep this cookbook, try more recipes, while aware that the recipe might take a long time to prepare. I read the back of the book and learned that in 1985 the author opened a fresh pasta business, supplying a chain of retail shops. I’m sure that she has a lot of help when she prepares her recipes. I need a sous chef!

The Recipe: Seafood Agnolotti

This recipe makes enough for 2-4 people, depending on appetites. It makes extra pasta dough, which can be frozen, uncooked, for later use.

Pasta:

  • 1 1/2 cup all purpose flour
  • 1/2 cup semolina flour
  • 1/2 teaspoon salt
  • 2 eggs
  • 2 tablespoons olive oil
  • 2-4 tablespoons water

Put the flours and salt in an electric mixer bowl, then add the eggs and oil. Turn the mixer to a low speed and mix until the eggs are incorporated. Continue mixing while adding water, one tablespoon at a time, just until the dough holds together. Remove the dough and push it into a large ball, cover with plastic wrap, and let stand at least 30 minutes.

Divide the dough into four pieces. Use a manual pasta maker to roll each portion into a long thin sheet, going sequentially through the settings on the roller from 1 (thick) to 6 (thin). If a sheet gets too unwieldy, cut it in half. Cover the sheets of dough with plastic wrap or damp towels.

Filling

  • 2 ounces white fish, uncooked (cod, sole, halibut, haddock, etc.)
  • 2 ounces raw shrimp, shell removed
  • lemon, cilantro, and wine for poaching fish
  • 1 tablespoon finely chopped cilantro (this is fresh coriander)
  • 1/4 cup fine bread crumbs
  • 1 1/2 tablespoons grated fontina cheese
  • 1/8 teaspoon salt
  • about 1/2 ounce fresh spinach
  • 1/3 cup ricotta cheese

Bring a pot of salted water to a boil, then add lemon wedges, a few sprigs of cilantro, and a dash of white wine. Add the fish and cover the pot and remove from the heat. Let stand 2 minutes. Add the shrimp and let stand an additional 2 minutes. Drain through a colander. Pick out the fish and shrimp and place in separate piles; chop each finely (especially the shrimp, or it will poke through the agnolotti), then place in a bowl.

Put the fresh spinach in a pot – a half ounce is probably about a cup. The amount of spinach is not critical, since about all it brings to this dish is a bit of color (well, a few nutrients too). Add about a half cup of water to the pot, cover, and bring to a boil. Remove from heat, and when cool enough to handle, put the spinach through a colander and squeeze out all the moisture. Chop it finely and add to the fish and shrimp.

If necessary, make fresh bread crumbs in a food processor, or use packaged bread crumbs. Add these to the other filling ingredients along with the fontina and ricotta cheeses, a little salt, and a tablespoon of chopped cilantro.

Making the agnolotti

Beat an egg in a small bowl – it is used to seal the pasta. Set a pot of salted water over high heat to bring it to a boil.

Place a sheet of dough on your working surface. Use a cookie cutter or the rim of a glass (about 2 inches in diameter) to cut out circles of dough. Use a brush or your fingers to paint the beaten egg around the rim of each circle. (I used my fingers and I got the entire circle “painted” but hey, I’m a messy cook.)

Put a little filling in the center of each circle, then fold over to form a half-moon shape. (You will learn that you cannot fill these too full, or they will burst through the dough when you fold them over.) Press the sides of the circle together and go around the cut edges with a fork, or a zigzag pastry wheel or a crimper cutter if you own such a tool.

As the agnolotti are filled, place them on a lightly dusted piece of parchment. When you have enough to fill a pot (about 10-12), put them in to cook for about 4 minutes. Meanwhile, go back to making more agnolotti.

Remove cooked agnolotti with a slotted spoon and place them in a colander. Make agnolotti and cook agnolotti until you have used all the filling, or until you think you have enough to serve as many people as you have for dinner.

As the agnolotti cool in a colander, they probably won’t stick together, but watch them. I didn’t rinse them. When completely cool, you can put them on a large dish or in a bowl.

At serving time, these are tricky to heat back up. I microwaved them briefly, but a couple burst and made a mess in the microwave. The best way is probably to run hot water over them, or put them into a simmering sauce just before serving.

Wrap and freeze any unused pasta dough. If you have extra cooked agnolotti, you can freeze them.

Sauce 1: Baked Tomato Sauce

This makes more sauce than you will need for 2-4 people; any extra can be frozen.

  • 28 ounce can of whole, peeled tomatoes (undrained)
  • 2 cloves garlic (or more)
  • 1 small onion, cut in chunks
  • lots of fresh basil (at least a couple tablespoons when chopped)
  • 1/4 cup extra virgin olive oil
  • chili flakes
  • 1/3 cup fine bread crumbs (fresh if possible)
  • 1/3 cup grated Parmesan cheese (fresh if possible)

Put the tomatoes in a deep baking dish. Use an immersion blender in pulses to break up the tomatoes a little, without turning them into a puree. Alternatively, mash them with a fork.

Put the garlic, onion, and basil in a food processor and pulse a few times. You want these finely chopped, but not pureed. Stir the mixture into the tomatoes along with the olive oil, then sprinkle with a few chili flakes.

Mix the bread crumbs and the Parmesan cheese, then sprinkle over the top of the tomato mixture. Bake – uncovered – in a 400˚ oven for 45 minutes.

Don’t break the crust until the sauce is being tossed through the pasta; large crunchy bits should remain.

Sauce 2: Zucchini and mushrooms

  • 1/2 of a zucchini
  • 2-4 ounces mushrooms (plain old white ones, or see if you can a mixture of interesting-looking types at your local store)
  • olive oil to taste

Slice the zucchini into thin strips, julienne-style. Chop the mushrooms. Heat the oil in a pan and cook the zucchini for a minute or two, then add the mushrooms and cook a few more minutes, until the mushrooms are cooked. Drizzle with olive oil. Feel free to add garlic, basil, or Parmesan cheese, or even some cilantro.

Put it all together

Warm the agnolotti (if necessary) by running some hot water over them. Place them on a warm serving plate, if possible. Arrange, to taste, the tomato and zucchini-mushroom sauces around and on top of the agnolotti.

Serve! Enjoy!

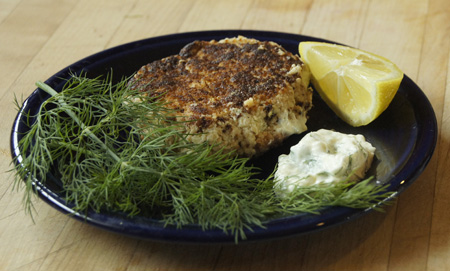
Favorites: Fish Cakes with Sauce

This recipe is based on one I clipped from a printed BonAppetit magazine, date unknown. I first tried these fish cakes in 2009, and modified the recipe several times to settle on the version below. What’s kind of nice about this entree is that you can use frozen fish. I choose frozen mahi mahi, simply because I can always find it as a wild caught product in our local stores. Cooked as is from the package, it can be tough. But chopped up in these dill-seasoned fish cakes, it is a yummy delicacy.

I state to use “12 ounces” of fish because that’s the size package it’s sold in. Any fish will probably work. I’ve been successful with tuna, mahi mahi, and cod. If you don’t have quite 12 ounces of a fish filet, add a few scallops to make up the weight.

If you don’t have fresh dill, use any fresh herbs you have, like oregano and basil.

The recipe makes 4 fish cakes. It will serve 2-4 people, depending on appetites. For the two of us, I usually have a leftover fish cake that tastes good the next day!

Sauce:

  • 1/4 cup mayonnaise
  • 1/4 cup yogurt (substitute the yogurt with mayonnaise if you prefer)
  • 2 tablespoons lemon juice (fresh) (go ahead and squeeze 3 tablespoons, since you will need 1 tablespoon for the fish cakes)
  • 1 tablespoon lemon zest
  • 2 tablespoons pickle relish
  • 1-2 tablespoons horseradish (this depends on how hot your horseradish is and how much you like the taste of horseradish)
  • 2 tablespoons chopped fresh dill (go ahead and chop 3 tablespoons, since you will need a tablespoon for the fish cakes)
  • 1/4 cup chopped green onions (go ahead and chop 1/2 cup, since you will need 1/4 cup for the fish cakes)

Fish cakes:

  • 2 cups fine bread crumbs, divided (process about 3 slices of sandwich bread in a food processor)
  • 1/4 cup chopped green onions
  • 1 tablespoon chopped fresh dill
  • 1 tablespoon lemon juice
  • 1 egg, lightly beaten
  • 12 ounces mahi mahi, or other boneless, darkish fish (this is a good time to use economical frozen fish)
  • olive oil

Mix the sauce ingredients and set aside.

Put 1 cup crumbs in a large bowl (for the fish cakes), and place about a cup in a dish (for coating fish cakes).

Cut the fish into large chunks and put it in a food processor. Using very short on/off pulses, very coarsely chop it (do not form a paste).

Add the processed fish to the breadcrumbs in the bowl; then gently mix in the egg, 1 tablespoon of the sauce, 1/4 cup green onion, 1 tablespoon of lemon juice, 1 tablespoon chopped dill, and a little salt.

At this point, you can let the mixture stand for an hour or so, covered in the refrigerator. The original recipe did not say to do this, but I did it and it worked.

Shape the fish mixture into 4 – 3 1/2″ round cakes. Thickly coat both sides with the breadcrumbs in the dish.

Heat a large non-stick pan over medium high heat. (I always hold my hand an inch above the pan and when I can feel a good heat coming off the pan, I know it’s ready. Don’t heat it to the smoking stage.) When the pan is hot, add enough olive oil to lightly cover the bottom of the pan. As soon as the oil is shimmering, carefully add the fish cakes. Cook until cooked through and nice and brown and crispy, about 4-5 minutes per side.

Serve immediately, with the sauce and fresh lemon wedges.

Fish Cakes

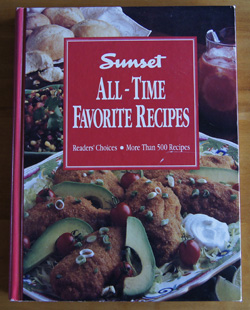
250 Cookbooks: Sunset All-Time Favorite Recipes

Cookbook #11: Sunset All-Time Favorite Recipes, Readers’ Choices. Sunset Publishing, 1993.

Sunset All Time Favorite Recipes

This one is going to be easy! I opened this volume of over 500 recipes and wanted to try at least half of them. I don’t have to write about how much I dislike a cookbook!

This is a cookbook I bought for myself. The recipes work right into my type of cooking. I’d say they lean towards Southwestern cooking, with lots of chiles and spices, fresh vegetables and fruits, light and practical recipes, as well as comfort foods. I went to the current Sunset Magazine website, and they still focus on “How to Live in the West” (US). That’s where I was born and raised—no wonder this cookbook “fits” me.

I have several pieces of paper marking pages in this book, and even a letter from my daughter. I’ve spent a lot of quality time with this cookbook. The book is well laid out with pleasing illustrations and rough-paper pages. I never wrote in this book, guess I felt it would be a shame to ruin the pages with my unreadable scrawl. There are not even any cooking stains in it. But I’ve used this cookbook a lot. Mostly as a reference for ideas, but a few of the recipes have become a part of my repertoire.

Special features that I have used as references include fish-cooking tips, sizzling stir-frys, and non-preachy lightening-up tips. The recipe content covers the gamut of appetizers to soups to poultry to vegetables to breads to desserts. Throughout, small insets offer historical tidbits and cooking insights. Nutritional information is given for each recipe.

One day a few years ago I re-shelved this cookbook and forgot about it. Well, I’m bringing it back downstairs and putting it within easy reach. It’s like finding an old friend.

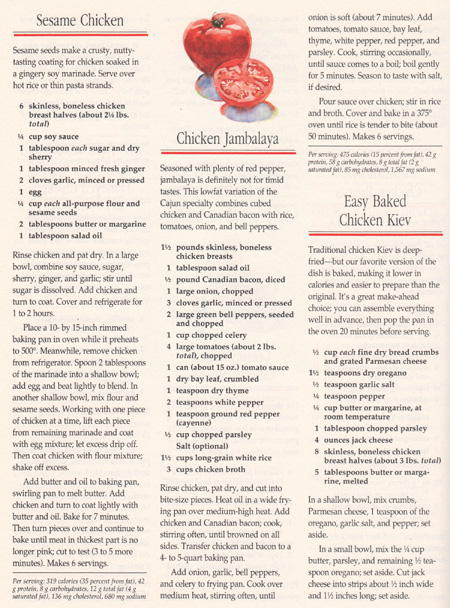
For this blog, I chose the recipe “Sesame Chicken”. It uses boneless chicken breasts, a marvelous, low-fat convenience food. Grilled, baked, stuffed, sauted and sauced . . . chicken breasts lend themselves to so many different meals. Years ago we had to bone our own chicken breasts; later, as a working mom, I felt it was worth the money to buy them already boned. In the last decades of the twentieth century, these became available individually frozen in freezer bags. They are a staple in my freezer!

Here is the entire page that has the Sesame Chicken recipe. It’s a good example of the nice layout and illustrations in this cookbook.

Sesame Chicken Recipe from book

Sesame Chicken


I made this recipe for two people, with two chicken breasts. I made the original amount of marinade, though, as reflected in my recipe entry below. The chicken is baked really hot, for only 15 minutes. On busy work days, I’m sure you could start the chicken marinading in the morning. In fact, you could probably take frozen breasts out of the bag in the morning, rinse quickly with hot water, put in a ziplock bag with the marinade, set the bag in the refrigerator for the day, and the chicken would be ready to cook for dinner.

  • 2 boneless, skinless chicken breasts (12-14 ounces)
  • 1/4 cup soy sauce
  • 1 tablespoon sugar
  • 1 tablespoon sherry
  • 1 tablespoon minced fresh ginger (a rasper-grater works well)
  • 2 cloves garlic, minced
  • 1 egg
  • 2 tablespoons flour
  • 2 tablespoons sesame seeds
  • 1 tablespoon butter
  • 1 tablespoon vegetable oil (about)

Mix the soy sauce, sugar, sherry, ginger, and garlic. Marinate the chicken breasts in this marinade for 1 to 2 hours in the refrigerator.

Preheat your oven to 500˚ (this might take awhile!). Place a baking pan (such as a 10×15-inch half sheet pan) in the oven to preheat the pan, too.

Put 1 tablespoon of the marinade in a shallow bowl; add egg and beat lightly to blend. In another shallow bowl, mix flour and sesame seeds. One at a time, remove the chicken breasts from the marinade and coat with the egg mixture; let excess drip off. Then coat chicken with flour mixture; shake off excess.

Add butter and oil to the hot baking pan and swirl to melt butter. Add chicken and turn to coat lightly with butter and oil.

Bake for 7 minutes. Then turn pieces over and continue to bake until meat in thickest part is no longer pink, about 3-5 more minutes. (Cut to test or use an instant read thermometer, 165˚ is good.)

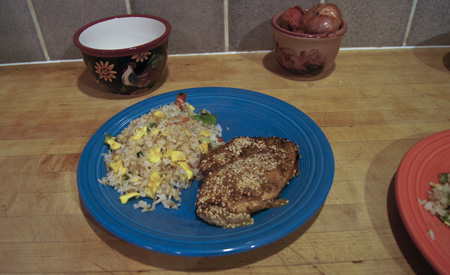
I served the Sesame Chicken next to homemade fried rice. We liked it, and I’ll make it again!

Sesame Chicken