250 Cookbooks: Weight Watchers 365-Day Menu Cookbook

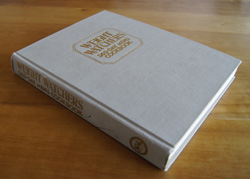
Cookbook #14: Weight Watchers 365-Day Menu Cookbook. Weight Watchers International, Inc., New American Library Books, 1981.

WW 365 Day Menu CB

This is one of the many diet cookbooks that I purchased over the years. Diets, a fitting topic to cover for a January post, eh? I’ve never taken part in a Weight Watchers program, but I believe that they encourage a good, balanced eating program. So, over the years I picked up a couple of their cookbooks, to get ideas for recipes.

About half of this particular cookbook is taken up by meal plans. As the title indicates, it plans your meals for 365 days – an entire year. I scanned through these menus and they left me uninspired. Then I scanned the rest of the book, which contains recipes for the dishes in the menus. Again, I was uninspired.

Some ingredients are just weird. Like, they call for you to boil skinned chicken necks and backs, to make a dish that is “filling and easy on the budget”. No no no, I’d never do that. Another recipe directs you to whip evaporated skim milk for 15 minutes to make a low-fat dessert. 15 minutes! Maybe that will help burn off calories. But no thank you, if I want a light, calorie-controlled dessert, I’ll buy one of the convenient frozen diet-type desserts that are available today. One recipe calls for “1/3 cup plus 2 teaspoons orange juice”. Now that simply doesn’t make sense. The same recipe calls for “18 ounces vanilla flavored dietary frozen dessert”. I don’t even know where to find that. A salad dressing recipe has a few seasonings added to “1 tablespoon plus 1 teaspoon olive oil and 1 tablespoon white wine vinegar” and serves 4 people for 42 calories a serving; again, exact measuring is called for and each person gets only 1/2 tablespoon of dressing on their salad. Another recipe calls for artificial sweetener and 1/2 teaspoon curacoa extract (what’s that?).

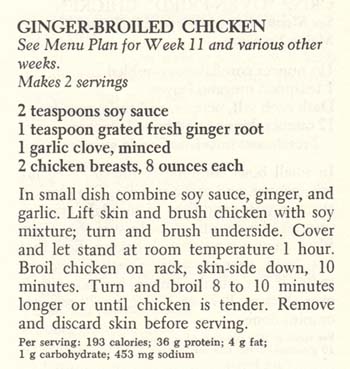
The recipes are a bit nutty on calorie content. For instance, in the recipe I chose (below), it states to use chicken breasts that are “about” 8 ounces each, and gives the calorie content as “193”. Why such a specific calorie value for an estimated ingredient? Today we are so fortunate to websites like Nutrient Facts, where I can quickly look up “chicken breast, meat only, cooked, roasted” to learn that 4 ounces of roasted chicken breast has 180 calories.

This is a cookbook that I will recycle. I found a recipe to try in this book, but only one. This cookbook might work for someone who has no imagination and likes to follow recipes obsessively and likes to think that they know exactly how many calories they are taking in. But that person is not me.

I visited the current Weight Watchers website, and I still think it is a good program. Currently they use some sort of point system to help people make good food choices, and they encourage people to eat fruits and vegetables and whole grains (although they don’t give a lot of details on the website, it’s more like a come-on). They offer encouragement to dieters through online or face-to-face support groups. (I looked at some of the recipes on the current web site, and was again uninspired. Just saying.)

The recipe I chose to try is “Ginger-Broiled Chicken”. I like this simple recipe because it uses freshly grated ginger in a garlic-soy sauce mixture that rubbed under the skin of chicken breasts. The chicken breasts rest at room temperature for an hour before broiling. (This is  unusual, most recipes today direct you to re-refrigerate chicken marinades as soon as possible.) I think the chicken will cook more evenly if it starts the oven broil at room temperature rather than cold. Finally, only after the chicken is cooked is the skin removed. Thus the chicken should stay moist during cooking, and you can remove the higher calorie skin before eating to reduce calories. This might be a good recipe for my repertoire of chicken recipes (currently, there are almost 50 pages of recipes in my personal chicken recipe document!).

Ginger-Broiled Chicken

Ginger-Broiled Chicken

  • 2 teaspoons soy sauce
  • 1 teaspoon fresh ginger, grated
  • 1 clove garlic, minced
  • 2 bone-in, skin-on chicken breasts, about 8 ounces each

Combine the soy sauce, ginger, and garlic and rub this mixture under the skin and all around each chicken breast. Let stand 1 hour at room temperature.

Set your oven’s broiler to a “low” setting and preheat a few minutes. Place the chicken skin side down on a rack in a pan, then put the pan in the oven about 5 inches from the broiler. Close the oven door.

Broil the chicken 10 minutes on the first side. Turn the chicken pieces, then broil another 8-10 minutes. If your chicken pieces are larger than 8 ounces each, it might take another 5 minutes to finish them. They are done when they are nicely browned and about 160˚ when checked with an instant-read thermometer.

Comments

These actually turned out great! The chicken breasts that I purchased were more like 14 ounces each, so I grated a bit more ginger and minced more garlic and soy sauce. The original recipe states only “broil chicken” with no oven settings or specifics such as how far to have the chicken from the broiler. My electric oven has two broiler settings, high and low, and I chose the low setting. I took a tape measure to measure the distance that I placed them from the broiler. It worked, so I incorporated these instructions in my version of the recipe (above).

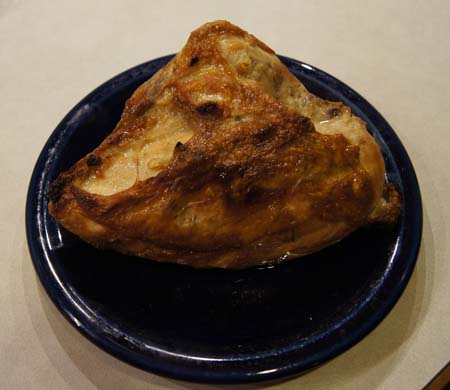
Here is a photo:

Ginger-Broiled Chicken

It’s lovely and browned, right? I served them with the golden skin still on. The original recipe is dour and directs you to take the skin off. Why not let the diners at least enjoy the look of the browned chicken? I took the skin off before eating it, but I say, let each diner make their own decision. This chicken was moist, tender, wonderfully flavored with ginger and garlic and lightly salted from the soy sauce. I’d make Ginger-Broiled Chicken again!

250 Cookbooks: The New Pasta Cookbook

Cookbook #13: The New Pasta Cookbook. Joanne Glynn, Tormont Publications, Montreal, Canada, 1993.
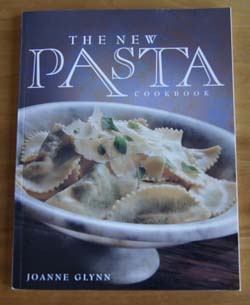
New Pasta Cookbook

Pasta is one of my favorite foods. Sometime in the early 1980s I bought a manual pasta maker, and sometime in the 1990s I received as a gift an electric pasta machine. I must have picked up The New Pasta Cookbook around the time I got the electric pasta machine. I don’t think I’ve ever made any recipe from this book, it’s clean and has no notes written in it.

This is a glossy cookbook with lots of photos, including pretty pictures of many different types of pasta. Some recipes use ready-made pasta, others include instructions for making the pasta from scratch. Lots of interesting variations on pasta sauces and pasta dishes are included. But for some reason, I just don’t “bond” with this book. The author doesn’t write personal notes, either in a foreword or with the individual recipes. Many recipes seem high calorie, although no nutrition information is included. I don’t like the layout of the recipes.The recipes have long names: “Fresh Carrot Pasta with Cream and Mint”, “Spicy Ricotta Agnolotti in Herb Leaf Pasta”, “Sauce of Leeks, Gruyere, and Cream”. Why do I mention this? A pet peeve. Long recipe names are distracting and pretentious, in my opinion.

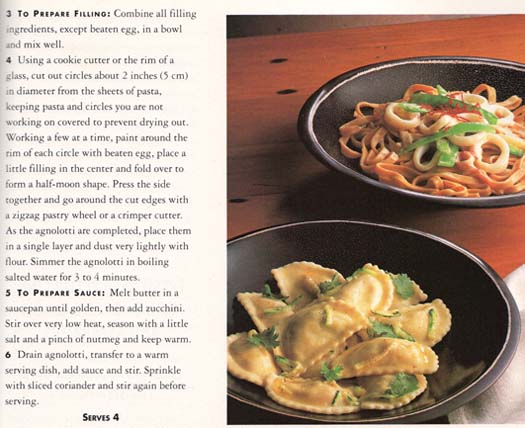
It took me several times of going through this book to find a recipe I wanted to try. I chose one of the long-name recipes: “Seafood Agnolotti with Coriander and Zucchini”. Agnolotti is a filled pasta, similar to ravioli, but these are folded-over circles instead of filled squares. The recipe calls for preparing the pasta from scratch. The filling is a mixture of fish, shrimp, ricotta, spinach, fontina cheese, and coriander (cilantro). The sauce is light, just zucchini and butter: sounds good, but my eating partner likes heavy sauces and he is not a fan of zucchini. I will make a regular tomato sauce to sauce the agnolotti, and I will also prepare a variation on the zucchini sauce.

I have set myself up for a long task: pasta from scratch, a filling, and two sauces to prepare. I will have to focus carefully on the sauces, since I will be going off-recipe so that I can create something both of us will enjoy. Here is what lies ahead for me:

Agnolotti Rec1Agnolotti Rec2

It’s a Wednesday afternoon. I find my old manual pasta maker, dust off the cobwebs (literally). I used to use it a lot!  I remember making pasta at least once a month when the kids were little. I’d make a full batch and freeze extra noodles for quick mid-week meals. Where did I find the time, raising kids and working full time? And why did I stop making fresh pasta? I think I stopped because stores now offer fresh pastas that are almost as good. I also use no-bake lasagne noodles (Barilla); soaked in hot water, these make a quick lasagne or can be rolled to make manicotti.

But I seem to recall that homemade, fresh pasta just can’t be beat. And now I have the time to see if my memory is correct.

The Project

I am first going to describe how I prepared this dish, and then I will write down the recipe as I revised it.

Freshly mixed pasta dough needs to rest 30 minutes to an hour before it can be rolled out. So the first thing I do is prepare the pasta dough. I use the recipe that I was given at a cooking demonstration when I first bought my manual pasta maker:
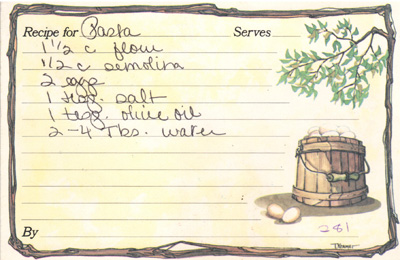
Pasta Recipe

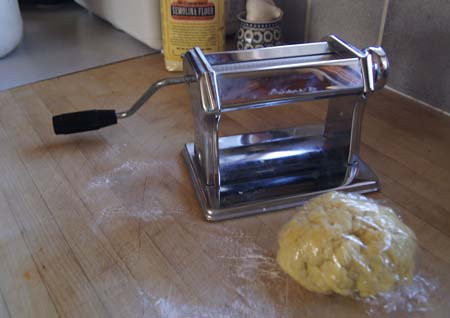
I like semolina flour in my pasta dough, and I know this recipe works. I’m not going to all this work using an untried dough recipe. I put the flours, salt, eggs, olive oil, and a couple tablespoons of water in my big stand mixer, and start it mixing on a low speed. Then I add more water in small portions until the dough almost holds together. This is a judgement call, and I was pleased that it all came back to me, I just “knew” when it was right. This day, I added 3 tablespoons of water.

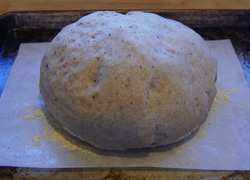
I took the dough out of the mixer and pressed it into a big ball. Then I covered it with plastic wrap and set it on the counter to rest. In the photo, you can see how the dough “almost” holds together.
Agnolotti 2

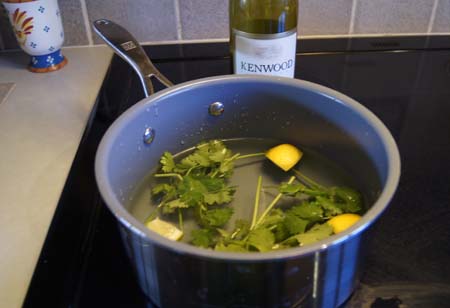
Time to start the filling. Note that the New Pasta Cookbook’s recipe calls for poached fish and cooked shrimp, but gives no instructions for either task. I decide to poach the seafoods in hot water seasoned with lemon, cilantro, wine, and salt. I brought this mixture to a boil:
Agnolotti 1

I added the fish to the pot and covered it, then removed it from the heat. After two minutes, I added the shrimp (shrimp should never be overcooked). I waited another two minutes, then strained the mixture through a colander. When cool enough to handle, I picked out the fish and the shrimp, chopped them into small pieces, and put them in a bowl.

Next, I cooked the spinach. Spinach really cooks down. I put half of a 5-ounce package of fresh spinach in a pot and added a little water, brought it to a bowl, then turned off the heat. In a few minutes it was done. I drained it through a colander, squeezed out most of the liquid, and chopped the spinach (it measured about 1/4 cup). I added it to the bowl with the fish and shrimp, then I added the remaining filling ingredients.

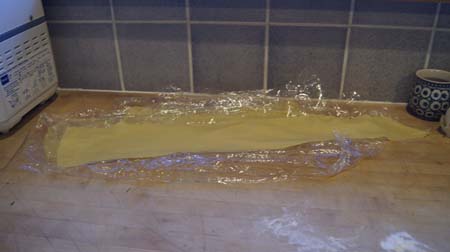
By this time, at least 30 minutes had passed, so it’s time to roll the pasta. Boy, this all comes back to me! This is fun, pushing the dough through the pasta roller. My pasta maker has six settings. I started on setting 1 (thickest) and pushed one-quarter of the dough through, turning the crank. Then I folded that piece in two and rolled it through once more. Next I changed to setting 2 and rolled it through once, setting 3 once, and so on all the way to setting 5. By this time, the sheet of dough was quite large, so I chopped it in half and put each piece through setting 6. After I rolled all the dough in this manner, I had 8 thin sheets of dough. I covered them with plastic wrap to keep them from drying out too much.
Agnolotti 3

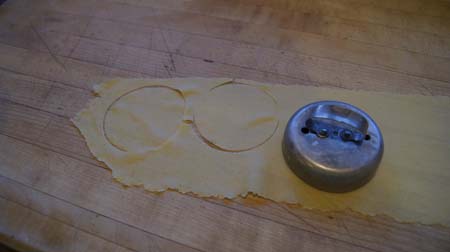
Time to fill and cook the agnolottis. I start a pot of water boiling as I lay the first sheet of pasta out on my counter. I take my very ancient biscuit cutter and start cutting out circles. I have to push down very hard because it’s not very sharp!
Agnolotti 4

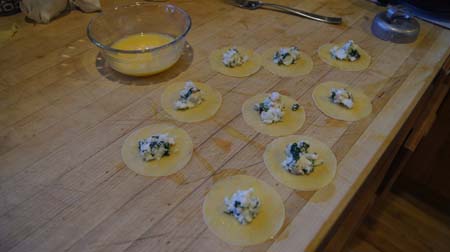
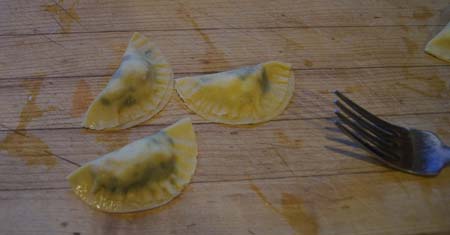
I use my fingers to spread an egg wash on each circle, then add a small amount of filling, then fold the agnolottis over and crimp with a fork.
Agnolotti 5Agnolotti 6

I quickly learned that I couldn’t use too much filling or the dough would crack when folded. I also learned that the agnolottis like to stick to the bread board, so I transferred them to a lightly floured parchment paper.

Once I had about a dozen agnolottis formed, I put them in boiling, salted water. They took about 4 minutes to cook.

I just had to try one! I carefully removed one with a slotted spoon and when it was still almost too hot, I put it in my mouth. Agnolotti 8
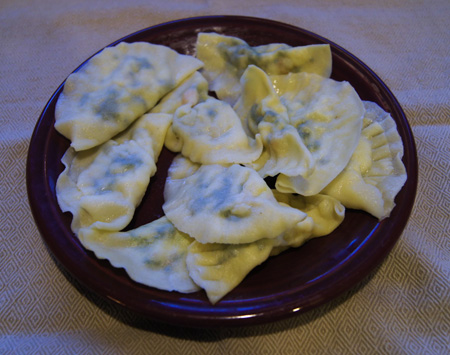
Absolutely heavenly! Perfect perfect perfect! The photo doesn’t do them justice, though.

Okay! Time to cook the rest of the little pastas. Now I can rest easy, I know they will make a great meal.

What happened, though, is that I cooked a lot of them, then got tired. I had enough for about three people when I stopped cooking the agnolottis. I had thought I’d make extra for another meal, but I had been in the kitchen for three hours and enough is enough. I froze about half the dough sheets for a future meal. I did a calculation, and I figure that if I had made the recipe according to the one in the cookbook, I would have enough for 8 people, not 4 as stated in the recipe. I had a lot of filling left over, but oh well. There is also a lot of wasted dough, since cutting circles leaves a lot of unusable dough pieces. (Square raviolis make better use of a sheet of dough. Ravioli is more environmentally proper. Ha.)

While I was making the agnolottis, I also prepared a baked tomato sauce. The New Pasta Cookbook has a recipe for this, and it appealed to me because I could just pop it in the oven and forget about it.
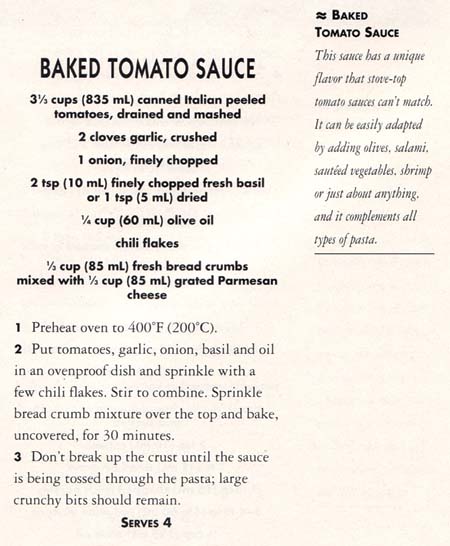
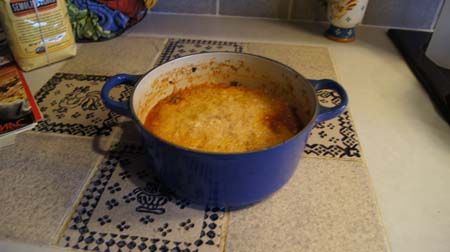
Baked Tomato SauceI followed this recipe almost as written. I didn’t drain the tomatoes; I used an immersion blender to crush them; I chopped the onion, garlic, and basil in a mini-chopper. It turned out great:
Baked Tomato SauceI finished the pasta and the tomato sauce about an hour before meal time. Just before we ate, I quickly sauted julienned zucchini and a mixture of mushrooms in a little butter.
To serve, I lay the agnolotti on each plate, then put a little sauce and zucchini-mushroom mixture on and around the pastas.

When I sat down to eat, I shoveled in about three pastas and then stopped to breathe. They were that good. Delicate, bursting with flavor, and perfectly complemented with my two sauces.

These were so successful that I will keep this cookbook, try more recipes, while aware that the recipe might take a long time to prepare. I read the back of the book and learned that in 1985 the author opened a fresh pasta business, supplying a chain of retail shops. I’m sure that she has a lot of help when she prepares her recipes. I need a sous chef!

The Recipe: Seafood Agnolotti

This recipe makes enough for 2-4 people, depending on appetites. It makes extra pasta dough, which can be frozen, uncooked, for later use.

Pasta:

  • 1 1/2 cup all purpose flour
  • 1/2 cup semolina flour
  • 1/2 teaspoon salt
  • 2 eggs
  • 2 tablespoons olive oil
  • 2-4 tablespoons water

Put the flours and salt in an electric mixer bowl, then add the eggs and oil. Turn the mixer to a low speed and mix until the eggs are incorporated. Continue mixing while adding water, one tablespoon at a time, just until the dough holds together. Remove the dough and push it into a large ball, cover with plastic wrap, and let stand at least 30 minutes.

Divide the dough into four pieces. Use a manual pasta maker to roll each portion into a long thin sheet, going sequentially through the settings on the roller from 1 (thick) to 6 (thin). If a sheet gets too unwieldy, cut it in half. Cover the sheets of dough with plastic wrap or damp towels.

Filling

  • 2 ounces white fish, uncooked (cod, sole, halibut, haddock, etc.)
  • 2 ounces raw shrimp, shell removed
  • lemon, cilantro, and wine for poaching fish
  • 1 tablespoon finely chopped cilantro (this is fresh coriander)
  • 1/4 cup fine bread crumbs
  • 1 1/2 tablespoons grated fontina cheese
  • 1/8 teaspoon salt
  • about 1/2 ounce fresh spinach
  • 1/3 cup ricotta cheese

Bring a pot of salted water to a boil, then add lemon wedges, a few sprigs of cilantro, and a dash of white wine. Add the fish and cover the pot and remove from the heat. Let stand 2 minutes. Add the shrimp and let stand an additional 2 minutes. Drain through a colander. Pick out the fish and shrimp and place in separate piles; chop each finely (especially the shrimp, or it will poke through the agnolotti), then place in a bowl.

Put the fresh spinach in a pot – a half ounce is probably about a cup. The amount of spinach is not critical, since about all it brings to this dish is a bit of color (well, a few nutrients too). Add about a half cup of water to the pot, cover, and bring to a boil. Remove from heat, and when cool enough to handle, put the spinach through a colander and squeeze out all the moisture. Chop it finely and add to the fish and shrimp.

If necessary, make fresh bread crumbs in a food processor, or use packaged bread crumbs. Add these to the other filling ingredients along with the fontina and ricotta cheeses, a little salt, and a tablespoon of chopped cilantro.

Making the agnolotti

Beat an egg in a small bowl – it is used to seal the pasta. Set a pot of salted water over high heat to bring it to a boil.

Place a sheet of dough on your working surface. Use a cookie cutter or the rim of a glass (about 2 inches in diameter) to cut out circles of dough. Use a brush or your fingers to paint the beaten egg around the rim of each circle. (I used my fingers and I got the entire circle “painted” but hey, I’m a messy cook.)

Put a little filling in the center of each circle, then fold over to form a half-moon shape. (You will learn that you cannot fill these too full, or they will burst through the dough when you fold them over.) Press the sides of the circle together and go around the cut edges with a fork, or a zigzag pastry wheel or a crimper cutter if you own such a tool.

As the agnolotti are filled, place them on a lightly dusted piece of parchment. When you have enough to fill a pot (about 10-12), put them in to cook for about 4 minutes. Meanwhile, go back to making more agnolotti.

Remove cooked agnolotti with a slotted spoon and place them in a colander. Make agnolotti and cook agnolotti until you have used all the filling, or until you think you have enough to serve as many people as you have for dinner.

As the agnolotti cool in a colander, they probably won’t stick together, but watch them. I didn’t rinse them. When completely cool, you can put them on a large dish or in a bowl.

At serving time, these are tricky to heat back up. I microwaved them briefly, but a couple burst and made a mess in the microwave. The best way is probably to run hot water over them, or put them into a simmering sauce just before serving.

Wrap and freeze any unused pasta dough. If you have extra cooked agnolotti, you can freeze them.

Sauce 1: Baked Tomato Sauce

This makes more sauce than you will need for 2-4 people; any extra can be frozen.

  • 28 ounce can of whole, peeled tomatoes (undrained)
  • 2 cloves garlic (or more)
  • 1 small onion, cut in chunks
  • lots of fresh basil (at least a couple tablespoons when chopped)
  • 1/4 cup extra virgin olive oil
  • chili flakes
  • 1/3 cup fine bread crumbs (fresh if possible)
  • 1/3 cup grated Parmesan cheese (fresh if possible)

Put the tomatoes in a deep baking dish. Use an immersion blender in pulses to break up the tomatoes a little, without turning them into a puree. Alternatively, mash them with a fork.

Put the garlic, onion, and basil in a food processor and pulse a few times. You want these finely chopped, but not pureed. Stir the mixture into the tomatoes along with the olive oil, then sprinkle with a few chili flakes.

Mix the bread crumbs and the Parmesan cheese, then sprinkle over the top of the tomato mixture. Bake – uncovered – in a 400˚ oven for 45 minutes.

Don’t break the crust until the sauce is being tossed through the pasta; large crunchy bits should remain.

Sauce 2: Zucchini and mushrooms

  • 1/2 of a zucchini
  • 2-4 ounces mushrooms (plain old white ones, or see if you can a mixture of interesting-looking types at your local store)
  • olive oil to taste

Slice the zucchini into thin strips, julienne-style. Chop the mushrooms. Heat the oil in a pan and cook the zucchini for a minute or two, then add the mushrooms and cook a few more minutes, until the mushrooms are cooked. Drizzle with olive oil. Feel free to add garlic, basil, or Parmesan cheese, or even some cilantro.

Put it all together

Warm the agnolotti (if necessary) by running some hot water over them. Place them on a warm serving plate, if possible. Arrange, to taste, the tomato and zucchini-mushroom sauces around and on top of the agnolotti.

Serve! Enjoy!

250 Cookbooks: 1000 Vegetarian Recipes

Cookbook #12: 1000 Vegetarian Recipes. Carol Gelles, Hungry Minds, Inc., NY, 1996.

1000 Vegetarian Recipes

My daughter went through a vegetarian phase, and I believe that’s when I acquired this cookbook. She or I bought it and it ended up on my bookshelf. I remember having to search for vegetarian entrees to serve when she came home to visit.

This is a good cookbook, a keeper. It is an ambitious work, one thousand recipes! But each recipe has a personal touch, none feel forced into being just because the author was trying to get to the designated number. Eggs and cheese are included in many but not all recipes. Appetizers, soups, entrees, side dishes, salads, breads, and desserts are all covered. These recipes incorporate a wide variety of grains and vegetables, and encourage me to branch out of my food comfort zone.

I decided not to choose an entree recipe to try for this blog. I cook for two, and my partner in eating likes his meat and potatoes. “Cabbage and Mushroom Curry”? No way. I have to save my favorite curry dishes for times when I have only myself to cook for. Would he eat “Szechuan Shredded Vegetables with Pressed Tofu”? No way. “Spinach and Dill Savory Bread Pudding”? No.

So I turned my focus to the side dish section of this cookbook. I found that it has an excellent section on whole and processed grains. Barley, kamut, millet, oats, quinoa, rice, rye, spelt, wheat, wild rice, bulgur, couscous, grits, cornmeal, buckwheat, and kasha are discussed, along with handy cooking tables. The recipes including these grains look tasty and interesting. Grains are among my favorite foods, and if I serve them with a serving of meat, I might get my dining partner to eat them too.

Although I’m choosing a side dish, I was tempted by many of the bread and muffin recipes. I plan to keep this book downstairs a while and explore it some more!

The recipe I am trying is “Quinoa with Shredded Vegetables”. I keep quinoa on hand, but haven’t cooked it very often. The vegetables are carrots, zucchini, and rutabaga. I haven’t cooked a rutabaga in . . . well, maybe never! I have snuck parsnips into soups, but never rutabagas. I even had to look them up before I went to the store, so that I’d know what they look like. I’ll just not mention to my husband what’s in the dish. Shredded, who will be able to tell?

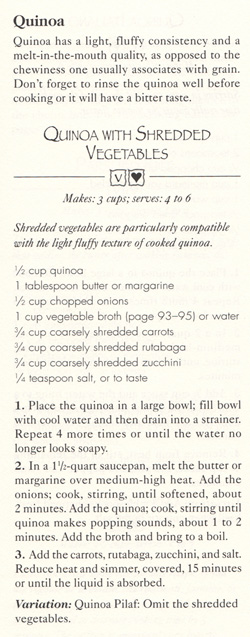
Here is the original recipe:

quinoa recipeI made it just like the recipe. I used vegetable broth, but I didn’t have any fresh or boxed on hand, so I dissolved a vegetable bouillon cube in a cup of water. This brought a lot of flavor to the dish, so I don’t suggest using just water. And do use a rutabaga, it added a subtle, earthy flavor. I liked it more than my dinner partner, but since I served it with Fish Cakes, I was able to serve this interesting side dish and have a successful dinner.
Quinoa with Shredded Vegetables

  • 1/2 cup quinoa
  • 1 tablespoon butter
  • 1/2 cup chopped onions
  • 1 cup vegetable broth
  • 3/4 cup coarsely grated carrots
  • 3/4 cup coarsely grated rutabaga
  • 3/4 cup coarsely grated zucchini
  • salt to taste

Put the quinoa in a bowl and cover with water, mix, then drain through a fine strainer. Do this about 4 times, or until the water no longer looks soapy.

Melt the butter in a medium saucepan over medium high heat. Add the onion and cook, stirring, until they are soft. (I always salt onions a little at this point, to sweat them.) This takes just a few minutes. Then add the quinoa and heat “until it makes popping sounds.” [This may or may not happen. I’ve had dry quinoa pop, but cooked in butter just after rinsing, it is reluctant to give off any good “pops”. Just stir the butter, onion, and quinoa mixture a few minutes, even if it doesn’t pop.] Add the broth and bring it to a boil.

Add the grated vegetables, lower the heat and cover and simmer 15-30 minutes, until all the liquid is adsorbed and the quinoa is done (soft). You might need to add more broth if the liquid is adsorbed but the quinoa is not yet done (I needed to).

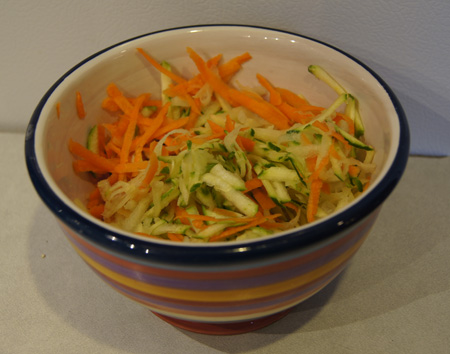
The grated vegetables are pretty:

grated vegetablesAnd here is the completed dish:

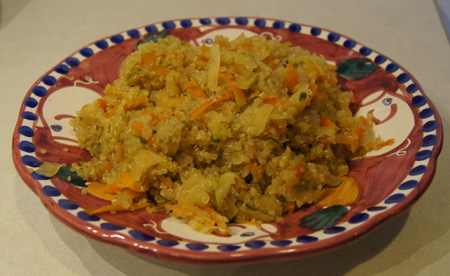
Quinoa with Shredded VegetablesI liked this, and will make it again!
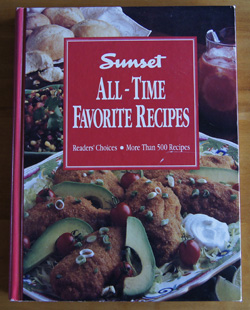
250 Cookbooks: Sunset All-Time Favorite Recipes

Cookbook #11: Sunset All-Time Favorite Recipes, Readers’ Choices. Sunset Publishing, 1993.

Sunset All Time Favorite Recipes

This one is going to be easy! I opened this volume of over 500 recipes and wanted to try at least half of them. I don’t have to write about how much I dislike a cookbook!

This is a cookbook I bought for myself. The recipes work right into my type of cooking. I’d say they lean towards Southwestern cooking, with lots of chiles and spices, fresh vegetables and fruits, light and practical recipes, as well as comfort foods. I went to the current Sunset Magazine website, and they still focus on “How to Live in the West” (US). That’s where I was born and raised—no wonder this cookbook “fits” me.

I have several pieces of paper marking pages in this book, and even a letter from my daughter. I’ve spent a lot of quality time with this cookbook. The book is well laid out with pleasing illustrations and rough-paper pages. I never wrote in this book, guess I felt it would be a shame to ruin the pages with my unreadable scrawl. There are not even any cooking stains in it. But I’ve used this cookbook a lot. Mostly as a reference for ideas, but a few of the recipes have become a part of my repertoire.

Special features that I have used as references include fish-cooking tips, sizzling stir-frys, and non-preachy lightening-up tips. The recipe content covers the gamut of appetizers to soups to poultry to vegetables to breads to desserts. Throughout, small insets offer historical tidbits and cooking insights. Nutritional information is given for each recipe.

One day a few years ago I re-shelved this cookbook and forgot about it. Well, I’m bringing it back downstairs and putting it within easy reach. It’s like finding an old friend.

For this blog, I chose the recipe “Sesame Chicken”. It uses boneless chicken breasts, a marvelous, low-fat convenience food. Grilled, baked, stuffed, sauted and sauced . . . chicken breasts lend themselves to so many different meals. Years ago we had to bone our own chicken breasts; later, as a working mom, I felt it was worth the money to buy them already boned. In the last decades of the twentieth century, these became available individually frozen in freezer bags. They are a staple in my freezer!

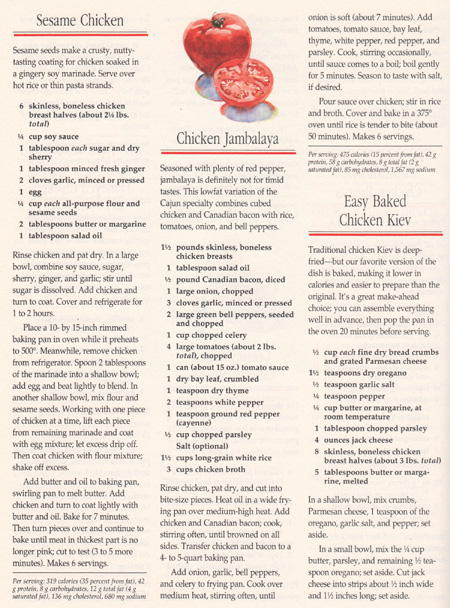
Here is the entire page that has the Sesame Chicken recipe. It’s a good example of the nice layout and illustrations in this cookbook.

Sesame Chicken Recipe from book

Sesame Chicken


I made this recipe for two people, with two chicken breasts. I made the original amount of marinade, though, as reflected in my recipe entry below. The chicken is baked really hot, for only 15 minutes. On busy work days, I’m sure you could start the chicken marinading in the morning. In fact, you could probably take frozen breasts out of the bag in the morning, rinse quickly with hot water, put in a ziplock bag with the marinade, set the bag in the refrigerator for the day, and the chicken would be ready to cook for dinner.

  • 2 boneless, skinless chicken breasts (12-14 ounces)
  • 1/4 cup soy sauce
  • 1 tablespoon sugar
  • 1 tablespoon sherry
  • 1 tablespoon minced fresh ginger (a rasper-grater works well)
  • 2 cloves garlic, minced
  • 1 egg
  • 2 tablespoons flour
  • 2 tablespoons sesame seeds
  • 1 tablespoon butter
  • 1 tablespoon vegetable oil (about)

Mix the soy sauce, sugar, sherry, ginger, and garlic. Marinate the chicken breasts in this marinade for 1 to 2 hours in the refrigerator.

Preheat your oven to 500˚ (this might take awhile!). Place a baking pan (such as a 10×15-inch half sheet pan) in the oven to preheat the pan, too.

Put 1 tablespoon of the marinade in a shallow bowl; add egg and beat lightly to blend. In another shallow bowl, mix flour and sesame seeds. One at a time, remove the chicken breasts from the marinade and coat with the egg mixture; let excess drip off. Then coat chicken with flour mixture; shake off excess.

Add butter and oil to the hot baking pan and swirl to melt butter. Add chicken and turn to coat lightly with butter and oil.

Bake for 7 minutes. Then turn pieces over and continue to bake until meat in thickest part is no longer pink, about 3-5 more minutes. (Cut to test or use an instant read thermometer, 165˚ is good.)

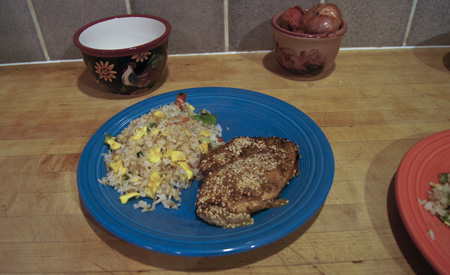
I served the Sesame Chicken next to homemade fried rice. We liked it, and I’ll make it again!

Sesame Chicken


250 Cookbooks: Bake-Off Recipes 1959

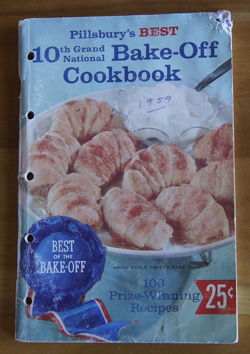
Cookbook #10: Pillsbury’s Best 10th Grand National Bake-Off Cookbook, 1959. From Pillsbury.

Bake Off 1959

This Bake-Off cookbook is in the same series as my Cookbook #4, so I’m not going to repeat the Bake-Off Cookbook background information. That was a 1964 cookbook, this one is five years older. You can see inflation in the price: this older one only cost 25¢, 10¢ less.

I like the nostalgic photos. Look at this woman’s hairdo:

hairdo

The cookbook has desserts, cookies, cakes, pies, breads, and main dishes. What impresses me about these early Bake-Off Cookbooks is that everything is made from scratch. Later ones rely on products like biscuit mix and packaged crescent rolls. The recipes highlight scratch (albeit brand name) ingredients: “Pillsbury’s Best All Purpose Flour”, “Morton Salt”, “French’s Vanilla Extract, “French’s Cinnamon”. I noted several cookie, dessert, and main dish recipes that I might try at a later date.

For this blog, I decided to try a cookie recipe. Mother marked several cookie recipes with her rating system, and I chose one of them. I love baking cookies, and used to make them weekly when the kids were little. There was a long stretch of years when I’d bake tons of Christmas cookies and send them to relatives. And at the end of each university semester I’d bake several kinds of cookies and take them to the Teaching Assistants that I supervised (I was the director of the Organic Chemistry Teaching Labs at CU Boulder).

Lately I’ve denied myself the simple pleasure of cookie-baking. In spite of our active retiree lifestyle, we just don’t need the extra, usually empty calories in cookies. But life is to be enjoyed whenever possible, and I’ve decided that cookies in moderation can fit into our eating plan. Cookies are small little parcels that can be enjoyed one at a time. Extras from a large batch can spend some time in the freezer before being savored. Even better, give some away to friends and relatives!

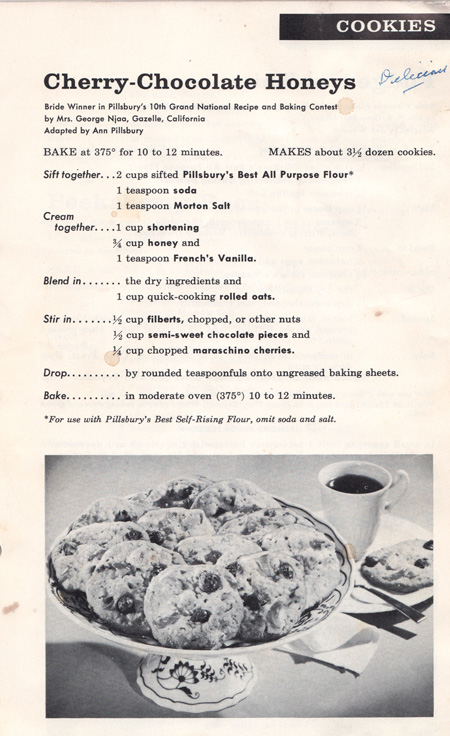
So, cookie time! Here is the original recipe for Cherry-Chocolate Honeys:

Cherry-Chocolate Honeys

My mother had tried these and marked the recipe Delicious. I smile at the cooking stains on the recipe. There is oatmeal and honey and filberts in them: semi-healthy ingredients. I started mixing them together and then did a double-take: There are no eggs! That’s unusual for a cookie recipe.

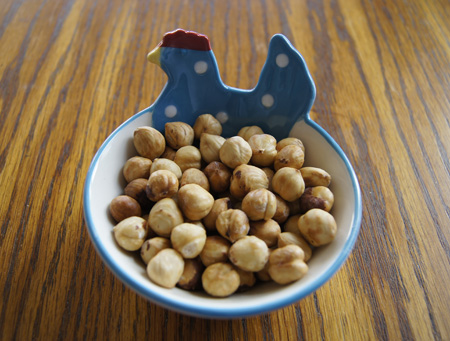
Filberts are now usually called hazelnuts. I found some at our local natural grocery, Steamboat Mountain. They had been refrigerated, so I decided to perk up their flavor with a roast in the oven. Fifteen minutes in a 350˚ oven made them golden brown, with the added benefit of making it easy to remove the dark brown husks.

hazelnuts

For the honey, I chose a flavorful local Colorado honey. The maraschino cherries were purchased from Whole Foods, and have no red dye, are preservative free, and have pure cane sugar. The vanilla I used is Madagascar Vanilla from the Savory Spice Shop in Boulder. I like using parchment-lined baking sheets – a new technique I incorporated into my cooking methods a couple years ago.

Cherry-Chocolate Honeys

  • 2 cups flour
  • 1 teaspoon baking soda
  • 1/2 teaspoon salt
  • 1 cup vegetable shortening
  • 3/4 cup honey
  • 1 teaspoon vanilla
  • 1 cup quick-cooking oatmeal
  • 1/2 cup filberts (hazelnuts), roasted at 350˚ for 15 minutes, then husked and chopped
  • 1/2 cup semi-sweet chocolate chips
  • 1/4 cup chopped maraschino cherries

Cream together the shortening, honey, and vanilla. Blend in the dry ingredients and the oatmeal. Stir in the nuts, chocolate chips, and maraschino cherries.

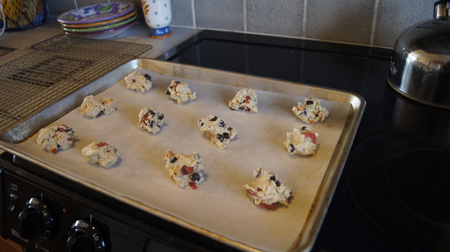
Drop by rounded teaspoonfuls onto ungreased baking sheets (or a parchment-lined half sheet pan). Bake at 375˚ for 10-12 minutes.

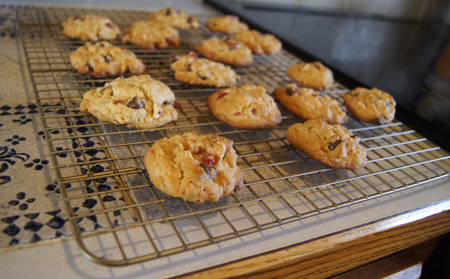
Cherry-Chocolate cookies before bakingAren’t these lovely?

Cherry-Chocolate Honey Cookies

And they taste great, too!

250 Cookbooks: Encyclopedia of Cookery, Vol. 1

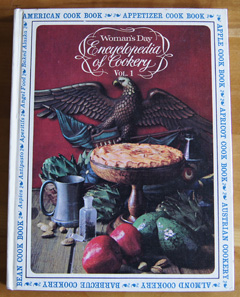
Cookbook #9: Woman’s Day Encyclopedia of Cookery, Vol. 1, A-Bea. Woman’s Day, Fawcett Publications, NY, 1966.

Encyclopedia of Cookery

This is the first in a series of 12 food encyclopedia volumes. They were my mother’s, so I will not part with them. But that’s not the sole reason that I now want to keep them.

Printed encyclopedias. Outdated tools? Today my first impulse when I have a question about (for instance) different types of apples, I open a web browser and enter my search terms. A plethora of links appears almost instantly, and I quickly scan the information that random people have uploaded to the internet. I have a (probably correct) answer, and then I jump to another website, or another task. That tidbit of information was fleeting. I probably will never see it again.

The web gives us quick answers, but we miss something, we miss the permanence of the written page. Print-published authors take a lot of time gathering their information, checking their facts, editing the text, polishing their photos. The next time I open this particular encyclopedia, the same information will be there, in my hands.

And when I took some time with this encyclopedia, which by definition gives “information on many subjects”, I found it full of not only information, but unexpected treats.

Let’s start with abalone, the first entry. This mollusk is described, including availability, calorie content, and basic preparation. Then several recipes are listed. This is the basic layout throughout the volume. Some information is dated, e.g., for abalone: “In the US, the fresh shellfish is limited to California. The law prohibits its shipment fresh to other parts of the country.” Interesting! It’s no longer true, but years ago, you could only have fresh abalone in California. The next entry is acorn squash, again with description and recipes. I learned that aioli is a thick sauce flavored with garlic. Definitions of the cooking terms “a la carte” and “a la grecque” and “a la king” are given, along with related recipes.

Then I came to a section titled “American Cooks are Good Cooks”. This section takes up a full third of the volume! I began reading the three page introduction to this section, written by a woman named Sophie Kerr. I’m sharing a few parts of this article so you, too, can enjoy it.

“A lot of talk goes round now and then to the effect that American cooks are way behind cooks of other lands when it comes to producing a first-rate meal, and that American food in general lacks the elegant subtlety of foreign dishes. I don’t know who started this nonsense, but nonsense it is, and it should be labeled so in large black letters. Actually, there is a great tradition in American cooking, and thousands of women have come to respect and perpetuate it.”

“. . . every housewife had her treasured recipes, which she wouldn’t give away even to her dearest friends. Those were the days of bake sales for church and charity, when the knowing ones lined up early to get some of Mrs. S-and-So’s pocketbook rolls, or Mrs. Whosis’ white cake with almond frosting, or Mrs. Query’s green-apple custard pie, and if the supply was gone when they got there, they screamed like Indians.”

Screamed like Indians! Boy, no one would write that today.

“Early in the 1900’s there appeared a new school of thought among American cooks. This was the era when careers for women were opening up in business and in the professions and arts, so certain groups, perhaps a little oversold on career stuff, proclaimed that it was menial to cook and that women now, for the first time, had their chance to come out of the kitchen. These groups made a noise considerably larger than their numbers warranted; but they did effect a slight hush-hush about recipes and good eating in general and particular. They said it wasn’t intellectual to be interested in food, and, of course, no woman likes to be publicly labeled as unintellectual. American cooking took something of a beating during this dark period; but it is cheering to remember that, in spite of all the shouting against them, there were plenty of sensible women who simply laid low and cooked better and better, confident that the tide would eventually turn.”

Enchanting. Sophie Kerr’s essay is followed by a collection of recipes from all fifty states. None of them caught my eye to try—Denver Sandwiches, Squaw Corn, Campfire Trout, Topeka Fried Chicken, Iowa Farm Ice Cream—but it’s interesting reading and has lots of photos. In fact, the entire volume is illustrated with full- and half-page photos, as well as drawings and decorative page borders.

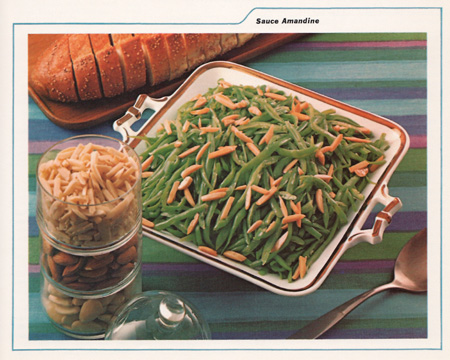
I am going to remember this encyclopedia the next time I want to look up information about a particular food item or term. I know I’ll not only find the information I need, but also a history lesson, and maybe a chuckle or two. It’s an excellent source of historical recipes from the first half of the twentieth century in the US. However, I don’t find the cookbook very useful when searching for a recipe, because of the organization. Who would think to look for a recipe for green beans in the “A” section, under “Sauce Amandine”, in the almond section? (In the encyclopedia’s defense, though, a detailed index at the back of the last volume helps.) Another drawback is that the recipes were written before the invention of modern kitchen conveniences: immersion blenders, food processors, and microwave ovens to name a few.

beans amandine

I decided to cook a recipe from the “Apple” section. I chose Apple Butter. Why? Well, as often happens, what I cook is determined by what needs to be used in my freezer or on my shelves. A couple months ago we were leaving for vacation and I had a lot of apples that wouldn’t keep until our return. So I cored them and cut them in chunks and froze them, thinking I’d make applesauce someday. Combined with a few aging apples on my counter, they would be great for apple butter.

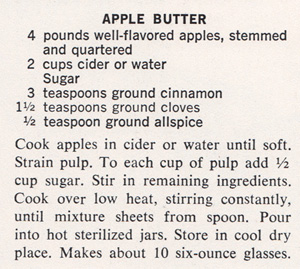
I modified the recipe from the Encyclopedia of Cookery (below) quite a bit.

Apple Butter

I wanted to use my slow cooker, and I didn’t want to strain the apple mixture. Instead, I chose to blend the cooked mixture, so that I could incorporate all the flavor and fiber of the apple skins. I added ginger and nutmeg because I like apple butter spicy. Consulting one of my crockpot books and a couple online recipes to determine cooking times, I came up with a more or less original recipe, entered below.

Apple Butter


If possible, use a mixture of sweet and tart apples. This recipe makes 12 4-ounce jars.

  • 4-5 pounds unpeeled apples (about 10-12 apples), stemmed and chopped roughly
  • 2 cups apple cider
  • 1 cup white sugar
  • 1 cup brown sugar
  • 1 tablespoon cinnamon
  • 1 teaspoon allspice* (see note below)
  • 3/4 teaspoon cloves
  • 1/2 teaspoon ginger
  • 1/4 teaspoon nutmeg
  • juice of 1/2 lemon

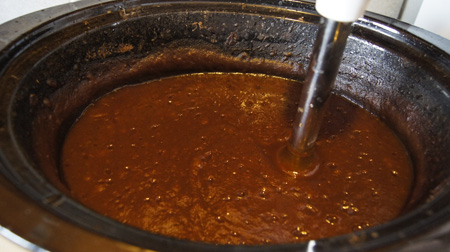
Combine all of the above ingredients (except the lemon) in a slow cooker. Cover and cook on low for about 10 hours. (This is convenient to do overnight.) At this point, you can let the mixture cool and process in batches in a food processor. Or, you can use an immersion blender to puree it right in the slow cooker.

Apple Butter in Crockpot

(At this point I feel like a witch stirring her brew. Witchery, cookery . . . why is this cookbook series the encyclopedia of cookery? No wonder I feel so at home. Here is my blog entry from five years ago, back when I was a practicing witch . . . ahem, chemist . . . )

With the lid off, turn to temperature to high and cook for 1-3 hours, stopping when the apple butter is the thickness you prefer. And taste it, adding more spices if you like. I added the juice of half a lemon to lend it a little zip. It took 2 hours for my apple butter to come to the thick spreading consistency that I like.

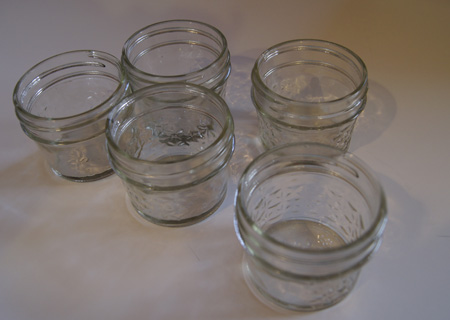
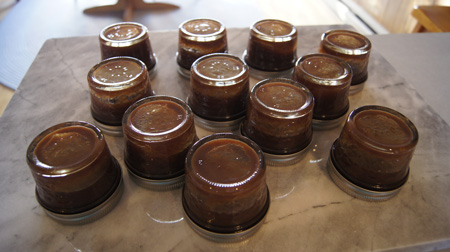
The apple butter will keep in your refrigerator for up to a month. I decided to can it in small 4 ounce jars to keep and to give away.

jarsI sterilized 12 of these cute little jars in boiling water, then filled them with the hot apple butter. Then I closed them with hot canning lids and set them upside down on the counter to cool.
apple butter cooling

The whole process took awhile and it really made the house smell like apples and cinnamon, especially during the overnight cook. It was all worth it! This apple butter turned out very good, and we are still enjoying it, on toast, peanut butter sandwiches, and sweet potato biscuits (cooked as per this recipe but with half the baking powder).

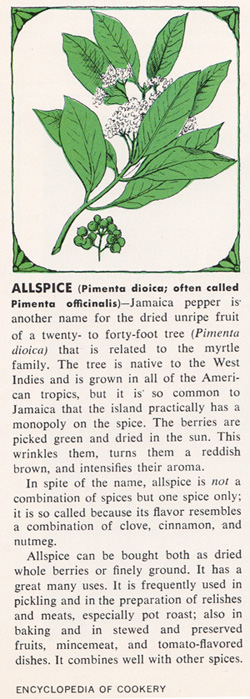
Note: Allspice’s definition is conveniently in the same encyclopedia volume:

allspice

250 Cookbooks: The New 365 Ways to Cook Hamburger and Other Ground Meat

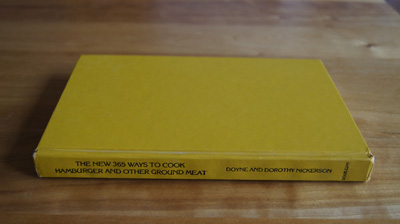
Cookbook #8: The New 365 Ways to Cook Hamburger and Other Ground Meat. By Doyne and Dorothy Nickerson, Doubleday & Company, Garden City, NY, 1983.

365 Ways to Cook HamburgerI think this book used to have a cover leaf, without it it looks so plain. But it is a plain little book. There aren’t any photos inside, although there are some pleasant drawn illustrations. The recipes are pretty plain too. Why did I buy it? Dunno. Guess I wanted hamburger ideas.
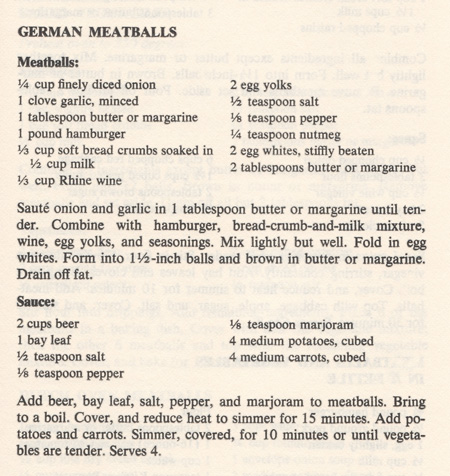
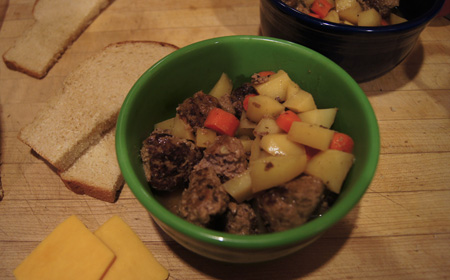
I don’t think I ever cooked anything from this book, although I had marked several pages. Those pages were for . . . meatballs! I am a huge fan of meatballs. I could eat meatballs once a week. They are right up there among my top comfort foods. I guess I already hinted at that when I chose to make the Pork Balls from cookbook #6. I like mushing the meat with the spices and egg, I like forming the meatballs, I love the aroma as they sizzle and cook in the pan. And I like the convenience of making extra, freezing them, and popping them into a sauce later for a quick meal. Oh, and I like stealing one as they sit on the counter to cool—hey, it’s important to taste them to make sure they are good!

The only recipe in this book I marked besides the ones for meatballs is one for gnocchi. I’ve tried several times in my life to make gnocchi from scratch, but nowadays I use the shelf-packaged product that you can find in most grocery stores.

Do I like this cookbook? It’s okay, but doesn’t have very many innovative ideas, nor are there commentaries to personalize the 365 recipes. The original publication date was 1958 and today, the recipes seem tired. Grilled hamburgers, skillet dishes, baked casseroles, soups, spaghetti meat sauce, tacos (with no seasoning other than salt), meat pies. If you have a hankering for a nostalgic hamburger pie with crescent rolls on top, this is your cookbook. It’s mostly basic hamburger cooking, the kind of cooking that doesn’t require a recipe. I could give this cookbook away and never miss it.

I chose German Meatballs, one of the recipes that I had marked years ago. I’m not sure if I tried this recipe before, but I doubt it because the cookbook is free of food stains and I didn’t write anything on the recipe. This recipe interests me because the onion is cooked before it’s added to the hamburger, there is white wine in the meatballs, the eggs are separated and the whites stiffly beaten. (I doubt that this will make the meatballs much different from ones made with whole, non-beaten eggs, but it’s worth a try.) I like the accompanying sauce, with beer, potatoes and carrots. I don’t have a recipe in my repertoire that is anything like this one. Sounds good for a winter dinner, as I watch the snow fall on a November day in Colorado.

German Meatballs

I had some problems cooking these meatballs. I could tell that the uncooked meatball mixture was much more liquid-y than I would normally choose, and sure enough, when I dropped the first couple meatballs into the hot pan, they flattened out like pancakes. Well, the dogs will like those! I added another generous half-cup of breadcrumbs to the meat mixture and that did the trick.

I tasted one of the cooked meatballs and said “yum!” As I had predicted, the high moisture content and egg whites in the meatballs made them light and almost delicate.

For the sauce, I recalled my Beer and Cheese Soup disaster, and substituted half of the beer with beef broth. As the sauce and meatballs and potatoes and carrots simmered together, I added more broth so that they would be covered.

When the vegetables were done, I didn’t know quite how to serve the dish, since the sauce was thin. As written in the cookbook, there is no way this dish could be served over pasta or rice, nor could it be lain on a flat plate, because the “sauce” was just a runny liquid. So I thickened it with a little cornstarch and called it a “soup-stew”. I served it in big bowls with slices of My Daily Bread and cheese. It was really good! The broth suffused the potatoes and carrots with a hint of beer, marjoram, and bay leaf, and the meatballs were just about perfect.

Below is my revised version.

German Meatballs


Serves 3-4.

Meatballs:

  • 1/4 cup finely diced onion
  • 1 clove garlic, minced
  • 1 pound hamburger (I used 90% lean)
  • 1 cup soft bread crumbs soaked in 1/2 cup milk
  • 1/3 cup white wine
  • 2 egg yolks
  • 1/2 teaspoon salt (or to personal taste)
  • 1/8 teaspoon pepper
  • 1/4 teaspoon nutmeg
  • 2 egg whites, stiffly beaten

Sauce and vegetables:

  • 1 cup beer
  • 1 cup beef stock
  • 1/4 teaspoon marjoram
  • 1 large bay leaf
  • 4 medium potatoes, cubed (gauge the amount of potatoes and carrots to your diner’s appetites)
  • 4 medium carrots, cubed
  • salt and pepper to taste
  • 1 1/2 tablespoon cornstarch mixed with a little water or broth

Heat a small amount of oil (olive or vegetable) in a pan and saute the onion, sweating with a little salt, until soft. Add the garlic and cook for 30 seconds more. Combine with the hamburger, bread-crumb-and-milk mixture, wine, egg yolks, and seasonings. Mix lightly but well. Fold in egg whites.

Form into 1-inch balls and brown in a small amount of hot oil. These burn more easily than most meatballs, so watch the heat of the pan and turn the meatballs often. When they are all browned, drain off any fat.

Add the sauce/vegetable ingredients—except the cornstarch mixture—to the meatballs and bring to a boil. Cover, and reduce heat to simmer for 20-30 minutes. If you like, add more broth so that the meat and vegetables stay down in the liquid. This will make it more soup-like.

When the vegetables are tender, slowly and with stirring, add the cornstarch mixture to thicken the sauce. (You can add more cornstarch if you like it thicker.) Taste and adjust salt and pepper to your taste.

German MeatballsWe each finished our German Meatballs and wiped the bowls clean with bread!
250 Cookbooks: Elena’s Secrets of Mexican Cooking

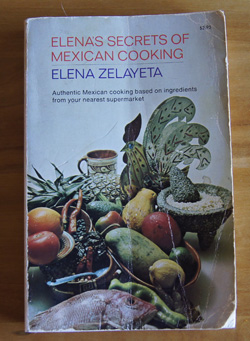
Cookbook #7: Elena’s Secrets of Mexican Cooking. By Elena Zelayeta, Doubleday & Company, Garden City, NY, 1958. “Authentic Mexican cooking based on ingredients from your nearest supermarket.”

Elenas Secrets of Mexican CookingI have been cooking “Mexican” food as long as I can remember. I grew up in Southern California in the 50s, and my mother made tacos, enchiladas, and miscellaneous Mexican-style casseroles quite often. Today I’d classify these as “Tex-Mex” or “Southwestern” cooking rather than true Mexican cooking. They relied heavily on chile powder, green chiles, salsa, taco seasoning packets, onions, bell peppers, sour cream, and lots of jack or cheddar cheese. My own Tex-Mex cooking today is usually put together recipe-free, using past experience to free-form a meal.
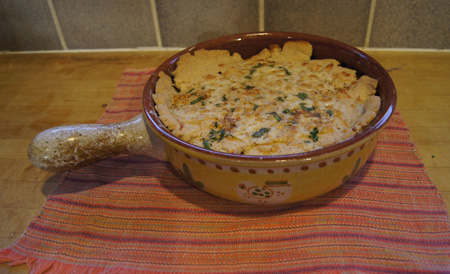
Elena’s Secrets of Mexican Cooking is likely the first cookbook that I purchased that talked seriously about the roots of Mexican cooking. It’s a wonderful and friendly book. In her preface, she discusses the influence of the Aztecs, Spanish conquerors, the European Emperor of Mexico in the 1860s (Maximilian) on the food of Mexico. She talks about different regional cooking in Mexico, and how Mexican dishes common in the southwestern US are little known in Mexico.

Elena herself was born in Mexico, but immigrated to San Francisco as a young girl, where she learned more about the cooking of Mexico from the cooks at her family’s inn. Quote: “Because of my many years in this country, I have learned what Americans like to eat. These recipes have been adapted to suit the palates of my American friends.”

In the introduction to this book, written by her friend, you find out that Elena became blind when her sons were young. That did not stop her from cooking: she learned how to use knives, blenders, bone chicken, make pastry, and even fry food in hot oil! Amazing, and inspiring.

I’m sure that I purchased this book because I wanted to expand my knowledge of Mexican cooking. And it did just that! Several pages are dirty and it is well-worn. I made notes on the tamales recipe, and tucked the recipe off the back of a Masa Harina package in the book. I also tucked a newspaper page of Mexican recipes in the book, including one for sopaillas.

Today, in 2012, I find this 1958 book useful (and I marked several more recipes to try), but a lot of the recipes use sort of unusual ingredients (pig’s head and feet, rabbit), or ingredients I’d rather purchase fresh (canned milk rather than fresh, canned tomatoes and canned tomatillos). One recipe calls for you to cook a bone-in chicken breast, and then bone it. Definitely not something I would do, with today’s abundance of boneless chicken breasts. Sliced cooked eggs are added to many dishes. Romano or Parmesan cheese is used often, while cheddar cheese is rarely used. Many recipes call for canned pimento—large red sweet pepper similar to red bell peppers—but I haven’t used these in years and don’t know if they are still readily available. Happily, taco seasoning packets are never called for. But where is the cilantro, Mexican oregano, fresh garlic, queso fresco, the black beans? Today, that’s the sort of ingredients I like in my Mexican-style food.

Today, many, many Mexican ingredients are available in our supermarkets. In 1958, Elena had to direct readers to some substitutions—this is a slight drawback because these substitutions are no longer necessary.

In conclusion, this book is still a pretty good reference for Mexican dishes. And it’s delightful reading, so I will keep this book!

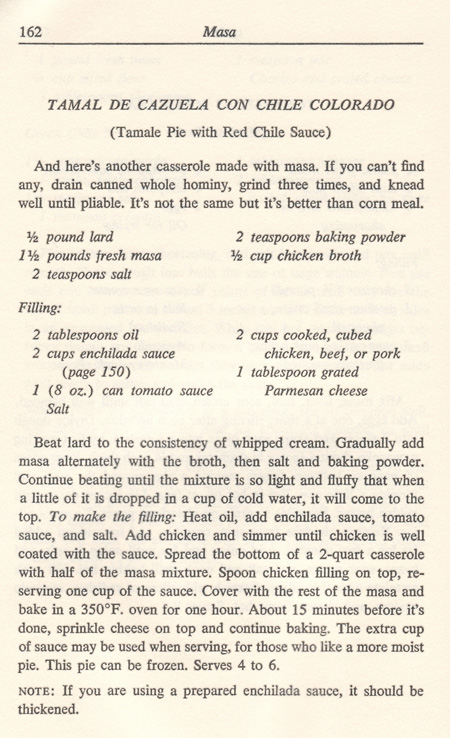
I chose to cook “Tamale Pie with Red Chile Sauce”. This recipe uses masa, while my old standby tamale pie recipe uses cornmeal. Should be interesting. It also calls for lard. Lard has come back into some favor these days, since it is high in monosaturated fats that some believe have health benefits (google “lard nutrition” for current discussions). Finally, I have some cooked chicken that I need to use.

I know that I stated in my first 250 Cookbooks post that I would follow the recipes I found exactly as written. I realize now that was a bad idea. There is no sense tossing out my years of experience just to follow a recipe as written. So from now on, I’ll scan in the original recipe, and then type in the recipe as I actually made it. That way, if I feel that a recipe needs more flavor or whatever, I will do what I think should be done to make the it better. After all, each recipe is not only an experiment, it’s the meal I have planned that day for dinner! No sense eating something awful, or tossing it down the garbage disposal. If a recipe totally bombs, I will not type it in, and not include it in my recipe index.

Recipe: Tamale Pie with Red Chile Sauce

The original recipe is below. The “enchilada sauce on page 150” is: Wilt one chopped onion and 1/4 cup chopped green pepper in 1 tablespoon oil, then add 3 cups tomato sauce, 2 teaspoons chile powder, and salt to taste. (I had really hoped that this cookbook would give a recipe for an enchilada sauce that tasted really special. I’ll keep looking.)

Tamale Pie

Results

Sadly, this recipe was a bust. I was so hoping it would work! The photo doesn’t look so bad, and we were able to eat our meal, but we didn’t go back for seconds, savor leftovers, nor will I make it again. The fault is largely my own. The big issue is that the recipe really called for fresh masa, not masa flour.

Elena's Recipe

Re-reading Elena’s book, I realize that fresh masa is a moist product. I have never seen it in a market. Right in the above recipe, she suggested grinding hominy to make it if it’s unavailable. My own notes in her book tell me that I tried making tamales from masa flour using another of Elena’s recipes calling for fresh masa, and that I had to add a lot more liquid than called for. I should have read all that before jumping into the recipe!

When I prepared Tamale Pie with Red Chile Sauce as above, I did add twice as much chicken broth to the dough as called for, because it looked dry. I should have added four times as much! The crust tasted okay, but it was heavy and dry. The filling was great, although I strayed from the recipe, adding corn, olives, a fresh tomato, and oregano, cumin, and fresh cilantro.

“I like your regular Tamale Pie a lot better!” said my husband. Me too. Here, I’ll share it with you. I’ve made it many, many times. You could easily substitute cooked chicken or pork for the ground meat.

Tamale Pie

  • 1/4 cup chopped onion
  • 1/2 cup chopped bell pepper
  • 1 pound ground beef
  • 1 teaspoon cumin
  • 1 teaspoon oregano, preferably Mexican oregano
  • 1 teaspoon basil
  • 2 teaspoons chile powder
  • fresh cilantro to taste
  • 1 15 oz. can (chopped) tomatoes (use fresh tomatoes if you have them)
  • about 3/4 cup corn, canned or frozen or even fresh
  • 1 small can whole olives (about 1 cup)
  • 1/2 to 1 cup tomato sauce
  • 1/2 cup cornmeal
  • 1 1/4 cup water
  • 1/2 teaspoon salt
  • 1/2 cup shredded Cheddar cheese

Cook the onion and green pepper until slightly soft, adding a little salt to help sweat the onions. Remove them from the pan and save. Brown the meat and drain any fat, then add the cooked onions/bell pepper back to the pan, along with the spices, tomatoes, corn, and olives. Add tomato sauce to your own taste. Simmer for about 10 minutes, and of course, taste it and adjust the seasonings! Feel free to be creative. When it suits your own tastes, spread it in a 1 quart casserole.

Combine the cornmeal, salt, and cold water in a saucepan. Cook and stir until thick, just a few minutes. Spread the cornmeal mixture evenly over beef. (For convenience, as a working person I used to freeze the casserole at this point for baking later in the week.)

Bake at 350° for 40 minutes. Sprinkle cheese over top and bake 5 minutes longer. Serves 3-4.

250 Cookbooks: The Complete Oriental Cookbook

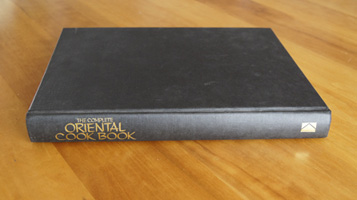
Cookbook #6: The Complete Oriental Cookbook. Edited by Isabel Moore and Jonnie Godfrey. Published by Marshall Cavendish Books Limited, London, 1979.

Complete Oriental Cookbook

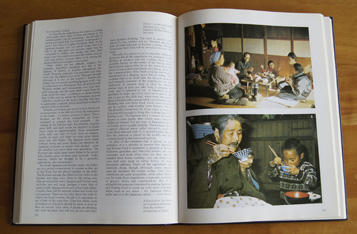
This is a large book with full page photos of many of the dishes. The cuisines of China, India, Japan, and Southeast Asia are each presented first with several pages of introduction, and then with many recipes. Since I threw away the book cover and thus the book looks pretty plain, I’ll share one of the pretty inside photos:

Complete Oriental Cooking

I think that this book was a gift to me, since I had an interest in Chinese cooking in the 1970s and some long-lost friend thought I would like it. I don’t think I tried a single recipe from this book in all these years! No recipes are dirty or written on, no scraps of paper mark any pages. Going through the book now, I can see why. The pictures are pretty, but the recipes don’t perk my interest. It’s like the editors gathered recipes, but never actually tried them.

This is a “coffee table book” and I think I’ll let someone else put it on their coffee table!

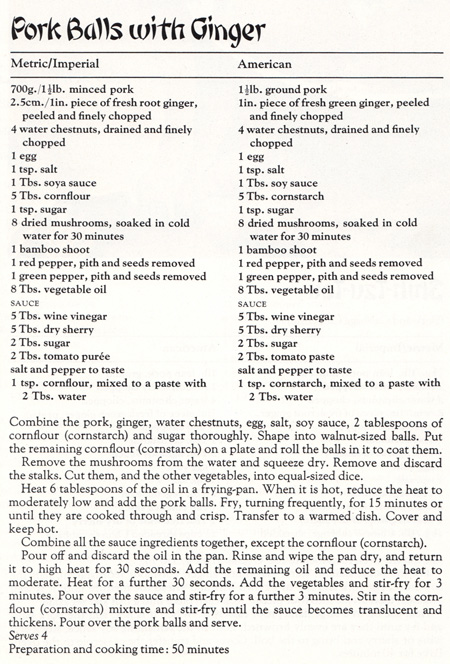
For the sake of this blog, I picked the following recipe titled “Pork Balls with Ginger”. I love meat balls, and especially pork meat balls made from well-raised pork. The water chestnuts and fresh ginger in the meatballs should perk up the texture and taste, and rolling the meatballs in cornstarch before frying should make them nice and crispy.

Recipe: Pork Balls with Ginger
2 stars


The recipe from this book is just too darned long to type into this blog. Plus you will note from my rating that it wasn’t that good and I don’t plan to make it again. So I scanned in the page. In fact, I might start doing this more often!Pork Balls with Ginger

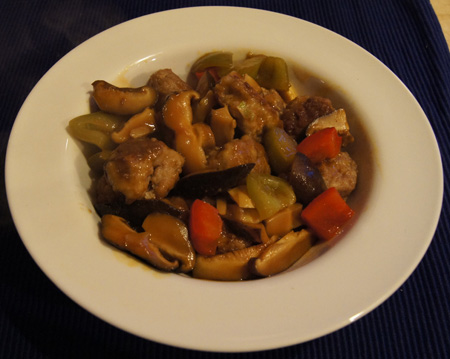
What’s wrong with this recipe? The sauce and the vegetables. The sauce had too much sherry and when I tasted it before serving, it was yucky. To make it palatable (we needed to be able to eat the meal!) I poured some of the sauce down the drain and diluted it with soy sauce and water. I should have used fresh shitaki mushrooms — I used some dried ones that I found at the Asian Seafood Market and they tasted terrible. For the “bamboo shoot”, I found a can of whole bamboo shoots at the same market. I tried this because the sliced bamboo shoots that stores carry are pretty tasteless. The whole ones had more flavor, but still didn’t taste good. (They looked interesting, though.) Fresh vegetables are so much better, and I suggest substituting celery or carrots for canned bamboo shoots.Pork Balls with Ginger

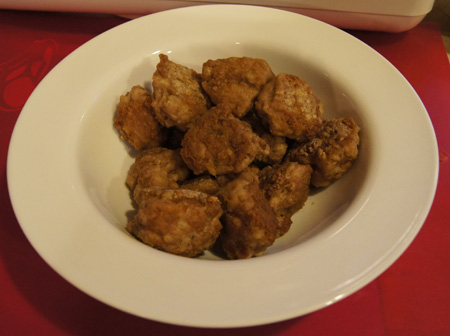
The pork meatballs were very good, though. Here is a recipe for enough meatballs for two people. When I make them again, I’ll use the Sweet and Sour Sauce from my own tried-and-true repertoire.

Pork Balls with Sweet and Sour Sauce
4 stars

(serves 2)

  • 3/4 pound ground pork, preferably from a store like Whole Foods
  • 1 tablespoon fresh ginger, chopped into fine dice
  • 1 1/2 tablespoons canned water chestnuts, chopped into fine dice
  • half of a whisked egg, or use 1 egg white
  • 1 tablespoon soy sauce
  • 1/4 teaspoon salt (optional)
  • 1/2 teaspoon sugar
  • 1 tablespoon cornstarch
  • Sweet and Sour Sauce (see below)

Combine all the above ingredients and make meatballs about the size of an in-shell walnut. Heat a non-stick pan and put maybe a quarter cup of oil into it. (That’s kind of a lot of calories, but you want the meatballs crispy, and when you are done frying, the oil is left in the pan.) Once the oil is hot, set the temperature at about medium to medium-high.

Put a couple tablespoons of cornstarch on a dish. Roll each meatball in the cornstarch, then add to the hot pan. Fry the meatballs for about 15 minutes, turning frequently. You want them “cooked through and crisp”. Remove with a slotted spoon to paper towels.

Pork Balls with Ginger

Sweet and Sour Sauce
(serves 2)

Here’s a sweet and sour sauce that I use a lot, albeit usually with a chicken dish. I’m sure it would work great with the Pork Balls with Ginger.

  • 3 tablespoons red wine vinegar
  • 1 small can pineapple chunks in juice, drain and save the juice
  • 3 tablespoons sugar
  • 1 1/2 tablespoons ketchup
  • 1 tablespoon cornstarch
  • vegetable oil
  • 1/4 of an onion, cut into largish chunks
  • red and/or green bell pepper chunks, to taste
  • (any other fresh veggie you like!)
  • 2 cloves minced garlic
  • 1/2 tablespoon grated fresh ginger

Whisk vinegar, reserved pineapple juice, sugar, ketchup, and cornstarch in bowl.

Wipe the oil from the pan that you used to cook the pork balls (or use a different pan). Add a little oil and the vegetables cook until softened, 4 to 6 minutes. Add pineapple chunks, garlic, and ginger and cook until fragrant, about 1 minute. Add vinegar mixture  and simmer until sauce is thickened, about 2 minutes. Serve over the hot Pork Balls with Ginger.

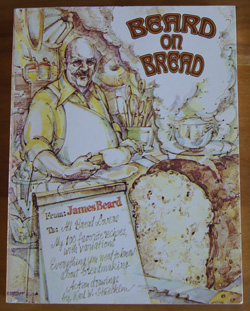
250 Cookbooks: Beard on Bread

Cookbook #5: Beard on Bread, James Beard, 1974. Published by Alfred A. Knopf, NY.

Beard on Bread

I pulled this book off the shelf and happily tucked into it. Bread is my passion. I have baked at least a loaf a week for twenty-five years. My bread-making techniques have changed over the years, and I have learned from both successes and failures. I am still learning, and am always willing to try something new. But when I try a new yeast bread recipe from one of my 250 Cookbooks, I will not follow the recipe exactly as printed in the book. Instead I will incorporate my hard-earned bread-making knowledge.

Let me explain. First, I include “gluten flour” in all my loaves. This is a high-protein flour that gives a loaf its stretchiness as you knead it, and that gives a cooked loaf the structure to stay together rather than crumble apart. Gluten flour helps tremendously when you want to include whole grain flours in a recipe.

Second, I use a bread machine set on the “dough” cycle to knead my breads and take them through the first rise step. The machine does a great job of kneading, and I can go off and do other things. Maybe this is “cheating” in some people’s opinions, but in my years as a working mom, the bread just wouldn’t have been made if not for the bread machine. And the machine keeps the temperature perfect for the rising step, so I’ll know exactly when to come back and get the loaf ready to bake in my oven.

Reading James Beard’s introduction, I don’t think he would pooh-pooh bread machines (he wrote it before home bread machines were available). For instance, he writes that using a mixer with a dough hook is okay. I heartily agree with Beard’s love of bread: “Good bread is the most fundamentally satisfying of all foods; and good bread with fresh butter, the greatest of feasts.” He enjoys “. . . the sensual pleasure in smelling a yeasty loaf baking in the oven, the sense of accomplishment in offering a real bread at a meal – to say nothing of the knowledge that each loaf is full of goodness instead of being just a starchy filler.” He writes that including multiple flours and meals just to make a bread more nutritious fails if you end up with a loaf that has a terrible texture. I agree with this too.

I enjoyed re-reading his discussions of flours, kneading, and baking methods. Beard on Bread was one of the books I studied as I developed my own yeast bread techniques in the 70s and 80s. Making bread is an ancient art and most of his information is timeless.

The recipes in Beard on Bread begin with a basic white bread with his observations and notes. If you have never made a yeast bread from scratch, you could learn how to make bread from this book alone. I scanned this book cover-to-cover, lingering on many recipes. I like his historical notes on each type of bread. I noted about ten recipes for my own personal “to try” list. I was pleasantly surprised to find a section of quick breads; I had never thought to look in this book for that type of recipe. This book is a keeper!

I decided to make Sourdough Rye bread. It’s a little “out there” from my usual style of bread, so I might learn something. I’ve made sourdough bread in the past, from home-passed or purchased starter, but it’s kind of hard to keep a sourdough starter fed and growing, and eventually I always forget them and they dry up and die. This recipe calls for a simple starter that you begin from ingredients on hand 4 days before you make the bread. I can manage that – and it should be enough to add a touch of sourness to the bread. I also like the good proportion of rye flour in the recipe, and I like the addition of poppy as well as caraway seeds.

Recipe: Sourdough Rye
five stars


“This sourdough rye appeared in the columns of The New York Times several years ago. I tried it, made some changes in it, and discovered that it was one of the best recipes I have ever used. The bread has a nice crumb, slices well, and keeps extremely well. I enjoy it for sandwiches and find that, thinly sliced and well buttered, it’s delicious served with smoked fish and oysters or other shellfish.” [James Beard’s note.]

My note: The recipe below is for half the original recipe: it makes one loaf instead of two. Other changes from the original are the inclusion of gluten flour and the use of a bread machine.

  • 1 package active dry yeast (1 tablespoon)
  • 1 1/2 cups plus 1/4 cup warm water
  • 3 cups all-purpose flour, approximately
  • 1 cup rye flour
  • 1/3 cup vital wheat gluten
  • 1 teaspoon salt
  • 1 1/2 teaspoons caraway seeds
  • 3/4 teaspoon poppy seeds
  • 1 tablespoon melted butter
  • 1 1/2 tablespoon sugar
  • Cornmeal
  • 1 egg, lightly beaten with 1 tablespoon water

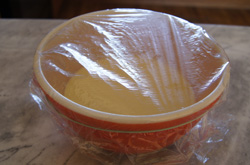
Four days ahead of breadmaking, prepare the “starter”. Combine 1 1/2 teaspoon yeast, 1 cup warm water, and 1 cup all-purpose flour in a plastic bowl or container. Cover tightly and let stand at room temperature for 2 days.

Note: I put it in a bowl and covered it with plastic wrap like this:

sourdough rye starter

After the 2 days at room temperature, put the starter in the refrigerator for at least another day.

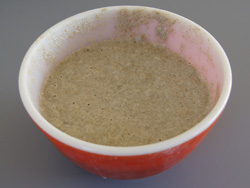
The day before preparing the dough, combine 1/2 cup of starter, the rye flour, and 1 cup warm water in a bowl. Cover with plastic wrap and let stand at room temperature overnight. (Note: You will have more starter than you need for this recipe. If you want to keep it going, replenish with equal parts of warm water and flour, let stand again at room temperature, and then refrigerate. Continue the process each time you use some of it.)

Here’s how it looked the next day, just before I stirred it down:

sourdough rye overnight

The next day stir down the dough, then put it in a bread machine* and add rest of the yeast (1 1/2 teaspoons), dissolved in 2 tablespoons water, salt, caraway seeds, poppy seeds, butter, and sugar. Add 1/3 cup vital wheat gluten and 1/2 cup all-purpose flour. Set the bread machine to the “dough” cycle. Watch it as it kneads and add more all-purpose flour as necessary to keep the dough from being too sticky. You want it to form a nice, round ball of dough. I added enough flour so that it was still “tacky” feeling but not “sticky”. Leave the dough in the bread machine through the rise cycle.

*Hand kneading directions: Add the flour a little at a time, to make a stiff but workable dough. Knead for 10 to 12 minutes, then shape into a ball. Place in a buttered bwol, turning to coat the dough with the butter. Cover and let rise in a warm, draft-free place until doubled in bulk, about 2 hours.

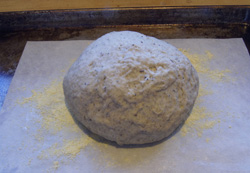
Take the risen dough out of the bread machine (or bowl, if you hand kneaded) and punch it down. Shape into a round loaf and place on a buttered baking sheet generously sprinkled with cornmeal.

formed loaf

Cover and let rise again until doubled in bulk, about 1 hour (mine rose in 30 minutes in a 73˚ kitchen).

Here’s the risen loaf. You can see how much bigger it is compared to the last picture (above).risen loafBrush with the egg wash, and bake in a preheated 375˚ oven for 30 minutes, or until lightly browned and the loaves sound hollow when rapped with the knuckles. Cool, covered with towels to prevent the crust from hardening.
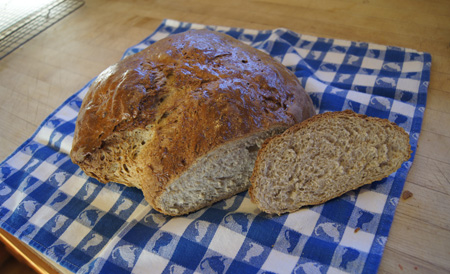
Here’s the baked loaf. I wish you could smell it too!

baked loaf

Next time I’ll be a little more careful when I form the loaf, you can see that it did not bake perfectly round. If I had been more careful, I would have had a prettier picture! Plus I cut the loaf when it was still kind of hot. But let me tell you, it tasted wonderful. We had it with a good homemade beef barley soup, and slices of cheese that melted into the warm bread.