250 Cookbooks: Cooking for Your Dragon

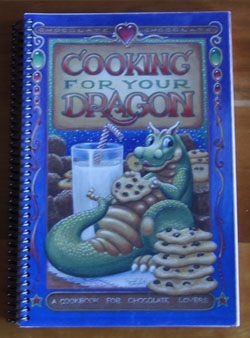
Cookbook #176: Cooking for Your Dragon, a cookbook for chocolate lovers, Randal Spangler, Fantastic Art (Books), Kansas City, 1996.

Cooking For Your Dragon cookbook

I’ve been a fan of Randal Spangler’s art for decades. On the wall above my computer I have two framed Spangler prints. One is a cat chasing a computer mouse that a “dragling” is using to lure her in. The other is a white-haired scientist pedaling a bike in a crazy contraption. Draglings are a Spangler creation, and cats and computers and cookies are among his favorite subjects. (Mine too!)

Cooking for your Dragon is full of Spangler’s artwork and every recipe has chocolate in it. Chocolate is a dragon’s favorite food! Legends of the mythical world of dragons are throughout the cookbook. It’s a delight to read.

The recipes are all very rich. I don’t think I’ve ever cooked a single one from this book! Mostly I enjoy the illustrations and whimsical stories. For this blog, I decide on “Brownie Cupcakes”.

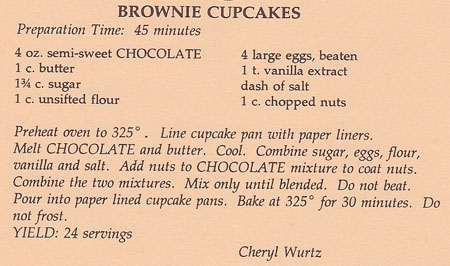
Brownie Cupcakes recipe

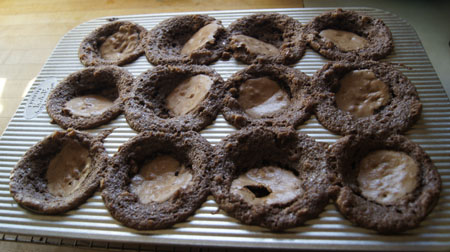
Well. Here is how my cupcakes turned out:

Brownie CupcakesTotal failure! They look terrible. Rose up, fell down.

The recipe does not explicitly state: “Pour into 24 paper lined cupcake pans”, although it states “24 servings”. I cooked them in two batches. The first batch, I probably filled them too full. I cooked the second batch after I scraped the first batch out of the pan, and I made sure to fill each cupcake only half full of dough. Baked, and same result as above.

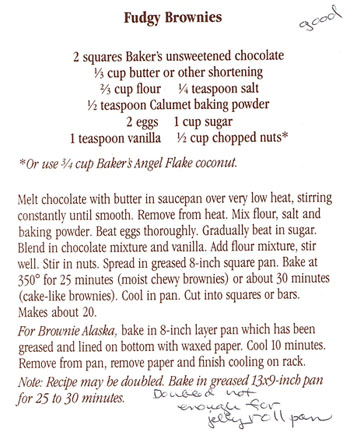
Why did they fail? Not sure. But there is no baking powder in the recipe. Compare this recipe with the one I have for “Fudgy Brownies” in Baker’s Book of Chocolate Riches. That recipe is almost exactly half of the above recipe, except it has baking powder in it and is baked in an eight-inch square pan.

The only other reason for failure (that I can think of) is that we live at high altitude and I didn’t make any of my usual altitude-dictated adjustments.

Win some, lose some! These did taste good, as “crumbles”. But I won’t try this recipe again – I’ll stick to Fudgy Brownies!

250 Cookbooks: Baker’s Book of Chocolate Riches

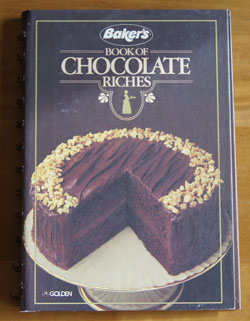
Cookbook #175: Baker’s Book of Chocolate Riches, General Foods Corporation, Golden Press, NY, 1983 (second printing, 1985).

Baker's Book of Chocolate Riches cookbook

I have three Baker’s cookbooks on my shelves. In blog post #118, I enjoyed looking through the 1932 one, Baker’s Best Chocolate Recipes, largely because it is so old. My other Baker’s cookbook is Baker’s Chocolate and Coconut Favorites, 1977.

I once tried the brownie recipe in this 1985 Baker’s Book of Chocolate Riches, and the recipe is exactly the same as the 1932 version! Good recipes hold up for years.

Fudgy Brownies recipe

This 1985 Baker’s Book of Chocolate Riches is definitely a cookbook I will keep. I know that each cookie, pie, cake or dessert recipe would cook up great. It’s one of my go-to books for when I need a good dollop of chocolate.

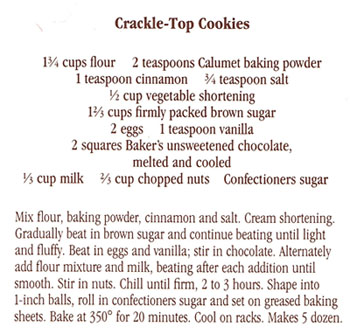
For this blog, I decide to make Crackle-Top Cookies. I’ll keep a few at home, but take most to a potluck meeting I have tonight. (Along with a bottle of wine, what is better than chocolate and wine!)

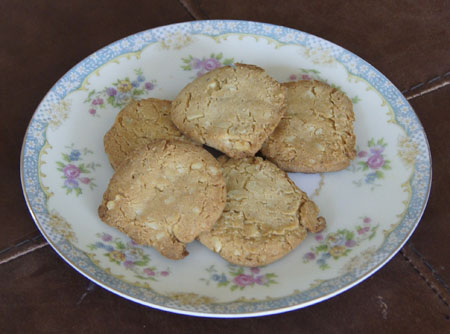
Crackle-Top Cookies recipeThis recipe is very similar to my recipe for Chocolate Chews. The differences are that this recipe has less flour, adds cinnamon, uses brown sugar instead of white, and has more nuts. Plus the baking time: these are cooked 20 minutes instead of 10 minutes.

Crackle Top Cookies
makes about 5 dozen

  • 1 3/4 cups flour
  • 2 teaspoons baking powder
  • 1 teaspoon cinnamon
  • 3/4 teaspoon salt
  • 1 2/3 cups brown sugar
  • 2 eggs
  • 1 teaspoon vanilla
  • 2 squares unsweetened baking chocolate, melted
  • 1/3 cup milk
  • 2/3 cup chopped nuts
  • powdered sugar

Mix the flour, baking powder, cinnamon, and salt.

Beat the shortening with a mixer, then beat in the brown sugar until light and fluffy. Add the eggs and vanilla, then stir in the chocolate and mix well.

Add the flour mixture alternately with the milk, beating after each addition until smooth. Stir in nuts.

Chill a few hours in the refrigerator. Shape into 1-inch balls, then roll each in powdered sugar. Bake at 350˚ for 10 minutes if you like chewy cookies, or 20 minutes if you like crisp cookies. (My recommendation is 10 minutes.)

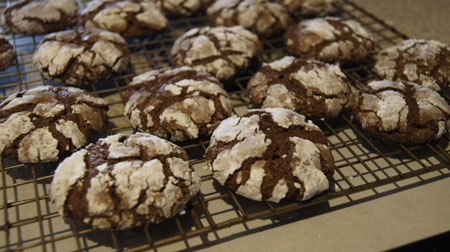
Crackle Top CookiesThese are excellent! I cooked the first batches 20 minutes, and I thought they were too crisp. The last batch I cooked only 10 minutes, and they were soft and chewy. We like the soft and chewy ones a lot better!

250 Cookbooks: Encyclopedia of Cookery, Volume 8

Cookbook #174: Encyclopedia of Cookery, Vol. 8, Moi-Pec, Woman’s Day, Fawcett Publications, NY, 1966.

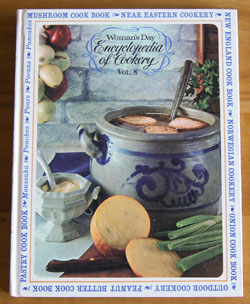
Encyclopedia of Cookery Volume 8

I have a set of twelve Encyclopedia of Cookery volumes and this is the eighth of that set – I covered the first seven in previous posts. I’ve enjoyed all of them so far! This volume covers curious and helpful information about foods from moi(sten) to pec(an).

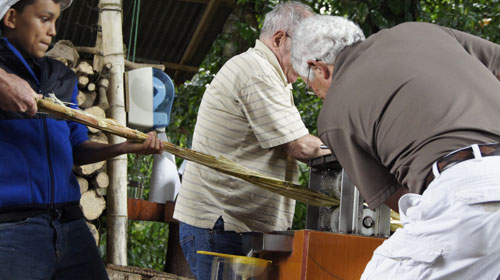
I begin my recipe and curiousity search on the first page. “Molasses” is the entry following “moisten”. I learn that molasses made from sugar cane. When we were in Costa Rica, we saw a demonstration of how they press sugar cane to get out the juice:

volcano region moonshine

But in Costa Rica, that sugar cane juice became moonshine! To make molasses, the cane juice is boiled down to a thick mass of syrup and crystals of sugar. Next, the brew is strained to isolate solid sugar crystals and syrupy liquid. The syrup from this first boiling process is sold as “light molasses”. “Dark molasses” results from a second boiling/straining of the syrup and “blackstrap molasses” results from a third boiling/straining. Light molasses can be used as a syrup on pancakes; dark molasses is less sweet (and darker in color) and is used in baking and candy making. Blackstrap molasses is generally used as cattle food – or as a health food. Molasses was the most widely used sweetener in America until the Civil War.

I like molasses, but none of the recipes in this section intrigue me. So I go on to moussaka (mid-Eastern eggplant casserole) and muffins (surprisingly – no recipe there I liked) and a Mushroom Cook Book. Wow, I’d love to make “cream of mushroom soup”. It would be delightful in a casserole instead of the over-processed canned mushroom soup that we get in the stores. (Someday.)

The Near Eastern Cookery section brings back memories of our trip to Turkey. Nesselrode? I remember it from childhood, but I think it was an ice cream. Perhaps it was:  I learn that “nesselrode” refers to an iced pudding made from egg yolks, sugar, cream, chestnuts, orange peel, currants, and candied cherries.

The  article “New England: Character and Cookery” was written by Louise Dickinson Rich. I find a recipe in this section for muffins using molasses called “Anthelias’ Sour-milk Gingerbread Cupcakes”. Could make those. Still, I search on for a recipe to make for this blog.

“Noodle” derives from words meaning “food paste”. In “Norwegian Cookery”, I find recipes for marzipan (from almonds, sugar, and egg whites), Puss Pass (a lamb stew), and cold cherry soup, made from fresh cherries (including ground pits), sugar, water, and lots of sherry.

Nutmeg, nutrition (interesting to read a 1966 view of this topic), and oatmeal. Oleomargarine was first prepared in 1870 by a French Chemist, Mège-Mouriès from beef oil, milk, and water, with annatto for coloring. Oleo derives from “elo” (oil) and margaric acid (an animal fat). Annatto seeds are used today in anchiote paste, a deep red seasoning from Mexico.

Olive oil should be “golden or straw yellow”, and “greenish oils are inferior”. My staple, green extra virgin olive oil, is not even mentioned! Next, oranges and oregano. An essay on “Outdoor Cooking” by Craig Claiborne and one on “The Delectable Oyster” by James Beard. Pancakes are the oldest form of bread and are made around the world. Oriental versions of pancakes have been made for “untold Oriental ages”. Next, pasties (meat pies) and a Pastry Cook Book.

“Patty” is a “small, round, flat mass of food dough, cereal, potato, or other vegetable, ground meat fish, poultry, or nuts”. Hmmmm.

Peas, a Peach Cook Book, peacock (yes, people eat them), peanuts, peanut butter – Peanut Butter Muffins! Pears and pecans finish off this volume.

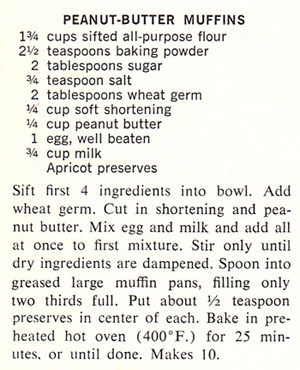
I want to make Peanut Butter Muffins. I haven’t made muffins with peanut butter in them for years!

Peanut-Butter Muffins recipe

I decide to leave the jam out of the muffins, add a bit more sugar, and combine the wet ingredients with a mixer, but otherwise will follow the recipe.

Peanut Butter Muffins
makes 10 muffins

  • 1 3/4 cups flour
  • 2 1/2 teaspoons baking powder
  • 3 tablespoons sugar
  • 3/4 teaspoon salt
  • 2 tablespoons wheat germ
  • 1 egg
  • 1/4 cup vegetable shortening
  • 1/4 cup (2 3/8 ounces) peanut butter
  • 3/4 cup milk

Stir together the flour, baking powder, sugar, salt, and wheat germ. Set aside.

Using a mixer, beat the egg. Mix in the shortening, then the peanut butter, then the milk. Stir in the dry ingredients only until the mixture is moistened.

Fill 10 mufffin cups (each should be 2/3 full). Bake at 400˚ for 20-22 minutes.

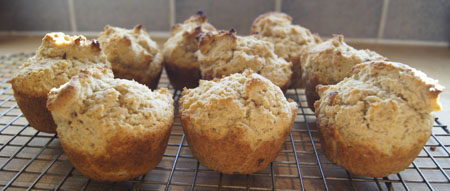
Peanut Butter Muffins

These tasted very peanut buttery, but were a little dry. With a lot of jam on them, I really enjoyed them. But looking at the original recipe, these are more like scones: the shortening and the peanut butter probably should be “cut in” with a pastry blender. I was reluctant to do this because it would be so messy! But mixed as in the original recipe, these might have been sort of flaky, like pie crust or scones.

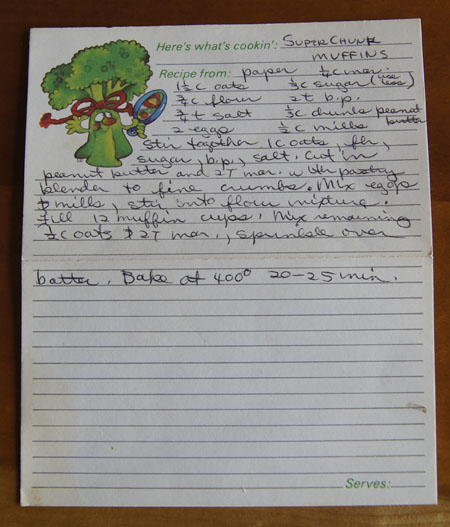
I found my old recipe for “Super Chunk Muffins” in my index card recipe file. I’ll make them soon and let you know if I like them better. This old recipe also calls for using a pastry blender to cut in the butter and peanut butter.

Super Chunk Muffins
makes 12 muffins

  • 1 cup oatmeal (quick)
  • 3/4 cup flour
  • 1/3 cup sugar
  • 2 teaspoons baking powder
  • 3/4 teaspoon salt
  • 2 tablespoons butter
  • 2 eggs
  • 1/2 cup milk

Stir together the oatmeal, flour, sugar baking powder, and salt. Cut in the peanut butter and margarine with a pastry blender to fine crumbs.

Mix the eggs and milk, stir into flour mixture. Fill 12 muffin cups.

Optional: mix 1/2 cup oatmeal and 2 tablespoons butter and sprinkle over the batter.

Bake at 400˚  for 20-25 minutes.

Super Chunk Muffins

250 Cookbooks: The Crockery Cook

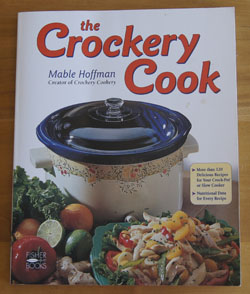
Cookbook #173: The Crockery Cook, Mable Hoffman, Fisher Books, Tucson, AZ, 1998.

The Crockery Cook cookbookA crock pot has been a staple in my kitchen for a very long time. I have 10 crockpot cookbooks! I even have another cookbook written by Mable Hoffman, Crockery Cookery. (See my first crockpot blog entry for a little on the history of crockpots.)

I picked this book off the shelf because a long-cooking meal fit into my schedule one day. Lately I just use the crockpot to cook pots of pork green chile and shredded beef. Time to shake up our meal times with a new recipe.

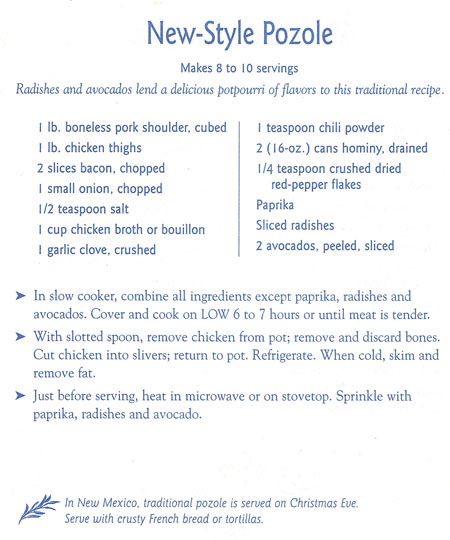
The Crockery Cook is nicely formatted and illustrated, with a large variety of recipes. I think I could always find something to cook from this cookbook, so I decide to keep it. And for this blog? I decide to make “New-Style Pozole”.
New-Style Posole recipe

I like hominy, and the bacon should add a nice twist. I have some hot peppers (my daughter grew them!) in my refrigerator, and we like things hot, so I’ll add them to the pot.

It’s best to prepare this recipe the day before to allow time for cooling the pozole so that you can skim off the fat.

Crockpot Pozole
prepare the day before

    • 1 pound boneless pork, cubed
    • 1 pound chicken thighs (bone-in or boneless)
    • 2 slices bacon, chopped
    • 1 onion, chopped
    • 1 clove garlic, chopped
    • 1/2 teaspoon salt
    • 2 cups chicken stock
    • 1 teaspoon chili powder
    • 2 16-ounce cans hominy, drained
    • dried pepper flakes (1/4 teaspoon or to taste)
    • fresh hot chili peppers to taste, chopped (optional)
    • garnishes such as: cilantro, avocado, sliced radishes, chopped red bell peppers, chopped red onions, chopped tomatoes, paprika

Mix all ingredients in a crockpot and cook on low 6-7 hours or on high for 3-4 hours. Add water as necessary to keep it soupy. Check seasonings and add salt and peppers to your own taste.

Let the pozole cool, then remove the chicken thighs. Bone them (if necessary) and chop into small pieces.

Put the pozole in the refrigerator overnight, then skim any fat from the top. Re-heat and serve with garnishes of your choice.

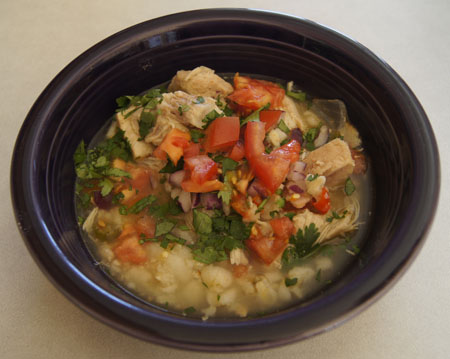
Crock Pot Posole

This was good, but not perfect. I thought the hominy was overcooked, too mushy. I couldn’t decide if it was a soup or a stew, but that doesn’t really matter! We like our Mexican food spicy, so if I make it again, I’ll add more peppers.

I served it with grilled quesadillas and it was a satisfying meal.

250 Cookbooks: Putting Food By

Cookbook #172: Putting Food By, Ruth Hertzberg, Beatrice Vaughan, Janet Greene, The Stephen Greene Press, Brattleboro, Vermont, 1973.
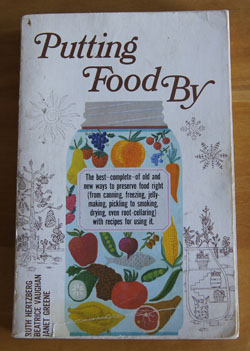
Putting Food By cookbook

The following is a quote from my own blog a couple years ago, when I covered the Complete Guide to Home Canning, Preserving and Freezing USDA.

“I used to put up tomatoes, hot salsa, jam, and pickles each year. I’d go to local vegetable stands and buy vegetables and fruits by the bushel. Why? So that I’d know the ingredients in my food, and I enjoyed doing it.”

And this is a quote from Putting Food By:

“Putting food by is prudence, and it’s involvement. It’s also a meaningful return to old simplicities and skills. Above all, it is deeply satisfying. We know what is added to food we put by for our families.”

Seems like the authors and I are in complete agreement! Putting Food By also gives a heads up to the USDA-produced pamphlets (like the Complete Guide to Home Canning) in the acknowledgements:

“The authors are grateful to all the anonymous dedicated people in federal- and provincial- and state-run projects in the United States and Canada who are constantly researching better and safer ways to handle our food.”

As I stated in my 2-year old blog post, these days I only put up jams. Well, that is, at least until I wrote that post and made dill pickles – I’ve made them several times since. Home made pickles are wonderful.

Both of these “canning” books are 1973 editions. I must have bought them In the mid-1970s, where for a year we rented a “quaint” old house on Walnut Street, called  “Walnetto” by our circle of friends. Somewhere in that house I found (and kept) two books: The Fannie Farmer Cookbook and the Whittier Wildcat Cookbook. Walnetto had a long backyard that went all the way to the creek that runs east between Walnut and Canyon. We used to have volleyball games there. And – we had a garden! The only time my husband and I really had a vegetable garden. He was the real gardener, I have to admit. I might have helped plant seeds but was lame on maintenance, like weeding and watering. But I loved having that garden, going out and picking fresh lettuce and carrots for salads. Lots of tomatoes, and of course overgrown zucchini. (There was even a shed with a fenced yard where we had a few chickens. The last chicken we had was the meanest thing . . . but I digress.)

I probably bought Putting Food By and the Complete Guide to Home Canning, Preserving and Freezing USDA in that era, and used the information to put up the overflow from our garden. We even had an ancient canning-pressure cooker. Ah, the memories.

Putting Food By is still in print! It’s in the 5th edition, published in 2010, with the same three authors. My copy is the first edition (and I’d love to see a copy of the 5th sometime). The chapters are: Canning, Freezing, The Preserving Kettle (jams, marmalade, fruit butters, relishes, pickles, mincemeat), Drying, Root-Cellaring, Curing (salting and smoking), The Roundup (rendering lard, pasteurizing milk, making soap, sausage, and cottage cheese), and Recipes. (There are also recipes throughout the book, the “Recipes” chapter covers using the canned/preserved foods.)

I think it’s the chemist in me that makes this all fascinating. And the fact that I love fooling around in the kitchen. Alas, time and the easy availability of good canned and preserved foods makes delving too far into putting food by . . . well, I’d say I have tons of other things I like doing too. And I don’t have a vegetable garden.

The canning directions and recipes in Putting Food By are clear, and cover the gamut of anything I ever might want to put up. I have no trouble finding something to try for this blog: “Corn Relish”. It’s corn season here in Colorado, and a corn relish sounds like a nice accompaniment for Mexican food.
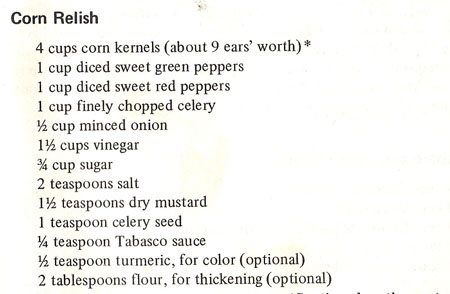
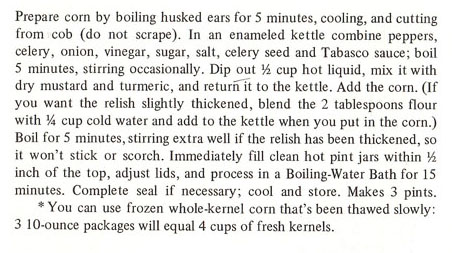
Corn Relish recipeCorn Relish recipeThis corn relish requires a “hot pack”. When I put up jam and such, I always use the popular 2-piece canning lids. To hot pack this type of canning lid, you put the hot vegetable or fruit mixture into hot sterilized jars, put a hot “dome” lid (the flat part) on top, screw down tightly with a hot metal screw band, and place the jar into a hot water bath that covers the jar to process. I refreshed my memory on this process by reading pages 10, 19, and 31.

I decide to leave out the turmeric and add a California green chile, but otherwise follow the recipe.

Corn Relish
makes 4 pints

  • 8-9 ears corn (you need enough for 4 cups corn kernels)
  • 1 cup diced sweet red peppers
  • 1 cup diced sweet green peppers
  • 1/2 cup California (Anaheim) green chile, diced (these are the long, milder green chiles)
  • 1 cup celery, chopped fine
  • 1/2 cup onion, chopped fine
  • 1 1/2 cups white vinegar
  • 3/4 cup sugar
  • 1 1/2 teaspoons dry mustard
  • 1 teaspoon celery seed
  • a few drops of a hot sauce, like Tabasco
  • 2 tablespoons flour mixed with 1/4 cup flour (optional)

Shuck the corn and cook in boiling water for 5 minutes. Let cool, then cut the corn from the cob to make 4 cups. Set aside.

Bring a large pot of water to a boil and add 4-5 pint glass canning jars to sterilize them while you prepare the relish. Also have a small amount of boiling water to sterilize the dome lids.

Combine in a big pot: peppers, celery, onion, vinegar, sugar, dry mustard, celery seed, and hot sauce. Bring to a boil and boil 5 minutes, stirring occasionally.

If you want the relish thickened, at this point, add the flour and water mixture.

Add the corn to the pot and boil, stirring frequently for 5 minutes.

As the relish boils, remove the jars from the boiling water bath. (This water bath is used in the next step, so don’t empty the pot yet!) Drain the jars on a clean cloth.

Immediately pour the cooked, hot relish into the drained, sterilized jars. Top with a sterilized dome lid, then add the screw-top band and tighten. Put the capped relish jar back into the boiling water bath, making sure the level of the boiling water is above the level of the top of the jars.

Process in the boiling water bath for 15 minutes. Remove the jars and let them cool. They will keep at least a year in your pantry, but always check the jars before use to make sure the seal is not compromised.

In the photo below, I have the relish boiling and the empty jars sterilizing.
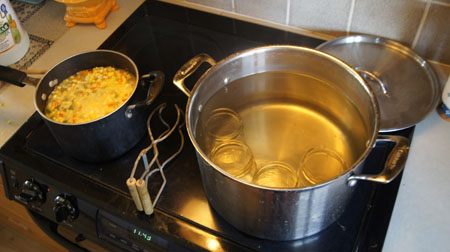
cooking the relish and sterilizing the jars

Next, the filled, sealed jars are in their 15 minute boiling water bath.
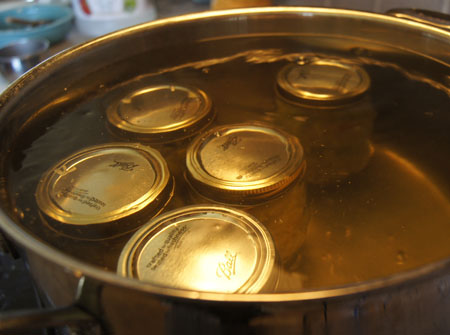
hot packing the relishAnd here are the jars of canned relish!
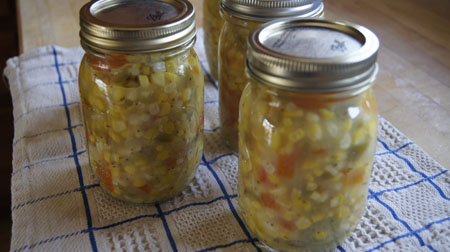
corn relish

Comments

This relish is good. It is sweet and sour and hot. I will use it mostly as a garnish for Mexican food.

I will definitely keep Putting Food By. Along with Complete Guide to Home Canning, it is a great reference for when I come upon a lot of produce or have a hankering to play around in the kitchen.

250 Cookbooks: Southwestern Grill

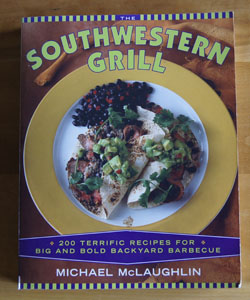
Cookbook #171: Southwestern Grill, Michael McLaughlin, the Harvard Common Press, Boston, MA, 2000.

The Southwestern Grill cookbookI bought this cookbook for myself and have always enjoyed it. Such refreshing ideas! Grilling with spices and fresh ingredients. A pleasure after some of my aged cookbooks.
I grew up in the Southwest (southern California), and tacos and enchiladas were part of our everyday meals, especially from the time I was a teen. How did this author develop his own interest in southwestern-style foods? On Wikipedia, I learn that Michael McLaughlin was born the same year I was, in Wray, Colorado. He moved to New York and became a chef. There he met Julee Rosso and Sheila Lukins, and helped them publish The Silver Palate Cookbook in 1983. This cookbook encourages homecooking with fresh ingredients, and has sold in excess of 2 million copies. (Why have I never heard of it? Sounds right up my alley.)

McLaughlin moved to Santa Fe, New Mexico, where he owned a restaurant for a time. His interest and expertise in fresh foods and grilling expanded to include bright, spicy Southwestern flavors. He became a food writer for Gourmet, Bon Appetit, and Food & Wine magazines. McLaughlin authored (or co-authored) over 20 cookbooks. I was sad to learn he passed away in 2002.

McLaughlin writes about two “very good things” that happened in the 1980s-2000. First, grilling, “formerly a casual backyard art form, evolved into an accepted and respected cooking method.” And “second, the food of the Southwest escaped from its regional confines and swept like a mesquite brushfire across the country.” The two combined and now both chefs and home cooks grill southwestern dishes, full of heat, spice and savory smoke. “Grilling has grown up . . . liberally seasoned with a dose of the special magic that is the unique culinary contribution of the American Southwest.”

Here is a sampling of recipe titles, to give you an idea of the variety in this cookbook: Steak and Grilled Green Onion Quesadilla, Cafe Pasqual’s Grilled Salmon Burritos with Cucumber Salsa, Grilled Chicken Totopo Salad, Warmed Grilled Chile-Lime Beef Salad, Arracheras with Crunchy Vegetable Garnish, Heirloom Bean Salad, and Grilled Tequila-Cured Salmon with Mango Pico de Gallo.

Some recipes are a bit “out-there” for my own cooking, partly because I’m not sure I could get some members of my family to eat them, for instance: grilled cactus, grilled eggplant dip, and portobello mushroom burgers.

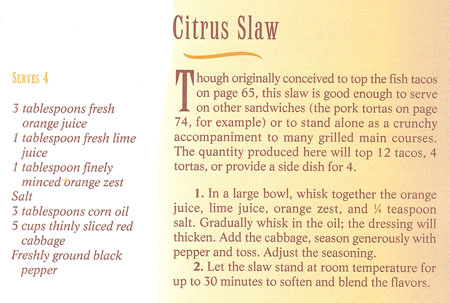
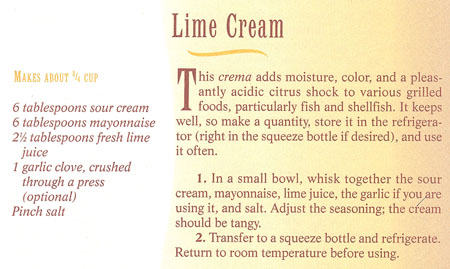
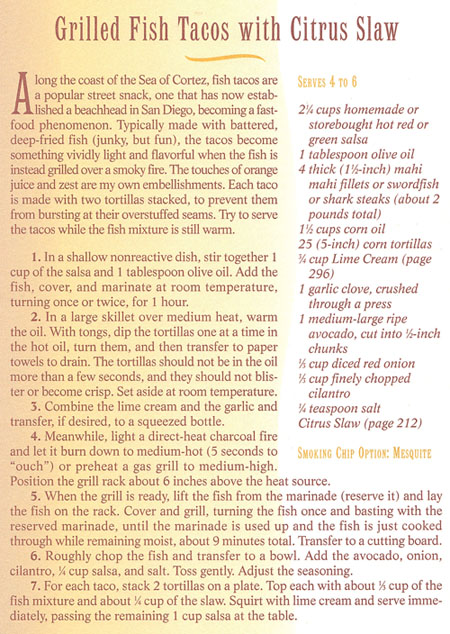
I like the Salsas, Sauces, and Condiments chapter a lot. For one, many of the recipes in this cookbook refer to this chapter for sauce/salsa/rubs recipes (for example, see the scan of the Grilled Fish Tacos recipe). And too, it allows the cook (me!) to be creative, adding a fresh salsa to “same old” tacos, for instance.

I am going to share a couple recipes that I love from this cookbook. I know, I usually try something new from a cookbook, but the rules are mine, and I can bend them! I have made the “Grilled Fish Tacos with Citrus Slaw” many times.

Grilled Fish Tacos recipeCitrus Slaw is a separate entry.

Citrus Slaw RecipeAnd so is the Lime Cream.

Lime Cream recipeI made these exactly according to the above recipes. And they were good, as always!
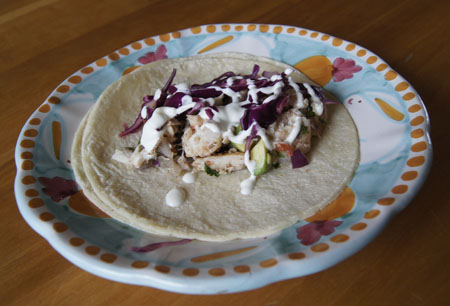
Fish TacosThank you Michael McLaughlin for this wonderful recipe! If you want to make them for yourself, pick up a copy of his book, or use my scans, above.
250 Cookbooks: Menu Magic in a Nutshell

Cookbook #170: Menu Magic in a Nutshell, Diamond Walnuts, California Walnut Growers Association, 1950.

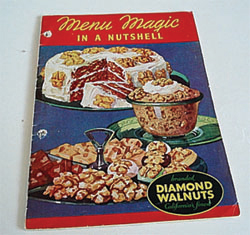
Menu Magic Diamond Walnuts cookbook

I have to admit something: the photo above is not mine. The cover on my booklet is missing, but I found the above photo online. This booklet is currently sold on the Etsy site for $12. The seller claims the book was published in 1950, and authored by cook(s) at the Good Housekeeping Institute.

Who buys these old booklets? Vintage books are used in scrapbooking or decoupage. Or maybe someone lost their old copy, or simply like walnut recipes!

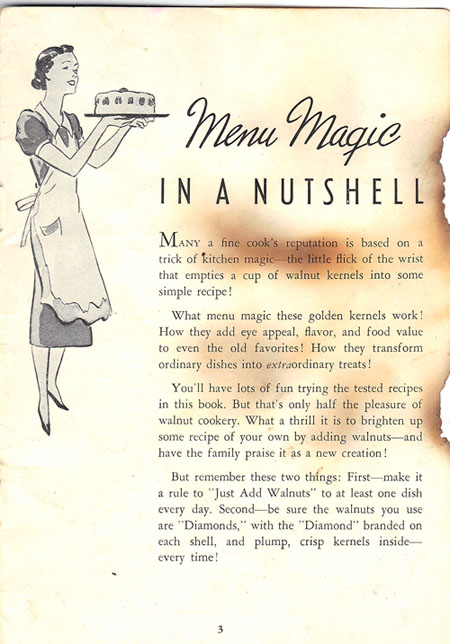
My mother liked walnuts This was her booklet, and I think she used it a lot. You can see how beat up the first page is:

Menu Magic in a Nutshell

It’s fun to read, isn’t it? Note it refers to the name “Diamond” branded on each nutshell. It took me a moment to remember: walnuts used to be available only in the shell. We used to spend hours shelling walnuts for Mother. In California, you could even pick your own walnuts off the trees, still in the soft skin that covered the hard shell. One birthday or Mother’s Day, us kids picked a whole bunch and shelled them all for Mother. By the time they were shelled and wrapped as a present and opened on the special day, the entire lot was wormy. Boy, that’s an old memory.

Today I buy shelled walnuts in bulk or bags. I always have some in the freezer, ready to add to muffins and breads, salads and desserts.

Let’s see what this vintage cookbook has to offer. Mixed Fruit and Walnut Salad has pineapple, dates, orange, banana, grapes, and walnuts, and is served over lettuce. Sounds pretty good to me. Diamond Chicken Salad adds walnuts to chicken, celery and mayonnaise salad. Yummy. There are several molded salads that were so popular in the 50s and 60s. Desserts are next: Brown Betty, Apple Walnut Tapioca, Raisin Walnut Pie, Walnut Peach Shortcake, Apricot Caramel Shortcake, Danish Apple Pudding, and Apple Crumb Pie all sound good. Mother marked “Prune Whip” as “good“. (Prune Whip is a meringue dessert with stewed prunes and walnuts.) She also liked Walnut Sticks, a bar cookie made with brown sugar, eggs, and walnuts. Just about all of the cookies and cakes look good to me!

Main courses? You can include walnuts with apples and sweet potatoes, or walnuts in turkey dressing, or in meatballs. The meatless walnut loaves do not appeal to me, though. Finally, candies: Divinity (Mother marked it “good”), Uncooked Fudge, and Sugared Walnuts. Looks like I’m missing pages 23-30. Sad, because the index tells me those pages included the bread recipes.

Well, I guess I’m going to have to keep this little “cookbook”. Maybe I’ll find the rest of this booklet someday.

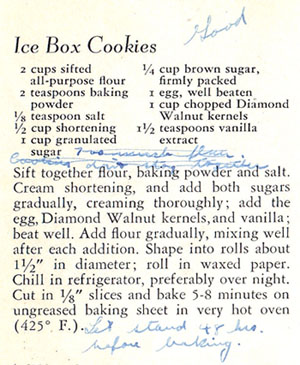
For this blog, I choose to make Ice Box Cookies. I like refrigerator cookies because I can always have them on hand to bake up fresh, and I can bake just a few at a time. Mother marked this recipe with her notes, so I know they are “Good”!

Ice Box Cookies recipe

I like brown sugar, so I am going to up the amount of brown sugar and decrease the amount of white sugar. Mother noted, and then crossed out, that there is too much flour in this recipe. I’ll add the flour very gradually and use the mixer to combine it in.

Ice Box Cookies
makes about 4 dozen

  • 1/2 cup vegetable shortening
  • 3/4 cup white sugar
  • 1/2 cup brown sugar
  • 1 egg
  • 1 cup chopped walnuts
  • 1 1/2 teaspoons vanilla
  • 2 cups flour
  • 2 teaspoons baking powder
  • 1/8 teaspoon salt

Cream the shortening and sugars for several minutes. Add the egg and beat in well. Mix in the walnuts and vanilla.

Stir together the flour, baking powder, and salt. Add gradually to the creamed mixture. (Do not add all of the flour mixture if the dough no longer holds together.) Remove from the mixing bowl and, with your hands, press the dough into one solid mass, then form it into a couple 1 1/2-inch logs. Wrap each log in plastic wrap and refrigerate at least 48 hours.

Cut into 1/8-inch slices and bake 7 minutes at 425˚.

Comments

My dough was too dry. I should have paid attention to my mother’s first note. In Colorado, I know from long experience that flour is very dry here. Next time I’ll use 1/4 cup less flour, though. They were kind of crumbly to slice before baking.

But are they good?

Ice Box CookiesYes! These are sweet, crisp, and tasty. I had one, and wanted more!
250 Cookbooks: Weber’s Real Grilling

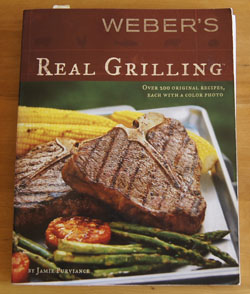
Cookbook #169: Weber’s Real Grilling, Jamie Purviance, Sunset and Weber books, Weber-Stephen Products Co., 2005.

Weber's Real Grilling cookbook

Ages ago we had a covered Weber charcoal grill, then changed to a gas grill at some point in time. Today I consider a gas grill an essential component of my cooking equipment, summer, fall, winter, and spring!

I got Weber’s Real Grilling about six years ago, when we purchased our current Weber gas grill. I use this book a lot! It sort of flops open to “Basic Baby Back Ribs”, where I have several post-its pressed into place.

I highly recommend this cookbook. It taught me how to cook over direct and indirect heat on a gas grill, and how to set the temperature of the grill. If I want to know about rubs, or BBQ sauces, I go to this book first. If I want to know how long to cook a cut of meat, poultry, or fish, I go to this book first. The recipe chapters are: red meat, pork, poultry, fish, veggies and sides, and desserts. Each recipe has an accompanying photo that makes this amateur photographer envious!

The recipes offer a variety of seasonings: Rib-Eye Steaks with Tomato Harissa, Flatiron Steaks with Little Italy Relish, Sweet Chili-Mustard Chicken Salad with Toasted Almonds, Smoked Pulled Pork in Hot Chile Sauce, and Soft Tacos with Halibut, Guacamole, and South American Slaw are some examples. A fun range of ingredients and lots of fresh herbs and vegetables – I can always find a recipe to try in this book!

In September 2013 we were “stranded” at our home northwest of Lyons by a 500-year flood. Rushing water covered our only drivable way to civilization. Our power was out for a week in our all-electric home. We had no landline service. No cell phone reception. I am a packrat, so we had plenty of food, but how to cook? The Weber grill! That’s when I pulled out Weber’s Real Grilling and learned how to grill pizzas. They were wonderful!

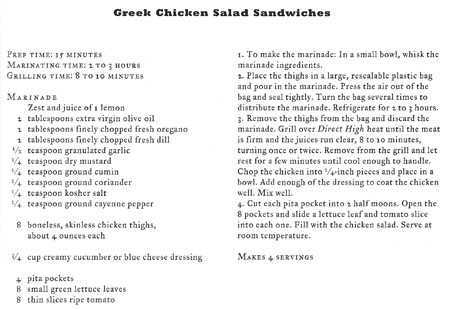
For this blog I choose to make “Greek Chicken Salad Sandwiches”.

Greek Chicken Salad Sandwiches recipe

I like the seasoning mix for the marinade, and I like using chicken thighs sometimes instead of chicken breasts. Ever since our trip to Turkey, I’ve especially enjoyed Mediterranean-style food. Plus: pitas! It’s been ages since I’ve bought (or made) pita bread. For the “creamy cucumber or blue cheese dressing”, I will substitute a cucumber dressing that I have in my own cooking documents.

Greek Chicken Salad Sandwiches with Cucumber Dressing for Two

  • zest and juice of 1/2 lemon
  • 1 tablespoon olive oil
  • 1 tablespoon chopped fresh oregano
  • 1 tablespoon chopped fresh dill
  • 1/4 teaspoon granulated garlic (or use fresh garlic)
  • a few shakes each: dry mustard, cumin, coriander, salt, cayenne pepper
  • salt and pepper (to your own tastes)
  • 8-10 ounces boneless, skinless chicken thighs
  • 2 pita breads
  • lettuce and tomatoes
  • cucumber dressing: 1/2 cup plain yogurt, 1 tablespoon mayonnaise, 1/2 teaspoon garlic powder, 1 tablespoon lemon juice, a couple leaves fresh mint (if you have it), and about a third of a cucumber, peeled, seeded, and finely chopped

Whisk together the marinade ingredients (lemon though the spices). Place the chicken thighs in a plastic bag and pour in the marinade. Close the bag and refrigerate 2-3 hours.

Combine the cucumber dressing ingredients and set aside.

Remove the thighs from the bag and discard the marinade. Grill over direct high heat until the meat is firm, 8-10 minutes, turning once or twice. Remove from the grill, and when cool enough to handle, chop the chicken into small pieces. Combine with enough of the dressing to coat the chicken and mix well.

Cut the pita breads in half. Open each half and fill with the chicken mixture, lettuce, and tomatoes and serve.

Comments

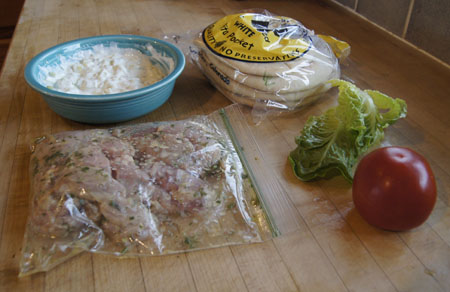
My cucumber dressing, pita pockets, marinated chicken, and the veggies:

Pita Sandwich ingredients

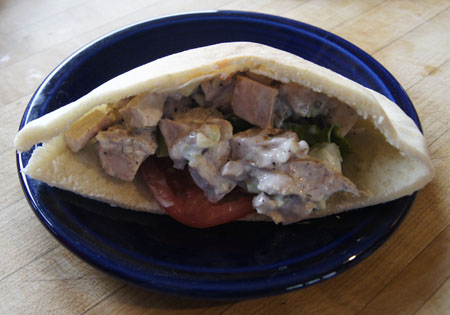
Here is an assembled sandwich

pita sandwiches

We both enjoyed these! The chicken in nicely seasoned and well complimented by the cucumber dressing. We had them for dinner on a hot summer day, but they’d be good for lunch too.

I’ve made chicken salad for sandwiches before, zillions of times. Usually I use boiled chicken. Marinating and grilling the chicken – for chicken salad? A great idea. Putting the salad in pita bread? Another great idea. Next time, I’ll probably cook the chicken ahead of time, since they are served at room temperature.

250 Cookbooks: Step-by-Step Microwave Cook Book

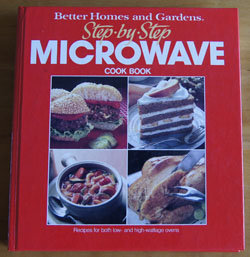
Cookbook #168: Step-by-Step Microwave Cook Book, Better Homes and Gardens, Meredith Corporation, Des Moines, Iowa, 1987.

Microwave Guide and Cookbook

I do like Better Homes and Gardens publications! As I leaf through this one, I find myself enjoying most everything: the photos and the writing and the recipes. Reminds me of the BH&G Golden Treasury of Cooking that I covered a couple weeks ago. Checking my cookbook database, I find 17 BH&G books, and I have covered all but this one so far – and most I decided to keep.

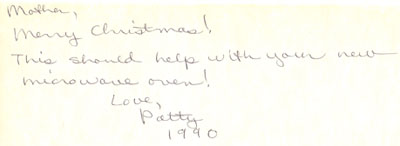
I bought this cookbook for my mother in 1990, when she got a microwave oven.

inscription

My mother never really liked “new fangled things”. She held out on a garbage disposal for years, and never wanted (or had) a dishwasher or clothes dryer. She relented to a microwave oven around 1990 – it came as the upper oven in her new stove. (I remember how long she needed a new stove, how the bottom was almost baked through by the time my father gave in and bought a new one.) My guess is that I found this cookbook in a bookstore, because I (still) like it so much (and purchasing in a brick-and-mortar bookstore is likely too because online book-buying was in its infancy in 1990).

I went into some detail on microwave ovens when I covered cookbook #17, Whirlpool Micro Menus Cookbook. I highly recommend reading that “old” post of mine! It talks of early microwaves and my uncle and how we were a bit wary of microwave ovens at first but how even ex-hippie-me finally added one to my kitchen. Now I would hate to live without a microwave oven, even though I use it mostly for tasks like defrosting or re-heating or melting cheese or making burritos, or baking chores like melting chocolate.

Microwave cookbooks encourage the reader to prepare the entire meal in the microwave, from appetizers to soup to stews to meats to breads to desserts. That’s simply not the way I cook! But, I am always looking for ideas and sometimes I need microwave cooking times and methods, so I will keep one or two microwave guides on my cookbook shelf.

Okay, details on why I like this cookbook. The appetizer section gives lots of good ideas, especially South-of-the Border-Style Meatballs, Pork Kabobs, Taco Chicken Nuggets, and party and snack and nut mixes ideas. The bread section describes how to use your microwave to raise yeast dough. I like the quick breads Cranberry Orange Loaf and Chocolate and Whole Wheat Ring and the cakes Pumpkin-Raisin Cake and Applesauce Cake, but I’d probably adapt them for a conventional oven. I’ve never thought of making candies like divinity or brittles in the microwave, but it might be nicer than standing over a hot stove. Excellent instructions for scrambled eggs and omelets. Fish and Vegetables En Papillote sounds good. Mother tried and liked “Saucy Tuna-Mac Casserole”. Walnut Bananas Foster! Sounds good for grandkids (if you leave out the rum!). If my regular oven breaks, I could simmer a pot roast in my microwave. I like the Spaghetti Pie, Mexican-Style Manicotti, and Saucy Sausage and Noodles casseroles. Good instructions for defrosting and cooking chicken pieces and a “Creating a chicken casserole” section. I like the chocolate and butterscotch ice cream toppings.

Clear instructions for thawing and cooking different foods are throughout the book, and the end of each section has the nutritional analysis of each recipe. Throughout, I am impressed by the clear instructions. Yes, I will keep this cookbook.

I choose to make Mexican Beef Salad for this blog.

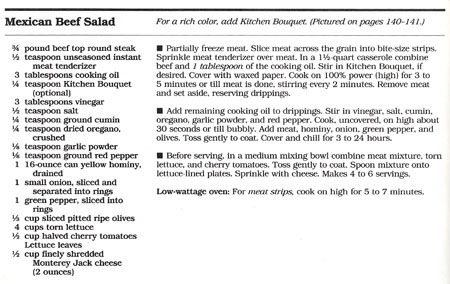
Mexican Beef Salad recipeThe round steak is cooked in the microwave, plus the prep takes just a few minutes. The whole salad can be prepared in just one bowl. It’s July, and hot, and the less time spent in a hot kitchen, the better! I do think this salad needs a little salsa and avocado. I also put a few tortilla chips in our salads for some crunch.
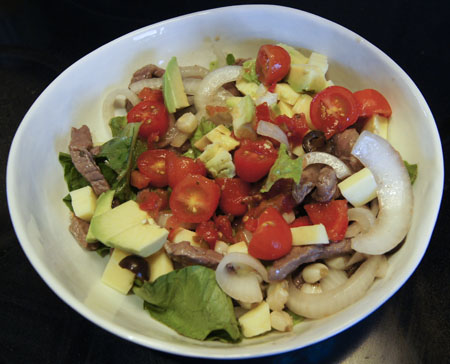
I had trouble finding a small can of “yellow hominy”. At my local supermarket, they only had 6 pound cans of hominy! The labels didn’t say “yellow” hominy, but the picture on one of the choices looked a little yellower than the others. I bought that one huge can, and when I opened it, the hominy inside was pretty pale. And now I have the rest of the can to re-purpose.

The ingredient amounts in my version of this recipe (below) are approximate. It is, after all, just a salad! Experiment as you wish.

Mexican Beef Salad
serves 2

  • 8-12 ounces beef round steak
  • 2 tablespoons cooking oil
  • 2 tablespoons vinegar (I used champagne vinegar)
  • 1/4 teaspoon salt
  • 1/2 teaspoon cumin
  • 1/2 teaspoon dried oregano (Mexican oregano if you have it)
  • 1/8 teaspoon garlic powder
  • 1/8 teaspoon cayenne pepper
  • 1 cup hominy (about)
  • 1/2 large onion, sliced
  • 1/2 green (or red) pepper, chopped or sliced
  • 1/4 – 1/3 cup sliced black olives
  • halved cherry tomatoes
  • 1/2 cup jack cheese, cut into small cubes, or grated
  • torn lettuce (I suggest romaine or iceberg)
  • optional: avocados, salsa, and tortilla chips

Slice the round steak into bite-sized strips. (It is easier to slice thinly if you put it in the freezer for about an hour first.)

Place the meat in a 1-quart glass casserole. Add 1 tablespoon oil, then microwave on high for 3-5 minutes, stirring every 2 minutes, until the meat is done.

Remove the meat from the casserole with a slotted spoon and set aside.

Add 1 tablespoon oil to the drippings in the casserole. Stir in vinegar, salt, cumin, oregano, garlic powder, and cayenne. Cook in the microwave on high about 30 seconds, or until it is bubbling. Add the cooked meat, hominy, onion, green pepper, and olives. Toss to coat. Cover and chill 3-24 hours.

When ready to serve the salad, stir the cherry tomatoes into the meat and vegetable mixture. Fill two bowls with as much lettuce as you like. Add the meat-vegetable mixture.

If you like, add chopped avocados and salsa, and garnish with tortilla chips.

Mexican Beef SaladThis was a great salad for a hot summer night! I’m sure I’ll make it again.
250 Cookbooks: Cookies, Cakes ‘n Muffins

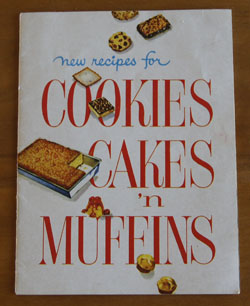
Cookbook #167: Cookies, Cakes ‘n Muffins, Kraft Kitchens, Chicago, Illinois, circa 1958.

Cookies Cakes 'n Muffins cookbook

A mystery presents itself as I open Cookies, Cakes ‘n Muffins. What is the publication date? All it says is “The Kraft Kitchens, Chicago, Illinois”.

Sleuthing-me sets out on the internet. When did “Kraft” first emerge as a company name? Wikipedia tells me that James L. Kraft started a cheese business in Chicago in the early 1900s, and his brothers joined him to form “J. L. Kraft and Bros. Company” in 1909. By 1923, the Kraft brothers company was part of the National Dairy Corporation. In 1969, National Dairy changed its name to Kraftco Corporation. In 1976, its name changed to Kraft, Inc.

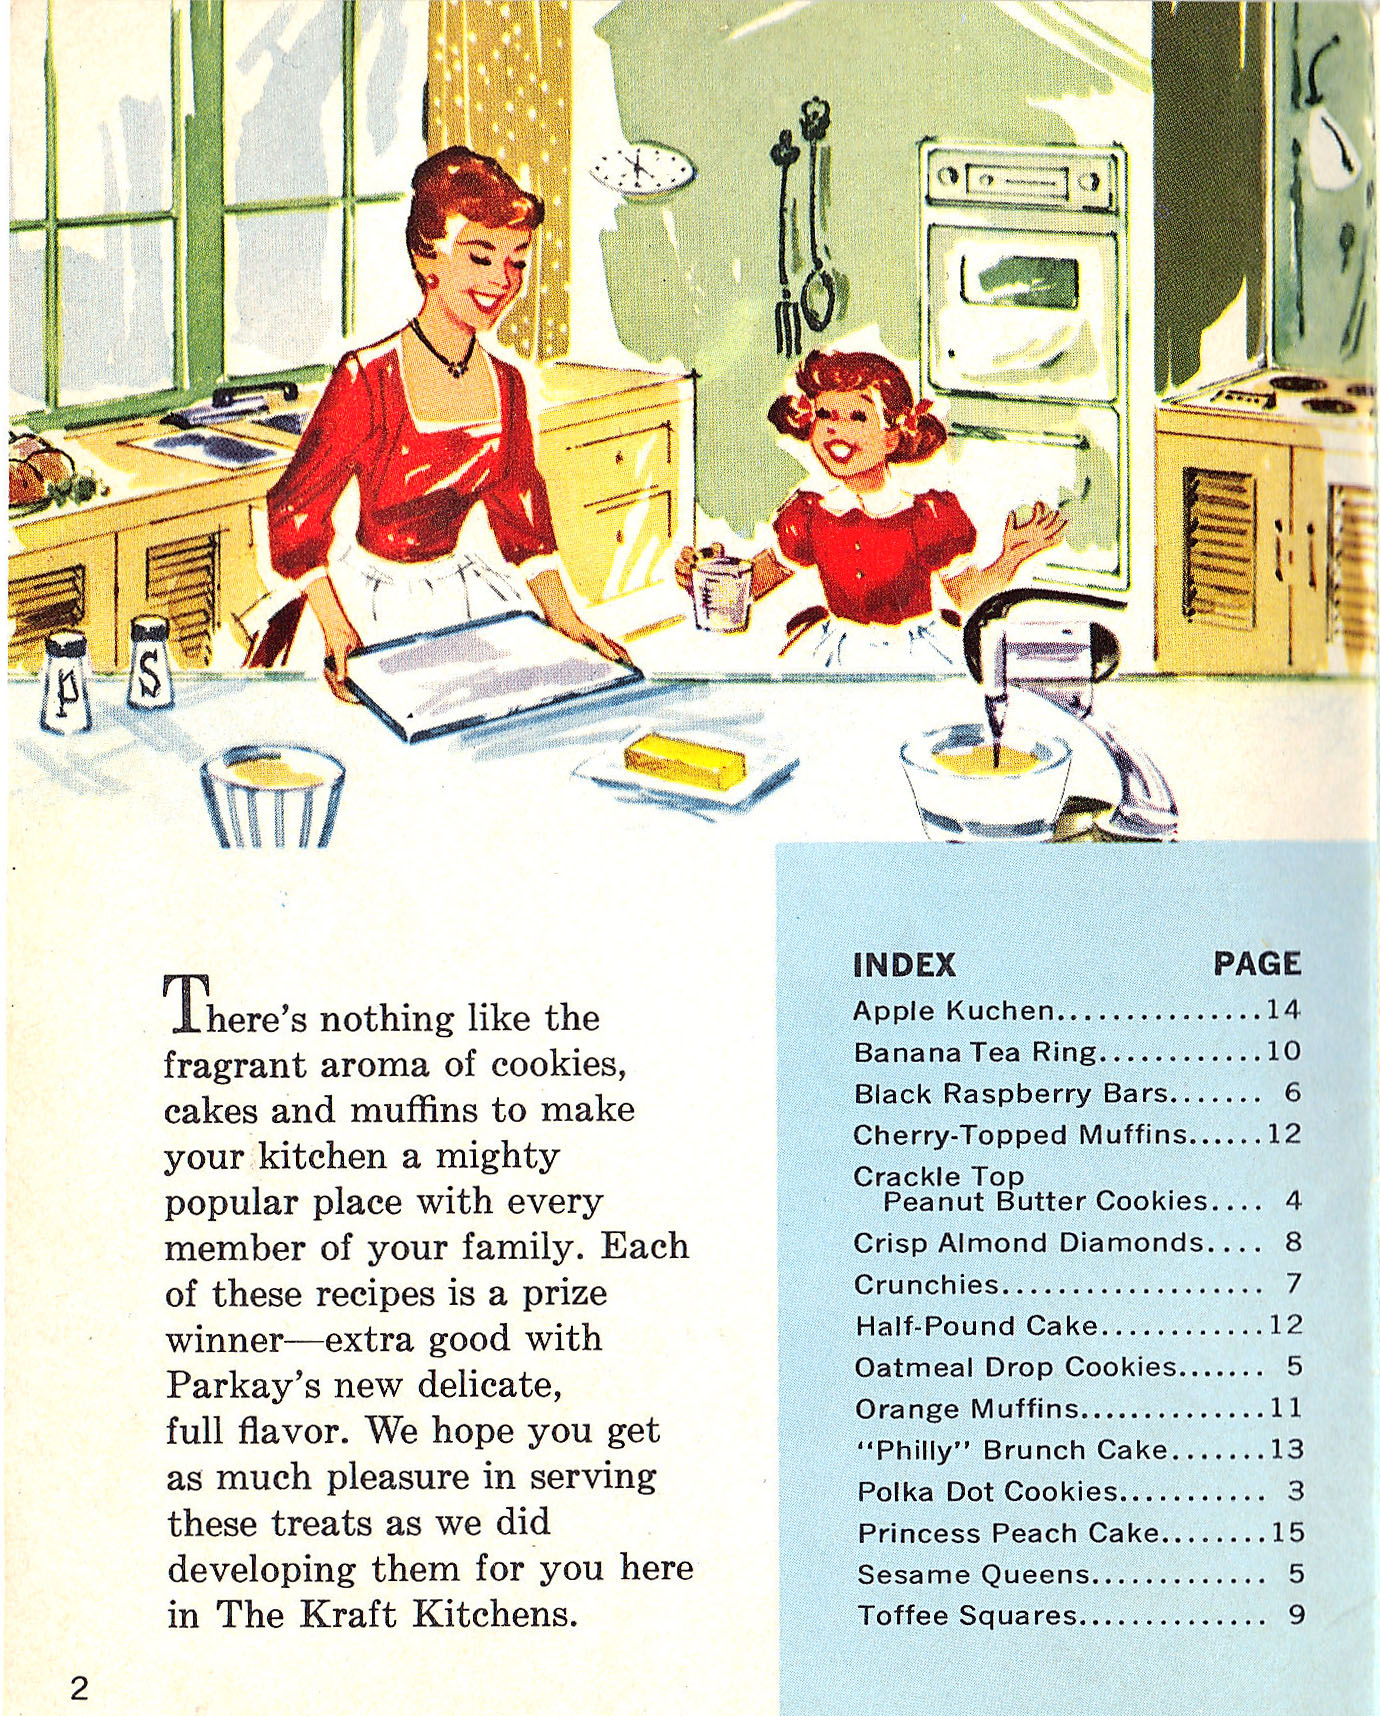
This all led me to think that since the booklet was produced by “The Kraft Kitchens”, it must have been produced after 1976. But the illustrations are much older-looking than the 1970s era:

illustration

Kind of like the era of the TV show “Father Knows Best”. A necklace and all dressed up as the mom works in the kitchen? Definitely the 50s or the 60s. (“Father Knows Best” ran from 1954 to 1960.)

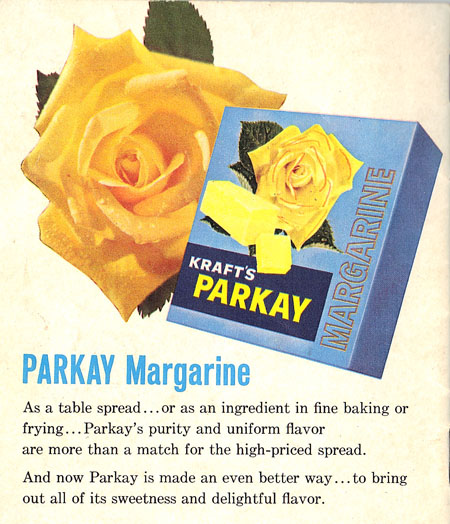
Maybe the phrase “Parkay margarine” will help me figure out the date. No, that clue is no help. Except: the “butter” sales line of the 1973 commercial is not in this booklet. So my booklet must be before 1973.

(An aside: A famous 1973 commercial claims Kraft’s Parkay tastes like butter: “A housewife looks at a square box of Parkay in her kitchen and says ‘Parkay’. In a rather comical voice the box of Parkay says ‘butter’, they go back and forth until she tries a taste of it and she says “butter” so the square box of Parkay says ‘Parkay!'”)

Then this catches my eye:

address

Kraftco transferred to Glenview, Illinois, in 1972. So I think I am right that this cookbook is pre-1970s. But hey, there is no zip code in the address! Aha, a clue! When did zip codes become part of US addresses? Wikipedia informs me that zip codes were introduced in 1963, became mandatory for 2nd and 3rd class mail in 1967, and thereafter were soon adopted generally. Before zip codes, postal “zones” were used, thus explaining the “Chicago 90″ in the address.”

Therefore, this booklet was definitely produced before 1963.

To further narrow down the publication date, I googled “photo Parkay margarine”. This pulled up a lot of photos of Parkay margarine packages through the years. One package looks just like this illustration on the back of Cookies, Cakes ‘n Muffins:

Parkay photo I follow the photo that looks like my cookbooklet to the page of origin. The photo is a Kraft’s Parkay Advertisement in Ebony Magazine, November, 1959.
My conclusion: this booklet was published sometime in the late 1950s. I add with confidence the publication date of “circa 1958″.

Whew. Now, to the cookbook contents: recipes. They are okay but pretty similar to recipes in other books. And, there aren’t many. Also, I like to use butter rather than margarine. The only reason I might keep this cookbook is that it is “vintage”.

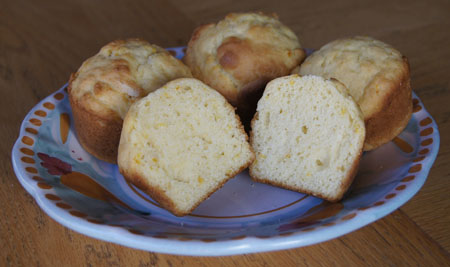
I decide to make “Orange Muffins” for this blog. I will use butter instead of margarine, and cut down the amount of baking powder – 1 tablespoon just seems like too much! The recipe says it makes 12 muffins, but as I fill my muffin pan with batter to my usual “2/3 full” per muffin cup, 8 good sized muffins was all the batter allowed.

Orange Muffins
makes 8 good sized muffins, or 12 smallish ones

  • 1/3 cup butter (use margarine if you prefer)
  • 1/3 cup sugar
  • 1 egg
  • 1 tablespoon orange rind
  • 1 1/2 cups flour
  • 2 teaspoons baking powder
  • 1/4 teaspoon salt
  • 1/4 cup fresh orange juice
  • 1/4 cup milk

Cream the butter and sugar, then add the egg and orange rind. Stir together the flour, baking powder, and salt. Combine the milk and orange juice. Add the flour mixture alternately with the milk-orange juice mixture, mixing well after each addition.

Fill muffin cups 2/3 full. Bake at 400˚ for 15-20 minutes.

Orange MuffinsThese are very good. Cake-like, but not too sweet for breakfast.