250 Cookbooks: Natural Cooking

Cookbook #203: Natural Cooking, Barbara Farr, Potpourri Press, Greensboro, NC, 1971.
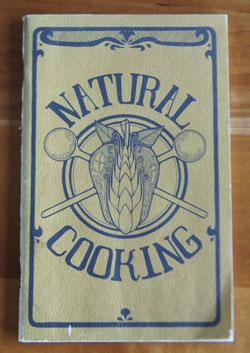
Natural Cooking cookbookThe title page of this booklet is marked “$1.50” in very neat handwriting. My guess is that I bought it in a Boulder bookstore, way back when. Today I could buy it for $3.95 on Amazon.

The Owl & Company Bookshop comments that Natural Cooking is a “scarce and relatively early natural food cook-book”, referring to the natural food movement that the “hippie” generation took on as its own. Barbara Farr’s Natural Cooking defines natural foods as minimally processed foods, for example, whole grains instead of white flour, foods grown without pesticides, and produce brought from farm to table as soon as possible.

There was a time when all grains and produce were grown without synthetic pesticides, and produce had to be eaten (or home-canned) quickly or it would spoil. In the early twentieth century the “food industry” grew fast, offering food processed to lengthen its shelf life. Home cooks were able to buy canned and packaged foods, and wanted more. Chemists  in the same era discovered and manufactured pesticides for greater crop yield, as well as food preservatives (additives) to give processed foods a longer shelf life. Home cooks of the 40s to 50s latched on to these convenient products.

Then came the “hippie” generation, a sub-set of the “baby boom” generation. Many hippies, children of the 1940s to the 1960s, wanted to go back to nature, and eliminate pesticides and food additives from their foods, as well as eat whole grains and freshly harvested foods (preferrably home grown). (Joni Mitchell: “Give me spots on my apples but throw away the DDT”.)

The hippie generation did not invent the movement for all natural foods. My edition of the Boston Cooking-School Cook Book, published in 1906, recommends whole grains and a balanced diet including fruits and vegetables.

I found Natural Cooking in the bibliography of this book, Secret Ingredients: Race, Gender, and Class at the Dinner Table, by S. Inness. It’s in the chapter “Recipes for Revolution“.

Natural Cooking referenceThe trend for whole grains continues today (2017). I like them because they have much more flavor than plain white bread, or white rice. Whole grains have a low glycemic index, touted in The Glucose Revolution Pocket Guide to Losing Weight as being important both for dieters and diabetics. Today, I see “low glycemic index” bars and foods advertised for fitness affectionados and dieters alike.

I sit down with Natural Cooking and slowly page through. On page 4, “Introduction”, is the quote from the inset (above), “A steaming bowl of soup, a ripe tomato still warm from the heat of the sun, and a loaf of crusty whole-grain bread; all of these are natural foods. On the other hand, a T.V. dinner is unnatural in its concept, unsatisfying in its flavor and unbeautiful to behold!”. I scanned in page 5, below, because it exemplifies the tone of Barbara Farr’s book:
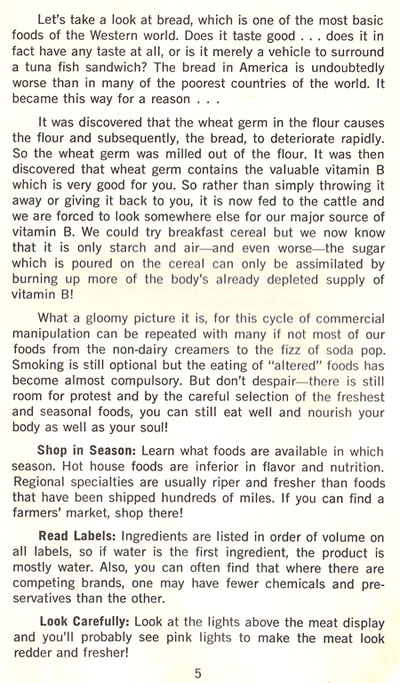
Natural Cooking

Here is an excerpt from page 6, Barbara Farr’s take on food faddists:
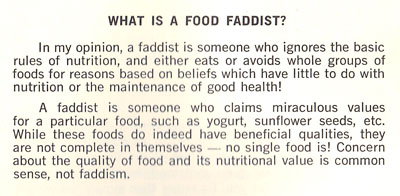
Natural Cooking

Even though this is a small collection of recipes, it is quite varied. The recipes in this book are not vegetarian and some include cuts of meat that we less commonly use today, such as oxtails, kidneys, liver, and smoked tongue. Hummus, eggplant, stuffed grape leaves, gazpacho, quiche, and bean soups show the variety of choices. I easily find three recipes I’d like to try: Swedish Limpa, a yeast bread made with beer and a larger proportion of rye flour; Turkish Swedish Meatballs made with lots of yogurt; and Apple Krisp, with raw sugar (Turbinado sugar, like I use for Creme Brulee), honey, apples, and wheat germ.

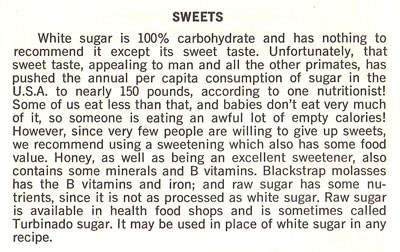
An aside: I like Barbara Farr’s paragraph on “Sweets”:
Natural Cooking

For this blog, I decide to make the Turkish Swedish Meatballs.
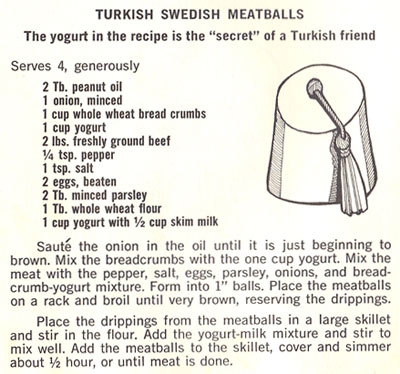
Turkish Swedish Meatballs recipeI cut the recipe in half for the two of us. I found the meatballs too sloppy as I formed them, so I added more breadcrumbs. I found it very hard to stir the whole wheat flour into the drippings, so next time I’d use white (AP) flour. (Not worth the trouble using whole grains for this small amount of flour, if it doesn’t work.) Below is my version of this recipe.

Turkish Swedish Meatballs
serves 2-3

  • 1 pound freshly ground beef; I used 90% lean beef from Whole Foods
  • 1/2 onion, chopped fine
  • 3/4 cup whole wheat bread crumbs (I used my homemade whole wheat bread)
  • 1/2 cup yogurt (I used organic, full fat plain yogurt)
  • pepper to taste
  • 1/2 teaspoon salt
  • 1 egg, beaten
  • 1 tablespoon minced fresh parsley
  • 1 tablespoon AP flour
  • 1/4 cup milk
  • 1/2 cup yogurt

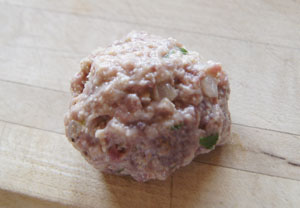
Saute the onion in a little oil until it is just beginning to brown. Mix the breadcrumbs with the 1/2 cup yogurt. Mix the meat with the pepper, salt, parsley, onions; add the bread-crumb-yogurt mixture. Form into 1-inch balls. They will not form easily, as this mixture is pretty, well, sloppy:
uncooked meatballSet the meatballs to rest on a plate or breadboard. Heat your oven to broil. Find a clean broiler pan, or use a rack set over a pan to catch the drippings. Lightly oil the broiler pan or the rack, then place the meatballs on it. Broil the meatballs until they are very brown. This took me 5-10 minutes; I rotated the pan often and turned the oven to low-broil about halfway through.

Take the pan out of the oven and let it cool. Reserve any drippings for the sauce.

Transfer the drippings to a large frying pan pan and stir in the flour (I had so few drippings that I added a bit of olive oil too). Add the milk and stir until smooth. Add the 1/2 cup yogurt. Add the meatballs to the skillet, mix it all together carefully (the meatballs are delicate), then cover and simmer about 1/2 hour, or until the meat is done.

Serve over noodles, rice, or mashed potatoes, or maybe a grain like farro, freekeh, bulgur, or cracked wheat. I used whole wheat linguine.
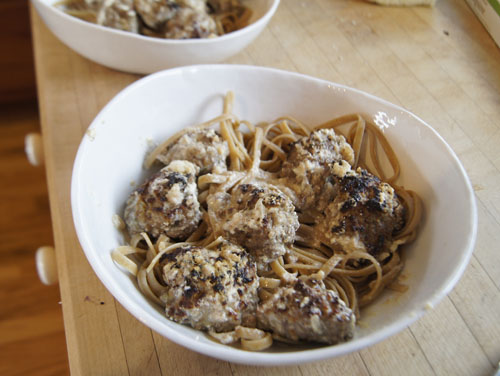
Swedish MeatballsI was surprised at how well these went over! The first comment from my dining-partner was “ummmm, these are good!” I too liked them. Full of flavor and nice and moist.

Next time I might use a frying pan that goes from oven to stove top. Using the broiler was kind of useless, since very little fat came off these meatballs. But the step of browning under a broiler was nice, because it got these delicate meatballs nice and brown without causing them to fall apart. It kept the moisture of the meatballs inside, and after a good simmer in the yogurt sauce, they were absolutely delicious.

I will definitely keep this cookbook!

250 Cookbooks: New Pillsbury Family Cookbook

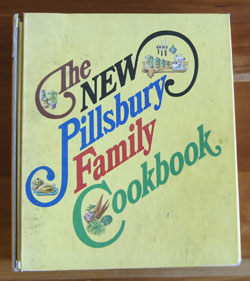
Cookbook #202: The New Pillsbury Family Cookbook, The Pillsbury Company, Minneapolis, Minnesota, 1973.

New Pillsbury Family CookbookThe New Pillsbury Family Cookbook is one of my three most-used reference cookbooks, alongside McCall’s Cook Book (1963) and the Joy of Cooking (1964). I always reference this book when cooking a good roast, especially a rib eye roast. I also use the fruit pie baking guide. This book is well-used, but entirely readable! It’s great for basic quick bread recipes too. If I want advice on how to cook or bake anything, this is one of the three I consult. Or, if I want to compare recipes.
The tone is straightforward, no “bossiness” like Joy of Cooking. The writing style is not “chummy” either. I am very comfortable with this book and its recipes – I grew up with this type of cooking, and began cooking this way, and still do, a lot of the time. Sure I often cook more twenty-first century, exploring new ingredients and methods, but our day-to-day meals are usually pretty twentieth century. We rarely eat dinner out, and that means I’ve had to come up with meal ideas zillions of times to keep things from getting boring. The New Pillsbury Family Cookbook? I won’t let go of it!

I search the web, and discover that others must also like this cookbook. It’s labelled a “classic cookbook” and also “vintage”. Hey, I resemble that remark! (I bought it when I was only 23.) This is a five-ring loose-leaf binder cookbook. I find that it was also published as a hard-bound book (408 pages, just like mine) and is now selling for as much as $74 when in mint condition (VintageCookbook.com). Guess I’m not the only one who likes classic American cookbooks.

Pillsbury is currently a brand name used by both General Mills (Minneapolis-based) and the J.M. Smucker Company (Orrville, Ohio-based). (Wikipedia.) Pillsbury has a current website with lots of recipes. Note that Pillsbury is also the name on many of the “Bake-Off” booklets that I have covered in this blog.

One thing about this book has always made me smile: cake, candy, and pie sections come before meats and main dishes. Vegetables are last. I like cake first too! . . .  but just now I realize . . . the chapters are in alphabetical order. Geesh, that takes some of the fun out of it!

As I flip through the pages, I note several recipes I’d like to try. I like the “batter” breads in the yeast bread section, like English Muffin Bread and Dilly Casserole Bread. These are no-knead breads, and although not held overnight like the current no-knead breads I make, they give a hole-filled texture, kind of like a crunch, to the finished breads. I note an apple cake that has 2 cups of fresh apples and only 3/4 cup of flour. The Carrot Cake has honey in it, and less oil than the current very good but also very high calorie version that is my standard. It also suggests using whole wheat flour instead of all-purpose flour, and gives directions for baking at high altitude (5200 feet). I made notes on the Brownies and Pumpkin Bars recipes. If I make a pecan pie, I consult this book – and have post-it notes on that page. If I forget the proportions for a graham cracker crust, or want to make a pie crust from vanilla wafers or other cookies, directions are in a nice table on page 147. And page 149 is indespensible to me: a table of how to bake different sizes and kinds of fruit pies.

Once again . . . I really do like this reference book. But let’s go on.

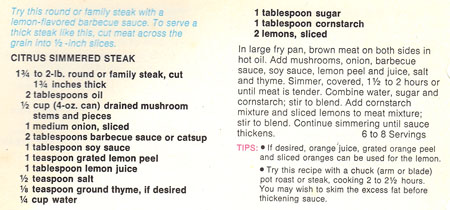
Pages 206-207 hold my post-it notes and magazine clippings for cooking prime rib roasts. These expensive, large roasts go on sale every holiday season, and I usually buy them to cook New Years Eve. Often with “roasted potatoes”, a delightful way to cook potatoes that my daughter and I first enjoyed in England in 2002. Today, I find a recipe for “Citrus Simmered Steak”, thick round steak that is simmered for a couple hours on the stove top. I decide to make this recipe for this blog, since I bought just such a steak yesterday on sale. Sounds like a nice, different mix of seasonings:

Citrus Simmered Steak recipeThe poultry and game chapter shows signs of “well-use”, but I haven’t marked any recipes. Today I do, though! “Golden Oven-Fried Chicken” is coated with cornflakes, almonds, and Parmesan cheese. Now, I’ve made cornflake-coated chicken for years, but almonds and cheese? No. I will make this recipe soon. (271)
The last chapters chapters show little signs of use. Seafood and outdoor cooking, salads and sauces, vegetables. I find a few basic recipes for mayonnaise, waldorf salad, tomato aspic, salad dressings, and a good selection of sauces, like mornay sauce, veloute sauce, hollandise sauce, cocktail sauce, and barbecue sauce.

Okay, time to cook! The recipe from The New Pillsbury Family Cookbook for “Citrus Simmered Steak” is above; below is my version.

Citrus Simmered Steak is simmered for a couple hours on the stove top, so I decided to pull out my big old cast iron pot. Lately I’ve been using the LeCreuset for braising; it’s nice that it goes from stove tip to oven. But I haven’t used the cast iron pot in ages, and thought I’d re-familiarize myself with the benefits of this pot. I suggest any covered, large pot you have, but the heavier the better.

Citrus Simmered Steak
serves about 4

  • 1 3/4-2 pounds round steak, at least 1-inch thick (often, this cut of round steak is called “London broil” in our supermarkets)
  • 2 tablespoons oil (approximate)
  • 1/2 teaspoon salt (or to taste)
  • pepper
  • 1 small can mushrooms, stems and pieces, drained (these days, “small” mushroom cans are 7 oz.), or use fresh, sliced mushrooms
  • 1 medium onion, chopped or sliced
  • 2 tablespoons ketchup
  • 1 tablespoon soy sauce
  • 1 teaspoon grated lemon peel
  • 1 tablespoon lemon juice
  • 1/4 teaspoon dried thyme
  • 1 tablespoon sugar
  • 1 tablespoon cornstarch
  • 1/4 cup water
  • 1 thinly sliced and seeded lemon

Heat the oil in a large pot on the stove top. Salt and pepper the meat, then cut it into large chunks that will fit into the pot. Brown the meat on both sides. Add mushrooms, onion, ketchup, soy sauce, lemon peel and lemon juice, and thyme. Simmer, covered, for about 2 hours, or until the meat is very tender. Check and stiir occasionally and add a little water if it looks like the mixture is drying out.

When the meat is done, remove it from the pan and set aside. Combine the sugar and cornstarch, then mix in the 1/4 cup water. Add this mixture to the pan and stir into the drippings, heating until bubbly and thick. Add more water if you think it’s too thick. Add the sliced lemon to this gravy, and then add the meat back in. Simmer a few minutes for the flavors to blend.

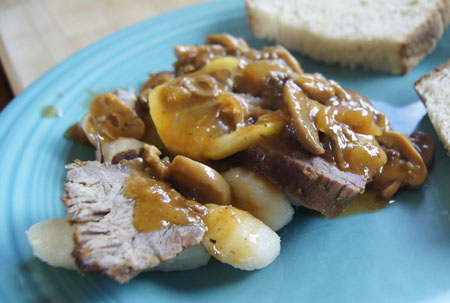
Slice the steak across the grain (yes, it’s kind of messy to do this). I served the steak-sauce mixture over store-bought gnocchi (because I like them!), but it would also be good over mashed potatoes, rice, or pasta.

Citrus Simmered SteakThis was tasty and flavorful I left most of the lemons off my husband’s serving because I wasn’t sure he’d like them. The Swiss/round steak was a bit like, well, like “round steak”. I always find this cut of meat rather chewy and flavorless, no matter how I cook it. With the sauce and the long cooking, though, it did make a good week night meal. I scraped the sauce off the leftover meat, sliced it thinly, and it made a yummy sandwich with tomatoes, lettuce, and ketchup. The last bit of leftover meat went into tacos.
Of course, I am keeping this cookbook!

250 Cookbooks: Betty-Anne’s Helpful Household Hints

Cookbook #201: Betty-Anne’s Helpful Household Hints, Vol. 1, Betty-Anne Hastings with Mary-Beth Connors, Ventura Books, NY, 1983.

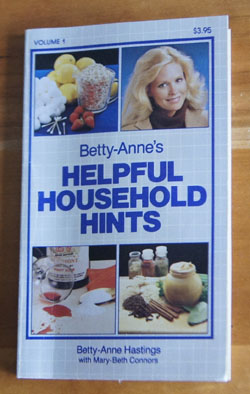
Why did I put this book in my “cookbook” database? There is not a single recipe in it, except ones for making play dough for kids. Well, the book’s in my database, so I gotta cover it!
Betty-Anne Hastings does not have much of an internet presence. Amazon lists Betty-Anne’s Helpful Household Hints for sale for $0.01, with one review: “I’d be lying if I didn’t say this book saved my life. For years I threw perfectly good trash away when I could be re-purposing it! Thanks Betty-Anne!” I did find Vol. 2 for sale too (note my volume is #1). A few other online bookstores have copies for sale. Betty-Anne’s Helpful Household Hints is noted in the Simple and Delicious blog (a 2014 entry).

Betty-Anne’s Helpful Household Hints is a small paperback, 127 pages in a largish font. Seven sections (see below), but no table of contents and – most importantly – no index. If you would like a tip, like how to make your dog safer while running loose at night, you have to go to the “Our Furry Friends” section and read through all the entries to see if the author has a suggestion (she does!).

These days, we simply “GTS”* to find tips on how to do most anything. Or go to a website/magazine like Real Simple.

I am not going to keep this book, but I’ll share with you some of the curious and helpful hints from each of the seven sections. And for my “recipe”, I’ll let my grandkids play with a batch of play dough!

play dough

1. A Potpourri of More Household Hints

“Ashtrays needn’t be a cleaning problem. For all your ashtrays (except your glass or crystal ones) just coat the surface with your favorite furniture polish. The protective coating will allow burns and ash build-up to just rinse out.”

“There’s nothing worse than a dull razor blade! But you may not have to throw it away yet. Try sharpening it on the striking edge of an old match book cover.”

“Let’s knot get the thread tangled. Even the most careful seamstress is likely to wind up with tangled thread while sewing. One way to help solve that problem is to work the knotting a little differently. Instead of taking the two strands of thread and knotting them together, knot each strand separately. You’ll be surprised at how few tangles you’ll have in the future.”

“Where can I store all my blankets in this small apartment? Lay the blankets out smoothly between the mattress and springs of your bed.”

2. Recycling Tips and Helpers

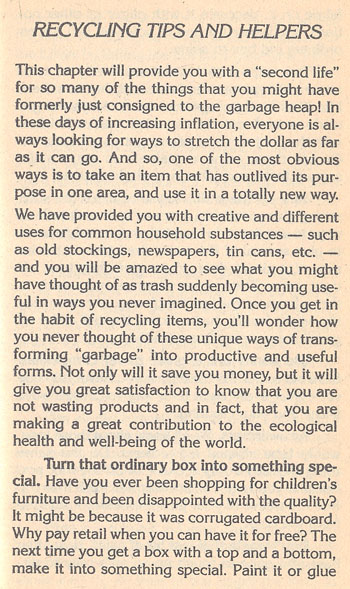
This is the first page from the recycling chapter – it’s a great example of the “tone” of this book.

recycling tipsA few more excerpts from this chapter follow.
“Keep a windowshade in the trunk. This is a space-saving device that you can be mighty happy to have handy. Use it as a ground throw for an impromptu picnic. Or, if you ever have a flat tire, a window shade can help to protect you and your clothing from the cold, dirty ground.”

“Take the juice of one banana skin . . . Would you believe banana skins have juice? Well,to find out for sure, try this bright trick. Cut off the hard ends. Throw the soft pulpy portion of the peel into a processor. Take the banana puree and use it to shine up your silver. You’ll be impressed.”

3. Gardening Victories

“Your very own compost heap . . . Everybody talks about compost heaps, but did you ever wonder what should really go into one? Here are some suggestions: coffee grounds . . . all leftover fruits and vegetables . . . plant cuttings and stalks . . . mulched up leaves . . . cut grass . . . any spoiled fruits and vegetables . . .  all peelings . . . eggshells . . . rinds . . . wood chips, etc. Leave out animal fats and anything that isn’t biodegradable.”

“Garden and have clean nails. If you don’t wear gloves, but hate the look of your nails after the job is finished, give them some extra protection with ordinary soap. Dampen the bar and then dig in. The caked soap under your nails will keep out the dirt.”

4. Clothing Care Tips

“Cold hands, cold wash. If you’re an outdoor enthusiast and hang your clothes to dry outside in the winter, here’s a way to keep your hands a bit warmer doing the chore. Fill a hot water bottle with hot water and throw it into the basket. Each time you grab for another item, just give that bottle a warming squeeze.”

“Tired of grey looking lingerie? Next time this happens, give them a little color lift. Don’t worry about the dye. It’s easy. Make up some hot, strong tea and soak them until your lingerie is just a little darker than desired. Give one quick rinse in cold clear water and the dye is set – and so are you – with fresh, new looking lingerie.”

“New life for an old straw hat. Soak it in cold, salt water until it’s soft and moldable. Then shape it back to its original condition and let it dry.”

5. Traveling and Vacation Hints

“Just before you pack to leave, are you faced with a wet toothbrush? Here’s a way to travel nice and dry. Just take your hair dryer and use it to blow the toothbrush dry. That way, you’ll always be packing a dry brush.”

“A soda tote. Save that paperboard soda six-pack tote and bring it on your camping trip. It collapses flat so it takes up no space. When serving meals, fill it with salt, ketchup and other bottles and carry it all to thte table at once. Saves steps and makes serving a meal easier.”

6. Our Furry Friends

“Want to keep your dog safe when he goes out at night? Try this to protect your dog from being hit by cars when he takes his nocturnal stroll. Just place a reflecting strip on his collar, and that will alert motorists that he’s around. You can also check at your local pet store, for some manufacturers make flea collars that reflect, thus providing two-in-one protection.”

“Does your pet have trouble when rock salt get inside his delicate paws? Try this trick. Take 4 small plastic sandwich bags and fasten them to your pet’s paws with rubber bands. You’ll have instant rainboots!”

(Warning from me: do NOT put food coloring in your hummingbird feeders.) “Here’s a great tip to help you tell when your hummingbird feeder is out of water. All you need to do is add red food coloring to the water and you’ll be able to tell immediately when the water is low! An extra plus is that hummingbirds are attracted to the red color, and if you paint stripes on the feeder with nail polish, it will also help to attract them.”

7. The Kids

“Rememer this simple tip: a child in colorful clothes is easier to find. Nothing stands out in a crowd like a toddler in red, purple or yellow.”

“Want a way to outsmart the baby that shakes his crib and walks it across the room? The way to solve this problem is to place ‘bunion pads’ under each leg of the crib. Then, when the baby tries to walk that crib, it won’t crawl!”

“Use this economical way to store your child’s small collectibles. When you use those large coffee cans, save them. Smooth over any jagged edges. Then paint and glue the cans together. Then you can either place them on their sides so you have a bunch of cubbyholes or you can cap them with the plastic top and use them individually.”

“Have you ever lost your child in a crowd? If so, try this. Tie a whistle around his or her neck, and tell them to blow it repeatedly if they lose you.”

________

* “GTS” means “google that shit”


250 Cookbooks: Boston Cooking-School Cook Book

Cookbook #200: Boston Cooking-School Cook Book, F. M. Farmer, Little, Brown, & Co., Boston, 1906 edition, perhaps the 1911 revised printing.

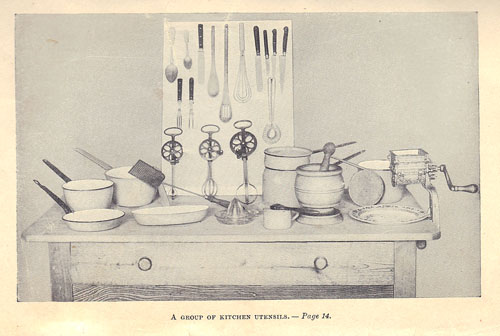
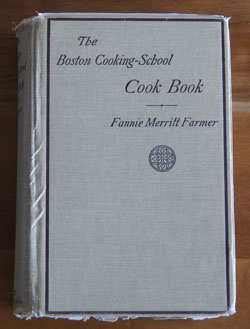
Boston Cooking-School Cook BookThe Boston Cooking-School Cook Book is my second-oldest cookbook. It was published in 1906! I hold it in my hands in amazement. The pages are a little brittle, and some of them are falling out, but it’s in pretty good condition, considering. I obtained this book from the Ruth C. Vandenhoudt house when I was in my teens. Ruth had carefully jacketed the front and back covers with canvas cloth, hand sewing the flaps to keep the cover in good condition. I just discovered the good condition of the uncovered book this week, as I gingerly pulled the jacket off the front cover to reveal the 111 year old cover in near-perfect condition (see photo above). Here is how she jacketed the cover:
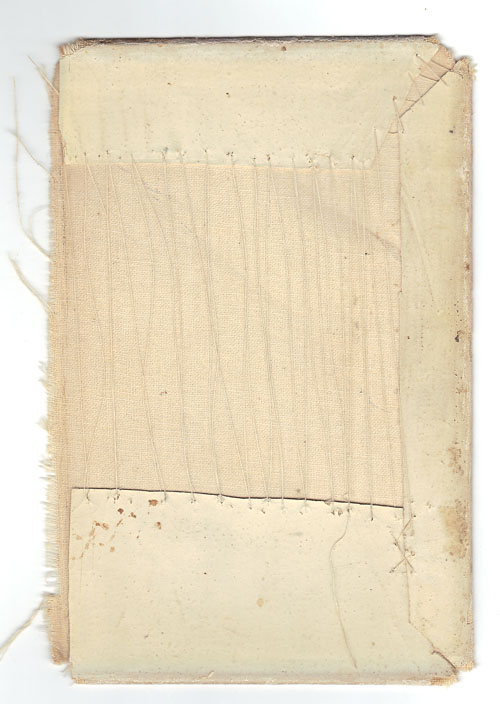
jacket

Fannie Merritt Farmer is the author of my 1906 edition of the Boston Cooking-School Cook Book. I learned about Fannie Farmer when I covered my 1965 Fannie Farmer Cookbook: “Fannie Farmer, born in 1857, was raised in a family that valued education, but could not attend school because of a crippling illness as a teen. So she started cooking at a boarding house at her parents home. Her interest in cooking took her to the Boston Cooking School, where she excelled as a student and eventually became school principal.” Please refer to my post on the Fannie Farmer Cookbook for my full discussion.

When was this book published?

My copy of the Boston Cooking-School Cook Book is missing the title page – including the publication date. About 5 years ago, I put myself into “sleuth mode” to figure out when it was published. My first guess was “1936”, but no, F. M. Farmer is listed as the author of Boston Cooking-School Cook Book editions only up to 1918 (Wikipedia, Boston Cooking-School Cook Book). Thus, my book is the 1896, 1906, or the 1918 edition.

To my amazement, Google/HathiTrust has full text digital versions of the1896, 1906, and 1918 editions online. Each page of each book was digitized and uploaded to the “cloud” so that nerds like me can read the entire book. I spent quite a bit of time perusing these fascinating books, searching for clues to match the printed edition in my hands to the proper edition year.

Brownies and War, I find, are enough to narrow down my edition. Brownies as we know them – chocolate-y bar cookies – were first made in the early 1900s:

“The earliest-known published recipes for a modern style chocolate brownie appeared in the Home Cookery (1904, Laconia, NH), Service Club Cook Book (1904, Chicago, IL), The Boston Globe (April 2, 1905 p. 34), and the 1906 edition of Farmer cookbook. These recipes produced a relatively mild and cake-like brownie.” (Wikipedia, accessed 2017)

My copy of the Boston Cooking-School Cook Book has a recipe for chocolate brownies on page 495. That narrows my edition to 1906 or 1918.

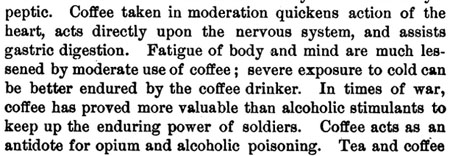
A careful read of the 1918 edition showed me that it has several references to war-time recipes (The Big One, or as we know it now, World War II). Here is an example:

coffee and war

My copy does not have this same text in the coffee section. Therefore, I have the 1906 edition.

As extra confirmation, when I access Wikipedia today (2017) I find a Boston Cooking-School Cook Book entry. The entry lists the number of pages in each edition:

  • 1st edition, 1896. 567 pp.
  • 2nd edition, 1906. 648 pp.
  • 3rd edition, 1918. 656 pp.

My copy has 648 pages, and this concurs with my prior research.

Each of the editions had revisions, for instance, the 1906 version that I found digitized online is noted as revised in 1911. Since I am missing the very first pages, I can’t be certain which revision (or which printing year) of the 1906 edition I have.

First sections of this book

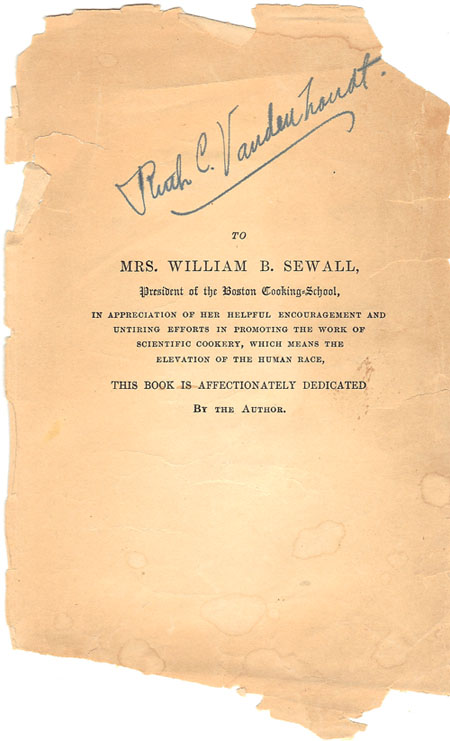
Below is the dedication page. It is no longer attached to the book. Note Ruth C. Vanderhoudt’s signature. As to the printed dedication, I like the phrase “scientific cookery”.

dedication page

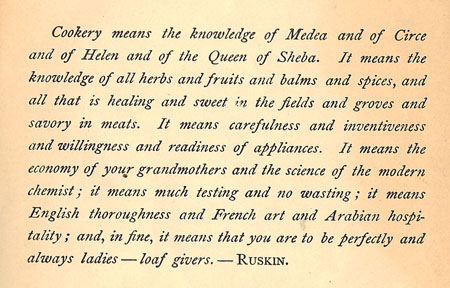
The next page prints this quote from “Ruskin”, probably John Ruskin, a “writer, art critic, draughtsman, watercolourist, social thinker” in the nineteenth century. I really like this quote.

quote

In her preface, Fanny Farmer writes: “During the last decade much time has been given by scientists to the study of foods and their dietetic value, and it is a subject which rightfully should demand much consideration from all. I certainly feel that the time is not far distant when a knowledge of the principles of diet will be an essential part of one’s education. Then mankind will eat to live, will be able to do better mental and physical work, and disease will be less frequent.”

Boston Cooking-School Cook Book, 1906, is so special to me that I decide to go through the entire book. This may take a few weeks!

Chapter 1: Food

“Food is anything which nourishes the body.” I can tell from her discussion of the nutritive values of different foods shows that there was a good knowledge in 1906 of nutritive value of different types of foods. Listed are proteins (she spells protein “proteid”), carbohydrates, fats and oils, mineral matter, and water. The “daily average ration of an adult requires”:

4 1/2 oz. proteid
2 oz. fat
18 oz. starch
5 pints water

4.5 ounces of protein is 126 grams. My guess is that the protein value of a food is measured experimentally today, and her 4.5 ounces means a 4.5 ounce amount of a mostly-protein food, such as a steak.

The next sections of this chapter discuss water, salts, starch, sugar, gum, pectose, and cellulose, fats and oil, milk, butter, cheese, fruits, vegetable acids (acetic, tartaric, malic, citric, and oxalic), condiments (black pepper, cayenne pepper, ginger, cinnamon, cloves, vinegar, capers [capers in the US in 1906!], and horseradish), and flavoring extracts (vanilla, almond, and lemon). I revel in the chemical knowledge of this early twentieth century woman:

“Starch is a white, glistening powder; it is largely distributed throughout the vegetable kingdom, being found most abundantly in cereals and potatoes.”

And then she give a chemical test for starch:

“A weak solution of iodine added to cold cooked starch gives an intense blue color.”

We used potassium-iodide test paper strips in the CU Organic Chemistry Teaching labs! I also like her comment on condiments:

“Condiments are not classed among foods, but are food adjuncts. They are made to stimulate the appetite by adding flavor to food.”

A big class of today’s “necessary nutrients” is not listed in this book: vitamins. What the heck, didn’t they know about vitamins in 1906? This here chemist is surprised to find that the first vitamin – vitamin A – was discovered in 1913. (Wikipedia, accessed 2017.) And this from my own blog on a 1928 cookbook describing “vitamines”: Salads, Vegetables and the Market Basket.

The book is illustrated with black and white photos. Here is the photo at the end of chapter 1:

black and white photo

Chapter 2: Cookery

“Cookery is the art of preparing food for the nourishment of the body. Prehistoric man may have lived on uncooked foods, but there are no savage races to-day who do not practise cookery in some way, however crude. Progress in civilization has been accompanied by progress in cookery.”

In 1906, cooking fuels included: kerosene, gas, wood, charcoal, and coal. (Gas ranges using piped gas were only limitedly available.) “Fire for cookery is confined in a stove or range, so that heat may be utilized and regulated.” “How to build a fire” is described in detail: Layer paper, small sticks or pine wood, hard wood, and then two shovelfuls of coal. Cover, and “strike with a match – sufficient friction is formed to burn the phosphorus, this in turn lights the sulphur, and the sulphur the wood – then aply the lighted match under the grate, and you have a fire.” The temperature of the fire is controlled with dampers.

Comment: Fannie Farmer really impresses me! She even tells us how matches work! As a woman career scientist, I love reading the work of women who came before me. I describe her writing style as “friendly scientific”.

The Cookery chapter continues ways of cooking, such as boiling, broiling, baking, braising, and frying. “How to bone a bird” and “how to measure”: teaspooons and tablespoons and measuring cups of regulation sizes were available, and she encourages their use: “Good judgment [sic], with experience, has haught some to maasure by sight; but the majority need definite guides.” Food is packed in ice to preserve it, or by a machine where compressed gas is cooled and then permitted to expand.” That’s a refrigerator she is describing. In 1906, many ways of preserving foods were used, including refrigeration, canning, sugar, drying, evaporation, salting, smoking, pickling, and packing in oil.

And more . . .

I have spent weeks on this already and have decided to publish the entry, but continue to add to it as time goes on. I have 50 more cookbooks to get through!

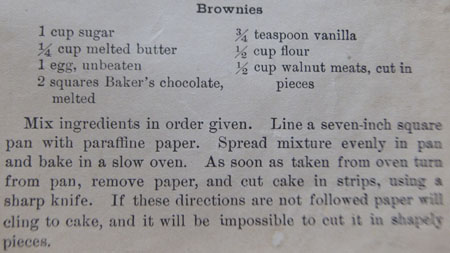
Brownies

The recipe that I want to cook for this blog is Brownies. It seems appropriate, since my 1906 edition is the first one to print the recipe. Before that time, there were no brownies! Hard to imagine life without these goodies.

brownies recipeI made them pretty much like the recipe, except I didn’t line the pan with paraffine paper, I simply sprayed with cooking spray (with flour in it). A “square” of Baker’s chocolate is an ounce of unsweetened baking chocolate in todays packaging. A “slow oven” is explained in my oven temperature reference. They did not say how long to bake them! I baked them a little hotter than a “slow oven” at 350˚ for 20-25 minutes until a toothpick tested almost clean.

browniesYum!

250 Cookbooks: Knudsen Recipes

Cookbook #199: Knudsen Recipes, Knudsen, Knudsen Creamery Co. of California, 1955.

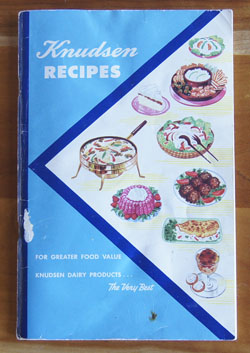
Knudsen RecipesThis is the second “Knudsen Recipes” cookbooklet that I have covered. I didn’t much like the recipes in the first one I covered, the 1953 version. In fact, I couldn’t find a single recipe to try in that version! This one is a lot better. I’ll give some examples below.

But first, a review. “Knudsen” is a California dairy product company, currently owned by Kraft Foods. Knudsen-brand products are still available in California and even in some of my local supermarkets here in Colorado. In 1955, they were quite proud of their high quality and modern research facilities. Note the illustration below. A chemist (male, of course) holding a round bottom flask with a claisen adaptor and a distillation apparatus.

inner coverFacing the page of the male chemist is a photo of the cook (female, of course) using a Knudsen product. Note: “For the young bride whose kitchen ‘know how’ begins and ends with frying an egg . . . “. And this is good too: “Here you will find colorful photographs showing how to make foods more appetizing and table settings more attractive.”
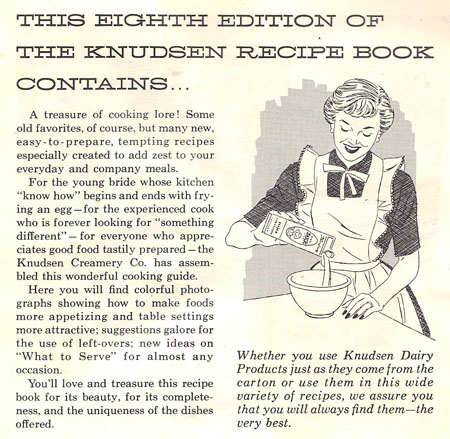
first page

Knudsen Recipes begins with recipes for appetizers. I kind of like” Smoked Salmon Spread”, with salmon, cream cheese, sour cream, and onion. It would be good with crackers or small toasts. My mother put a check by several recipes in this chapter – dips for parties and other get-togethers were quite popular in our home. Most of the Knudsen dips are made from cream cheese, sour cream, maybe cottage cheese, and then canned shrimp, tuna, crab, or bacon. Most sound “okay”. (Except the dip made with cottage cheese, Bleu cheese, sour cream, olives, and peanuts. I’d never make that one.)

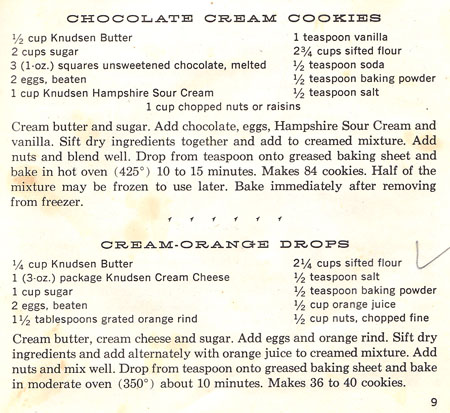
Dessert recipes come next. I like the recipe for “Chocolate Cream Cookies” (with sour cream) and Cream-Orange Drops (with cream cheese).

page 9

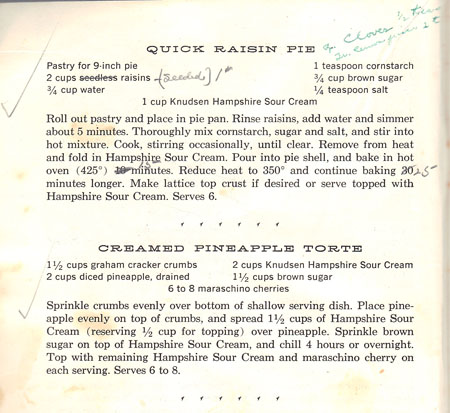
There is a cup cake recipe with cottage cheese in the batter I might like to try. “Boston Brown Betty” is an apple-crisp type of dessert with cream cheese and graham crackers – sounds good. Mother tried the “Quick Raisin Pie”:

page 8

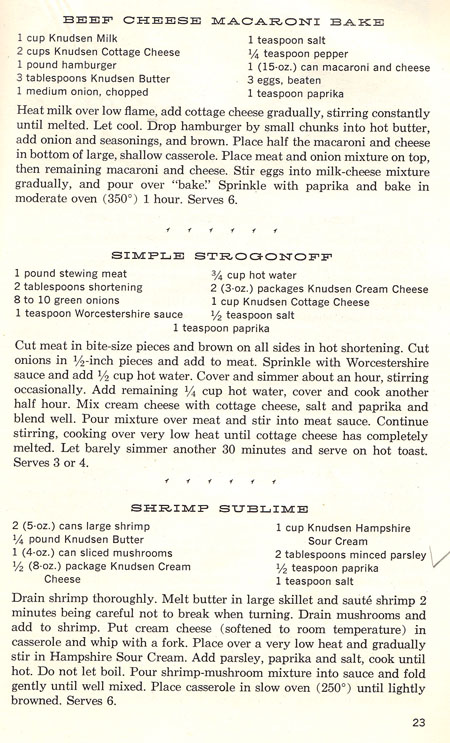
On to main dishes. “Liver Loaf” with liver, salt pork, bread crumbs, and cottage cheese doesn’t sound good to me, but it illustrates how popular organ meats used to be. The page below illustrates some of the main dishes: canned macaroni and cheese with milk, cottage cheese and hamburger;  stroganoff with cottage cheese and cream cheese rather than sour cream; a shrimp dish with canned shrimp.

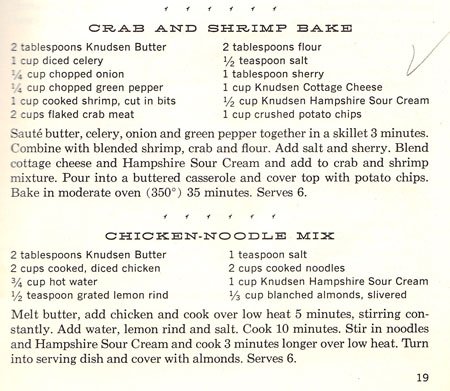
page 23The “Crab and Shrimp Bake” (below) is made with cooked shrimp “cut in bits’ and crab meat, cottage cheese, sour cream, celery and onion and green pepper, and potato chips. I don’t know, does it sound good to you? I do think I’d probably like the “Chicken-Noodle Mix”.page 19
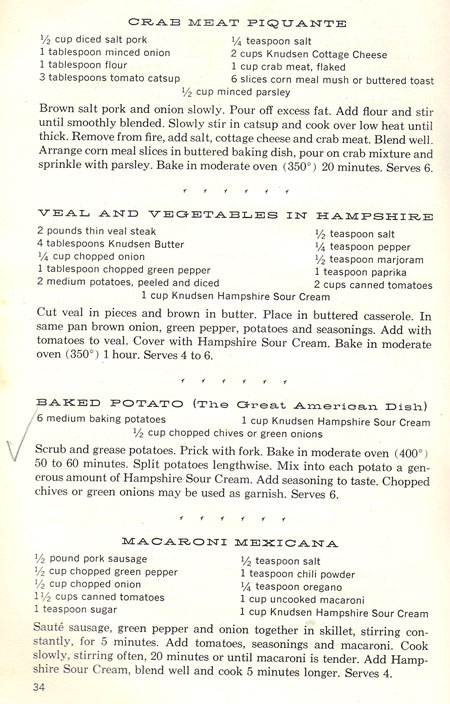
Below is another page of main dish recipes. Note the “Baked Potato” recipe. Haven’t seen this recipe for awhile – baked potatoes with sour cream and chives. That was always a standard at our house and was often offered at restaurants. In fact, when they’d ask if we wanted butter or sour cream and chives, we’d say “both”. I think we sometimes made a mix of butter, sour cream, cream cheese, and chives (or green onions) to put over baked potatoes.

page 34

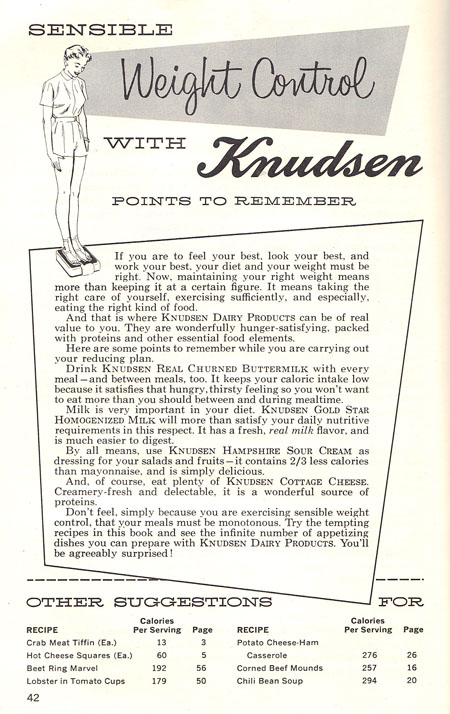
In the middle of the book is a page of menus for the family and entertaining (typical 50s “the woman belongs in the home” slant). Next is a section on dieting:

page 42

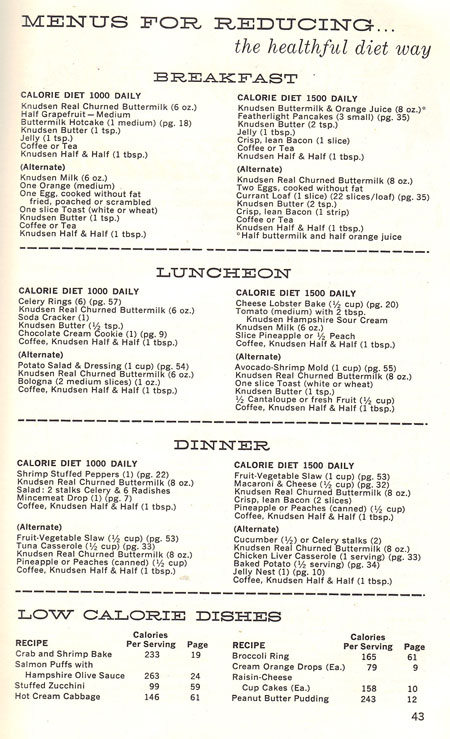
The next page is “Menus for reducing”. Example, for lunch, you get 6 celery rings (celery with Bleu cheese, cream cheese, and sour cream), a small glass of buttermilk, one soda cracker, 1/2 teaspoon of butter, one cookie, and coffee with half-and-half. Egads! you could skip the silly single soda cracker and the sugary cookie and have something whole grain instead, and put skim milk in your coffee! Where is the protein, except in the milk products? And note the low-calorie recipes at the bottom of the page, with the 243 calorie peanut butter pudding (vanilla pudding mix, peanut butter, and cottage cheese).

page 43I like this excerpt below: “But first, you must learn the language of calories, a language anyone can pick up quickly.”

page 44

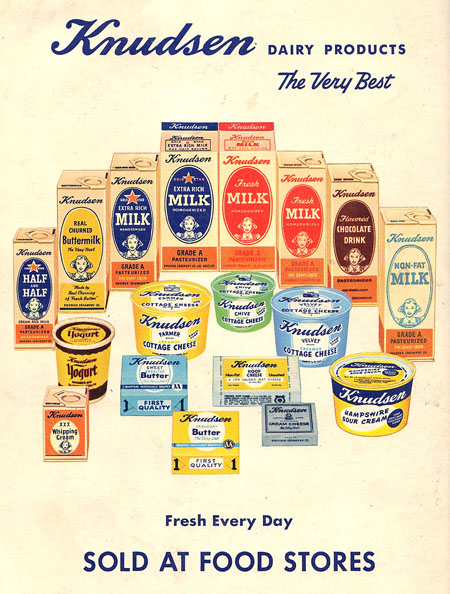
One more comment on this dieting section. I would have thought that yogurt would be in a dieting plan. But no recipes in the book include yogurt, although it is included with the Knudsen products on the back cover:

back cover

After the menu planning and dieting sections, Knudsen Recipes goes to salad recipes: molded salads with cream cheese and cottage cheese and fruit, avodados with cottage cheese, broccoli with cream cheese. Not many of these recipes interest me, other than as nostalgia.

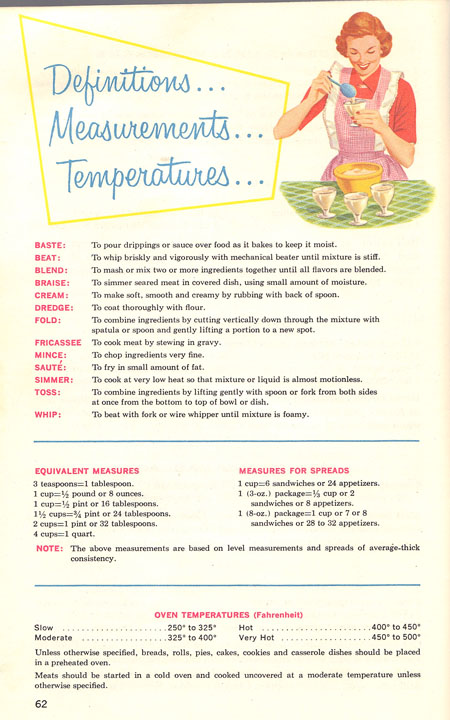
I like the page below for two reasons. For one, I like the illustration of the housewife. For two, I like the table of “oven temperatures”. Many times I have run across a recipe in an older cookbook that says simply “cook in a hot oven” or the like. This table will help me convert old recipes to current oven settings.

page 62

If you would like to see more of this cookbook for yourself, I found a digitized copy of this book on the HathiTrust.org site: the record and the full digitized view.

I decide to make “Chocolate Cream Cookies” for this blog. The scan of the original recipe is above in this blog, page 9. Below is my updated version of this recipe.

Chocolate Cream Cookies
about 6 dozen

  • 1/2 cup butter (I used salted butter)
  • 2 cups sugar
  • 2 eggs
  • 3 ounces unsweetened baking chocolate, melted
  • 1 cup sour cream
  • 1 teaspoon vanilla
  • 2 3/4 cups flour
  • 1/2 teaspoon baking soda
  • 1/2 teaspoon baking powder
  • 1/2 teaspoon salt
  • 1 cup chopped walnuts

Cream the butter and the sugar on high speed. Add the eggs one at a time and beat until well mixed. Add the chocolate, and then the sour cream; mix in on medium speed. Combine the dry ingredients and add slowly until all of the flour is incorporated. Add the nuts and mix in.

Drop dough from a teaspoon onto a baking sheet. (I used a sheet of parchment in my half-sheet pan.) Bake at 375˚ for 8-12 minutes.

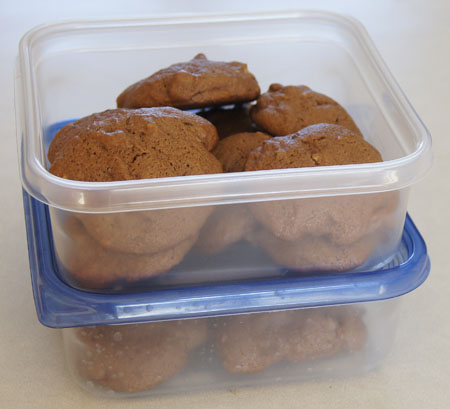
Here are my cookies. I took them to share at my Lyons Garden Club meeting.

Chocolate Cream Cookies

These cookies are very good! Kind of a subtle chocolate-y flavor in a soft cookie. The sour cream does make these cookies stand out amongst all the other chocolate cookies I have made.

I baked the first batch as directed at 425˚ for 10 minutes. I could smell them burning and sure enough, the bottoms of this first batch were burned. I lowered the oven to 375˚ for 10 minutes for the rest of the cookies. I suggest peeking at the first batch at 8 minutes though, as all ovens vary a bit.

I made the dough for these and kept it in the refrigerator, making cookies “as needed”. As the original recipe states, you could probably freeze the dough with success.

250 Cookbooks: The Heinz Book of Meat Cookery

Cookbook #198: The Heinz Book of Meat Cookery, H. J. Heinz Company, Pitsburgh, Penna., 1937.

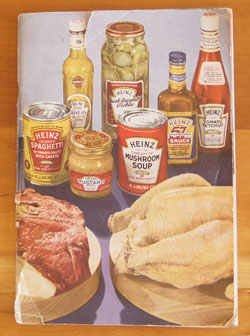
Heinz cookbookWow, this is another vintage booket! I didn’t have the publication date – 1937 – entered in my cookbook database so I thought it was one of my mother’s 50s-era booklets. And I thought it was missing the cover. But I found the publication date when I carefully searched the booklet, and by comparison with photos online, I find this booklet is not missing the cover. Here it is laid open, with both front and back covers showing:
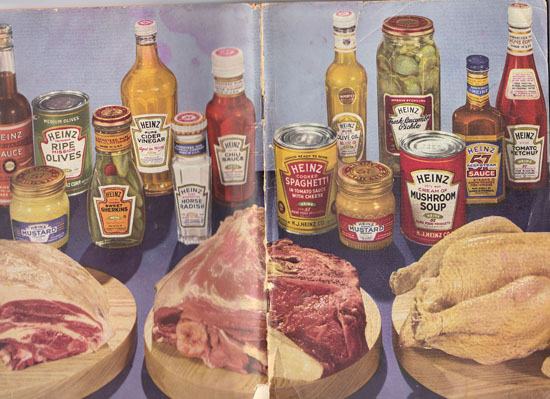
HeinzCBcovers

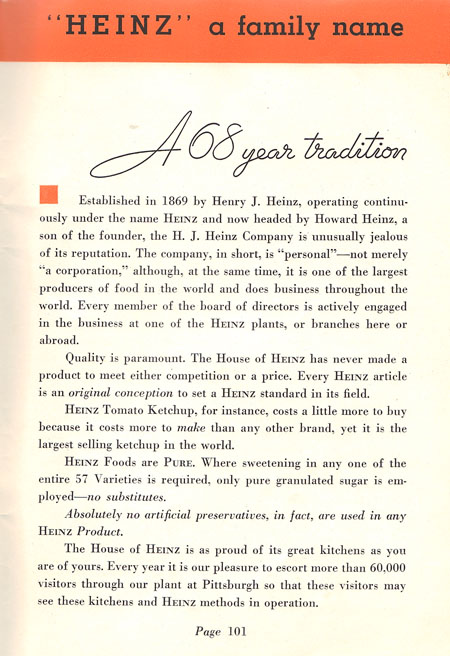
Henry J. Heinz established the Heinz company in 1869. In 1937, 68 years later, this excerpt from The Heinz Book of Meat Cookery shows that the company is proud of its reputation:

Heinz company information

Note: “Heinz Foods are Pure. Where sweetening in any one of the entire 57 varieties is required, only pure granulated sugar is employed – no substituties. Absolutely no artificial preservatives, in fact, are used in any Heinz Product.”

Sounds like today’s natural food claims. Let’s see, does the bottle of Heinz ketchup (I always choose Heinz ketchup!)  in my cupboard still lives up to this claim? Judge for yourself – here is the list of ingredients for Heinz Tomato Ketchup (“grown not made”): tomato concentrate from red ripe tomatoes, distilled vinegar, high fructose corn syrup, salt, spice, onion powder, natural flavoring. No preservatives, but high fructose corn syrup instead of pure granulated sugar.

Heinz is one of the longest-running food companies in the US. (I’ve covered quite a few of the American brands because a large portion of my cookbook collection is manufacturer’s cookbooks.) Established in 1869, Heinz remained a company under that name until 2013, when it was purchased by Berkshire Hathaway and 3G Capital, resulting in the Kraft Heinz Company. Accoding to Wikpedia, this company is currently one of the 5 largest food companies in the world.

Heinz brand products have a “57” on the label – the Heinz “57 Varieties” slogan. Excerpted from Wikipedia, accessed 2017: “Henry J. Heinz introduced the marketing slogan ’57 Varieties’ in 1869 [although over 60 varieties were offered at that time]. He later claimed he was inspired by an advertisement he saw while riding an elevated train in New York City (a shoe store boasting ’21 styles’). The reason for ’57’ is unclear. Heinz said he chose ‘5’ because it was his lucky number and the number ‘7’ was his wife’s lucky number. However, Heinz also said the number ‘7’ was selected specifically because of the ‘psychological influence of that figure and of its enduring significance to people of all ages’.” Now, “57 varieties” is a general term for a mixed bunch, like a mutt dog.

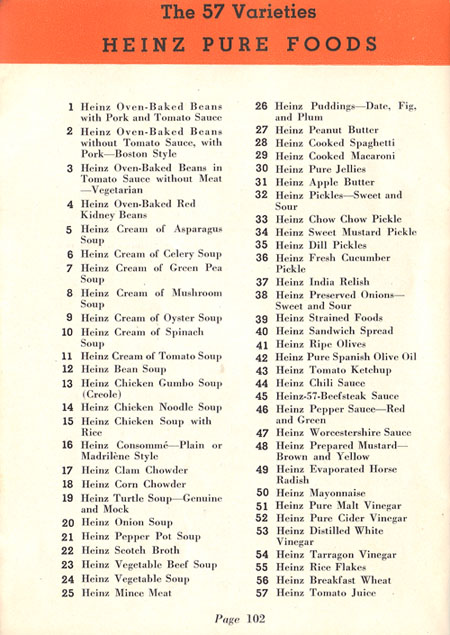
The Heinz Book of Meat Cookery, 1937, lists these 57 varieties:

Heinz 57 varietiesA good proportion of the varieties are canned soups. The “cream of” varities are asparagus, celery, green pea, mushroom, oyster, spinach, and tomato soups. (I think their “cream of tomato” variety is what we now call canned “tomato soup”.) Other soups are chicken soups, clam chowder, turtle (!), onion, pepper pot, and vegatable beef. Only some of these soups are available today, and they are no longer Heinz brands.The above list also includes baked beans (several varieties), mincemeat, puddings, olives, cooked spaghetti and cooked macaroni, peanut butter, breakfast wheat, and jams. Most of items in the above list, except Heinz condiments: ketchup, chili sauce, steak sauce, mustard, and vinegar. (I only buy Heinz ketchup and chili sauce, and I keep them in my pantry at all times!)
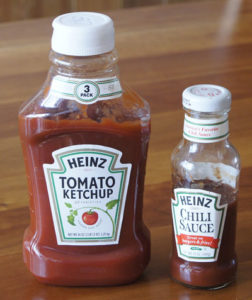
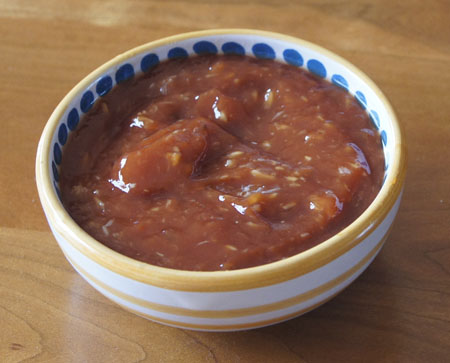
Heinz ketchup and chili sauce

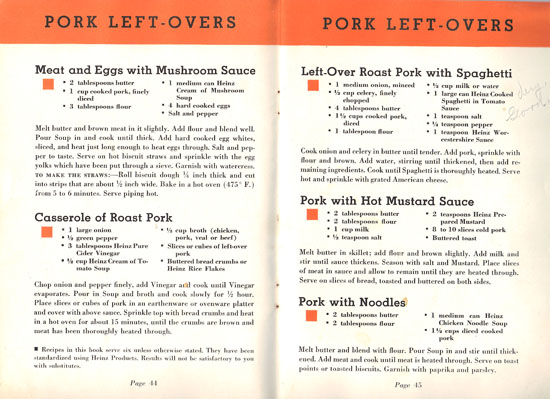
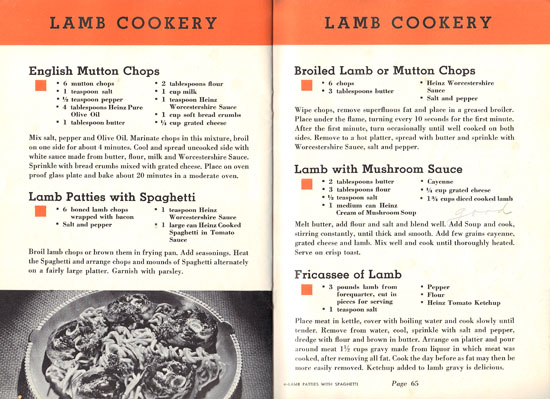
What to cook from this book? The recipes are not my style of cooking. Here are some typical examples (the notes on these are my grandmother’s writing):

Heinz recipesHeinz recipes

Note the “Left-Over Pork Roast with Spaghetti”. It calls for “Heinz cooked spaghetti in tomato sauce”. Even if I could find canned spaghetti, I would not make myself eat it.

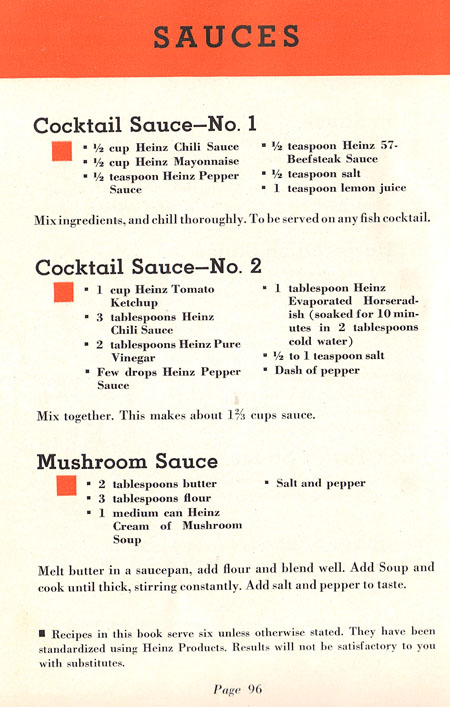
Near the end of the book I find some sauce recipes:

Heinz sauce recipesI like the “Cocktail Sauce–No. 2”. This is how I usually make cocktail sauce, except I use lemon instead of vinegar (and I never measure anything!). I like to add a little Lea and Perkins Worcestershire sauce, a current Heinz brand, so I’ll add a few drops. I’m not sure “evaporated horseradish” is available; I’ll use prepared horseradish.
This is a good sauce for dipping shrimp. I don’t keep bottled cocktail sauce in my pantry, because it is so easy to make. In the below version, I’ve halved the above recipe, and it made enough to dip about 2 pounds of cooked shrimp.

Cocktail Sauce

  • 1/2 cup ketchup
  • 2 tablespoons chili sauce
  • 1 tablespoon vinegar (or use lemon juice)
  • a few drops of hot sauce (like Tobasco) or some cayenne pepper
  • 1 tablespoon horseradish
  • a few drops of Worcestershire sauce
  • salt and pepper to taste

Mix all the ingredients. Taste, and adjust seasonings if desired.

Cocktail Sauce

Yummy, as usual! Nice excuse to get some cooked shrimp from Whole Foods.

I’ll keep this cookbook, but this time I will shelve it with my other “vintage” cookbooks!

250 Cookbooks: Glucose Revolution Pocket Guide to Losing Weight

Cookbook #197: The Glucose Revolution Pocket Guide to Losing Weight, Kaye Foster-Powell, Jennie Brand-Miller, Stephen Colaguiuri, and Thomas M.S. Wolever, Marlowe and Company, NY, NY, 2000.

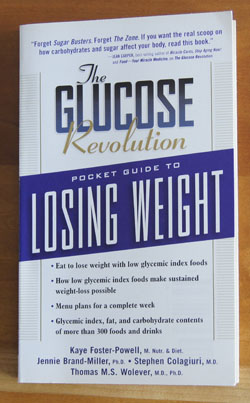
Glucose Revolution cookbookMy Whole Foods basket overflowing with fresh fruits and vegetables, I rolled towards a sample table last Thursday. The enthusiastic young man had laid out samples of yet another protein bar for the sports enthusiasts of Boulder. I was about to pass on by, but I heard the words “low glycemic index” . . . that stopped me.
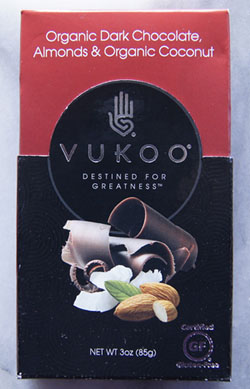
A little bell rang in my head: “I have a book on my cookbook shelf on the glycemic index of foods. I’ll do that book next, and in the meantime, I’ll buy one of his protein bars!”

Vukoo barLittle did that young man know that he was the inspiration for this week’s blog post.
The Glucose Revolution Pocket Guide to Losing Weight is all about the “glycemic index” of foods. Why is the glycemic index important? Low glycemic index foods help stabilize blood glucose levels. Spikes in glucose are related to insulin levels, and thus to diabetes. For the dieter, low GI foods keep you feeling full longer. The Glucose Revolution Pocket Guide, page 9: “The glycemic index is a clinically proven tool in its applications to diabetes, appetite control and reducing the risk of heart disease.” One chapter gives sample diet plans, and another lists healthy snacking techniques. At the end of the book is a lengthy table of the glycemic index of many foods.

(I covered another cookbook for diabetics: The Calculating Cook. I’ve always found that while dieting, keeping a strict eye on carbohydrates is a must.)

How is the glycemic index of a food measured? The researchers recruit volunteers, feed them equivalent carbohydrate amounts of foods, then measure their glucose levels by sampling their blood over several few hours. All foods are compared with a reference food, pure glucose, which is arbitrarily assigned a value of 100.

Here are some sample glycemic index (GI) values (from this book):

  • peanuts, 1/2 cup: 14
  • barley, 1/2 cup: 25
  • milk, 1 cup: 27
  • kidney beans, 1/2 cup: 27
  • garbanzo beans, 1/2 cup: 33
  • apple, 1 medium: 38
  • spaghetti, whole wheat, 1 cup: 37
  • spaghetti, white, 1 cup: 41
  • bread, 100% wheat bread, 1 1/2 ounce: 53
  • sweet potato, 1/2 cup mashed: 54
  • banana: 55
  • potato, white, 1/2 cup mashed: 91
  • bread, white french baguette, 1 ounce: 95

From the above examples, you see that foods that are not classified as carbohydrates such as peanuts or milk naturally have a low glycemic index (GI) value. Fruits in general are low GI. Legumes like garbanzos and kidney beans are low. Whole wheat bread has a GI of 53, while white bread has a value of 95. Sweet potatoes have a value of 54, while white potatoes have a value of 91.

Kind of justifies the old “health food” adage that whole wheat bread is better for you than white wheat bread. Go for complex carbohydrates!

I found that I had downloaded and saved a 2002 journal article on the topic of glycemic index – this subject has interested me for quite a while:

  • International table of glycemic index and glycemic load values: 2002, Kaye Foster-Powell, Susanna HA Holt, and Janette C Brand-Miller, Am J Clin Nutr, 2002;76:5–56.

Note that the lead author of this journal article is Kaye Foster-Powell, the lead author of The Glucose Revolution Pocket Guide to Losing Weight. The 2002 journal article defines a related value, “glycemic load”, which is the glycemic index normalized to the amount of carbohydrate in a particular food:

glycemic load, or “GL” + (GI x the amount of carbohydrate) divided by 100.

Kaye Foster-Powell is a co-author of a 2008 article on glycemic index:

  • International Tables of Glycemic Index and Glycemic Load Values: 2008, Fiona S. Atkinson, Kaye Foster-Powell, and Jennie C. Brand-Miller, Diabetes Care, 2008 Dec; 31(12): 2281–2283.

Both of the above articles have tables of GI and GL values. You can also search for the GI or GL value for a food online:

I especially like the University of Sydney site because you can enter a food and find out both its GI and GL. It’s a comprehensive site that explains all that you might want to know about glycemic index.

The Great Courses on nutrition

I am a big fan of The Great Courses, audio university-level lectures on a multitude of topics. Years ago I purchased “Nutrition Made Clear” by Roberta H. Anding; I highly recommend it. Dr. Anding discussed glycemic index in lecture 6, “Not All Carbohydrates Are Created Equal”, and lecture 22, “Metabolic Syndrome and Type 2 Diabetes”. She also referenced the 2002 J. Clin. Nutrition article by Foster-Powell, K. et al.

What to cook for this blog?

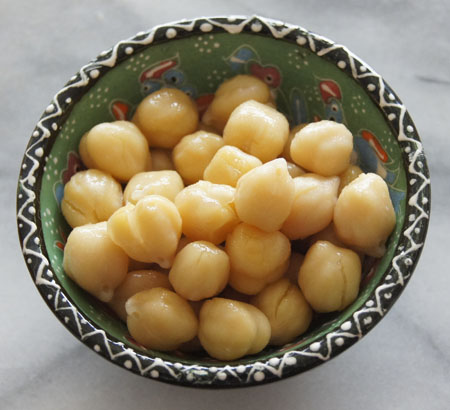
Since there are no recipes in The Glucose Revolution Pocket Guide to Losing Weight, I decide to cook a low GI/GL food and use it . . . somehow! I found some dried garbanzo beans in my pantry. Also known as chickpeas, they have a GI of 31 and GL of 9. I cooked a big batch in my electric pressure cooker.

garbanzo beansI will put these pretty beans in green salads and main dish salads (I have a great recipe for a Mediterranean salad). I can use them for hummus (I’ve made it many times before). They freeze well, so I froze several containers for later use. Garbanzo beans should be a healthy addition to our diet.
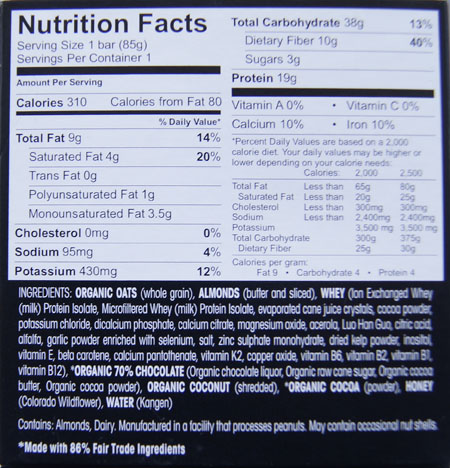

And what of the Vukoo bar? “Glycemic index” is not noted on the bar’s label. But the three major ingredients, oats (GL of 11), almonds (not a carbohydrate), and whey (a protein) do have low GL. The young man giving us samples claimed that half a bar kept one of his friends hunger-free for several hours. I found that little pieces of this bar kept me full between meals – it took me a week to finish it.

Vukoo bar nutrition

250 Cookbooks: Borden’s Cooperative Housewives Recipes

Cookbook #196: Borden’s Cooperative Housewives Recipes, Borden’s Cooperative, NY,  circa 1925.

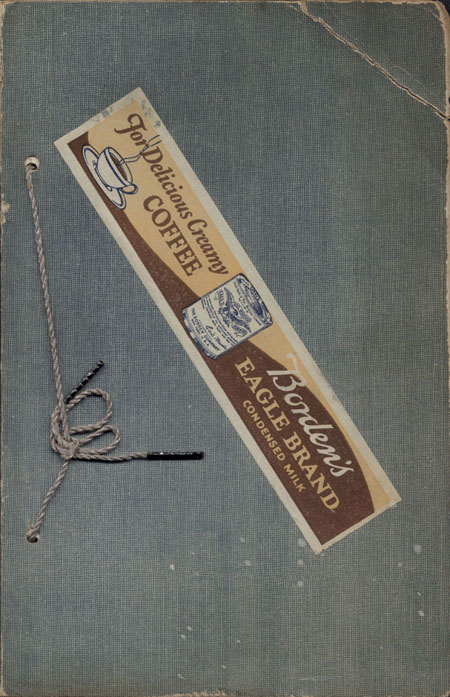
Borden Cooperative Housewives Cookbook

I pull a small book out of my “old book section”. Curiously, the cover and spine are blank. The cover is blue cloth over cardboard, like the clip-binders we used in junior high. I open to the first page:

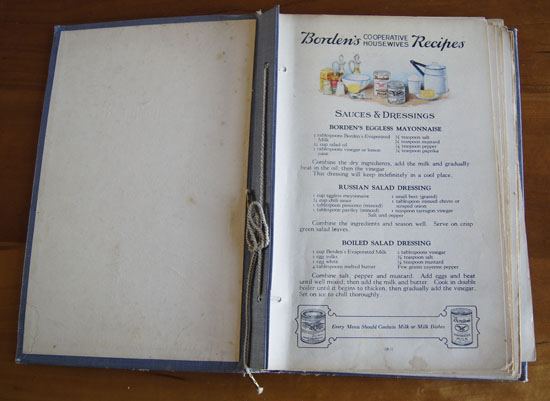
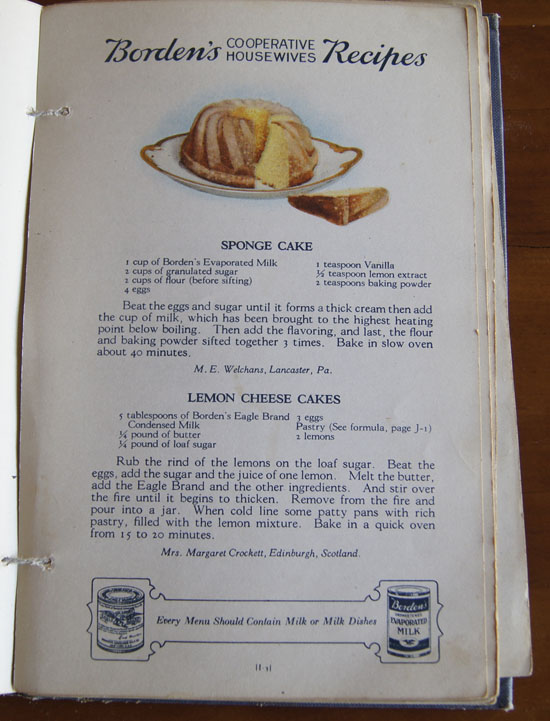
first pageAs you can see, the pages are held in with a string tie. The front of each double-sided page is headed with “Borden’s Cooperative Housewives Recipes” and a color illustration. Several recipes follow, and then the bottom of the page has a can of Borden condensed milk on the left, a can of Borden’s evaporated milk on the left, and a saying, like “Every Menu Should Contain Milk or Milk Dishes”.
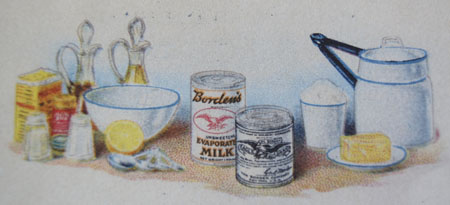
bottom banner

Note the white with blue trim double boiler in the illlustration? To this day, I have one of these vintage double boilers on a shelf in my basement.

double boiler

A couple other pages:

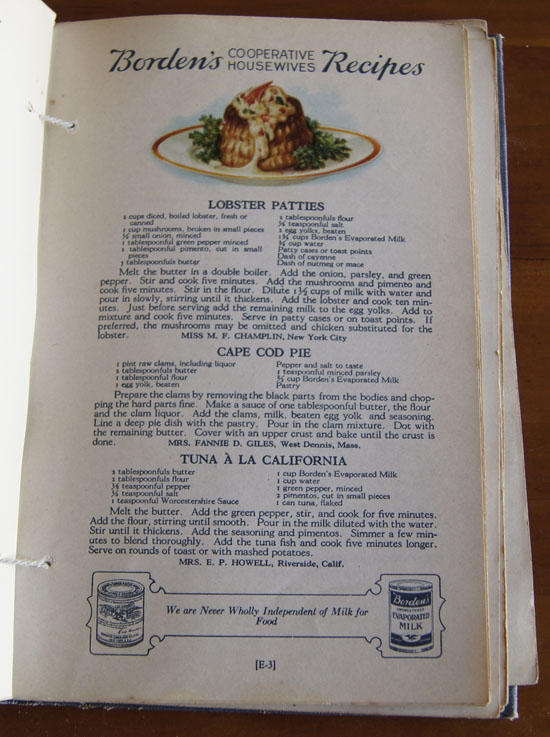
sponge cake pagelobster patties page

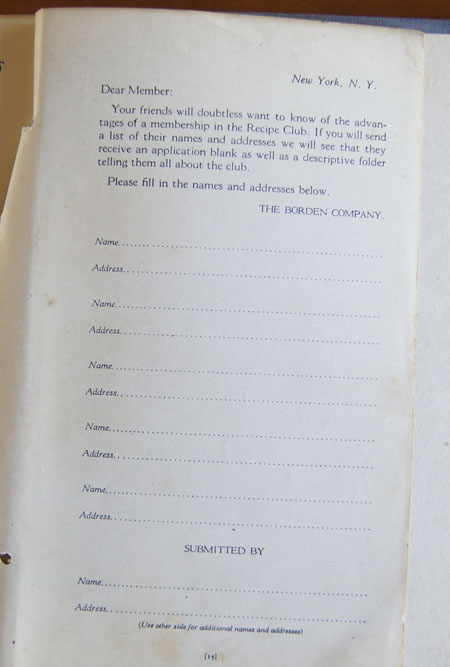
The last page of this book invites members to submit the name and address of friends to send to the Recipe Club:

last page

Maybe the mailing address was simply “The Borden Company, New York, N. Y.”?

I am pretty sure this book belonged to my maternal grandmother – she would have been a young mother at the time. There is some handwriting on the back page of the book that looks like hers. So I am almost positive it was her fingers that tied the bow in the string that keeps these pages together. I remember that she could tie perfect bows and that she made her own hats. Mother and I could never tie a good bow.

Memories.

I deduce that Grandma belonged to a “Recipe Club” sponsored by the Borden Company. Probably the company sent her pages on a regular basis, and she would add each page to the book. The pages are numbered with a letter and number, like “B-1”, “E-3”, “G-2”, etc.

There is no publication date in this book. I hit the internet to dig up some information. Michigan State University Libraries (MSU) has this entry for a book on their shelves:

Borden’s Cooperative Housewives Recipes
Publisher: N.Y. Condensed Milk Co. (New York, N.Y.)
1925 (ca.)
21.6 x 14.0 cm
Copyright: Permission is granted from the copyright owner/holder.

The above dimensions match my book. The cover photo is almost the same:

Borden's cookbookThe sticker on the MSU copy reads, “For delicious creamy coffee: Borden’s Eagle Brand Condensed Milk.” Perhaps the sticker on my copy fell off?
The book at MSU is part of the The Alan and Shirley Brocker Sliker Collection, housed with the library’s special collections. And, the entire book is available digitally on their website. Copyright permission is granted, so I feel free to share with you photos and scans of this very old book.

I find one more internet entry pertinent to my Borden’s Cooperative Housewives Recipes on the etsy.com site. A copy of a book that looks like mine was sold through the etsy site – they have photos of the cover and some of the pages. The description reads: “Way back when, Borden’s Evaporated Milk sponsored a recipe club. Each member received recipe installments, and these pages were inserted into a string binding by the Housewife”. They list the publication date as “circa 1920’s”. The pages in my book are in a different order than in either of the copies I viewed online (not surprising) but some are the same.

The Borden company

Gail Borden founded the Borden Company to produce evaporated milk in 1857. The company prospered during the Civil War by selling condensed milk to Union armies. In 1899, the name changed to the Borden Condensed Milk Company, and it became the Borden Company in 1919. It prospered for decades until it suffered significant losses in 1991-1993. In 1997, employees of Borden’s formed “Eagle Family Foods Inc.”, producing Eagle Brand Sweetened Condensed Milk (now a division of Smucker’s). The brand has been bought and sold several times by this point in time (2017).

History of evaporated and condensed milk

Canned evaporated milk was introduced to the American public in 1853 by Gail Borden. The wikipedia version of the story says that on a return trip from England, Borden was devastated by the deaths of several children who drank poor milk from shipboard cows. At that time, fresh milk could only be stored for a few hours before it spoiled – I think that’s why the cows were onboard. Anyway, Borden was inspired to find a way to store milk for long periods at room temperature. He applied a vacuum to fresh milk to pull off a lot of the water, leaving what he called “evaporated milk”.

How did he do this, this chemist asks? A “vacuum” is produced when the atmosphere (air) is removed from a sealed chamber. A vacuum chamber has a lower atmospheric pressure – and at lower pressure, a liquid boils at a lower temperature. In the case of milk, lowering the boiling point of the liquid (mostly water) causes the water to depart the system and leaves the other components of the milk unscathed (because they are not exposed to high temperature). (Rember the old PV=nRT equation you learned in school, where P is pressure and T is temperature? Lower the pressure, lower the boiling temperature. Note that in a pressure cooker the opposite happens: the pressure in increased, and the water boils at a higher temperature.) “Evaporated milk” is stable at room temperature, and when canned will last a long time on a pantry shelf.

How was the vacuum produced in 1857? On wikipedia, I find that methods for producing a vacuum in a chamber were discovered by the 13th century. By the 1800s, several types of vacuum pumps were in use. Borden was impressed and inspired by the vacuum method used by the Shakers to remove water from fruit juices. Likely it was a mechanical pump like the first photo on this page, but I could not find out for sure.

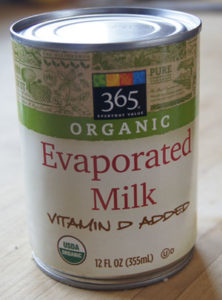
evaporated milkEvaporated and condensed milk as sold today
Each recipe in Borden’s Cooperative Housewives Recipes has evaporated or condensed milk as an ingredient. I know that “evaporated” milk is still sold as “evaporated milk” in a can so labeled. But what is “condensed” milk in today’s lingo? I know that “sweetened condensed milk”, a sugar-sweetened form of evaporated milk, is readily available, but is it the same as “condensed milk”? I need to know this before I cook a recipe calling for this ingredient in Borden’s Cooperative Housewives Recipes.

I go to Wikipedia and look up “condensed milk”. The entry states: “the two terms ‘condensed milk’ and ‘sweetened condensed milk’ are often used synonymously today.” My question is answered.

I do want to note that canned evaporated milk is still often used in cooking, in spite of the readily available fresh milks of today. In some recipes, it works better than fresh milk. I’ve tried fresh milk in pumpkin pie and the pies do not bake up as well as when made with evaporated milk. According to allrecipes.com, canned milk is “the cornerstone of many puddings, including flan, frosting and fudge. Pumpkin pie wouldn’t exist without it”. Canned sweetened condensed milk is a very thick, sweet product that lasts for years in my pantry and I keep it on hand for decadent desserts.

Okay, I feel read to cook a recipe from this book!

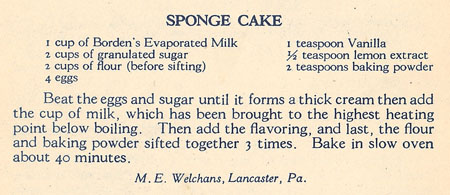
I decide to try “Sponge Cake”.Sponge Cake recipeThe photo of this cake (one of the photos earlier in this blog) show that it was baked in a bundt pan. I decide not to heat the evaporated milk to just below boiling (this is an unusual step in cake-baking). I guessed a slow oven to be 350˚ F.
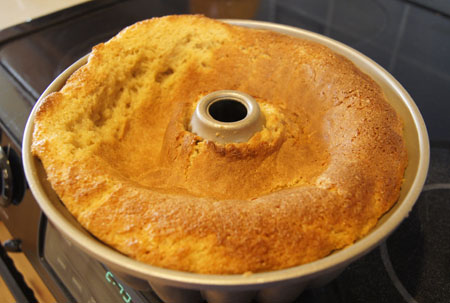
Well, I made the cake, and took it out of the oven after 40 minutes. This is how it looked:

fallen sponge cakeI was so disappointed! This is my planned dessert, and we had company. I showed it to my husband and he sympathized with me.
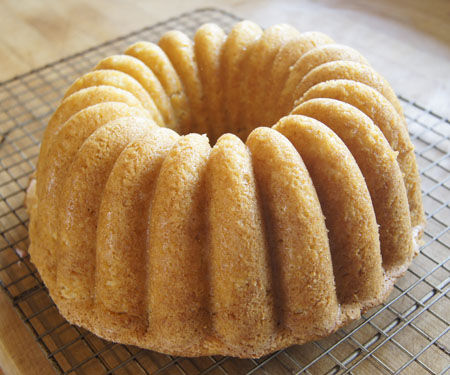
Then I waited 10 minutes for the cake to cool. I inverted it onto a cooling rack and carefully urged it out of the pan. Lo and behold!

sponge cakeIt’s beautiful!

Why did the cake fall? I suspect the oven temperature. After the fact, I found from Wikipedia that a “slow oven” is 300-325˚ F. Or maybe the step that I skipped – heating the evaporated milk – is important for the outcome of the cake.

I served slices of this cake with sliced, lightly sugared strawberries and whipped cream. I thought the “crumb” of this cake was a little dense, but everyone else simply loved this dessert! If I try a sponge cake again, though, I will compare and contrast with modern recipes for this type of cake.

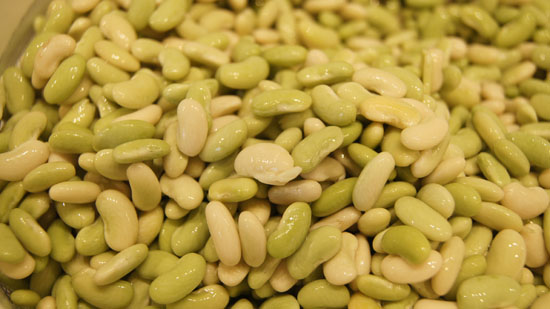
Flageolet beans

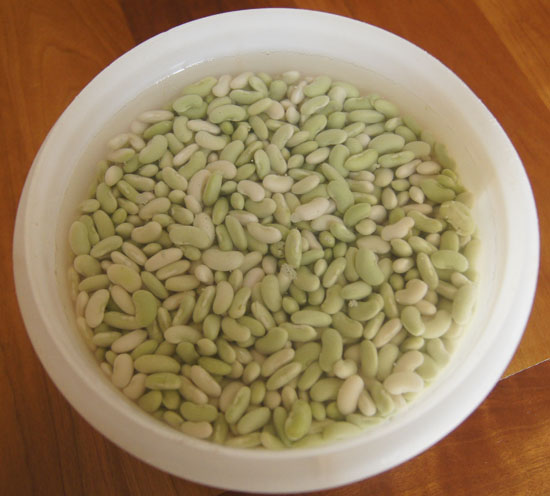
flageolet beansI found an (expensive) bag of heirloom flageolet beans at a little store called “Cured“. Aren’t they pretty? Some of them are creamy tan, and some pale green.
“Cured” is a curious shop tucked near a janitorial supply on about 18th and Pearl in Boulder. I discovered it a few years ago, and now stop to browse whenever I’m in the area. They have an exotic selection of cheese and sausage, and shelves of items like duck fat, olives, crackers, truffles – all sorts of exotic fare. Plus gorgeous loaves of bread. They have a sit-down area for coffee customers. The late morning we were there last week, the store was crowded to overflowing! (Don’t folks in Boulder have to work mornings?)

What to do with these flageolet beans? I went to the website of Rancho Gordo, the company that sells these beans. According to Rancho Gordo, If soaked overnight, flageolets need only about 45 minutes to cook. That’s not long, so I decide not to use the electric pressure cooker that I traditionally use for beans, and instead just let these simmer on the stove top.

Here is how they look just after I put them in a bowl and added water:

flageolet beans

(The photo at the top of this page is of the beans the next morning, after soaking.)

I did add a little salt before cooking, although the Rancho Gordo website advised against it. The cooking liquid from these beans has amazing flavor.

I pretty much followed the recipe for Grilled Shrimp with White Beans, Sausage & Arugula on the Rancho Gordo website. I added a bit of basil, and near the end of the cooking I added a couple fresh, peeled, chopped tomatoes marinated in about a tablespoon of balsamic vinegar for about 30 minutes.

I served these to my bean-reluctant husband for a Saturday night dinner. Surprise! He liked them! And of course I did!

250 Cookbooks: Seal-A-Meal I

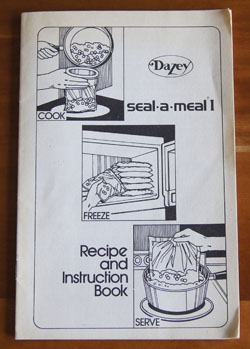
Cookbook #195: Seal-A-Meal I, Recipe and Instruction Book, Dazey Products Company, 1976.

Seal-A-Meal cookbook

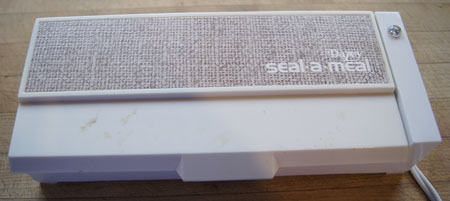
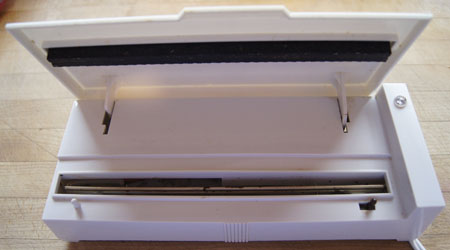
I bought a “seal-a-meal” by Dazey sometime way back in the late 1970s or early 1980s. I still have it! And it still works. It’s an inexpensive little unit, with a heating bar and a way to hold and press bags over the bar.

seal a mealseal a mealNote the two pegs in the above photo, the white one on the left and the black one on the right. Special bags, or “pouches”, were sold that had holes along the side to latch on to the bags. I have a small roll of this type of this bag material – as you can see in the photo below. See the little round hole in the bottom right corner of the photo?
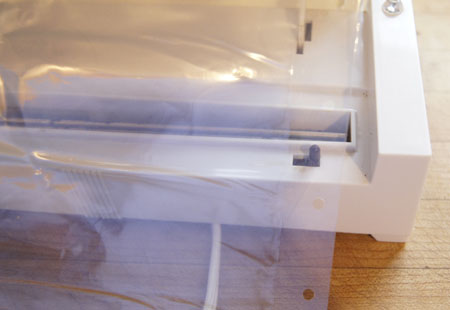
seal a meal

I searched and searched, but to my knowledge, this type of bag (with holes along the sides) is no longer sold. The Seal-a-Meal® brand now owned by Sunbeam Products (doing business as Jarden Consumer Solutions). The bag sealer units of today use vacuum to remove the air from the bag filled with food, and then heat seal them. Both approaches result in an air-tight, sealed bag, a bag that can be put in a freezer or in boiling water.

There are zillions of reasons to have food or other things in an air-tight bag, or pouch. “Ideas, ideas, ideas” on pages 12-15 of Seal-A-Meal I suggest pouch-sealing food such as tomatoes, vegetables, fruits, eggs, dough for rolls, coffee, even sandwiches. Sportsmen can seal survival kits and fishing gear. Mothers of babies and toddlers can freeze formula and baby foods, and put anything that children shouldn’t touch in seal-a-meal bags. Picknickers can mix up martinis, seal in pouches, and put in the cooler. Seamstresses can store delicate laces and sequins. Teenagers can make water pillows. One can store polished silver in sealed bags.

I contribute this idea: buy meat or fish on sale and seal in the seal-a-meal then freeze; this prevents freezer burn.

How have I used my seal-a-meal? Mostly for short backpacking or car camping trips. I’d make a batch of chile or spaghetti sauce, pouch-seal and freeze it. The meal would go into one of the adult backpacks, while we watched our kids scamper up the trail. The frozen meal acted like an ice block to keep items like cheese cool in the pack. After we reached our campground and set up camp, we’d heat the pouch of food over a camp stove. And enjoy a great meal, with the wind blowing softly in the pine trees, the stars coming out over the Rocky Mountains.

backpacking

My Seal-A-Meal I booklet includes a handful of recipes for cooking foods directly in the bag, like poached eggs and or “Fussless Fudge Sauce”. Another handful of recipes are for main dishes like stew, spaghetti sauce, and chile: you prepare ahead (or prepare a double recipe) and freeze in a seal-a-meal bag for later.

For this blog, I decide to cook a batch of stew meat to “demonstrate” the seal-a-meal process. For a change, I am not going to give you a formal recipe for my stew. Unlike this blog, much of my cooking is done sans recipe. Here goes:

Stew Meat Base

Cut up a chuck cross rib roast – one or two inch chunks – about 3 or 4 pounds of meat (or use pre-packaged stew meat). Toss away any big chunks of fat. Turn on an electric pressure cooker to “brown”, then add about half the meat. Oil in the pan is optional. I found that the first half of the meat I put in the pan browned well and most of the liquid evaporated –  I should have removed it and browned the other half, but I looked at the clock and was running late, so I just tossed in the rest of the meat. In a few minutes, the splattering pile of meat still had a lot of liquid in it, but what the heck, time is ticking. Add a roughly chopped onion and carrot, and maybe 4 chopped garlic cloves. And some salt and pepper. Open a bottle of red wine and pour in a good dollop. Add maybe a cup of water. Cover and seal the pressure cooker, set to “high pressure” for 22 minutes, then let the pressure come down on its own. Well, I let it come down until it was time to leave, when I released the pressure totally and unplugged the unit. I came back maybe 6 hours later. And it was perfect!

This made enough cooked stew meat for 3 meals for 2 people. I divided it in thirds, and put one portion in a pan on the stove top. I mushed up the cooked carrots and onions with a fork: they are there just for flavor. I added chopped carrots, celery, and potatoes, more water, and cooked until veggies were done. Then I thickened with a little cornstarch mixed in a bit of water. It was one of the best stews I have ever made!

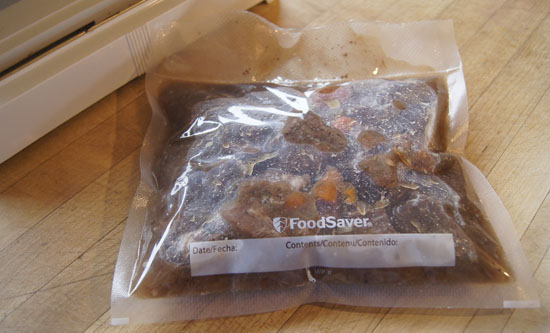
I took the other two portions of stew meat base and pouch-sealed. I used two recently-purchased vacuum style seal-a-meal bags and filled each with stew. (I lost the EZ fill gadget that makes it easy to fill bags without getting food on the sides of the upper portion of the bag so there was a bit of food on the edge I wanted to seal – I forged ahead anyway.)

I heated the seal-a-meal unit for 3 minutes, placed the top of the bag on the hot bar, pressed out most of the air, closed the top, and said “one seal-a-meal, two seal-a-meal, three seal-a-meal, four seal-a-meal”, then it was sealed. It sizzled a bit because there was a bit of food in the sealing area, but it still formed an air-tight seal.

seal a meal stewThe filled bags are now in my freezer, ready for a couple quick meals.

Comments on food storage, 2017 style

As I used my seal-a-meal this week, I did find the it to be a good method to seal foods for storage. The frozen pouches take up little space in the freezer (compared to a plastic lidded container). The drawback is the time involved (maybe 5 minutes to find and heat the unit and to fill the bag) and the messiness of filling a bag with a wet food like a stew.

Since the advent of seal-a-meal units in the 1970s, plastic bags with nearly air-tight “zip” type seals entered the American marketplace (Hefty and Ziplock brands). Although I wouldn’t freeze something like stew in these bags, I do use them for fresh meats that I’ve bought in bulk; cooked hamburger and sausage; tomatoes, fruits, nuts . . . I use these ziplock-style bags all the time. The advantage over seal-a-meal is that they are quick and easy to fill. Also, I often re-use these bags by rinsing with water.

For leftovers like pasta sauce and chile, I use reuseable, lidded solid plastic containers like Tupperware® or Rubbermaid®. Most of my Tupperware is ancient (they don’t make it now as well as they used to!). Recently, Rubbermaid has come out with a line of “easy find lid” containers that I like a lot because many of the lids are interchangeable between container sizes and the lids are easy to find and the containers stackable. I like them too because they are reusable and thus better for the environment.

And nerdy me, I keep a list of what’s currently in my freezers in Evernote, accessible from my computer, iPhone, and iPad. I have two freezers, one with the refrigerator and one huge one down in the basement. We are 6 miles from the nearest town, and 20 miles from a big supermarket, and I hate to run out of something and have to drive out to a store. Plus I can take advantage of sales. Plus when I was working, I could cook for a whole week on Sundays and store the meals in the freezer.