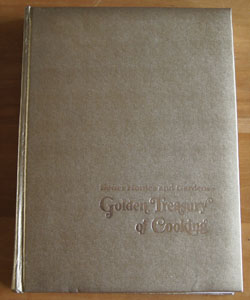
Cookbook #166: Golden Treasury of Cooking, Better Homes and Gardens, Meredith Corporation, USA, 1973.
“With one foot planted in the past and one in the future, Americans are propelling themselves forward into the ’70s. In all areas of life there is a paradoxical blending of past and future – especially in food. Homemakers are performing a modern juggling act. On one hand, they are using foods that are quick, easy, and convenient. While, on the other hand, they are going back to many of the old, time-tested cooking techniques that their grandmothers used. Out of all this comes such diverse ideas as microwave cooking, making your own breads, computerized meal planning, and organic gardening. What lies in the future? Whatever it is, it’s sure to be the best of both worlds – the nostalgic old one of the past and the bright new one of the future.”
Golden Treasury of Cooking, page 261
One foot in the past, and one in the future. My cooking philosophy for sure. And the present? That’s where I am, thinking about what to learn, to discover, and to cook today.
This week, I decided to take the Golden Treasury of Cooking off the shelf. I’ve been putting this one off because I know it will take some time. This is a special book, a super-collection of nostalgic recipes, and handsomely illustrated and presented. But more than that, it was given to my mother from my father for Christmas 1973.

The Golden Treasury of Cooking a gorgeous book. Although now faded, the cover is still golden, and a little puffy-soft. I am sure it was meant to be a coffee table book. This book compiles Better Homes and Gardens magazine’s recipes from 1930 to the early 1970s. It’s sectioned into decades: the 30s, 40s, 50s, 60s, and 70s. Each section begins with a bit of history – good Americana. A full page photo of a sample magazine cover graces each historical review, and then a fold-out photo collage of memorabilia from the age. Each decade’s recipes are sectioned into representative featured recipes (recipes from restaurants or famous people, or popular trends such as home canning, barbecues, convenience cooking, or natural foods) and then a good collection of recipes from Better Homes and Gardens magazines of the decade.
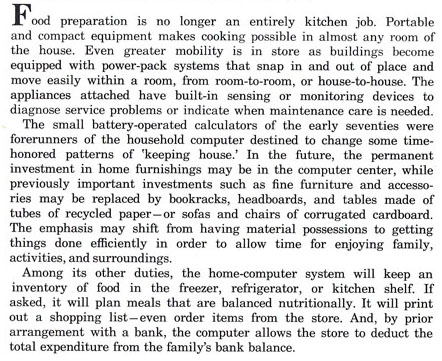
I spend quite a few hours this week reading this book. I especially enjoy reading each decade’s introduction. I think of my grandmother in the 30s, my mom in the 40s and 50s, and me in the kitchen in the 60s and 70s. The 70s is especially fun, with its predictions of the future:
My mother’s notes are throughout this book. It’s fun to page through the recipes! Some of the recipes that interest me: Daffodil Cake (an angel food and sponge cake all in one), Orange Biscuits, Meatballs Stroganoff, Banana Apricot Bread, Puffy Tortilla Bake (includes crepes), Dilly Bread (a yeast bread with cottage cheese in it), Blueberry Dumplings (stove top blueberries with dumplings), Strawberry Shortcake (a good biscuit recipe), Pfeffernuesse (old-fashioned anise flavored cookies), Stuffed Date Drops (Mother marked “Delicious!!”), Skillet Enchiladas, and the original Toll House Cookies recipe. I also found a recipe for “Bun-steads”. I think these are the baked tuna sandwiches that Mother used to make. They sound weird today, but I used to like them: a tuna and egg salad mixture baked with cheese inside a frankfurter bun.
The Golden Treasury of Cooking is reviewed by The Iowa Housewife. She included some photos and recipes from the book that you might find interesting.
For this blog I decide to make Pineapple Upside Down Cake, from the 1940s section. I currently use a recipe in my recipe documents — one that I cobbled together — but I’d like to try this one (below).
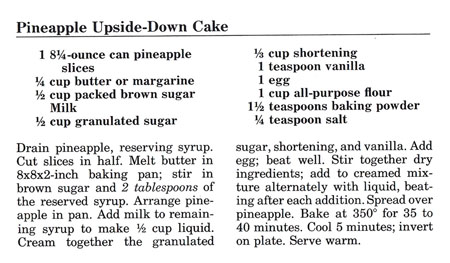
The only change I plan is to keep the pineapple rings whole, and put a maraschino cherry inside each ring.
Pineapple Upside Down Cake
makes one 8 x 8-inch cake
- 1 8 1/4-ounce can pineapple slices
- 1/4 cup butter
- 1/2 cup brown sugar
- maraschino cherries
- milk
- 1/2 cup white sugar
- 1/3 cup shortening
- 1/4 teaspoon salt
- 1 teaspoon vanilla
- 1 egg
- 1 cup flour
- 1 1/2 teaspoons baking powder
- 1/4 teaspoon salt
Drain the pineapple, reserving the syrup. Melt the butter in an 8 x 8 x 2-inch baking pan; stir in the brown sugar and 2 tablespoons of the reserved pineapple syrup. Arrange the pineapple rings in the pan – you might have to cut a few in half to cover the bottom of the pan. Put maraschino cherries into the center of each pineapple ring. Set the pan aside.
Add milk to the remaining pineapple syrup to make 1/2 cup liquid. Cream together the white sugar, shortening, and vanilla. Add egg; beat well. Stir together the dry ingredients; add to creamed mixture alternately with liquid, beating after each addition.
Spread the dough carefully over the pineapple-brown sugar mixture in the pan. Bake at 350˚ for 35-40 minutes, until the cake is turning brown around the edges. Cool 5 minutes and then invert carefully onto a plate. Serve warm with whipped cream.
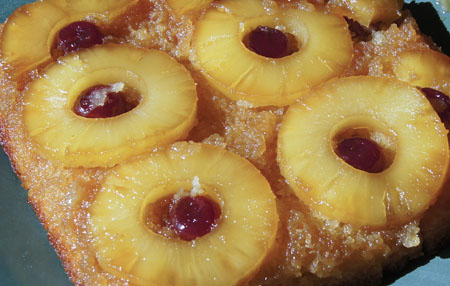 Oh yes, this was good! Pineapple Upside Down Cake has always been one of my husband’s favorite desserts. This new version was rich and sweet and very pineapple-y. Will I make it again, and do I recommend it? Yes to both.
 These are excellent cookies! Soft and rich, but not too sweet. We all liked them, and they disappeared in a hurry!
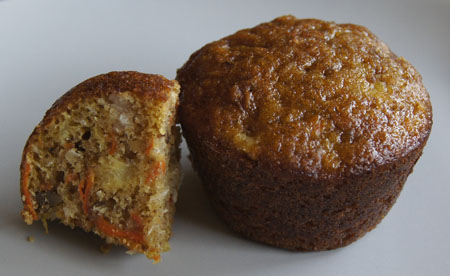
 This little community cookbook was compiled by Lorraine Moore, the vice president of the Sierra Cahuenga District Women’s Club Board in 1980-81. Donna Smith – “Donna’s Board” – was the president at the time. My mother was a member of the Sun Valley Women’s Club, one of the clubs in the Sierra Cahuenga District. I remember her talking about going to those meetings for years, and I think she served for a time as secretary – she was an excellent typist and great at organizing. The
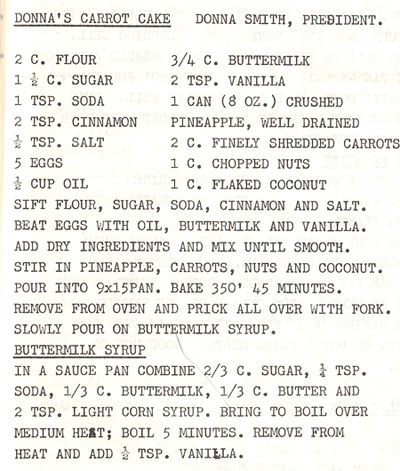
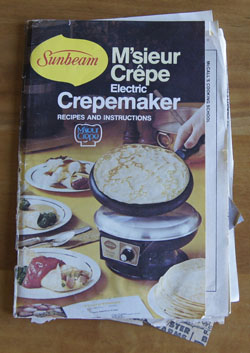
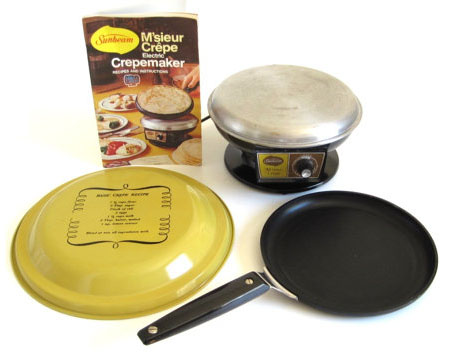
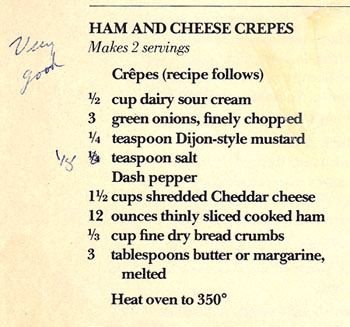
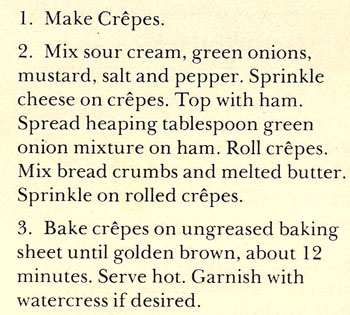
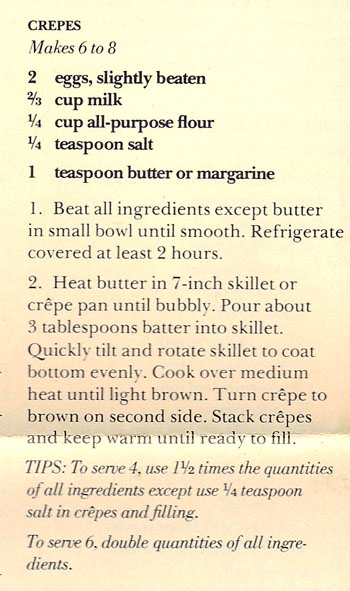
 Note: Later in the week, I made chocolate crepes following a recipe in M’sieur Crêpe Electric Crepemaker. Filled with fresh strawberries and whipped cream and drizzled with chocolate sauce, they too were delicious!
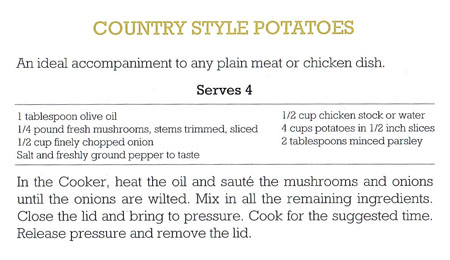 The “suggested time” in the above recipe is indicated by a little chart below each recipe. I perused the instruction pages of the booklet and figured out that I should set my current pressure cooker to “high”.
 These were very good! And so fast and simple. I have to remember that it’s often worth the effort to carry the pressure cooker up from the basement. It really is time-saving, and clean-up is easy. I will make these again!
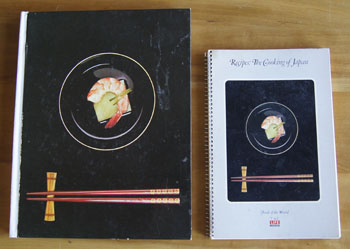
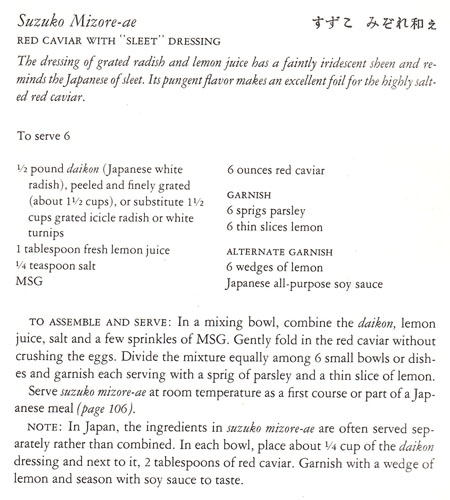
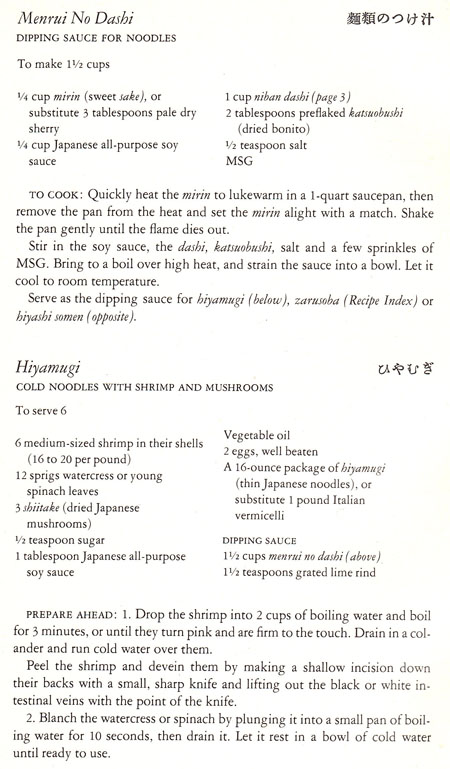
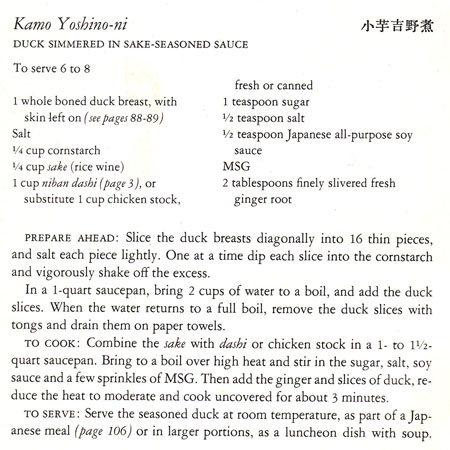
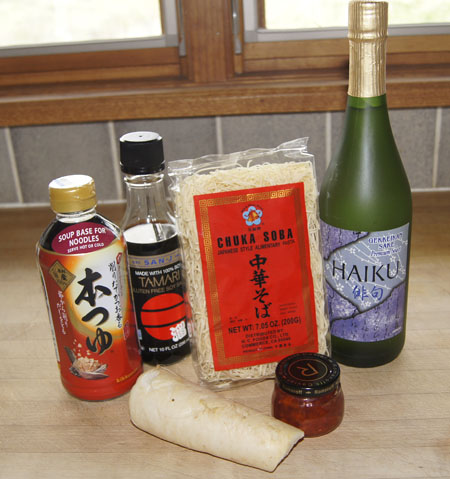
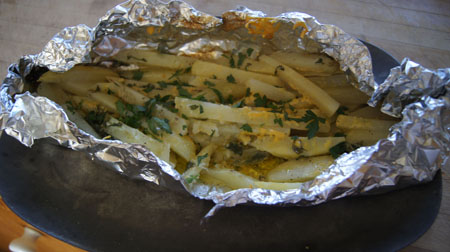
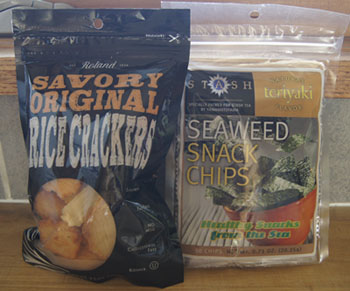 I had fun cooking my Japanese dishes and worked as best as I could to artfully arrange them on our plates:
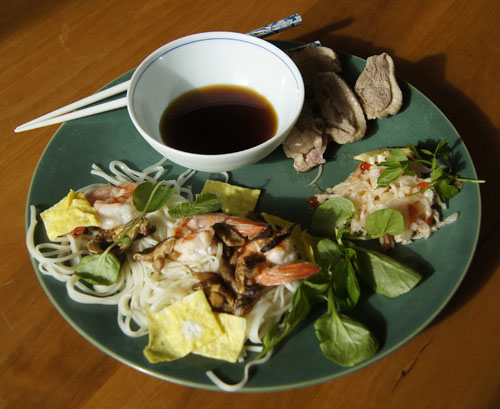
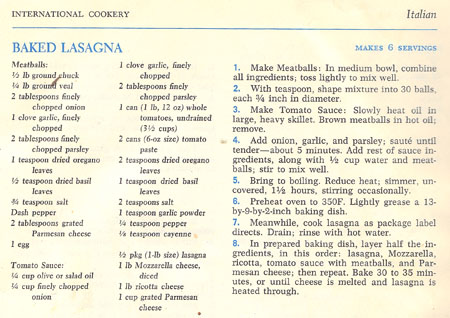
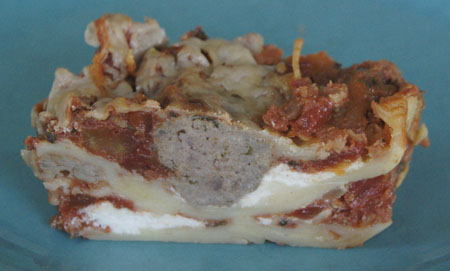 This lasagna was “a cut above” and “amazing”, comments from my millenium-age son and his wife. I give it a big “yum”!
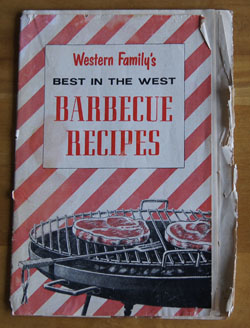

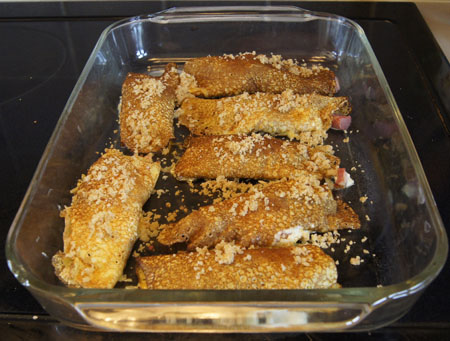
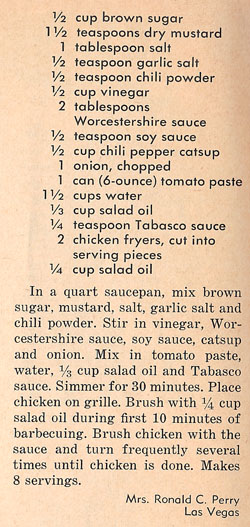
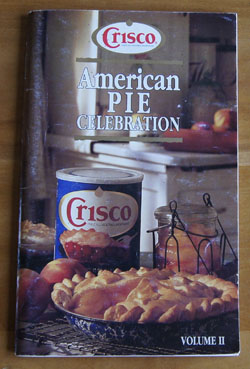
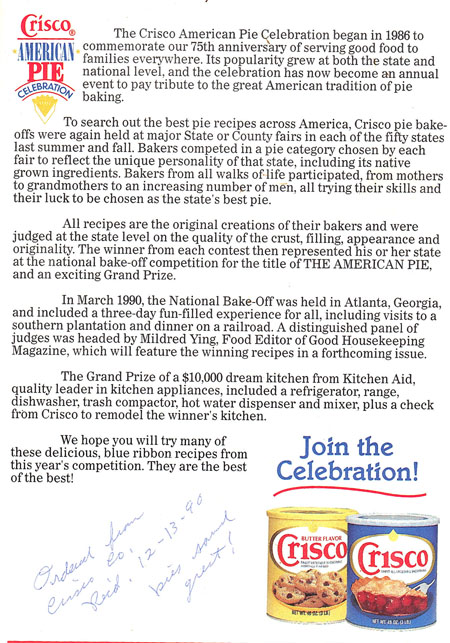
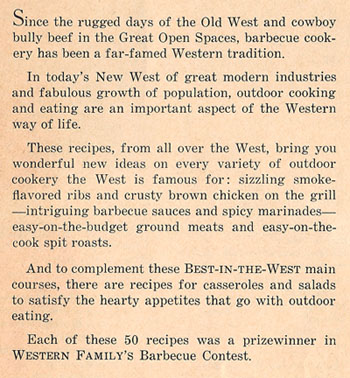 I am surprised how much I like the recipes in this dated booklet! Many of them sound good, albeit the instructions are often quite brief: “Pour the marinade over the ribs and marinate for at least one hour. Grill ribs over charcoal for 45-60 minutes, or until done, turning frequently and brushing with sauce.” Each recipe includes the name of the contributor, usually a “Mrs.” from a western state.
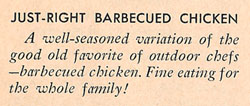
 I haven’t cooked bone-in chicken pieces on a grill in ages. Below are the instructions given in this booklet for an old-style charcoal grill.
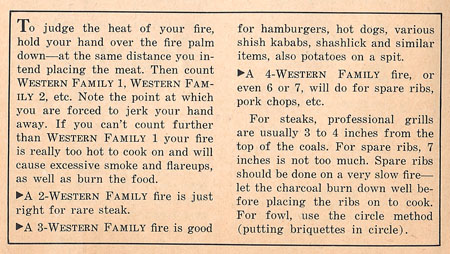
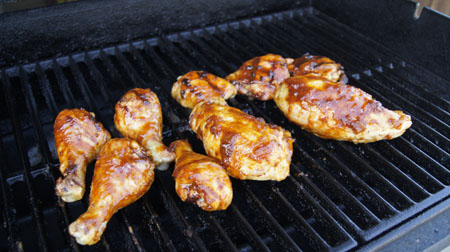 This chicken was really good! I will definitely grill chicken this way again. The sauce was perfect, and the chicken was juicy. It was just as good cold the next day!

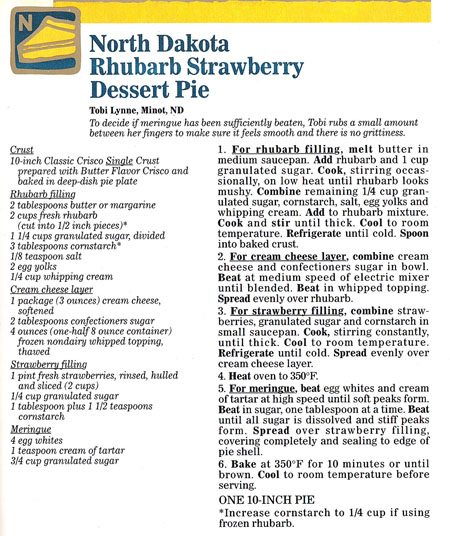 I had an easy dinner planned, so I made my pie crust in the morning, then settled happily in to prepare the filling in the afternoon. Boy, it was a lot of work, or at least, a lot of time! I washed my fresh organic rhubarb and cut it into half-inch pieces and filled my 2-cup measure (10 ounces). Then I put it in a saucepan and added the 1 cup sugar and heated. What? Where is the liquid? It’s just rhubarb and sugar. I double-checked the recipe – yup, that’s what they said! I kept heating on medium high heat until the sugar melted and the rhubarb released moisture and became mushy. Here is a photo after the cornstarch, egg yolks, and cream was added, and the mixture cooked to thick-ness:
 On cooling, it got a little thicker.
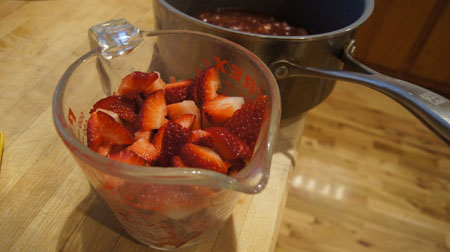 It didn’t take long to cook the strawberries, sugar, and cornstarch:
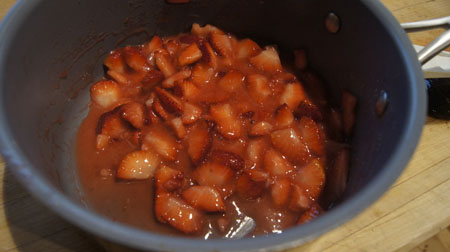 I mixed the cream cheese, powdered sugar, and Cool Whip. I whipped the egg whites and sugar and cream of tartar. Finally, I am ready to assemble the pie. Here are all the prepared mixtures:
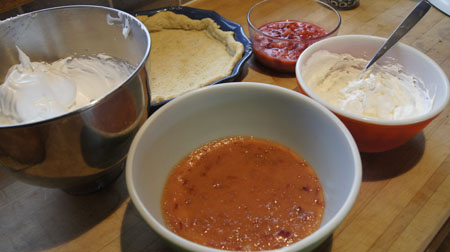 And here is the baked pie:
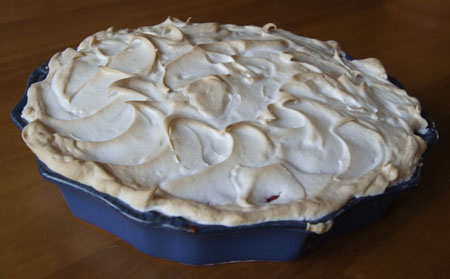 Looks beautiful, doesn’t it? But it was a disaster when we cut our pie “slices”. It was just a runny mess inside. Not at all like it was supposed to be. And I paid careful attention to each step! We ate our portions – it tasted sweet and fruity and definitely satisfied our sweet tooths. But I tossed the rest of the pie the next day.