250 Cookbooks: Chicken Cookbook

Cookbook #120: Chicken Cookbook, The Pillsbury Company, 1993.

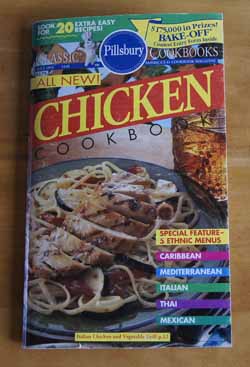
Chicken CookbookI can see me standing at the check-out counter, flipping through this advertising cookbook, getting  hooked by many chicken-cooking ideas. So I tossed it in my basket along with a pile of groceries (kids at home) and paid the $2.75 (along with a lot for the groceries).

Advertising cookbooks – love ’em and hate ’em. Their history I discussed in a previous post. I haven’t bought one in 15 years – probably because I go to the internet these days for new cooking ideas.

Not sure yet if I’ll keep this one. I see several interesting ideas for cooking chicken, although I don’t like all of the ingredients. Packaged crescent rolls, prepared pie crusts, frozen fruits and vegetables, canned fruits and vegetables, canned soups. I am more of a “from scratch” person. Still, I can use the ideas in this cookbook and substitute fresh ingredients as I like.

I decide to make “Plum Barbecued Chicken Kabobs” for this blog. It’s summer, time to use the grill! I like kabobs, although I am not a huge fan of the basic bell pepper and onion and potato and meat skewers. This recipe for chicken kabobs has grapes alternated between the chicken pieces: this should add moisture and some good flavor. I’ve never used grapes on skewers before – sounds interesting.

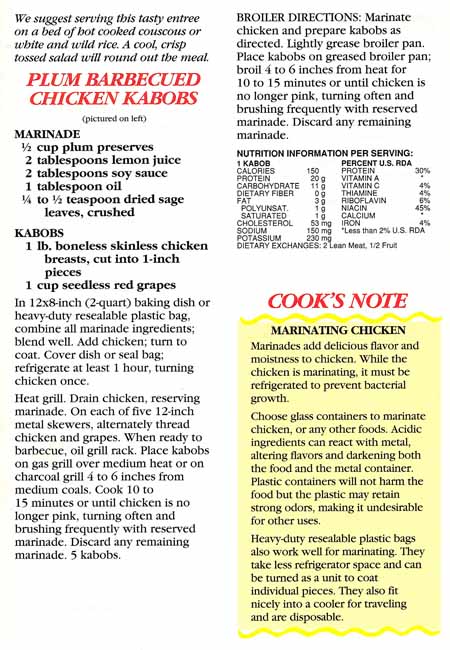
Plum BBQ Chicken Kabobs recipeI can’t find any plum preserves! I checked several stores. Instead I bring home a jar of apricot preserves and also a jar of “plum sauce“, an Asian condiment. (I need the plum sauce anyway for a different recipe I am trying this week, one for grilled pork chops from my Weber’s Real Grilling book.) I’ll taste each and decide which to use in the Plum Barbecued Chicken Kabobs.

Chicken and Grape Kabobs
makes 4 kabobs, serves 2-3

  • 1/2 cup plum or apricot preserves
  • 2 tablespoons soy sauce
  • 2 tablespoons lemon juice
  • 1 tablespoon oil
  • 1/2 teaspoon dried sage, rubbed or leaves
  • 1 pound boneless skinless chicken breasts
  • 1 cup (about) of large red or black seedless grapes

Combine the preserves, soy sauce, lemon juice, oil and sage in a small bowl – this is the marinade.

Cut the chicken into 1-inch cubes. Combine with the marinade in a baggie and put in the refrigerator at least 1 hour.

Soak 4-5 bamboo skewers (or use metal ones). Remove the chicken from the marinade  – save the marinade for basting. Thread the chicken alternately with the grapes on the skewers.

Heat the grill to medium-high. Cook the kabobs for 10-15 minutes, until the chicken is done. Turn them often and baste several times with the reserved marinade. (Toss the marinade when done.)

Serve. I set out the Asian plum sauce but neither of us used it.

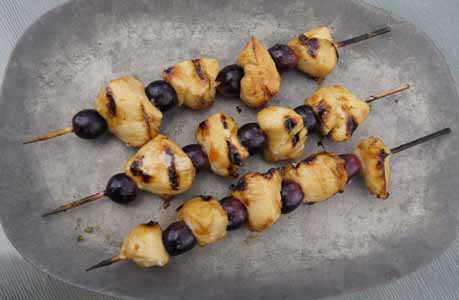
Chicken Grape KabobsThese were great! Tasty and moist with a nice sweetness from the grapes and the marinade. I served them over raisins-mandarin orange-lemon couscous with Parmesan toast. Success!

250 Cookbooks: The Bread Basket

Cookbook #119: The Bread Basket, Standard Brands Incorporated, 1941.

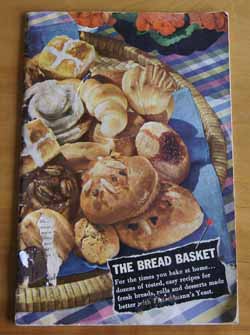
The Bread Basket cookbook“‘Baking day’ isn’t on the American housewife’s calendar any more. For at her bakery or grocery . . . fresh every day . . . is a profusion of breads, rolls, cakes and pastries that’s one of the world’s wonders.

“How tempting they are . . . how delicious . . . how cheap . . . and what a world of work they save!

“But there are times when women like to run up a batch of rolls of their own, or try their hand at a coffee cake, just to see if they can still do it!”

So begins this delightful 1941 cookbook. I smile as I turn the pages.

The breads in this cookbook are all yeast breads, and Fleischmann’s yeast is specified in every recipe. (Standard Brands was formed in 1929 by J. P. Morgan by a merger of Fleischmann’s and four other companies. In 1981, Standard Brands merged with Nabisco to form Nabisco Brands, Inc.)

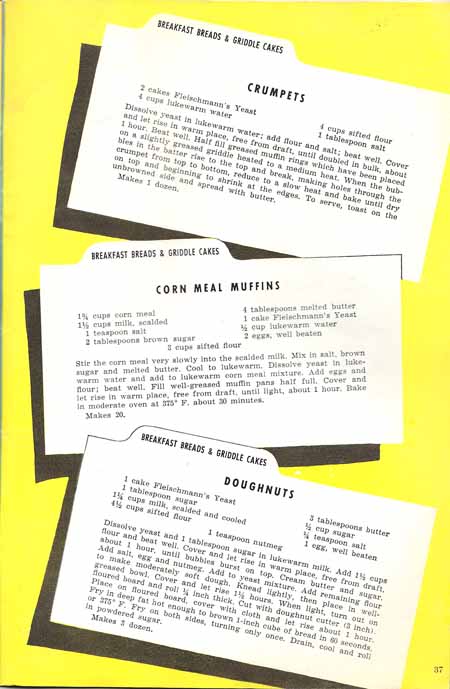
The copy right has expired on this cookbook, so I am going to share with you a few of my favorite pages. Let the book speak for itself!

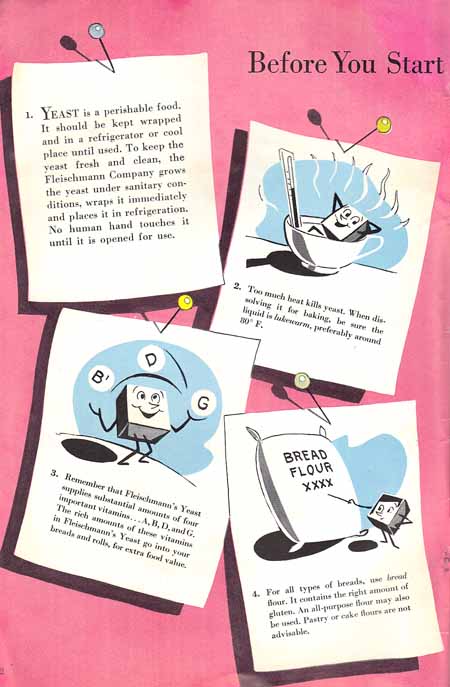
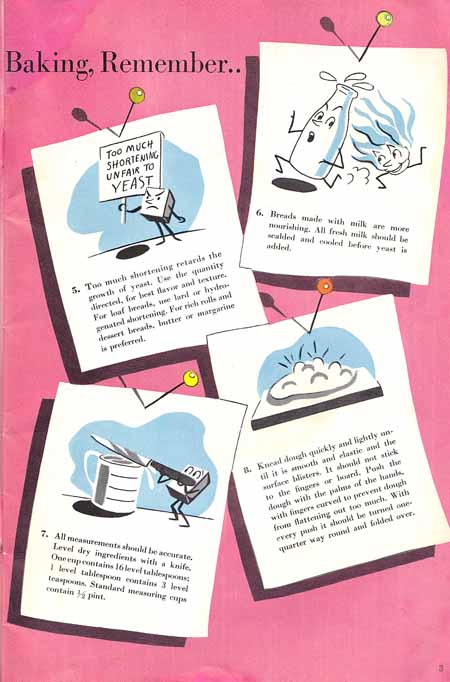
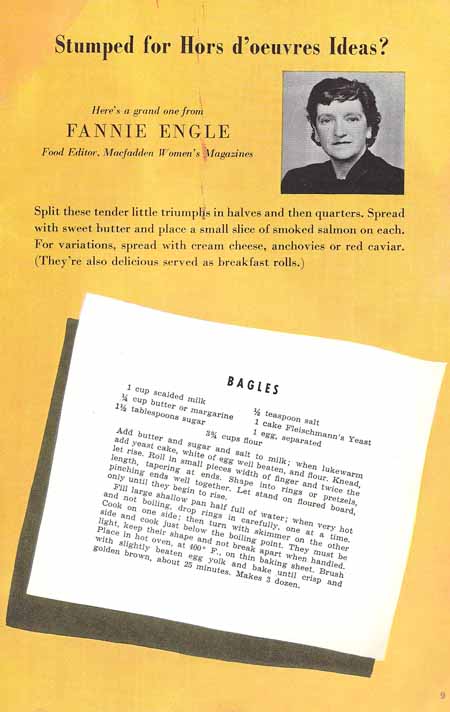
page 2page 3Bagles! And yes, the recipe below is for “bagels”, as we spell it.

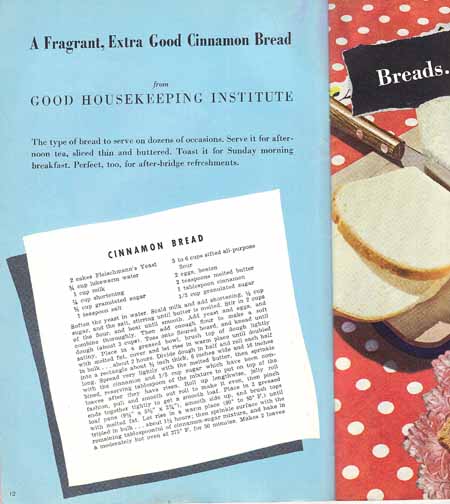
page 9page 12Corn Meal Muffins recipeI always google my cookbook titles. This time I find the Fresh Loaf website has reproduced a later version of The Bread Basket. The cover is the same, the layout is the same, but the content is different and refers to war rationing.

This was one of my mother’s cookbooks, but she didn’t make any notes in it, nor are their food stains. She must have got it soon after she was married.

I decide to make “Corn Meal Muffins” for this blog. The original recipe is in the picture just above. I think it might be interesting to use yeast as the leavening in corn muffins instead of baking powder! I hope they turn out.

A couple notes. The recipe calls for “scalded milk”. This is simply milk heated to just below boiling. This kills any bacteria that might interfere with the yeast and/or the taste of the bread. With today’s pasteurized milk, most (but not all) cooks consider this an unnecessary step.

“1 cake of yeast” probably means a 2 ounce cake of wet, compressed yeast. Although caked yeast is supposedly still available, I haven’t seen it in years, so I will use my usual active dry yeast. According to the Red Star website, 1/3 of a 2 ounce yeast cake is equal to 2 1/4 teaspoons of dry yeast. I am making a half recipe, so I should use 3 3/8 teaspoons of dry yeast. (I actually used 1 1/2 teaspoons yeast but would use more next time.)

Yeast Corn Muffins
makes 10

  • 1 cup milk
  • 2 tablespoons butter
  • 7/8 cup cornmeal
  • 1 tablespoon brown sugar
  • 1/2 teaspoon salt
  • 2 1/4 teaspoons dry yeast (note added later: too yeasty, so 1 1/2 teaspoons is my suggestion)
  • 1 egg
  • 1 1/2 cup flour

Scald the milk, then stir in the butter until it melts, then stir in the cornmeal. Add the brown sugar and salt. Let cool to lukewarm, then stir in the yeast, egg, and flour.

Grease a muffin pan (you will only need 10 of the muffin cups). Fill each muffin cup half full. Let rise one hour, until light.

Bake at 375˚ for 22 minutes (or until they test done).

Comments

These turned out great! Unlike baking powder muffins, these did not crumble and fall apart a lot as we ate them. They were rough and chewy! The flavor was perfect. I think these might also be good with some cooked corn off-the-cob stirred into the batter. (Maybe with green chiles and chopped red bell pepper too.)

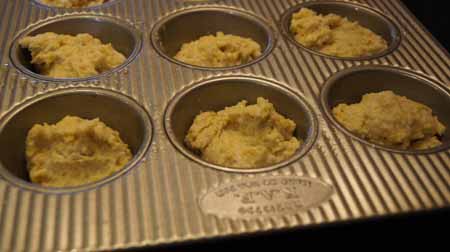
Here are the muffins just after I put the batter into the muffin pan:

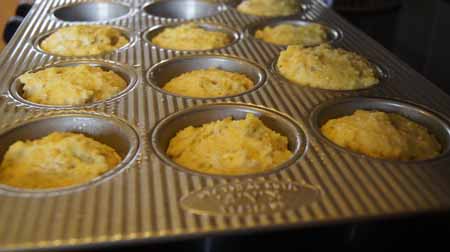
just into panHere they are after an hours’ rise. They look a little lighter or higher:

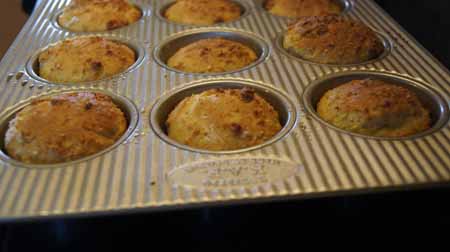
risenAnd here they are baked:

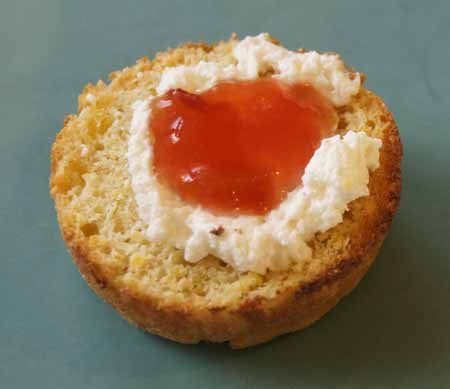
bakedThese weren’t really tall muffins, but this might be my mistake. I made a slight calculation error and only used 1 1/2 teaspoons yeast instead of 2 1/4 teaspoons. Next time they might turn out higher – but they were dang good as is! I liked them split and toasted and spread with cream cheese and jam:

muffin with jam

250 Cookbooks: Baker’s Best Chocolate Recipes

Cookbook #118: Baker’s Best Chocolate Recipes, General Foods Corporation, 1932.

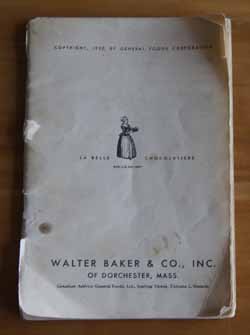
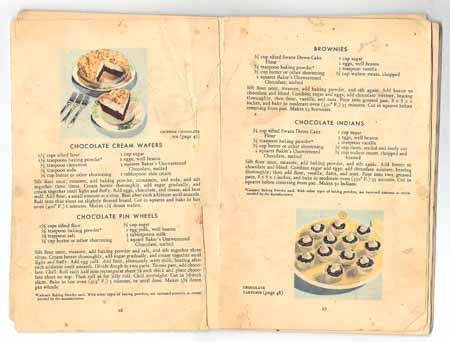
Baker'a Chocolate CookbookThis small cook book had me totally fooled. Piled in a messy stack of booklets, I thought it was just another manufacturer’s cookbook from the sixties or seventies. The cover is missing. The recipes read “modern”, not dated. I find my mother’s notes on a few of the cake recipes, so it wasn’t mine. Finally I think to ask: “when was this published?” OMG, it’s from 1932! It should have been shelved with the vintage cookbooks.

I have found another treasure, albeit a little one.

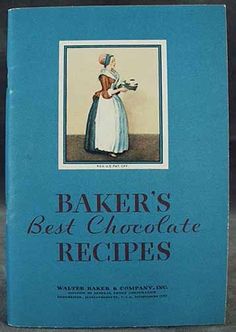
Here is a photo of the cover that I got on the internet:

cover of bakers 1932 CBIn a previous on the Mexican Cookbook, I wrote about the South American origins of chocolate. “The Spaniard ships that returned to Europe were laden with seeds and cuttings, which flourished in various climates.” By 1932, chocolate had been a part of American cuisine for four hundred years. Here’s a quote from the introduction of Baker’s Best Chocolate Recipes:

“Four hundred years of popularity. Few flavors have ever had the widespread popularity of chocolate. Rich . . . smooth . . . fragrant . . .  its delightful flavor has appealed to everyone wherever and however it has been served.”

And about chocolate milk:

“Foamy, creamy-rich cocoa is a wonderful food with which to woo finicky child-appetites – an easy and delicious way of helping to include the daily quart of milk in their meals. Grown-ups welcome cocoa, too, as a way of building up run-down systems. And in this day of slimmer waists, cocoa is popular because it provides nourishment that is satisfying but not fattening.”

According to this book, the first chocolate mill in the US was built on the banks of the Neponset river in Dorchester, Massachusetts. In 1780 it became the establishment of Walter Baker and Company. We can still buy Baker’s chocolate today, although it is currently owned by Kraft Foods.

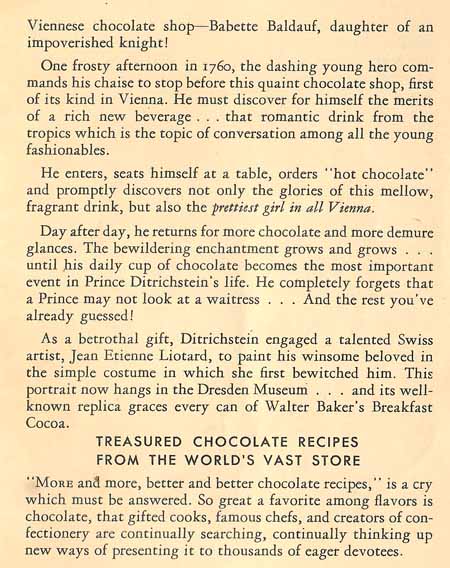
This excerpt from the book gives the story behind the logo:

chocolate storychocolate storyI will definitely keep this cookbook. Not only because it is old, but because it has good basic chocolate recipes, like for a cocoa syrup if I run out of the bottled kind, and cakes and chiffon pie and eclairs and on and on. I decide to make the brownies for this blog. Sure, I have dozens of recipes for brownies, but this one is from 1932! I think one of my older cookbooks has the original brownie recipe, but that will be the subject of a later blog post.

Here is a scan of the brownies page and the facing page, just to show you the condition of this book:

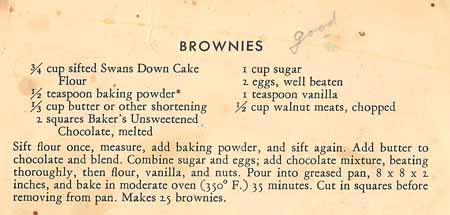
brownies recipeHere is a larger version of the recipe:

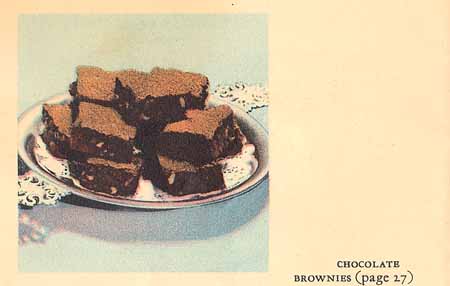
brownies recipeThat’s my mother’s “good” on the recipe. The photo of these brownies is on another page:

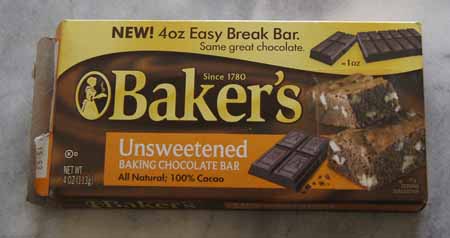
browniesI made these just like the recipe, except I cooked them a little less. I even used Baker’s chocolate:

Baker's baking chocolateBrownies, 1932 Baker’s version

  • 3/4 cup flour
  • 1/2 teaspoon baking powder
  • 1/3 cup butter
  • 2 ounces Baker’s Unsweetened Chocolate
  • 1 cup sugar
  • 2 eggs
  • 1 teaspoon vanilla
  • 1/2 cup chopped walnuts

Stir together the flour and baking powder.

Melt the butter and chocolate in a saucepan and let cool a bit.

Beat the eggs, then add the sugar and beat it in. Add the chocolate mixture, beating thoroughly, then add the flour mixture, the vanilla, and the nuts.

Bake in a greased 8-inch square pan for 30-35 minutes, until they test done with a toothpick.

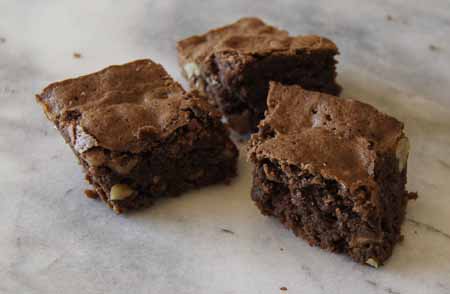
browniesPerfect brownies!

250 Cookbooks: Settlers’ Recipes and Remedies

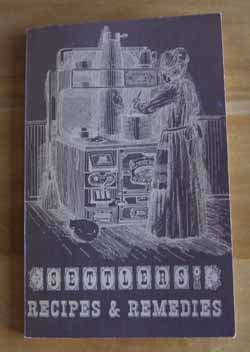
Cookbook #117: Settlers’ Recipes and Remedies, Historic Boulder, Inc., 1978.

Settlers Recipes and Remedies Cookbook“Hiccups are immediately stopped by giving a lump of sugar saturated with wine vinegar.”  “For a headache, peel and slice raw potatoes and bind them on the forehead in a cloth that reaches around the head.” “It will be bad weather if carrots grow deeper.”

Such is the lore of the first settlers in Boulder, Colorado. Settlers’ Recipes and Remedies includes small black and white photos of people and serving ware and  a store and historic homes in Boulder. There are quite a few recipes – some basic, some interesting, some odd – but few very are practical for today’s cooks. No oven temperatures! No cooking times!

I must have bought this book used in a bookstore in Boulder, since “$3.00” is written in pencil on the first page. I’ve never used it as a recipe source. I can’t find any information about it online, except that the Denver Public Library has a copy. Historic Boulder has a current website, but they don’t mention this book.

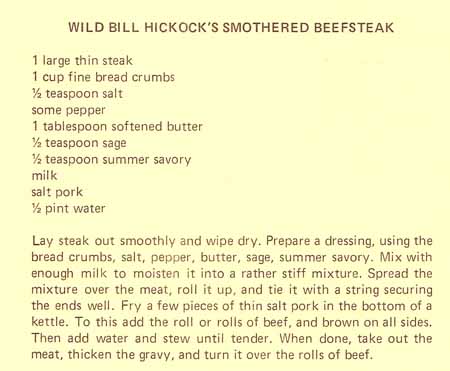
I will cook “Wild Bill Hickock’s Smothered Beefsteak” for this blog. You take a thin steak, smooth a bread stuffing on top, roll it up, and cook it til done. Good basic foodstuff. Then, I will recycle this book.

Beef Rolls recipeSteak Roll
serves 2

  • one thin-cut steak, sirloin or round, about 12 ounces
  • 1 cup fine bread crumbs
  • 1 tablespoon soft butter
  • 1/2 teaspoon sage
  • 1/2 teaspoon summer savory (or, use oregano or thyme)
  • salt and pepper
  • milk, about 1/4 cup
  • salt pork, about a tablespoon, chopped
  • beef broth, 1-2 cups, or use water
  • flour

Lay the steak out on a breadboard and pound with a meat pounder/tenderizer until it is smooth and flat.

Put the breadcrumbs, butter, herbs, and salt and pepper in a bowl. Add enough milk to make a “stiff” mixture (one that hold together when pressed with your hands). Spread this mixture over the steak in an even layer.

Roll the steak (from either side, your choice) and tie with pieces of string. Set aside.

In a pot on the stove top, brown the salt pork. Add the steak roll and brown on all sides. Add beef broth (or water); the roll does not need to be submersed in liquid, just have the depth of liquid at about an inch. Cover the pot and simmer 1 1/2 – 2 hours. Check about every 30 minutes and add more broth or water if it is evaporating away.

The roll is done when it is knife-tender. Remove the roll from the pan and set aside. Add a tablespoon or two of flour to the gravy in the pot and mix in; add water until the gravy is as thick or thin as you like.

Slice the roll and serve with the gravy.

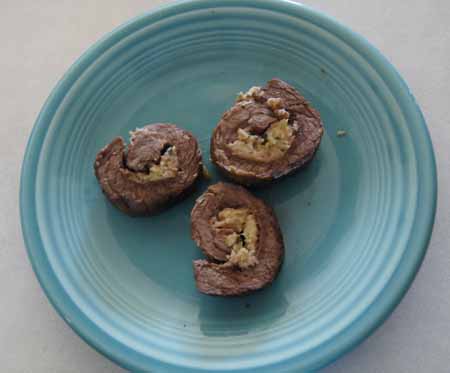
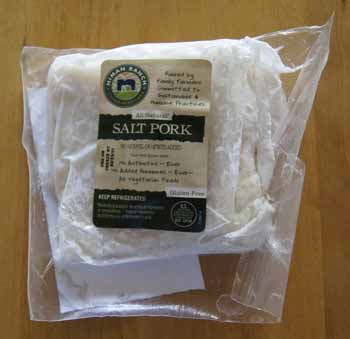
Beef RollsWe liked these – good comfort food. They were excellent with mashed potatoes and peas!I think the salt pork added a lot of flavor. If you can’t find it, use a piece or two of bacon. I was able to find salt pork at Whole Foods. Part of the current movement to bring saturated fats back into the US diet, I guess!

Salt Pork

250 Cookbooks: Weber Charcoal Barbecue Kettles

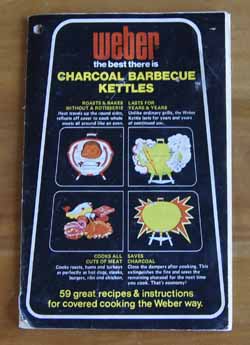
Cookbook #116: Weber Charcoal Barbecue Kettles, Weber-Stephens Procuts Co., Arlington Heights, Illinois, circa late 1970s.

Weber Charcoal Barbecue Kettles“Pork tenderloin surprise packages on p. 15, but missing that page!” That is what I wrote in my database when I entered this small instruction and recipe booklet. And that recipe is all I think about now when I pick up this booklet to find a recipe for this blog! None of the other (remaining) recipes are anything I want to make.

What are pork tenderloin surprise packages? Well, as I recall, you take some bacon and wrap it around a thick slice of pork tenderloin topped with – something else – and toothpick it all together. You put it on the grill and cook it – at some temperature – until done. Cheese enters the picture at some point. We loved these back in the day but I haven’t made them in years.

On a hunch, I googled “pork tenderloin surprise packages” and hit the jackpot. I guess I’m not the only fan of this recipe! I found several very similar versions of the recipe online. Yay!

Here is a photo of the original recipe (1972 edition, not the same as my little booklet) from the Let’s Talk BBQ site. Visit that site for great photos of the steps for making Pork Tenderloin Surprise Packages! Cooks.com has a version that is a little easier to read. Saz’s site’s version suggests mozzarella cheese and specifies “indirect heat” and a cooking time of 55 minutes (not 45 minutes like the original) and a doneness temperature of 170˚. I like this version too; it suggests that you can cook them in the oven.

I am tickled to find the original recipe, but I still have some work to do: I need to work out how to cook these on a gas grill, both time and temperature.

I know that the bacon grease will drip off these little packages – so I begin by making sure the drip pan at the bottom of my gas grill is clean and wiping off some of the chunks of build-up on the inside of the BBQ. My grill top has a temperature gauge; while cooking these packages I will nudge the burners to get it to read 350-375˚. I’ll put them over indirect heat. Starting at 40 minutes, I will check the temperature of the pork with an instant-read thermometer. When the temperature is about 160˚, I’ll add the cheese to the top and check every couple minutes until the cheese is melted. Ready, set, go!

Here is my version of the recipe.

Pork Tenderloin Surprise Packages
this is written for one; multiply as necessary

These work best with the pork in a thick chunk. Pork tenderloins have both a skinny and a fat end. I found that I could cut a 2-inch thick slice from a skinnier end and flatten it to 1 1/2-inch if necessary.

  • 1 slice of pork tenderloin, 3-6 ounces (depending on appetite); thickness about 1 1/2-inch
  • seasoning (salt and pepper; but you barely need salt if the bacon is salty)
  • 2 slices bacon
  • 1 slice of cheese: aim for 1/4-inch thick
  • 1 slice of tomato: aim for 1/2-inch thick
  • 1 chunk of bell pepper
  • 1 slice of cheese (I used sharp cheddar)

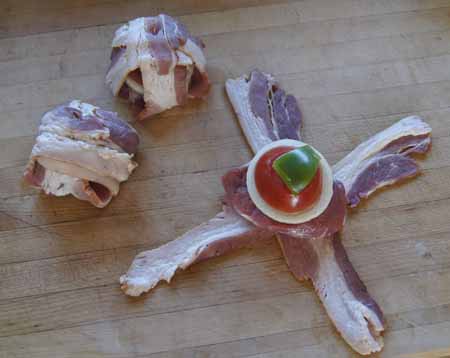
Cross the two slices of bacon and put the pork tenderloin in the center. Add the onion, then tomato, then bell pepper. Fold the bacon ends in and secure with a toothpick.

Heat your gas grill to about 375˚. I did this by turning on all the burners to get the grill good and hot. Then, on my Weber gas grill with three burner strips, I set the front one to “high” and turned off the other two. I found that this maintained the 375˚ temperature for the duration of the cooking.

Put the pork packets on the grill over indirect heat: on my grill, I put them over the back two unlit burners. Close the BBQ.

After 40 minutes, begin checking the temperature of the pork tenderloin. Cook the meat to 160˚. (Mine took 45 minutes.) Add the slice of cheese to the top of the package and cook only until the cheese melts – about 5 minutes.

Serve!

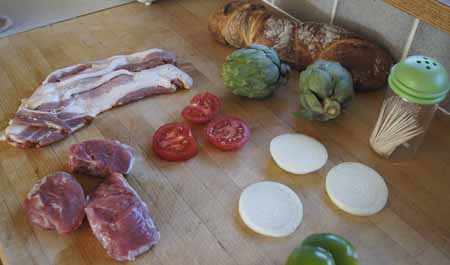
Preparation steps:

These are really easy to make. I served them with artichokes and fresh sourdough bread.

surprise packagesSlice and stack! An X marks the spot.

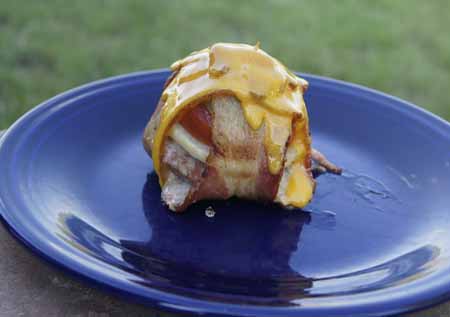
surprise packagesAnd here is one of the grilled pork tenderloin surprise packages:

pork tenderloin surprise packagesYes these were fatty but who cares! The onion was soft-cooked, the tomato perfect, and the bacon – well, if you like bacon, you know that bacon makes everything taste great. I’m glad I found my old recipe and made these again. The missing pages from this booklet may show up tucked in one of my other cookbooks, but it doesn’t matter anymore, I have the recipe I want. Now I can recycle the remains of this booklet.

250 Cookbooks: Pasta

Cookbook #115: Pasta, The Good Cook Series, by the Editors of Time-Life Books, Time-Life Books, 1982.

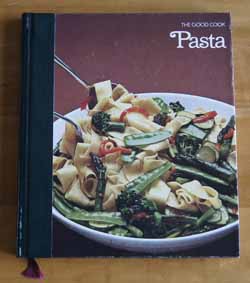
Pasta CookbookThis is a great reference for anyone who loves to make – or eat – pasta. The photos of pasta varieties and preparation are gorgeous and helpful. I am sure I used this book when I was learning the techniques of making fresh pasta. The information is this book is still applicable, and I will definitely keep it!

Recipes in this book? My note to myself about this book is “most of the recipes are rather high calorie, have lots of cream, or include frying”. In my older age I am a bit more lax on (good) fats in my diet, especially having just read “The Big Fat Surprise”. I will keep this book out for awhile, and explore the recipes I noted before: macaroni and cheese, stuffed pasta, dumplings, gnocchis, pasta pies, fried noodles, and oriental pastas.

The first half of this book is all about making, cooking, and saucing pasta. The second half is an “Anthology of Recipes”. I was sort of surprised that this is collection of previously published recipes – not ones developed specifically for this book. The recipes were written by world-renowned chefs or copied from out-of-print or foreign books. It is a very interesting collection to peruse.

For this blog? I’ll make one of the macaroni and cheese recipes. I don’t make macaroni and cheese a lot. Granted, it’s a great comfort food – but it doesn’t often fit in my menu plans. We almost always eat meat at dinner, and macaroni and cheese is a bit too rich as a side dish. When I do make it, I make a white sauce plus cheese, then fold in cooked macaroni. A few times I have made the macaroni from scratch using my pasta machine, and it was really delicious. (This was a good main dish when my daughter was in a vegetarian phase.)

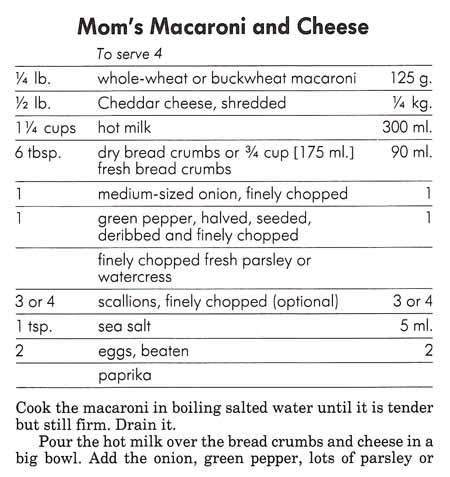
The recipe I choose to make from the Pasta cookbook is a baked variety. It is rich with cheese, but not the added butter of a white sauce. The suggested macaroni is whole wheat, so, added fiber and lower glycemic index. I plan a meal of grilled sirloin steak, steamed broccoli, and “Mom’s Macaroni and Cheese”.

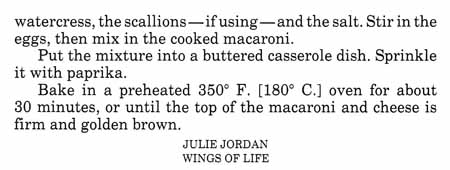
Mom's Mac and CheeseMom's Mac and CheeseNote the credit for this recipe: “Julie Jordan, Wings of Life”. Here is an interview-article on Julie Jordan (Cabbage Town Chef), a woman of about my age who ran a vegetarian restaurant. She mentions “Mom’s Mac and Cheese” in the interview. I love the way she writes in the above recipe: “lots of parsley”. Yes! Cooking is not about following a recipe to a tee.

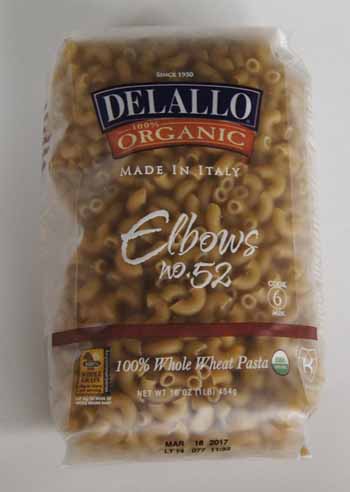
Here is the whole wheat macaroni I found in a local store:

whole wheat macaroniI made a few small modifications. Below is my version.

Baked Macaroni and Cheese with Whole Wheat Noodles
serves 4

  • 1/4 pound whole wheat macaroni
  • 1/2 pound extra sharp cheddar cheese, grated
  • 1 1/4 cups hot milk
  • 1/2 cup bread crumbs (preferably from whole wheat bread)
  • 1 small onion, chopped very fine
  • 2 tablespoons finely chopped bell pepper
  • parsley (to taste, maybe 1/4 cup chopped)
  • 1/2 teaspoon salt
  • 2 eggs, beaten
  • paprika

Cook the macaroni according to the package directions. Do not overcook it: it needs to be done but still firm.

Put the bread crumbs and cheese in an appropriately-sized casserole and pour the hot milk over the mixture. Add the onion, bell pepper, “lots of parsley”, and salt. Stir in the eggs, then mix in the cooked macaroni. Sprinkle with paprika.

Bake at 350˚ for about 30 minutes, until the top of the casserole is golden brown. Serve!

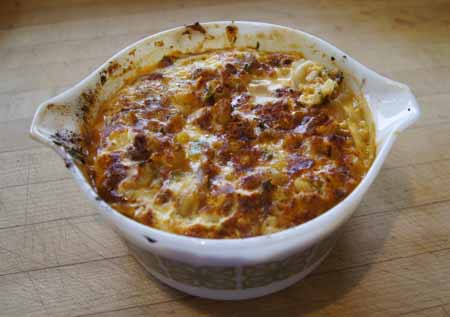
Baked Whole Wheat Macaroni and CheeseYum. This macaroni and cheese earned a thumbs up from both of us. I will make it again!

250 Cookbooks: Vive La Machine

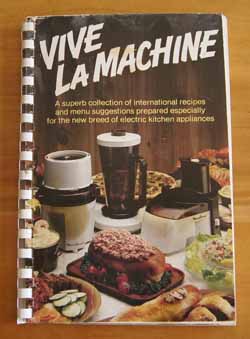
Cookbook #114: Vive La Machine, Moulinex Products, Inc., editor Sue Spitler, published by Marketing Communications International, USA, 1977.

Vive La Machine CB“A superb collection of international recipes and menu suggestions prepared especially for the new breed of electric kitchen appliances.”

And what is the “new breed” of kitchen appliances? Food processors: counter-top machines that shred, slice, chop, and puree foods. They became available for home cooks in the US sometime in the 1970s. I got my first one in the 80s. It was a “La Machine”. Hence I own this cookbook!

But alas, that old La Machine bit the dust. It did a pretty good job of shredding: I used it a lot to grate cheese, zucchini and carrots. The slicer worked okay but it was often easier to slice small amounts of vegetables with just a knife. You had to hold a bowl under the spitter-shute because the shredded/sliced foods came flying out. I liked the nice small bowl with a spinning blade for dicing vegetables and grinding meats. A drawback of the  La Machine was that it was hard to clean, since the dirty parts were not immersible.

But the big issue with my La Machine was the funky connection of the top to the bottom.  I had to buy new parts at least once. I eventually replaced it with a Cuisinart brand food processor.

I kind of like this Vive La Machine cookbook. The recipes rely on freshly grated and chopped foods, thus recipes are from-scratch and up my alley.

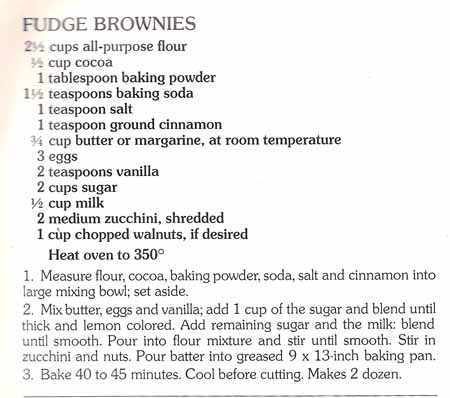
For this blog, I choose to make “Fudge Brownies”.

Fudge Brownies RecipeI am going to re-name these “Chocolate Zucchini Brownies”. They are chocolaty, but not really fudgy.

My version is below: I halved the recipe and made a couple small changes.

Chocolate Zucchini Brownies
makes an 8×8-inch pan of brownies

  • 1 1/4 cups flour
  • 1/3 cup cocoa
  • 1 1/2 teaspoons baking powder
  • 3/4 teaspoon baking soda
  • 1/2 teaspoon salt
  • 3/4 teaspoon cinnamon
  • 6 tablespoons butter (3/8 cup)
  • 2 eggs
  • 1 teaspoon vanilla
  • 1 cup sugar
  • 3 tablespoons milk
  • 1 cup shredded zucchini, lightly packed (about 1 medium zucchini, whatever that is)
  • 1/2 cup chopped walnuts

In a bowl, stir together the flour, cocoa, baking powder, baking soda, salt, and cinnamon. Set aside.

In a mixer, blend well the butter, eggs, vanilla, and sugar. Add the milk and mix in. Add the flour mixture and mix on low speed until smooth. Add the zucchini and nuts.

Pour into a greased (I used non-stick spray) 8-inch square baking pan. Bake at 350˚ for 35-45 minutes, or until it tests done with a toothpick.

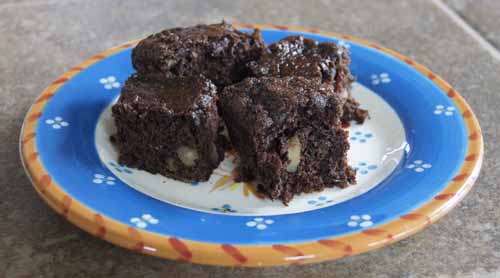
Chocolate Zucchini BrowniesThis recipe is a keeper! Yes I already have about a dozen great brownie recipes, but this one needs to be put in my repertoire. These are kind of light and fluffy and are especially moist. If no one told you zucchini was in them, I doubt you would guess. And the cinnamon – the cinnamon! It adds a . . . je ne sais quoi touch . . . never leave out the cinnamon.

These brownies fell just a little bit in the center of the pan. Since we live at 5400 feet, next time I will apply my high-altitude baking suggestions to see if it helps. Doesn’t matter a lot, these taste yummy!


Favorites: Sukiyaki

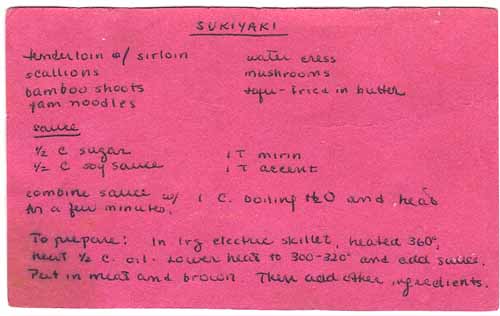
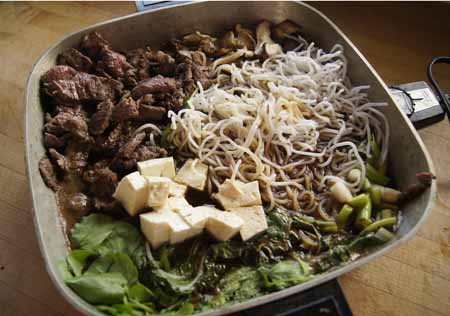
One of my college roommates was Japanese, and she wrote out this recipe for Sukiyaki for me:Sukiyaki RecipeWhen we cooked in our on-campus apartment, we made this in my electric fry pan. She was a very neat person (I, on the other hand, can tend to be slovenly) and put neat little piles of the different ingredients – meat, veggies, tofu, noodles – in different sections of the pan. I always loved this meal. And the memories of our times together, including visits to her aunt’s house in Southern California.

I just re-discovered my electric fry pan and was inspired to dig out my old recipe card. I actually found it! Here is how I prepared Sukiyaki last Saturday, here in the year 2015.

Sukiyaki
serves 2

  • 9 ounces beef tenderloin or sirloin, cut into small strips
  • a couple green onions, cut into 1-inch pieces
  • bamboo shoots, about half a can
  • yam noodles (fresh, from an Asian market, or maybe a local supermarket)
  • water cress (one small bunch; could use spinach)
  • mushrooms, sliced (I used fresh shitakes)
  • tofu, about 10 half-inch chunks
  • sauce: 1/4 cup sugar, 1/4 cup soy sauce, 1/2 tablespoon mirin (rice wine, or use sherry), 1/2 cup water

Heat a large electric fry pan to 360˚ (or use a large, flat skillet on your stove top). Add a few tablespoons vegetable oil and fry the meat until brown. Push the meat to a corner of the pan. Lower the heat to 320˚ and add the sauce. Put the green onions, bamboo shoots, noodles, water cress, mushrooms, and tofu in separate piles in the pan. Continue to heat until all the ingredients are hot. Serve!

Sukiyaki

250 Cookbooks: Hamilton Beach Automatic Heat Control Appliances

Cookbook #113: Hamilton Beach Automatic Heat Control Appliances, Hamilton Beach, Racine, Wisconsin, Division of Scovill Manufacturing Company, circa 1970 (no date in booklet).

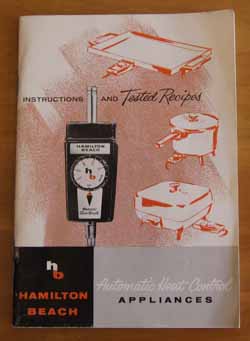
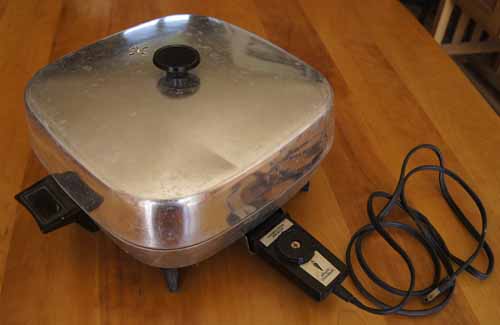
Automatic Heat Control Appliances CookbookI found my old electric fry pan while organizing my cooking stuff in the basement. I wavered between putting it on the “definitely toss” or the “maybe recycle” pile for several weeks. I haven’t used this fry pan in years, one reason being is that it is missing the little metal circle that enables you to set it at a particular temperature.

Then I found this instruction/recipe booklet: Hamilton Beach Automatic Heat Control Appliances. (Is is one of the “ccok books” listed in my database.) That inspired me to give this appliance one last meal to cook for us!

I carry the fry pan upstairs and wash off the dust and cobwebs. The bottom of the bottom has a small layer of burned-on fat, but I don’t bother scrubbing it off. The top looks like it is water-spotted, but it doesn’t clean up with an SOS pad.

electric fry panThis unit has three pieces: the lid, the fry pan, and the plug-in thermostat. Thus, you can clean the pan by first unplugging the thermostat, then immersing the pan in water to clean. I note a patent number on the plug-in thermostat:

3007028

This US patent was granted in 1961 to G. E. Sorenson for an “Electrically heated device with plug-in thermostat”. (Patent page.) The timing makes sense; I acquired this fry pan about 1969-71. I remember my college roommate making sukiyaki in it. The booklet tells me that the plug-in thermostat also works with a griddle and a saucepan (I had neither).

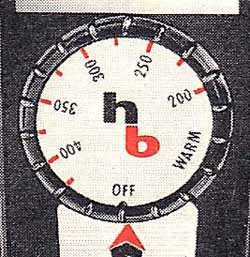
I decide to make “Chicken Tetrazzini” on page 42 of the booklet. But how am I going to set the temperature?  Hmmm. There is a photo of the dial on the cover of the booklet. Maybe if I scan it?

HB dialOkay – now I’ll print the above and cut it out and tape it to the thermostat. Cool, it works! I’m ready to make the tetrazzini.

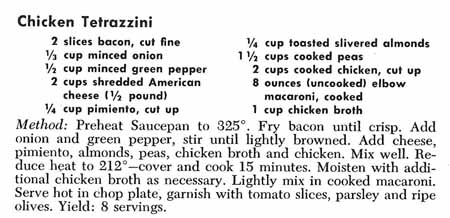
Chicken Tetrazzini recipeI will make a half-recipe. Instead of American cheese, I will use regular cheddar cheese. For cooked peas, I will use frozen peas, straight from the bag. Elbow macaroni – !!! – none in my pantry! I don’t feel like driving back to town, so I substitute whole-grain cavatelli. I did pick up pimientos yesterday – I was surprised to find them canned at Sprouts. Pimientos are less prevalent these days than they were in the 1970s. I usually substitute red bell peppers. According to Wikipedia, a pimiento is a chili pepper that is smaller and a bit more sweet and succulent and aromatic than a bell pepper.

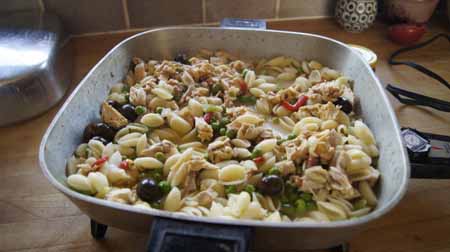
Below is my version of Chicken Tetrazzini. I used the electric fry pan, but any stove-top pan could be used.

Chicken Tetrazzini
serves 3-4

  • 1 slice bacon, chopped fine
  • 1/4 cup diced onion
  • 1/4 cup chopped green bell pepper
  • 2 tablespoons pimiento (or use chopped red bell pepper)
  • 1 cup cooked chicken, cut into chunks
  • 3/4 cup frozen peas
  • 2 tablespoons slivered almonds
  • 1/2 cup chicken broth (you may need more)
  • 1 cup grated cheddar cheese
  • olives and parsley (optional)
  • 4 ounces (dry) elbow macaroni (can substitute another type of pasta)

Cook the bacon in a skillet or sauce pan. (I used the electric fry pan set at 325˚.) When the bacon is crisp, add the onion and green pepper and stir until softened. Lower the heat and add the pimientos, chicken, peas, almonds, chicken broth, and cheese. Cover and cook for about 15 minutes. If the mixture gets too dry, add a bit more chicken broth.

Meanwhile, cook the macaroni in salted boiling water. Drain, then add to the chicken mixture. Lightly mix and heat. If you like, add a few olives and some parsley. Serve!

ChickenTetrazziniWe both liked this! It’s tasty and easy.

I’ll keep my electric fry pan. It would be good for the Stylish Meat Balls I made last week, because it is a large pan and maintains a low heat setting. I’m sure I’ll find other uses now that I have rediscovered it.

250 Cookbooks: Rice – 200 Delightful ways to serve it

Cookbook #112: Rice – 200 Delightful ways to serve it, Southern Rice Industry, New Orleans, LA, 7th edition, 1937. Prepared by the home economics department of the Southern Rice Industry, New Orleans; recipes tested and approved by the Home Economics Department of Louisiana State University (Director: Beth Bailey McLean).
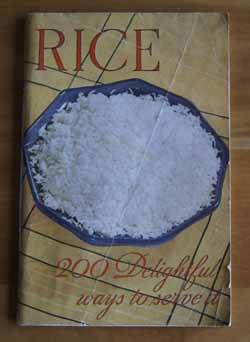
RiceCB“The set table must appear balanced. Dishes must be so placed that no spot is crowded, no side or end is over-balanced with dishes. All the lines on the table should go across or lengthwise of the table. A diagonal line attracts attention, and should be avoided. Therefore, the handles of dishes, bread-and-butter spreaders, oyster forks, salt-and-pepper sets, must follow this rule. If round doilies are used, the threads should also be placed parallel to the edge of the table, not on a diagonal. All dishes, linen, and silver must be placed to follow this rule, or the effect is one of carelessness.”

This is the delightful advice from page 11 of Rice. Yes the book has many recipes for rice, but I enjoy the glimpse into 1930s Americana even more.
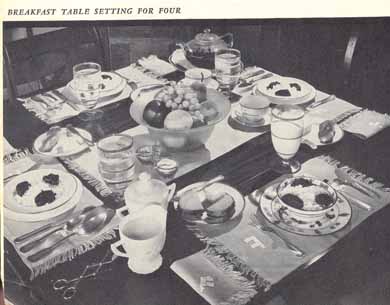
table settingMy copy of Rice is almost 80 years old but is in excellent condition. I am not sure whether this cookbook was my mother’s, her mother’s, or from the “Ruth C. Vandenhoudt” house (relatives of my father’s mother). It doesn’t look like it was ever used: no writing or food stains.

As the title states, this book contains 200 recipes for cooking with rice:

“For this book, we have selected recipes that are usable in every section of the United States. Some of the rice recipes are excellent for the main dish in the low cost diet. Other rice recipes are ideally suited to the most elaborate menu in the high cost diet.”

Rice waffles, muffins, fritters; codfish and rice omelet, rice with poached eggs, cheese soup with rice, cream of rice soup, crabs with rice, Mexican and Uruguayan rice, rice loaves, jambalaya, risotto, baked rice and cheese, luncheon salad, rice pudding, rice and raisin pie . . . and more. The recipes are dated, but I’ll be able to adapt at least one of them for this blog.

More Americana, on “Types of Table Service”:

“The English, or family type, is the one most suited to the average family where there is no maid or cook. In this service, all the food is served att he table by the host and hostess, instead of being brought in from the kitchen in individual servings. The hostess of today would do better to perfect this type of service, rathere than to attempt the more formal types.”

 “Rules for Waiting on a Table”:

  1. Food dishes and soiled dishes from the last course must be removed.
  2. Clean dishes and food for the next course must be placed.
  3. This exchange must be done quietly and quickly.
  4. There should be no unsightliness or appearance of great haste.
  5. There should be no display of dishes or silver.
  6. There should be no unnecessary trips to and from the kitchen.
  7. Always consider the comfort of those at the table. Do not make them fear an accident because of the clumsiness or carelessness of the waitress.

I TOTALLY FAIL! If I serve you food, you may be fearing an accident because of my clumsiness!

Okay, enough levity. For this blog, I decide to cook “Stylish Meat Balls”.

Tomato soup? Was there really canned tomato soup in the 1930s? Yes, apparently so. In 1897 a a chemist at  Campbell’s named Dr. John T. Dorrance “invented” Campbell’s Soup as we know it. His idea was to take the water out of the soup, thus selling it in a smaller can and for less money. Here is a little on the history of Campbell’s Tomato soup and on the soup can design.

I do keep canned tomato soup in my pantry, but mostly for making French dressing. For Stylish Meat Balls, I want to make my own tomato soup. I consulted Cooks Illustrated, and modified their recipe for “Ultimate Cream of Tomato Soup”. Below is my version of this recipe.

Uncanned Tomato Soup

  • 1 (28 ounce) can whole or diced tomatoes
  • 1 tablespoon brown sugar
  • 2 tablespoons butter
  • 2 large shallots or 1 small onion, chopped fine
  • 1 tablespoon tomato paste
  • salt to taste
  • 1tablespoon flour
  • 1 cup chicken stock

Drain the tomatoes; reserve the juice. Pat the tomatoes dry, then place them on a half-sheet pan lined with parchment. Sprinkle the tomatoes with the brown sugar. Bake at 450˚ until the liquid evaporates and the tomatoes begin to color; do not let them char. Remove from oven and let cool.

Heat the butter in a pan and add the shallots (or onions). Cook until they soften, then add the tomato paste and a little salt. Cook a few minutes, then add the flour and cook, stirring constantly for about 30 seconds, until the flour is incorporated. Stir in the chicken broth, the reserved juice from the can of tomatoes, and the tomatoes that were roasted in the oven. Let simmer about 10-15 minutes.

If you have an immersion blender, use it to blend the hot soup. If not, let it cool a bit and then blend it in batches in a blender or food processor. If the soup is too thick for your taste, thin it with water or chicken stock.

The soup is ready to eat at this point, or you can add a few tablespoons of cream. I tasted it without cream and said “yum”. But we didn’t eat it as soup, I used it in the “Stylish Meat Balls”.
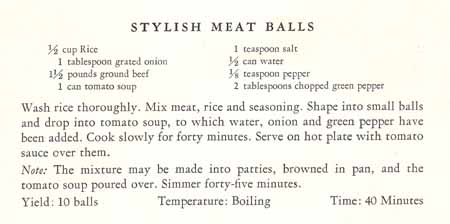
Stylish Meat BallsBelow is my recipe for Stylish Meat Balls. Note that the original recipe says to shape into “small balls”, but also note that it says it makes 10 meat balls. For 1 1/2 pounds of meat, that’s 2.4 ounces per meat ball. I consider those large meat balls. When I made the recipe, I made about 16-20 meat balls, and they were bigger than the meat balls I usually make.

Stylish Meat Balls
serves 4-6, depending on appetites

  • 1/2 cup rice
  • 1 1/2 pounds ground meat
  • 1/2 teaspoon salt
  • 1/8 teaspoon ground pepper
  • Uncanned Tomato Soup (recipe above)
  • 1 tablespoon grated onion (this is very good)
  • 2 tablespoons chopped green pepper

Mix the rice, ground meat, salt and pepper. Form into about 16-20 meat balls.

Heat the tomato soup. (I suggest a very large flat pan, so that the meat balls can rest in a single layer in the pan.) Add the meat balls, cover, and cook over very low heat for about 45 minutes. If you cook this too hot, it WILL stick to the bottom of the pan and burn. Check it frequently as it cooks and add a little water if it gets too thick.

Serve the meat balls – and the sauce in which they cooked – over rice or noodles. I served mine over brown rice with cooked mushrooms and fresh basil:
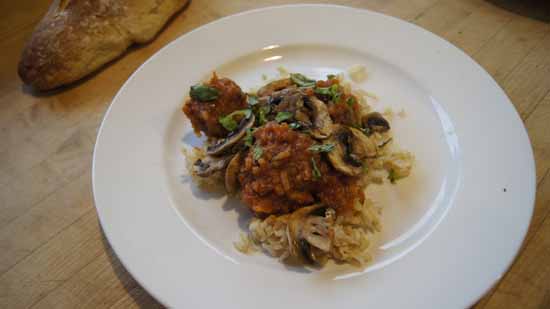
Stylish Meat BallsMy Stylish Meat Balls got the comment “these are better than your usual meatballs”. I liked them too! The rice inside the meat balls keeps them moist. (They are kind of like inside-out Pearl Balls!) They definitely earned a “yum” from me.