250 Cookbooks: Low Fat and Fit!

Cookbook #73: Low Fat and Fit, Betty Crocker, General Mills, Inc., Minneapolis, Minnesota, 1996.

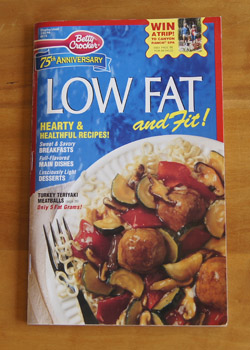
LowFatAndFitCBLow Fat and Fit is one of those small booklets that tempt you as you wait at the supermarket check-out stand. I paged through this one in 1996 and took it home for $2.99.

This booklet includes a good selection of breakfast, main dish, salad, and dessert recipes. Typically, the recipes shave calories by using low-fat dairy products, small amounts of oil or margarine (1 teaspoon to brown 4 chicken breasts), and egg whites or egg substitute instead of whole eggs. Lean meats and portion control also trim calories. Lifestyle choices such as physical exercise is recommended to help maintain a healthy weithy. Four pages are devoted to what is essentially an ad for a health and fitness ranch spa.

Yada yada yada. Nothing very new or exciting in this cookbook. I decided to try “Chicken Breasts with Sun-Dried Tomato Sauce” for this blog.

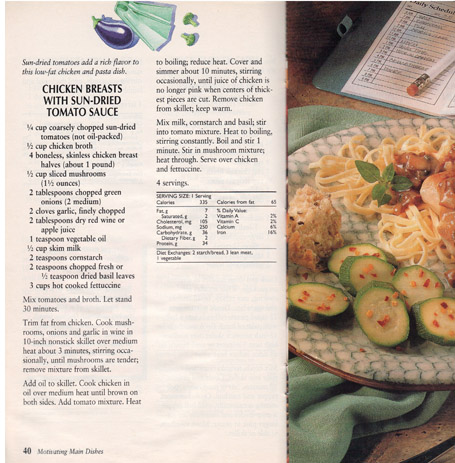
Chicken Breasts with Sun-Dried Tomato SauceNote that the recipe calls for sun-dried tomatoes that are not oil-packed. I think the only reason for this choice is to save calories. The oil-packed ones I used only had 10 calories per piece. It’s kind of ridiculous the way they trim calories off the recipes.

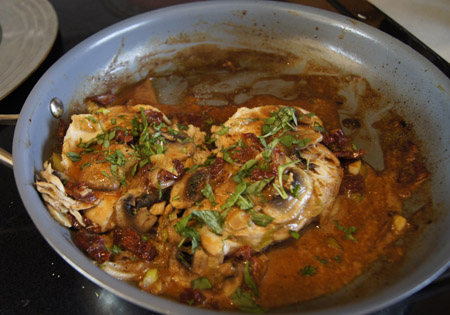
These chicken breasts were not good enough to make again. Even my photo is pretty terrible. My dining partner picked out the sun-dried tomatoes, saying they tasted like the briny olives that he hates (and I love). I cleaned my plate, but was not “wowed” enough to copy the recipe in as a “keeper”.

Chicken with Sun-Dried Tomatoes I was about to recycle Low Fat and Fit, but a few of the breakfast items made me hesitate: Crunchy Oven French Toast, Oatmeal Pancakes, Ricotta-Banana Crepes, and Poppy Seed Drop Scones. I’ll keep it around for awhile just in case.

Since this sauced chicken recipe was not a hit, I’ll share a keeper of a recipe that I make a lot. I call it “Chicken With Veloute Sauce and Veggies”. I like the sauce because it is easy, semi low-fat, and has wine in it. The original recipe called for artichoke hearts, but I use whatever I have on hand.

Chicken With Velouté Sauce and Veggies
serves 2

  • scant 2 tablespoons butter and 2 tablespoons flour (this depends on how obsessive you are feeling about too many calories)
  • 1 cup chicken stock
  • 2 boneless chicken breast halves or chicken tenders (about 9 oz. for 2 people)
  • 1 egg
  • flour seasoned with salt and pepper (enough to coat the chicken pieces)
  • extra-virgin olive oil to barely cover bottom of pan (you can use a different vegetable oil)
  • 1/3 cup dry white wine
  • vegetables: canned or frozen artichoke hearts (NOT the marinated ones), sautéd or gently cooked mushrooms, julienned zucchini, celery, carrots, onions, or whatever else comes to mind

Melt the butter in a small sauce pan, then stir in the 2 tablespoons flour and cook for 2–3 minutes; do not allow to brown. Stir in the chicken broth and some freshly ground black pepper; boil and cook about 3 minutes until thickened. Set aside. (It might get scummy, so cover top with plastic wrap if you are worried about it.)

If using chicken breasts (rather than chicken tenders), pound them to 1/2-inch thick. Whisk the egg with a little water. Dip the chicken in the egg mixture, then in the salt-and-peppered flour.

Heat a fry-pan until it feels hot when you hold your hand a couple inches above it. Add the olive oil and tilt to cover the pan. Set to medium high heat. Cook the chicken about 5 minutes on each side until golden brown and nearly cooked through. Remove from pan and set aside.

With the skillet at medium-high heat, add the wine, stirring to de-glaze the pan. Add reserved sauce and cook a few minutes, stirring constantly. Stir in the vegetables. Add the browned chicken breasts to the sauce and cook them for a few minutes. Sometimes the breasts are larger and need a few more minutes to cook, sometimes smaller pieces like tenders only need a brief time to warm up to serving temperature.

I usually serve this over rice, but pasta or about any grain would work too.

Enjoy!

250 Cookbooks: Cooking Through the Year

Cookbook #70: Cooking Through the Year. Shirley Gill, Smithmark Publishers Inc., NY, NY, 1994.

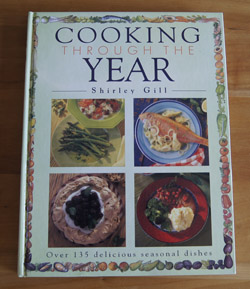
Cooking Through the YearCooking Through the Year is a beautiful cookbook. Over the years that I have owned it, I have often left it out on a coffee table, leisurely paging through the glossy photos and interesting recipes. At the time of this blog, it had been shelved too long – time for it to come back out and be enjoyed again.

A gift from my daughter, I will definitely keep this cookbook!

This book has no preface, no introduction, and no personal information at all about Shirley Gill, the author. I like to know about the authors of my books! I resorted to a Google search and found this on Amazon:

“Shirley Gill graduated with a diploma in Home Economics before starting work in publishing, first for the Food Magazine, and then for Cook’s Weekly. She worked as Cookery Editor of the successful Taste magazine, then later moved to Essentials. Since then Shirley has worked as a food writer and home economist, contributing to many books and magazines.”

Shirley has also authored or co-authored several other cookbooks, including recent ones on wok and pizza cooking.

Cooking Through the Year is a great resource for Saturday night and company dinners. Each recipe is just a little fancier than my usual fare. Everything I have tried from this book has been great. Many are a little rich for our calorie budget, but in moderation, they can fit into a sensible eating strategy. These titles exemplify the variety of recipes in this cookbook: Spiced Eggplant with Mint Yogurt, Skate with Lemon and Capers, Venison with Cranberry Sauce, Spiced Sweet Potato Turnovers, Spaghetti with Herb Sauce, Smoked Trout Pilaf, Cod with Spiced Red Lentils, Onion and Gruyère Tart, and Rhubarb Meringue Pie. There are over 135 recipes in all in this 8 1/2 x 11-inch book.

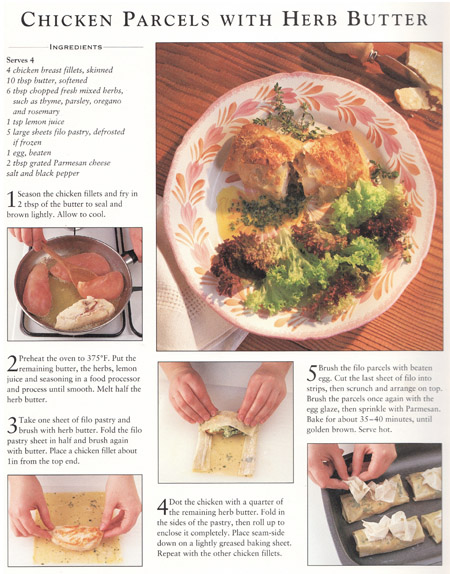
I chose to make “Chicken Parcels with Herb Butter”. The scan below illustrates both the recipe style and Karl Adamson’s  photography.

Chicken Parcels RecipeThe instructions are clear, and the photos are very helpful. I will cut the recipe in half, and use fresh herbs from my own garden:

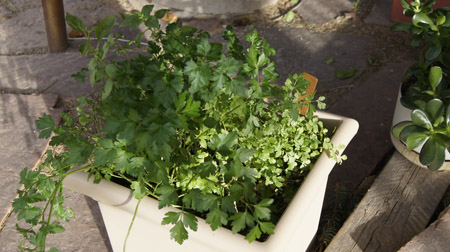
herb gardenI harvested a mixture of basil and thyme and a little parsley. I like the way the recipe is “open-ended” in the choice of herbs.

To go with the Chicken Parcels with Herb Butter, I made “Spinach Salad with Bacon and Shrimp” on page 10 of this cookbook. It was a good variation of one of our favorites: wilted spinach salad. I used only the lean part of strips of bacon to lower the fat. The shrimps added a nice flare! I’ll make it again.

Chicken Parcels with Herb Butter
adapted from Shirley Gill’s Cooking Through the Year
serves 2

  • 2 boneless chicken breasts, about 4-6 ounces each
  • 5 tablespoons soft butter, divided (I used unsalted butter)
  • about 3 tablespoons chopped fresh herbs: basil, thyme, parsley, oregano, rosemary, cilantro – your choice!
  • 1/2 teaspoon of lemon juice, if you have it
  • 3 sheets of filo pastry (available frozen in most supermarkets)
  • 1 beaten egg
  • 1 tablespoon grated Parmesan cheese
  • salt and pepper

Fry the chicken breasts in a tablespoon of hot butter until lightly brown. This step seals the outside of the breasts; the inside will be cooked later. Sprinkle the breasts with a little salt and pepper as they cook.

Chop up the fresh herbs by hand or use a food processor. Mix them with 4 tablespoons butter, salt and pepper, and a little lemon juice (optional), then melt half of this herb butter.

Take a sheet of the filo dough and brush it with the melted herb butter. Fold the filo sheet in half and brush again with herb butter. Place a chicken breast just below the top of the prepared sheet.

Dot the chicken with half of the unmelted herb butter. Fold in the sides of the pastry, then roll up to enclose completely. Place on a greased or parchment-lined half sheet pan. Repeat with the other chicken breast.

Brush the filo-wrapped chicken with the beaten egg. If you like, use the third sheet of filo dough to decorate the parcels: cut into strips, then scrunch up and arrange on top.

Brush the parcels again with beaten egg, then sprinkle with Parmesan cheese.

Bake at 375˚ for 30-35 minutes, until golden brown.

Comments

These are great! I’ll make them again.

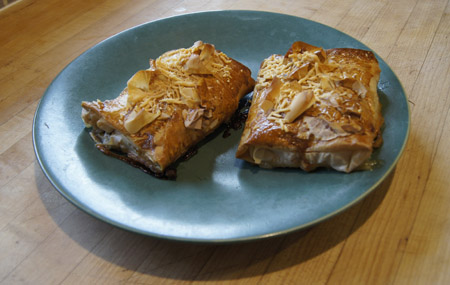
Chicken Parcels

250 Cookbooks: 100 Best Chicken Recipes

Cookbook #69: Better Homes and Gardens. Better Homes and Gardens, Meredith Corporation, U.S.A., 1982. “Courtesy of Holly Farms.”

100 Best Chicken RecipesNot sure where I got this cookbook. It’s water-warped and stained but not written in. It might have been a freebie booklet that came with a cookbook or a package of Holly Farms chicken. (I still can buy Holly Farms chicken!)

Most recipes in this booklet call for cut-up bone-in chicken pieces or cooked chicken. If boneless chicken breasts are called for, you are directed to bone them yourself. Back in 1982, boneless chicken breasts were expensive! I learned how to bone them to save money. Today, frozen boneless-skinless chicken breasts are easy to find, and not terribly expensive. I love their convenience. Oddly enough, it’s hard to find a package of cut-up chicken in stores these days; instead, thighs, legs, wings, and breasts are sold separately. Whatever happened to “pick-of-the-chix”?

I an not entranced with the recipes in this booklet.  Many of them start with chicken pieces that are fried for about 15 minutes, then sauced and cooked to completion. So, when you go to eat, you have to fish the cooked chicken out of the sauce, and away from the bones, and the fatty skin if you are watching calories. I saved a couple of these recipes to try at a later time, and I found one for this blog, but I am recycling this cook-booklet.

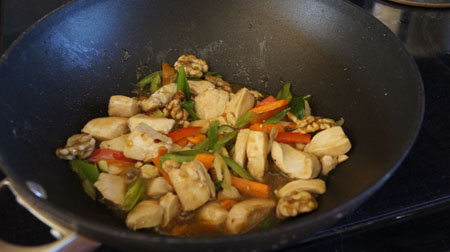
The recipe below is #96 of the 100 recipes. (All the way at the end!) It is “Chicken with Walnuts”, a stir-fry with fresh ginger and walnut halves and a suggested garnish of kumquats.

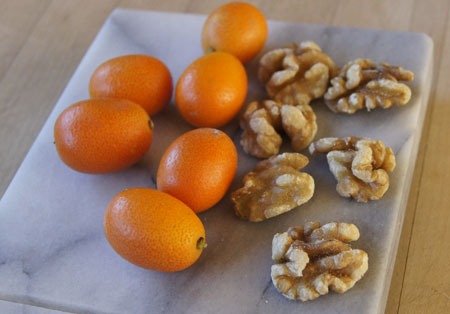
kumquats and walnutsKumquats! We had a kumquat tree in our half-acre yard in Southern California where I grew up. Some years it would be heavily laden with these bright orange oval fruits. Tart! They are almost too much to eat in one bite. A blog entry from Susan Russo sums up the experience: “Then my teeth sunk into the juicy flesh and — POW! — a jolt of tartness hit my taste buds. Involuntarily, my cheeks sucked in, my lips puckered, and my eyes watered.”

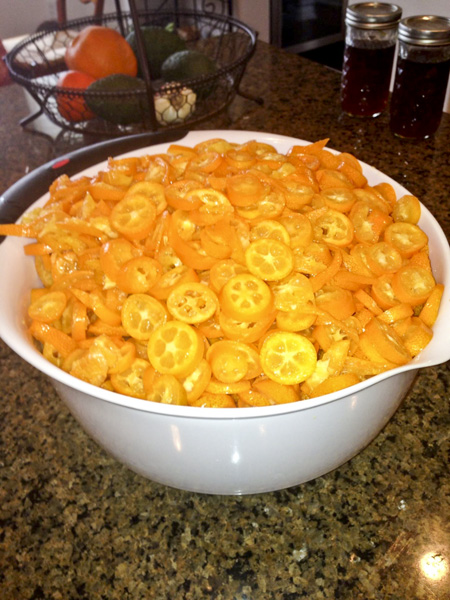
Kumquats are great for jams and chutneys. My sister recently sent me a photo of a big bowl of kumquats that they were preserving:

kumquatsI found kumquats in Colorado at Safeway! In June! Kind of surprising.

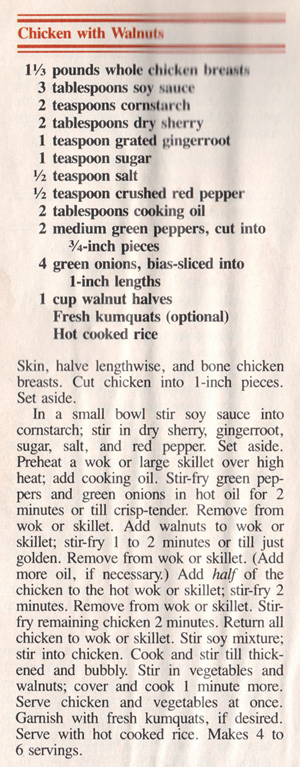
Here is the original recipe for Chicken with Walnuts:

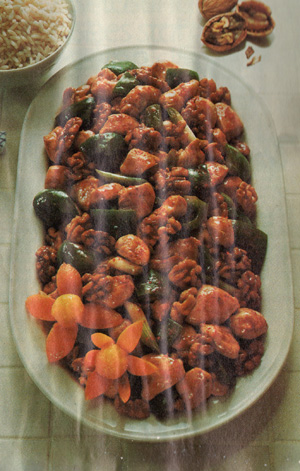
Chicken with WalnutsThe photo below illustrates their suggestion for the kumquat garnish:

kumquat as a garnishSee the two kumquats at the lower left? The peeled back the thin skin of the kumquats so that they look like flowers. I tried that on one kumquat, but didn’t quite see the sense in it, since eating a kumquat is all about the explosive flavor of skin and flesh together. Instead, I thinly sliced a couple kumquats and put them next to the chicken-walnut mixture on our plates. We each stirred in just enough kumquat to zing up the taste, without it being overwhelming. I also added a bit of fresh cilantro.

Here is my version of Chicken with Walnuts.

Chicken with Walnuts
serves about 2

  • 9-10 ounces boneless chicken (breasts or thighs), cut into 1-inch pieces
  • 2 tablespoons soy sauce
  • 2 teaspoons cornstarch
  • 1 tablespoon dry sherry
  • 1/2 teaspoon grated fresh ginger
  • 1/2 teaspoon sugar
  • 1/4 teaspoon crushed red pepper
  • cooking oil and water as needed
  • sliced red and/or green bell peppers, cut into thin slices, about 1/2 cup total
  • 2 big green onions, cut on the diagonal into thin slices
  • 1/2 carrot, cut into thin slices
  • 1/2 cup walnut halves
  • fresh kumquats, maybe about 4-6, thinly sliced
  • a few sprigs of fresh cilantro, chopped

Combine the soy sauce, cornstarch, sherry, ginger, sugar, and crushed red pepper. I added about a half-cup of water to this mixture to make the dish saucier, but this water-addition is optional.

Heat a wok or skillet until it feels hot, then turn the heat to medium-high. Add the walnuts and toast them, watching carefully so they do not burn. Remove them from the wok.

Add a little oil to the wok, then add the carrots and stir fry for a couple minutes. Add the bell peppers and green onions and stir fry another couple minutes. Remove them from the wok.

Add the chicken to the wok and cook 2-5 minutes, until it loses its pink color. Add the soy sauce mixture and cook until hot and bubbly; add more water if you like it that way. Stir in the vegetables and walnuts and cook a minute or two more.

Serve over rice, with the chopped cilantro on top and the sliced kumquats on the side – or mixed in, if you are sure you will like it!

Chicken with WalnutsComments

We liked this, but didn’t go crazy over it. I thought the kumquats and cilantro gave it a zippy and fun taste – but I wouldn’t want to eat it every day of the week. I liked the walnuts in this stir fry.

But the cookbook? I’m not keeping it.

250 Cookbooks: The ABC of Casseroles

Cookbook #65: The ABC of Casseroles. Peter Pauper Press, Mount Vernon, NY, 1954.

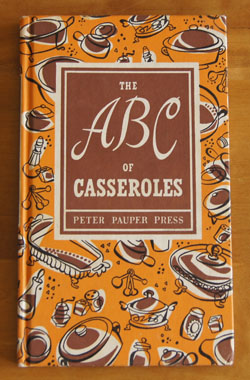
ABC of CasserolesThe “ABC of Casseroles” belonged to my mother-in-law. I know this fact only because a phone number and address written in her handwriting is on the inside cover. Other than that and a few food stains on a couple pages, it looks unused.

That doesn’t mean that my husband didn’t endure a lot of casseroles from his mom’s kitchen! Although, it was often his older sisters who did the cooking, since his single-parent mom worked. Tuna fish concoctions are among his worst food memories. The other casseroles – he won’t even talk about. During our first years together, I learned to call a dish “hamburger baked with potatoes, vegetables and cheese” rather than “Easy Layered Casserole”. I had to teach him that casseroles can be good!

This cookbook exemplifies the bad class of 50s casseroles. The ABC of Casseroles claims no author other than “The Editor”. Here is the “To the reader” page:

“None of the recipes is complicated, or too difficult for the inexperienced cook. We have had her particularly in mind in assembling these recipes, since it is she, and not her older and more experienced sister, who usually holds down a job, and cooks too. Many of the dishes can be prepared the day before, and baked at the last minute. And many are quickies that can be both prepared and cooked in an hour’s time.”

I can’t figure out from that paragraph which sister has a job, the older or the younger? Guess the mom refuses to cook. Whatever.

Examples of recipes in this book are Kansas City Franks (hot dogs, canned tomatoes, catsup, frozen carrots and peas), Lamb and Lima Beans, Liver Casserole (bacon, liver, okra, lima beans, apples, “6 cubes apple jelly”), Noodles and Salami (noodles, salami, evaporated milk), and Ragout of Oxtail (oxtails, bacon, carrots, turnips, lima beans). Oddly enough, there is a recipe for Lobster a la Marseilles. Perhaps lobster was cheap in the 50s, or maybe it just wasn’t popular yet. The lobster in this recipe is cooked and taken out of the shell, chopped, and then baked with onions, mushrooms, and tomatoes. All of the recipes are in alphabetical order by recipe title; hence the title, “ABC of Casseroles.” Kind of ties in with the sisters doing the cooking.

This cookbook is going into the recycle bin. But first, I must find a recipe I can cook for this blog. Since it will be a meal for me and my husband, I want it to taste good. Meaning, I will make a “few” changes to make it palatable for our  tastes.

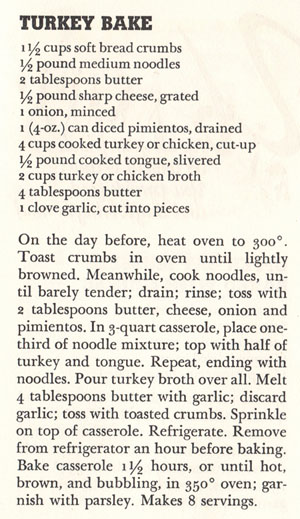
The recipe I choose is “Turkey Bake”.

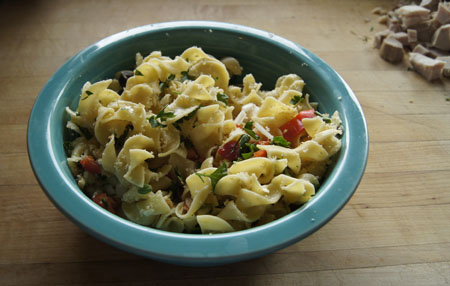
Turkey Bake RecipeDefinitely, the tongue is out! From there, I will substitute fresh red bell peppers for the pimentos and add mushrooms and olives (ingredients in one of my favorites, Chicken Casserole). I have frozen leftover turkey (Thanksgiving, 2013, it needs to be used up!) and actual homemade turkey stock. I will mix the bread crumbs into the noodles, as they will help to thicken the casserole. I do like that this recipe does not call for canned cream of chicken soup.

Let’s see if my Turkey Bake Casserole can be a hit.

Turkey Bake Casserole
serves 3-4

This casserole can be made a day ahead (I did!).

  • 1 cup bread crumbs
  • 3 1/2 ounces medium noodles
  • 1 tablespoon butter (optional)
  • 3 ounces cheddar cheese, grated
  • 1/2 of a medium-sized onion, chopped (approximate)
  • 1 clove garlic, chopped fine
  • 1/4 of a red (or green) bell pepper, chopped
  • 1/2 of a 4-ounce can of olives
  • chopped parsley to taste
  • about 5 large fresh mushrooms, sliced and dry-cooked a few minutes in a medium hot pan to get some of the water out of them
  • 1 1/2 cups cooked turkey or chicken, chopped
  • 1 cup stock (turkey, chicken, or use a bouillon cube dissolved in a cup of water)

Toast the bread crumbs in a 300˚ oven for 10 minutes, until they are lightly browned.

In a bowl, combine 3/4 cup of the toasted bread crumbs with the noodles, butter, cheese, onion, garlic, bell pepper, olives, and parsley. Combine the mushrooms with the turkey.

Put a third of the noodle mixture in a 1 1/2 or 2-quart casserole. Top wit half of the turkey and mushrooms. Repeat, ending with noodles. Pour turkey broth over all. Sprinkle the remaining 1/4 cup bread crumbs on top of the casserole.

At this point, you can cover and refrigerate the casserole for a day.

When ready to bake, heat the oven to 350˚. Cover the casserole (foil or a lid) and bake for 1 hour. Uncover and continue baking another 10-15 minutes, until it is hot, bubbling, and brown.

Comments

This was good and tasty. I might make it again, and I would certainly recommend it to anyone looking for an easy weeknight meal.

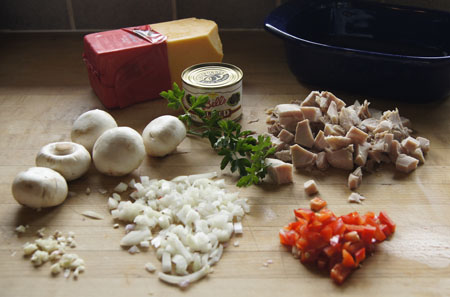
Here are (most of) the ingredients:

ingredientsLook at my nice fresh home-grown parsley! I decided to cook the mushrooms a bit so that they did not add a lot of moisture to the casserole. You could probably skip that step.

The noodles and vegetables look pretty:

ingredientsThere is probably no reason to layer the casserole as per the original directions, so if you prefer, just mix the 3/4 cup bread crumbs with the noodles and vegetables and turkey and cheese, put in a casserole, and add the turkey broth and top with the remaining bread crumbs.

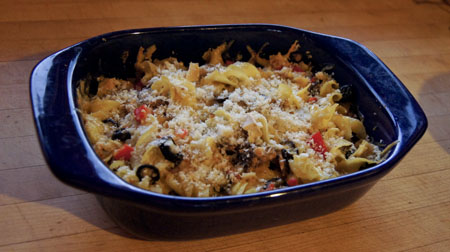
It cooks up pretty:

Turkey Bake CasseroleIn 2014, I can now call a casserole a “casserole”. It took decades, but my husband now brightens up when I tell him I am making a casserole for dinner!

250 Cookbooks: Römertopf Cooking is Fun

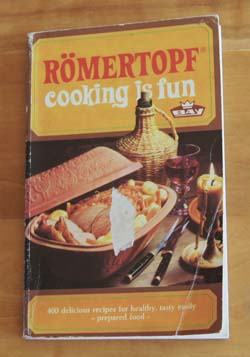
Cookbook #64: Römertopf Cooking is Fun. Wendy Philipson, Eduard Bay, Ransbach, 1971.

Romertopf Cooking is FunI picked this book out of the stack of paperback cookbooks totally thinking it would be out of date and nearly useless. But no, it made me smile, and that in itself has value.

My sister gave me a Römertopf cooker back in the 70s. I did use it a few times, but I’m not sure if I ever used this particular cookbook or even how I got this cookbook. It is not marked with food stains or notes.

And now my big admission of guilt: I broke my Römertopf after I’d had it a couple years. I forget exactly how I broke it, whether it was temperature-shock or a physical drop. My husband glued it back together, but I never felt safe using it for cooking again. So it sat accusingly on the soffit in the kitchen for years and years. I finally tossed it during a kitchen cleaning some time back.

What is a Römertopf cooker? It’s a covered clay pot, one of several brands available. You use it, pre-soaked in water, in a hot oven, for braising meats, cooking fish and soups, and even desserts. Supposedly, it cooks especially well because the soaked pot releases steam as the food bakes and all the natural (and healthy) juices are kept in the finished meal.

Let’s compare clay pots to other braising methods. A slow cooker (crock pot) can be left all day, unattended, which is great. Drawbacks: you need to use a separate pan if you want to start with browned meats, and sometimes a crock pot overcooks everything. Any stove top covered pan is useful for braising, but it needs to be monitored. Covered, stove-top-to-oven cookware like Le Creusets allow you to brown meats directly in the pot, then you can leave then unattended in the oven for several hours. Le Creusets are especially heavy and sturdy. (You can drop them!)

Now we come to clay pots. Clay pots require a soaking in water before use. You cannot set them on a hot stove top to pre-brown meats. You cannot add cold liquids during the cooking process or the pot will break. They are fragile, sensitive both to temperature and physical shock. They are difficult to get clean. (Le Creusets are really easy to clean.)

So why use a clay cooker? This cookbook and even today’s online resources claim that a clay cooker imparts excellent flavor and tenderness to a meal, require no added fat, and keep in all the nutrients. So I will give mine a try.

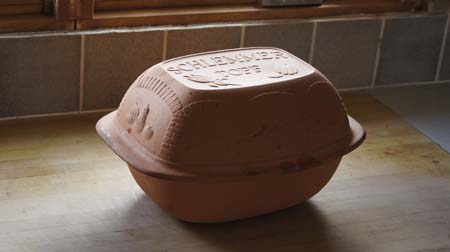
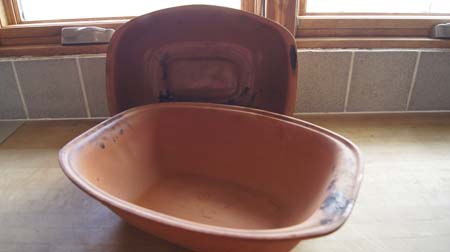
Oh – yes, I do again have a clay pot cooker – so I am able to cook a meal from this cookbook. I got it for baking no-knead bread loaves. It is a different brand: Schlemmer Topf. The inside of the bottom section is glazed, I think for easier cleaning. Anyway, it’s a clay pot, and I’ll cook something in it for this blog.

clay potA little bit about this cookbook
skip to the recipe if this bores you!

This book is the English adaptation of the original German “Braten und Schmoren im Römertopf”. Wendy Philipson completely reworked and extended the German version. She is from England, and spent time in Germany teaching English at the University of Munich.

Clay pot cooking dates back thousands of years, to the Romans and even before to “our most primitive ancestors, who lived from the fruits of the hunt, cooked the meat of the animals they had killed in simple clay containers placed in the glowing embers of their fires.” Why cook in a clay pot today? Wendy gives several reasons. For one, very little liquid needs to be added, so the natural juices and the full “flavour” and taste and vitamins are retained. “The aroma and taste of food prepared in this way is rich and nutritious.” Secondly, no fat needs to be added to a dish, great for those on a diet for slimming or health reasons. “This has been officially verified by the Institute of Domestic Science in Munich – and the Bay-Römertopf is the only casserole of its kind which has been subjected to these tests.” Third, “cooking in a Römertopf is really child’s play. ‘Overdone’ and ‘burnt’ are words which are completely unknown in the Römertopf kitchen. Once a dish is in the oven nothing can go wrong.”

Finally. the Romertopf is “attractive as well as useful. Nowadays, with modern technical developments, not only in outer space but also in the kitchen, the housewife is grateful for every technical improvement – from the high-speed pressure cooker to the fully automatic oven. Yet sometimes we think wistfully that with all this progress the cosiness of the old-fashioned kitchen is being lost. The Römertopf – much to our delight – combines the best of both worlds.”

(Note the publication date: 1971. Crock pot cookery came to the American kitchen in the early 70s, as per my research for my first slow-cooker cookbook blog post.)

Clay pot basics: Soak the clay pot and the lid for at least 10 minutes before use, put into a cold oven and then heat the oven slowly; never add cold liquids during the cooking process; uncover during the last 10 minutes or so to brown the meat; take out of the oven and set on a folded towel to prevent temperature shock. Clean in hot water with a brush, do not use harsh cleaners, and learn to accept that you will not get it looking sparkly clean.

Basically, in my opinion, using a clay baker will kind of a pain. But, will using the clay pot be worth the trouble? Will it taste fantastic? Will I regain the cosiness of an old-fashioned kitchen?

The recipe

I chose to cook “Roman Pot Beef”. Like many of the entries in this cookbook, the recipe is just sketched out. The majority of recipes are for meats (beef, veal, pork, mutton and lamb, game, and poultry). Fish and soups are also included. Desserts are given a few pages, with the caution “not for slimmers!”. (As I said, this book makes me smile.)

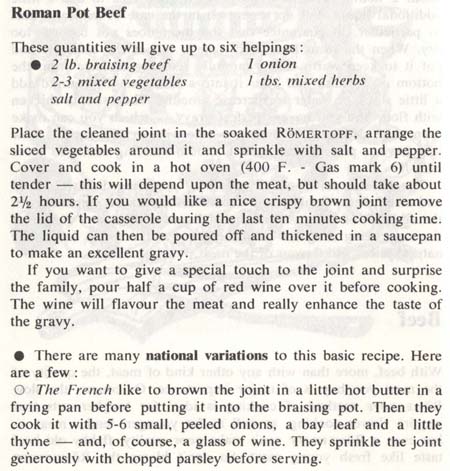
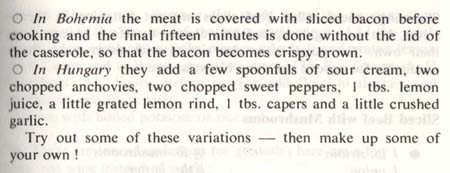
I checked online, and the current Römertopf website has content quite similar to my 1971 Römertopf Cooking is Fun cookbook. (It’s written in English, with a heavy German accent.) The recipe for “Braised Joint of Beef” reads a lot like the “Roman Pot Beef recipe in my cookbook:

Roman Pot BeefRoman Pot BeefA “joint” of beef is a roast. I chose a cross-rib chuck roast. Mixed vegetables, 2-3? I think carrots for sure, then maybe leeks and parsnips. Potatoes would work, but I suggest adding them about an hour before the dish is done, or they will be cooked to death. I like the Hungarian national variation: sour cream, anchovies, garlic, capers, and a bit of lemon. And the red wine from the general suggestion. So here goes!

Römertopf Pot Roast (“Roman Pot Beef”)
serves 4-6

  • cross-rib roast, 2-3 pounds
  • 1 onion, chopped roughly
  • carrots, leeks, parsnips, potatoes, red bell pepper, about 3/4 cup each, roughly chopped
  • fresh herbs (parsley, thyme, oregano) or dried, to your own taste (or use 1 tablespoon dried Italian seasoning herbs)
  • potatoes (optional)
  • 1 tablespoon sour cream
  • 2 anchovies, chopped
  • 1 tablespoon lemon rind
  • 1 tablespoon capers
  • 2 cloves garlic, chopped
  • salt and pepper
  • about 1/2 cup red wine

Soak both the top and bottom of a clay baker in water for at least 10 minutes. Leave your oven off.

Take the clay baker out of the water and towel off. Put the roast in it, then the onion and other vegetables, the herbs, capers, anchovies, lemon rind, garlic, and salt and pepper. Smear the sour cream on top of the roast. Pour a little wine over the mixture. Cover the pot.

Place the clay baker in a cool oven (adjust the oven rack to a low position). Turn the oven to 400˚. Let cook for 2 1/2 hours. You can peek at it during the cooking time to make sure it isn’t drying out and browning, but it does work. And, you can’t add cold liquid anyway, as it might break the pot. You can add quartered potatoes during the last hour of cooking.

Note: CAREFULLY open the clay baker to check the contents. Do not put your face directly over it and pull off the lid. I learned the hard way! It is very hot and steamy! Using a pot holder, lift the lid so that it vents away from you.

At the end of the cooking time, remove the pot from the oven and carefully remove the lid. Take the roast out of the pot, set it on a plate, and cover it with foil. If you wish, use a slotted spoon to remove the (overcooked) vegetables to serve with the roast and then pour the meat juices into a pan to make a gravy. What I did was pour the entire vegetable-meat juice mixture into a food processor, then pulsed until it was fairly smooth. I put that mixture into a pan, added beef stock and about a tablespoon of corn starch, and heated it all until it was thick. It was wonderful!

Comments

This “pot beef” was very, very good, as cooked per my version above. It’s hard to tell whether or not it was better than my usual version of a pot roast (a recipe from Cooks Illustrated). In some ways, the preparation was easier, since I did not have to brown the meat first. In some ways, it was harder, since handling the hot, almost fragile clay pot is tricky. But I do like the connection with the past of cooking in a clay pot. Last June, we traveled to Turkey, and learned a lot about ancient civilizations, including the Romans. So, I’ll probably use the clay pot again for a stew or such. It was fun.

My clay pot began this current adventure sort of dirty. Just saying. It’s hard to get clay pots clean. Before this pot beef, I had only used it for baking bread.

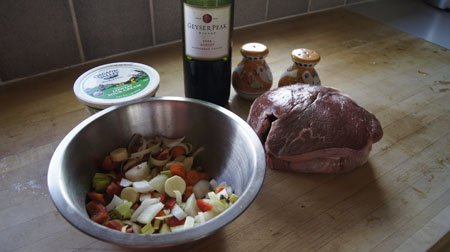
clay potHere are the ingredients that I used. You really can use just about whatever you like. There are onions, carrots, parsnips, red bell peppers, garlic, anchovies, capers, and lemon rind in the bowl.

pot beef ingredientsAfter cooking, the vegetables are kind of overdone. The cookbook claims that the cooked mixtures are a good presentation “as is”. I disagree. Plus, look at all the browned stuff on the sides that will be hard to clean off.

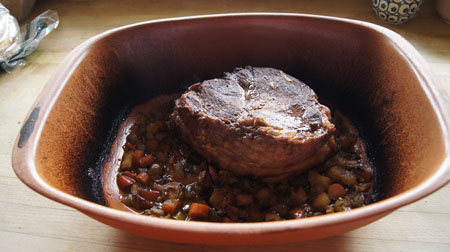
cooked beef potThe meat itself is nicely browned and very tender. As I wrote above, I made a gravy from the meat juices and food-processed vegetables. When the pot had cooled a bit, I used some beef stock to rinse some of the nice browned stuff into the gravy mixture. I served it over big flat noodles and it was excellent. Good flavor, tender meat.

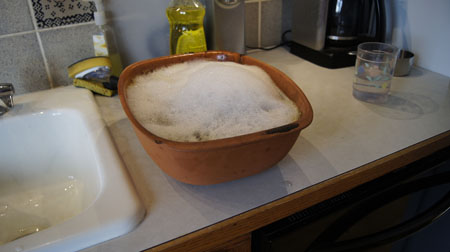
Clean-up time. I soaked the pot in soapy water for an hour or so, and to my surprise, it cleaned up nicely. So no complaints from me.

clay pot soaking

250 Cookbooks: New Crockery Cooker Cook Book

Cookbook #63: The New Crockery Cooker Cook Book. Better Homes and Gardens, Meredith Corporation, Des Moines, Iowa, 1987.

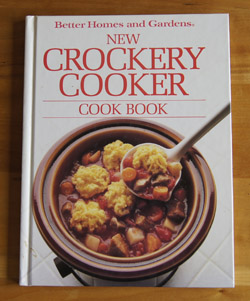
New Crockery Cooker CookbookThis is my third crock pot cookbook entry; I have eleven in all. Please see my first crock-pot entry for a brief history of crock-pots.

I used this cookbook a lot. I found a bunch of clippings in the back, and scraps of paper and notes in/on several pages. The cover is dirty with food spots (but cleanable!). I got my inspiration for my Botched-up Cassoulet recipe from this cookbook. Even today, I am noting about ten main dish or stew recipes I’d like to try (or cook again). Soups are included in this cookbook and look fine, but I usually just toss together soups sans recipe. The New Crockery Cooker Cookbook has a chapter on breads to accompany the main dishes; I am marking down a few to try.

So I do still like this cookbook. By the 80s, the preponderance of pre-packaged mixes in recipes in everyday cookbooks diminished. I’m talking about mixes like spice seasoning packages and biscuit-type products, that sort of thing. I like the way this book employs tapioca in the recipes as a thickener. I appreciate the authors’ admission that crock pots cook chicken to a pulpy mass; they suggest freezing chicken pieces before adding to the pot so that it cooks to perfection. The New Crockery Cooker Cookbook is sensible and useful (IMHO).

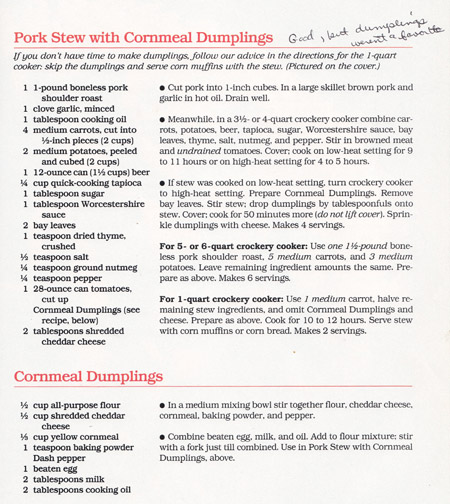
For this blog, I choose to cook Pork Stew with Cornmeal Dumplings. Except, I will not make the dumplings because I wrote a note to myself that my family did not like them. The cover of this cookbook (above) shows a photo of this stew (with dumplings). Here is a scan of the recipe:

Pork Stew with Dumplings recipeI know from experience that potatoes and carrots will turn to mush after “9-11 hours on low or 4 to 5 hours on high”. Maybe this is just a problem of my own current crock pot, but I will change this recipe by adding the potatoes and carrots in the last hour of the cooking time.

Instead of the dumplings, I will serve the stew with Parmesan-topped french bread. Corn muffins would be great too, or better yet, my corn sticks (that I should add to this cooking blog!).

Pork Stew
serves 2-4, depending on appetites

  • 1 pound boneless pork, cut into 1-inch chunks
  • 1 14-ounce can diced tomatoes
  • 1 12-ounce can beer
  • 1 clove garlic, chopped fine
  • 1 tablespoon sugar (optional, not sure I’d use again)
  • 1 tablespoon Worcestershire sauce
  • 2 bay leaves
  • 1 teaspoon dried thyme
  • 1/4 teaspoon ground nutmeg
  • 1/2 teaspoon salt (or to taste)
  • 1/4 teaspoon pepper (or to taste)
  • 3 tablespoons quick cooking tapioca
  • 1/2 – 1 cup water (may or may not need)
  • 2 carrots, cut into about half-inch chunks
  • 2 potatoes, peeled and cubed (if you use red potatoes, you could leave the skins on)

Brown the meat in a little oil in a frying pan; add to crock pot. Then, rinse the good browned drippings in the pan into the crock pot, using maybe the tomatoes, the beer, or a little water.

Add the tomatoes, beer, Worcestershire sauce, sugar (if using), bay leaves, thyme, nutmeg, tapioca, and salt and pepper to the pot. Stir it all up, cover, and set the crock pot your choice of low or high temperature.

After 6 hours on low or 3 hours on high, add the potatoes and carrots. Cook until the potatoes and carrots are done: probably another two hours on the low setting or one hour on the high setting.

Note: If you really know your crock pot, use your own knowledge to adjust the cooking time. Mine cooks pretty hot. I checked it several times during the cooking and added more water. Unfortunately, especially with the step of adding the potatoes and carrots near the end, this recipe cannot be left unattended for the entire day.

Comments

This stew is good. I messed up and added only a 14-ounce can of tomatoes instead of the suggested 28-ounce can! (Maybe that’s why I had to add more liquid during cooking.) But it still turned out fine. I might try using more tomatoes next time. I found the taste a little too “sweet”, it almost was like a sweet-and-sour pork dish (I felt like I should have added pineapple). My dining partner liked it “as is”, though.

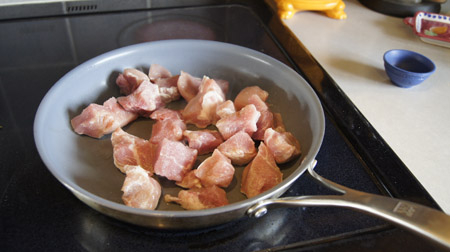
Here are the pork cubes, browning. I decided to rinse the brownings into the stew pot, as noted in my directions (above).

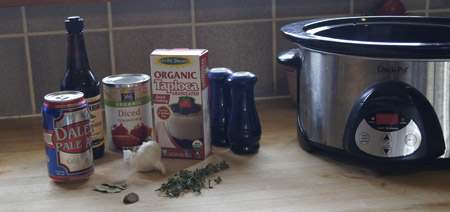
browning the pork cubesMy ingredients up to the potatoes and carrots are below. Note that I used fresh thyme and I ground my own nutmeg; next time I’ll just used dried thyme because it just wasn’t worth the bother. There is a new box of tapioca because I had searched my cabinets for minute-tapioca and found two old boxes with expiration dates of 2002 and 2008, respectively. (Guess it’s been awhile since I needed tapioca!) And the Dale’s Pale Ale: I’m in Lyons, and that’s our local brewery!

Pork Stew ingredientsDuring the cooking time, I had to stir and add water several times. It stuck to the bottom sides of my crock pot. I suggest using 3 tablespoons tapioca (as in my ingredient list) instead of the 1/4 cup, because it got pretty thick. I may not have had this issue if I had used the called-for amount of tomatoes. But also, as I stated before, I know my crock pot, and I know it cooks hot. It’s really too big of a crock pot for two people.

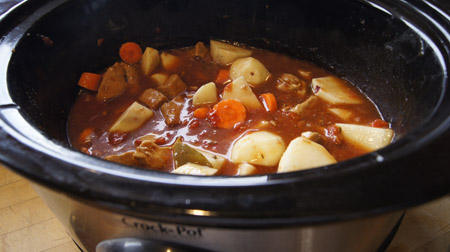
Here it is, nearly finished, with the potatoes and carrots added.

Pork StewIt was good, I’d give it 3 stars out of 5. I’ll probably make it again. It is a good change of pace from my usual southwestern-style spicy pork stews.

250 Cookbooks: The Wine Diet Cookbook

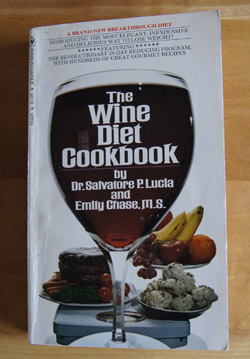
Cookbook #60: The Wine Diet Cookbook. Dr. Salvatore P. Lucia and Emily Chase, M.S., The Piper Company, NY, NY (Abelard-Schuman also listed), 1974, Bantam Edition, 1976.

The Wine Diet CookbookI bought this book back in the 70s. I love wine and I have to watch calories, so I thought: a wine diet, perfect! Sort of tongue in cheek though, since I know from experience that wine sometimes ruins my personal dieting strategy.

I believe in keeping small amounts of your choice foods in a diet, especially if your diet is long term. Too much denial will derail any healthy eating plan. So for me, wine and chocolate are included – but in moderation. And wine (like chocolate) is good for you. According to the authors of this book: “Wine is a food; a source of energy for work and body maintenance.”

A brief outline of the wine diet is on page 10:

“The Magic Number: 1200. The total daily calorie budget for these menus is approximately 1200, including a 4-ounce glass of table wine with dinner each night. . . . We have selected a 1200-calorie program because at this calorie level it is possible to include the basic elements needed for good nutrition and still give the slimmer a chance to average as much as a two-pound loss per week.”

I agree with the 1200 calories per day for dieting, and that was my goal when I used to (obsessively) count calories. But my 1200 total was without wine, and I was never able to give up a treat of fruit in the afternoon for a glass of wine at dinner.

The authors state that “a glass of table wine brings relaxation and satisfaction that adds greatly to the slimmer’s enjoyment of the meal”. “Wine is a stimulating and a most salutary nutritional element.” “Very little will power will be needed to diminish the volume of a meal.” That may work for some people, but not always for me. Instead, one glass can tempt me to have another glass, and too much wine decreases my will power to stop eating.

This book might work for someone besides me. The diet plan is sensible, including a good balance of carbohydrates, protein, and fruits and vegetables. Diet margarine and low-fat milk products are employed to shave calories, and all recipes are explicit in portion amounts and calories. Daily menu plans are outlined. Wine is used in many of the recipes, adding flavor without adding calories.

Not many of the recipes in this book beg me to be tried. I appreciate the reminder to use more wine in cooking to boost flavor, but today I find no other benefits in this 50 year old cookbook. I will recycle the The Wine Diet Cookbook.

Before recycling: for this blog, I will cook “Dilly Beef Rolls”.

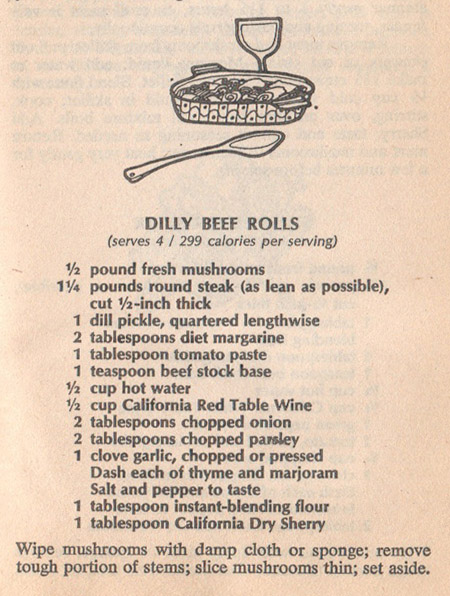
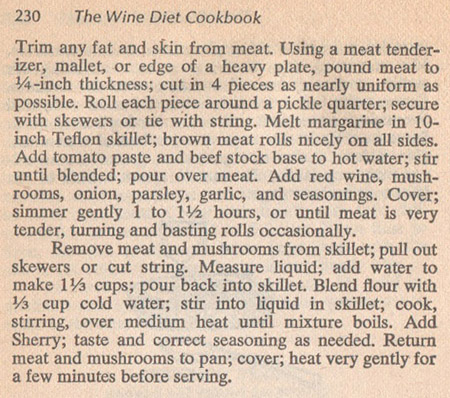
Dilly Beef Rolls RecipeDilly Beef Rolls RecipeKind of a cute idea, rolling round steak around a dill pickle. I will use the dill pickles I made last summer. I will skip the “2 tablespoons diet margarine” and use a few drops of olive oil instead. For the “1 teaspoons beef stock base” and “1/2 cup hot water”, I will substitute my own beef stock. I buy tomato paste in a tube, so that’s easy. I see no need for instant-blending flour; it’s almost as easy to use regular flour mixed with a little water. California Red Table Wine? No, I won’t leave that out! Not sure the bottle in the refrigerator is Californian, but it’s red. And I have sherry too. Okay, this should be fun. I get to get out my ancient meat mallet too, that’s always fun.

Let’s see if this recipe can turn a usually tough and bland round steak into a flavorful, low-fat meal. My version of the recipe follows.

Dilly Beef Rolls
serves 2-3

  • 9-12 ounces round steak – buy the “thin cut” if possible
  • 1 large whole dill pickle, quartered lengthwise
  • 1/2 of a medium onion, chopped
  • 1 clove garlic, chopped
  • 1/4 pound sliced mushrooms
  • 1/2-3/4 cup beef stock
  • scant 1/2 cup red wine
  • 1 tablespoon tomato paste
  • thyme, about 1/2 teaspoon (I used fresh thyme)
  • marjoram, about 1/2 teaspoon (I used dried)
  • salt and pepper to taste
  • 1 tablespoon flour
  • 1 tablespoon dry sherry
  • fresh chopped parsley to taste

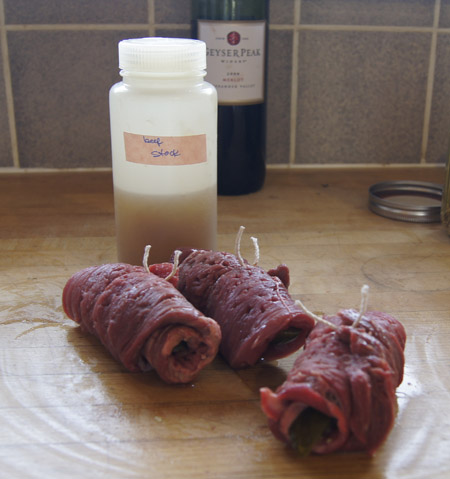
Cut the round steak into 2 or 3 equal pieces, then pound with a mallet to 1/4-inch thickness. Roll each piece around a pickle quarter, and tie the center with string.

Heat a (coverable) cooking pot until it feels hot when you hold your hand an inch above it. Add a small amount of olive oil and tilt the pan to spread the oil. Lower the heat to medium, then add the round steak rolls and brown them on all sides. Remove them from the pan and set them aside on a plate.

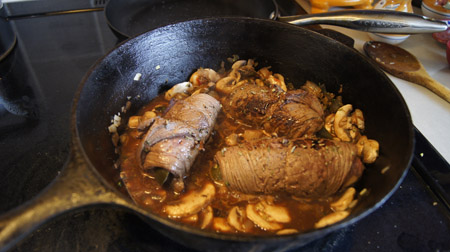
Add a few more drops of oil to the pan. Add the onions and sweat them with a little salt, cooking until they are soft. Add the garlic and mushrooms; cook and stir until the mushrooms are wet and soft. Add the broth, wine, tomato paste, thyme, and marjoram; stir. Add the beef rolls and any of the pan juices that have collected on the plate.

Cover the pot and lower the heat to maintain a very gentle simmer. Cook for at least an hour and a half, until the meat is nice and tender.

Remove the beef rolls and cut the strings off. Set them aside while you finish the sauce.

To the sauce in the pot, add the 1 tablespoon flour mixed into a little broth (or water) to a smooth paste. Stir until mixed in well; add more broth (or water) if the sauce looks too thick. Add the sherry and chopped parsley. Heat the sauce to a simmer, then add the beef rolls back in and heat it all up. At this point, you can let your dinner “hold” until you are ready to serve.

Serve these dilly beef rolls with any starch, such as mashed potatoes, rice, or pasta.

Comments

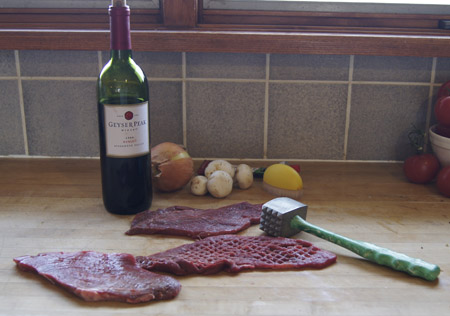
I was lucky to find very thin round steak. In the photo below, I have already pounded one of the slices with my ancient mallet.

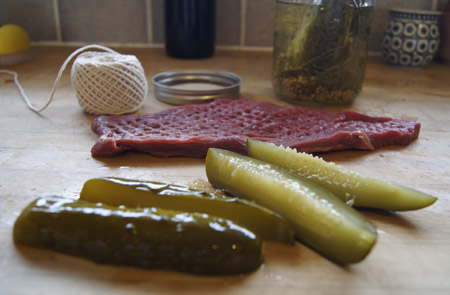
Dilly Beef RollsThe focus in the photo below is on my dill pickles. Yes, I canned them myself last summer! They are gorgeous, aren’t they?

Dilly Beef RollsI found that these rolls hold together fine with just one piece of string in the middle. Beef rolls formed around a crumbly stuffing are a lot harder to manage. Note my container of homemade beef stock. (I should talk about how I make and store it sometime.)Dilly Beef RollsI browned the beef rolls in my heavy cast iron pot. Lately I’ve been using my LeCreusets a lot, but this old pot with its heavy lid works really well for stove-top braising. Below is the mixture of beef and vegetables and seasonings before the long simmer.

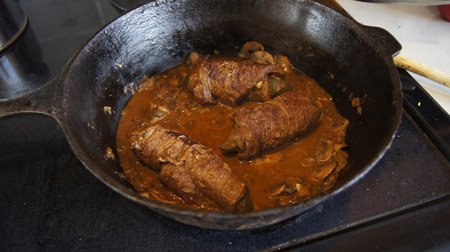
Dilly Beef RollsThe mixture after cooking looks just a little different, but the meat has changed in character from tough to soft. It smells really good, too.

Dilly Beef RollsPlated:

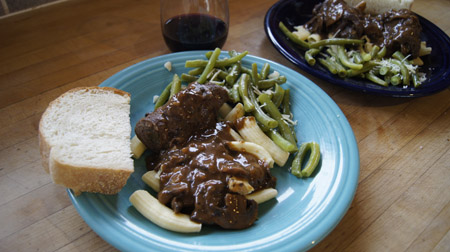
Dilly Beef RollsNote the glass of wine! On a weeknight! Just had to go with the advice of The Wine Diet Cookbook. It’s a small glass, a measured 4 ounces, not very much.

These beef rolls taste really good. I’ll make them again! The dill pickle inside gave them the flavor of a sauerbrauten. The gravy, while low in fat, was very flavorful! And I even forgot the parsley. I did put a little chopped fresh oregano on the green beans, though.

Note the pasta – it is homemade. Last week I got out my old pasta machine and made a big batch of these large macaroni noodles (and froze them in portions). That pasta machine will surely be the focus of a future blog post. The bread is homemade too, a result of my recent acquisition of a new sourdough starter. All is yummy.

250 Cookbooks: Fifty-Two Sunday Dinners

Cookbook #56: Fifty-Two Sunday Dinners, A Book of Recipes. Mrs. Elizabeth O. Hiller. The N. K. Fairbank Company, Chicago, NY, St. Louis, New Orleans, and Montreal, 1913.
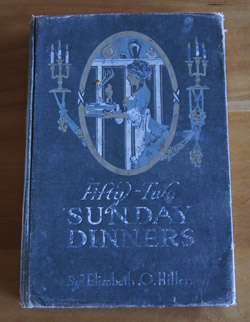
Fifty-Two Sunday DinnersNote the publication date: 1913!  This is my third-oldest cookbook – 101 years old! I store this one on a shelf above my main collection, with other cookbooks of very special interest.

I entered this book in my database as originating from “Mother’s collection”. I do not remember seeing this book at our childhood home, and she did not write notes in it. So I do not know its history. Was it one of Grandma Burch’s cookbooks? My mother’s mother was a great cook. Especially desserts: “I only eat dinner to get dessert!”
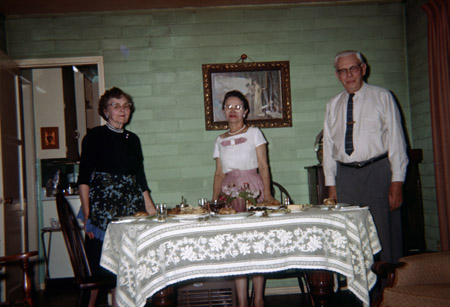
grandparents

Grandma (center) and Grandpa Burch with one of her own Sunday dinners. (And wearing a dress she made.)

The price is printed on the back of the title page:

priceI was curious as to how $1 would translate into today’s dollars. WestEgg tells me that what cost $1 in 1913 would have cost $22.88 in 2012.

This cookbook doesn’t look well-used. There are some food marks, but few pencil markings. A couple neatly-clipped recipes are tucked between pages. My guess is that my grandmother clipped these recipes: she was very neat. My mother was more like me, a messy recipe clipper. Neither of us could tie a ribbon bow, either, while her mother was an expert at bow tying. She was also a talented seamstress, sewing most of her own clothes. I remember that her hemming stitches were small and neat. Mother and I made bigger stitches, a little less neat. Ah, memories.

Fifty-Two Sunday Dinners is a charming artifact, a bit of history, a peek inside American kitchens a hundred years ago.

“The title of ’52 Sunday Dinners’ has been given the book because Sunday dinners as a rule are a little more elaborate than the other dinners of the week, but from these menus may be gleaned helpful hints for daily use.”

This has changed a bit since my childhood: a big sit-down Sunday dinner is less prevalent. But what has not changed is the goal to eat healthy food:

“The eternal feminine question is, ‘What shall we have for dinner to-day?’ It is not always the easiest thing in the world to think of a seasonable menu, nor to determine just the right combination that will furnish a meal appetizing and well-balanced in food values. Furthermore, both the expense and the amount of work entailed in preparation must be considered. This Cook Book is especially designed to meet just that pressing daily need of the housewife.”

Of course I cringe at “the eternal feminine question” clause, but it serves to remind me once again: “we’ve come a long ways, ladies”.

I was quite surprised to find that this entire book is online, part of the Gutenberg project. It’s copyright-free, so I can copy as much as I like into this blog. And you can read this book right now and see what you think of it.

The cookbook is organized as chapters for each month of the year. Each chapter begins with a quote. These quotes speaks to me:

“Let hunger move thy appetite,
And not savory sauces. –Shakespeare.”

“Hunger is the best seasoning for meat,
And thirst for drink. –Cicero.”

That’s why my resolution for 2014 is to eat something each day that makes me immediately want another bite. There is a hidden meaning in my resolution: If I’m hungry, I sense the flavor in even the healthiest of foods, and something very sweet tastes so bright it bursts with flavor. So, stay hungry.

I also like this quote:

“If you are an artist in the kitchen, you will always be esteemed. –Elizabeth in Her German Garden.”

I think this would have been a quite useful cookbook back in its day. It includes a good variety of recipes, and interesting menu suggestions. Basic cooking techniques are not covered; it was written for the home cook who already had a good grasp of the basics. This was the era before canned soups, biscuit mixes, boxed frostings, packaged hamburger, boneless chicken breasts . . . food processors and microwave ovens. Food preparation for these Sunday dinners would have taken the housewife hours in the kitchen.

Mrs. Elizabeth O. Hiller (the author) highly touts the benefits of a product called Cottolene.

“In the interest of health and economy a number of the recipes suggest the use of Cottolene—a frying and shortening medium of unquestioned purity—in place of butter or lard. Cottolene is a vegetable shortening, pure in source and manufactured amid cleanly favorable surroundings. It is no new, untried experiment, having been used by domestic science experts and thousands of housewives for nearly twenty years; to them Cottolene for shortening and frying is ‘equal to butter at half the price, better and more healthful than lard—and more economical than either.'”

“There isn’t an ounce of hog fat in Cottolene, and from cottonfield to kitchen human hands never touch the product.”

Cottolene was a brand of shortening made of beef tallow and cottonseed oil. (Wikipedia, accessed 2014.) It was popular until the mid-twentieth century – about the time shortenings like Spry came to American markets.

I was charmed by the menus. Not quite charmed enough to make a full dinner from one, though. I chose the menu for the second Sunday of March, the week I began this blog entry. Below is the menu and associated recipes. Note the faint handwritten note: “½ of ¾ = 3/8”.
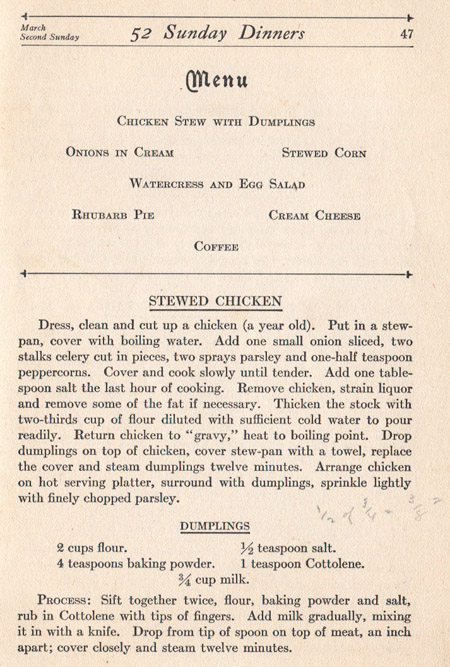
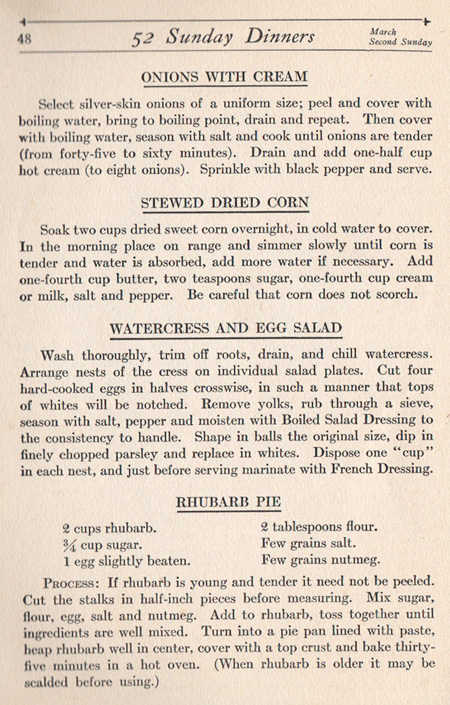
menuonions with creamI decide to make variations of two of the above recipes: the chicken stew with dumplings and the onions with cream.

I am not about to dress, clean and cut up a “year old chicken”, nor cook it for several hours. My choice is to start with boneless chicken thighs and cook for about an hour. I will add vegetables to the stew, since that is part of “healthy food” lore in the US today. I have a great recipe for chicken and dumplings that I developed myself, and will share it with you (below).

I will make some onions with cream; they sound easy and reminiscent of the creamed onions I remember from the 50s. Stewed dried corn? No, don’t think I’ll try that, or the watercress and egg salad. I’d love to make the rhubarb pie, but, too many calories.

Onions with Cream
variable servings

  • pearl onions, about 6-8 per person
  • cream (less than a half cup, depending on how many you are serving)

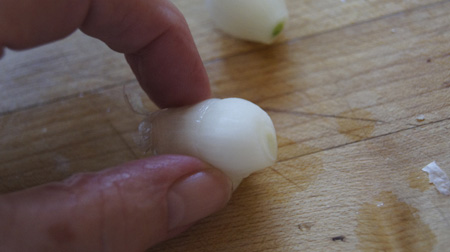
Cut off the tip of each onion, the side opposite the root end. Put in boiling water for 2 minutes, drain and cool. Hold the onion by the root end and squeeze until the onion pops out. Cut off the root end and they are ready to cook.

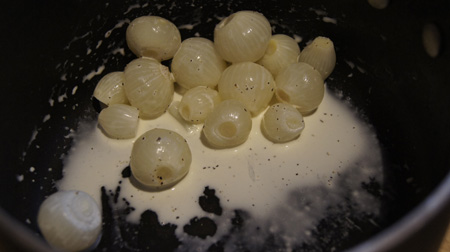
Boil the peeled onions in salted water for 20 minutes. Drain, then add enough cream to coat them. Grind some pepper over them, and they are ready to serve.

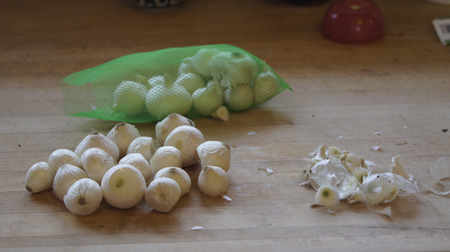
Here are the little pearl onions. I have cut off the tips of the growing end, leaving the root end intact.
onionsAfter a 2-minute boil, you can squeeze the onion out of its skin:
peeling pearl onionsHere they are, after a 20-minute boil, drained of water and lightly coated with cream:
onions with creamI liked these. I put them atop my serving of chicken and dumplings (below). Fifty-Two Sunday Dinners also has a recipe for more traditional creamed onions, served in a more traditional white sauce. I chose this recipe because I had a bit of heavy cream in the refrigerator that I wanted to use up. High in fat and calories, but I just used a bit, and it really brightened the flavor of the pearl onions.

Here is my promised recipe for chicken and dumplings. This recipe is a work-in-progress, as I keep making tiny changes each time I make it.The chicken has no bones, the sauce is thick and flavorful, and the dumplings are soft and a tiny bit gooey.

Chicken and Dumplings PLF
serves 2 or 3

Any covered pot that can go on the stove top will work for this recipe. I always choose an oval Le Creuset, because it allows for lots of dumpling space.

For the stew:

  • one half of a medium onion, chopped (about a half-cup)
  • 1 cup diced celery
  • leeks (optional; one leek would be sufficient)
  • 2 cloves garlic, chopped
  • 2 tablespoons flour
  • 1-2 cups chicken stock or water
  • 9 oz. chicken thighs, cut into chunks
  • 3 small red potatoes, quartered
  • 1 cup sliced carrots
  • salt and pepper to taste
  • a few sprigs of fresh thyme (or 1 teaspoon of dried thyme)
  • 1 bay leaf
  • chopped parsley (about a half-cup)
  • 1/2 cup peas

Dumplings:

  • 1  cup flour
  • 1 1/2 teaspoon baking powder
  • 1/4 teaspoon salt
  • 1 teaspoon poppy seeds
  • 1 egg
  • 1/2 cup milk

In the pot, cook the onions, celery, and leeks in a little olive oil until they soften. Add the garlic and stir a minute or two, then add the 2 tablespoons of flour and stir constantly for a couple minutes. Slowly stir in a cup of chicken stock (or water), until all the flour is incorporated into the liquid.

Add the chicken, carrots, potatoes, bay leaf, thyme, and salt and pepper. Add more stock or water until the vegetables and chicken are all immersed. Simmer about an hour, lightly covered, until the vegetables are tender. Check occasionally; add more broth/water if the mixture is getting too thick.

Just before you add the dumplings, remove the bay leaf and the thyme sprigs, and add the peas and the parsley.

Drop the dumpling dough by tablespoonfuls (golf ball sized) onto the stew. Cover, set the heat low enough to maintain a gentle simmer, cook until dumplings are firm, 25-30 minutes.

Ingredients:
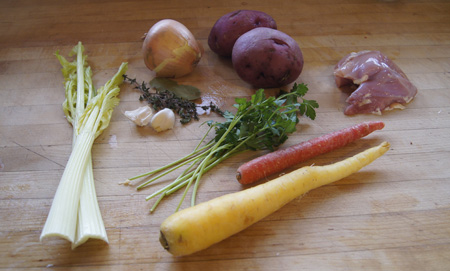
ingredientsThe stew mixture, before the hour simmer:
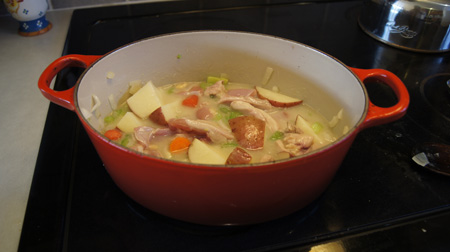
stew before simmeringAfter simmering and adding the peas and parsley, just before adding the dumpling dough. At this point, the broth should be a little thick and covering the vegetables. Check the taste for salt and pepper. You can see my dumpling dough in the back: it is rather sticky.
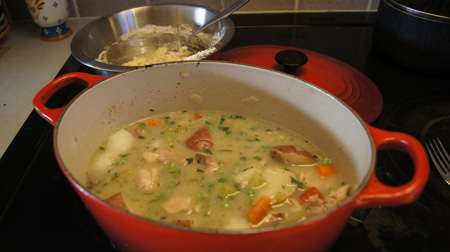
just before adding dumplingsThe finished dish:

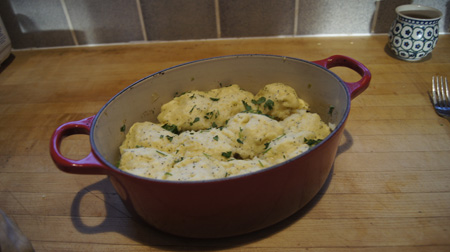
Chicken and Dumplings PLFThe aroma is heavenly (I got comments!) This version of my Chicken and Dumplings was wonderful. Homey, full of nutrients, low in fat, and delicious to boot. I might add less dumpling dough next time (my dining partner tolerates dumplings but doesn’t love them like I do). But as I said, this recipe is a work-in-progress.

No Cottolene in my dumplings! In fact, note that they are fat-free. Chicken and dumplings is different from a chicken pot pie. For a pot pie, I would cover the stew with pie crust or biscuits made with shortening or butter, and bake in the oven. The result would be a stew covered with a golden brown pastry, and it would look beautiful and taste very good, but be laden with a lot more calories. But I gotta say, my Chicken and Dumplings are so good, we (barely) miss the fat.

250 Cookbooks: Hamburger & Ground Meats Recipes

Cookbook #51: Hamburger & Ground Meats Recipes. Better Homes and Gardens, Meredith Corporation, Des Moines, Iowa, 1980.

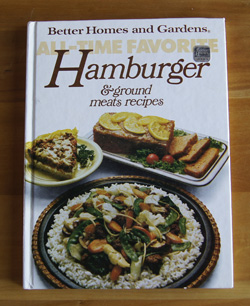
Hamburgers and Ground Meats RecipesHamburger ideas: More! This is the second hamburger-recipe cookbook I’ve covered in this blog. Ground meats are a mainstay in my freezer, great for easy and tasty mid-week meals. I’m always on the lookout for new recipes to try, even if I only cook the recipe once. “Variety is the spice of life.”

I’m going to keep this cookbook. Sure, it’s over 30 years old, but people ate well back then, too. I want to try the Crepe-Style Manicotti, Swedish Burgers, Greek-Style Crepes, and Sausage Quiche. I found a recipe for “main dish crepes” that I had been looking for for years. I was surprised to find recipes that incorporate feta cheese – I didn’t discover feta cheese until about ten years ago. I also found a recipe for “oven meatballs” that I think I used to make a lot. Baked meatballs can be low-fat, and meatballs freeze well, great for quick thawing to pop into a spaghetti sauce.

For this blog, I chose “Hearty Mexican Casserole”.

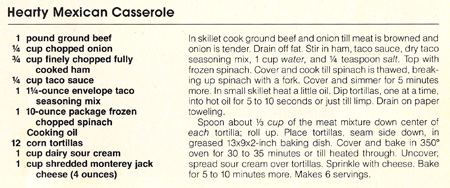
Hearty Mexican Casserole RecipeIt wasn’t until I was halfway through cooking this dish that I realized it was a lot like the “Wyoming-Mexican Casserole” that I have been making for years. Sure enough, it is exactly the same recipe that I typed it onto an index card in the 1970s. I probably clipped it from a Better Homes and Gardens magazine. I remember it being touted as “John Wayne’s favorite casserole”. When I google that phrase today I come up with a different recipe, one with chiles and eggs and evaporated milk. I guess I was wrong about John Wayne.

I’m killing two birds with one stone with this blog entry, sharing a favorite recipe and covering one of my 250 cookbooks.

Hearty Mexican Casserole
or, “Wyoming-Mexican Casserole”
serves about 4

  • 1/4 cup chopped onion (I used more like a half cup)
  • 1 pound ground beef
  • 3/4 cup finely chopped ham
  • 1/4 cup taco sauce (I used a bottled, chunky salsa)
  • 1 1/4-ounce envelope taco seasoning mix OR use 1 teaspoon each: cumin, chile powder, and oregano (preferably Mexican oregano)
  • salt to taste
  • 10 ounces spinach, cooked (can use frozen spinach)
  • cooking oil
  • 12 corn tortillas
  • 1 cup sour cream
  • 1 cup grated jack cheese

Cook the onion in a little olive oil, then remove them from the pan and set aside. Brown the ground beef (drain off fat if necessary), then add back in the onions along with the ham, taco sauce, and seasonings. Add the spinach and some water (about a half cup) and simmer 5-10 minutes.

Cook the tortillas in hot oil until just limp. Alternatively, you can steam or microwave the tortillas to soften them.

Spoon about 1/3 cup of the meat mixture on each tortilla; roll up. Place the filled tortillas, seam side down, in a greased baking dish (13×9-inch). Cover and bake at 350˚ for 30-35 minutes or until heated through. Uncover; spread sour cream over tortillas. Sprinkle with cheese. Bake for 5-10 minutes more, until the cheese is melted.
Comments

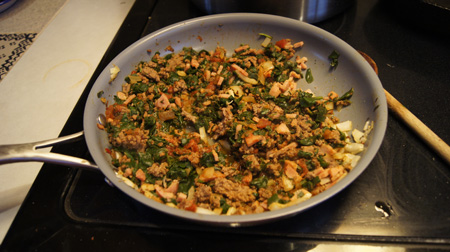
These are actually enchiladas. And they are good! Here is the mixture before it was rolled into the tortillas:

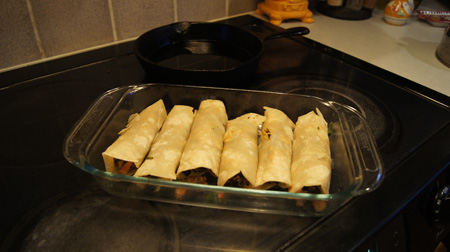
Hearty Mexican CasseroleI made a half recipe and baked them in a 7×11-inch pan. I like these scrunched up next to each other. Here they are, ready for their first phase of baking:

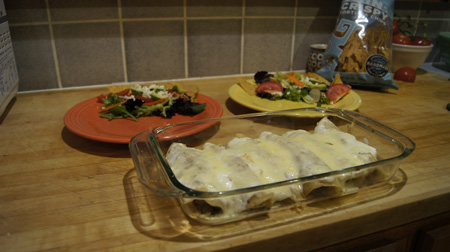
Hearty Mexican CasseroleAnd here they are, sour cream and cheese on top and baked, ready to be plated next to avocado-tomato-queso-fresco salads:

Hearty Mexican CasseroleTime to enjoy a great meal!

Favorites: Cheater’s Chiles Rellenos

My “real” recipe for chile rellenos calls for deep frying the rellenos. They are wonderful, but I rarely make them because of the fat calories the frying adds to the dish (not to mention the time-consuming and messy process of deep frying the egg-battered stuffed chiles).

Instead, I make this cheater’s version a lot. This recipe is from my own index card collection and probably entered my repertoire in the 1970s.

Cheater’s Chiles Rellenos
serves 4

  • 6 eggs, separated
  • 1 tablespoon flour
  • 1/4 teaspoon salt
  • 1 4-oz. can green chilies, diced
  • 1/2 lb. Jack cheese, sliced thin or grated
  • salsa or a spicy diced tomato sauce like rotel
  • optional: sour cream

Beat egg whites until soft peaks form. Beat egg yolks lightly, add flour and salt and mix until smooth. Fold in whites until well blended. Turn half the mixture into a greased 12x8x2-inch baking dish. Cover with chiles and cheese. Top with remaining egg mixture.

Bake at 325˚ about 25 minutes. Top with salsa and sour cream.

Half a recipe: I made a half recipe and baked it in a 4 1/2 x 6 1/2 x 1 1/2-inch small Le Creuset baking dish. I baked it at 350˚ about 25 minutes. It puffed up over the top of the baking dish and turned out pretty and perfect.