250 Cookbooks: Mexican Cooking

Cookbook #129: Mexican Cooking, The Pillsbury Company, 1995.
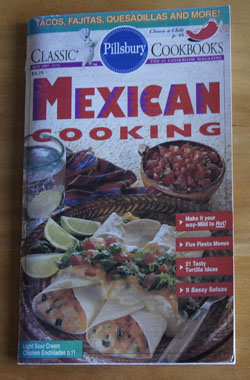
Mexican Cooking CookbookThis is one of the series of “Classic Pillsbury Cookbooks” – I discussed their history in a previous post. This cookbook must have caught my eye enough to purchase it at the check-out stand back in 1995.

And I can see why it called to me then – the recipes are kind of the way I make Mexican food. Trouble is, I rarely follow a recipe for this type of cooking, I just toss it together. It’s hard to go wrong when you start with things like salsa and beans and tortillas and cheese and some sort of meat. I’m sure I got a couple good ideas from this book twenty years ago, but I didn’t mark any recipes. And today, I was able to find a recipe for this blog, but I will recycle the cookbook.

I decide to make “Chicken and Corn Tortilla Casserole”. It’s similar to Mexican Chicken Casserole, except it does not call for canned chicken soup and it does include pimientos and sour cream. Plus, the assembly method is different: instead of layering, you cut the tortillas in quarters and mix the chicken mixture together in a bowl before placing it in the casserole. Halfway through the cooking, you stir the casserole. My issue with most chicken/tortilla casseroles is that the tortillas turn to mush after cooking. Maybe this method will keep the tortilla texture better.

Here is the original recipe:

ChickenCornTortCassRecOf course I made a few changes. I didn’t have cooked chicken on hand, so I boiled two boneless chicken breasts to use in this casserole, then used 1 1/2 of them (1 1/2 cups). I used the cooking broth instead of store-bought broth. I didn’t have sour cream, so I used Austrailian-type full fat plain yogurt. I used more green chiles than called for and they were “hot green chiles”. I added a little chile powder and cumin to the chicken-tortilla mixture.

Mexican Chicken Casserole 2
serves 3-4

  • 1 1/2 cups cubed cooked chicken
  • 1 1/2 cups grated cheddar cheese
  • 1/2 cup chopped onion
  • 1/2 cup chicken broth
  • 1 4-oz. can chopped green chiles (mild or hot)
  • pimientos: I found them in a 4-oz. can and used half the can; can substitute red or green bell peppers
  • 1/2 teaspoon chile powder
  • 1/2 teaspoon cumin
  • 6 or 7 corn tortillas, cut into quarters
  • sour cream or plain yogurt, enough to cover top of casserole, about 1/2 – 3/4 cup
  • green bell pepper strips

Combine the chicken, half the cheese, and the onion, broth, green chiles, pimientos, chile powder, cumin, and tortillas in a large bowl. Stir together. Pour the mixture into a 1 1/2 – 2 quart greased casserole.
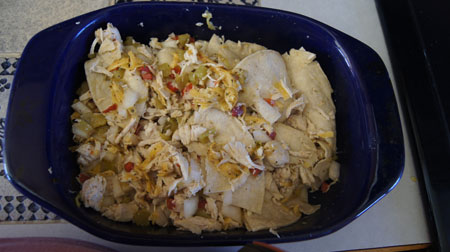
casserole before cookingCover the casserole and bake at 350˚ for 30 minutes, stirring once during this baking time. After the 30 minutes, spread the sour cream over the top, sprinkle on the remaining cheese, and lay the bell pepper strips on top. Bake, uncovered, 5 minutes, until the cheese is melted. Let the casserole stand 5 minutes before serving.
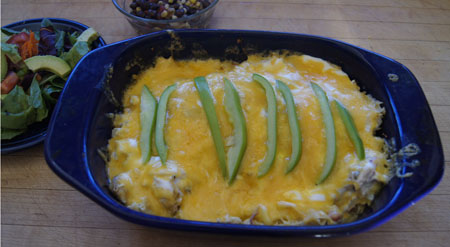
Mexican Casserole 2Doesn’t it look pretty? I served it with some black beans mixed with freshly cooked corn off the cob and salsa, a lettuce salad with avocado, and heated corn tortillas. The taste of this casserole is very good, much like Mexican Chicken Casserole 1 but I liked the sour cream on top. (And I liked not having to use canned chicken soup.) The tortillas were once again mushy, but I guess that’s just the way these casserole are. The taste was great and it was a hit!

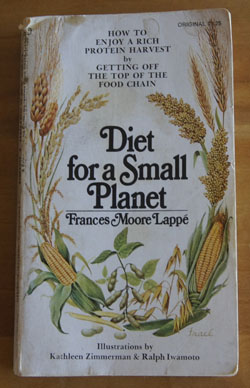
250 Cookbooks: Diet for a Small Planet

Cookbook #128: Diet for a Small Planet, Frances Moore Lappé, Ballantine Books, NY, NY, 1971.

Diet for a Small Planet cookbookI bought Diet for a Small Planet in the 1970s when it was a popular book in the health food movement. In this book, Lappé encourages everyone to become vegetarians (or at least eat less meat), because raising meat requires a lot more resources than does growing crops meant for direct human consumption. One drawback to becoming a vegetarian can be a lack of protein in the diet. Lappé has a solution for that: the quality of protein found in meat could be had for vegetarians if they combined specific vegetable groups to obtain “complete proteins”.

What is a “complete protein”? Here goes. Proteins are made up of chains of amino acids (trust me, this is true, I am a chemist!). According to Lappé, a complete protein contains the eight amino acids that our bodies cannot make: tryptophan, leucine, isoleucine, lysine, valine, threonine, the sulfur containing amino acids, and the aromatic amino acids. These are the essential amino acids, or EAAs. These EAAs must not only be present in our foods, they must be present in the right proportions. And you need to eat the complementary foods in the same meal.

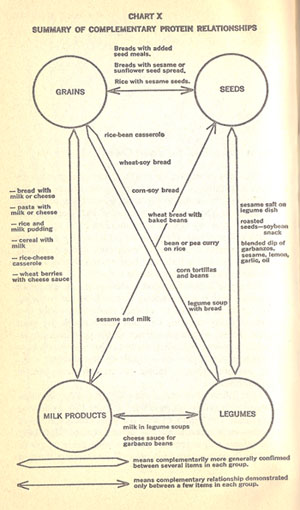
For instance. Nuts like sunflower seeds are high in the amino acid tryptophan and low in lysine, while legumes like black beans are high in the amino acid lysine and low in tryptophan. Toss some sunflower seeds on top of black beans and you consume a complete protein. Examples of other combinations are grains and milk products, seeds and legumes, and grains and legumes. (Note the milk products: this is not a vegan diet.) Often the traditional dishes of cultures exemplify Lappé’s theory: Cajun red beans and rice, India’s dal and flat wheat bread, Mexican beans and corn.

Below is a scan from the book that illustrates the complementary protein scheme:

complete protein chartThe first part of Diet for a Small Planet contains a ton of charts and tables to support Lappé’s hypothesis: Amino Acid Content of Foods and Biological Data on Proteins, Food Values of Portions Commonly Used, Composition of Foods, Amino Acid Content of Foods, Protein Requirements, Calorie Cost per Gram of Usable Protein, and more. The data in these tables is supported by bibliographical references. The second half gives recipes for twenty different vegetable combinations.

I swallowed the “complete protein” theory totally, and although I never became a vegetarian, I believed the theory after reading this book. I do remember hearing that you no longer had to eat the combinations in the same meal, only the same day or so. Imagine my surprise when I went online today and found that the complete protein method is no longer held as true!

In this 2013 article, Jeff Novick writes that Lappé’s hypothesis is based on a 1952 article by William Rose that reported minimum daily requirements of the eight EAAs. Rose then doubled the minimum and claimed it as the recommended daily requirement. Novick states: “Modern researchers know that it is virtually impossible to design a calorie-sufficient diet based on unprocessed whole natural plant foods that is deficient in any of the amino acids.” Setting the Record Straight, by Michael Bluejay (2013), is another good article that refutes the complementary protein theory. Interestingly, Wikipedia’s article on Complete Protein does not address the controversy.

Back to cooking. I decide to make Tabouli, or “Zesty Lebanese Salad”. It incorporates the “complementary protein foods” wheat (bulghur) and legumes (garbanzo beans). Bulghur (or bulgur) is a wheat product, kind of like a cereal. (We enjoyed a related wheat product called burghul or cracked wheat in Turkey. Bulgur is fine-grained and quick-cooking, while burghul takes a long time to cook and is big and chewy.)

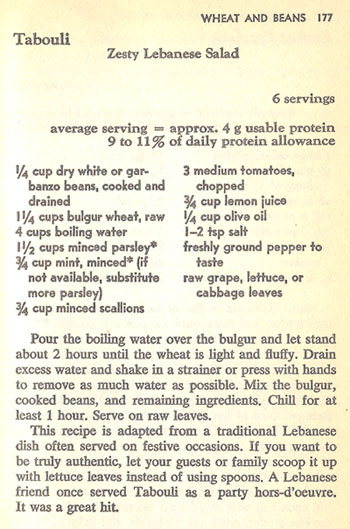
Tabouli RecipeTabouli, or Tabbouleh, is an Arabian dish. It usually doesn’t contain garbanzos (chick peas), although these beans are quite common in Middle Eastern cooking. Lappé’s version of tabouli calls for dried garbanzos and I wanted to use canned ones, so I just sort of guessed at the amount of beans to use. Also, I often make myself a bulghur salad, and usually just toss it together sans recipe, so I again strayed from the book’s version of tabouli.

Tabouli
serves 3-4

  • 1/2 cup bulgur wheat, uncooked
  • 1 1/4 cups water
  • 1 can garbanzo beans
  • 1/2 cup chopped parsley (or to taste)
  • 1/4 cup chopped fresh mint (no substitutes!)
  • 1/2 cup chopped green onions
  • 1 tomato, chopped
  • juice of 1 lemon
  • 2-4 tablespoons olive oil
  • 1/2 teaspoon salt, or to taste
  • freshly ground pepper

Boil the water in a pan, then add the bulgur. Leave it on the burner for a minute or two, then remove from the heat and let stand at least 10 minutes. Put in a strainer to drain off all the water, then put it in a bowl.

Add all of the remaining ingredients and mix. Refrigerate until cold. Taste the salad and adjust the seasonings if you want to. Serve as a side dish or over greens.

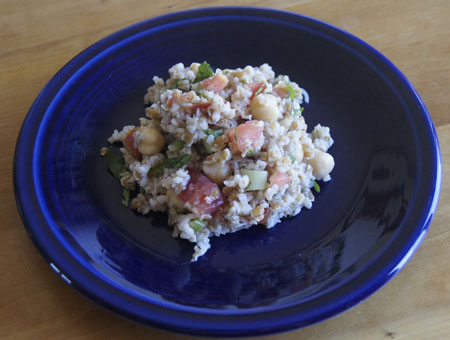
TabouliI really liked this salad, especially with some feta cheese mixed in. And the cookbook, Diet for a Small Planet? I will keep it, for nostalgia rather than the recipes.

250 Cookbooks: Cookies

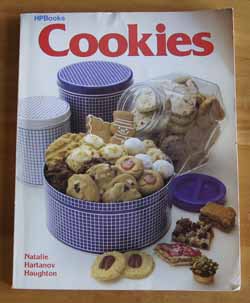
Cookbook #127: Cookies, Natalie Hartanov Haughton, HPBooks, Inc., Tucson, AZ, 1983.

Cookies CookbookCookies. One of my favorite foods in the world. Homemade, of course!

Cookies was a birthday gift from my mother to me in 1987. My mother was a master cookie baker, as I’ve probably mentioned quite a few times in this blog. Looking through this cookbook today, I realize she put a lot of thought into the choice of this particular book. The recipes are definitely her type of cookie, and the collection reflects her entire repertoire – especially the drop, bar, and rolled cookies.

Cookies birthday noteI have totally under-used this cookbook. There is a coffee-cup stain on one page and I see a couple wrinkled pages here and there, but I didn’t mark any recipes as “tried”. I guess there are huge swaths of my life when I just didn’t make cookies because of the calories. Or, I just baked a handful of same-old-recipes when we all needed a cookie fix.

This will change: today I well reshelve this cookbook with my very-favorites! There are lots of recipes I want to try in this book and all are from-scratch. The photos are great too.

Cookies begins with a few pages of cookie basics. “Successful Cookie Baking” reiterates  the way my mother taught me to bake cookies – and the way I continue to bake them to this day. I actually wrote down some important cookie-baking points in 1993 when I made a bound “Cookie Book” as a present for a friend:

“I always measure flour by dipping a measuring cup into a large canister of flour; I almost never sift before (or after) measuring. I always use unbleached flour. I use margarine (the cheap, stick kind) but you are welcome to substitute butter – I’m sure it would make everything better. Do use real chocolate chips and real vanilla.

“I always beat the shortening, sugar, and egg mixture extremely well, until quite fluffy. Then, add the combined dry ingredients and mix only until they are all mixed in.”

I have switched to butter rather than margarine in most of my cooking. It used to be that we were told margarine was healthier (and cheaper) than butter, so I used margarine a lot. Health advisories have changed, so it’s butter for me these days whenever I try a new recipe. But: many cookie recipes bake up differently with butter than margarine. I remember an Alton Brown episode of Good Eats wherein he made chocolate chip cookies three ways – with butter, with margarine, and with shortening – and each turned out different. And that is my experience too. (When I was still living at home, a girlfriend came over and we made chocolate chip cookies. She pulled butter out of the refrigerator instead of the margarine the recipe called for, and those cookies spread way out on baking. Wow! A first experience with experiments in baking. (Mother always – always! – followed a recipe to a “T”. I hardly ever do that these days.)

Anyway. I am only gradually changing my older margarine-based recipes to butter-based, making sure each time that adjustments do not need to be made to have them turn out the way I like.

I pick up this cookbook on a morning when my day’s plans include something very special: I am going to spend the afternoon with my 20 month old grandson. Thought I: “Ah, I know what I’ll do! I’ll whip up a cookie batter at home and take some to bake with him!”

Grandmothers and cookies, YES!

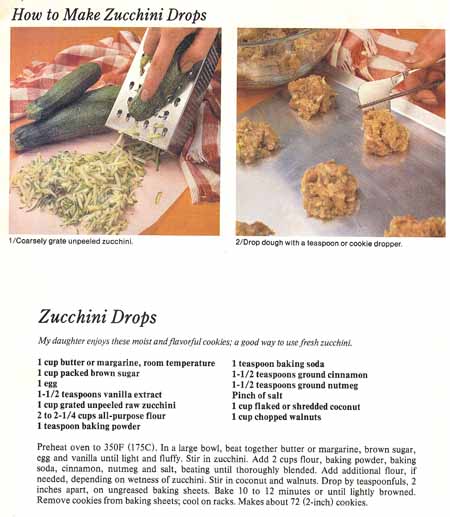
Which recipe to bake? I choose “Zucchini Drops”. I think they will pass the strict codes of “natural and healthy” foods that my daughter wants for her child. Except the sugar: I’ll have to play that down. “Just a little sugar in these, honest! A ton of zucchini and walnuts – good foods!”

Zucchini Drops recipeZucchini Drops
makes about 6 dozen small cookies

  • 1 cup butter
  • 1 cup brown sugar
  • 1 egg
  • 1 1/2 teaspoons vanilla
  • 1 cup grated unpeeled raw zucchini
  • 2 – 2 1/4 cups flour (use some whole wheat flour if you want to)
  • 1 teaspoon baking powder
  • 1 teaspoon baking soda
  • 1 1/2 teaspoons cinnamon
  • 1 1/2 teaspoons nutmeg
  • some salt – only if you are using unsalted butter
  • 1 cup flaked cocout
  • 1 cup chopped walnuts

Using a mixer, beat together the butter, brown sugar, egg, and vanilla until light and fluffy. Stir in the zucchini. Add 2 cups of the flour along with the baking powder, baking soda, cinnamon, nutmeg, (and salt), and beat just until thoroughly blended. If the batter is pretty wet, add up to 1/4 cup more flour. Stir in the coconut and walnuts.

(The wetness of zucchini varies. Basically, you want the batter to be stiff enough to drop onto baking pan – my batter needed the extra 1/4 cup flour. If your first batch of cookies flattens out too much, add a bit more flour.)

Drop by teaspoonfulls onto a baking sheet. Bake at 375˚ for 10-12 minutes, until the cookies are lightly browned. (I first tried these at 350˚ for 15 minutes, but I like them a little better baked at the higher temperature.)

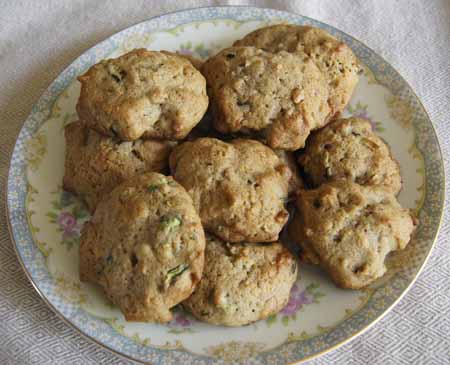
Zucchini DropsThese were a big success! They are very soft and moist and flavorful. And a little healthy. They don’t taste real sweet, actually, my husband calls them “muffin tops” instead of cookies. (Go ahead and eat them for breakfast!)

Cookie EaterMy little cookie eater takes his cookies very seriously! He ate two and wanted more. They put him in a very good mood!

250 Cookbooks: 500 Snacks – Bright Ideas for Entertaining

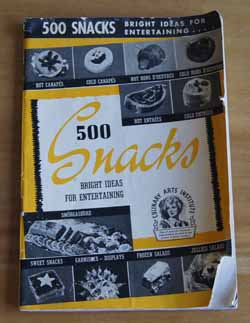
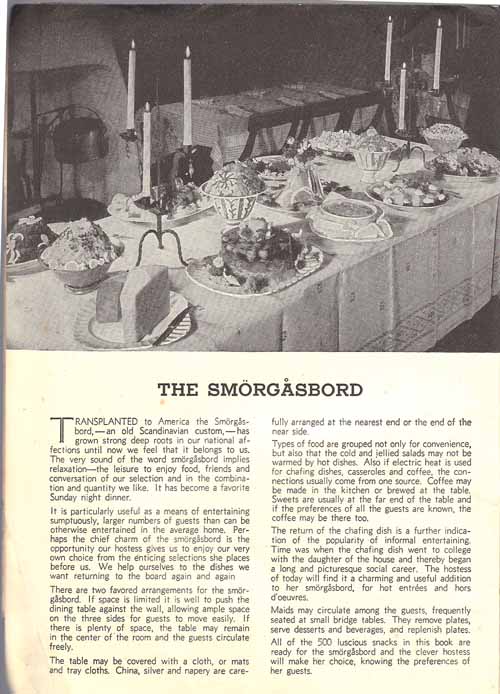
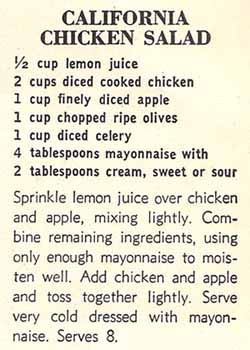
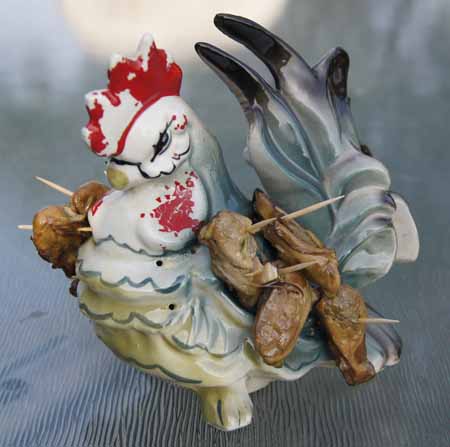
Cookbook #126: 500 Snacks – Bright Ideas for Entertaining, edited by Ruth Berolzheimer, Consolidated Book Publishers, Chicago, Illinois, 1940. 500 Snacks CookbookI’d call this a “vintage” cook book. That’s my polite way of saying I think most of the recipes are not appetizing. Rounds of bread topped with cream cheese, eggs, and anchovy filling; olives lined neatly over cream cheese on squares of bread; toast topped with ground boiled ham, cheese, horseradish and condensed tomato soup; celery stuffed with tangy cheese spread; bananas rolled in cereal crumbs and deep fried; sausages baked in bananas; anchovy paste mixed with eggs and formed into balls and served on toothpicks; sardines on toast covered with melted American cheese; tomato juice and ground ham and cream cheese and mayonnaise in a molded salad loaf. (Actually those deep fried bananas sound kind of good . . . ) I was ready to recycle this book, but I checked my database and found that it was my mother’s. There is some handwriting in this book, not sure it is hers, perhaps my grandmother’s? Maybe she gave it to my mother, that’s about the time my parents were married (1940). This book is for sale online, for about $10. Guess I’ll keep my copy because it is so old. And 500 Snacks is kind of fun to leaf through. Brings back memories of the adult cocktail hour and the hors d’oeuvres always served at family gatherings. I especially remember smoked oysters on toothpicks in a special serving dish (I’ll put a photo on the bottom of this blog entry) and the family story from when I was a little girl – once my cat got up and ate the little oysters off the toothpicks. I like the introduction to 500 Snacks: “The Smorgasbord”. smorgasbordI decide to make “California Chicken Salad” for this blog. It actually sounds good – a mixture of chicken, apples, olives, and celery, bound together with mayonnaise and sour cream. Should be good over lettuce or with crackers, or maybe in a sandwich. California Chicken Salad recipeCalifornia Chicken Salad

  • 1/2 cup lemon juice
  • 2 cups diced cooked chicken
  • 1 cup finely diced apple
  • 1 cup chopped ripe olives
  • 1 cup diced celery
  • salt to taste
  • 1/4 cup mayonnaise
  • 2 tablespoons sour cream

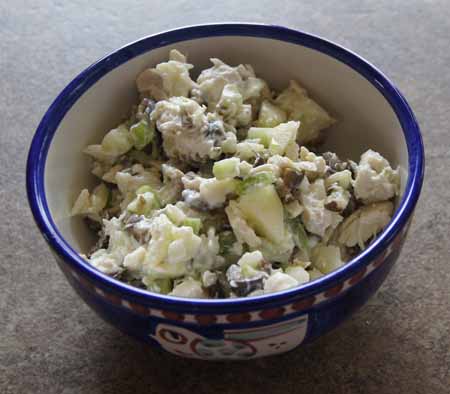
Combine the chicken, apple, and lemon juice in a large bowl. Add remaining ingredients and stir. Add a little more sour cream or mayonnaise if the mixture is not moist. California Chicken SaladSuccess! The apples and olives really perked up an ordinary chicken salad. We all made sandwiches for lunch on toasted wheat or sourdough bread with some good crunchy romaine. I put provolone cheese on mine. And now for the promised photo of smoked oysters on toothpicks. I have this ceramic chicken with holes for toothpicks in it. In fact, I have a gang of these chickens. They are all family hand-me-downs. Here is one of the meanest-looking chickens with some smoked oysters stuck in it: chicken with oysters on toothpicks

250 Cookbooks: Woman’s Day Encyclopedia of Cookery, Volume 6

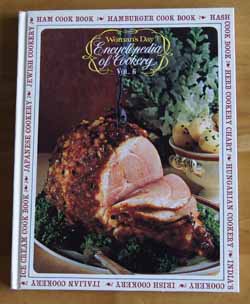
Cookbook #125: Woman’s Day Encyclopedia of Cookery, Vol. 6, Had-Kid. Woman’s Day, Fawcett Publications, NY, 1966.

Encyclopedia of Cookery Vol. 6Cookbook number 125, halfway through my 250 Cookbooks! Coincidentally, I picked up this volume of Woman’s Day Encyclopedia of Cookery to do this week, and it’s Volume 6 of the 12 volume set – halfway through. Perfect for this week.

I tuck happily into this cookbook, remembering the unexpected treats I found in the first 5 Encyclopedias of Cookery. This one begins with haddock, hake, and halibut. Next is a “ham cook book”, then a “hamburger cook book”. My mother liked the chili meatballs in the hamburger cook book. Herbs – a great section that includes a several-page chart with drawings, descriptions, and culinary uses of over forty herbs, and a section on how to build your own herb garden.

Hermit: a dark spice cookie filled with fruits and nuts. Hominy, honey, horehound (an herb used to make horehound candy), hors-d’oeuvre, hot cakes. Hungarian Cookery: a great section with goulashes and stews and strudels.

Ice: a good read on the history of the household use of ice. Ice cream cookbook. India’s Cookery. Irish Cookery. Italian.

Jam. Jamaican soups. Jambalaya. Japanese Cookery. Jellies. Jewish Cookery.

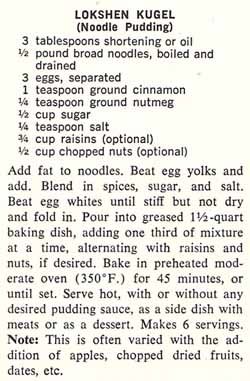
“Lokshen Kugl” in the Jewish Cookery section: This is my real find in this volume of Encyclopedia of Cookery. I’ve been looking for this recipe since college. From my previous post mentioning kugel: “Way back in college, a friend brought a traditional Jewish kugel to a party. It had noodles and was sweet: I had never had anything like it before and loved it. To this day, I have never made a sweet kugel for myself, but just the mention of ‘kugel’ gets pings of longing zooming around my brain.” In that crazy brain of mine, I thought the dish was named “luchen-kugel”. I googled but did not find any recipe similar to the kugel my friend brought to that long-ago party. Now I see “Lokshen Kugl” in this cookbook and know it is exactly what I was looking for.

Lokshen KuglBack to the rest of the encyclopedia entries. Julienne, juniper berry, kabob (kebab), kale (pre-famous), ketchup, kid (as in the meat of a young goat slaughtered before being weaned).

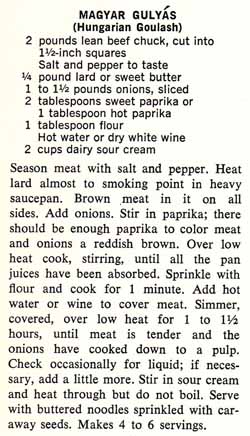
Shall I make the Lokshen Kugl for this blog? Hmm, think I’ll wait for later, when I have someone other than my husband to share this discovery with. Instead, I decide to make “Hungarian Goulash” from the Hungarian Cookery section. Usually when I make a paprika-laden meat goulash, I start with a tender cut of meat like pork tenderloin or beef sirloin sliced very thin. I like my quick version so much that I added it to this blog as Pork with Paprika and Mushrooms. Now, I want to try the “Hungarian Goulash” recipe in this cookbook to compare and contrast a traditional recipe with my current one. Here is the original recipe:

Hungarian GoulashI bought two pounds of beef chuck and cut it into 1 1/2-inch cubes, trimming off the fat as I did so. And then, over a pound of onions! I would never use that many if I were doing this recipe-less. I weighed the sliced onions to get the proper amount and the pile of onions was about the same size as the pile of meat! The meat is browned in lard – and yes, I have some. I simmered the meat and onions and paprika for at least a couple hours.

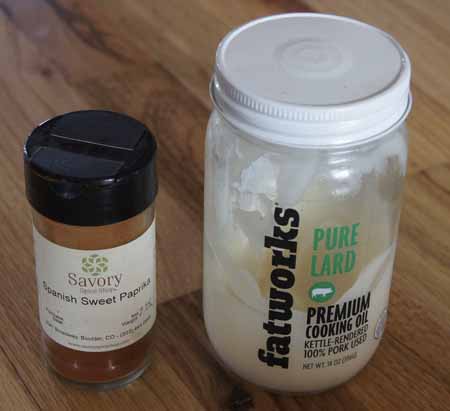
paprika and lardBelow is my version of “Hungarian Goulash”. I’ll let you know if I like it as much as my quick version.

Hungarian Goulash
serves about 4

  • 2 pounds beef roast, cut into 1-inch chunks (or, use stew meat)
  • salt and pepper
  • 2 tablespoons lard
  • 1 to 1/2 pounds sliced onions
  • 2 tablespoons sweet paprika or 1 tablespoon hot paprika
  • 1 tablespoon flour
  • water (or white wine or a combination thereof) to cover the meat
  • 1 cup sour cream

Sprinkle the meat with salt and pepper to taste. Heat the lard in a heavy pan of appropriate size, then add the meat and brown on all sides. Add the onions and cook just until the onions begin to wilt. Stir in the paprika – the meat and onions should be a reddish brown (so add more paprika if necessary). Cook and stir until most of the pan juices are absorbed or evaporated. Stir in the flour and cook a minute or two. Then, add water/wine to cover the meat (I used water).

Cover the pan and simmer over low heat for 1-2 hours. The onions will cook down to a “pulp” and the meat should become very tender. Check during the cooking time and add more liquid as necessary. ( kept my goulash at a fairly fast simmer and checked quite a few times; it took at least 2 hours for the meat to be tender and the onions pulpy.)

Stir in the sour cream and heat through but do not boil. Serve with noodles sprinkled with caraway seeds.

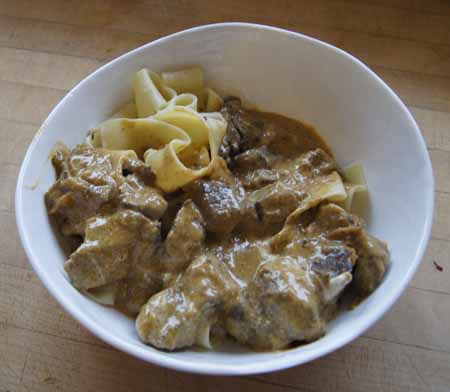
Hungarian GoulashThe sauce in this goulash is wonderful! The onions really were “melted” into it. I found the meat a little chewy, so next time I’d choose a better cut of meat (I used beef chuck and it was pretty fatty) or I would cut the meat into smaller chunks (I did 1 1/2-inch pieces). (I included these changes in my version of the recipe, above.) The caraway seeds mixed into the noodles were a great touch.

Do I like it better than my quick version? Not really, but I like it equally as much. The sauce and the meat have better flavor, but the beef was a bit tough and the goulash took a long time on the stove. This would work well in a crock pot or a pressure cooker, or, save it for a long and chilly winter day when you want the aromas of a great stew wafting from your kitchen for hours.

Note: This is the sixth in a series of 12 food encyclopedia volumes. I discussed the first five volumes here: Volume 1, Volume 2,  Volume 3, Volume 4. aand Volume 5.

250 Cookbooks: Hershey’s Cocoa Cookbook

Cookbook #124: Hershey’s Cocoa Cookbook, Hershey Chocolate Company, Western Publishing Company, Inc., USA, 1979.

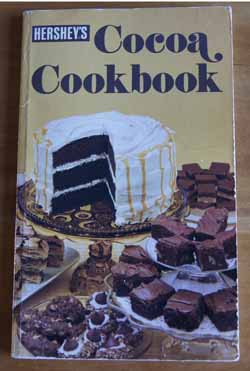
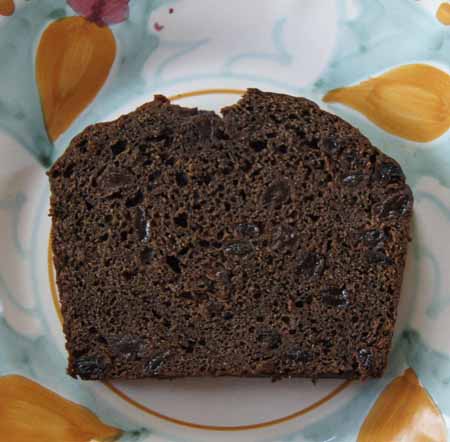
Hershey's Cocoa CookbookCAN I REALLY HAVE SOMETHING THIS GOOD FOR BREAKFAST? Boy, that was my first thought as I took a bite of Chocolate Banana Bread early this Friday morning. This recipe that I tried from Hershey’s Cocoa Cookbook is a definite keeper!

Each and every recipe in this small cookbook features cocoa – the unsweetened powdered chocolate form of chocolate. I think I always passed over this book thinking it’s “just another chocolate cookbook”. But no, the recipes are all from scratch, and I always have cocoa in my pantry because it keeps so well. And this cookbook has all the basics: cakes (including red velvet cake), cupcakes, cookies (brownies), candies (fudge), pies (cocoa chiffon pie), frostings, sauces (classic cocoa sauce and hot fudge sauce), and beverages (cocoa from scratch). Plus many interesting recipes I’ve never seen before, like the Chocolate Banana Bread.

The back cover of Hershey’s Cocoa Cookbook states that this cookbook was “free!”. It probably came with a new box of cocoa. Today, I found it for sale online for about five dollars.

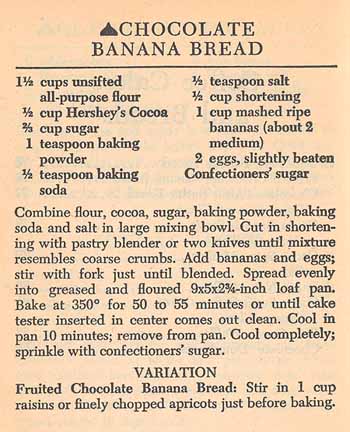
I chose this banana-based quick bread because as so often happens in the summer, I had very ripe bananas that needed to be used. I added the suggested raisins too. Here is the original recipe.

Chocolate Banana Bread recipeI decided to use unsalted butter rather than the shortening. And I added raisins. I felt that the batter would fit better into an 8×4-inch loaf pan (and I was correct). Instead of cutting in the butter with a pastry blender, I used a food processor. I used an immersion blender to mash the bananas because I like to get them really smooth. Below is my version of the recipe.
Chocolate Raisin Banana Bread
makes one loaf

  • 1 1/2 cups flour
  • 1/2 cup unsweetened cocoa
  • 2/3 cup sugar
  • 1 teaspoon baking powder
  • 1/2 teaspoon baking soda
  • 1/2 teaspoon salt
  • 1/2 cup unsalted butter
  • 2-3 ripe bananas – enough for 1 cup mashed
  • 2 eggs
  • 1 cup raisins

Lightly grease an 8×4-inch loaf pan and heat the oven to 350˚.

Put the flour, cocoa, sugar, baking powder, baking soda, and salt in a food processor and pulse a couple times to combine. Cut the butter into half-inch chunks and add to the top of the dry ingredients. Mix with 6-10 short pulses, until the mixture is in coarse crumbs. Do not overmix.

Mash the bananas by hand or use an immersion blender – whatever is your favorite method. Make sure the bananas measure to about 1 cup when mashed. Add the eggs and mix in well.

Combine the wet and dry ingredients in a bowl and add the raisins. Mix only until blended. Pour into prepared pan and bake at 350˚ for 55-60 minutes, or until it tests done with a toothpick.

Chocolate Banana Raisin BreadThis dense, moist chocolate bread is delicious. It’s not overly sweet. The chocolate almost (but not quite) masks the bananas. I really liked the raisins. I really like this bread.

Breakfast though? Yeah, sometimes. It was also really good with vanilla ice cream and a little chocolate syrup for dessert. Yum any way or time you eat it!

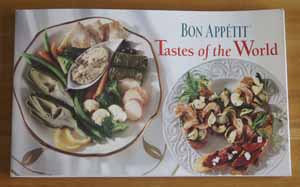
250 Cookbooks: Bon Appétit Tastes of the World

Cookbook #123: Bon Appétit Tastes of the World, Bon Appetit, The Condé Nast Publications, Inc., NY, NY, 1996.

Tastes of the World CookbookThis little cookbook has lots of interesting ideas for spicing up my cooking. I am pretty surprised at this! It’s just one of those “free gifts” that one gets when they subscribe to a magazine. I covered another such Bon Appetit cookbook in a previous post and wasn’t impressed. But this one – almost every page has a recipe I could try.

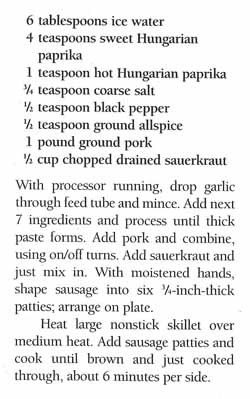
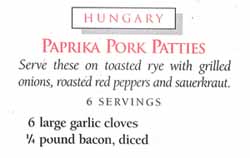
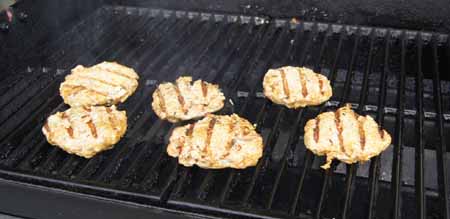
I decide to make Paprika Pork Patties for this blog. A nice change on ordinary hamburgers! First, pork instead of beef. And then, bacon! Since my daughter is visiting I decide to splurge on some bacon calories. How can one go wrong? And then, lots of paprika. Finally, chopped sauerkraut is mixed into the patties. Nice for both moisture and taste. Here is the original recipe:

Paprika Pork PattiesPaprika Pork PattiesI can’t find hot Hungarian paprika so I substitute a little hot chile powder. (But next time I am at Savory Spice Shop in Boulder I will look for it because I am curious.) I decide to grill these because it’s summer and we have company and it’s nice being outside with lots for my toddler grandson to do (like chase bubbles!). Below is my version of the recipe.
Paprika Pork Patties
serves 3-4

  • 6 cloves garlic
  • 1/4 pound bacon, diced
  • 6 tablespoons water
  • 4 teaspoons sweet paprika
  • 1/2 teaspoon chile powder
  • 1/2 teaspoon salt
  • 1/2 teaspoon pepper
  • 1/2 teaspoon allspice
  • 1 pound ground pork
  • 1/2 cup chopped drained sauerkraut
  • garnishes such as more sauerkraut, onions, roasted red peppers, pickles, mustard, whatever are your favorites

Set up a food processor. With the motor running, drop the garlic through the feed tube until it is minced. Then, add the bacon, water, paprika, chile powder, salt, pepper, and allspice and process until a thick paste forms. Turn off the processor, add the pork, then pulse a few quick times until all is combined.

Remove the pork-spice mixture from the processor and stir n the sauerkraut. Form into six patties.

Heat a grill and set to medium high. Cook patties about 4 minutes per side. (You can also cook these in a skillet on the stove top.)

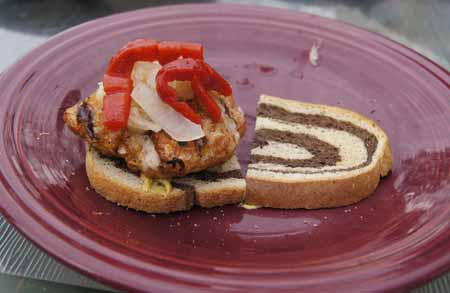
pork patties on the grillServe on toasted rye bread with the garnishes of your choice.

pork patties on a bunThese were enjoyed by all! I will probably make them again, although I tried a pork sliders recipe a few weeks ago that my husband and I liked a little better.

bubbles

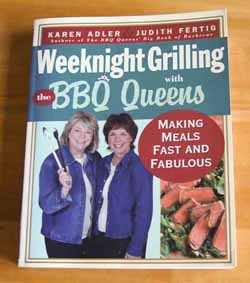
250 Cookbooks: Weeknight Grilling with the BBQ Queens

Cookbook #122: Weeknight Grilling with the BBQ Queens, Karen Adler and Judith Fertig, The Harvard Common Press, Boston, Massachusetts, 2006.

Weeknight Grilling with the BBQ Queens CB I love this cookbook. Weeknight Grilling with the BBQ Queens pulls me out of my cooking doldrums – I can’t count the times I have flipped through its pages for ideas. Such fresh tastes! “Grilled Pork Tenderloin Salad with Steamed Baby New Potatoes and Anchovy Caper Vinaigrette” is one of our favorites. Fresh herbs and interesting spice combinations abound in most of the grilling recipes. Polenta, orzo, couscous, hearts of palm, jicama, fennel, capers, endives, hummus, curry . . . vegetarian, pork, beef, chicken . . . sandwiches, meats, salads . . . variety galore in this cookbook. I especially like the summer salad recipes. The only type of recipe I haven’t tried are the grill stir-fries.

Weeknight Grilling with the BBQ Queens is also practical. I can easily find how to grill a pork tenderloin, for instance. It’s easy to mix and match ideas from different recipes. Instructions are always clear.

So this book’s a keeper!

Note that this cookbook was published in 2006. The authors, Karen Adler and Judith Fertig, are “The Barbecue Queens” (with the tiaras to prove it) and currently active in the commercial cooking community. Besides authoring numerous books, they have appeared on the Food Network, Better Homes and Gardens TV, PBS, and more. I plan to the BBQ Queens website for more grilling ideas.

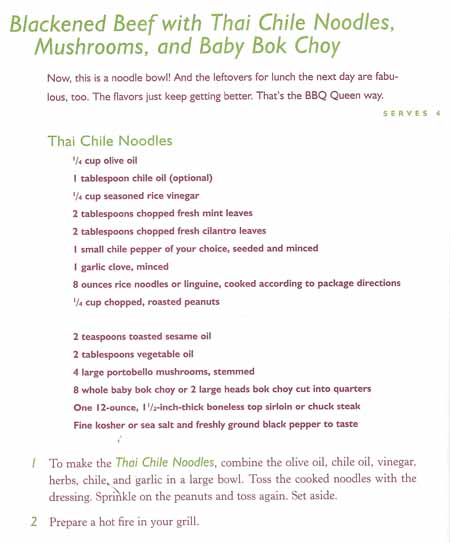
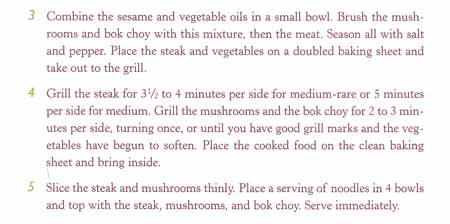
I decide to make “Blackened Beef with Thai Chile Noodles, Mushrooms, and Baby Bok Choy” for this blog. Below is a scan of the recipe in spite of copyright issues (I think it’s okay) to show you the layout and style of this cookbook.

reciperecipeI’m going to vary this just a bit. For one, I think we want a little more meat. For three adults, I will use close to a pound of beef. The sirloin I have in the freezer is only about three quarters of an inch thick, but I’ll use it anyway. I want more garlic, but less hot chile.

I miss-read the recipe and added a couple drops of sesame oil to the noodles, and I liked it that way. When I served this, it begged for soy sauce, so we passed it at the table.

So. Below is my version (with a shortened title!).

Steak and Thai Noodles
serves 3-4

Noodles

  • 8 ounces Thai-style rice noodles, cooked
  • 1/4 cup olive oil
  • a few drops of chile oil (if you have it)
  • a few drops of (toasted) sesame oil
  • 1/4 cup rice wine vinegar
  • 2 tablespoons chopped fresh mint leaves
  • 2 tablespoons chopped fresh cilantro leaves
  • 2 cloves garlic
  • part of a small chile (like a jalapeno), chopped fine – use an amount suitable to your personal taste
  • 1/4 cup dry roasted peanuts, chopped lightly

For the grill

  • sirloin steak, about 1 pound, thick-cut if possible
  • portobello mushrooms, about 4 large, stemmed and wiped clean
  • 4-6 baby bok choy (leave them whole)
  • 2 tablespoons vegetable oil
  • a few drops of sesame oil
  • salt and pepper
  • soy sauce (optional; pass at the table)

For the noodles, combine the oils, vinegar, herbs, garlic and chile for in a large bowl. Add the cooked noodles and toss. Sprinkle the peanuts on top. You can do this before you start grilling, if you wish.

Combine the vegetable oil with the sesame oil, brush some of this mixture on the mushrooms and bok choy, then on the meat. Salt and pepper everything.

Heat your grill (in your usual way) and then set the burners to medium high. Grill the steak over direct heat for 3-5 minutes per side, until medium-rare or medium, as per your own preference. At the same time, grill the mushrooms and bok choy over direct heat for about 2-3 minutes per side. As stated in the BBQ Queens original recipe, you grill: “until you have good grill marks and the vegetables have begun to soften.”

To serve, slice the steak and mushrooms into thin slices and the bok choy into bite size pieces and put on top of the noodles.

Serve! We liked a little soy sauce on top.

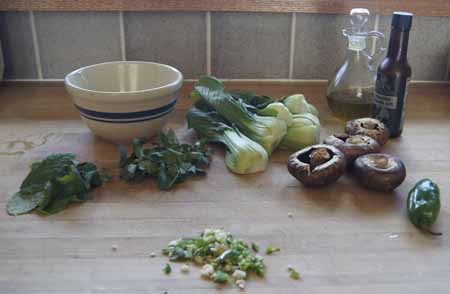
Here are my ingredients:

ingredientsAnd serving:

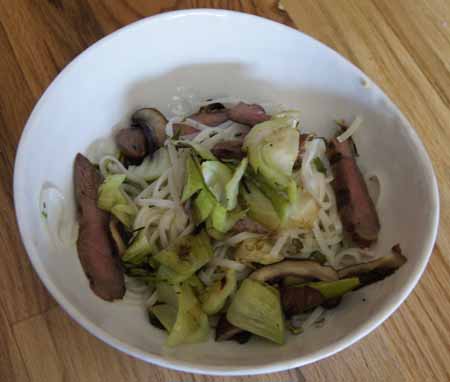
Beef Thai NoodlesThis was a definite hit and I will make it again!

Apple Coconut Muffins

Instant favorite: A muffin recipe from the Whittier Wildcats Cookbook, this week’s 250 Cookbooks blog entry. These muffins are oh so good! They pack a full cup of coconut and a cup and a half of apples into 12 muffins. I added some cinnamon and used fresh nutmeg.

I think these are really “cupcakes”. Too rich to be called “muffins”. Maybe a little whole wheat flour will assuage my conscience.

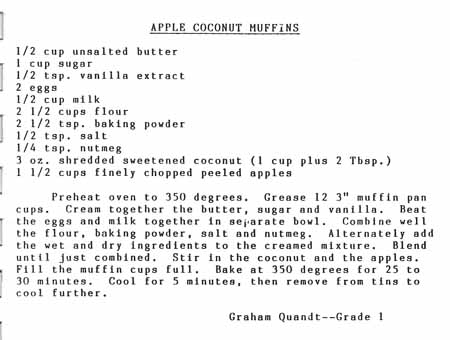
Here is the original recipe:

Apple Coconut Muffins recipeBelow is my version:

Apple Coconut Muffins
makes 12 muffins

  • 1/2 cup unsalted butter (or use regular butter and skip the additional salt)
  • 1 cup sugar
  • 1 teaspoon vanilla
  • 2 eggs
  • 1/2 cup milk
  • 1 cup whole wheat pastry flour
  • 1 1/2 cups all-purpose flour
  • 2 1/2 teaspoons baking powder
  • 1/2 teaspoon salt
  • 1/2 teaspoon ground nutmeg (freshly ground if possible)
  • 1 teaspoon cinnamon
  • 1 cup shredded sweetened coconut (this weighed 3 1/2 ounces on my scale)
  • 1 1/2 cups chopped, peeled apple (for me, this took 1 1/2 large apples)

Prepare 12 muffin tins in your favorite fashion.

In a mixer, cream the butter, sugar, and vanilla.

Stir together the flours, baking powder, salt, and spices.

Whisk together the eggs and milk.

Add the flour mixture alternately with the egg mixture to the creamed mixture, blending after each addition only until just combined. Stir in the coconut and apples.

Bake at 350˚ for 30 minutes or until they are light brown on top and test done with a toothpick. Cool in pan at least 15 minutes before removing to cool on a wire rack.

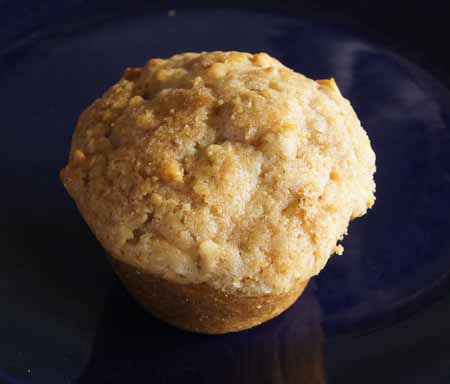
Apple Coconut MuffinsBe sure to let these cool before removing from the pan. I tried getting one out after only 5 minutes and – oops! It fell apart. So of course I had to taste it. And then go back for more. Addicting!

250 Cookbooks: Whittier Wildcat Cookbook

Cookbook #121: Whittier Wildcat Cookbook, Whittier School Community, 19??.

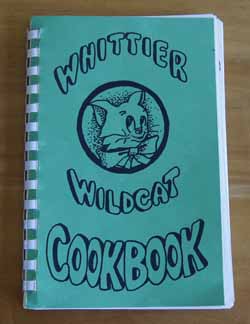
Whittier Wildcat Cookbook“I have no idea where this book came from” reads my cookbook database. Nowhere in this book is a publication date. It is a “community cookbook” –  compiled by the teachers, parents and students at an elementary school. (Here is the first community cookbook covered in this blog.) The introductory page thanks “Mary West-Smith” for typing all of the recipes on her word processor, so my guess is that it was produced in the mid-1970s.

“Whittier” at first calls to mind the city in Southern California. But no . . . “Whittier” is also an elementary school in Boulder, Colorado. A school on Pine and 20th.

Well, this all is starting to make sense. We lived in a dumpy old house on Walnut, full of character (and characters), for a couple years in the mid-1970s. We called the house “Walnetto”. What times. The Whittier school was just a couple blocks from Walnetto. Perhaps a child or parent was going door-to-door with this cookbook and I bought it from them? Quite likely.

And yes I googled this book. I found a couple references that confirm it was published in Boulder, Colorado – and the publication date is unknown. I could purchase it through AbeBooks.com for $22.90 (!).

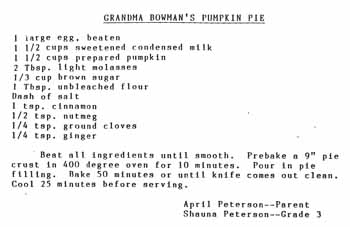
Time to settle in and read. The recipes? Pretty good. Good homey main dishes for families (Pot Roast Breckenridge and Stayabed Stew). Salads for potlucks (7-Up Salad and Coco-Cola Salad). Breads and cakes and cookies and pies (Dump Cake and Turtle Cake and Monkey-Face Cookies). Many look so familiar they could have been in my own mother’s recipe box. Some are treasured family recipes:

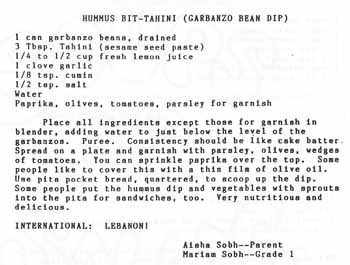
WWfamfav1WWfamfav2Some are international recipes:

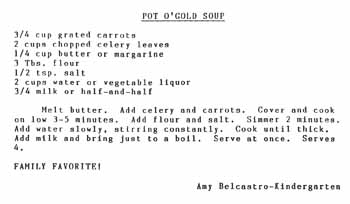
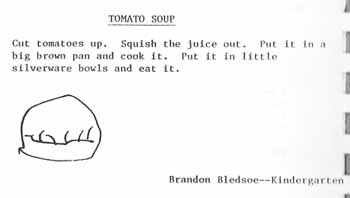
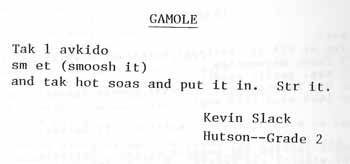
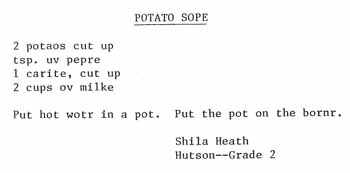
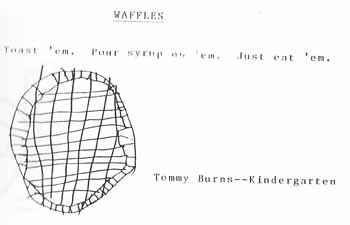
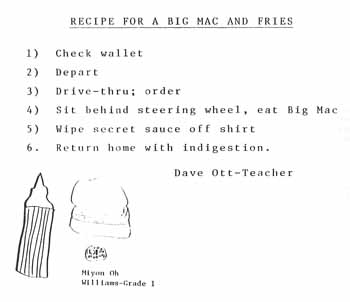
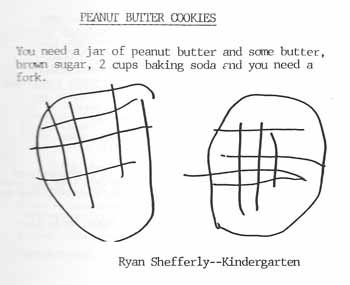
WWintl1And special treats! Little kids contributed some of the drawings and recipes.

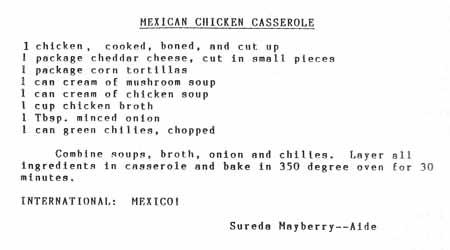
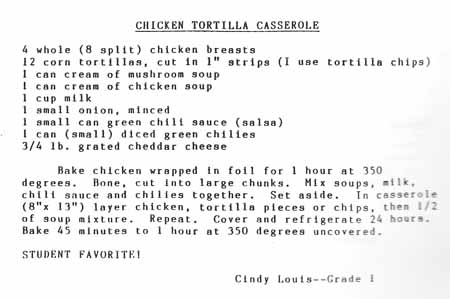
WWkids1WWkids2WWkids3WWkids4WWkids5WWkids6I am going to make a Mexican chicken casserole for this blog. The cookbook has two similar recipes:

WWMexCassRec1WWMexCassRec2(I also have a recipe for this casserole in my own collection – but I decide not to look at it until I am done cooking a Wildcat one.)

Below is a combined version of the Whittier Wildcats recipes, with a couple small modifications of my own.

Note: This casserole is a good way to use up leftover cooked chicken, but if you don’t have any around, cook one large boneless chicken breast for this recipe.

Mexican Chicken Casserole 1
serves about 4

  • 1 1/2 cups chopped cooked chicken
  • 1 clove garlic, finely chopped (optional)
  • 6 corn tortillas
  • 1 small onion, chopped
  • 1 can cream of chicken soup
  • 1/2 cup chicken broth
  • 1 can green chiles (4 oz.)
  • 1/2 cup green chile salsa (optional)
  • 6 oz. grated cheddar cheese
  • 1/2 teaspoon cumin
  • chopped fresh cilantro to taste

Mix the chicken with the garlic and some chopped cilantro and a little kosher salt and rub it all together. (This step is optional, but adds a good zip of flavor.)

Mix the cream of chicken soup with the chicken broth.

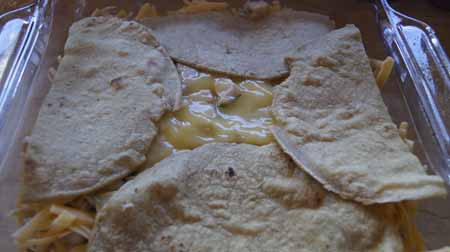
Put a little of the chicken in the bottom of an 8×8-inch baking pan. Layer with half of the tortillas. I cut the tortillas in half and layered them like this:

Mexican Chicken preparation(I put another piece of tortilla to fill in the hole in the middle but I wanted to illustrate my method.)

On top of the tortillas, add half of the remaining chicken, half of the onion, half of the soup-broth mixture, half of the green chiles, half of the green chile salsa, half of the cheese, and a sprinkling of cumin.

Add another layer of tortillas, then top with the remaining ingredients. Put a little cilantro on top for flavor and color (if you like cilantro).

Bake at 375˚ for 35-45 minutes, until the whole top is bubbly (check the center).

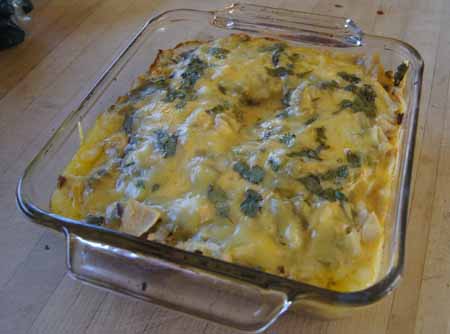
Mexican Chicken CasseroleThis was a huge success. The garlic, cumin and cilantro perked up the original recipe(s) but did not overwhelm the dish. I baked for 30 minutes, but it wasn’t hot in the center yet, so I modified cooking time to 45 minutes.

Now it’s time to look at my own version of this recipe. Turns out I have two: one pretty much like the Whittier versions, except it adds chopped green pepper and a can of “Rotel” tomatoes with chiles; one calls for the addition of garlic, cumin, chile powder, and canned red enchilada sauce.

Which recipe do we like best? I think this new version without any red sauce at all!