250 Cookbooks: Microwave Guide & Cookbook

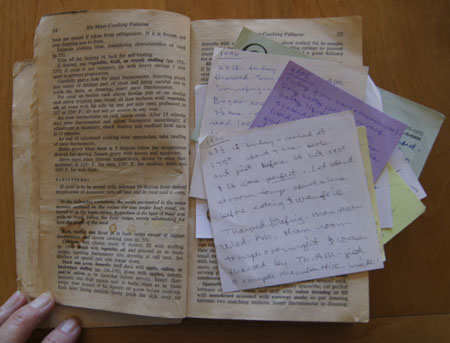
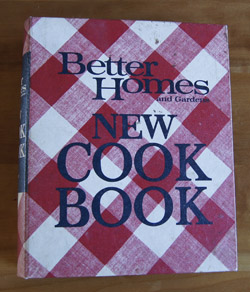
Cookbook #147: Microwave Guide & Cookbook, General Electric Co., USA, 1979.

Microwave Guide & CoobookWho needs an instruction book for a microwave oven? You just put in your coffee cup or lunch, set the dial for a minute or two, and click start, right? And if you ever want to know how long to cook a particular food item, you just google it.

So were my thoughts as I sat down with this book. I started leafing through it. The very first pages describe how microwave ovens work. A magnetron in the microwave oven generates and transmits microwaves. “Microwaves” are high frequency (and short wavelength) radio waves. AM, FM and CB radiowaves are lower frequency (and higher wavelength) than microwaves. Your microwave oven is similar to a miniature broadcasting system! It is self contained – only the inside of the metal-lined oven sees the broadcast.

How do microwaves cook food? They agitate water molecules and cause them to vibrate and generate heat. Most food has plenty of water in it so it heats – and cooks. (And the air around the food does not get hot, so the food does not brown.)

On page 5 of The Microwave Guide & Cookbook, a potato is comparisonally cooked in a pan, an oven, and in a microwave. For each process, they recorded a “heat photo” or thermograph. This tickles my scientistific nerve! After 4 minutes, a microwaved potato is all yellow or hot, while it takes an hour for a potato in a conventional oven to show the same thermograph.

Twelve big pages show photos of foods that cook particularly well in a microwave; I find this practical, visual, and useful. This book recognizes the limits of microwave cooking, while reminding me that I could be using it for more foods than I currently do. A few pages describe microwave safe dishes and food coverings.

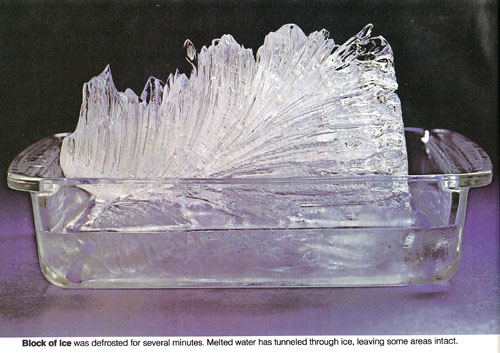
And then, in the defrosting section, a lovely photo of a block of ice partially thawed in a microwave:

microwaved block of ice

Isn’t that cool? I think this book is a keeper! I like reviewing the science behind my appliances and I like having good cooking references at home for those times when we don’t have the internet in our semi-rural area.

The Microwave Guide & Cookbook presents different foods in separate chapters: appetizers, meats, poultry, fish, eggs and cheese, sauces, pasta and rice, vegetables, breads, desserts, and jams. Each of the meat, poultry, and fish chapters begins with a description of how to defrost different forms of the food (e.g., details for hamburger, steaks, and roasts) and then gives cooking instructions and a few recipes. The recipes are often for illustration – the cook is encouraged and guided to adapt his or her own recipes to a microwave version.

What I learned or found useful:

In the ground meat section, I liked the instructions for defrosting. My current microwave oven has an autodefrost function that works miserably; now I have the knowledge to use a manual defrost mode more effectively.

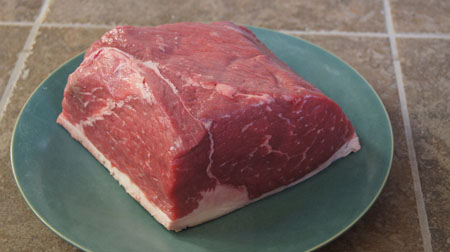
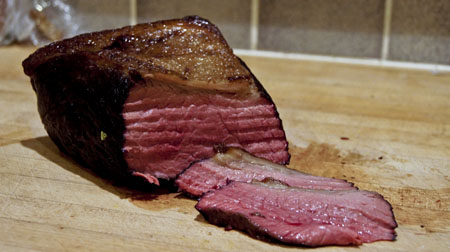
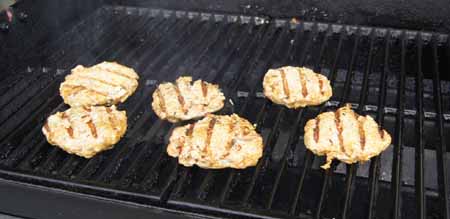
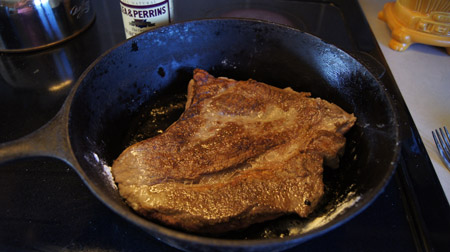
In the steak section, they say you can grill a steak briefly to get the grill marks and flavor, then heat it up in the microwave at dinner time. Sounds like a good idea for a busy cook.

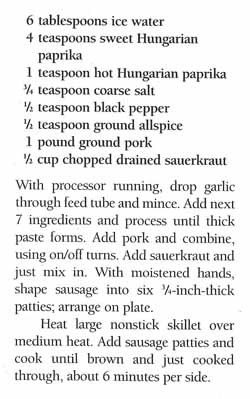
I found a ham and pork loaf recipe that might help me use up leftover ham and have an interesting filling for sandwiches.

Bacon can be microwaved on a plate covered with a paper towel.

Explicit instructions for cooking chicken are given: number (and size) of the chicken pieces; cooking power; cooking times; turning instructions. This cookbook has a microwave version of Mexican Chicken Casserole that I would like to compare and contrast with the two versions I have covered in this blog: one and two.

You can boil pasta in a microwave! Maybe we will (again) have an extended power outage and I will only have the use of my microwave oven when using our somewhat-limited backup generator system.

The egg section gives a good “microlesson” on how to microwave scrambled eggs and how to poach an egg. I could definitely learn from this. Hey, they have an egg and cottage cheese scramble, like I make on the stove top! Microwave oven users are given a strict warning NOT to microwave whole eggs in the shell. Oh boy, I learned this in lab. Back in the 70s I was working in a molecular biology lab. We had a microwave oven in the lab, ostensibly to liquify agar gel for bacteria plates. Well, one of our young lab helpers decided to microwave a whole egg in it. It burst loudly and violently! The lab stank for weeks.

The vegetable section is excellent and complete with tables and comments. I know I’ll refer back to this in the future.

Desserts. How to melt chocolate, make fudge, s’mores, custards, puddings, and pies. Brownies. Cakes in a microwave oven rise higher but are not brown; the texture is great, though, and frosting will cover any difference. Quickie chocolate sauce, butterscotch sauce, and cinnamon sugar sauce might come in handy and tasty.

With all these good ideas and learning lessons, what to choose to cook for this blog? Umm, I do love meatballs. Let’s try a microwave meatball recipe and compare and contrast with my usual stovetop method. How about Swedish Meatballs?

Swedish Meatballs recipe
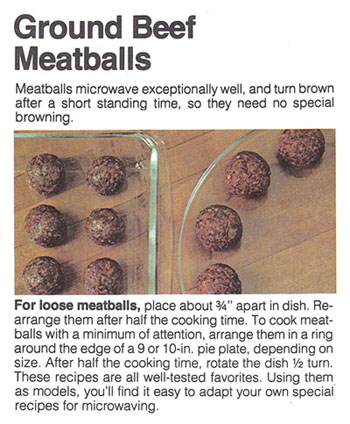
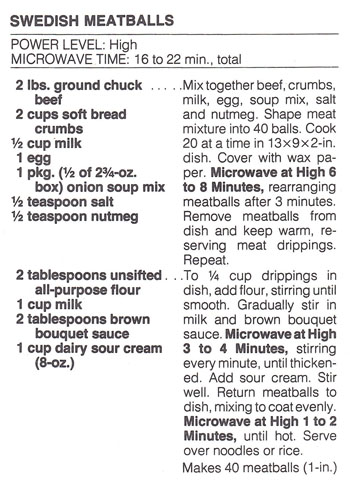
In the Microwave Guide & Cookbook, general instructions for microwave meatballs are given on the same page as the Swedish Meatballs recipe. I find these instructions useful:

microwaving ground beef meatballsI halved the recipe for the two of us. I usually cook 12 ounces of meat for us – I cooked about 14 ounces this time and had a few meatballs left over. I didn’t have brown bouquet sauce (kitchen bouquet) so I left it out.

Microwave Sweedish Meatballs
serves about 2

  • about 14 ounces ground beef
  • 1 cup bread crumbs
  • 1/4 cup milk
  • 1/2 egg (whisk an egg, measure wieght or volume, use half)
  • 1/2 packet onion soup mix*
  • 1/4 teaspoon salt
  • 1/4 teaspoon nutmeg
  • 1 tablespoon flour
  • 1/2 cup milk
  • 1/2 cup sour cream

*Onion soup mix still comes with 2 packets per box. But, now the box weighs 2 oz. instead of the old 2 3/4 oz. I opened one packet and used about half of it for my version of the recipe.

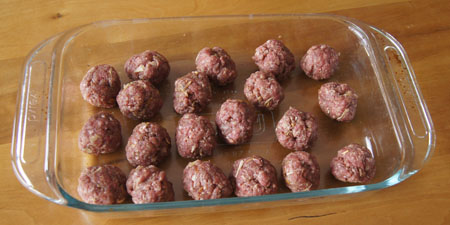
Mix the ground beef, bread crumbs, milk, egg, onion soup mix, salt, and nutmeg. Form into 20 meatballs (I used a kitchen scale to get them all equal-sized).

Put the meatballs in a glass baking dish that fits in your microwave oven. (I used a 9×11-inch glass pan.) Cover with wax paper.

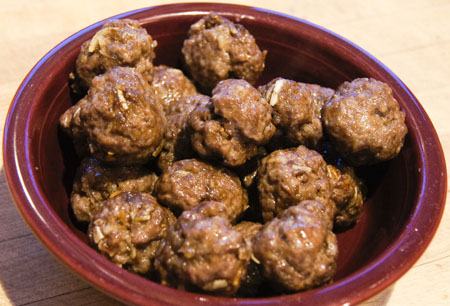
Microwave on high for 6-7 minutes (until done), rearranging the meatballs halfway through the cooking. (If you question whether or not they are done, you can gently cut an opening in one to check.)

Remove the meatballs from the baking dish and set aside. Add the flour to the drippings that remain in the baking dish and stir well, then gradually stir in the milk. Microwave at high for 3-4 minutes, stirring every minute, until the mixture is thickened. Add the sour cream and stir.

Stir the reserved meatballs into the sauce and mix to coat evenly. Microwave at high for 1-2 minutes, until hot. Serve over noodles or rice.

Here are the meatballs before cooking:

uncooked meatballsAnd here they are cooked:
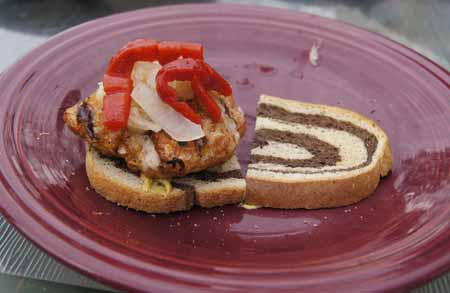
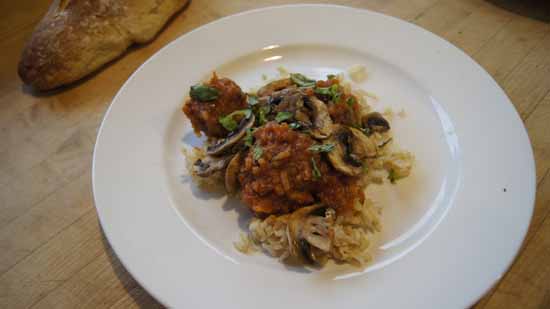
cooked meatballs

Plated:

Microwave Swedish Meatballs

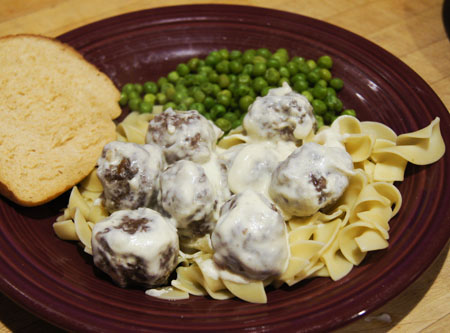
I got raves for this simple dish! It really was easy and fast, and tasted great. I didn’t have a splattered range top to clean either. I did kind of miss the good odor of browning meat. But other than that, I think these are just about as good as traditionally-cooked meatballs.

It would be easy to adapt any of my current meatball recipes to this microwave version: the rule is 20 meatballs from 14 ounces of meat baked on “high” in a microwave oven for 6 minutes. If I used a pound of meat, I might increase the cooking time a half minute or so. If you are cooking two pounds of meat, cook in two batches.

Success!

Note: I covered another microwave cookbook (that I didn’t like) and a bit of the history of microwave ovens in a previous post. I got my first microwave oven (a Whirlpool) in 1981 and it lasted 23 years. I’m currently on my second microwave oven, a combination convection-microwave JennAir.

250 Cookbooks: Let’s Cook It Right

Cookbook #135: Let’s Cook It Right, Adelle Davis, Harcourt Brace Jovanovich, Inc., NY, NY, 1970.

Let's Cook It Right cookbookAdelle Davis. I remember this author as one of the gurus of the health food movement back in our hippie days.

My copy of this book is well-worn. I keep it in the kitchen as a reference for cooking meats because it has good roast-cooking time tables. I always cook turkeys according to her directions: stuffed and on a rack with the breast side down. Each Thanksgiving since 1995, I have left a note on a piece of paper tucked between pages 54 and 55 of this book. On each note is how I cooked the turkey, and how it turned out.

notes in Let's Cook It RightLet’s Cook it Right was first published in 1947, then updated in 1962 and 1970. My 1970 edition dedication reads:

“Dedicated to my daughter, Barbara, in the hope that here husband and children will not have to eat TV dinners.”

I haven’t actually read this book in decades. I recall Davis as being a bit “preachy”. But I liked her, partly because she – like me – earned a masters in biochemistry. This week I take some time scanning through Let’s Cook it Right. From the preface:

“Surely we all agree that our foods should be both delicious and sufficiently health-building to enhance our enjoyment of life; and that dishes which are good for you but almost impossible to eat deserve little praise. Since we spend approximately a thousand hours each year eating our meals, they should be pleasant hours, times of family unity and companionship.”

Davis stresses that we need to buy nutritious foods and then cook them correctly to preserve the nutrients. And she assumes the cooking is done by the woman of the household, as in:

“Despite the need to retain maximum value in all food preparation, women are advised by thousands of recipes to extract and discard nutrients or to destroy them by high temperatures, long cooking, or the incorporation of air”.

The tone of Adelle Davis’ writing is serious and didactic: women must learn how to cook properly so that they do not ruin or toss nutrients. Her reward for this work:

“When she hears her physician praise the beauty of her children, when she sees her husband, young beyond his years, succeeding because of his energies, when she feels the surge of vibrant health in her own body, she will realize that she is largely responsible. She has shouldered her tasks and has seen to it that good health has come from good cooking.”

Once I get past the preachiness and non-feminist ideas, I do like many of the concepts in this book. “You Need Have No Failures in Cooking Meats” is the chapter I have used the most. “Serve Your Salads First” is a firm and steady rule of my household, just ask any member of my family. In “Get Acquainted with Fish” she asks: “How many hundreds of tmes have you heard housewives remark, ‘I don’t cook fish because I don’t like the odor in the house’? The fact is that when fish is properly cooked, there is no odor.” Davis’ advice for cooking fish at low temperature helped me keep fish odors to the minimum.

Let’s Cook it Right leans heavily towards protein-dense foods. Adelle Davis frowns on sugar, and writes that if a person is sedentary, they should only eat 1 slice of bread per day. The chapter on bread is titled “If You Want to Bake Bread”. In her opinion, one should buy whole wheat bread loaves rather than bake it at home. I am the opposite – I love home-baked bread! From my notes in this cookbook, I can tell that I tried her whole wheat bread recipe, but I did not write whether or not it turned out. There are almost zero cake recipes in this version of Let’s Cook it Right. In the chapter on desserts, “Desserts Can Contribute to Health”, Davis writes: “Frankly, I have never been good at baking cakes.”

This excerpt from the bread chapter illustrates the tone of Davis’ writing:

“Never shall I forget a dinner to which a friend invited me, saying, ‘I’m going to prepare everything from your cookbook.’ It was her first attempt to use whole-wheat flour and powdered milk. She had tried to make yeast bread of rancid pastry flour and still more rancid wheat germ, purchased from a market where the turnover was slow. She had added to the bread powdered milk which should have been sweet-smelling and as fine as face powder but which had an offensive odor and looked like crushed rock; such changes occur when powdered milk has been left exposed to the air. It was impossible to say who was the more embarrassed, my hostess or myself. We ate cold cereal, however, and remained friends. But I shudder when I think of how many other hosewives may have unknowingly obtained products of inferior quality.”

Davis would be amazed to walk into today’s stores with their abundant fresh whole grain flours, not to mention the ready availability of responsibly grown beef, pork, and chicken products.

(I note this with some distress: Davis writes that if we are enjoying the aroma of something cooking, we should be aware that the nutrients are leaving the meal along with the smells.)

In Let’s Cook it Right, Adelle Davis does not toute vitamin supplements. But apparently that is not true of all of her writings. On Quackwatch, the article “The Legacy of Adelle Davis” by Stephen Barrett claims that her recommendations of supplements for certain conditions were sometimes dangerous. From Wikipedia: “She . . .  became the most recognized nutritionist in the country. Despite her popularity, she was heavily criticized by her peers for many recommendations she made that were not supported by the scientific literature, some of which were considered dangerous.” On the other hand, the Adelle Davis Foundation is entirely positive about her contributions and continues her legacy.

For this blog, I turn to the chapter “You Need Have No Failures in Cooking Meats”. Adelle Davis presents a wonderful way to cook a beef roast. You put it in a 300˚ oven for an hour, then turn the oven down to the temperature you want it to end up at (or turn the oven off) and leave it the entire day. Come home and the roast is cooked to perfection, evenly medium-rare pink throughout. I used to do this all the time! It’s great for the working person, and it’s also great (according to Davis) for keeping nutrients in the meat. This method is similar to sous vide, in that you slow cook the meat by setting the cooking device – the oven in this case – to the desired finished temperature.

(No scan of this recipe; Davis’ method is explained in a two-page section titled “Slow Roasting”.)

In the spirit of Adelle Davis, I buy a responsively grown 4 pound beef rump-round roast at Whole Foods. (She would not have approved of the cost, however!)

uncooked roastIn 2015, I have an oven that I can set to any temperature from 100˚ to 550 ˚ F. This should work even better than the oven I had back when I first explored this method, as that oven did not have low temperature settings.

Slow-Roasted Beef

  • 3-4 pound beef rump or round roast
  • salt and pepper
  • olive or vegetable oil

If the meat has more than 1/2 inch of fat on it, trim some of the fat off. Season the roast with salt and pepper (Davis says not to salt the meat; I disagree). Rub a little oil over the surface of the roast. Place the roast in a roasting pan, on a rack if possible. Do not cover the roast. Insert a meat thermometer in the center of the roast.

Place the roast in a preheated 300˚ oven for 1 hour (to destroy bacteria on the surface). Then, turn the oven down to internal temperature that you desire. (If your oven does not have a low setting, simply turn it off. It should work.) Do not open the oven door!

  • rare 135˚
  • medium 150˚
  • well done 160˚

For a rare-cooked roast, it takes about 2 1/2 hours per pound.

When the meat has reached the internal temperature that you want, take it out and serve.

slow-cooked roastMine turned out perfect! I cooked it to rare. It was evenly pink throughout, just the way we like it! Good the first night with mashed potatoes and gravy, and excellent sliced/shaved very thin for sandwiches the next several days.

250 Cookbooks: Bon Appétit Tastes of the World

Cookbook #123: Bon Appétit Tastes of the World, Bon Appetit, The Condé Nast Publications, Inc., NY, NY, 1996.

Tastes of the World CookbookThis little cookbook has lots of interesting ideas for spicing up my cooking. I am pretty surprised at this! It’s just one of those “free gifts” that one gets when they subscribe to a magazine. I covered another such Bon Appetit cookbook in a previous post and wasn’t impressed. But this one – almost every page has a recipe I could try.

I decide to make Paprika Pork Patties for this blog. A nice change on ordinary hamburgers! First, pork instead of beef. And then, bacon! Since my daughter is visiting I decide to splurge on some bacon calories. How can one go wrong? And then, lots of paprika. Finally, chopped sauerkraut is mixed into the patties. Nice for both moisture and taste. Here is the original recipe:

Paprika Pork PattiesPaprika Pork PattiesI can’t find hot Hungarian paprika so I substitute a little hot chile powder. (But next time I am at Savory Spice Shop in Boulder I will look for it because I am curious.) I decide to grill these because it’s summer and we have company and it’s nice being outside with lots for my toddler grandson to do (like chase bubbles!). Below is my version of the recipe.

Paprika Pork Patties
serves 3-4

  • 6 cloves garlic
  • 1/4 pound bacon, diced
  • 6 tablespoons water
  • 4 teaspoons sweet paprika
  • 1/2 teaspoon chile powder
  • 1/2 teaspoon salt
  • 1/2 teaspoon pepper
  • 1/2 teaspoon allspice
  • 1 pound ground pork
  • 1/2 cup chopped drained sauerkraut
  • garnishes such as more sauerkraut, onions, roasted red peppers, pickles, mustard, whatever are your favorites

Set up a food processor. With the motor running, drop the garlic through the feed tube until it is minced. Then, add the bacon, water, paprika, chile powder, salt, pepper, and allspice and process until a thick paste forms. Turn off the processor, add the pork, then pulse a few quick times until all is combined.

Remove the pork-spice mixture from the processor and stir n the sauerkraut. Form into six patties.

Heat a grill and set to medium high. Cook patties about 4 minutes per side. (You can also cook these in a skillet on the stove top.)

pork patties on the grillServe on toasted rye bread with the garnishes of your choice.

pork patties on a bunThese were enjoyed by all! I will probably make them again, although I tried a pork sliders recipe a few weeks ago that my husband and I liked a little better.

bubbles

250 Cookbooks: Settlers’ Recipes and Remedies

Cookbook #117: Settlers’ Recipes and Remedies, Historic Boulder, Inc., 1978.

Settlers Recipes and Remedies Cookbook“Hiccups are immediately stopped by giving a lump of sugar saturated with wine vinegar.”  “For a headache, peel and slice raw potatoes and bind them on the forehead in a cloth that reaches around the head.” “It will be bad weather if carrots grow deeper.”

Such is the lore of the first settlers in Boulder, Colorado. Settlers’ Recipes and Remedies includes small black and white photos of people and serving ware and  a store and historic homes in Boulder. There are quite a few recipes – some basic, some interesting, some odd – but few very are practical for today’s cooks. No oven temperatures! No cooking times!

I must have bought this book used in a bookstore in Boulder, since “$3.00” is written in pencil on the first page. I’ve never used it as a recipe source. I can’t find any information about it online, except that the Denver Public Library has a copy. Historic Boulder has a current website, but they don’t mention this book.

I will cook “Wild Bill Hickock’s Smothered Beefsteak” for this blog. You take a thin steak, smooth a bread stuffing on top, roll it up, and cook it til done. Good basic foodstuff. Then, I will recycle this book.

Beef Rolls recipeSteak Roll
serves 2

  • one thin-cut steak, sirloin or round, about 12 ounces
  • 1 cup fine bread crumbs
  • 1 tablespoon soft butter
  • 1/2 teaspoon sage
  • 1/2 teaspoon summer savory (or, use oregano or thyme)
  • salt and pepper
  • milk, about 1/4 cup
  • salt pork, about a tablespoon, chopped
  • beef broth, 1-2 cups, or use water
  • flour

Lay the steak out on a breadboard and pound with a meat pounder/tenderizer until it is smooth and flat.

Put the breadcrumbs, butter, herbs, and salt and pepper in a bowl. Add enough milk to make a “stiff” mixture (one that hold together when pressed with your hands). Spread this mixture over the steak in an even layer.

Roll the steak (from either side, your choice) and tie with pieces of string. Set aside.

In a pot on the stove top, brown the salt pork. Add the steak roll and brown on all sides. Add beef broth (or water); the roll does not need to be submersed in liquid, just have the depth of liquid at about an inch. Cover the pot and simmer 1 1/2 – 2 hours. Check about every 30 minutes and add more broth or water if it is evaporating away.

The roll is done when it is knife-tender. Remove the roll from the pan and set aside. Add a tablespoon or two of flour to the gravy in the pot and mix in; add water until the gravy is as thick or thin as you like.

Slice the roll and serve with the gravy.

Beef RollsWe liked these – good comfort food. They were excellent with mashed potatoes and peas!I think the salt pork added a lot of flavor. If you can’t find it, use a piece or two of bacon. I was able to find salt pork at Whole Foods. Part of the current movement to bring saturated fats back into the US diet, I guess!

Salt Pork

250 Cookbooks: Weber Charcoal Barbecue Kettles

Cookbook #116: Weber Charcoal Barbecue Kettles, Weber-Stephens Procuts Co., Arlington Heights, Illinois, circa late 1970s.

Weber Charcoal Barbecue Kettles“Pork tenderloin surprise packages on p. 15, but missing that page!” That is what I wrote in my database when I entered this small instruction and recipe booklet. And that recipe is all I think about now when I pick up this booklet to find a recipe for this blog! None of the other (remaining) recipes are anything I want to make.

What are pork tenderloin surprise packages? Well, as I recall, you take some bacon and wrap it around a thick slice of pork tenderloin topped with – something else – and toothpick it all together. You put it on the grill and cook it – at some temperature – until done. Cheese enters the picture at some point. We loved these back in the day but I haven’t made them in years.

On a hunch, I googled “pork tenderloin surprise packages” and hit the jackpot. I guess I’m not the only fan of this recipe! I found several very similar versions of the recipe online. Yay!

Here is a photo of the original recipe (1972 edition, not the same as my little booklet) from the Let’s Talk BBQ site. Visit that site for great photos of the steps for making Pork Tenderloin Surprise Packages! Cooks.com has a version that is a little easier to read. Saz’s site’s version suggests mozzarella cheese and specifies “indirect heat” and a cooking time of 55 minutes (not 45 minutes like the original) and a doneness temperature of 170˚. I like this version too; it suggests that you can cook them in the oven.

I am tickled to find the original recipe, but I still have some work to do: I need to work out how to cook these on a gas grill, both time and temperature.

I know that the bacon grease will drip off these little packages – so I begin by making sure the drip pan at the bottom of my gas grill is clean and wiping off some of the chunks of build-up on the inside of the BBQ. My grill top has a temperature gauge; while cooking these packages I will nudge the burners to get it to read 350-375˚. I’ll put them over indirect heat. Starting at 40 minutes, I will check the temperature of the pork with an instant-read thermometer. When the temperature is about 160˚, I’ll add the cheese to the top and check every couple minutes until the cheese is melted. Ready, set, go!

Here is my version of the recipe.

Pork Tenderloin Surprise Packages
this is written for one; multiply as necessary

These work best with the pork in a thick chunk. Pork tenderloins have both a skinny and a fat end. I found that I could cut a 2-inch thick slice from a skinnier end and flatten it to 1 1/2-inch if necessary.

  • 1 slice of pork tenderloin, 3-6 ounces (depending on appetite); thickness about 1 1/2-inch
  • seasoning (salt and pepper; but you barely need salt if the bacon is salty)
  • 2 slices bacon
  • 1 slice of cheese: aim for 1/4-inch thick
  • 1 slice of tomato: aim for 1/2-inch thick
  • 1 chunk of bell pepper
  • 1 slice of cheese (I used sharp cheddar)

Cross the two slices of bacon and put the pork tenderloin in the center. Add the onion, then tomato, then bell pepper. Fold the bacon ends in and secure with a toothpick.

Heat your gas grill to about 375˚. I did this by turning on all the burners to get the grill good and hot. Then, on my Weber gas grill with three burner strips, I set the front one to “high” and turned off the other two. I found that this maintained the 375˚ temperature for the duration of the cooking.

Put the pork packets on the grill over indirect heat: on my grill, I put them over the back two unlit burners. Close the BBQ.

After 40 minutes, begin checking the temperature of the pork tenderloin. Cook the meat to 160˚. (Mine took 45 minutes.) Add the slice of cheese to the top of the package and cook only until the cheese melts – about 5 minutes.

Serve!

Preparation steps:

These are really easy to make. I served them with artichokes and fresh sourdough bread.

surprise packagesSlice and stack! An X marks the spot.

surprise packagesAnd here is one of the grilled pork tenderloin surprise packages:

pork tenderloin surprise packagesYes these were fatty but who cares! The onion was soft-cooked, the tomato perfect, and the bacon – well, if you like bacon, you know that bacon makes everything taste great. I’m glad I found my old recipe and made these again. The missing pages from this booklet may show up tucked in one of my other cookbooks, but it doesn’t matter anymore, I have the recipe I want. Now I can recycle the remains of this booklet.

Favorites: Sukiyaki

One of my college roommates was Japanese, and she wrote out this recipe for Sukiyaki for me:Sukiyaki RecipeWhen we cooked in our on-campus apartment, we made this in my electric fry pan. She was a very neat person (I, on the other hand, can tend to be slovenly) and put neat little piles of the different ingredients – meat, veggies, tofu, noodles – in different sections of the pan. I always loved this meal. And the memories of our times together, including visits to her aunt’s house in Southern California.

I just re-discovered my electric fry pan and was inspired to dig out my old recipe card. I actually found it! Here is how I prepared Sukiyaki last Saturday, here in the year 2015.

Sukiyaki
serves 2

  • 9 ounces beef tenderloin or sirloin, cut into small strips
  • a couple green onions, cut into 1-inch pieces
  • bamboo shoots, about half a can
  • yam noodles (fresh, from an Asian market, or maybe a local supermarket)
  • water cress (one small bunch; could use spinach)
  • mushrooms, sliced (I used fresh shitakes)
  • tofu, about 10 half-inch chunks
  • sauce: 1/4 cup sugar, 1/4 cup soy sauce, 1/2 tablespoon mirin (rice wine, or use sherry), 1/2 cup water

Heat a large electric fry pan to 360˚ (or use a large, flat skillet on your stove top). Add a few tablespoons vegetable oil and fry the meat until brown. Push the meat to a corner of the pan. Lower the heat to 320˚ and add the sauce. Put the green onions, bamboo shoots, noodles, water cress, mushrooms, and tofu in separate piles in the pan. Continue to heat until all the ingredients are hot. Serve!

Sukiyaki

250 Cookbooks: Rice – 200 Delightful ways to serve it

Cookbook #112: Rice – 200 Delightful ways to serve it, Southern Rice Industry, New Orleans, LA, 7th edition, 1937. Prepared by the home economics department of the Southern Rice Industry, New Orleans; recipes tested and approved by the Home Economics Department of Louisiana State University (Director: Beth Bailey McLean).

RiceCB“The set table must appear balanced. Dishes must be so placed that no spot is crowded, no side or end is over-balanced with dishes. All the lines on the table should go across or lengthwise of the table. A diagonal line attracts attention, and should be avoided. Therefore, the handles of dishes, bread-and-butter spreaders, oyster forks, salt-and-pepper sets, must follow this rule. If round doilies are used, the threads should also be placed parallel to the edge of the table, not on a diagonal. All dishes, linen, and silver must be placed to follow this rule, or the effect is one of carelessness.”

This is the delightful advice from page 11 of Rice. Yes the book has many recipes for rice, but I enjoy the glimpse into 1930s Americana even more.

table settingMy copy of Rice is almost 80 years old but is in excellent condition. I am not sure whether this cookbook was my mother’s, her mother’s, or from the “Ruth C. Vandenhoudt” house (relatives of my father’s mother). It doesn’t look like it was ever used: no writing or food stains.

As the title states, this book contains 200 recipes for cooking with rice:

“For this book, we have selected recipes that are usable in every section of the United States. Some of the rice recipes are excellent for the main dish in the low cost diet. Other rice recipes are ideally suited to the most elaborate menu in the high cost diet.”

Rice waffles, muffins, fritters; codfish and rice omelet, rice with poached eggs, cheese soup with rice, cream of rice soup, crabs with rice, Mexican and Uruguayan rice, rice loaves, jambalaya, risotto, baked rice and cheese, luncheon salad, rice pudding, rice and raisin pie . . . and more. The recipes are dated, but I’ll be able to adapt at least one of them for this blog.

More Americana, on “Types of Table Service”:

“The English, or family type, is the one most suited to the average family where there is no maid or cook. In this service, all the food is served att he table by the host and hostess, instead of being brought in from the kitchen in individual servings. The hostess of today would do better to perfect this type of service, rathere than to attempt the more formal types.”

 “Rules for Waiting on a Table”:

  1. Food dishes and soiled dishes from the last course must be removed.
  2. Clean dishes and food for the next course must be placed.
  3. This exchange must be done quietly and quickly.
  4. There should be no unsightliness or appearance of great haste.
  5. There should be no display of dishes or silver.
  6. There should be no unnecessary trips to and from the kitchen.
  7. Always consider the comfort of those at the table. Do not make them fear an accident because of the clumsiness or carelessness of the waitress.

I TOTALLY FAIL! If I serve you food, you may be fearing an accident because of my clumsiness!

Okay, enough levity. For this blog, I decide to cook “Stylish Meat Balls”.

Tomato soup? Was there really canned tomato soup in the 1930s? Yes, apparently so. In 1897 a a chemist at  Campbell’s named Dr. John T. Dorrance “invented” Campbell’s Soup as we know it. His idea was to take the water out of the soup, thus selling it in a smaller can and for less money. Here is a little on the history of Campbell’s Tomato soup and on the soup can design.

I do keep canned tomato soup in my pantry, but mostly for making French dressing. For Stylish Meat Balls, I want to make my own tomato soup. I consulted Cooks Illustrated, and modified their recipe for “Ultimate Cream of Tomato Soup”. Below is my version of this recipe.

Uncanned Tomato Soup

  • 1 (28 ounce) can whole or diced tomatoes
  • 1 tablespoon brown sugar
  • 2 tablespoons butter
  • 2 large shallots or 1 small onion, chopped fine
  • 1 tablespoon tomato paste
  • salt to taste
  • 1tablespoon flour
  • 1 cup chicken stock

Drain the tomatoes; reserve the juice. Pat the tomatoes dry, then place them on a half-sheet pan lined with parchment. Sprinkle the tomatoes with the brown sugar. Bake at 450˚ until the liquid evaporates and the tomatoes begin to color; do not let them char. Remove from oven and let cool.

Heat the butter in a pan and add the shallots (or onions). Cook until they soften, then add the tomato paste and a little salt. Cook a few minutes, then add the flour and cook, stirring constantly for about 30 seconds, until the flour is incorporated. Stir in the chicken broth, the reserved juice from the can of tomatoes, and the tomatoes that were roasted in the oven. Let simmer about 10-15 minutes.

If you have an immersion blender, use it to blend the hot soup. If not, let it cool a bit and then blend it in batches in a blender or food processor. If the soup is too thick for your taste, thin it with water or chicken stock.

The soup is ready to eat at this point, or you can add a few tablespoons of cream. I tasted it without cream and said “yum”. But we didn’t eat it as soup, I used it in the “Stylish Meat Balls”.

Stylish Meat BallsBelow is my recipe for Stylish Meat Balls. Note that the original recipe says to shape into “small balls”, but also note that it says it makes 10 meat balls. For 1 1/2 pounds of meat, that’s 2.4 ounces per meat ball. I consider those large meat balls. When I made the recipe, I made about 16-20 meat balls, and they were bigger than the meat balls I usually make.

Stylish Meat Balls
serves 4-6, depending on appetites

  • 1/2 cup rice
  • 1 1/2 pounds ground meat
  • 1/2 teaspoon salt
  • 1/8 teaspoon ground pepper
  • Uncanned Tomato Soup (recipe above)
  • 1 tablespoon grated onion (this is very good)
  • 2 tablespoons chopped green pepper

Mix the rice, ground meat, salt and pepper. Form into about 16-20 meat balls.

Heat the tomato soup. (I suggest a very large flat pan, so that the meat balls can rest in a single layer in the pan.) Add the meat balls, cover, and cook over very low heat for about 45 minutes. If you cook this too hot, it WILL stick to the bottom of the pan and burn. Check it frequently as it cooks and add a little water if it gets too thick.

Serve the meat balls – and the sauce in which they cooked – over rice or noodles. I served mine over brown rice with cooked mushrooms and fresh basil:

Stylish Meat BallsMy Stylish Meat Balls got the comment “these are better than your usual meatballs”. I liked them too! The rice inside the meat balls keeps them moist. (They are kind of like inside-out Pearl Balls!) They definitely earned a “yum” from me.

250 Cookbooks: New Creative Crock-Pot Stoneware Slow Cooker Cookbook

Cookbook #107: New Creative Crock-Pot® Stoneware Slow Cooker Cookbook, Robin Taylor Swatt, Pascoe Publishing, Rocklin, CA, 2001.

New Creative Crock-Pot CookbookI come in from outside on a cool spring morning and a spicy, beefy aroma sends my senses racing. Ropa Vieja is in the crockpot! I think this is what I like most about slow cooker cooking.

I found the Ropa Vieja recipe in the New Creative Crock-Pot® Stoneware Slow Cooker Cookbook. I have covered other crock pot or slow cooker cookbooks in a few other posts in this blog; some history of crock pots and my opinionated thoughts on them is in this blog post. To find my crock pot recipes, search my website for “crock” or select the category “slow cooker” or go to the recipe index.

The New Creative Crock-Pot® Stoneware Slow Cooker Cookbook is nicely presented and pleasant to leaf through. The introduction is written by the “Rival® Kitchen”, and throughout, Crock-Pot is followed by the obnoxious-to-type “®“. No introduction is given by the author.

Notes in this cookbook indicate that I have tried several recipes from this book: a tomatillo chicken, beef roast, and a hoisin chicken. I like the section entitled “from around the world”, and I appreciate the low-fat section. In my opinion, too many of the recipes call for prepackaged seasoning mixes but other than that, most of the recipes I could try. But I probably won’t. I usually cook for just two, and my current Rival® Crock-Pot® is a 3-4 quart cooker, so it makes a lot. And I rarely need the time-saving convenience of a crock pot (a luxury of retirement). These days I mostly use my crock pot for things like pork green chili, spicy pinto beans from scratch, and shredded beef, dishes I usually cook from memory rather than from a recipe. Comfort food dishes I can make a lot of and freeze some for later meals.

But the recipe for Ropa Vieja in the New Creative Crock-Pot® Stoneware Slow Cooker Cookbook could add something new to my shredded beef repertoire. The cut of beef used is flank steak, rather than roast or brisket. This interests me, because flank steak should give nice long “ropes” of shredded beef. (Ropa Vieja does not translate to “ropes”, instead, it is “old clothes”.)

ropa viejaropa viejaI buy a large (and expensive) flank steak. Instead of vegetable broth, I use my own beef stock. I stay with just carrots in the cooking liquid, although I want to throw in onions and garlic. (I know the carrots will just be mush after 7 hours cooking, but they should add some flavor!) I can’t resist adding some spices, like chili powder, cumin, and cayenne. I toss in half a chili pepper that I have in the ‘fridge. Instead of making the tomato-chili-broth and serving the dish like a stew, I decide to use the shredded beef sans sauce in burritos.

Okay. I mangled the recipe. But Ropa Vieja gave me inspiration, and often that’s all I look for from my cookbooks!

Flank Steak Shredded Beef
serves about 6

  •  1 1/2 – 2 pounds flank steak
  • 2 carrots, peeled and cut into large chunks
  • 1 cup beef stock
  • 2 teaspoons chile powder
  • 1 teaspoon cumin
  • dash cayenne
  • 1 teaspoon salt
  • black pepper
  • a small fresh chili pepper, or half a larger one (optional and to your own personal taste)

Put the stock and spices (and chili pepper, if using) into a 3-4 quart slow cooker, then add the flank steak. Cook on low 7-9 hours or high 3-4 hours. The shredded beef is done when it falls apart when you grab some with a fork.

Here is the cooked beef:

shredded beefLook at the big ropes of shredded beef! The turned out perfect. It was great mixed with onions and beans and cheese in flour tortillas. I had lots leftover for other meals.

The carrots were as I predicted, mushy like baby food. But the cooking liquid was dark and rich with beef and spice flavors. It would have been good mixed with onions and chiles and tomatoes as in the original recipe, except that it had a layer of fat on top:

shredded beef brothI put the cooking liquid in the refrigerator and a few days later removed the hardened layer of fat. I put it on the stove and thickened it with cornstarch, and mixed it with some of the leftover shredded beef (and olives and onions and cheese) for enchiladas. Yum!

250 Cookbooks: All-Time Favorite Beef Recipes

Cookbook #102: All-Time Favorite Beef Recipes, Better Homes and Gardens, Meredith Corporation, Des Moines, Iowa, 1977 (18th printing, 1983).

AllTimeFavoriteBeefRecCBMore ways to cook beef! Guess you know that I am not a vegetarian. I acquired this book in the mid-eighties, and it is a good example of American cookbooks of that decade. The contents include recipes for roast beef, pot roasts, steaks (expensive and less-expensive), meat loaves and meatballs, hamburger recipes, soups and stews, leftover roast beef, and variety meats.

I find it refreshing to open this (dated) cookbook and not be barraged with brand-name ingredients, nor to see packaged mixes as ingredients. Plain fare mostly, not terribly inspiring but some good comfort food recipes.

Paging through this book, I re-discover a recipe I’ve always liked for “Italian Bracioli” – round steak stuffed with onions and rolled up and baked in a tomato sauce. When I was a working mom, I relied on this type of recipe, since I could cook it on a Sunday and heat it up on a weekday. I also tried (and liked) the Spinach-Stuffed Flank Steak and the Oven Swiss Steak. So, I’ll keep this cookbook.

I decide to make “Greek-Style Sandwiches” for this blog. It calls for pita bread, which means I have an excuse to go to the Mediterranean Market on Bluff in Boulder, always an interesting trip (I love exploring shelves of foreign cuisine products).

Greek-Style SandwichesThe above recipe is (in my opinion) an “Americanization” of Greek cooking, so I am calling my version “Beef Steak Pitas”. Most Mediterranean cooking calls for lamb, fish, or chicken rather than beef, and yogurt instead of the sour cream dip with chives. I kept the beef, but I substituted plain yogurt for the sour cream dip, added green onions, and added feta cheese.

Pita breads vary widely. I bought Greek pitas from the Mediterranean store: they were huge and tasty but they did not have pockets. We found we could fold them carefully over the filling like a taco, but it was almost easier to eat them with a fork. Next time I’ll look for pita breads that have pockets. Or, make my own.

Beef Steak Pitas
serves 3-4

  • 1 pound sirloin steak
  • 1/2 cup red wine
  • 2 tablespoons olive oil
  • 1/2 teaspoon dry oregano (or use 1 tablespoon fresh oregano)
  • salt and pepper to taste
  • 1 1/2 cups chopped lettuce
  • 1 chopped tomato
  • 2 green onions, chopped
  • 1/2 of a cucumber, peeled, seeded, and diced
  • 1/2 cup crumbled feta cheese
  • 1/2 cup plain yogurt
  • pita breads

Slice the steak crosswise into thin strips, and then shorten the strips to about 1-inch pieces. Combine the wine, olive oil, oregano, and salt and pepper; add the meat, cover, and marinade up to 24 hours.

Drain the meat well, then fry in a hot pan for about 5 minutes. Meanwhile, ready the garnishes: lettuce, tomato, green onions, cucumber, feta cheese, and yogurt. (The amounts of these are approximate; add them to your personal tastes. A few hot peppers would be good on these too.)

If your pita is thick, microwave for a few seconds and place the meat and toppings on it and serve it like a taco. If your pita breads have good pockets, slice each pita in half and open each pocket and fill with the meat and garnishes.

meat for beef pitasI first sliced the meat into quarter-inch wide/two-inch long pieces before marinating, as directed in the original recipe (and as seen in the above photo). On tasting the cooked meat, I found it too chewy, so I chopped the meat into smaller pieces before serving. Next time I make these I’ll cut the steak into smaller pieces before marinating – I incorporated this change in my version of the recipe.

Beef PitasThese are very tasty, albeit a bit unwieldy with the thick pitas. The meat really has a great flavor, and they look so pretty on the plate with all the garnishes. I’ll make them again!

250 Cookbooks: Better Homes and Gardens New Cook Book

Cookbook #82: Better Homes and Gardens New Cook Book, Better Homes and Gardens, Meredith Press, NY, Des Moines, 1968.

Better Homes and Gardens New CookbookThis is one of my mother’s basic cookbooks. By “basic cookbook” I mean it is the type of cookbook that encompasses all types of recipes and can serve as one of a cook’s core references. For instance, if you want to know how long and hot to cook a roast, or a fruit pie, or a vegetable, the answer is in this book. Such cookbooks tend to be less trendy than what I think of as specialty cookbooks. And, these cookbooks tend to remain useful over the decades.

1968: the publication date of Better Homes and Gardens New Cook Book. I graduated from high school in 1967. Thus my mother did not use this cookbook as a reference when I was a young child at home. But, the recipes certainly reflect the type of cooking I grew up on in my mother’s kitchen. Casseroles and one-dish meals, including chili con carne, enchiladas, macaroni and cheese, chicken divan, tuna casserole, hamburger pie, and goulash. Salads for a group, including frosted cheese mold, waldorf salad, coleslaw, five-bean salad, potato salad, ambrosia, and cran-raspberry ring. Other chapters include appetizers, barbecues, breads, cakes, candies, canning, desserts, meats, poultry and fish, soups, and vegetables.

Mother marked several recipes in this book, including Potato Rolls (yeast rolls with mashed potatoes), Herbed Chicken Bake (wild rice, mushrooms, cream of chicken soup, pimientos), and Italian Salad Bowl (lettuce with raw vegetables, Italian dressing, and blue cheese). These recipes are similar to favorites of mine that I discovered on my own from other sources. But for me, the two treasures in this book are the peach and cherry pie recipes. These are her reference – her “work-in-progress” – recipes. On each she wrote notes as to how she made the pie and how to change it next time. What tickles me is that she and I both came up with the same baking method for a peach pie – 425˚ oven for 15 minutes and then 350˚ for 30 minutes – rather than the reference directions of 400˚ for 45-50 minutes. Guess I am my mother’s daughter!

BHG Peach Pie recipeBetter Homes and Gardens New Cook Book is a ring-bound cookbook: the pages are loose-leaf, it opens flat, and you can remove and add recipe pages to it. Indeed, my mother cut a few pre-punched recipes from the Better Homes and Gardens monthly magazine and added them to the appropriate chapters in this cookbook. A nice idea to keep a cookbook current, but in reality, it kind of makes it messy.

I decide to make “Deviled Swiss Steak”. Swiss steak and salisbury steaks were popular ways to cook beef when I was in elementary school.

Steak. And elementary school. That brings back a memory. I was in first grade, at Vinedale Elementary School in Sun Valley, California. The Art Linkletter Show “Kids Say the Darndest Things” chose me (me!) to go on TV. The show’s crew interviewed me and the other little kids for the episode just before we went on live TV. They asked us what our favorite food was, then we were supposed to combine that food with the name of our principal to re-name our elementary school. Well my favorite food was chicken. But some other little kid had already chosen chicken, so I had to choose steak (I didn’t like steak then, found it too chewy). The principal of our school was Mrs. Salisbury. So they had me say:

My school is “Mrs. Salisbury Steak School”.

I didn’t understand what I had said until years later. They tricked me into saying something I would never have come up with on my own. Ah, show business. So honest, so real.

Back to 2014 and the recipe for Deviled Swiss Steak. It calls for a thick round steak. In my opinion, it’s hard to find good recipes for round steak. It can be tough if cooked quick and to medium rare, and it can be dry and tasteless if braised for a long time. This recipe holds promise because of the flavorful mustard and Worcestershire (Yes! I can spell it), the pounding with a mallet, and the gravy that should result after a long cook time.

Deviled Swiss Steak RecipeI decide to use my old cast iron pan to cook this Swiss steak recipe. It has a very heavy lid, and it’s hard to beat cast iron for braising. Cast iron pans are nearly indestructible (as opposed to my easy to clean but finicky non-stick cookware). I’ve had my cast iron pan since the 70s.

I made a couple changes in the Deviled Swiss Steak recipe as I went along; below is my version of Swiss Steak.

Swiss Steak
serves 3-4 but easily scales up

  • 1 1/2 pound round steak, 1-1 1/2 inch thick
  • 2 tablespoons flour
  • 3/4 teaspoon dry mustard
  • salt and pepper
  • vegetable oil for frying
  • 1 tablespoon Worcestershire sauce
  • water (as needed, start with 1/2 cup)
  • mushrooms, about 1/2 cup sliced

Combine the flour and dry mustard. Salt and pepper the round steak, then sprinkle half  the flour mixture on top and pound with a mallet; turn over and sprinkle the rest of the flour on the other side and pound again. (This is fun!)

Heat a big heavy pan (choose one that has a close-fitting lid) and add enough oil to coat the bottom. Brown the steak on both sides.

Combine the Worcestershire sauce with a half-cup water, pour carefully onto the steak, stir up a little, then cover and turn the burner to a low setting. Cook for 1 1/2 – 2 hours. Check occasionally and add water as necessary. It’s done when the meat is tender.

Remove the meat from the pan. Scrape the pan juices and heat, adding water until there is about a cup of gravy in the pan. I wanted the gravy thicker, so I rubbed a tablespoon flour into a tablespoon of butter, dropped it in small pieces into the pan gravy, and stirred while heating until it was the thickness I wanted. Add fresh (raw) sliced mushrooms to the gravy and heat just until the mushrooms are done.

Slice the meat and serve with the mushroom-pan gravy. I found there was not enough gravy to serve this dish over rice or noodles, so instead I made twice-baked potatoes.

Comments

This Swiss Steak was good, we both liked it. Not a “stellar” dinner, but a good, tasty, homey, and inexpensive weeknight meal.

Here are my ingredients:

Swiss Steak ingredientsMy round steak has a lot less fat than the one in the photo printed in the cookbook. Look at my mallet! I was my mother’s and I think it’s cool. And I like my old cast iron pan too.

Below is the floured-pounded steak browning in the skillet.

Swiss Steak fryingThe steak cooking (above) is not very pretty. But look at the mushrooms cooking in the gravy!

Swiss Steak - mushroomsI consider this meal a success. And I’ll keep the cookbook, not only for sentimentality, but because I marked several recipes to try.