250 Cookbooks: Cookies, Brownies and Bars

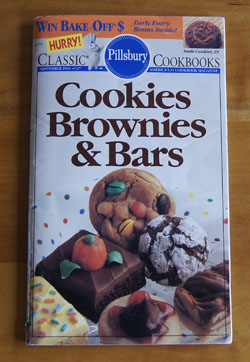
Cookbook #111: Cookies, Brownies and Bars, Classic Cookbooks, The Pillsbury Company, Minneapolis, MN, 1991.

Cookies Brownies Bars CBIf you have a great memory, you will recognize the photo above. I have already covered this cookbook on this blog. But, that was my copy, and this is a copy that I sent my mother. Since I had entered both into my cookbook database when I stopped at 250 cookbooks, I have to cover it again! My obsessive-compulsive rules, my blog.

I sent this copy of Cookies, Brownies, and Bars to my mother. On the first page, she wrote “from Patty Christmas 1991”. Before I mailed it, I hand-wrote “good” and “great” on many of the recipes, and Mother added her own notes. I’m going to hold onto this cookbook just for that. It makes me smile, a little sadly perhaps, and it brings back memories.

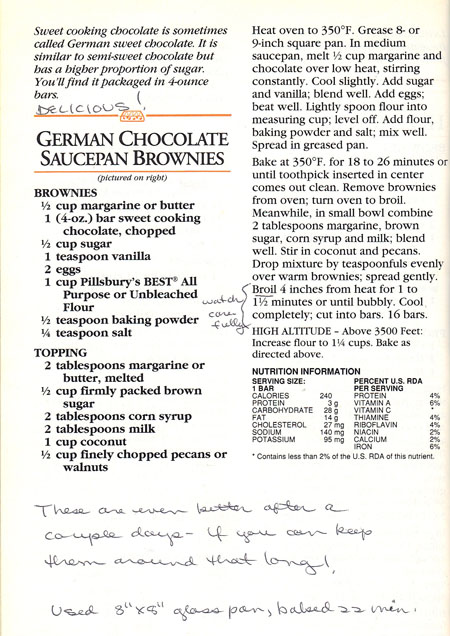
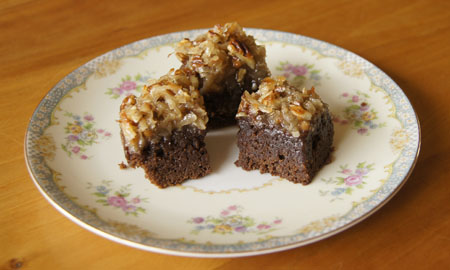
For this blog, I decide to make a very chocolate-y brownie: “German Chocolate Saucepan Brownies”. I used to make these a lot when the kids were around to eat them. I wrote on the recipe: “DELICIOUS”. For me to write in all caps is unusual – it’s like shouting – and means these are stupendous brownies!

German Chocolate Saucepan BrowniesI make these just like the recipe.

German Chocolate Brownies

brownies

  • 1/2 cup butter
  • 1 4-ounce bar of German’s Sweet Baking Chocolate
  • 1/2 cup sugar
  • 1 teaspoon vanilla
  • 2 eggs
  • 1 cup flour
  • 1/2 teaspoon baking powder
  • 1/4 teaspoon salt

topping

  • 2 tablespoons butter
  • 1/2 cup brown sugar
  • 2 tablespoons corn syrup
  • 2 tablespoons milk
  • 1 cup coconut
  • 1/2 cup chopped walnuts or pecans

Heat the oven to 350˚ and butter an 8×8-inch baking pan (I use a glass pan).

Melt the butter and chocolate over low heat. Take off the heat and stir in the sugar and vanilla, then add the eggs and mix in well. Mix the flour with the baking powder and salt, then add to the chocolate mixture. Spread into the prepared pan.

Bake at 350˚ for 18-26 minutes, or until a toothpick inserted in center comes out clean. Take out of the oven and turn the oven to high broil (you can leave the oven rack in the middle of the oven).

While the brownies bake, prepare the topping. Mix the butter, brown sugar, corn syrup and milk, blending well. Then, add the coconut and pecans.

Use a small spoon to drop dollops of the topping on the brownies until the brownies are just about covered evenly. Gently spread the topping until the brownies are covered.

Place the brownies under the broiler. Broil for about a minute: WATCH CAREFULLY! The topping can brown pretty quickly, so don’t leave the area!

Remove the brownies from the oven and cool. It’s best if they are completely cool before you cut them.

German Chocolate BrowniesDELICIOUS!

250 Cookbooks: Cooking of Provincial France

Cookbook #110: Cooking of Provincial France, M. F. K. Fisher and the Editors of Time-Life Books, Time-Life Books, NY, 1968. Foods of the World series; seventh printing, revised 1969, reprinted 1976. (Note: Julia Child is credited as a consultant for Cooking of Provincial France.)
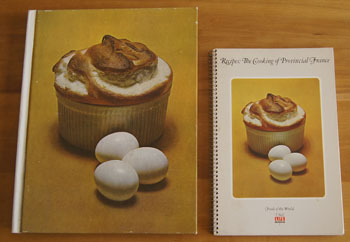
Cooking of Provincial FranceThis book is an unexpected pleasure. M. F. K. Fisher turns out to be “Mary Francis Kennedy Fisher”. I had never heard of her, so I looked her up online. According to Wikipedia, she was one of the preeminent American food writers of the twentieth century. A website devoted to her life and works is a good online resource for this interesting writer.

My first clue that I will like this writer is her introduction to Cooking of Provincial France. I always associate French cooking with heavy, rich sauces. Apparently Fisher had come up against the same prejudice:

“When I stopped in Scotland with my young children after a long stay in Provence, elderly and rather insular friends exclaimed in wonder at how well we seemed to be, ‘in spite of those dreadful thick rich concoctions covering everything and making one bilious, not to mention gouty.'”

She goes on to explain how French provincial cooking differs from grand or haute cuisine. “French provincial” is the cuisine cooked in country kitchens. Fisher writes: “haute cuisine stood or fell upon its essential stocks, and on the five basic warm sauces: espagnole, veloute, bechamel, tomato, and hollandaise.” In contrast, “most dishes that come from country kitchens make their own juices, right in the casseroles in which they are cooked and often without any need of the strainings, the additions, the final touches intrinsic to a great chef’s unfaltering performance.”

Fresh herbs, vegetables, dairy products, eggs, and meats are the mainstay of French provincial cooking. As I leaf through the pages of Cooking of Provincial France, I find myself planning an entire meal to cook. Definitely my type of recipes! (Especially since I recently read The Big Fat Surprise and have been incorporating more butter and full-fat milk products in our diet.)

M. F. K. Fisher

Much like my experience with The Cooking of China, a Foods of the World cookbook I covered in a previous blog post, I have discovered another fascinating woman culinary author from the mid-twentieth century.

Fisher was born in Michigan in 1908 and grew up in Southern California. Her family was “highly literate” and she was writing poems as a young girl. In college, she met Al Fisher; they married and soon moved to France for several years. She learned to love the people’s food of France: cooked in home kitchens with fresh ingredients. She loved to write, she loved cooking – so she combined her two passions as a food writer. Her first book, Serve it Forth, was published in 1935. Her last was published in 1992.

From this web site, I learn: “Mary Frances contributed to their income by working in a picture-framing shop that sold pornographic postcards. She read books and, inspired by an Elizabethan cookbook she discovered at the Los Angeles Public Library, she began writing essays of her own on cooking.” Also from this web site: “Her first book, Serve it Forth was so unlike other ‘women’ writers on the subject of cooking that many critics thought it was written by a man.”

I like her style of writing, her prose, her sense of humor. Her essays are a mixture of memoir, travel, and culinary tales. I checked out a compilation of her works from the library, “Art of Eating”, and am enjoying the read.

(If you like, you can read a few pages of her 1937 book Serve It Forth on Google Books.)

What to cook?

I am caught first by the recipe for French onion soup. I don’t believe I’ve ever made it! Time to try. Fisher’s version begins with cooking the onions slowly until they are nice and brown, then adding beef stock. (The recipes in this book for chicken and beef stocks are almost exactly like my own self-evolved stock recipes for the same.) The soup is topped off with a crust of bread, cheese, and a run in the oven.

Okay, soup to start my meal. Now I need something to go with the soup. Luckily this book is brimming with good recipes. I’ll make French bread for sure.

Main dish? Something light like fish. But sauced. How about a nice aioli (garlic mayonnaise) over halibut? And a vegetable or two. How about artichokes? I also like the spinach-ham stuffed mushrooms, held together with a bechamel sauce. (The recipe is titled Champignons Farcis, or “baked stuffed mushroom caps”.)

For dessert, I choose clafoutis aux cerises, or cherry cake. This is sweet cherries baked in an eggy batter with lots of vanilla.

So I settle in early on a rainy Saturday to begin the bread. I cooked (played?) off-and-on all day on my French provincial dinner. Everything came out perfect.

As my official recipe from this book for this blog, I’ll write up only the French onion soup. Here is the recipe:French Onion Soup RecipeI made it almost exactly like the above recipe, except for downsizing to serve just two people.
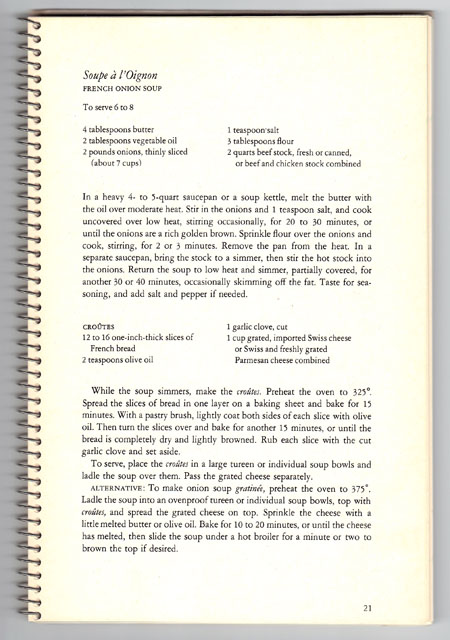
Soupe à l’Oignon
French Onion Soup
serves 2

  • 2 tablespoons butter
  • 2 tablespoons oil
  • 1 pound onions, thinly sliced
  • 1/2 teaspoon salt (or to taste)
  • 1 tablespoon flour
  • up to 1 quart beef stock, preferably homemade

croûtes:

  • 2 1-inch thick slices of French bread
  • olive oil (to brush bread slices)
  • 1 garlic clove, split in half
  • 1/2 cup shredded Swiss or Parmesan cheese, or a mixture thereof

Melt the butter with the oil in a saucepan. Stir in the onions and salt and cook, uncovered, over low heat, stirring occasionally, for about 30 minutes. They will become a rich golden brown if you have the patience to do this step carefully.
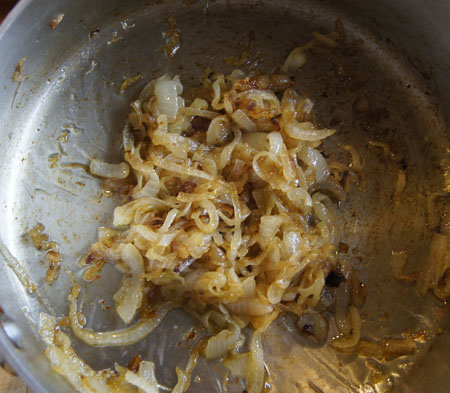
browned onionsSprinkle the browned onions with the tablespoon of flour and stir for several minutes. Add about 3 cups of the stock slowly, with stirring. Simmer, covered, for about 45 minutes. Add more stock if the soup is too thick, and adjust the seasonings.

While the soup is simmering, or even earlier in the day, make the croûtes, or toasted bread slices. Put the 1-inch thick bread slices in a 325˚ oven for 15 minutes. Remove from oven and drizzle or brush each side of the slices with olive oil. Put them back in the oven (preferably with the side that used to be up now down) and bake for another 15 minutes, until they are lightly browned. Remove from oven and rub each slice with the cut garlic clove.

Divide the soup between two ovenproof soup bowls. Put a croûte on top of each and sprinkle with the grated cheese. Bake for 10-20 minutes in a 375˚ oven. If you like, as a last step, put the soup bowls under a broiler for a couple minutes to brown the tops.
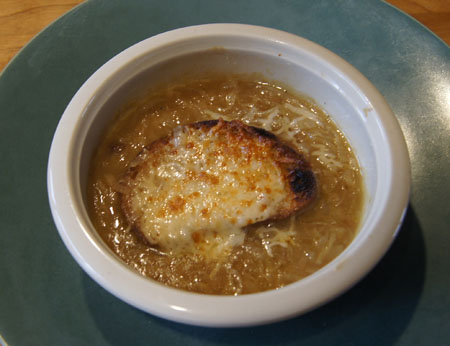
French Onion SoupThis was yummy. I kept the amount of cheese a bit low and we liked it that way. I’ll make it again! Here’s a photo of the bread and vegetables I prepared for the second course:
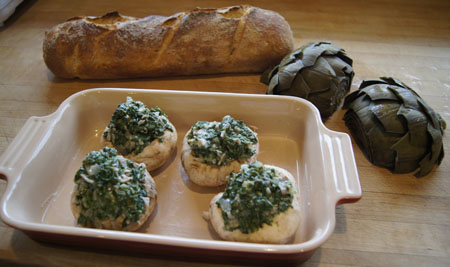
veggies and breadThe rest of the meal  – the fish with aioli and the cherry cake – tasted great but were not terribly photogenic.

Bon appetit!

250 Cookbooks: The Complete Book of Food Counts

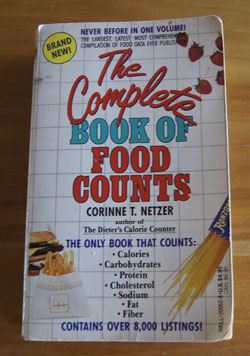
Cookbook #109: The Complete Book of Food Counts, Corinne T. Netzerk, Dell Publishing, NY, NY, 1988.

The Complete Book of Food CountsI previously discussed one of my calorie reference books: Calories and Carbohydrates by Barbara Kraus. The Complete Book of Food Counts is quite similar; it lists calories, carbohydrates, protein, cholesterol, sodium, fat and fiber of over 8000 foods. Many of the entries are brand-name items (and today you can get their nutrient values on the package). Entries for beef are kind of hard to decipher: are the meats weighed before or after cooking? (This book is still in print: a 9th edition was published in 2012.)

I plan to keep one or two of my calorie-counting references, so I’ll put The Complete Book of Food Counts through a trial run of calculating the number of calories in a recipe.

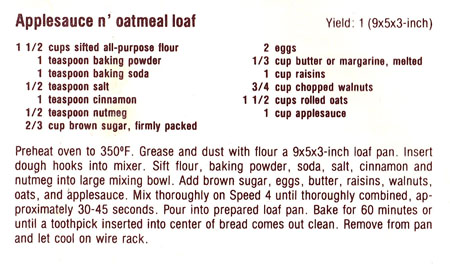
What recipe? I decide to cook another recipe from the Sunbeam Deluxe Mixmaster Mixer cookbook. Why? I just got the vintage replacement bowl in the mail and want to use it! Here is the recipe for “Applesauce ‘n Oatmeal Loaf”:

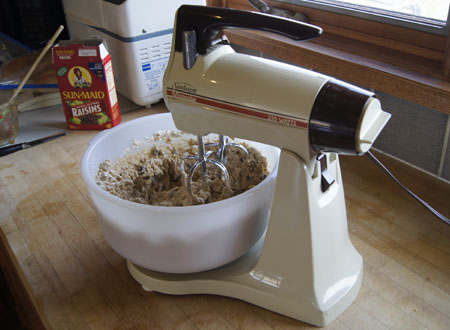
Applesauce Oatmeal LoafHere’s my vintage mixer mixing, for the first time in years!

Sunbeam Mixer mixingThis bread turned out tasty and wholesome. A bit too wholesome, though! It is kind of dry and heavy, and I doubt I’ll make it again. It did serve its purpose though as a change-of-pace breakfast bread. And, it serves the purpose of testing my book’s usefulness in looking up calories.

Calories in this bread

Here are my results, from The Complete Book of Food Counts and my trusty internet site, Nutrient Facts.

Netzerk’s book Internet source
1 1/2 cups flour 600 675
1 teaspoon baking powder 4 0
1 teaspoon baking soda 0
1/2 teaspoon salt 0
1 teaspoon cinnamon 6
1/2 teaspoon nutmeg 6
2/3 cup brown sugar 529 547
2 eggs 158 140
1/2 cup butter 813 810
1 cup raisins 488 490
3/4 cup walnuts 578 585
1 1/2 cups oatmeal (cooked) 210 195
1 cup applesauce 106 130 (slices)

Comments on calorie results

As you can see, the calorie values quite similar from both sources.

Time: Netzerk’s book 9 minutes 45 seconds. The internet search on Nutrient Facts took 10 minutes.

Ease of Search:  It was almost as easy to use this book as to use the internet, even though there are a lot of extraneous (brand-name) listings to fish through in the book. I was surprised that the times for both searches was about the same. I was also surprised to find the calorie counts for baking powder, cinnamon, and nutmeg in the printed book. Neither source listed dry oatmeal (the value from Quakers Oatmeal box was 450 calories total).

Conclusion: The Complete Book of Food Counts is a decent calorie counter book. I will keep it for those times we are without power!

250 Cookbooks: Sunbeam Deluxe Mixmaster Mixer

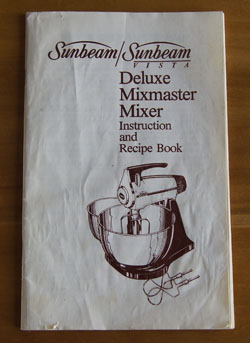
Cookbook #108: Sunbeam Deluxe Mixmaster Mixer, Instruction and Recipe Book, Sunbeam Appliance Company, 1983.

Sunbeam Deluxe Mixmaster cookbookI dug this little book out of the “instruction booklet” pile because . . . well, because I am organizing my kitchen storage area in our basement and found my old Sunbeam mixer. But, it’s missing both of the bowls that came with it. Shall I toss the mixer? Can I still find replacement bowls for this old appliance? Maybe I can find the model number in this instruction booklet to help me locate the bowls.

First: Does this mixer still work? I plug it in and – yes! The motor whirs!

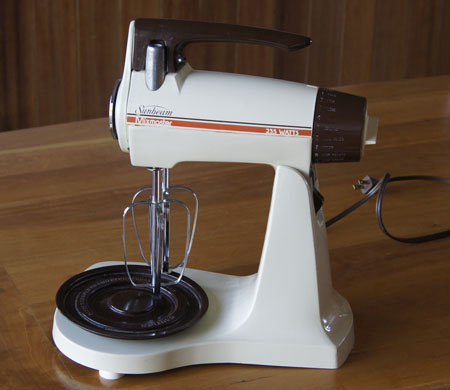
Sunbeam MixmasterI search the Internet for “Sunbeam Mixmaster”. I soon realize that my mixer is not “old”, it is “vintage”! I place a bid on eBay for a replacement bowl, and then follow some links on the history of Sunbeam Mixmasters.

The first electric mixers were introduced to the American public in 1915-1920. Sunbeam mixers were introduced in the early 1930s, after Ivar Jepson joined the Chicago Flexible Shaft Company. Jepson was a prolific inventor, and thanks to his inventions, the company did well even during the great depression. He was with the company – which changed its name to “Sunbeam” – until 1967. He is known as “Mr. Sunbeam”.

(There is a Yahoo group called “We Actually Collect Electric Mixers”, or WACEM.)

Here is an article on the vintage history of Sunbeam Mixmasters, written by a collector. Retro Kitchen Mixers is another good read. This one helps mixer-owners determine which model from 1930-1967 they own.

My mixer, alas, is from the 1980s and I can’t find the model number anywhere, it is neither in the instruction book, on the mixer, nor online. Luckily I only need a bowl, and the one I got through eBay fits my mixer. (I won the bidding! The used bowl cost $10 plus shipping.)

So my old Sunbeam is up and running again. I don’t really know why I replaced it with a new KitchenAid. Perhaps I was using it for kneading bread and it just wasn’t powerful enough for thick doughs. I remember one of the Sunbeam beaters collapsed while making Turtle Brownies and I had to order a new one.

I have decided to keep this 1980s mixer because it is: Vintage!

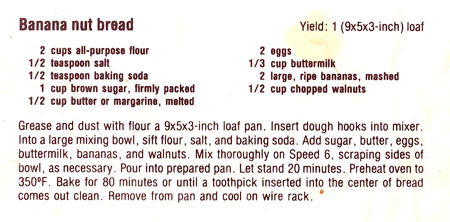
Since I have the Sunbeam Deluxe Mixmaster Mixer recipe booklet in my hand, and since it is entered in my database of 250 cookbooks, I decide to cook one of the recipes for this blog. There are only about 40 recipes in this cookbook, most of them are good old American basics. I decide to make Banana Nut Bread, partly because I have plenty of ripe bananas on hand. This Sunbeam version of banana bread is different from my usual recipe in that it has butter in it and a lot of brown sugar. Perhaps the extra sugar is not great for our health, but it sounds yummy!

Banana Bread recipeBanana Bread (from Sunbeam)
makes one 9x5x3-inch loaf

  • 2 cups flour
  • 1/2 teaspoon salt
  • 1/2 teaspoon baking soda
  • 1 cup brown sugar
  • 1/2 cup butter, melted
  • 2 eggs
  • 1/3 cup buttermilk
  • 2 large, ripe bananas, mashed
  • 1/2 cup chopped walnuts

Put the flour, salt, and baking soda in the large bowl of an electric stand mixer and mix on low for a few seconds to combine. Add the sugar, butter, eggs, buttermilk, bananas, and walnuts. Mix on medium to medium high speed until thoroughly mixed, scraping sides of the bowl as necessary.

Pour the batter into a 9x5x3-inch loaf pan. If your pan is non-stick, you probably don’t have to grease it. If not, grease and flour the pan.

Let stand 20 minutes. (This is an unusual step; I did let it stand but I don’t think it’s necessary.)

Bake at 350˚ for 60-80 minutes, until it tests done with a toothpick.

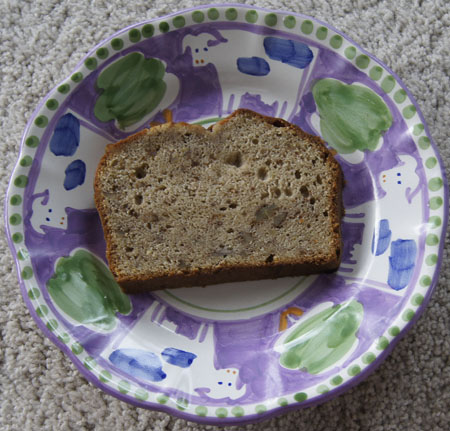
Banana BreadThis was excellent banana bread. Nice and sweet!

250 Cookbooks: New Creative Crock-Pot Stoneware Slow Cooker Cookbook

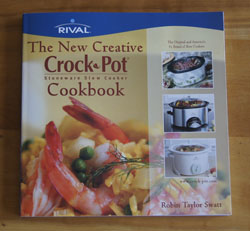
Cookbook #107: New Creative Crock-Pot® Stoneware Slow Cooker Cookbook, Robin Taylor Swatt, Pascoe Publishing, Rocklin, CA, 2001.

New Creative Crock-Pot CookbookI come in from outside on a cool spring morning and a spicy, beefy aroma sends my senses racing. Ropa Vieja is in the crockpot! I think this is what I like most about slow cooker cooking.

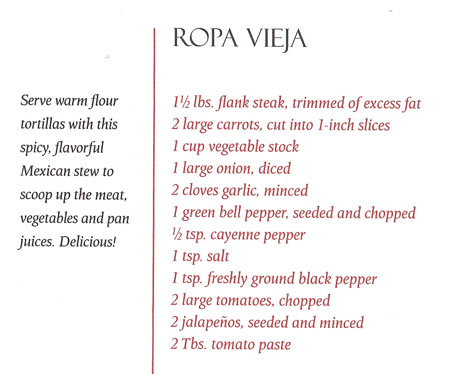
I found the Ropa Vieja recipe in the New Creative Crock-Pot® Stoneware Slow Cooker Cookbook. I have covered other crock pot or slow cooker cookbooks in a few other posts in this blog; some history of crock pots and my opinionated thoughts on them is in this blog post. To find my crock pot recipes, search my website for “crock” or select the category “slow cooker” or go to the recipe index.

The New Creative Crock-Pot® Stoneware Slow Cooker Cookbook is nicely presented and pleasant to leaf through. The introduction is written by the “Rival® Kitchen”, and throughout, Crock-Pot is followed by the obnoxious-to-type “®“. No introduction is given by the author.

Notes in this cookbook indicate that I have tried several recipes from this book: a tomatillo chicken, beef roast, and a hoisin chicken. I like the section entitled “from around the world”, and I appreciate the low-fat section. In my opinion, too many of the recipes call for prepackaged seasoning mixes but other than that, most of the recipes I could try. But I probably won’t. I usually cook for just two, and my current Rival® Crock-Pot® is a 3-4 quart cooker, so it makes a lot. And I rarely need the time-saving convenience of a crock pot (a luxury of retirement). These days I mostly use my crock pot for things like pork green chili, spicy pinto beans from scratch, and shredded beef, dishes I usually cook from memory rather than from a recipe. Comfort food dishes I can make a lot of and freeze some for later meals.

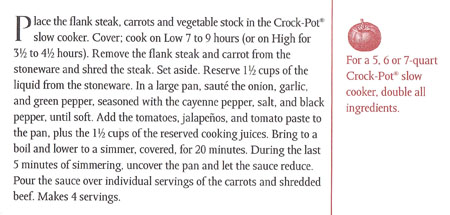
But the recipe for Ropa Vieja in the New Creative Crock-Pot® Stoneware Slow Cooker Cookbook could add something new to my shredded beef repertoire. The cut of beef used is flank steak, rather than roast or brisket. This interests me, because flank steak should give nice long “ropes” of shredded beef. (Ropa Vieja does not translate to “ropes”, instead, it is “old clothes”.)

ropa viejaropa viejaI buy a large (and expensive) flank steak. Instead of vegetable broth, I use my own beef stock. I stay with just carrots in the cooking liquid, although I want to throw in onions and garlic. (I know the carrots will just be mush after 7 hours cooking, but they should add some flavor!) I can’t resist adding some spices, like chili powder, cumin, and cayenne. I toss in half a chili pepper that I have in the ‘fridge. Instead of making the tomato-chili-broth and serving the dish like a stew, I decide to use the shredded beef sans sauce in burritos.

Okay. I mangled the recipe. But Ropa Vieja gave me inspiration, and often that’s all I look for from my cookbooks!
Flank Steak Shredded Beef
serves about 6

  •  1 1/2 – 2 pounds flank steak
  • 2 carrots, peeled and cut into large chunks
  • 1 cup beef stock
  • 2 teaspoons chile powder
  • 1 teaspoon cumin
  • dash cayenne
  • 1 teaspoon salt
  • black pepper
  • a small fresh chili pepper, or half a larger one (optional and to your own personal taste)

Put the stock and spices (and chili pepper, if using) into a 3-4 quart slow cooker, then add the flank steak. Cook on low 7-9 hours or high 3-4 hours. The shredded beef is done when it falls apart when you grab some with a fork.

Here is the cooked beef:

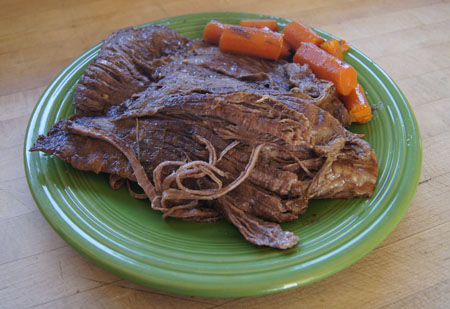
shredded beefLook at the big ropes of shredded beef! The turned out perfect. It was great mixed with onions and beans and cheese in flour tortillas. I had lots leftover for other meals.

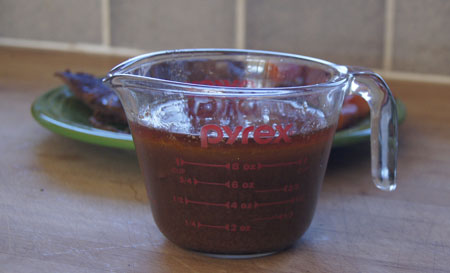
The carrots were as I predicted, mushy like baby food. But the cooking liquid was dark and rich with beef and spice flavors. It would have been good mixed with onions and chiles and tomatoes as in the original recipe, except that it had a layer of fat on top:

shredded beef brothI put the cooking liquid in the refrigerator and a few days later removed the hardened layer of fat. I put it on the stove and thickened it with cornstarch, and mixed it with some of the leftover shredded beef (and olives and onions and cheese) for enchiladas. Yum!

250 Cookbooks: Bread Machine Favorites (Fleischmann’s Yeast)

Cookbook #106: Bread Machine Favorites (Fleischmann’s Yeast), Copyright by Specialty Brands, a Division of Burns Philp Food Inc., San Francisco, CA, 1994. Tested in the Better Homes and Garden Test Kitchen, a registered trademark of Meredith Corporation.

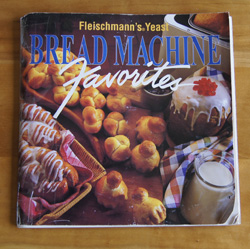
Bread Machine FavoritesThis is a great cookbook. I have thumbed through it many times and it shows! I keep it with my other favorite cookbooks, near the Joy of Cooking.

I like the recipes in Bread Machine Favorites because they all work. Each recipe includes a “recommended bread machine cycle”, so they work across the different brands of bread machines. There is a great “Troubleshooting Guide” if your loaves are not turning out perfect. This guide helped me hone my bread-machine-breadmaking skills. Most importantly, I learned to watch the bread in the machine and add more water or flour as necessary. (Here is my discussion of my experience with – and love of – yeast breads.)

These are the recipes I have tried and liked in Bread Machine Favorites: Blueberry-Lemon Bread, Cottage Wheat Bread, Pumpkin-Nut Bread, Zucchini-Carrot Bread, Old-Fashioned Cinnamon Rolls, and Dried Cherry-Almond Bread. The one I used to make almost weekly is Cottage Wheat Bread. It has cottage cheese in it, therefore a little added protein and calcium. Plus it’s just a darn good whole wheat bread.

Most of the loaf recipes in this cookbook call for baking the bread in the bread machine. It is my preference to bake yeast loaves in a conventional oven. I bake a small loaf (8 1/2 x 4 1/2 inches) for about 22 minutes at 385˚, or until it is nicely browned. The Bread Machine Cookbook also has recipes for rolls and braided loaves, and those are baked in a conventional oven.

About yeast. I like to know my yeast, so I buy it in two-pound packages (and I usually do not buy Fleishmann’s yeast, not that it isn’t good). By always using the same yeast, and using the bread machine to rise the loaves at a consistent temperature, I know I will get consistent results. After I acquire a two-pound package of yeast, I fill a small jar and keep it in the refrigerator, and store the rest in the freezer. Here is my discussion of bread yeast.

For this blog, I will try the “Basic Sourdough Bread”. About a year ago I purchased a sourdough starter from King Arthur Flour. Up until now, I have only used this starter to make no-knead rustic loaves. I have been very happy with the flavor and consistency of these rustic loaves loaves. They are not as sour as San Francisco sourdough bread, but I’m not sure that sort of sourness is possible in Colorado. In any case, they taste different than no-knead bread made without sourdough starter. Now I want to expand my sourdough repertoire to a kneaded loaf!

(By the way: this is the first time in my life that I have kept a sourdough starter fed and perfect for an entire year!)

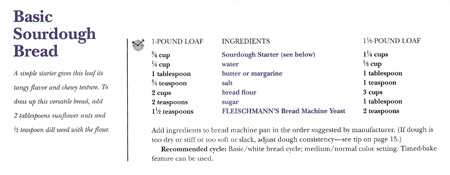
Here is the sourdough recipe in Bread Machine Favorites:

Basic Sourdough Bread recipeI had to make a few changes in the recipe. As the bread kneaded, it was too dry, and I added at least 1/4 cup water to get the correct consistency. When I examine the “Sourdough Starter” directions in Bread Machine Favorites, I note that this cookbook directs to feed the starter with equal parts water and flour. My starter is fed with twice as much flour as water, therefore, 2 cups of flour in this recipe is too much. Below is my revised version, as well as directions for feeding my starter.
Sourdough Bread Machine Bread
makes one 8 1/2 x 4 1/2 loaf

  • 3/4 cup unfed sourdough starter (see directions below)
  • 1/4 cup water
  • 1 tablespoon butter
  • 1 3/4 cups bread flour
  • 1/2 teaspoon salt
  • 2 teaspoons sugar
  • 1 1/2 teaspoons yeast

Put all the ingredients in your bread machine and set to a dough cycle, or to a basic white bread cycle with medium color (baking) setting.

If you have the bread machine do the baking, you just wait until it’s baked!

If you want to bake the bread in the oven, transfer the dough to an 8 1/2 x 4 1/2-inch pan. Let rise at room temperature just until the loaf peaks a half-inch over the sides of the pan. Bake for 25 minutes at 385˚.

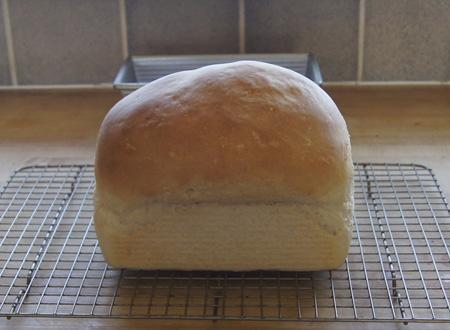
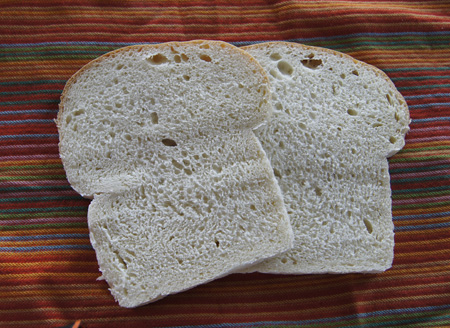
Sourdough LoafThis is great bread. The sourdough gives it a subtle flavor and soft texture. My only problem was that I used the original amount of flour and had to add more water, and ended up with a huge loaf. Honest: This loaf was just to the top of the pan when I put it in the oven, but it ballooned up on baking! Even so, the bread doesn’t have huge holes in it, nor a coarse texture. I made it Saturday and today is Wednesday and I am so looking forward to my lunch-time sandwich on this tasty, soft bread. (Note that my directions, above, incorporate my revision of using less flour so that the loaf should not rise as large.)

sourdough bread slicesSourdough starter note

My advice on sourdough starter is to get some from a friend or purchase from a reliable source. My starter is fed like this:

  • remove 8 ounces or about a cup and either use it or toss it
  • add 1 cup flour and 1/2 cup water and mix well
  • let stand at room temperature an hour or two, until it is bubbly
  • cover with plastic wrap and refrigerate
  • repeat once a week, whether you are baking a sourdough loaf or not!

The directions that came with my starter say to use freshly fed starter in a recipe. However, for the bread machine sourdough loaf that I make for this blog, I used unfed (just out of the refrigerator) starter and it worked great. In fact, it almost worked too well, as the bread rose a lot in the oven, as you can see in the photo of the loaf.
Note

I have an extra copy of Bread Machine Favorites! I liked it so much that I bought a copy to give away, then forgot to.

250 Cookbooks: Low-Carb Comfort Food Cookbook

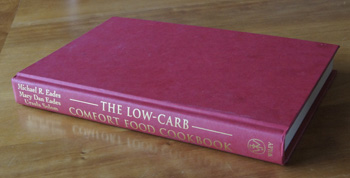
Cookbook #105: Low-Carb Comfort Food Cookbook, Mary Dan Eades, Michael R. Eades, and Ursula Solom, John Wiley and Sons, Hoboken, New Jersey, 2003.

LowCarbComfortFoodCBYes! This is the cookbook I want to do this week: a book of recipes for the Atkins diet. Why? Because I’ve been reading a new book about the possible advantages of including fat in your diet, and it has got me re-thinking my own eating plan (again). That book is The Big Fat Surprise by Nina Teicholz. It’s an interesting read and if I am ambitious, I’ll post about it sometime soon.

The Atkins diet is high in fats and protein and low in carbohydrates. We tried this diet sometime in the early 2000s. I only lasted 4 hours on this diet – I just could not give up bread! My husband did better than me, and lost some weight, but he only stayed on Atkins for a few months.

My big issue with the Atkins diet is a logical one: figuring out how to prepare interesting meals without bread, pasta, rice, potatoes or any other carbohydrate-laden foodstuffs. That’s why I bought this Low-Carb Comfort Food Cookbook when my husband was on Atkins: I needed ideas.

This book gives a large variety of recipes to make meals less boring than a slab of meat and some salad. One I actually used a lot was “Mock Mashed Potatoes”, a dish made from whipped cauliflower, butter, cream, and mayonnaise. The Low-Carb Comfort Food Cookbook has recipes for breads such as rolls and loaves, as well as tortillas.

But. Years ago I tried the recipe for “Almost No-Carb Bread”. This was quite a project, since it entailed gathering the following ingredients: almond meal, wheat bran, gluten flour, soy protein powder, and only a tiny amount of whole wheat flour. The wheat bran required a “toasting step”. The result of all the work? A loaf that had a taste and texture that did not appeal to us. Tortilla recipes with similar “flour pretenders” are also included in this book. They looked like too much work so I never tried them.

This book’s main dish recipes for meats usually include added cream and butter. Since I was not on the Atkins, I had to cook separately for my husband. The Low-Carb Comfort Food Cookbook encourages the use of sugar substitutes, and I just don’t like using them. Cheese on the diet is limited to 1 ounce per day. (We love cheese.) Back in the early 2000s, I was able to find very few low-carb products on grocery shelves or by special order (such as tortillas) but in general, such products were not as prevalent as they are today. Planning and cooking meals was no longer fun.

I was quite happy when my husband abandoned the Atkins diet. I shelved this book and forgot I owned it until I was searching for this week’s blog entry. Now, I will definitely recycle this cookbook.

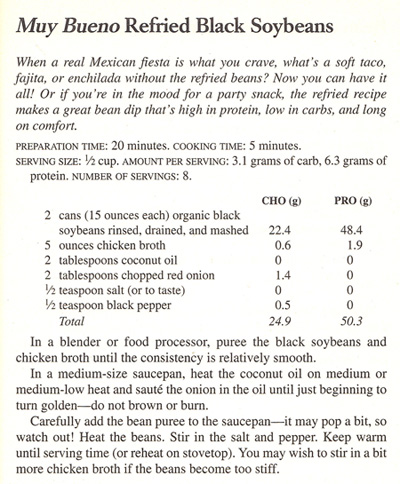
I do need to cook a recipe from this book for this blog before I abandon it. After leafing through the entire book, I decide to make “Refried Black Soybeans”.

refried black soybeans recipeI recently rediscovered soybeans. These beans are higher in protein and lower in carbohydrates than are most other beans. Here are the comparative values for pintos and soybeans (1 cup each, cooked; source: NutrientFacts).

pintos soybeans
calories 200 290
fat 0 grams 15 grams
protein 12 grams 29 grams
carbohydrate 35 grams 15 grams

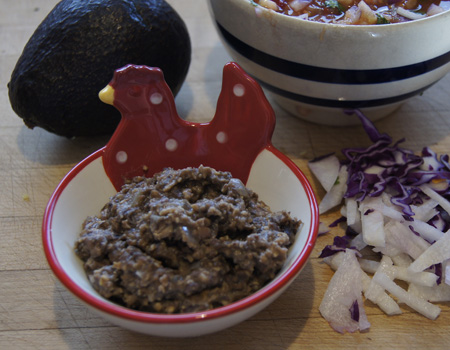
I made the recipe as in the scan (above), except I added a bit of cumin and chile powder. They only took a few minutes to put together:

cooked black soybeansI liked these as a side dish for the tamales that I made for the same meal. I thought they were tasty, with a nice, kind of crunchy texture. But my husband went “bleh” and left most of them on his plate. I won’t make them again.

Favorites: Pita Bread

Pita breads are easy to find in stores, but they can be thick or thin or have pockets or not. I like my pitas thin and with pockets. But store ones that are thin and have pockets usually fall apart when you fill them with a lot of stuff.

I recently made Beef Steak Pitas for this blog. The thick, pocket-less pita that I bought at a local Mediterranean market reminded me: I can make my own pitas!

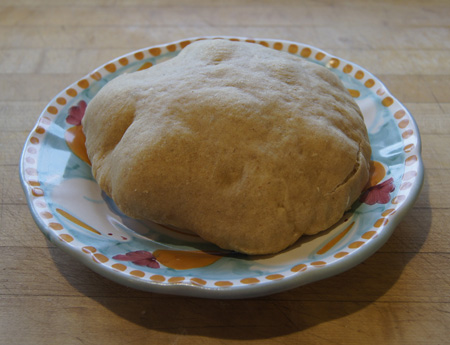
Sometimes you just have to do it yourself to get it right. I made these last week and they turned out perfect. I enjoy the nutty taste and chewy texture that the whole wheat flour lends these breads. I like watching them puff up in the oven. I love taking out a hot one, cutting it in half, filling it with a slice of cheddar cheese, and ooh-ing and aah-ing at the experience.

(I also like filling them with a lot of stuff. I also like that they store well, on the counter or in the freezer.)

In 1999, I wrote up my method for pita breads in my old blog (here is the history of that blog). Here is that post, along with my slightly updated recipe for pitas.

1999 post:

I was inspired to make these after a member of a news group I was reading, rec.food.baking, asked for suggestions as to how to get pita bread to bake with even crusts. No one else in the group was posting an answer, so I dug out my old recipe (it’s been at least 15 years since I tried these, back when I was baking with more whole grains than I do currently) and gave it a whirl. And yes, I did use a bread machine to do the dough, sorry, but I like the freedom it gives me, plus I’m busier than I used to be. The recipe works just as well if you do the kneading by hand, then let it rise until double, punch down and form the loaves.

I was amazed at how good they came out – nutty and chewy and utterly delightful. I get such a kick out of the way they puff up, but then I’m easily entertained. They make a great pocket for fillings, because they stay together much better than the store-bought cracker-like pitas. Most of these had even crusts top and bottom, though a couple were uneven: I have no explanation as to why, I thought I did them all the same. (Guess they were rebel pitas.)

Pita Breads
makes 10

  • 1 1/2 cups water
  • 1 teaspoon salt
  • 1/2 tablespoon sugar
  • 1 generous tablespoon olive oil (you can use any vegetable oil)
  • 2 1/4 cup all purpose flour
  • 2 tablespoons gluten flour (or regular flour)
  • 1 1/2 cups whole wheat flour (not white wheat flour)
  • 1/4 cup wheat germ
  • 2 tablespoons yeast

Mix in bread machine on the dough cycle, monitoring the dough after the first few minutes in the machine, adding a little more flour or water if necessary to keep a nice ball of dough. If you can, leave the dough a little bit wetter than you would for conventional loaves. When the cycle is complete, divide the dough into 10 pieces, knead each piece briefly, then roll each into a 6 inch circle. At this point, you may let them rise until puffy, about 20 minutes.

Put a heavy griddle on the bottom of your oven. If you have a gas oven, this really means on the BOTTOM; in an electric oven, you must use the lowest rack (take out the upper rack). Heat the oven and the grill to 425˚ for at least 15 minutes before you start baking the pitas. Place the loaves on the heated grill, a couple at a time, and bake for 6-8 minutes. They should puff up magically! If desired, you can then place them under the broiler to brown the tops.

Note: You can use a baking stone instead of a griddle.

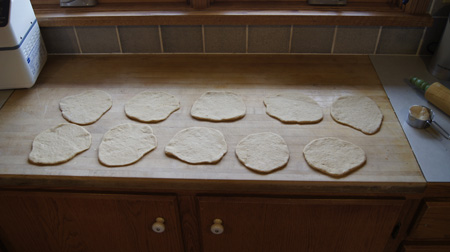
Here are my 10 little pitas, ready for the oven.

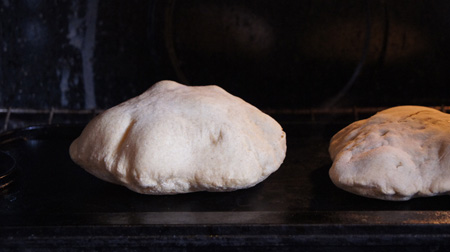
10 little pitasHere they are magically rising when I opened the oven to take a peek!

pitas risingHere is one of the baked pitas. These actually kept their puffiness and I had to kind of squish them down before storing in plastic bags.

pita breadYum!

250 Cookbooks: Woman’s Day Encyclopedia of Cookery, Volume 5

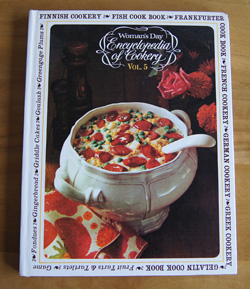
Cookbook #104: Woman’s Day Encyclopedia of Cookery, Vol. 5, Fin-Gum. Woman’s Day, Fawcett Publications, NY, 1966.

Encyclopedia of Cookery Volume 5This is the fifth in a series of 12 food encyclopedia volumes. I discussed the first four volumes here: Volume 1, Volume 2,  Volume 3, and Volume 4.

“Finland is a land where the seasons and seasonal foods are savored. The winter is long, dark, and quiet, and people stay at home, with good music, and good books. . . . Finnish cookery is Scandinavian, but simpler and more austere.”

So begins Volume 5 of the Woman’s Day Encyclopedia of Cookery. Finnish cookery is followed by a complete section on fish, which includes great photos, a fish cook book, and forty fish sauces. James Beard contributed an article to this useful fish reference. Next comes flageolet (a small green bean), flake (a small, flat, thin loose piece of food which looks like a scale”), flan, flapjack, florentine (“a cooking method which uses spinach as its base), fluke (a fish), and flummery (a dessert). Fondue! Fondues are fun. They were very popular in the seventies and eighties, and we had beef fondue just a couple weeks ago.

Forks? In the 11th century, aristocrats used the fork more as a lark than as a method of serious eating. Frankfurters? An 8-page cookbook, including a photo of frankfurters swimming in a corn-cream sauce. The “Freeze” section includes basic rules for successful home freezing.

French cookery begins with a cute illustration and an article by James Beard. Fritters, frog’s legs (“if it is necessary to dress them, cut off the hind legs close to the body and wash them well in cold water – remove feet”). Fruits, including a good section on fruit tarts. Fudge, gallantine (boned cooked meat covered with aspic, as in “gallantine of eel”), game (bear chops, roast haunch of beaver, roast coot, Maryland muskrat, woodchuck in cream). Garnishes, German cookery, ginger, ginger beer, goulash, Greek cookery (especially, baklava), greens (kale is listed as a green to cook), guinea fowl (“the habits of guinea fowl are not always admirable, they are gregarious and polygamous, they make a lot of noise and lay their eggs in a casual and haphazard manner on the ground, they resist regimentation”), and lastly, gumdrop.

What to make for this blog? Hmmm. Under German cookery, my eyes fall on “kuchen”. Oh, that’s it! The word “kuchen” is a happy one for me. I always think first of a creamy and sweet noodle kuchen, full of eggs and cinnamon. In college a Jewish friend brought this kuchen to a party. After all these years, I still remember it with longing. (Today I can find sweet noodle kuchen recipes online, and yes, they are a traditional Jewish dish.)

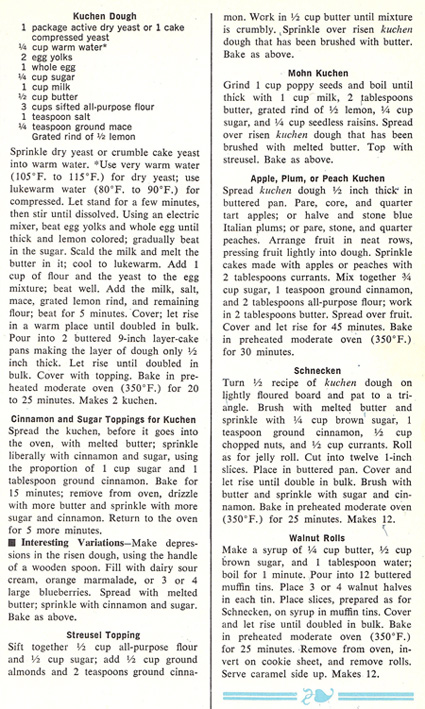
The kuchen in the Encyclopedia of Cookery is not made with noodles, but I am trusting my favor with the word kuchen to draw me to a good recipe. According to this encyclopedia, kuchen means “cake” in German, and to “millions of Americans, kuchen, or coffeecake, is the basis for a typical Sunday morning breakfast. Kuchen dough is not too sweet or rich; it is rather the foil for luscious toppings.”
Here is the recipe from the book:

Kuchen RecipeThis kuchen dough recipe has eggs and butter, but not a whole lot of sugar. I agree with the Encyclopedia: it is neither too sweet nor rich.

I decide to cut the recipe in half, and I choose the apple topping variation. Then as I made the dough, I totally goofed. I read “yeast dough” and got it in my head that I would make this in my breadmaker. I had already thrown all the dough ingredients into my breadmaker before I realized my mistake. The dough was thin! Oops. I was supposed to scald the milk and use a mixer. What the heck, I’ll go for it, and see if it works. My breadmaker has a great dough cycle where it heats all the ingredients before beginning the kneading and rising cycles. Should work.

Apple Kuchen Coffeecake
makes one 9-inch cake

  • 5/8 cup milk
  • 1/4 cup melted butter
  • 1 egg yolk
  • 1/2 egg (I whisked one egg in a glass measuring cup and used half of it)
  • 2 tablespoons sugar
  • 1/2 teaspoon salt
  • 1 1/2 cups all purpose flour
  • a pinch of mace or cinnamon
  • grated rind of 1/4 lemon (approximate)
  • 1 1/2 teaspoons yeast

Add all of the ingredients to the bowl of a breadmaker. Set the cycle to “dough” with “pre-heat” and “rise”. This dough is runny: it will not form a big ball of dough.

(Non-breadmaker instructions: Heat the milk and cold butter until the butter melts, cool to lukewarm. Pour into a mixer bowl and add the rest of the ingredients. Beat for 5 minutes. Cover and let rise in a warm place for about an hour.)

Pour the dough into a buttered 9-inch cake pan. Let rise for about 30-45 minutes. (It should “double in bulk” but this is kind of hard to tell.)

Top with the topping:

  • 1 apple, peeled and thinly sliced
  • 3/8 cup sugar
  • 1 tablespoon flour
  • 1 teaspoon cinnamon
  • 1 tablespoon butter

Arrange the apple slices neatly on top of the risen dough.  Mix together the sugar, flour, and cinnamon and spread over the fruit.

Bake at 350˚ for 35 minutes.

Here is my kuchen after the second rising step, just before I put it in the oven:

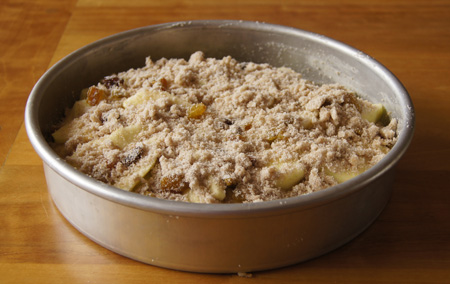
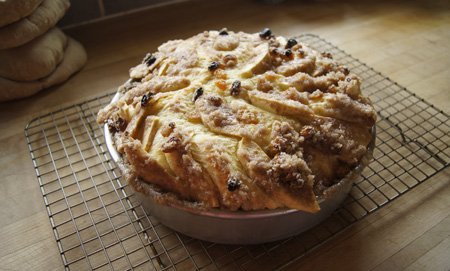
kuchen unbakedAnd here it is, hot out of the oven:

Apple KuchenThis was delicious! It was good as-is, but if you like more apples on top, go for it. The original recipe says to leave the apples in quarter-apple chunks; this might be good too.

I took the above photo as soon as the kuchen came out of the oven. The real story is that as it cooled, it fell. And the falling made it even better: it had a creamy, eggy feel and sweet spicy flavor, reminding me of that noodle kuchen I had back in college.

Yum.

250 Cookbooks: Creme de Colorado Cookbook

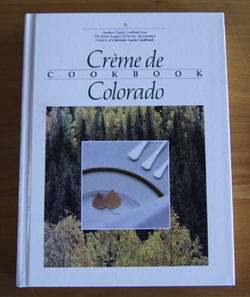
Cookbook #103: Crème de Colorado Cookbook, The Junior League of Denver, 1987.

Creme de Colorado CBThis is one of my favorite cookbooks! I store it in my kitchen cabinet with other cookbooks that I use a lot (like my Joy of Cooking). I rely on it for the Denver Cheesecake that I make at Christmas. I love the Creamy Banana Coffee Cake, with bananas, cream cheese, spices, and pecans, baked in a bundt pan. It’s my reference for baklava. I have notes and scrap papers throughout this cookbook.

This cookbook is produced by the Junior League of Denver. To date, they have produced five Colorado cookbooks, and the Crème de Colorado is the second in the series. Beautiful color photos of Colorado landscapes grace the introductory pages of this full-sized hardcover cookbook. John Fielder is the photographer. You can check out his photography on his web page. He used to produce yearly calendars of Rocky Mountain National Park – I bought them every year – but those have been discontinued.

The Crème de Colorado Cookbook is a from-scratch cookbook, with a wide variety of good recipes. Many recipes tend to be high in calories. Butter, cream, and cheese are common ingredients. I use this cookbook more at holiday times than in every day cooking. But looking at the recipes today, I find many that I want to try that either are calorie-appropriate or could easily be made so with a few changes.

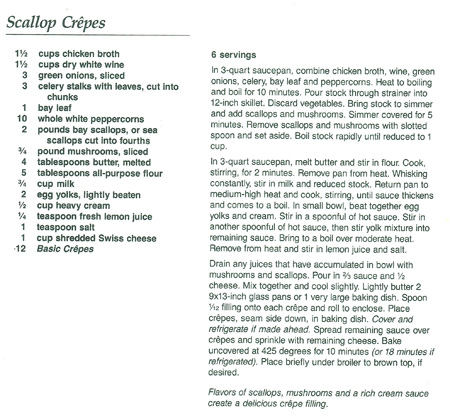
I decide to make “Scallop Crepes” for this blog. This recipe intrigues me because of the way the scallops are prepared. Briefly, the scallops are put in a hot stock for a few minutes and then removed. Thus, the scallops do not get overcooked but all of their juices are released into the stock. I have this big bag of scallops in the freezer that I bought on sale, and I have tried cooking scallops from this bag without success: I fried them, and they leaked liquid into the pan and got very tough. I am curious to try the method in Crème de Colorado to see if I can preserve the texture (and flavor) of these scallops.

Scallop Crepes recipeThe above recipe calls for whipping cream, and I’ll substitute it with milk to save calories. I want to serve these as small, appetizer-sized crepes, so I will make the crepes smaller. I will halve all amounts to serve three instead of six. Other than that, I plan to pretty much follow this recipe.
Scallop Crepes
serves 3 as a main dish, 4-6 as an appetizer

Crepes

  • 1/2 cup water
  • 1/2 cup milk
  • 2 eggs
  • 1/4 teaspoon salt
  • 1 cup flour
  • 2 tablespoons melted butter (optional, leave out for fewer calories)

Combine all crepe ingredients in a blender and mix well. Let stand an hour or so. Make 3-inch crepes in your favorite way. My way is this: I have a dedicated (old) crepe pan, I heat it to very hot, spray with non-stick spray, and immediately pour a small amount of batter onto the pan and roll the pan to distribute the batter. I cook both sides of the crepe about 15 seconds.) Crepes can be made ahead and extras can be stored in the refrigerator for a later dinner (or breakfast!).

Stock, scallops, and mushrooms

  • 3/4 cup chicken stock
  • 3/4 cup white wine
  • 2 green onions, cut roughly
  • 1 or 2 stalks celery, cut roughly
  • 1 bay leaf
  • whole peppercorns (about 5)
  • 1 pound bay scallops
  • 1/3 pound mushrooms, sliced

Combine the chicken stock, wine, green onions, celery, bay leaf, and peppercorns and heat to boiling. Simmer for 10-20 minutes, then pour through a strainer to remove the vegetables. Put the stock back into the pan and add the scallops and mushrooms and simmer 5 minutes (no longer!). Remove the scallops and mushrooms, either by straining or using a slotted spoon. Reserve the scallops and mushrooms. Boil the stock to reduce the volume to about 1/2 cup.

The sauce and filling

  • 2 tablespoons melted butter
  • 2 1/2 tablespoons flour
  • 5/8 cup milk (1/2 cup plus 1 tablespoon)
  • 1/2 cup reduced stock from the previous step
  • 1 egg yolk, lightly beaten
  • 1 teaspoon fresh lemon juice
  • salt to taste (about 1/4 teaspoon)
  • 1/2 cup shredded Swiss cheese

Melt the butter and stir in the flour. Stir for a minute or two, then stir in milk and reduced stock, cooking until bubbly. Keep stirring until smooth and a little thick.

Beat the egg yolk with a couple tablespoons of the milk, then beat in a spoonful of the hot sauce. Stir the egg yolk mixture into the hot sauce and heat until bubbly and thick. Remove from heat. Add lemon juice and salt.

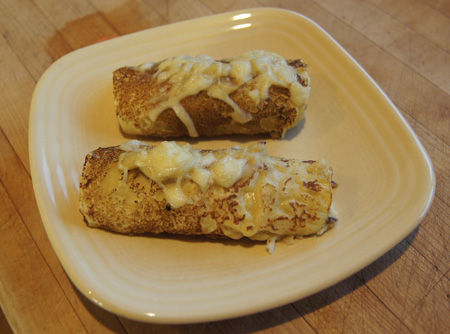
Add a little over half of the sauce to the cooked scallops and mushrooms, along with half of the Swiss cheese. Gently mix, then fill the crepes and roll to enclose. Place the crepes in a lightly buttered or non-stick-sprayed pan. Cover with the remaining sauce and sprinkle with the remaining cheese. Bake uncovered at 425˚ for 10 minutes.

These were good! I added a bit more lemon juice to the sauce (and incorporated that change in my version of the recipe, above). I especially like these as appetizers, rather than a full meal, but that’s just my preference.

Scallop Crepes