250 Cookbooks: Römertopf Cooking is Fun

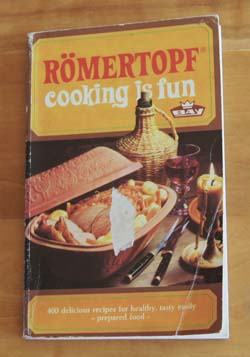
Cookbook #64: Römertopf Cooking is Fun. Wendy Philipson, Eduard Bay, Ransbach, 1971.

Romertopf Cooking is FunI picked this book out of the stack of paperback cookbooks totally thinking it would be out of date and nearly useless. But no, it made me smile, and that in itself has value.

My sister gave me a Römertopf cooker back in the 70s. I did use it a few times, but I’m not sure if I ever used this particular cookbook or even how I got this cookbook. It is not marked with food stains or notes.

And now my big admission of guilt: I broke my Römertopf after I’d had it a couple years. I forget exactly how I broke it, whether it was temperature-shock or a physical drop. My husband glued it back together, but I never felt safe using it for cooking again. So it sat accusingly on the soffit in the kitchen for years and years. I finally tossed it during a kitchen cleaning some time back.

What is a Römertopf cooker? It’s a covered clay pot, one of several brands available. You use it, pre-soaked in water, in a hot oven, for braising meats, cooking fish and soups, and even desserts. Supposedly, it cooks especially well because the soaked pot releases steam as the food bakes and all the natural (and healthy) juices are kept in the finished meal.

Let’s compare clay pots to other braising methods. A slow cooker (crock pot) can be left all day, unattended, which is great. Drawbacks: you need to use a separate pan if you want to start with browned meats, and sometimes a crock pot overcooks everything. Any stove top covered pan is useful for braising, but it needs to be monitored. Covered, stove-top-to-oven cookware like Le Creusets allow you to brown meats directly in the pot, then you can leave then unattended in the oven for several hours. Le Creusets are especially heavy and sturdy. (You can drop them!)

Now we come to clay pots. Clay pots require a soaking in water before use. You cannot set them on a hot stove top to pre-brown meats. You cannot add cold liquids during the cooking process or the pot will break. They are fragile, sensitive both to temperature and physical shock. They are difficult to get clean. (Le Creusets are really easy to clean.)

So why use a clay cooker? This cookbook and even today’s online resources claim that a clay cooker imparts excellent flavor and tenderness to a meal, require no added fat, and keep in all the nutrients. So I will give mine a try.

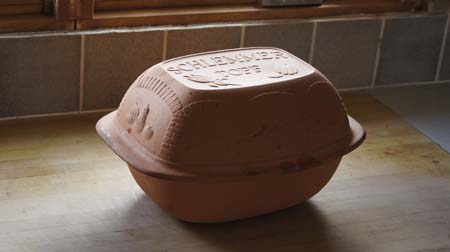
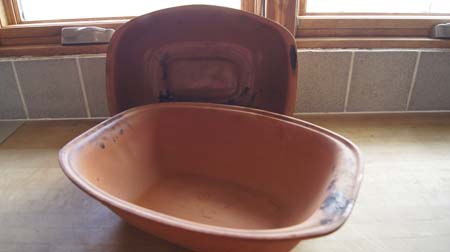
Oh – yes, I do again have a clay pot cooker – so I am able to cook a meal from this cookbook. I got it for baking no-knead bread loaves. It is a different brand: Schlemmer Topf. The inside of the bottom section is glazed, I think for easier cleaning. Anyway, it’s a clay pot, and I’ll cook something in it for this blog.

clay potA little bit about this cookbook
skip to the recipe if this bores you!

This book is the English adaptation of the original German “Braten und Schmoren im Römertopf”. Wendy Philipson completely reworked and extended the German version. She is from England, and spent time in Germany teaching English at the University of Munich.

Clay pot cooking dates back thousands of years, to the Romans and even before to “our most primitive ancestors, who lived from the fruits of the hunt, cooked the meat of the animals they had killed in simple clay containers placed in the glowing embers of their fires.” Why cook in a clay pot today? Wendy gives several reasons. For one, very little liquid needs to be added, so the natural juices and the full “flavour” and taste and vitamins are retained. “The aroma and taste of food prepared in this way is rich and nutritious.” Secondly, no fat needs to be added to a dish, great for those on a diet for slimming or health reasons. “This has been officially verified by the Institute of Domestic Science in Munich – and the Bay-Römertopf is the only casserole of its kind which has been subjected to these tests.” Third, “cooking in a Römertopf is really child’s play. ‘Overdone’ and ‘burnt’ are words which are completely unknown in the Römertopf kitchen. Once a dish is in the oven nothing can go wrong.”

Finally. the Romertopf is “attractive as well as useful. Nowadays, with modern technical developments, not only in outer space but also in the kitchen, the housewife is grateful for every technical improvement – from the high-speed pressure cooker to the fully automatic oven. Yet sometimes we think wistfully that with all this progress the cosiness of the old-fashioned kitchen is being lost. The Römertopf – much to our delight – combines the best of both worlds.”

(Note the publication date: 1971. Crock pot cookery came to the American kitchen in the early 70s, as per my research for my first slow-cooker cookbook blog post.)

Clay pot basics: Soak the clay pot and the lid for at least 10 minutes before use, put into a cold oven and then heat the oven slowly; never add cold liquids during the cooking process; uncover during the last 10 minutes or so to brown the meat; take out of the oven and set on a folded towel to prevent temperature shock. Clean in hot water with a brush, do not use harsh cleaners, and learn to accept that you will not get it looking sparkly clean.

Basically, in my opinion, using a clay baker will kind of a pain. But, will using the clay pot be worth the trouble? Will it taste fantastic? Will I regain the cosiness of an old-fashioned kitchen?

The recipe

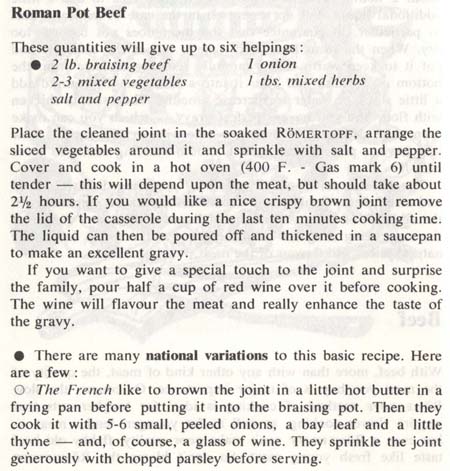
I chose to cook “Roman Pot Beef”. Like many of the entries in this cookbook, the recipe is just sketched out. The majority of recipes are for meats (beef, veal, pork, mutton and lamb, game, and poultry). Fish and soups are also included. Desserts are given a few pages, with the caution “not for slimmers!”. (As I said, this book makes me smile.)

I checked online, and the current Römertopf website has content quite similar to my 1971 Römertopf Cooking is Fun cookbook. (It’s written in English, with a heavy German accent.) The recipe for “Braised Joint of Beef” reads a lot like the “Roman Pot Beef recipe in my cookbook:

Roman Pot BeefRoman Pot Beef
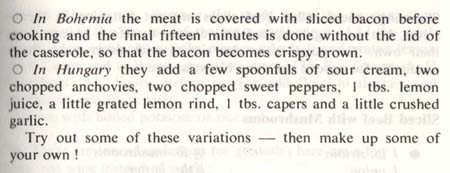
A “joint” of beef is a roast. I chose a cross-rib chuck roast. Mixed vegetables, 2-3? I think carrots for sure, then maybe leeks and parsnips. Potatoes would work, but I suggest adding them about an hour before the dish is done, or they will be cooked to death. I like the Hungarian national variation: sour cream, anchovies, garlic, capers, and a bit of lemon. And the red wine from the general suggestion. So here goes!

Römertopf Pot Roast (“Roman Pot Beef”)
serves 4-6

  • cross-rib roast, 2-3 pounds
  • 1 onion, chopped roughly
  • carrots, leeks, parsnips, potatoes, red bell pepper, about 3/4 cup each, roughly chopped
  • fresh herbs (parsley, thyme, oregano) or dried, to your own taste (or use 1 tablespoon dried Italian seasoning herbs)
  • potatoes (optional)
  • 1 tablespoon sour cream
  • 2 anchovies, chopped
  • 1 tablespoon lemon rind
  • 1 tablespoon capers
  • 2 cloves garlic, chopped
  • salt and pepper
  • about 1/2 cup red wine

Soak both the top and bottom of a clay baker in water for at least 10 minutes. Leave your oven off.

Take the clay baker out of the water and towel off. Put the roast in it, then the onion and other vegetables, the herbs, capers, anchovies, lemon rind, garlic, and salt and pepper. Smear the sour cream on top of the roast. Pour a little wine over the mixture. Cover the pot.

Place the clay baker in a cool oven (adjust the oven rack to a low position). Turn the oven to 400˚. Let cook for 2 1/2 hours. You can peek at it during the cooking time to make sure it isn’t drying out and browning, but it does work. And, you can’t add cold liquid anyway, as it might break the pot. You can add quartered potatoes during the last hour of cooking.

Note: CAREFULLY open the clay baker to check the contents. Do not put your face directly over it and pull off the lid. I learned the hard way! It is very hot and steamy! Using a pot holder, lift the lid so that it vents away from you.

At the end of the cooking time, remove the pot from the oven and carefully remove the lid. Take the roast out of the pot, set it on a plate, and cover it with foil. If you wish, use a slotted spoon to remove the (overcooked) vegetables to serve with the roast and then pour the meat juices into a pan to make a gravy. What I did was pour the entire vegetable-meat juice mixture into a food processor, then pulsed until it was fairly smooth. I put that mixture into a pan, added beef stock and about a tablespoon of corn starch, and heated it all until it was thick. It was wonderful!

Comments

This “pot beef” was very, very good, as cooked per my version above. It’s hard to tell whether or not it was better than my usual version of a pot roast (a recipe from Cooks Illustrated). In some ways, the preparation was easier, since I did not have to brown the meat first. In some ways, it was harder, since handling the hot, almost fragile clay pot is tricky. But I do like the connection with the past of cooking in a clay pot. Last June, we traveled to Turkey, and learned a lot about ancient civilizations, including the Romans. So, I’ll probably use the clay pot again for a stew or such. It was fun.

My clay pot began this current adventure sort of dirty. Just saying. It’s hard to get clay pots clean. Before this pot beef, I had only used it for baking bread.

clay pot
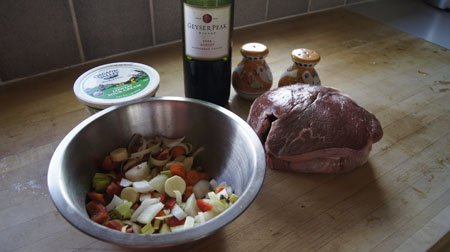
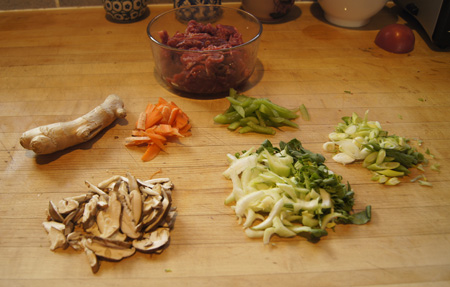
Here are the ingredients that I used. You really can use just about whatever you like. There are onions, carrots, parsnips, red bell peppers, garlic, anchovies, capers, and lemon rind in the bowl.

pot beef ingredients
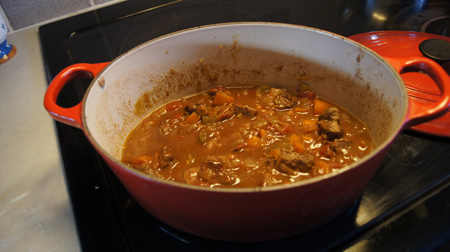
After cooking, the vegetables are kind of overdone. The cookbook claims that the cooked mixtures are a good presentation “as is”. I disagree. Plus, look at all the browned stuff on the sides that will be hard to clean off.

cooked beef pot
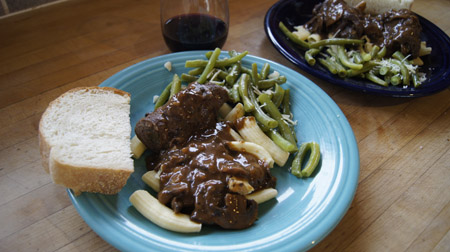
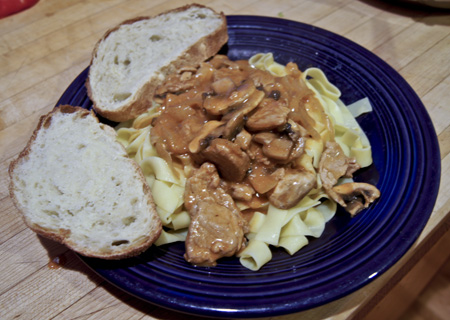
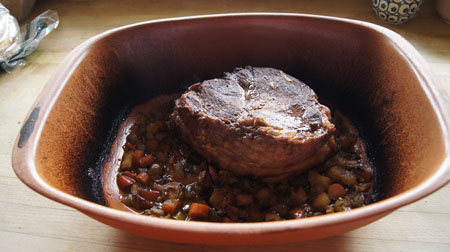
The meat itself is nicely browned and very tender. As I wrote above, I made a gravy from the meat juices and food-processed vegetables. When the pot had cooled a bit, I used some beef stock to rinse some of the nice browned stuff into the gravy mixture. I served it over big flat noodles and it was excellent. Good flavor, tender meat.

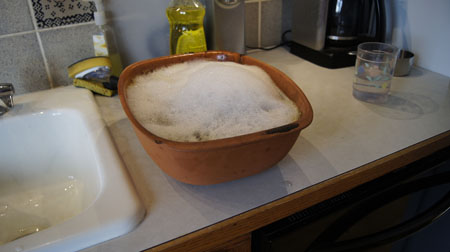
Clean-up time. I soaked the pot in soapy water for an hour or so, and to my surprise, it cleaned up nicely. So no complaints from me.

clay pot soaking

250 Cookbooks: The Wine Diet Cookbook

Cookbook #60: The Wine Diet Cookbook. Dr. Salvatore P. Lucia and Emily Chase, M.S., The Piper Company, NY, NY (Abelard-Schuman also listed), 1974, Bantam Edition, 1976.

The Wine Diet CookbookI bought this book back in the 70s. I love wine and I have to watch calories, so I thought: a wine diet, perfect! Sort of tongue in cheek though, since I know from experience that wine sometimes ruins my personal dieting strategy.

I believe in keeping small amounts of your choice foods in a diet, especially if your diet is long term. Too much denial will derail any healthy eating plan. So for me, wine and chocolate are included – but in moderation. And wine (like chocolate) is good for you. According to the authors of this book: “Wine is a food; a source of energy for work and body maintenance.”

A brief outline of the wine diet is on page 10:

“The Magic Number: 1200. The total daily calorie budget for these menus is approximately 1200, including a 4-ounce glass of table wine with dinner each night. . . . We have selected a 1200-calorie program because at this calorie level it is possible to include the basic elements needed for good nutrition and still give the slimmer a chance to average as much as a two-pound loss per week.”

I agree with the 1200 calories per day for dieting, and that was my goal when I used to (obsessively) count calories. But my 1200 total was without wine, and I was never able to give up a treat of fruit in the afternoon for a glass of wine at dinner.

The authors state that “a glass of table wine brings relaxation and satisfaction that adds greatly to the slimmer’s enjoyment of the meal”. “Wine is a stimulating and a most salutary nutritional element.” “Very little will power will be needed to diminish the volume of a meal.” That may work for some people, but not always for me. Instead, one glass can tempt me to have another glass, and too much wine decreases my will power to stop eating.

This book might work for someone besides me. The diet plan is sensible, including a good balance of carbohydrates, protein, and fruits and vegetables. Diet margarine and low-fat milk products are employed to shave calories, and all recipes are explicit in portion amounts and calories. Daily menu plans are outlined. Wine is used in many of the recipes, adding flavor without adding calories.

Not many of the recipes in this book beg me to be tried. I appreciate the reminder to use more wine in cooking to boost flavor, but today I find no other benefits in this 50 year old cookbook. I will recycle the The Wine Diet Cookbook.

Before recycling: for this blog, I will cook “Dilly Beef Rolls”.

Dilly Beef Rolls RecipeDilly Beef Rolls RecipeKind of a cute idea, rolling round steak around a dill pickle. I will use the dill pickles I made last summer. I will skip the “2 tablespoons diet margarine” and use a few drops of olive oil instead. For the “1 teaspoons beef stock base” and “1/2 cup hot water”, I will substitute my own beef stock. I buy tomato paste in a tube, so that’s easy. I see no need for instant-blending flour; it’s almost as easy to use regular flour mixed with a little water. California Red Table Wine? No, I won’t leave that out! Not sure the bottle in the refrigerator is Californian, but it’s red. And I have sherry too. Okay, this should be fun. I get to get out my ancient meat mallet too, that’s always fun.

Let’s see if this recipe can turn a usually tough and bland round steak into a flavorful, low-fat meal. My version of the recipe follows.

Dilly Beef Rolls
serves 2-3

  • 9-12 ounces round steak – buy the “thin cut” if possible
  • 1 large whole dill pickle, quartered lengthwise
  • 1/2 of a medium onion, chopped
  • 1 clove garlic, chopped
  • 1/4 pound sliced mushrooms
  • 1/2-3/4 cup beef stock
  • scant 1/2 cup red wine
  • 1 tablespoon tomato paste
  • thyme, about 1/2 teaspoon (I used fresh thyme)
  • marjoram, about 1/2 teaspoon (I used dried)
  • salt and pepper to taste
  • 1 tablespoon flour
  • 1 tablespoon dry sherry
  • fresh chopped parsley to taste

Cut the round steak into 2 or 3 equal pieces, then pound with a mallet to 1/4-inch thickness. Roll each piece around a pickle quarter, and tie the center with string.

Heat a (coverable) cooking pot until it feels hot when you hold your hand an inch above it. Add a small amount of olive oil and tilt the pan to spread the oil. Lower the heat to medium, then add the round steak rolls and brown them on all sides. Remove them from the pan and set them aside on a plate.

Add a few more drops of oil to the pan. Add the onions and sweat them with a little salt, cooking until they are soft. Add the garlic and mushrooms; cook and stir until the mushrooms are wet and soft. Add the broth, wine, tomato paste, thyme, and marjoram; stir. Add the beef rolls and any of the pan juices that have collected on the plate.

Cover the pot and lower the heat to maintain a very gentle simmer. Cook for at least an hour and a half, until the meat is nice and tender.

Remove the beef rolls and cut the strings off. Set them aside while you finish the sauce.

To the sauce in the pot, add the 1 tablespoon flour mixed into a little broth (or water) to a smooth paste. Stir until mixed in well; add more broth (or water) if the sauce looks too thick. Add the sherry and chopped parsley. Heat the sauce to a simmer, then add the beef rolls back in and heat it all up. At this point, you can let your dinner “hold” until you are ready to serve.

Serve these dilly beef rolls with any starch, such as mashed potatoes, rice, or pasta.

Comments

I was lucky to find very thin round steak. In the photo below, I have already pounded one of the slices with my ancient mallet.

Dilly Beef RollsThe focus in the photo below is on my dill pickles. Yes, I canned them myself last summer! They are gorgeous, aren’t they?

Dilly Beef RollsI found that these rolls hold together fine with just one piece of string in the middle. Beef rolls formed around a crumbly stuffing are a lot harder to manage. Note my container of homemade beef stock. (I should talk about how I make and store it sometime.)Dilly Beef RollsI browned the beef rolls in my heavy cast iron pot. Lately I’ve been using my LeCreusets a lot, but this old pot with its heavy lid works really well for stove-top braising. Below is the mixture of beef and vegetables and seasonings before the long simmer.

Dilly Beef RollsThe mixture after cooking looks just a little different, but the meat has changed in character from tough to soft. It smells really good, too.

Dilly Beef RollsPlated:

Dilly Beef RollsNote the glass of wine! On a weeknight! Just had to go with the advice of The Wine Diet Cookbook. It’s a small glass, a measured 4 ounces, not very much.

These beef rolls taste really good. I’ll make them again! The dill pickle inside gave them the flavor of a sauerbrauten. The gravy, while low in fat, was very flavorful! And I even forgot the parsley. I did put a little chopped fresh oregano on the green beans, though.

Note the pasta – it is homemade. Last week I got out my old pasta machine and made a big batch of these large macaroni noodles (and froze them in portions). That pasta machine will surely be the focus of a future blog post. The bread is homemade too, a result of my recent acquisition of a new sourdough starter. All is yummy.

250 Cookbooks: George Foreman Lean Mean Fat Reducing Grilling Machine Cookbook

Cookbook #40: George Foreman Lean Mean Fat Reducing Grilling Machine Cookbook. George Foreman and Connie Merydith, Pascoe Publishing, Rocklin, CA, 2000. (Salton, Inc.)

George Foreman Grill CookbookThis is another cookbook I thought I’d toss. But it has some good ideas in it. There are about 175 recipes, mostly for seasoning different meats for the grill. A few of those are enticing enough to try. Plus it’s a low-fat way to cook, and nutrients are listed with each recipe. So I’ll keep this cookbook.

My first big question was: “Did I throw away the George Foreman grill?” I haven’t used it in years, and had put it aside to give away. I clomped down the stairs to the basement to search. And, there it was, under a shelf. Yay. And I even found the drip trays that came with it. So I’m good to go for trying a recipe from this book.

Why was I ready to get rid of this appliance? Because it is a pain in the neck to clean. The grill surfaces are not detachable, so I have to prop the whole grill up in the sink and rinse with soapy water. It is non-stick, and that helps, but still, it’s awkward to clean. The book says this about cleaning: “Your plastic grilling spatula and a wet sponge will safely remove any food particles.” I wish it were that easy. Also, I use my outdoor gas grill a lot for grilling, even in the winter. Clean-up is so much easier.

Why will I keep this appliance? Well, I have the room for it in the basement. And I’d like to try it for panini-type sandwiches. And the recipe I tried (below) took just a couple minutes to cook – such a quick and easy dinner. I’m ready to play with this grill a little, maybe I’ll come up with an easier way to clean it. And I’ll try a few more recipes from the cookbook, even if I end up using my gas grill to cook them.

I searched today (in 2013) and found that George Foreman grills are still publicized and sold. One model of the new ones has removable grill plates that can be put in the dishwasher. See? I wasn’t the only one who complained about clean-up issues.

George Foreman Grill

For this blog, I decide to make “Poor Boy Steak Sandwiches”. The recipe calls for chuck steak, and I’d just seen it on sale in an ad from a local store. I like the green chiles and tomatoes added to the meat in the second half of the cooking; this will make the sandwich filling tasty and moist.

Poor Boy Steak Sandwich recipeI was able to find some good, whole wheat deli rolls in the Whole Foods bakery section. These made the sandwiches great. You can see them in the photo below. They are probably “club” rolls; they are about 3 inches wide are thick enough to hold up to a big juicy filling.

I cooked one 14-ounce steak for the two of us. There was some left over, and on a hungrier day, my dining partner might have gone back for seconds. But on this night, the doggies loved their dinner a little more than usual.

Poor Boy Steak Sandwiches
serves 2-3; this recipe is intended for a George Foreman type grill

  • 1 large chuck steak, maybe 14 ounces
  • salt and pepper
  • 1 4-ounce can diced green chiles
  • 1 small tomato, diced
  • mustard, mayonnaise, and ketchup
  • 2-3 large sandwich buns, toasted
  • slices of red onion

Preheat a Foreman grill for 5 minutes. Meanwhile, slice the steak in thin strips across the grain and remove any fat.

Place the steak strips in the grill and sprinkle with salt and pepper. Put a drip tray at the bottom of the grill to catch the drippings. Grill for 2-3 minutes. Dump the green chiles and tomatoes on top of the meat and grill another 2 minutes.

Toast the buns and spread them with mustard and mayonnaise to your own tastes. Pile the meat mixture into the bun and top with sliced onions. Serve with ketchup.

Here is the cooked meat mixture:

Poor Boy Steak FillingAnd here is a filled sandwich, served with some cooked baby potatoes:

Poor Boy Steak SandwichThey were good. These would be even better with a New York or ribeye steak, but then the sandwich would no longer be “poor” as those are usually expensive cuts of meat. Sliced thinly, the chuck steak worked fine. It has lots of flavor and maybe fewer calories, and is definitely cheaper.

This is an amazingly fast dinner or lunch to put together. If you slice the steak while the grill heats, the sandwiches will be on the table in less than 10 minutes.

250 Cookbooks: Quick and Easy Recipes

Cookbook #34: Quick and Easy Recipes. California Home Economics Teachers, California Cookbook Company, Orange, California, 1986.

Quick and Easy RecipesThis spiral-bound book is a collection of recipes contributed by home economic teachers in California in the 1980s. It’s a notched-up version of a “community” cookbook, as it is professionally published (it has an ISBN) and has good color photos contributed by several food companies.

My sister sent me this cookbook for Christmas in 1986. She was a teacher in the California school system and that’s probably how she came across this book. She notes three recipes – layered spinach salad, orange bread, and spinach dip – as being really good. Layered spinach salad was a classic back then, a great dish for bringing to a party. You make it the day before so the flavors can meld. This version has spinach, bacon, frozen peas, Romano cheese, fresh mushrooms, red onions, mayonnaise and sour cream. I have made and liked the orange bread (you blend a whole orange!) and the spinach dip, served with fresh vegetables, could be made low-cal by using Greek yogurt.

Like the spinach salad, the recipes in this book are a very good reflection of American family cooking in the 1980s. Classic recipes include artichoke dip, clam dip, cheese rolls, molded salads, tuna casseroles, hamburger stroganoff, and chicken rice casserole. The recipes are not always from scratch, but they are still home-cooked. Examples of typical 80s ingredients are Bisquick, frozen dinner rolls, crescent rolls, packaged pudding, canned soups, cake mixes, dried onion soup mix, tater tots, canned tuna, canned clams, and canned French fried onions. These ingredients may not be the best for us, but they aren’t terrible and they bring both ease of cooking and (to me) a sense of comfort food. And on the healthier side, many of this book’s recipes do include only non-packaged and fresh ingredients, and several recipes are labeled “low-fat”.

I will go back to this cookbook for some of the classics I remember from that time. If I ever want to make artichoke dip or layered salad, now I know where to find a recipe without going online. Plus the cookbook has a note from my sister, so I definitely will keep it!

But what to cook for this blog? As usual, I’m looking for something low-fat that uses ingredients I have on hand, and that will add to my cooking repertoire. This cookbook has a chapter titled “Stir Fry Cookery”; sounds right up my alley. I chose to try the “Shredded Beef with Green Peppers” because (1) I have a flank steak in the freezer and (2) flank steaks are a lean meat and (3) I like the tablespoon of fresh ginger it includes and (4) it calls for very thin slicing and then marinating of the flank steak before cooking. I’m usually pretty impatient when preparing meat for stir fries, tending to cut it into large slices. That works for chicken or pork tenderloin, but not for beef (too tough). I think the very thin slicing – shredding – will get me out of my usual rut.

I plan to modify the recipe (surprise!). My dining partner doesn’t like green peppers, so I’ll tone them down and add some other vegetables that I have on hand.

Shredded Beef with Green PeppersLooking carefully at the above recipe, I see a mistake: It calls for 1 tablespoon of vegetable oil in the marinade and 1/2 cup for cooking. But in the directions, it says to put 5 tablespoons of oil in the wok, and never says what to do with the other 3 tablespoons. And half a cup of oil is way too much oil anyway – that’s almost 1000 calories!

Another issue: it has way too little meat, at least for our tastes. Two-thirds of a pound of meat is about 10 ounces; I use about 9 ounces for 2 people, and this recipe claims to feed 4.

I don’t like sesame oil very much, and I think it needs soy sauce, so in my version I will put 1 tablespoon soy sauce in the marinade and then taste to decide if it needs more after it cooks. I’ll also up the vinegar (and use rice wine vinegar, not “rice wine”). Why baking soda? That’s a strange ingredient for a stir fry; I’ll leave it out. I also think it needs thickening, so I’ll add a touch of cornstarch.

Guess I pretty much mangled the original recipe, even before I started! And then I began cooking … oooh, more changes are needed. I got the wok nice and hot with a little oil in it, then added the finely shredded beef. No way was it done cooking in 10 seconds. After about 30 seconds there were still a lot of raw pieces of meat, but then the meat released a bunch of juice into the pan. I probably cooked the meat 5 minutes before it was all cooked, and then I had quite a bit of juices in the pan. The juices are sure to add to the flavor – I decided to take it off the heat and keep the juices. (Maybe it would have been done in 10 seconds if I had used 5 tablespoons of oil, but heck, it would have splattered all over the place.)

Whew, lots of changes. The recipe below is how I actually cooked this dish.

Shredded Beef with Vegetables
serves about 2 people

I served this over rice.

Steak and marinade:

  •  9 ounces flank steak, sliced across the grain, at an angle, as thinly as you can – you want it “shredded”
  • 1 tablespoon rice wine vinegar
  • 1 tablespoon soy sauce
  • 1 tablespoon vegetable oil
  • sesame seed oil to taste (I used a few drops)

Vegetables:

  • 1 tablespoon freshly grated ginger root
  • a mixture of thinly sliced vegetables, such as green peppers, green onions, carrots, baby bok choy, cabbage, mushrooms, and/or celery
  • 1/4 teaspoon sugar
  • soy sauce to taste: I used about 2 tablespoons reduced-sodium soy sauce

Combine the sliced beef with the marinade ingredients and let stand about 15 minutes. While it marinades, prepare your vegetables. I used shitake mushrooms, baby bok choy, carrots, green peppers, and green onions. Aim for about the same amount of total sliced vegetables as you have sliced beef.

Heat a tablespoon or two of vegetable oil in a wok (or any fry pan) over high heat for 1 minute. Add the beef and stir fry until all the meat looks cooked but not so long that the juices that come out of the meat evaporate away. Remove the cooked beef (and its juices) from the wok and put in a bowl.

Return the wok to medium high heat. You can add a few drops of oil, if you wish. Add the vegetables (don’t forget the ginger) and stir fry for 2-3 minutes. Add the cooked beef and its juices back to the pan. Add:

  • 1 teaspoon cornstarch dissolved in a couple tablespoons water
  • soy sauce to taste (1-2 tablespoons)

Heat through and serve over rice.

shredded beefI sharpened my knife and took some time to “shred” the beef. The pile of sliced beef is about 9 ounces; the rest went back into the freezer for another meal.

vegetables for shredded beef dishAbove are the sliced vegetables (and a hunk of ginger root) that I used in the dish.

Shredded Beef with VegetablesAnd above is the cooked dish. We liked it a lot! Some red peppers might have been nice for color. It had just enough sauce to serve over rice. Taking the time to carefully shred the flank steak before cooking is really worth the while.

I now have a new stir fry recipe in my repertoire! Hmm, this would be good with hoisin sauce in a flour tortilla. Moo shoo beef. Stay creative!

Favorites: Pork with Paprika and Mushrooms

Time to write down a recipe for something that I have always cooked without a recipe. It’s something that I just “throw together”. But this one needs to be shared, it’s that good and simple.

I used to take inexpensive cuts of meat and cook them for hours in onions, seasonings, and stock. When tender, I’d stir in a bit of sour cream and serve over noodles or rice. Comfort food. In the last several years, my old method for making this dish gravitated towards the recipe below. Instead of tough meat, I use pork tenderloin. This version only takes about 30 minutes prep and cooking time.

My husband asks: “What is that dish you are making?” and I never know what to call it. It emerged from my repertoire unnamed. Is it a stroganoff? A goulash? A paprikash? I really don’t know. All I know is that it’s very good, easy, and low-calorie (especially if you use non-fat yogurt).

You might already make something like this, but if not, try this easy recipe. I’ve named it “Pork with Paprika and Mushrooms”.

Pork with Paprika and Mushrooms


Serves 2.

  • 9-11 ounces pork tenderloin, cut into 1/8-1/4-inch round or scallop-shaped pieces
  • 1 small onion
  • 1/2 red bell pepper, sliced (optional)
  • 2 teaspoons paprika
  • 2 tablespoons flour
  • 1 cup chicken broth
  • 3-4 ounces mushrooms (about 4 large), sliced
  • 3 tablespoons sour cream or Greek non-fat yogurt
  • noodles (3 ounces dry will serve 2 people)

Halve the onion, then cut into slices. Saute in a little hot olive oil (add the bell pepper slices too if you are using them). When it begins to soften, add the pork tenderloin and cook a few minutes, until all the pieces are browned on all sides. Add the paprika and flour and stir until the flour is incorporated, then stir in the chicken broth and mushrooms. Season with salt and pepper to taste.

Simmer the mixture, covered or uncovered, for about 20 minutes. While it simmers, cook some noodles. Currently, I like pappardelle noodles. These are wide, long noodles, usually sold dry and nested. Fettuccini would work well too, or short, wide noodles.

When you are almost ready to serve, stir in the sour cream and gently heat for a minute or two. To serve, spoon the pork mixture over the noodles.

Here’s how it looks just before you add the sour cream/yogurt. You want a small amount of thick gravy, since the sour cream will thin this sauce.

Pork Paprika

Here it is, plated.

Pork Paprika


Lamb Stew, with Cinnamon

Lamb Stew with Cinnamon

I created this recipe! And I wrote it down, pretty amazing for me, but maybe not so much since this happened during the last two years, so I had the time since I wasn’t working. I wrote the introductory paragraphs then too.

(2011) This all began with a trip to the Savory Spice Shop on the Boulder mall. I brought home the most wonderful cinnamon that perfumed the house for days. I would come in from outside and think “cinnamon, I must use it in a dish other than a dessert!” In the meantime, I put it in a dessert and muffins. Once I ate a re-heated cinnamon-laden muffin for breakfast, and then hours later, in different clothing and hands washed, I was in the last 5 minutes of a 30 minute stint on the ellipticals at the rec center, and very sweaty, and suddenly I smelled cinnamon wafting around my head! I shook my head in amazement.

So back to the idea for a main dish with cinnamon. I thought back to the Mediterranean cooking class I took a few years ago. Cinnamon was in a chicken dish, and a ground lamb dish. I was thinking more of a stew. So I googled lamb and cinnamon and stew, and found a recipe that I based the following recipe on, with changes in spices made from the cooking class recipes.

Was the recipe a success? Yes! Did I get my cinnamon “fix”? Yes I did. Just the sort of complex flavor mix that I was looking for. Mixed with the lamb aroma, the cinnamon itself wasn’t recognizable as pure cinnamon, but it added a complexity that was simply super. The hint of cayenne picked up the flavor to perfection.

This recipe serves two, generously. Since one of my pet peeves is the restaurant tradition of serving the same serving size to a small woman as a large man, I am reluctant to state the number of servings with a pretension of accuracy. It would serve one guy and two women, is my guess. It serves the two of us with some left over, enough for lunch the next day or for the doggies.

Lamb Stew, with Cinnamon


Serve this over rice or couscous. Flatbreads (naan) make a nice addition too.

  • 1 pound boneless lamb stew meat, cut into chunks
  • olive oil or vegetable oil
  • 1 carrot, diced
  • 1 stalk celery, diced
  • 3/4 of a medium onion, sliced thin
  • 3 cloves garlic, chopped
  • 1/2 t cinnamon
  • 1/4 t cumin
  • a few shakes each of: nutmeg, allspice, cloves, and red (cayenne) pepper (watch the cayenne – not too much! really, just a couple shakes!)
  • salt and pepper to taste
  • a couple bay leaves
  • 3 T flour
  • 1 cup of diced, canned tomatoes – about 3/4 of a 14-oz. can
  • 1/2 cup white wine
  • 1/2 cup chicken stock
  • chopped parsley to taste

Brown the lamb in batches in a little hot oil in a pot on the stove. Don’t crowd it; if you put too many of the lamb cubes in at once, they won’t brown as well. As they brown, remove the lamb cubes from the pan and set them in a bowl.

In the same pot that you browned the lamb in, saute the carrots, celery, and onion in a little oil until soft, adding a little salt to help sweat the vegetables. Add the garlic and the spices and salt and pepper and continue to cook and stir for a couple minutes. Add the lamb back to the pot. Add the flour and stir until it’s incorporated. Finally, add the tomatoes, wine, and stock. (Feel free to add a bit more stock if it looks too thick.)

Cover and simmer for at least 2 hours, probably more like 2 1/2 hours. Check periodically; add more stock if it’s too thick, and check the lamb to see if it’s done. You want the lamb to be falling-apart tender, and it takes awhile. (This could be done in a crock pot. I’d suggest 7-8 hours on low.)

Before serving, add some chopped fresh parsley (if you remember! I always forget).

The photo on the top of this post is of the cooked stew. The photo below is before the long simmering step. By the end of the cooking, the celery and onions meld into the sauce and the spices. This really is good, I’ve made it three times and someday I’m sure it will be listed in my “favorites”!
Lamb Stew with Cinnamon, before simmering


250 Cookbooks: Eating Light

Cookbook #16: Eating Light. Better Homes and Gardens, Meredith Corporation, Des Moines, Iowa, 1985.

Eating Light

This is another low-calorie cookbook that I picked up in the 1980s. I remember that I frequently bought the “women’s magazines” like Better Homes and Gardens during that time, so it doesn’t surprise me that I purchased a book with the same name.

This cookbook is similar to the magazine: glossy, and produced by a company rather than an individual. The recipes have long names and pretty pictures, but not many tempt me to try them. Years ago, I probably picked up some ideas on low-calorie cooking from this book, but today, I find it “old hat”. Not very interesting. Also, they put the nutrition information in the appendix, rather than with each recipe, which I find inconvenient.

I decided to try “Pork Pinwheels with Apricot Stuffing”. I like pork tenderloin, and I like apricots. It’s a new idea (to me) to use dried apricots in a stuffing for pork. And I think the pinwheels might look pretty, and hopefully I’ll be able to add another pork tenderloin recipe to my repertoire.

There is only one other recipe in this book that looks interesting, so I’ll copy that recipe and give this cookbook away.

Pork PinwheelsComments

These turned out pretty good, at least when I made some changes. I’ll type in the recipe below. But first I’ll rant, with a what’s wrong with this recipe discussion.

This recipe makes “6 servings”. Those are dang small servings. Each person would only get about 2 1/2 ounces of pork. Generally a serving of pork is 4 ounces. For the two of us, I weigh out 9-10 ounces of pork for a meal. (The nutrition information on the package of pork tenderloin that I bought states that 4 ounces has 130 calories and 23 grams of protein!)

The nutrition information (at the back of the book) states “191 calories” per serving. Using the information on the packaging of the ingredients, I come up with more like 160 calories per 1/6 of the recipe. And note that I don’t use too many significant figures: it’s silly to say “191 calories” when there so many variables when one actually prepares the recipe. Bread, for instance, has a quite variable calorie content. (I used My Daily Bread so I know exactly how many calories it has.)

The recipe slips in unnecessary calories by employing both butter and apricot nectar. Butter has 100 calories per tablespoon (Nutrient Facts) and can be eliminated by using a non-stick pan (and a tiny amount of olive oil) to wilt the onion and celery. Surprisingly, a can of apricot nectar has 200 calories. And it contains “high fructose corn syrup, apricot juice concentrate, apple juice concentrate”. If/when I make this again, I’ll try to find a better juice choice at Whole Foods.

The recipe calls for “1 pound” of pork tenderloin. Ground meat might be sold in exact 1 pound packages, but the same is not true for pork tenderloin. The one I used weighed 14 3/4 ounces. I went ahead and used it (even though I aim at 9-10 ounces) because to roll up the meat, a certain mass is required. I had leftovers, but the dogs didn’t mind. Be aware, though, that this recipe does not scale down well to only two people.

Broiling is called for in this recipe. But, it does not state whether to set the broiler to high or low. I tried 5 inches from the broiler and the low setting; the pinwheels were burning within 2 minutes. Luckily I checked! I don’t know what kind of broiler they used but mine simply did not work. I changed my oven to “bake”, as reflected in my typed recipe below. I don’t think that using a broiler rack is necessary. The book states that broiling with a rack is a great method because it allows the fat to drip off; my opinion is that pork tenderloin has very little fat in it to drip off. I’d skip it next time.

All that said, the meal was a success. The pinwheels were pretty and the cinnamon was a nice addition. If you want to try these, use my recipe below.

Pork Pinwheels with Apricot Stuffing


With one pound of pork tenderloin, this would serve about 3 people. Adjust the amounts of all ingredients according to the number of people you are feeding and the weight of the purchased pork tenderloin.

  • 1 pound pork tenderloin
  • 2/3 cup chicken broth
  • 1/3 cup finely chopped dried apricots
  • 2 tablespoons chopped onion
  • 2 tablespoons chopped celery
  • 1/8 teaspoon cinnamon
  • salt and pepper to taste
  • 2 cups dry whole wheat bread cubes (about 1/4-inch cubes)
  • 1 1/2 teaspoons cornstarch
  • dash nutmeg
  • 1 cup apricot nectar (try to find one that does not have high fructose corn syrup; perhaps you can find fresh apricot juice)

Heat the broth to almost boiling. Pour it over the apricots and let stand for at least 5 minutes while you prepare the vegetables.

Cook the onion and celery in a tiny amount of olive oil in a non-stick pan until the onion wilts; salt to taste and to sweat the onion. Add the cinnamon and pepper, then add this and the apricot mixture to the bread cubes.

Split the tenderloin lengthwise, cutting to, but not through, the opposite side. Open it out and pound it lightly with a meat mallet until it is about 10 inches by 6 inches. Spread the stuffing evenly over the tenderloin. Roll up jelly-roll style, starting from one of the short (6-inch) sides.

Secure the meat roll with toothpicks or tie with string at 1-inch intervals. Then, cut the meat roll into six 1-inch slices.

Carefully place the meat slices in a lightly greased or Pam-sprayed baking pan. [“Cut side down”? For four of the slices, both sides are cut. Another recipe-rant.]

Baking: I suggest a quick broil on low for a minute or two to brown the tops of the pinwheels. Then, bake these at 400˚ for about 20 minutes. Check with an instant-read thermometer; about 150˚ internal temperature is good. I served these with sides of double-stuffed potatoes and vegetables.

Below is a photo of the pork roll. It’s so bulbous! Toothpicks might work better, since the string kind of squished it and left a mark on the pinwheels after they were cooked.

pork roll before cutting
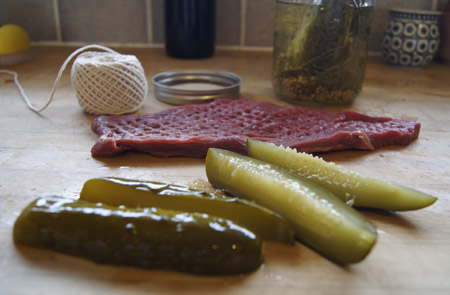
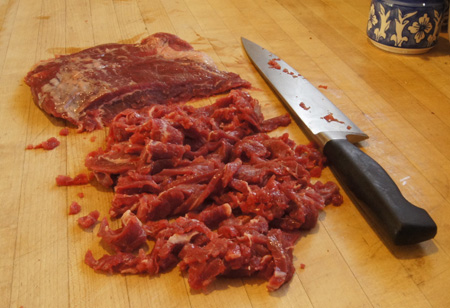
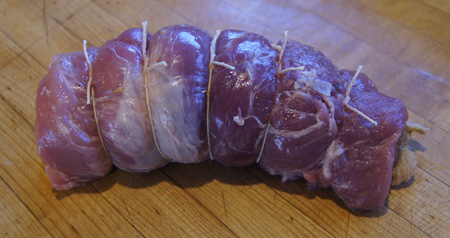
Here it is after I cut two pinwheels. I only cut five in all because I started with a little less than a pound of tenderloin.

cut pinwheels
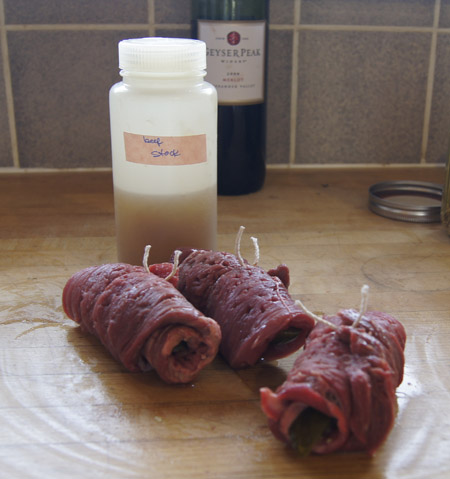
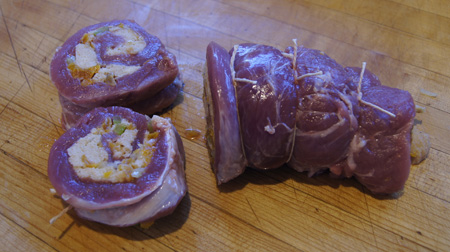
The pinwheels, cooked and plated:

cooked pinwheels

Pretty good!

Favorites and 1990s Blog: Beef Jardiniere Crepes

This favorite recipe for leftover beef in crepes was in my 1990s blog. I’m listing it in both categories because unlike the cookie recipes, which I can  make only rarely, I make this recipe a lot.

I love to make crepes. They are so pretty and yummy. They do take a chunk of time, though, since I always mix them and then let the batter sit for at least an hour before cooking. And pan-cooking the crepes is time-intensive, at least for about 10-15 minutes. This all means that (for me) the time chosen to make crepes is traditionally a slow, leisurely pocket of time, a Sunday afternoon, a time with nothing pressing.

Crepes can be made ahead of time and stored in the refrigerator for several days. For Beef Jardiniere Crepes, I used to make the crepes, filling, and sauce on Sunday, and then on a weekday quickly put them all together and bake. Then it was a 30-minute weekday meal, and delicious and low calorie.

I have watched Alton Brown make crepes on TV, and read about them elsewhere. I make them a little different. I cook both sides, and rarely are my crepes “lacy”. If crepes are lacy, all the good moist filling leaks out. And I really don’t understand why one would only cook one side. Maybe mine are thicker. Maybe mine are better.

I do use a pan sold specifically for crepes. I bought it years ago and it looks like it. It is a cheap, light, non-stick pan with shallow sides. Any 8-10″ non-stick pan will do. To save calories, I lightly coat the pan with non-stick spray (instead of butter) before cooking each crepe. Details on my method are in the text and photos below.

Beef Jardiniere Crepes


I make these a lot. They are yummy, on the low-calorie side, have lots of veggies, and use up leftover roast beef. Plus I just like crepes. [Note to myself in my personal recipe file.]

This recipe serves about 4.

Crepes:

  • 2 eggs
  • 1 cup milk
  • 3/4 cup flour
  • 1/2 teaspoon baking powder
  • 1/4 teaspoon salt

Filling:

  • 1 pound leftover cooked beef, chopped into 1/4-1/2″ dice
  • 1 1/2-2 cups beef broth
  • 1/2 cup chopped onion
  • 1/2 cup chopped celery
  • 3/4 cup chopped carrots
  • 1/2 teaspoon dried basil or fresh basil to taste
  • 1/2 teaspoon dried sage or fresh sage to taste
  • salt and pepper to taste
  • 1 tablespoon cornstarch mixed with 1/4 cup water

Sauce:

  • 1 1/4 cup reserved cooking liquid
  • 1 tablespoon catsup
  • 1 tablespoon red wine (optional, but good)
  • 1/8 teaspoon garlic powder
  • salt and pepper to taste
  • parsley, fresh or dried, to taste
  • 1 tablespoon cornstarch

Place all crepe ingredients in a blender and blend until smooth, stopping and scraping down a couple times, about 1-2 minutes. Let stand at least one half hour before making the crepes, then blend briefly again.

(At this point, you can jump down to making the filling while the crepes rest.)

Heat a non-stick skillet on medium high until a drop of water sizzles when put in the pan. Or, hold your hand an inch above the pan and see if noticeable heat is coming off it. I keep my pan on a setting between 8 and 9 (with 10 being the highest setting). Give the pan a quick spray with something like Pam (do this before cooking each crepe). Measure out about 1/3 cup crepe batter. Hold the pan in one hand and quickly pour the batter into the pan and rotate the pan so that the batter covers the pan. Cook only 10-20 seconds, until golden brown on the bottom. Then, flip and cook the other side. Continue until all crepes are cooked. (Makes 8-10 crepes.)

Cook the onion, carrots, and celery in a small amount of butter or olive oil until the onion wilts, then add the chopped roast beef and the broth and cover and cook 15 minutes.

Pour off 1 1/4 cup of the vegetable-beef cooking liquid and reserve for the sauce. If too much of the liquid has cooked away, make up to this volume with more beef broth. You want to leave a little liquid behind in the vegetable-beef mixture too, so that it is saucy.

Add the 1 tablespoon cornstarch mixed with 1/4 cup water to the vegetable-beef mixture and cook over medium high heat until the mixture thickens. Remove from heat and set aside.

Combine all the sauce ingredients except the cornstarch. If the mixture is cool, you can add the cornstarch directly to it; otherwise, stir the cornstarch into a little water first and then slowly stir it into the sauce. Cook the sauce until thick – this takes just a few minutes.

Note: We like our sauces fairly thick. If I see that the sauce is not thickening as much as I like, I’ll add more cornstarch. This is an individual preference so feel free to make changes.

Fill crepes with vegetable-beef mixture, cover with foil, and bake at 375° for 15-20 minutes. Serve with the heated sauce.

Below is a photo of a crepe just about ready to be turned. See the how the edges are golden brown. And I wasn’t kidding when I said my crepe pan was old and worn – but it works great. crepes
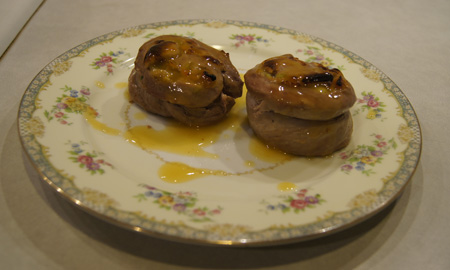
Now the second side cooks:

crepes

 A pile of crepes:crepes
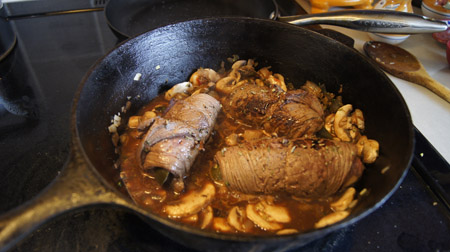
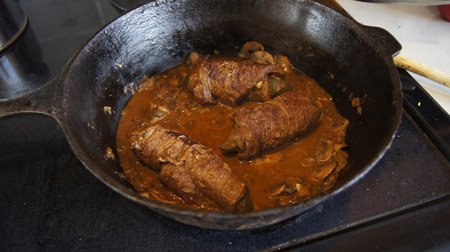
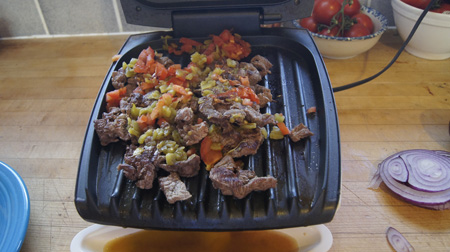
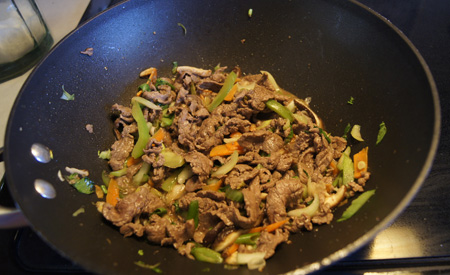
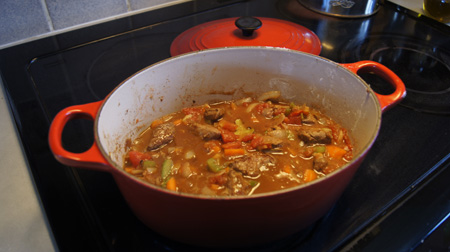
The beef and vegetables cooking:

beef and vegetable filling
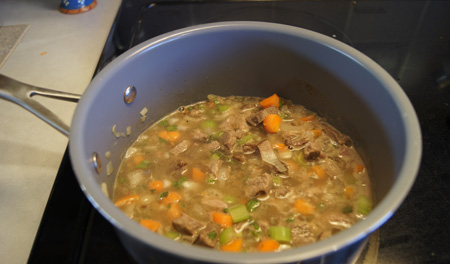
The filled crepes waiting to be covered and baked. I usually have a little extra filling that I put over the top of the filled crepes, it makes them look prettier.

filled crepes
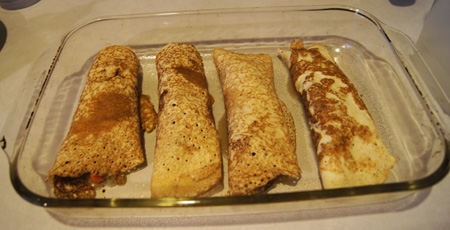
I wasn’t going to take another photo of the prepared crepes or I wouldn’t have chosen the yellow plate. But plated, they looked so pretty (we both commented on them) that I just couldn’t resist. Below is my one-and-a-half crepe serving, my calorie-allotted amount. It was very good.

plated crepes
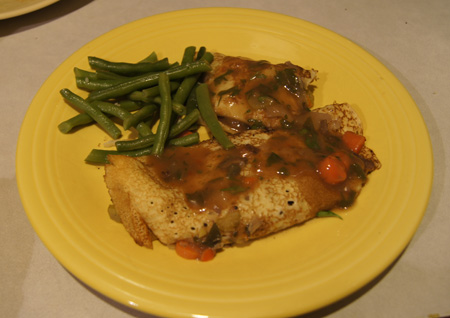
I usually have some leftover crepes. I don’t mind, I like them for breakfast. Sometimes I fill them with cottage cheese, sprinkle with a little cinnamon, roll up and cook in a non-stick pan for a few minutes. Kind of like healthy crepes suzette. Or I just heat them up and drizzle with syrup. Or we have them for dessert, filled with blueberries. Can’t go wrong having too many crepes about.

Favorites: Italian-Style Turkey Cutlets

I found this recipe somewhere in a magazine or newspaper way back when: meaning, before I started writing down where and when I got a recipe. It has stood the test of time; I still make it today and I made it when the kids were here too. This recipe is for four people, although now I halve the recipe for just the two of us.

If you can’t find thin turkey breast cutlets, slice a whole breast horizontally. These are best when the crunch-to-juicy-turkey ratio is large.

Today, I generally chop a fresh tomato or two for this dish, since I halve the recipe and who wants half a can of tomatoes leftover. I also use fresh thyme and basil to taste. If you keep the amount of frying oil low and don’t add more mozzarella cheese, this is a great low calorie meal.

Italian-Style Turkey Cutlets

  • 4 turkey breast cutlets or fillets (about 1 1/4 pound for 4 people)
  • 1 egg white
  • 1 tablespoon Dijon-style mustard
  • 1 cup bread crumbs (you will have some leftover)
  • 1/4 cup chopped onions or shallots
  • 1 clove garlic, chopped fine
  • fresh or canned tomatoes (about 2 cups)
  • herbs to taste (thyme, basil, oregano, or an Italian mix)
  • 1/4 cup grated mozzarella cheese

Cook the onion in a saucepan until it wilts, then add garlic and cook 30 seconds. Add the tomatoes and fresh or dried herbs to taste. Salt and pepper to taste. Let this mixture simmer at least twenty minutes while you prepare the turkey cutlets.

Pound turkey cutlets to about 1/4″. If they spread out into huge pieces, cut them into smaller ones. Beat the egg white in one shallow bowl and put the bread crumbs in another shallow bowl. Shake some dry Italian seasoning mix and salt and pepper onto the bread crumbs and mix in.

Slather the Dijon mustard over the pounded turkey cutlets. Then dip them in the egg white, then roll in the bread crumbs.

Heat a non-stick pan until it feels nice and hot when you hold your hand an inch above it. Then drop in a little oil (olive oil is great) and spread it around. Add the breaded cutlets and cook 4-5 minutes on each side until golden. As they cook, heat the broiler in your oven.

Remove the cutlets from the pan and place them on a baking sheet or broiler pan. Divide the grated mozzarella cheese among them, then put them under the broiler and watch carefully until the cheese melts.

Plate the finished cutlets and spoon on some of the sauce. Cooked noodles are a great accompaniment, and a little fresh Parmesan doesn’t hurt!

Here’s a photo of the tomato sauce simmering and the cutlets frying. I use the pan in the back for the broiling step. This whole meal goes together in about 30 minutes. It’s a great meal for a workday. (Or a busy retirement day.)

turkey cutlets
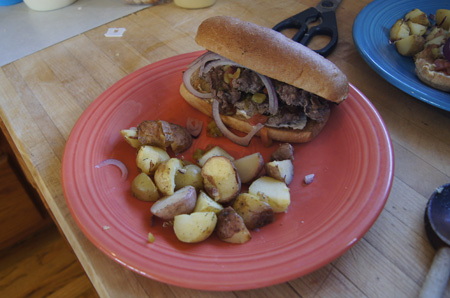
Here is the plated meal. I used my own homemade noodles, prepared in a big batch the week before and stored in the freezer. Making the agnolotti from the New Pasta Cookbook a few weeks ago really inspired me to get out my manual pasta maker more often and make my own noodles. Something good has come from my travel through my 250 cookbooks!

turkey cutlets

250 Cookbooks: The New 365 Ways to Cook Hamburger and Other Ground Meat

Cookbook #8: The New 365 Ways to Cook Hamburger and Other Ground Meat. By Doyne and Dorothy Nickerson, Doubleday & Company, Garden City, NY, 1983.

365 Ways to Cook Hamburger
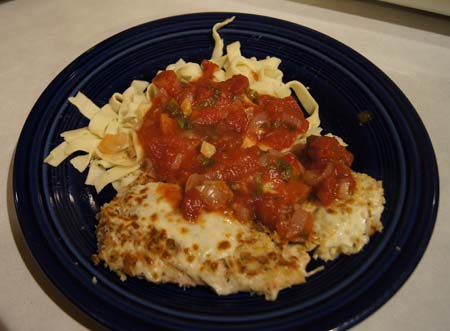
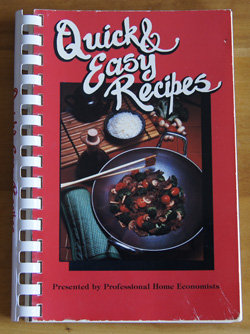
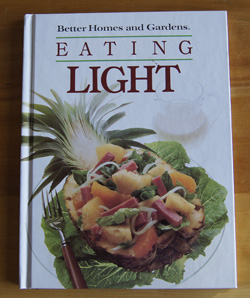
I think this book used to have a cover leaf, without it it looks so plain. But it is a plain little book. There aren’t any photos inside, although there are some pleasant drawn illustrations. The recipes are pretty plain too. Why did I buy it? Dunno. Guess I wanted hamburger ideas.

I don’t think I ever cooked anything from this book, although I had marked several pages. Those pages were for . . . meatballs! I am a huge fan of meatballs. I could eat meatballs once a week. They are right up there among my top comfort foods. I guess I already hinted at that when I chose to make the Pork Balls from cookbook #6. I like mushing the meat with the spices and egg, I like forming the meatballs, I love the aroma as they sizzle and cook in the pan. And I like the convenience of making extra, freezing them, and popping them into a sauce later for a quick meal. Oh, and I like stealing one as they sit on the counter to cool—hey, it’s important to taste them to make sure they are good!

The only recipe in this book I marked besides the ones for meatballs is one for gnocchi. I’ve tried several times in my life to make gnocchi from scratch, but nowadays I use the shelf-packaged product that you can find in most grocery stores.

Do I like this cookbook? It’s okay, but doesn’t have very many innovative ideas, nor are there commentaries to personalize the 365 recipes. The original publication date was 1958 and today, the recipes seem tired. Grilled hamburgers, skillet dishes, baked casseroles, soups, spaghetti meat sauce, tacos (with no seasoning other than salt), meat pies. If you have a hankering for a nostalgic hamburger pie with crescent rolls on top, this is your cookbook. It’s mostly basic hamburger cooking, the kind of cooking that doesn’t require a recipe. I could give this cookbook away and never miss it.

I chose German Meatballs, one of the recipes that I had marked years ago. I’m not sure if I tried this recipe before, but I doubt it because the cookbook is free of food stains and I didn’t write anything on the recipe. This recipe interests me because the onion is cooked before it’s added to the hamburger, there is white wine in the meatballs, the eggs are separated and the whites stiffly beaten. (I doubt that this will make the meatballs much different from ones made with whole, non-beaten eggs, but it’s worth a try.) I like the accompanying sauce, with beer, potatoes and carrots. I don’t have a recipe in my repertoire that is anything like this one. Sounds good for a winter dinner, as I watch the snow fall on a November day in Colorado.

German Meatballs

I had some problems cooking these meatballs. I could tell that the uncooked meatball mixture was much more liquid-y than I would normally choose, and sure enough, when I dropped the first couple meatballs into the hot pan, they flattened out like pancakes. Well, the dogs will like those! I added another generous half-cup of breadcrumbs to the meat mixture and that did the trick.

I tasted one of the cooked meatballs and said “yum!” As I had predicted, the high moisture content and egg whites in the meatballs made them light and almost delicate.

For the sauce, I recalled my Beer and Cheese Soup disaster, and substituted half of the beer with beef broth. As the sauce and meatballs and potatoes and carrots simmered together, I added more broth so that they would be covered.

When the vegetables were done, I didn’t know quite how to serve the dish, since the sauce was thin. As written in the cookbook, there is no way this dish could be served over pasta or rice, nor could it be lain on a flat plate, because the “sauce” was just a runny liquid. So I thickened it with a little cornstarch and called it a “soup-stew”. I served it in big bowls with slices of My Daily Bread and cheese. It was really good! The broth suffused the potatoes and carrots with a hint of beer, marjoram, and bay leaf, and the meatballs were just about perfect.

Below is my revised version.

German Meatballs


Serves 3-4.

Meatballs:

  • 1/4 cup finely diced onion
  • 1 clove garlic, minced
  • 1 pound hamburger (I used 90% lean)
  • 1 cup soft bread crumbs soaked in 1/2 cup milk
  • 1/3 cup white wine
  • 2 egg yolks
  • 1/2 teaspoon salt (or to personal taste)
  • 1/8 teaspoon pepper
  • 1/4 teaspoon nutmeg
  • 2 egg whites, stiffly beaten

Sauce and vegetables:

  • 1 cup beer
  • 1 cup beef stock
  • 1/4 teaspoon marjoram
  • 1 large bay leaf
  • 4 medium potatoes, cubed (gauge the amount of potatoes and carrots to your diner’s appetites)
  • 4 medium carrots, cubed
  • salt and pepper to taste
  • 1 1/2 tablespoon cornstarch mixed with a little water or broth

Heat a small amount of oil (olive or vegetable) in a pan and saute the onion, sweating with a little salt, until soft. Add the garlic and cook for 30 seconds more. Combine with the hamburger, bread-crumb-and-milk mixture, wine, egg yolks, and seasonings. Mix lightly but well. Fold in egg whites.

Form into 1-inch balls and brown in a small amount of hot oil. These burn more easily than most meatballs, so watch the heat of the pan and turn the meatballs often. When they are all browned, drain off any fat.

Add the sauce/vegetable ingredients—except the cornstarch mixture—to the meatballs and bring to a boil. Cover, and reduce heat to simmer for 20-30 minutes. If you like, add more broth so that the meat and vegetables stay down in the liquid. This will make it more soup-like.

When the vegetables are tender, slowly and with stirring, add the cornstarch mixture to thicken the sauce. (You can add more cornstarch if you like it thicker.) Taste and adjust salt and pepper to your taste.

German MeatballsWe each finished our German Meatballs and wiped the bowls clean with bread!