250 Cookbooks: Simply from Scratch Recipes

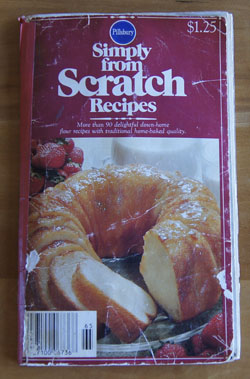
Cookbook #146: Simply from Scratch Recipes, Pillsbury Kitchens, The Pillsbury Company, USA, 1977.

Simply From Scratch cookbook

I have two copies of this cookbook listed in my 250 cookbooks database, so in my obsessive-compulsive manner I have to cover it twice! Bear with me, it’s worth covering twice. It has great recipes!

The first copy I covered was the one I gave to my mother, and this one in my hands now is my own copy. I used it so much that I had to tape the cover back together. The pages fall out as I turn them.

Every recipe I’ve tried from this cookbook has turned out. It’s my go-to book for potato chive rolls and one-rise monkey bread.

But the recipe I love and have used the most is the one for “Blueberry Muffins”. I must have made them a zillion times over the last 40 years! They have the perfect combination of blueberries and oats and orange juice and are simple to make.

In fact, I am going to make them this week for this blog. (I have to redeem myself to my husband after my “sawdust” malt syrup bran muffins, although I loved them.)

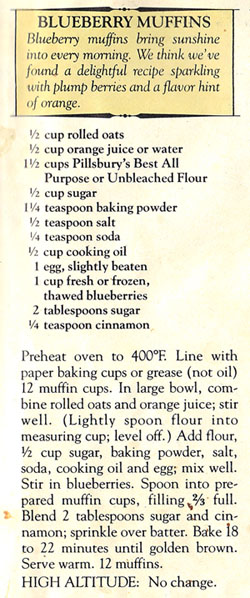
Blueberry Muffins

I made these exactly like the recipe this week. Sometimes I mix the dry ingredients together and the wet ingredients together, then combine the two mixtures just before putting them in the oven. (That’s the method recommended by most chefs.) In Simply from Scratch Recipes, the muffin ingredients are just mixed in a big bowl, without regard to wet and dry ingredients.

Blueberry Muffins
makes 12 smallish muffins

  • 1/2 cup oatmeal (I used quick oatmeal)
  • 1/2 cup orange juice or water (I used fresh orange juice)
  • 1 1/2 cups flour
  • 1/2 cup sugar
  • 1 1/4 teaspoons baking powder
  • 1/2 teaspoon salt
  • 1/4 teaspoon baking soda
  • 1/2 cup vegetable oil
  • 1 egg, lightly beaten
  • 1 cup blueberries, either fresh or thawed frozen berries
  • 2 tablespoons sugar plus 1/4 teaspoon cinnamon (topping, optional)

In a large bowl, combine the oatmeal and orange juice and stir. Add the flour, sugar, baking powder, salt, baking soda, oil, and egg and mix well. Stir in the blueberries.

Prepare a 12-muffin standard size tin by lightly greasing, spraying with non-stick spray, or lining with paper baking cups. Fill them 2/3 full. If desired, sprinkle the cinnamon-sugar mixture on top.

Bake 15-22 minutes at 400˚ until golden brown.

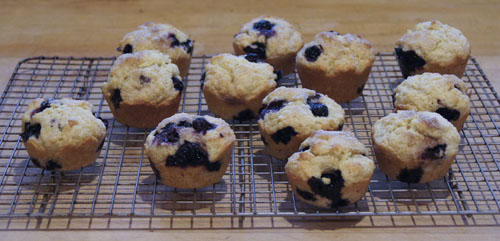
Blueberry MuffinsGreat again! The simple mixing method worked fine. I liked the cinnamon-sugar on top: sometimes I skip that step. Sometimes too I try to cut calories by decreasing the sugar and oil. But this time, I made them as they were meant to be. And they were delicious.

250 Cookbooks: Blue Ribbon Malt Extract

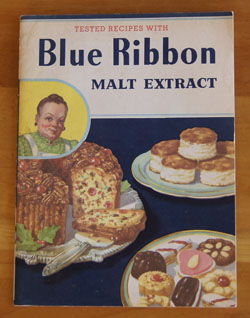
Cookbook #145: Blue Ribbon Malt Extract, Premier Malt Products, Inc., Peoria Heights, Illinois, 1951.

Blue Ribbon Malt Extract cookbook

How did this booklet get into my collection? I am clueless. I just wrote a couple posts about bagels and touched on the ingredient “malt syrup” – so not surprisingly, Blue Ribbon Malt Extract caught my eye when I searched for a book to cover this week.

What is malt syrup? I found online that malt syrup is (generally) made from barley. The barley is soaked in water just until it sprouts and then it is dried – a process called malting. The sprouting process develops several different enzymes that break starches into sugars.  Malt syrup is mostly the sugar maltose, along with complex carbohydrates and a bit of protein (and some vitamins, see below). It’s about half as sweet as sugar.

The opening section of Blue Ribbon Malt Extract reads:

“Blue Ribbon Malt Extract is a valuable addtion to the diet, and a delightful means of bringing new taste to everyday cooking. Its use in bread, for instance, will decrease the leavening time, and produce a larger, lighter loaf of better texture, deeper crust, and more appetizing appearance. Bread and other goods baked with Blue Ribbon Malt Extract will also keep their freshness and tastiness much longer.”

Except for bagels, I’ve rarely seen malt syrup called for in breads. And, I don’t remember malt syrup being touted as a health food supplement. But sure enough, wikipedia states that it was used as a nutrition enhancer for children in England in the first half of the twentieth century. It tastes better than cod liver oil (given for the same purpose) but it tastes a lot better. A tablespoon serving has 10% RDA niacin, 6% vitamin B6, and 6% riboflavin (source: WolfAlph). (In The House at Pooh Corner, malt syrup was Tigger’s favorite food!)

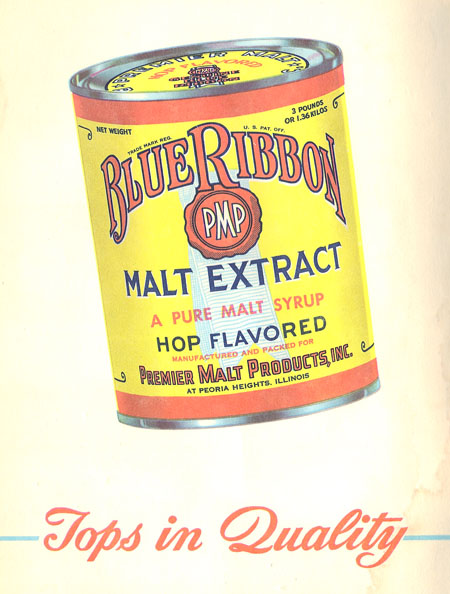
In all the recipes in this book, only a small amount of malt syrup is called for, like teaspoons and tablespoons. Please carefully study the photo below, taken from this cookbook, of a can of Blue Ribbon Malt Syrup:

Malt Extract

3 pounds of malt syrup in a can! Now, that’s a lot when you use so little for each recipe or for nutrition! What did people do with all that malt syrup?

Beer. The answer is beer. I figured this out by googling “malt syrup” and finding almost all of the hits leading to homebrewing sites. I also liked the following, a current review of this book on Amazon:

“If you wrote to the Blue Ribbon company [in the 1950s] and asked for recipes, they would send you this [book] . . . wonder of wonders, a few weeks later you would get a letter. The envelope had no return address. You opened it up, and there was a single typed sheet with home brew recipes. That was what you really wanted. You could then happily brew to your heart’s content.”

During prohibition, people used malt extract in their recipes for homebrew. Note that this book was published in 1951, decades after prohibition was repealed: homebrewing was still illegal in the US until 1978. The company that produced Blue Ribbon Malt Extract had to keep a low profile. (Modern Pabst Blue Ribbon beer is connected with Blue Ribbon malt extract. If you want to read more: Premier Malt Products and Pabst Blue Ribbon.)

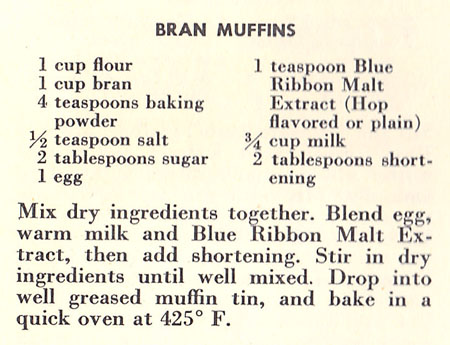
Back to my cookbook, Blue Ribbon Malt Extract. I decided to make Bran Muffins for this blog post.

Bran Muffins recipe

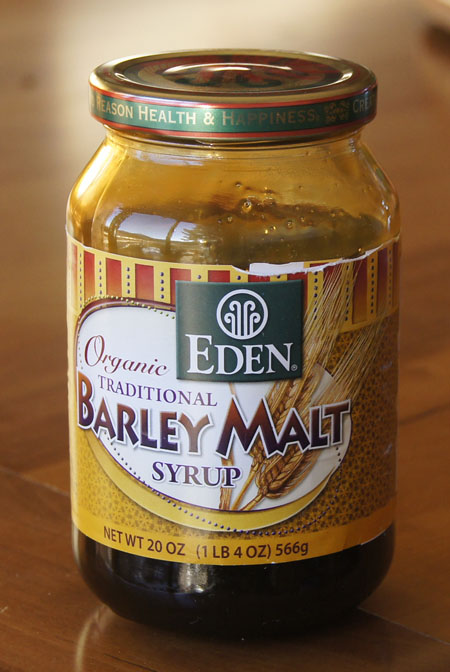
I searched local stores and found malt syrup at Whole Foods (but nowhere else):

Barley Malt Syrup

Since I want a good feel for the flavor of malt syrup in baked goods, I decided to use 3 tablespoons of the syrup instead of just 1 teaspoon. The jar of malt syrup says to use 1 tablespoon less liquid for each 4 tablespoons of malt syrup in a recipe, so I have adjusted the recipe for this amount.

Malt Syrup Bran Muffins
makes 8 muffins

  • 1 cup flour
  • 1 cup wheat bran
  • 4 teaspoons baking powder
  • 1/2 teaspoon salt
  • 2 tablespoons sugar
  • 1 egg
  • 3 tablespoons malt syrup (60 grams)
  • scant 3/4 cup milk (measure 3/4 cup and remove 1 tablespoon)
  • 2 tablespoons vegetable oil

Mix the flour, bran, paking powder, and salt and stir together. Blend the sugar, egg, malt syrup, milk, and oil and whisk until well mixed. Combine the wet and dry ingredients just until mixed.

Fill 8 greased muffin cups with the batter. Bake at 425˚ for 15-18 minutes.

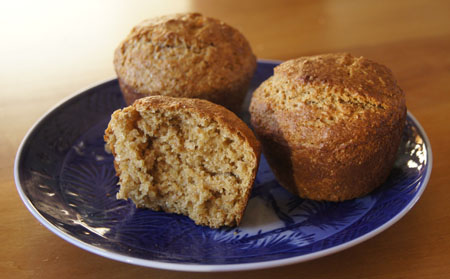
Malt Syrup Bran Muffins

The original recipe said to drop into “a well greased muffin tin”. I assume that means 12 muffins, but as I filled the muffin cups, I decided that 8 muffins was the proper amount. No time was specified; I tried 20 minutes and I think it was a little too long. I incorporated these changes in my version of this recipe, above.

And how did these taste? I broke one open right out of the oven and devoured it. The fragrence and taste of the malt syrup was subtle but definitely there. I found these to be really filling. I ate one before a workout and believe they gave me lots of energy! I really enjoyed these muffins.

But my husband? “They taste like sawdust.” Sigh. You will have to judge them for yourself.

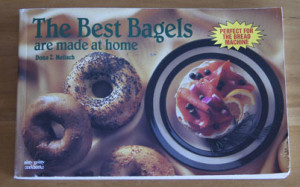
250 Cookbooks: The Best Bagels are Made at Home

Cookbook #144: The Best Bagels are Made at Home, Dona Z. Meilach, Bristol Publishing Enterprises, San Leandro, CA, 1995.

The Best Bagels are Made at Home cookbook

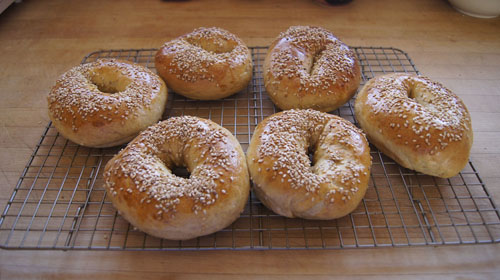
I am quite proud of my homemade bagels. Below is a 2012 photo of my “Basic New York Water Bagels“, my most-used recipe in The Best Bagels are Made at Home. I’ve made these tons of times! I modified the recipe just a bit, and will share it with you in a different post.

NY bagels

These bagels are lighter than store- or shop-bought bagels and absolutely wonderful.

Bagels are made from a yeast dough. They take a few more steps than a basic loaf of bread: instead of just slapping the dough into a bread pan and then the oven, you have to divide it into pieces, form each piece into a bagel, boil each in hot water, and glaze with an egg mixture and topping. Only then do they go into the oven.

But note: I have taken the time to make these many, many times. It’s worth it!

Who taught me how to make bagels? I learned from this cookbook. Dona Meilach clearly explains all the steps in bagel-making. I had tried to make them a few times before I got this cookbook, but met only with miss-shapen masses of baked dough – I found forming the dough into a bagel shape nearly impossible. Luckily I bought this book, studied and practiced, and now can make these any time I want!

Meilach begins with a little bagel history. What we know as the American bagel came with the Polish immigration in the late 1800s, and were popular among the Polish Jews who settled in New York. Between 1910 and 1915, the Bagel Bakers’ Local #338 union was formed. Apprentices of this union eventually moved to different parts of the US, and the popularity of bagels spread. (In one of my own 1941 cookbooks, The Bread Basket, I found a recipe for “bagles”.) In the early 1950s, bagels were handed out at the intermission of a Broadway comedy called Bagels and Yox. Soon after, popular women’s magazines ran recipes for “bageles”. And now, bagels are an institution in the US, as we all know!

Bagel history is followed by “Directions for Making Bagels”, pages 12-31. This is an especially helpful section. The six steps of bagel making – dough mixing (bread machine encouraged) and first rise, shaping, second rise, boiling, glaze, and baking – are described in detail. Next, Meilach discusses ingredients. Of note, she advises the reader to use bread flour for its high gluten content and recommends malt syrup in bagels. Her claim is that it “helps give bagels their unique appeal, malt assists with bfowning, and feeds the yeast.” Malt syrup can be hard to find. I once bought it from a store that sold beer brewing supplies; later I found it at a health food store. Currently, I use malt powder that I buy from King Arthur Flour and supplement it with a little sugar. But you can always use molasses or sugar instead.

The bulk of this book is recipes for different bagels, about 200 different kinds! The ingredients for each variety is laid out at about one per page. Useful as it is, this organization is also a tiny bit inconvenient because the recipes themselves do not give the times for the second rise and boiling and baking or even the oven temperature. Whenever I try a new recipe from this book, I have to fish back through the first 19 pages for the necessary specifics.

Okay. Critical step in bagel preparation, shaping. Meilach describes several methods for forming bagels:

  • the hole in the middle method
  • the hula hoop around the finger method
  • the rope method
  • bagel cutter method

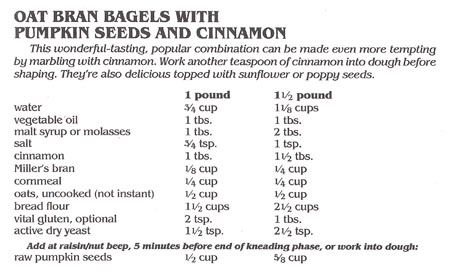
I tried several of these before I settled on a modification of the “hula hoop around the finger” method. Photos of how I do this are below, in the recipe that I chose for this blog, I “Oat Bran Bagels with Pumpkin Seeds and Cinnamon”.

Oat Bran Pumpkin Seed Bagels recipe

My version is below, pretty much the same, with the complete directions included. Note that “Miller’s bran” is wheat bran – it’s not critical to the recipe so you can leave it out if you don’t have any.

Oat Bagels with Pumpkin Seeds
makes 8 bagels

  • 1 1/8 cups water
  • 1 tablespoon oil
  • 1 tablespoon sugar*
  • 2 tablespoons malt powder*
  • 3/4 teaspoon salt
  • 1 tablespoon cinnamon (yes, a tablespoon! or even more if you like!)
  • 1/4 cup wheat bran
  • 1/4 cup cornmeal
  • 1/2 cup oatmeal (I used the quick-cooking kind)
  • 2 1/2 cups bread flour (10 5/8 ounces)
  • 1 tablespoon gluten
  • 2 1/2 teaspoons yeast
  • 5/8 cup raw or roasted pumpkin seeds

*You can substitue the “1 tablespoon sugar plus 2 tablespoon malt powder” with 2 tablespoons molasses or 2 tablespoons sugar.

Combine all of the ingredients EXCEPT the pumpkin seeds in a breadmaker set on a dough cycle with a rising step. Add the pumpkin seeds when the machine “beeps” for additions, or mix them in after the bread has risen. (If you add them at the start, they will be ground to tiny bits.)

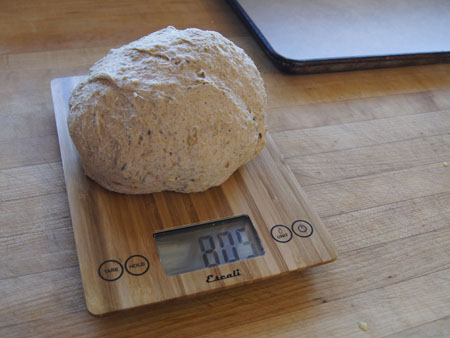
When the breadmaker cycle is done, take the dough out. Fold it a few times, then weigh it. Mine weighed 809 grams.

bagel dough

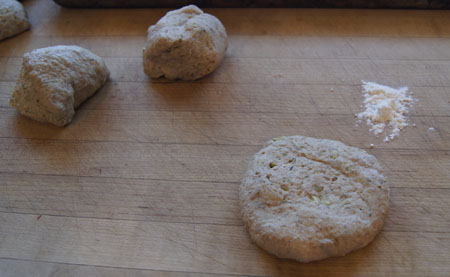
Divide the dough into 8 pieces – mine were about 100 grams each. (You could make 10 bagels if you want smaller bagels.) Flatten each to a circle, as shown below. I have a little flour on my breadboard in case things get sticky.

flattened bagel dough

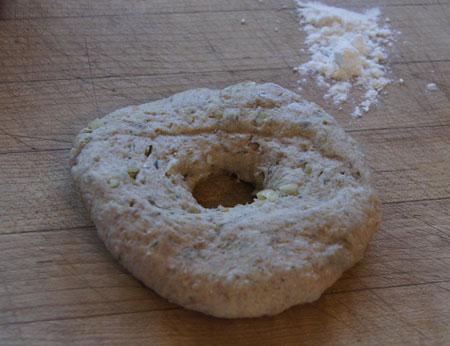
Poke a hole in the center of the flattened circle.

poke a hole in the dough

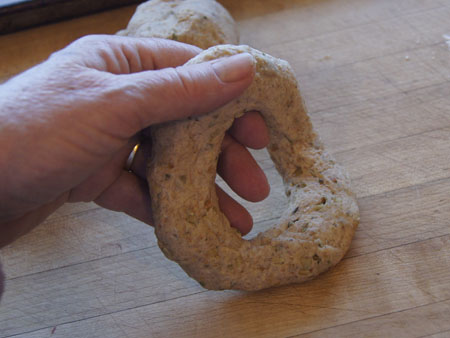
Now, pick up the bagel dough. You can put it on your finger and swirl it around, or put a few fingers in the center and stretch and pull and smooth the dough until it is a nice bagel shape. With one hand inside the hole, I kind of roll the bagel between my palms to smooth it. Leave a hole a bit bigger than a bagel-hole that you are used to in purchased bagels. The bagel will rise in all directions in the next steps, and the hole will get smaller.

formed hole

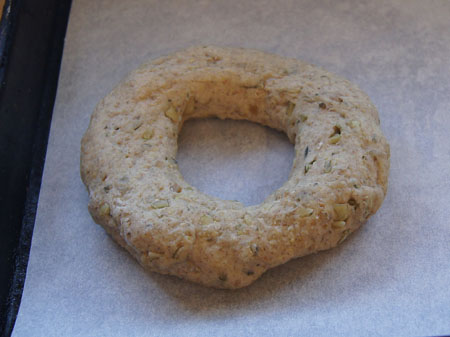
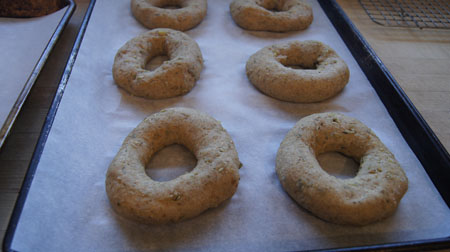
Place the smoothed bagel on a lightly greased surface or on parchment and let rise 20-30 minutes.

formed bagel

My kitchen was a bit cool, and this dough has a lot of bubble-popping bran in it, so I let my bagels rise about 40 minutes.

bagels risen

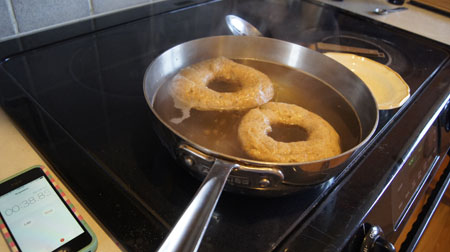
While the bagels rise, bring a pot of water to a boil. Add a tablespoon of malt powder (or use a tablespoon of sugar). Have ready an egg wash (1 egg whisked with 1 tablespoon water) and your choice of seeds for the top (I chose poppy seeds).

Take a bagel and put it in the boiling water, flipping it so that you put the top side down (this gives smoother looking baked bagels). Set a timer and boil 30 seconds, then turn it over, add another flipped bagel, and boil another 30 seconds. Remove the first bagel and turn the second and add another – continue until all the bagels are boiled.

If the instructions in the above paragraph are hard to follow, just do this: boil each bagel 30 seconds on each side!

bagels boiling

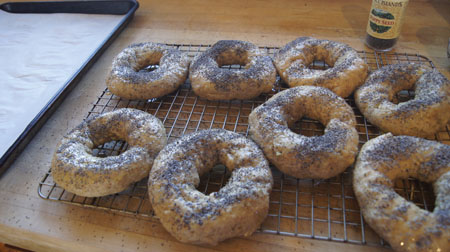
Set each boiled bagel on a rack. Brush with the egg wash and sprinkle with seeds.

bagels ready for the oven

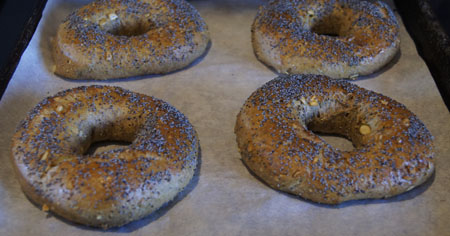
Bake at 400˚ for 20 minutes.

Oat Pumpkin Seed Bagels

I ate one right out of the oven! Boy was it good. Next day I had one with cream cheese and jam for breakfast. Deli meat and cheese and lettuce and tomato for lunch. Gotta make some more!


250 Cookbooks: All-Time Favorite Casserole Recipes

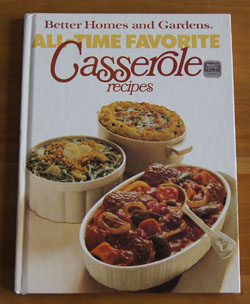
Cookbook #143: All-Time Favorite Casserole Recipes, Better Homes and Gardens, Meredith Corporation, Des Moines, Iowa, 1977.

AllTimeFavoriteCasserolesCB

A history of casserole-fear lurks in my household. Tuna casseroles prepared by my husband’s immediate family gave casseroles a bad name, as I discussed in a previous post, The ABC of Casseroles. Bottom line, for years I called a casserole dish by its ingredients rather than “such-and-such-casserole”.

On the other hand, I had a lot of good-tasting casseroles from my own mother’s kitchen in the 50s and 60s. Casseroles were great for gatherings, and leftovers made an easy meal the next day. Granted, many of the casseroles of that era relied on canned soups and vegetables; many were calorie-laden with rich creams and cheese. But delicious? Yes!

So I pulled All-Time Favorite Casserole Recipes from the shelf with mixed feelings. A good or a bad casserole book? And whose book was this? Mine, I guess. Published in 1977. No notes in it at all. Hmmm.

I turn the pages. The first recipe is “Sunday Chicken-Rice Bake”. Cream of mushroom soup, dried onion soup mix, canned mushrooms, frozen peas and carrots. I used to love a chicken-rice casserole made by my father’s mother – maybe this is the recipe! I continue through the pages, and find that about every fourth recipe interests me. Granted, many rely on food products I would rather avoid, like canned soups and vegetables and too much butter, but light makeovers could straighten that out. I like this cook book!

The chapters are: For the Family, For One or Two Servings (perfect for us!), For Entertaining, International Specialties, and Rounding Out the Meal.

I found a gem in the “For Entertaining” chapter: Tetrazzini Crepes.

This is a recipe for crepes filled with a turkey-ala-king-like mixture. In tetrazzini crepes, the mixture includes olives and cheese and sherry. Don’t I already make something like that? I searched my computer for “tetrazzini” but found nothing. Not ready to give up, I searched for “crepes” in my poultry recipe documents. “Turkey Crepe Casserole” has steamed vegetables in a white sauce, no that’s not it . . . “Tetrazini Crepes” – that’s it! I spelled tetrazzini with only one “z”. I do have a saved recipe for tetrazzini crepes in my repertoire!

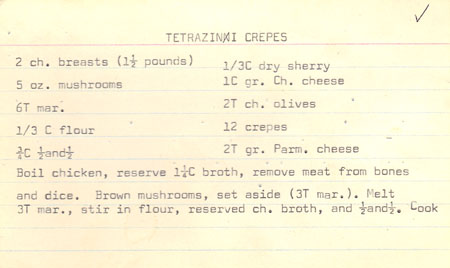
I gleefully read my own Tetrazzini Crepes recipe. Here is the note I wrote to myself in my recipe document:

“This recipe is from one of my own recipe cards, typed on a lined 3×5-inch card. This indicates that it probably dates it to the 1970s. I made it again in 2012 and decided the recipe is a keeper! I’m not sure of the origin of the recipe, whether I found it myself or if I got it from Mother. I don’t remember it well, so I didn’t make it a lot, although I’m often looking for chicken or turkey crepe recipes. I think I forgot about it.”

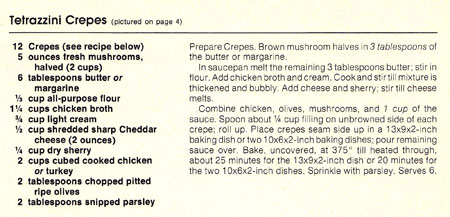
The recipe typed on my recipe card is nearly word-for-word the recipe in All-Time Favorite Casserole Recipes. Here is the book version:

Tetrazzini Crepes recipe

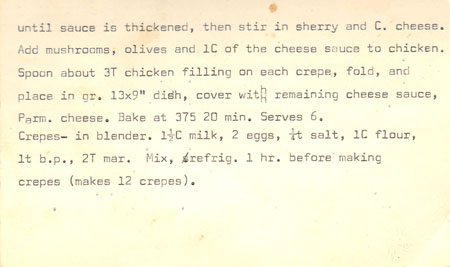
Here is the front and back of the recipe card that I typed in the 1970s:

Tetrazzini Crepes recipeTetrazzini Crepes recipe

Tetrazzini Crepes calls for leftover turkey, but you can always use cooked chicken instead. The sauce is a cheese sauce like you would use for macaroni and cheese, but with sherry added. Some of the sauce is reserved for the top of the crepes, and some is mixed with the turkey and olives and fresh mushrooms. (What is “tetrazzini”? An American dish named after the Italian opera star Luisa Tetrazzini.)

I made some changes to the recipe sometime over the years. The last time I made it, I made the full recipe of sauce and olives and crepes, but only used half the amounts of chicken and mushrooms. I used milk instead of cream in the sauce. For a meal for the two of us, I filled five crepes for the meal, and saved the rest of the crepes for another use (like blueberry crepes!).

I can hardly wait to make this again!

Tetrazzini Crepes
serves 2

  • 1/2 recipe crepes, below (I always make a full recipe and use the extras elsewhere)
  • 3 ounces fresh mushrooms, sliced (about 1 cup)
  • 3 tablespoons butter
  • 1/4 cup flour
  • 3/4 cup milk
  • 3/4 cup chicken broth (or water)
  • 1 cup grated cheddar cheese (more than the original recipe!)
  • 1/4 cup dry sherry
  • 1 cup chopped cooked turkey or chicken*
  • 2 tablespoons sliced olives
  • grated Parmesan cheese (optional)

*If you want to, you can start with one uncooked chicken breast (bone-in or boneless). Boil it in water until done, then remove the chicken from the bones (if necessary) and dice it. You can even reserve the cooking water as “chicken broth”.

Brown the mushrooms in a small amount of butter (or cook them dry until the moisture comes out). Transfer them to a bowl, then add the olives and chopped cooked turkey or chicken. Set aside.

Melt the 3 tablespoons butter in a sauce pan, stir in the flour and cook until the flour is absorbed. Slowly add the chicken broth and cook until the sauce thickens, then add the milk. Add more of one of the two liquids if necessary to make it the sauciness you want. Stir in the sherry and the cheddar cheese and heat just until the cheese melts. (This makes about 2 cups sauce.)

Add half the sauce to the reserved mushroom-olive-turkey mixture. Stir together, then use this filling to generously fill 5 crepes. Place the crepes in a lightly greased baking dish. Cover them with the other half of the cheese sauce (you may not use all of it, but we like things saucy). If you like, you can sprinkle with a little Parmesan cheese.

Bake at 350˚ for 15-20 minutes (just until bubbly).

Crepes
“full recipe”

  • 1 1/2 cups milk
  • 2 eggs
  • 1/4 t salt
  • 1 C flour

Mix in blender, let stand 1 hour before making crepes. Makes 12 crepes.

(I discuss how I cook crepes in this post.)

Comments

These were as good as I remembered! Here is the cheese sauce mixture re-heating in the pan. I usually heat the mixture a bit because the turkey might be cold from the refrigerator.

tetrazzini crepe prep

Here are the filled crepes before baking. This shows how much sauce I used on top. Plus, they are prettier at this step than when cooked!

tetrazzini crepe prep

We both scarfed these up. I had some fresh, hulled English peas from Trader Joe’s that I cooked and served beside them. With bread and salad, an excellent meal.

I was curious to see what I could find about this casserole book on the web. I found that I could buy it for one penny on Amazon. Better Homes and Gardens published 18 cookbooks in the “All Time Favorites” series (circa 1970-1990); I have 3 of these books. I covered “All Time Favorite Pies” in this post. I also found that Better Homes and Gardens keeps an Our Best Recipes website. This would be a good place to search for a new casserole recipe to beat the mid-week doldrums. Some of the website’s recipes still include canned soups, but many include interesting ingredients and combinations.

250 Cookbooks: Vegetariana

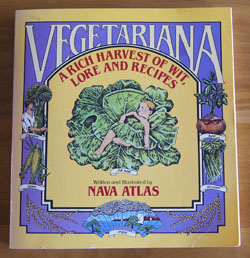
Cookbook #140: Vegetariana, Nava Atlas, The Dial Press, Doubleday & Company, Inc., Garden City, New York, 1984.

Vegetariana cookbook“A rich harvest of wit, lore and recipes” continues the title. Yup, that’s this book! It has sat too long on my shelf. I am entranced with the illustrations and quotes:

“Of Soup and Love, the first is best”
“Ther ought t’be some way t’eat celery so it wouldn’t sound like you wuz steppin’ on a basket.”
“In the early Greek and Roman eras, beans were widely used as ballots. Casting a white bean signified an affirmative vote, whereas a dark bean was a negaitve vote.”
“Training is everything. The peach was once a bitter almond; cauliflower is nothing but cabbage with a college education.”
“Ginger sharpneth the sight, and provoketh slothful husbands.”

As I turn the pages of Nava Atlas’s book, I get hung up on reading and pondering all these non-recipe “extras”. I can copy a few quotes and a bit of lore, but I can’t show you all the illustrations (copyright issues and/or laziness on my part). Happily, Amazon will let you view some of this book (click on ‘Look Inside’).

Shame-faced, I haven’t tried many (or any?) of the recipes. I have always meant to take a day a week and cook no-meat meals. But it never really happens (and I can only blame some of this on my partner-in-eating).

I turn to the Introduction. Atlas begins: “‘What on earth do you eat?’ was a question I was often asked when I first became a vegetarian in the early 1970s. Even then, a meatless diet was not as widespread and accepted as it is today.” As a child, she didn’t have to be urged to “finish your vegetables” but to “eat your meat”. Meat just didn’t appeal to her. “It was not until I was sixteen years old that I was ‘adult’ enough to assert my way in the kitchen and delare myself a vegetarian. At first, this decision was not met with cheers from the family.”

She is a delight. And informative: “Many of my generation believe that vegetarianism sprand up in the 1960s and blossomed into the new age of health consciousness of the 1970s. However the roots of vegetarianism run as deep as ancient India, classical Greece and Rome, and the Old and New Testiments of the Bible. More recently, but perhaps even more obscure is the story of the almost concurrent, widespread vegetarian movements in ninteenth-century America and England, attracting scores of pominent writers and reformers.”

So us hippie baby boomers weren’t so groundbreaking. Funny how each generation thinks they are the first to discover the world.

Happily, Nava Atlas is still writing, and enchanting us and sharing recipes. Do visit her website: VegKitchen with Nava Atlas.

Recipes in this book? Lusty Curried Peas, Vegetable Lo Mein, Buckwheat Noodles with Snow Peas, Herbed Wheat Berries, Barley and Blackeye Peas, Mozzarella Mashed Potato Pie, Mushroom Barley Soup, Potato Corn Chowder, Chocolate Chip Peanut Cake. All the recipes look easy to follow, are nicely seasoned, use fairly common ingredients – and many are interesting, even to non-vegetarians.

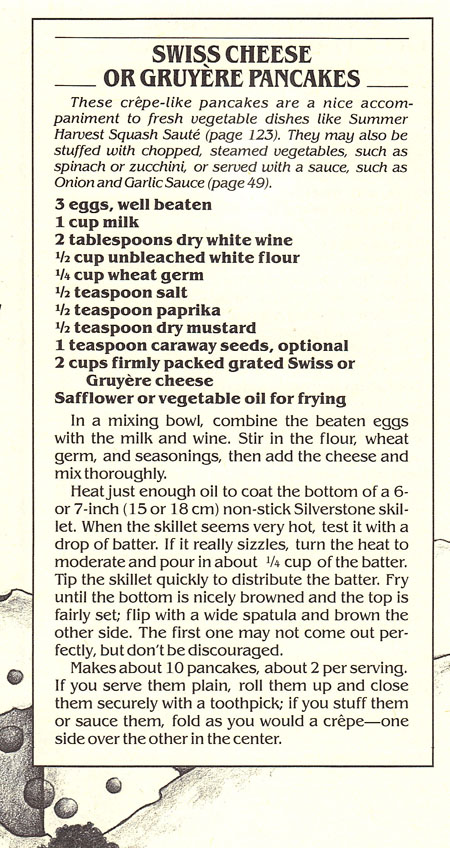
I choose to make “Swiss Cheese or Gruyère Pancakes”. Cheese goes right into the batter of these crepe-like pancakes. Atlas suggests serving them with “Summer Harvest Squash Saute” (butternut and summer squash and zucchini sauted in butter with wine, soy sauce and herbs), filled with steamed vegetables, or sauced with Onion and Garlic Sauce.

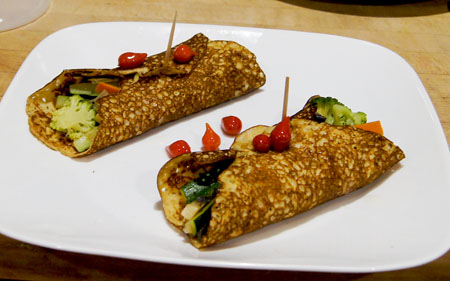
Gruyere Crepes recipeI plan to stuff them with steamed vegetables. I made a half recipe; since it is hard to “halve” an egg, I beat up two eggs, weighed the total, then used 3/4 of the amount (this translated to 75 grams of beaten egg.) The remaining egg went into scrambled eggs the next day.

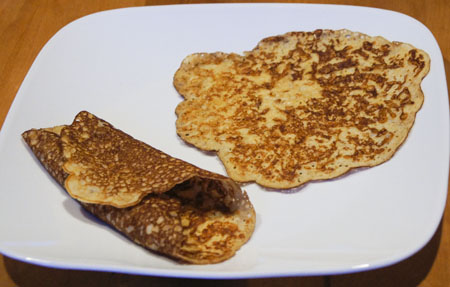
These cook up like crepes, so that is what I am calling them in my version of this recipe, below.

Gruyere Crepes
makes about 6 crepes

  • 2 eggs, beaten, then remove 1/4 of the mixture for a later use
  • 3/4 cup milk
  • 1 tablespoon white wine
  • 1/4 cup flour
  • 2 tablespoons wheat germ
  • 1/4 teaspoon salt
  • 1/4 teaspoon paprika
  • 1/4 teaspoon mustard
  • 1 cup grated Gruyère cheese, firmly packed

Combine the eggs, milk and wine. Stir together the wheat germ, salt, paprika, and mustard, then add to the egg mixture. Stir in the cheese.

Heat a pan until a drop of batter or water sizzles when dropped on it. Turn the burner down to medium to medium-high because these crepes brown a bit easier than most due to the cheese in the batter. Add a little butter or non-stick spray, then pour about 1/4 cup of the batter into the pan and tilt the pan so the batter spreads. Cook until brown, then flip and briefly cook the other side. Continue until all the crepes have been cooked.

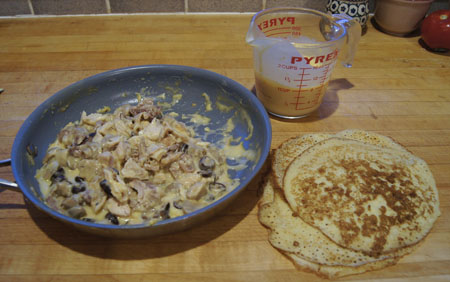
cheese crepesI served them with a medley of steamed vegetables. I would also love these wrapped around cooked, creamed or plain spinach.

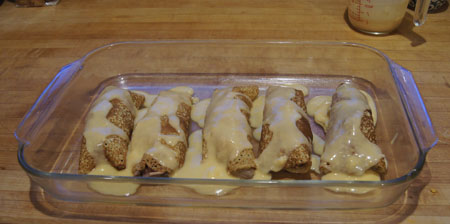
filled cheese crepesI added cooked salmon to the meal to satisfy our non-vegetarian cravings. Later in the week I used one like a taco, filled with ham and tomatoes and lettuce. Delicious!

Vegetanaria is a keeper!

250 Cookbooks: FYI Chem Recipe Book

Cookbook #139: FYI Chem Recipe Book, Second FYI Chemistry Conference: Global Communication for a Sustainable World, University of Colorado, Boulder, 2007.

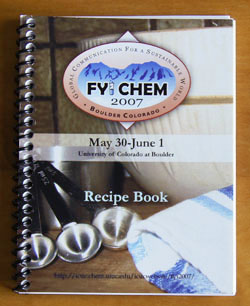
FYI Chem CookbookThis delightful small book is a keepsake from the  second FYI Chemistry Conference, held at CU Boulder in the spring of 2007. I was still working then, and although I didn’t attend the conference, Dr. Margaret Asirvatham – a long-time colleague – gave me this book. (I’m not sure that the International Center for First-Year Undergraduate Chemistry, ICUC, the sponsor of the event, is currently active, since the url listed in the book says “server not found”.)

Conference participants contributed recipes from their homelands for this cookbook. Like many a group of university chemistry teachers, they came from all over the world: India, Israel, Italy, Peru, Mexico, the US, Greece, and Spain.

This is a geeky international chemistry version of a community cookbook!

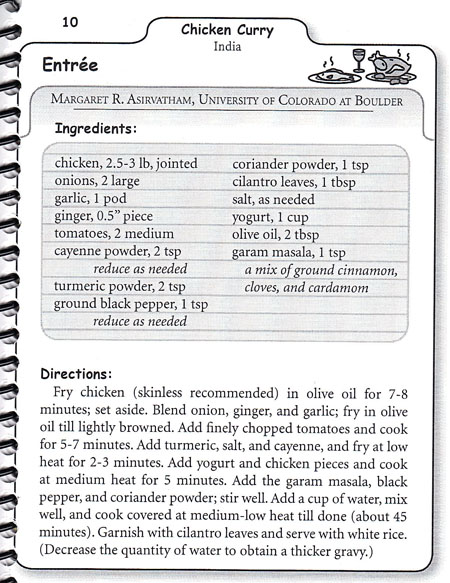
I know I have made one recipe from this cookbook: Chicken Curry. This is one of Margaret’s recipes, and it was really good. I will make it again for this blog! A few of the other recipes I’d like to try are: Easy Rice Pilaf (baked with vermicelli), Vada (yellow split peas), Dolmadakia (stuffed grape leaves), Traditional Andalusian Gazpacho, Tacos Dorados de Pollo (shredded chicken fried in tortillas), Pinza (a traditional Italian cookie) and Chocolate-Mint Cookies (peppermint frosting!).

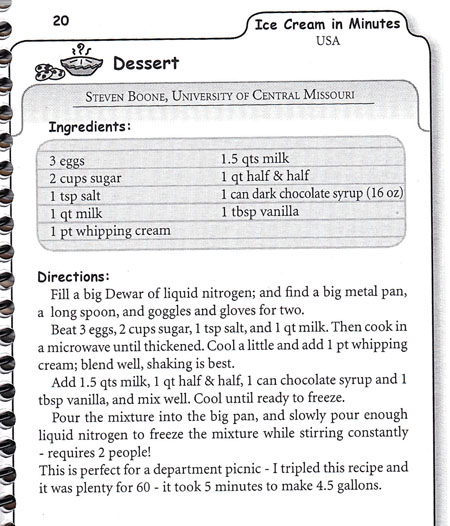
And here is my favorite ice cream recipe, although I can’t make it at home!

fast ice creamLiquid nitrogen! Since I was in the chem building for most of my working life, I’ve had this ice cream a lot. The undergraduate chemistry club liked to make it on “mole day” (celebrated on October 23), plus it worked it’s way into other parties and events.

Here is Margaret’s recipe for Chicken Curry.

Chicken Curry RecipeThis recipe calls for bone-in chicken pieces, and I have made it that way before. This time, I want to use some boneless chicken thighs instead. This makes eating the sauced-chicken easier (plus I have some boneless thighs in the freezer). I didn’t have fresh ginger, so I used ground ginger from a jar. My husband sees turmeric and sees yellow – and hates it. So, I left it out. When he asked what I was cooking for dinner, I said “spiced chicken over rice”. If I had said “curry”, he would have hated it. So. Below is my version of this dish.

Note: Don’t leave out the cayenne, garam masala, or coriander. Otherwise, this is just another chicken dish. The spices make it special.

Chicken Curry
serves 2-3

  • 12-14 ounces boneless skinless chicken thighs or breasts (or use bone-in pieces)
  • olive oil for frying
  • 1 smallish onion, chopped
  • 1 clove garlic, diced
  • 1/4-inch fresh ginger, diced OR use 1/2 teaspoon ground ginger
  • 1 medium or large tomato, diced
  • optional: 1 teaspoon turmeric powder
  • 1/4 – 1 teaspoon cayenne (to your own taste)
  • 1/2 teaspon garam masala
  • 1/2 teaspoon coriander powder
  • 1/2 cup plain yogurt
  • salt (to taste)
  • black pepper (to taste)
  • fresh cilantro leaves to taste (optional)

Cut the chicken into bite-sized chunks and fry in a little hot oil. Remove from the pan and set aside. Fry the onion (and fresh ginger, if you are using it) in a little hot oil until it softens and is lightly brown. If you are using ground ginger, sprinkle it over the onions as they cook. Add the garlic and stir about half a minute.

Add the chopped tomato and cook 5-7 minutes. Add the turmeric (if using) and cayenne and cook at low heat for a few more minutes, then add the yogurt, garam masala, coriander powder, and salt and pepper. Stir well.

Add the chicken back to the sauce, stir, and then cook for about 30 minutes (more if you are using bone-in pieces). Serve over rice with cilantro leaves sprinkled on top if you like.

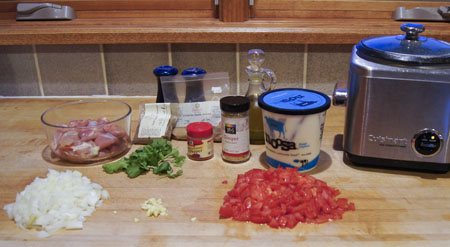
This did take quite a gathering of ingredients:

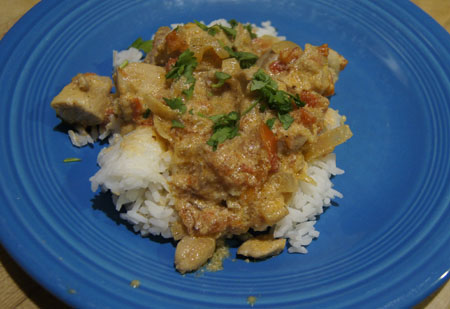
chicken curry ingredientsThe final dish:

chicken curryI loved this curry! My hubbie went back for seconds, so he liked it too (I never told him it was curry).

Another success in my kitchen lab!

250 Cookbooks: Ryzon Baking Book

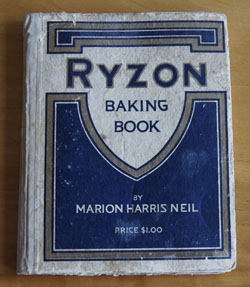
Cookbook #138: Ryzon Baking Book, Marion Harris Neil, General Chemical Company, 1917.

Ryzon Baking Book cookbook1917! This was my grandmother’s cookbook. She turned the pages when my mother was only one year old. On one page there are crayon marks: Could they have been made by Mother? On another page my grandmother wrote some math calculations. She was good at math.

The book is a bit water-wrinkled with a few sugar stains (and crayon marks) but otherwise in pretty good shape. It’s hard-covered, unusual for an advertising booklet. “Price $1.00” translates into $20.24 in today’s inflated dollars. Another blogger wrote about this cookbook too: The History of Food and Drink Collection, What’s Cookin’ @Special Collections.

“Ryzon”, what’s that? Ryzon was a brand of baking powder sold for a few years in the early twentieth century.

What is baking powder? It is a chemical mixture that makes breads and cakes “rise” in the oven. It is called a “leavening agent”. Before baking powder, yeast was used to leaven breads and cakes. In a mixture of flour and water, yeast ferments, and on baking, the mixture releases carbon dioxide, putting little bubbles in the mixture and the bread rises. Yeast-risen breads and cakes tend to have a distinctive yeasty flavor.

Baking soda is another leavening agent. It is sodium bicarbonate, a weak base that can be found in natural deposits. When baking soda is mixed with water, flour, and a small amount of an acidic ingredient like sour milk or vinegar, it too releases carbon dioxide on heating and causes breads and cakes to rise. Baking soda was used by the ancient Egyptians for paints; by the mid-eighteenth century it was used for baking. Baking soda breads tend to have a distinctive flavor of their own because one ingredient must be sour.

Baking powder was introduced to the cooking public in the mid-nineteenth century. It is a dry mixture of baking soda and a weak solid acid. This acid can be one of several phosphate or sulfate compounds:

  • monocalcium phosphate
  • sodium aluminium slufate
  • potassium bitartrate (potassium hydrogen tartrate, or cream of tartar)
  • monosodium phosphate
  • sodium acid pyrophosphate

Cornstarch is added to the weak base-weak acid mixture to keep the two from combining (and reacting) on storage. The cornstarch also keeps the baking powder from clumping. Percentages: baking soda 30%, weak acid 5-25%, rest is cornstarch.

Baking powder gives virtually no flavor to baked goods (although some may argure this point, see the next paragraph) and bakers don’t have to include an acidic ingredient in the batter. It is simple to use because you don’t have to wait for a dough to rise. That’s why breads leavened with baking powder/baking soda are called “quick breads”.

Cooks are often picky when it comes to their choice of the weak acid used in the baking powder product they use. Some don’t like aluminum-acid containing baking powders because the aluminum lends baked goods a metallic taste; some believe aluminum is not be good for your health.

Some baking powders are “double acting”, meaning they contain two different weak acids, one that starts acting as soon as water is added and one that doesn’t act until it is heated in the oven.

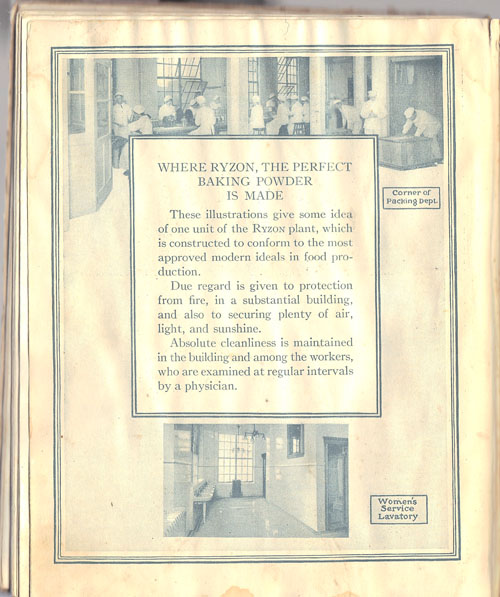
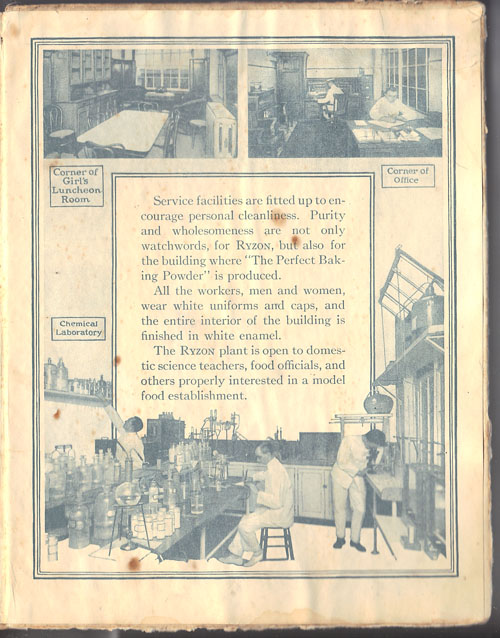
Ryzone was a single-acting baking powder: it used only monosodium phosphate. The Ryzon Baking Powder cookbook claims that phosphate baking powders are the most desirable. One section raves about the purity of their monosodium phosphate and the cleanliness of their factory and workers.

What kind of baking powder do I use? I generally use whatever brand my local supermarket sells. Currently I have an open can of Clabber Girl Double Acting baking powder in my cabinet. The acids in this brand are sodium aluminum sulfate and monocalcium phosphate. I also have a new can of Bakewell Cream (purchased from King Arthur Flour) that includes only the weak acid sodium acid pyrophosphate (although they claim it is double acting).

All this might be boring to you, but for me – as a chemist and as a cook – I liked reviewing a baking process I use all the time.

Here are some take-home lessons to help our quick bread baking:

  • When using baking powder or baking soda, you always need to get the batter in the oven as soon as possible so the little bubbles don’t escape before your bread or cake is baked. (You probably have 10-15 minutes.)
  • Baking soda is the choice when you use sour milk (buttermilk) or yogurt in the batter.
  • Recipes often call for a combination of baking soda and baking powder. This is because double acting baking powder gives an extra “umpf” when the batter is heated.
  • Baking powder is a less-concentrated leavening agent than baking soda because it has a filler (cornstarch). It is 30% baking soda, while baking soda is 100%.
  • Be careful not to use too much baking powder, because if it is not all used in the baking process, it might lend a metallic taste to your baked good.
  • If you are out of baking powder but have cream of tartar, you can substitute: mix two parts cream of tartar with one part baking soda.
  • Rule of thumb: use one teaspoon of baking powder per cup of flour in a recipe that does not have an acidic ingredient.
  • Rule of thumb: use 1/2 teaspoon baking powder and 1/4 teaspoon baking soda per cup of flour and cup of buttermilk.

I decide to make Ryzon Gingerbread for this blog (and for us!).

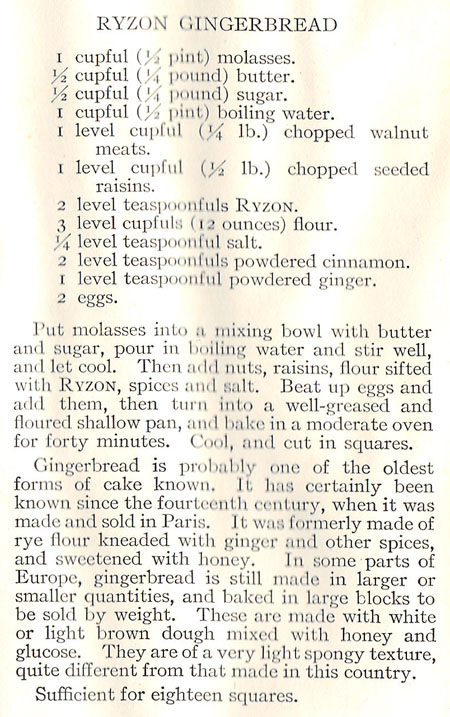
Ryzon Gingerbread RecipeNote the bit of history in the above clip: “Gingerbread is probably one of the oldest forms of cake known. It has certainly been known since the fourteenth centure, when it was made and sold in Paris.”

I have always liked gingerbread, but I don’t make it a lot. In fact, I don’t even have a “go to” recipe for plain old gingerbread (I do make a great Apple Gingerbread Cobbler). This Ryzon recipe has lots of molasses in it, which is considered a healthy-ish sweetener. (I am surprised at how many of the recipes in this Ryzon cookbook are called “health breads” and have whole wheat flour in them.) And it has nutritious raisins and nuts. The recipe calls for “a shallow pan” – I chose a 9-inch square pan and it worked fine. A “moderate” oven is 350-375˚ – I chose 375˚. Below is my version.

Hearty Gingerbread

  • 1 cup molasses (340 g)
  • 1/2 cup butter
  • 1/2 cup sugar
  • 1 cup water
  • 1 cup nuts
  • 1 cup raisins
  • 2 teaspoons baking powder
  • 1/4 teaspoon salt
  • 2 teaspoons cinnamon
  • 1 teaspoon ginger
  • 3 cups flour
  • 2 eggs

Combine the molasses, butter, sugar, and water in a pan and heat gently (with stirring) on the stove until the butter melts. Remove from heat and let cool.

Butter and flour a 9-inch baking pan (or a 7×11-inch pan). Heat the oven to 375˚.

Combine the nuts and raisins on a cutting surface and chop roughly. (You can, of course, chop them in any way you like.) Add the nut/raisin mixture to the molasses mixture. Stir together the baking powder, salt, cinnamon, ginger, and flour and then add it to the nut/raisin/molasses mixture. Beat the eggs and add them too.

Pour the batter into the prepared pan. Bake at 375˚ for 40-50 minutes, until it is nicely browned and pulls away from the sides of the pan.

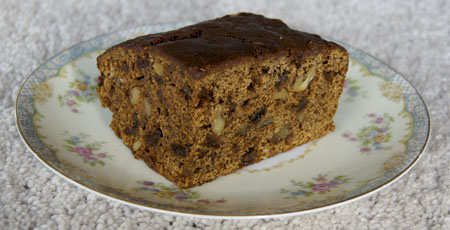
GingerbreadI really enjoyed this gingerbread. Gingery and molassesy. And dense with nuts and raisins. We had it for dessert with cool whip. It’s also good for snacking during the day, and for breakfast!

Note: after writing this post, a friend alerted me to posts on the Serious Eats blog on baking powder and baking soda. Excellent discussions.

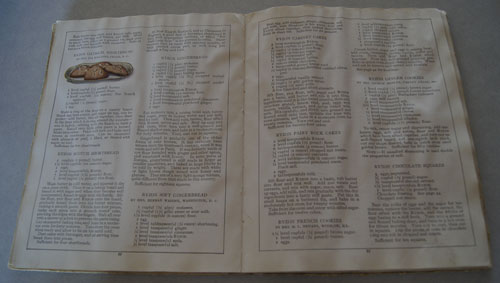
I liked the way the book lay open on the counter:

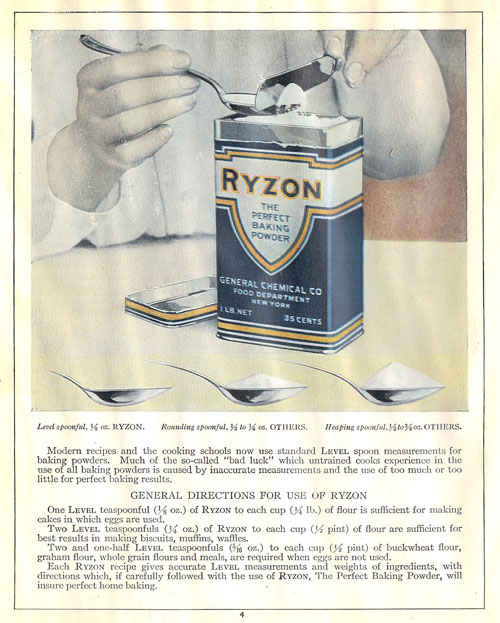
open Ryzon cookbookI also like the page that describes how to measure a level teaspoon and the two inside-cover pages from the back of the book that talk about the General Chemical Company factory.

RyzonRyzonRyzon

250 Cookbooks: 101 Perfect Chocolate Chip Cookies

Cookbook #137: 101 Perfect Chocolate Chip Cookies, Gwen Steege, Storey Communications, Inc., Pownal, Vermont, 2000.

101 Perfect Chocolate Chip Cookies cookbookI must have purchased this cookbook in a weak moment! The recipes are great, all of them. But calorie-laden. If you like chocolate chip cookies but are in a cookie-rut, it’s time to open this book and make a slightly different batch of these delights. Me? I love chocolate chip cookies, but I’ve only tried one so far from this cookbook: “Joyous Chocolate Chip Cookies”.

Who contributed the cookie recipes to this book? Well, they are the best recipes from entries to a contest in 1987 sponsored by The Orchards, an inn in western Massachusetts. Entries came from “almost every state, as well as from Italy, Canada, and Mexico”. So, the recipes were contributed by people like you and me. Each recipe has a note written by the person who sent it in. It’s a very friendly book.

And how can there be so many chocolate chip cookie variations? The chips can be chunks and can be of differents sizes or different chocolates (milk, semi-sweet, or bittersweet), or non-chocolate chips can be added to the mix. Flour can be white or whole wheat; a grain like oatmeal can be added. Butter, margarine, vegetable shortening or oil can be used. Different sweeteners are employed: brown or white sugar, honey, corn syrup, molasses. Peanut butter and nuts, fruits and vegetables are nutritious additions.

The first chapter of this book is a great reference for the effects of different oils and sugars on the texture of cookies. For beginners, it’s also a great reference for basic cookie mixing and baking techniques.

Gwen Steege published this and one other cookie book, and a book on gardening. She’s published lots of stuff on knitting.

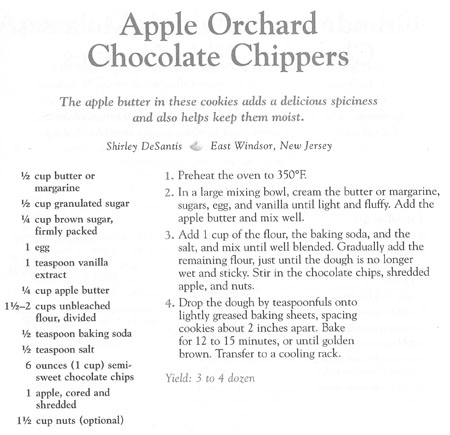
I decide to make Apple Orchard Chocolate Chippers.

Apple Orchard Chocolate ChippersI used the maximum amount of flour and I did add nuts, and I changed the cooking temperature. I had my own apple butter to use in this recipe. Below is my version.

Apple Chocolate Chip Cookies
makes about 3 dozen

  • 1/2 cup butter (preferrably unsalted)
  • 1/2 cup sugar
  • 1/4 cup brown sugar
  • 1 egg
  • 1 teaspoon vanilla
  • 1/4 cup apple butter
  • 2 cups flour
  • 1/2 teaspoon baking soda
  • 1/2 teaspoon salt (use less if your butter is salted)
  • 6 ounces semi-sweet chocolate chips (1 cup)
  • 1 medium apple, cored and grated
  • 1 cup chopped walnuts

Cream the butter and sugars, then add the egg and vanilla and beat until light and fluffy. Add the apple butter and mix well.

Stir together the flour, baking soda, and salt. Gradually add this mixture to the creamed mixture. Stir in the chocolate chips, apple, and walnuts.

Drop by teaspoonfuls onto lightly greased or parchment lined baking sheets. Bake at 375˚ for about 12 minutes, or until they are beginning to brown.

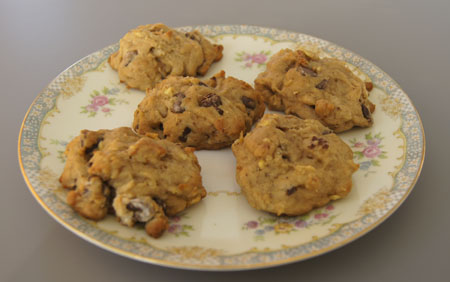
Apple Nut Chocolate Chip CookiesThese are great! They are kind of cake-like, some said they even are like “muffin tops”. They definitely satisfy (or encourage) my sweet tooth.

250 Cookbooks: Crockery Cookery

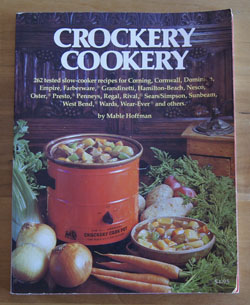
Cookbook #136: Crockery Cookery, Mable Hoffman, H. P. Books, Tucson, AZ, 1975.

Crockery Cookery cookbook“Welcome to good eating! Slow cooking is the secret of good cooks the world over.” So begins the introduction to Crockery Cookery. This is a very friendly book – totally opposite from my last blog entry, Let’s Cook It Right. However, Mable Hoffman touts slow cooking just like Adelle Davis did, e.g., the slow-baked roast beef that I made last week. Hoffman writes that slow cooking “retains many vitamins high temperatures destroy.”

Mable Hoffman published 18 cookbooks over 25 years. She was one of the first to publish recipes specifically for slow-cookers. This 2010 article, Mable Hoffman dies at 88; slow-cooker pioneer wrote ‘Crockery Cookery’, tells us about her life and writing.

(See my first crockpot blog entry for a little on the history of crockpots.)

I like Crockery Cookery. Lots of good-sounding recipes with ingredients I usually keep on hand. The first chapters cover the use and care of slow cookers and measurement conversion charts, and a chapter titled “Consumer’s Guide) is of historical interest – it decribes the crockpots available in 1975. There is a temperature chart with details on how these recipes work with each type of pot. The soups and stews chapters are the ones I would use most often, but I noted the snack mix recipes (like chex mix) in the appetizers chapter as well. Of course, the recipes are 4 decades old, but that doesn’t mean they aren’t tasty.

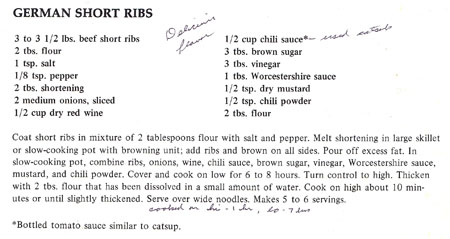
And I’ll keep this cookbook for another reason: it was my mother’s. She noted several recipes and stashed clipped slow cooker recipes between several of the pages. I decide to make one of the recipes she marked with notes, German Short Ribs:

German Short RibsShort ribs are available bone-in or boneless. They are usually cut into individual ribs, like country-style pork spareribs. Short ribs are a flavorful but less-tender cut of meat: perfect for a slow cooker. I went to the butcher at Whole Foods and found short ribs that were in long chunks, both bone-in and boneless. The bone-in ones were very fatty and the boneless ones very lean. I got one bone-in rib for the flavor, and then four boneless ribs for the lower calories. Then I cooked them as in the above recipe, using my mother’s advice to cook for 1 hour on high and 7 hours on low.

German Short Ribs
serves 4-6

  • 3-3 1/2 pounds beef short ribs (I suggest boneless ones)
  • 2 tablespoons flour (for dredging the meat)
  • salt and pepper
  • oil (or lard or shortening) for browning the meat
  • 2 medium onions, sliced
  • 1/2 cup red wine
  • 1/2 cup chili sauce (can use ketchup)
  • 3 tablespoons brown sugar
  • 3 tablespoons vinegar (I used white vinegar)
  • 1 tablespoon Worcestershire sauce
  • 1/2 teaspoon dry mustard
  • 1/2 teaspoon chili powder
  • 2 tablespoons flour (for thickening)

Salt and pepper the short ribs and dredge in the 2 tablespoons flour. Brown on all sides in hot oil (I used groovy lard). I did this browning step in a pan on the stove; if your slow-cooker has a browning setting, you can do it in the cooker itself.

Remove the meat from the fat (drain it if you brown it in the cooker).

Combine the onions, wine, chili sauce, brown sugar, vinegar, Worcestershire sauce, mustard, and chili powder in the slow cooker. Add the meat and mix.

Cover and cook on low for 6-8 hours. Remove the meat from the cooker. Mix the final 2 tablespoons flour in a small amount of water and stir it into the sauce in the slow cooker. Turn the slow cooker to high and cook about 10 minutes, or until slightly thickened.

Serve over wide noodles.

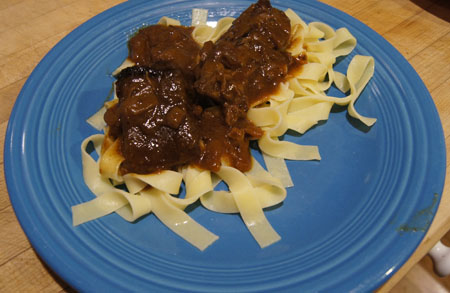
German Shortribs“Delicious flavor” just like my mother noted! The ingredient mixture was perfect. And it smelled really good cooking!

I cooked them an hour on high and 7 hours on low. But next time, I will cook them 6-8 hours on low. I think my crockpot cooks a bit higher on low than crockpots from the 1970s; anyway, I felt mine were a little overdone. The meat was broken down almost like a shredded beef dish. No complaints from my dining partner, though! I will make these again.

Note: We had leftovers so I froze the meat and gravy. A couple weeks later, I heated it up and added potatoes and carrots and served it like stew. This meat really has great flavor.

Note: These are the crockpot cookbooks that I have covered so far.

250 Cookbooks: Let’s Cook It Right

Cookbook #135: Let’s Cook It Right, Adelle Davis, Harcourt Brace Jovanovich, Inc., NY, NY, 1970.
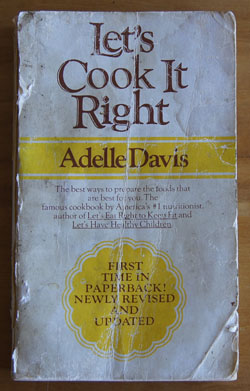
Let's Cook It Right cookbookAdelle Davis. I remember this author as one of the gurus of the health food movement back in our hippie days.

My copy of this book is well-worn. I keep it in the kitchen as a reference for cooking meats because it has good roast-cooking time tables. I always cook turkeys according to her directions: stuffed and on a rack with the breast side down. Each Thanksgiving since 1995, I have left a note on a piece of paper tucked between pages 54 and 55 of this book. On each note is how I cooked the turkey, and how it turned out.
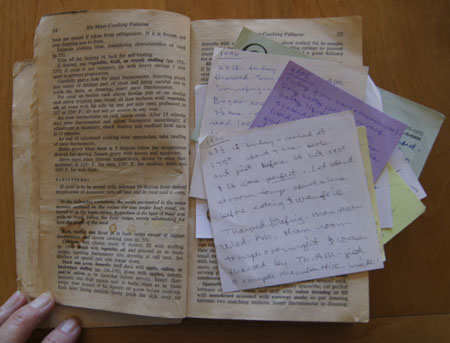
notes in Let's Cook It RightLet’s Cook it Right was first published in 1947, then updated in 1962 and 1970. My 1970 edition dedication reads:

“Dedicated to my daughter, Barbara, in the hope that here husband and children will not have to eat TV dinners.”

I haven’t actually read this book in decades. I recall Davis as being a bit “preachy”. But I liked her, partly because she – like me – earned a masters in biochemistry. This week I take some time scanning through Let’s Cook it Right. From the preface:

“Surely we all agree that our foods should be both delicious and sufficiently health-building to enhance our enjoyment of life; and that dishes which are good for you but almost impossible to eat deserve little praise. Since we spend approximately a thousand hours each year eating our meals, they should be pleasant hours, times of family unity and companionship.”

Davis stresses that we need to buy nutritious foods and then cook them correctly to preserve the nutrients. And she assumes the cooking is done by the woman of the household, as in:

“Despite the need to retain maximum value in all food preparation, women are advised by thousands of recipes to extract and discard nutrients or to destroy them by high temperatures, long cooking, or the incorporation of air”.

The tone of Adelle Davis’ writing is serious and didactic: women must learn how to cook properly so that they do not ruin or toss nutrients. Her reward for this work:

“When she hears her physician praise the beauty of her children, when she sees her husband, young beyond his years, succeeding because of his energies, when she feels the surge of vibrant health in her own body, she will realize that she is largely responsible. She has shouldered her tasks and has seen to it that good health has come from good cooking.”

Once I get past the preachiness and non-feminist ideas, I do like many of the concepts in this book. “You Need Have No Failures in Cooking Meats” is the chapter I have used the most. “Serve Your Salads First” is a firm and steady rule of my household, just ask any member of my family. In “Get Acquainted with Fish” she asks: “How many hundreds of tmes have you heard housewives remark, ‘I don’t cook fish because I don’t like the odor in the house’? The fact is that when fish is properly cooked, there is no odor.” Davis’ advice for cooking fish at low temperature helped me keep fish odors to the minimum.

Let’s Cook it Right leans heavily towards protein-dense foods. Adelle Davis frowns on sugar, and writes that if a person is sedentary, they should only eat 1 slice of bread per day. The chapter on bread is titled “If You Want to Bake Bread”. In her opinion, one should buy whole wheat bread loaves rather than bake it at home. I am the opposite – I love home-baked bread! From my notes in this cookbook, I can tell that I tried her whole wheat bread recipe, but I did not write whether or not it turned out. There are almost zero cake recipes in this version of Let’s Cook it Right. In the chapter on desserts, “Desserts Can Contribute to Health”, Davis writes: “Frankly, I have never been good at baking cakes.”

This excerpt from the bread chapter illustrates the tone of Davis’ writing:

“Never shall I forget a dinner to which a friend invited me, saying, ‘I’m going to prepare everything from your cookbook.’ It was her first attempt to use whole-wheat flour and powdered milk. She had tried to make yeast bread of rancid pastry flour and still more rancid wheat germ, purchased from a market where the turnover was slow. She had added to the bread powdered milk which should have been sweet-smelling and as fine as face powder but which had an offensive odor and looked like crushed rock; such changes occur when powdered milk has been left exposed to the air. It was impossible to say who was the more embarrassed, my hostess or myself. We ate cold cereal, however, and remained friends. But I shudder when I think of how many other hosewives may have unknowingly obtained products of inferior quality.”

Davis would be amazed to walk into today’s stores with their abundant fresh whole grain flours, not to mention the ready availability of responsibly grown beef, pork, and chicken products.

(I note this with some distress: Davis writes that if we are enjoying the aroma of something cooking, we should be aware that the nutrients are leaving the meal along with the smells.)

In Let’s Cook it Right, Adelle Davis does not toute vitamin supplements. But apparently that is not true of all of her writings. On Quackwatch, the article “The Legacy of Adelle Davis” by Stephen Barrett claims that her recommendations of supplements for certain conditions were sometimes dangerous. From Wikipedia: “She . . .  became the most recognized nutritionist in the country. Despite her popularity, she was heavily criticized by her peers for many recommendations she made that were not supported by the scientific literature, some of which were considered dangerous.” On the other hand, the Adelle Davis Foundation is entirely positive about her contributions and continues her legacy.

For this blog, I turn to the chapter “You Need Have No Failures in Cooking Meats”. Adelle Davis presents a wonderful way to cook a beef roast. You put it in a 300˚ oven for an hour, then turn the oven down to the temperature you want it to end up at (or turn the oven off) and leave it the entire day. Come home and the roast is cooked to perfection, evenly medium-rare pink throughout. I used to do this all the time! It’s great for the working person, and it’s also great (according to Davis) for keeping nutrients in the meat. This method is similar to sous vide, in that you slow cook the meat by setting the cooking device – the oven in this case – to the desired finished temperature.

(No scan of this recipe; Davis’ method is explained in a two-page section titled “Slow Roasting”.)

In the spirit of Adelle Davis, I buy a responsively grown 4 pound beef rump-round roast at Whole Foods. (She would not have approved of the cost, however!)
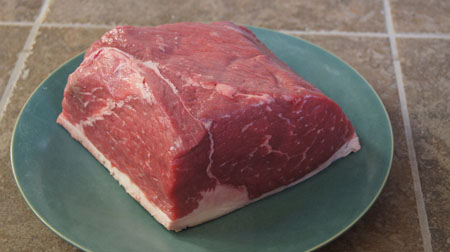
uncooked roastIn 2015, I have an oven that I can set to any temperature from 100˚ to 550 ˚ F. This should work even better than the oven I had back when I first explored this method, as that oven did not have low temperature settings.

Slow-Roasted Beef

  • 3-4 pound beef rump or round roast
  • salt and pepper
  • olive or vegetable oil

If the meat has more than 1/2 inch of fat on it, trim some of the fat off. Season the roast with salt and pepper (Davis says not to salt the meat; I disagree). Rub a little oil over the surface of the roast. Place the roast in a roasting pan, on a rack if possible. Do not cover the roast. Insert a meat thermometer in the center of the roast.

Place the roast in a preheated 300˚ oven for 1 hour (to destroy bacteria on the surface). Then, turn the oven down to internal temperature that you desire. (If your oven does not have a low setting, simply turn it off. It should work.) Do not open the oven door!

  • rare 135˚
  • medium 150˚
  • well done 160˚

For a rare-cooked roast, it takes about 2 1/2 hours per pound.

When the meat has reached the internal temperature that you want, take it out and serve.
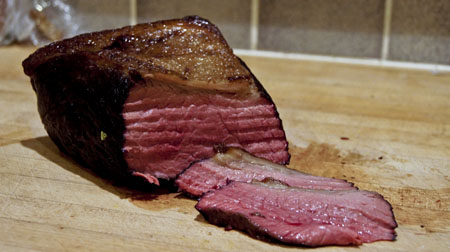
slow-cooked roastMine turned out perfect! I cooked it to rare. It was evenly pink throughout, just the way we like it! Good the first night with mashed potatoes and gravy, and excellent sliced/shaved very thin for sandwiches the next several days.