250 Cookbooks: Cuisinart Elite Collection, 14-cup Elite Collection

 Cookbook #232: Cuisinart Elite Collection, 14-cup Elite Collection, Cuisinart, Conair Corporation, NJ, circa 2010.
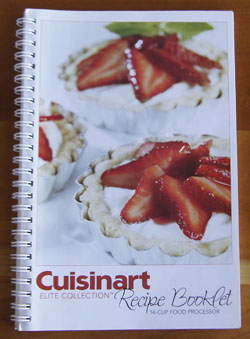
Cuisinart Elite Collection cookbookMy current food processor is the 14-cup Elite (I covered my old one in this post). I give this Cuisinart permanent residence on the counter in my kitchen! I chose this 14-cup food processor for myself in 2010, when I retired from the University of Colorado. The folks in the Chem Dept took up a collection and gave me a gift card the night of my retirement celebration – and this Cuisinart Elite is what I chose to buy for myself. I look at it with fond memories.

The 14-cup Elite comes with 3 bowls: small, medium, and large; a blade for chopping and a blade for dough; and the usual slicing discs and grating discs. The blades and discs fit into a cute Barbie-style plastic storage box. I use the large bowl a lot, and the small one is especially nice when I am preparing food for the two of us.

How would I review this Cuisinart, after using it for 8 years? Well, no food processor is perfect. Liquid sometimes leaks from the top, because the rubber gasket does a poor job of sealing the connection between the bowl(s) and the top of the unit. It’s also tricky sometimes to get the lid and feeder in the proper position for the switch to work (sometimes I have to hold the lid down with my hand while chopping). Cheese, especially jack cheese, just doesn’t want to grate in it, it gobs up into chunks. When I grate carrots or any vegetable, big chunks are left on top of the shredding disc. Sure there are 3 bowls, supposedly so you can quickly move through different parts of a recipe, but the blades and discs and the processor lid always have to be rinsed inbetween. If I had a clean-up person following me around, I’d use my Cuisinart a lot more. Often it’s easier to just grab a good knife and chop.

But would I choose to live without it? Heck no. It’s my best tool for quantities of chopped vegetables, it’s what I use to make pie crusts, it’s what I use to make hummus, pesto, and salad dressings. As I said, I allow it permanent space on my kitchen counter, and that says a lot. It looks good too. Plus, Cuisinart has excellent support for their products. My food processor and I just have a sort of love-hate relationship.
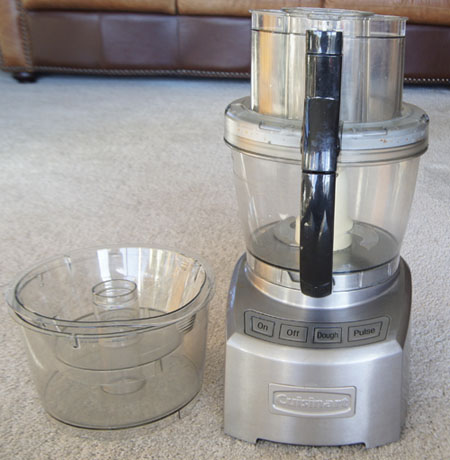
Cuisinart Elite food processorI page through the recipes in this booklet. Yum, I want to make about every-other recipe! Just like my Cuisinart Prep 11 booklet, this is an excellent and enticing recipe resource. (A complete opposite from the Pressure Cooker, User’s Manual booklet that I covered a couple weeks ago.)

Here are all the recipes I’d like to try: Tartar Sauce, Spinach Pasta Dough, Classic Bruschetta, Caramelized Onion, Steak and Gruyere Quesadillas, Tomato Soup, Shredded Carrot Salad with Honey-Ginger Dressing, Spinach Ravioli, Classic Meatballs, Sweet Potato and Black Bean Empanadas, Stuffed Roasted Peppers, Cherry Crumb Muffins, Chocolate Chip Crumb Cake, and Pound Cake with Pine Nuts and Olive Oil.

For this blog, I will make the Roasted Red Pepper Sauce, scanned in below. Note how nicely this book is laid out – so much nicer than my other appliance recipe/instruction books:
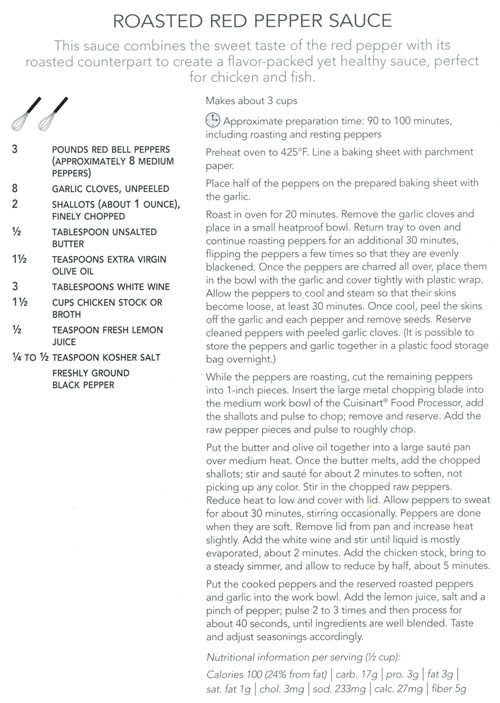
Roasted Red Pepper Sauce recipeI decided to make just a half recipe for the two of us.

Roasted Red Pepper Sauce
makes about 1 1/2 cups

  • 4 medium to large red peppers (1 1/2 pounds)
  • 8 garlic cloves, unpeeled
  • 1 shallot, about 1/2 ounce, chopped
  • 1 teaspoon butter
  • 1 teaspoon olive oil
  • optional: 1-2 tablespoons white wine or a few splashes of white vinegar
  • 3/4 cup chicken stock
  • dash of fresh lemon juice
  • salt and pepper to taste

Heat the oven to 425˚. Put half the red peppers and all of the garlic on a parchment-lined baking sheet. Roast it all in oven 20 minutes, remove and save the garlic, then continue roasting the red peppers for 30 more minutes. Turn the peppers occasionally so that they become evenly blackened. When they are charred all over, remove them and immediately seal them in a plastic bag. After about 30 minutes, the peppers will be cool and the skin easy to remove. Peel both the roasted peppers, removing the seeds, and also peel the garlic cloves. Store them together until you are ready to complete the sauce (I left mine overnight in the refrigerator).

Put the shallots in a food processor bowl fitted with a chopping blade. Pulse to chop, then remove them and set aside. By hand, chop the remaining 2 red peppers into 1-inch chunks and put these chunks in the food processor; pulse several times to roughly chop. Remove and set aside.

Heat the butter and olive oil in a large sauté pan using medium heat. Cook the shallots a couple minutes to soften – don’t let them get brown. Stir in the chopped red peppers, then cover the pan and reduce the heat to low. After 30 minutes, the peppers will be soft and “sweated”. Remove the lid from the pan and increase the heat slightly. Add the white wine (if you are using it) and stir unti the liquid is mostly evaporated (2 minutes). Add the chicken stock and simmer until reduced by half, about 5 minutes.

Put all of this shallot-pepper-stock mixture into the work bowl of the food processor, add the lemon juice and salt and pepper, and add the reserved roasted red peppers and garlic. Process about 40 seconds, until the mixture is well blended. Taste and adjust seasonings accordingly.
Roasted Red Pepper Sauce

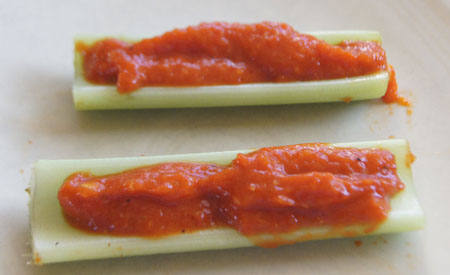
This was a lot more work than I signed up for! I didn’t read the recipe carefully enough before I started. But it is a very, very good sauce. So far I’ve just eaten it on celery – it would also be good on sandwiches but we are on a two-week no-carb stint. But this sauce/relish should keep a week or so in the refrigerator, and I will look for a chicken dish to use it on.


250 Cookbooks: Complete World Bartender Guide

 Cookbook #231: Complete World Bartender Guide, Bob Sennett, editor, Baronet Publishing Company, NY, 1977.

Complete World Bartenders Guide cookbookWhy did I buy this book? We rarely make “cocktails”. Guess I had a moment when I wanted to act “civilized”, like my parents’ generation, where fancy cocktails were routine at social get-togethers. Whatever the cause, I bought the book. And the result was Complete World Bartender Guide sat my shelf, gathering dust.
I searched online for the title “Complete World Bartender Guide”. I was a little surprised that this book is still for sale. Seems it is still an important reference for aspiring bartenders as well as at-home cocktail makers. My 1977 edition is the first, there was a new edition with the same cover in 1987, and a new one with a different cover in 1993. Lots of hits – more than twenty. Amazon sells the Complete World Bartender Guide: The Standard Reference to More than 2,400 Drinks, 1993 edition, for $6.06. I paged through the available online content of this edition and the content looks much like mine. Here are some more copies for sale:

  • WebRestaurantStore $7.99
  • DiscoverBooks $3.23
  • eBay $3.49
  • AbeBooks $6.66

On occasion, I have poured over the multitude of recipes in the Complete World Bartender Guide. There are 356 recipe pages, and about 5-6 recipes per page. That’s about 2000 drink recipes! If I made one drink per day from this book, it would take me five and a half years to make them all!

Hmmm. That might be an interesting topic for a new daily blog: “2000 Cocktails”. I’m sure it would lead to some amusing anecdotes. But no, I am not going to do it.

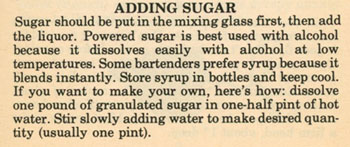
I touched on cocktails in this post: Zestful Recipes for Every Meal. That vintage cookbook had suggestions for using lemons, oranges and grapefruit and was authored by the  orange distributors in Southern California. I made a lemon simple syrup and used it in a martini. What does Complete World Bartender Guide say about sugar syrups? Here, on page 7:

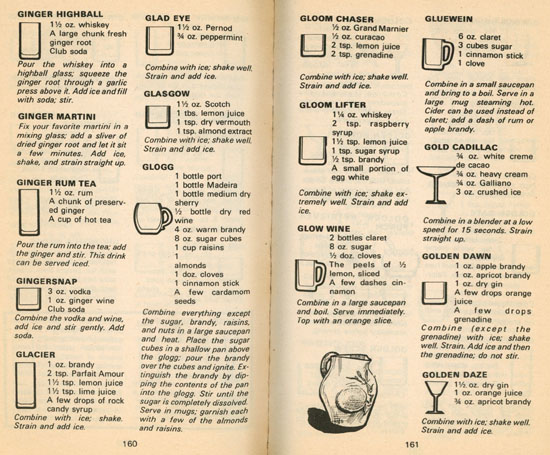
simple syrupActually, this page might be useful to me in the future. But I also have another recipe source for simple syrups in my comprehensive reference book, Food Lover’s Companion. As well as this simple syrup, Complete World Bartender Guide lists different types of liquors and liquers, such as sloe gin, armagnac, anisette, and dry gin. Is Food Lover’s Companion a good reference for these as well? It does lists the first three, but not dry gin. So if I recycle Complete World Bartender Guide, I might lose access to some important printed informaiton.

While in the reference section of the Complete World Bartender Guide, I see the entry “sloe gin”. I’ve bought that before – but what for? Oh, I remember, “Skip and Go Nakeds”. Yes, “Skip and Go Nakeds”, devilish drinks made for us by my uncle from vodka, beer, lemonade, and as I remember it, sloe gin. He even gave us the glasses to make them in so we could have them properly served at home in Colorado:

skip and go naked glassesMy uncle served in World War II and was for a time a bartender. Spending an evening with my aunt and uncle was always entertaining! We have the best memories of our visits to their home in Southern California.
Back to definitions, like sloe gin. What is it? It’s a liqueur made from the berries of the blackthorn bush, called “sloe berries”. Sloe gin is red and thickly sweet and sinks to the bottom of the glass, kind of like grenadine. And what is grenadine? It’s a flavoring made from pomegranates. Note that the sloe gin is red and has sugar and adds alcohol to the already potent Skip and Go Nakeds.

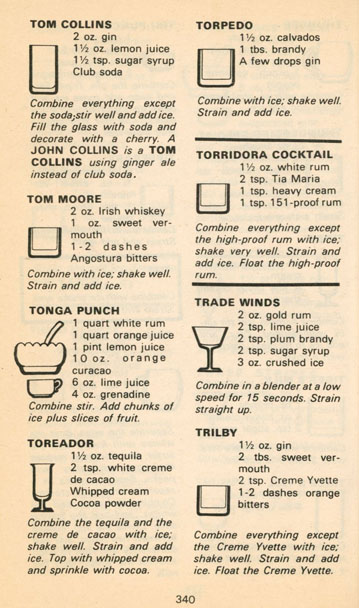
One drink I am curious about is the “Tom Collins”. Decades ago, one could easily find “collins mix” on shelves. That stopped – I remember having a longing for a Tom Collins, but I could not find the mix. What could I have done? Why, simple look in my copy of “Complete World Bartender Guide”:

Tom CollinsCollins mix is masde with simple syrup, lemon juice, and soda water. I could have used my Lemon Simple Syrup to make a Tom Collins. I should have looked on my own bookshelves for answers long ago.

This list of measurements might come in handy:

bar measurementsBar glasses – they don’t have my “Skip and Go Nakeds!”
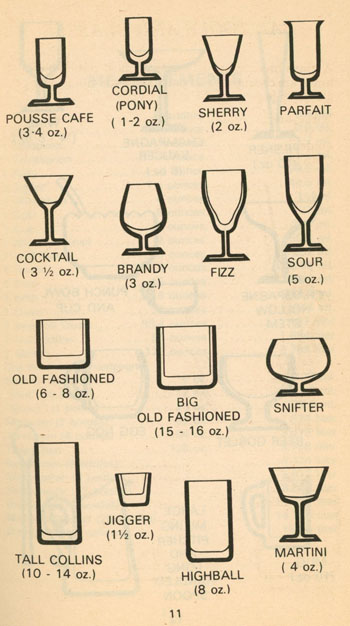

bar glasses 1bar glasses 2

Here is the book open at a typical page of bar drinks:

example bar drinks pageWhat am I going to make for this blog? We don’t really drink cocktails, especially this time of year, largely because we are trying to cut calories. There are a few low-calorie alcoholic drinks . . . and at the very back, a few non-alcoholic drinks. That suits the bill for us this January as we recover from the excesses of last year. I’ll try one of the tomato cocktails:
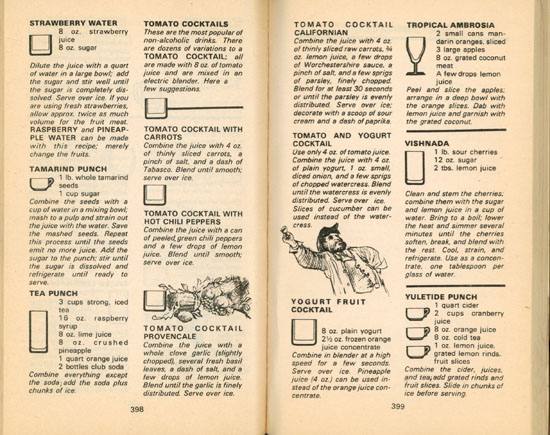
tomato cocktailsI will make the tomato cocktail with carrots. I keep small cans of tomato sauce in my pantry because I often use them when making marinara sauce. I took out a carrot to use, and wondered how much it weighed. Less than one ounce! This was an averaged-sized carrot. Heavens, I am supposed to use 4 ounces of carrots! That seemed way too much for me, so I only used that one 1-ounce carrot.
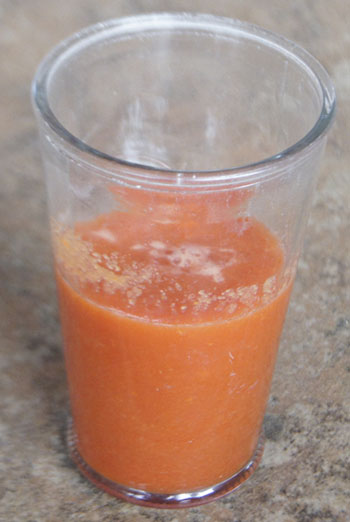
Alcohol-free Tomato Cocktail with Carrots
serves 1

  • 1 8-ounce can tomato juice
  • 1 carrot (use more if you want)
  • a dash of Tobasco
  • salt to taste

Cut the carrot into very thin slices. Blend until smooth. Serve over ice if you like.

tomato carrot cocktailSure, this was good. The carrots were still a bit crunchy after a minute of blending, though. I didn’t mind, but you might use carrot juice instead, or a juicer.
Shall I keep the Complete World Bartender Guide? I haven’t really decided. I meant to recycle it when I first picked it up, but I had some fun going through it, and might again in the future. I guess I’ll keep it for now!

250 Cookbooks: Pressure Cooker

Cookbook #230: Pressure Cooker, User’s Manual, Fagor America, Inc., Lyndhurst, NJ, 1999.

Pressure Cooker cookbookThis is the instruction manual that came with the pressure cooker I bought sometime in the early 2000s. I have already talked about that specific pressure cooker in my post Fagor Pressure Cookers, More than 50 Recipes.
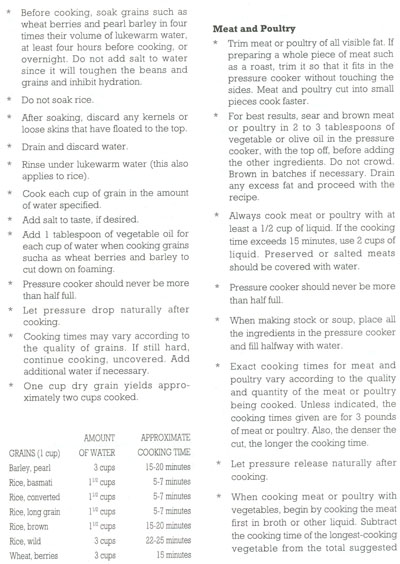
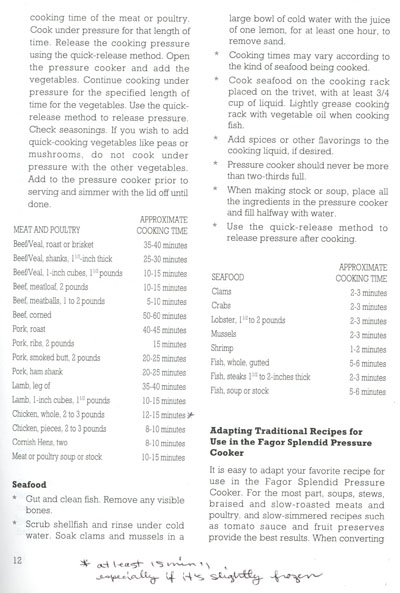
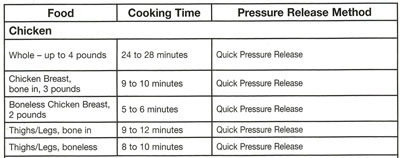
The first few pages detail how to use a stove-top pressure cooker and how long to cook a variety of foods. I now use an electric pressure cooker, so only the cooking time lengths and pressure release times are useful to me. For instance, the length of time to cook chicken is discussed in this section:

page 11page 12

I’ve used this booklet – that note is in my handwriting. The cooking times for chicken correlate well with the times in my current electric cooker instruction booklet (Cuisinart Electric Pressure Cooker).

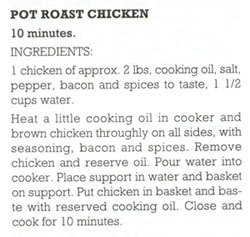
How about the recipes in this booklet? Good recipes might make me keep an instruction cookbook. But Pressure Cooker, User’s Manual, has only 8 pages of recipes, from soups to vegetables to rice and pastas to game and poultry to meat to fish to desserts. The recipes are basic preparations, none have a much flair. Instead, their purpose is to acquaint the new user with the range of foods that can be cooked in a pressure cooker. Here is a typical recipe:

Pot Roast Chicken recipe I don’t need this booklet anymore, since I no longer have a stove-top pressure cooker and since the recipes aren’t very exciting. I will recycle it.
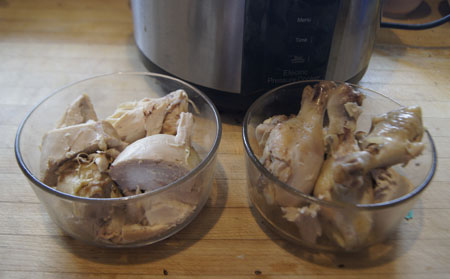
For this blog I will cook chicken in my current electric pressure cooker. I go to Whole Foods to buy a whole chicken, but they are out! This is the day after Christmas and many shelves are bare. Not wanting to travel to another store, I buy bone-in chicken breasts and drumsticks, about 4 pounds worth. Do I need to cook chicken pieces for a shorter time than a whole chicken? According to to the section on Meats and Poultry in Pressure Cooker, User’s Manual (above), the answer is “yes” – 9-10 minutes for pieces, 12-15 for whole. (The chicken-piece cooking time length correlates well with my Savory Chicken recipe.) How much liquid should I add to the pot? Pressure Cooker, User’s Manual states “Always cook meat or poultry with at least a 1/2 cup of liquid. If the cooking time exceeds 15 minutes, use 2 cups of liquid.”

The pressure release method also affects how done the chicken will be in a certain amount of time. Are the pressure release method the same in both sets of instructions? No, they are not exactly alike, as I found when I compared the manual cooker instructions with those in my Cuisinart Electric Pressure Cooker book:

electric pressure cooker times

Comparison:

Manual cookbook instructions

  • slow release
  • 9-10 minutes for cut-up chicken
  • 12-15 for whole chicken (and I noted to cook whole chicken 15 minutes “especially if it’s slightly frozen)
  • 1 1/2 to 2 cups water in their recipe for cut-up chicken in Chicken Casserols

Electric pressure cooker instructions

  • quick release
  • 10 minutes for cut-up chicken
  • 24-28 minutes for whole chicken
  • 1 cup liquid in my recipe for cut-up chicken (Savory Chicken)

In summary, the manual cooker instructions state to cook a whole chicken a little bit longer than chicken pieces; the electric cooker instructions state to cook a whole chicken two and a half times as long. I can see that there are several other variables to control: cut of chicken, weight of chicken, amount of liquid, amount of liquid, length of cooking, and type of pressure release.

So how the heck shall I cook my odd mixture of thick chicken breasts and drumsticks? I decide to make an educated guess and do an experiment. I will cook my large-sized bone-in chicken breasts and 6 drumsticks in 1/2 cup water (and a little salt) for at least 10 minutes and use the quick release. But as an experiment, I decide to check the chicken after 8 minutes.

Results

At 8 minutes, the drumsticks were done, but the breasts were kind of “hard”. I took the drumsticks out of the cooker and cooked the chicken breasts 5 minutes longer. Here is my chicken at 13 minutes:

pressure cooked chicken

All the chicken pieces are done, but honestly, the breasts were kind of rubbery and dry. Hmmm. I poured the cooking liquid into a measuring cup – it totalled 1 cup. It seems a lot of the juices ran out of the chicken. In the future, I recommend trying more water in the pot at the start, up to 2 cups.

This chicken did make a great chicken salad. Cut up and dressed with mayonnaise, it was just fine, and didn’t taste rubbery. It was also good in chicken soup (made with that cup of chicken liquid). And I have enough chicken for yet another meal too.

This is an experiment in progress! For large chicken breasts, I suggest trying (first) 1-2 cups water, and 12-15 minutes (quick release) cooking time for a whole chicken. If I have a whole chicken, I’d try 16-20 minutes.

I had a fun time with this – I still like doing experiments.

250 Cookbooks: Five Hundred ways to prepare California Sea Foods

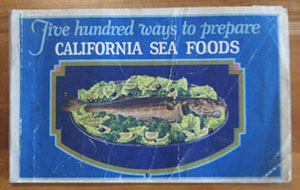
Cookbook #229: Five Hundred ways to prepare California Sea Foods, Compiled by State Fish Exchange, California State Printing Office, Harry Hammond, State Printer, Sacramento, CA, 1934.

California Sea Foods cookbookThe sheer abundance of fish covered in this book is amazing – about 60 species! The table below shows the types, poundage, and total amount of fish produced in 1933 in California.
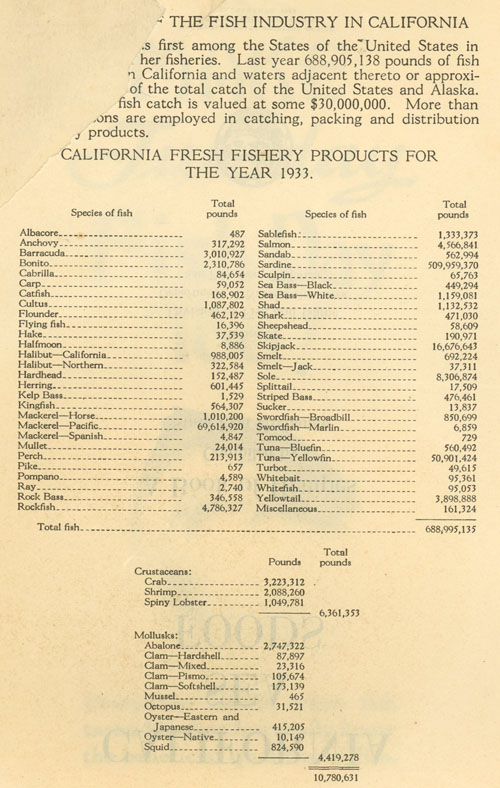
fishing production 1933

How does this compare with California’s fishery products today? On the California Department of Fish and Wildlife site, I found this document: California Department of Fish and Wildlife, Table 7 – Origin and Poundage of Commercia Fish Landings Into California During 2016. Here is a summary of a comparison of totals in 1933 and 2016:

  • 1933: 669,775,413 pounds of commercial fish and crustaceans/mollusks
  • 2016: 165,184,101 pounds of commercial fish and mollusks

Over 4 times as much was produced in 1933 than in 2016 – that is impressive. And below is my rough summary comparing the most fished types of fish 1933 and of the most fished types of fish in2016, in poundage per year (“m” is “million”):

  • 1933: sardines (510 m), mackerel (69 m), yellowfin tuna (51 m), , skipjack (16.5 m), sole (8 m), rockfish, salmon, anchovies, abalone, shrimp, crab (these last all 2-5 m)
  • 2016: squid (82 m), crab (dungess, 26.5 m), anchovies (18 m), sea urchin (6 m), mackerel (4 m), sole (4 m), shrimp, rockfish, hagfish, sablefish (these last all 2-3 m)

Fish tales abound in this data! Sardines were a huge industry in California until the 1940s. Sardine canneries abounded in the San Fransisco area – Cannery Row in Monterey was made famous by the book of the same name by John Steinbeck. Overfishing forced the canneries to close. Yellowfin tuna populations have dropped since the thirties – overfishing has declined the tuna population. Mackerel was heavily fished and canned in California, depleting the populations, but they came back by the 1970s. The higher proportion of dungess crabs today surprised me, until I learned that until 1938, it was illegal to can crabs. Why is squid such a huge proportion of the California fisheries in 2016? Because it is the popular “calamari”. But that’s not the whole story. According to a 2016 NPR aritcle, “More than 80 percent of U.S. squid landings are exported — most of it to China. The rare percentage of that catch that stays domestically goes to Asian fresh fish markets or is used as bait. Ironically, the lion’s share of the squid consumed in the United States is imported.”

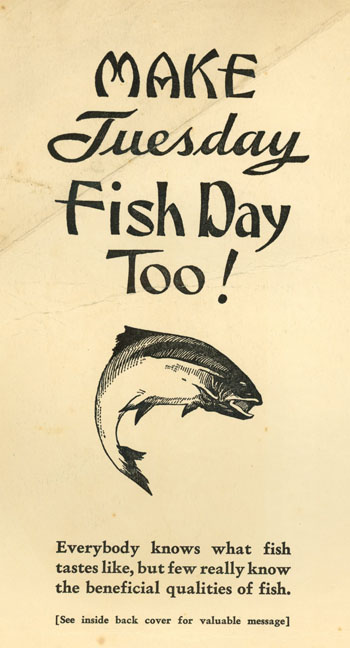
California Sea Foods encourages Californians to eat more fish. “Make Tuesday Fish Day Too!” reads the front inside cover.

inner coverThis takes me back: when I was in elementary school, we always had fish on Friday – a tuna fish sandwich in my lunchbox. Fish on Friday was a Catholic practice, and although we were not Catholic, we nevertheless had those tuna sandwiches. Curious about this tradition, I found several interesting articles. In Lust, Lies And Empire: The Fishy Tale Behind Eating Fish On Friday, an npr.org article, I learn that this “no fish” policy was once thought to be because of a medieval pope who was trying to prop up the fishing industry. But instead, according to Christian teaching, abstinence was observed as a penance on Fridays is to commemorate the Friday death of Jesus, who redeemed a sinful world. “Abstinence” in this case refers to refraining from meat (Wikipedia). Why meat? Because it’s the flesh of warmblooded mammals, animals that have sacrificed their lives for us. Fish, the flesh of coldblooded animals, is “considered fair game”. (Many books have been written on this topic, including Fish on Friday by Leonard Feeney and Why Do Catholics Eat Fish On Friday by Michael Foley.)
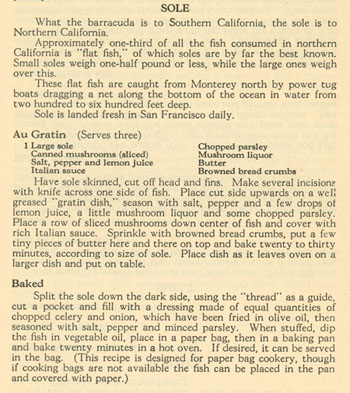
Five Hundred ways to prepare California Sea Foods has a very useful table of contents/index, handily referring the reader to recipes for cooking and serving all of the fish in the above table. The fishes can be baked, boiled, cooked in a bouillabaise or cioppino, broiled, made into cakes or croquettes or fritada, fried, jellied (made into a mold), made in a pie, put in a salad or sandwich, put in a souffle or soup, or steamed (and I still haven’t listed all the methods!). After the fish recipes are lots of recipes for fish sauces.

As an example, I look up “sole”, a fish I cooked for a recent post:

soleThat’s not the only page of recipes for sole – they go on for four more pages!
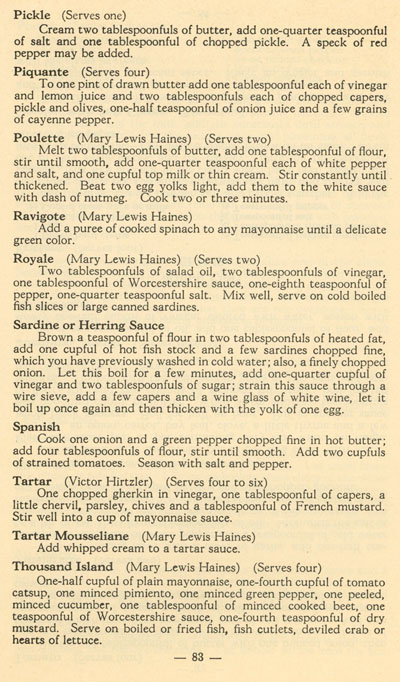
Here’s another page from Five Hundred ways to prepare California Sea Foods:

tartar sauceThe book ends with “Reasons Why you should make Tuesday Fish Day too!” touts fish as “one of the most heathful and nourishing foods known to science”.
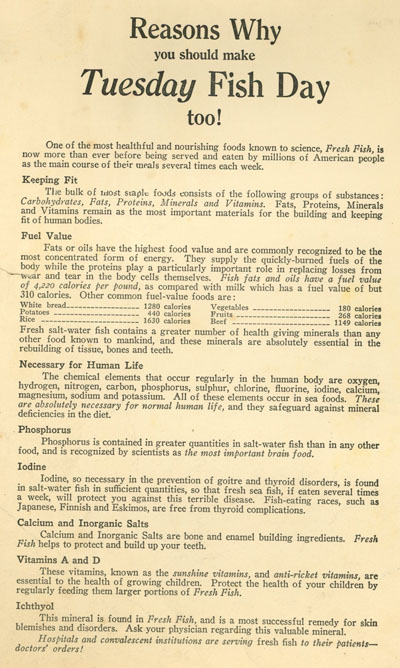
inner back cover

I will make Tartar Sauce for this blog. The original recipe is in one of the scans, above. My version is below. I didn’t have chervil

Tartar Sauce
enough for 2-3 people

  • one dill pickle, chopped (don’t use a huge pickle; you want about 1 tablespoon chopped)
  • 2 teaspoons capers
  • 1/2 teaspoon dried tarragon (or use fresh, or use chervil as given in the original recipe)
  • 1 tablespoon chopped fresh parsley
  • 1 green onion, chopped fine
  • 2 teaspoons Dijon mustard
  • 1/2 cup mayonnaise

Mix all of the above together and serve.

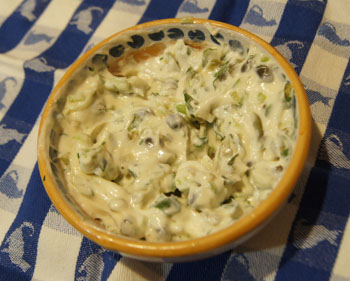
tartar sauceThis tartar sauce was amazingly good. Fresh and zingy. I served it with salmon along with wedges of lemon. I usually make “tartar sauce” by mixing together mayo or yogurt with a little pickle relish and tarragon. But this one is a big step up in flavor, and still very easy to make. I am sure I’ll use it a lot in the future!

I’ll end with the photo on the back of the book. Peace.

back cover

250 Cookbooks: Sunbeam Mixmaster

Cookbook #228: Sunbeam Mixmaster, Sunbeam Corporation, Chicago, Illinois, Canada, 1957.

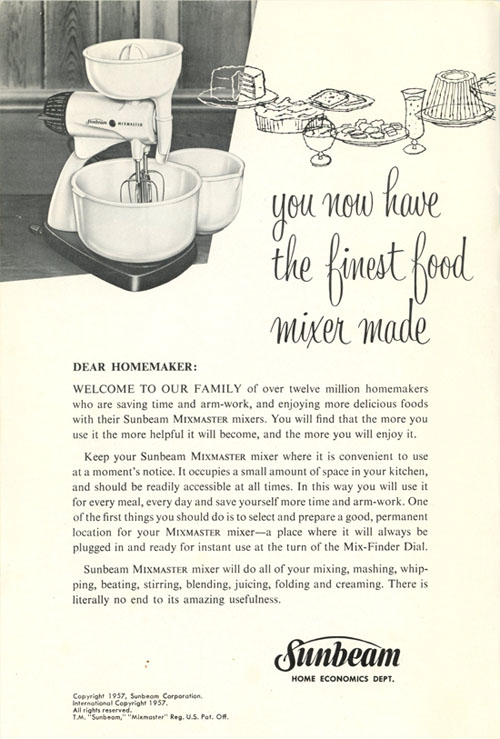
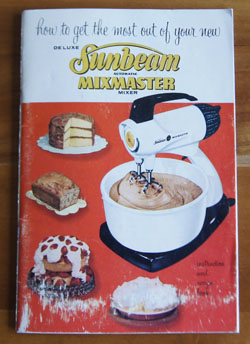
Sunbeam Mixmaster cookbook

I open the first page of this vintage cookbook and a slip of paper falls out:

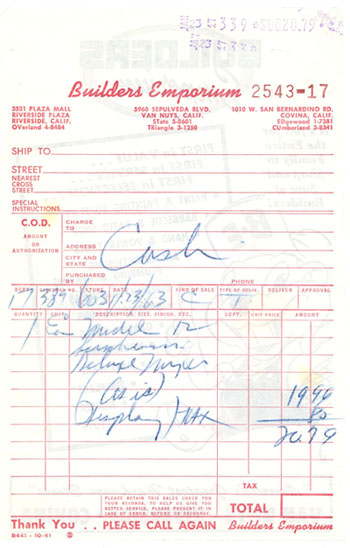
original receipt

The receipt for my mother’s Sunbeam mixer! Purchased 1/23/1963 at Builders Emporium in Van Nuys California – for $20.79. The clerk wrote “as is, display”. Since it was neither Christmas nor my mother’s birthday, my guess is that she bought it for herself with “mad”  money, money she received at birthdays and Christmas. I remember this mixer in her kitchen, mixing up cakes and pie fillings and batches of cookies. Mother believed in homemade, and loved baking. So her mixer really, really got used.

I don’t know if this was her first electric mixer, or a replacement. The first electric mixers were introduced to the American public in 1910-1920, so she probably had some sort of electric mixer before. But I’m sure that this was a big step-up for her.

(I covered the history of electric mixers in my post on my own Sunbeam that I got in 1983. Please see my 250 Cookbooks post Sunbeam Deluxe Mixmaster Mixer for more on this topic.)

I will keep this booklet ony for my own nostalgia. The recipes? They all look good, but nothing stands out, I’ve seen similar recipes in the many other older cookbooks I’ve covered. But do join me in perusing some of the pages of this 1963 cookbook. First, the inside cover:

inside cover

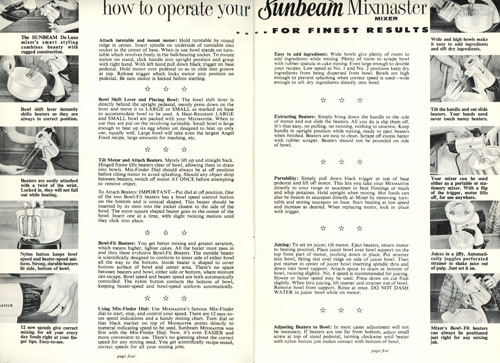
Two pages of instructions:

directionsBasic instructions for making cakes. I like the vintage black-and-white photos:
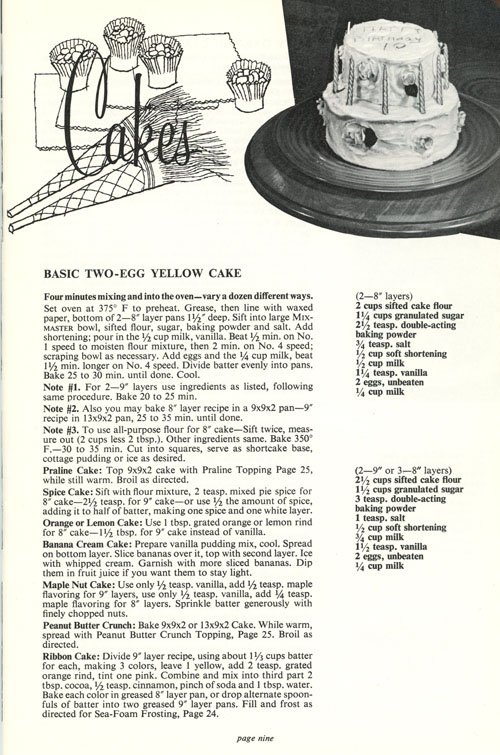
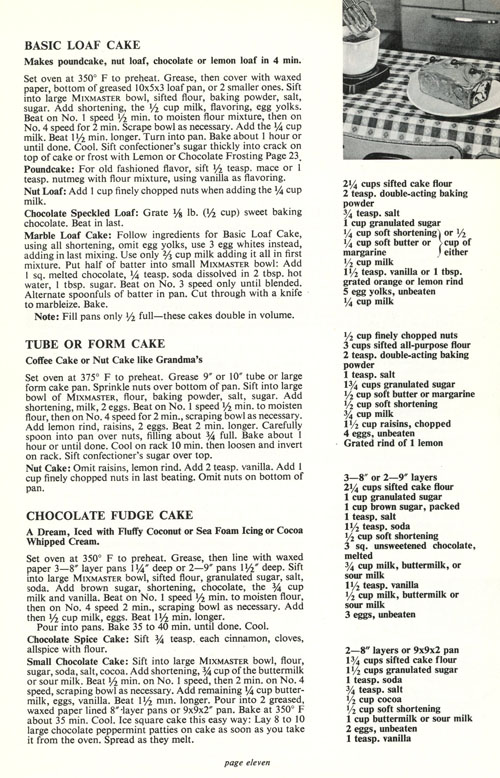
cakesLoaf cakes:

loaf cakes

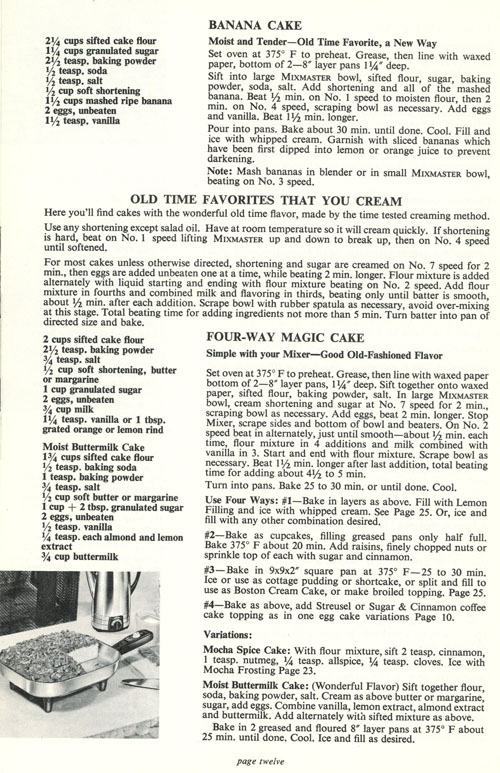
I like this next one for several reasons. First, I like the banana cake recipe. I’m not positive I have a layered banana cake recipe in my repertoire. Second, there is a discussion of what it means to “cream” the shortening and the sugar. Finally, the photo at the bottom of the page is a cake baked in a Sunbeam electric fry pan. (See this and this.)

banana cake and more

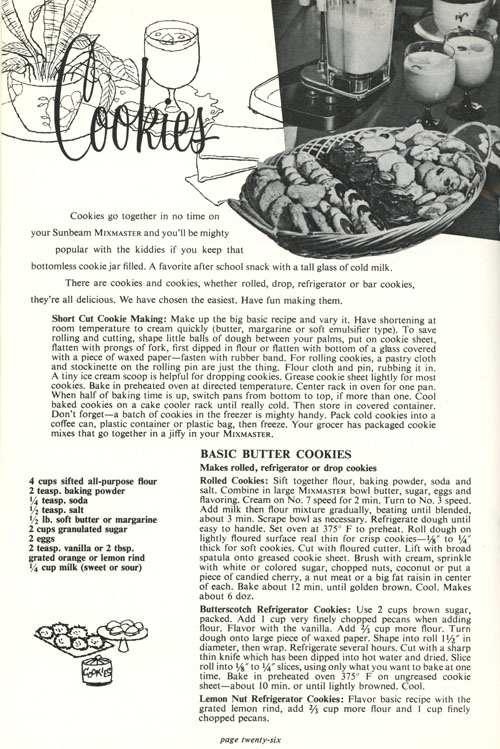
Cookies, of course!

cakesI like the following page for the kitchen counter photo at the top of the page. And the text below suggests to use a Sunbeam electric fry pan for the pan cakes, a waffle iron for the waffles, and a blender as well as the mixmaster for the meat loaf.
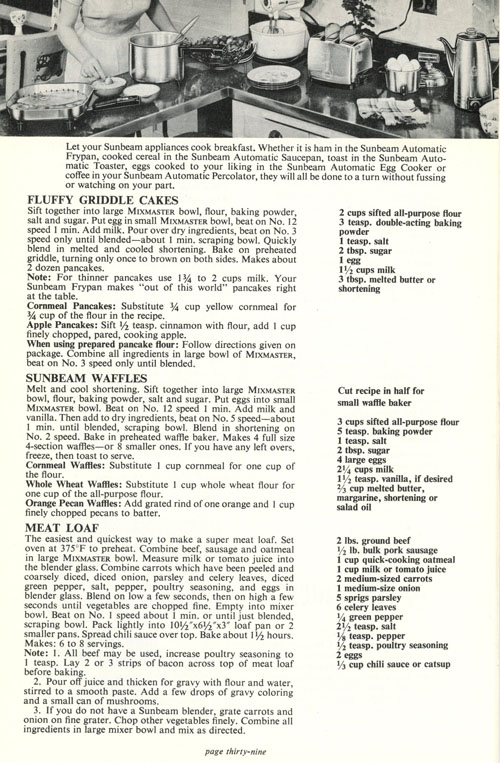
appliancesFinally, the back cover, showing all the available Sunbeam appliances in 1957. I made a similar scan of the back cover of Sunbeam Controlled Heat Automatic Frypan (1953), if you want to compare.
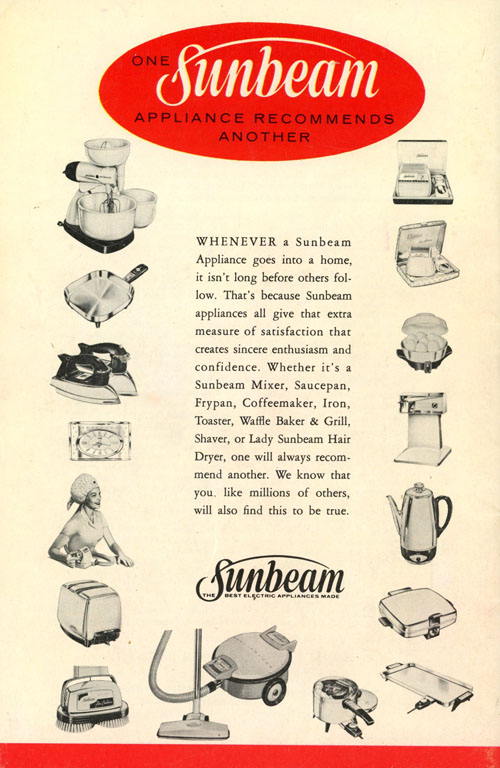
back cover

I decide to make Butterscotch Refrigerator Cookies for this blog, the ones describe in the second paragraph on the scanned “cookie” page, above, under Basic Butter Cookies. I like refrigerator cookies – I have recipes for four types in this blog so far! When cooking for just two, they are nice because I don’t have to bake up a whole batch at a time to get a few fresh cookies for dessert.

Butterscotch Refrigerator Cookies

  • 4 2/3 cups flour
  • 1 cup very finely chopped pecans
  • 2 teaspoons baking powder
  • 1/4 teaspoon baking soda
  • 1/2 teaspoon salt
  • 1/2 pound butter (1 cup or 2 sticks)
  • 2 cups brown sugar
  • 2 eggs
  • 2 teaspoons vanilla
  • 1/4 cup milk

Stir together the flour, pecans, baking powder, baking soda, and salt. Set aside.

Combine the butter, sugar, eggs, and vanilla and beat in an electric mixer at relatively high speed for 2 minutes. Turn to low speed and add the milk and then the flour mixture gradually, beating until blended, about 3 minutes.

Turn the dough onto a work space and shape it into two rolls, each 1 1/2 inches in diameter and 11-12 inches in length. Wrap the rolls and refrigerate several hours.

Cut with a sharp knife (dipping the knife in hot water then drying might make this easier). Make the slices 1/8 to 1/4 inch thick. Cut only as many as you want to bake at one time.

Bake at 375˚ on ungreased cookie sheets for about 10 minutes.

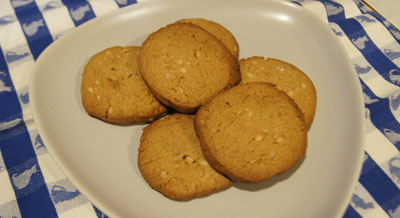
Butterscotch Refrigerator CookiesThese are tasty. I cooked them too long because I didn’t read my directions! I thought it was “12 minutes”, but it was “10 minutes”. I checked them at 12 and thought they weren’t brown enough, so I gave them another 2 minutes and they actually tasted burned. 10 minutes! They will not look real brown but will be done!
250 Cookbooks: Mastering the Art of French Cooking

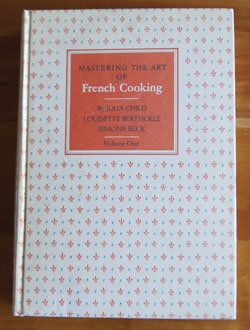
Cookbook #227: Mastering the Art of French Cooking, Julia Child, Louisette Bertholle, Simone Beck, Borzoi Books, Alfred A. Knopf, NY, 1961. Thirtieth Printing, June, 1978.

Mastering the Art of French Cooking cookbook

“Julie & Julia”, the 2009 film starring Meryl Streep and Amy Adams, portrays the true story of Julie Powell, a young New Yorker who took on the challenge of cooking all 524 recipes in Mastering the Art of French Cooking. She covered her experiences in a blog, and eventually a book: Julie and Julia: 365 Days, 524 Recipes, 1 Tiny Apartment Kitchen. When the movie came out, I ran upstairs to see if I had a copy of Mastering the Art of French Cooking. And yes, it was on my bookshelf!

Mastering the Art of French Cooking always intimidated me. My copy is barely wrinkled, no food stains mar the pages. In the past, no more did I want to read it that I would want to read a book on advanced physical chemistry.

I’ve grown up a bit though, and taken a class on classic French sauces. I’ve also learned how to make my own great stocks. I’ll say “I am wiser”, and am feeling this especially this week because I just turned a year older. Now as I turn the pages of Mastering the Art of French Cooking, I can understand the language and appreciate the wisdom, and I smile warmly at Julia Child’s complete love of cooking.

On my birthday this week, I got up late and decided to make an omelet. And I don’t just mean “make an omelet”, I wanted to make an omelet according to Julia’s directions. I wanted nothing else for breakfast! Just an experiment. It was, afterall, my birthday.

I open Mastering the Art of French Cooking to page 127. Julia Child says it will only take 30 seconds to make the omelette. And, “An omelette cannot be made in a sticky pan. The eggs must be able to slide around freely. This is why it is a good idea to have one pan that is reserved for omelettes only.” And the type of pan Julia Child likes the best? The French type of plain iron pan with sloping sides. Aha, I own just such a pan! I got it about a year ago. But I banished it to the basement because it is so heavy and hard to clean.

Today I jog down to the basement and retrieve the pan. I scrub it with steel wool and soap, dry it carefully, and heat it to get all the water off. Then I rub it with oil and wipe all that off. I set it on the stove.

“The individual 2- to 3-egg omelette is usually the tenderest, and by far the best size to practice making.” Perfect. “Just before heating the butter in the pan, break the eggs into a mixiing bowl and add salt and pepper. With a large table fork, beat the eggs only enough to blend the whites and yolks thoroughly. From 30 to 40 vigorous strokes should be sufficient.”

My 3 eggs mixed with 30 vigorous strokes, it’s time to heat my pan. “Place the butter [1 tablespoon] in the pan and set over very high heat . . . as the butter melts, tilt the pan in all directions to film the sides. When you see that the foam has almost subsided in the pan and the butter is on the point of coloring, it is an indication that it is hot enough to pour in the eggs.”

Next comes the short but busy omelette-cooking step. I am to hold the (heavy) pan in my left hand, pour in the eggs, and immediately start sliding the pan back and forth rapidly over the heat. And at the same time, I am supposed to stir the eggs with the bottom flat side of a fork to spread them all over the bottom of the pan. In only 3 or 4 seconds, the eggs will become a light custard, and it will be time to tilt the pan at a 45 degree angle and gather the eggs at the far lip of the pan. And give “4 or 5 sharp blows on the handle of the pan with your right fist to loosen the omelette and make the far edge curl over onto itself.”

This all happened very fast. But somehow, I poured a creamy, soft roll of eggs onto a plate. No toast, no coffee cake, no sausage, just eggs. I immediately take the hot omelette and  two forks and sit down next to my husband. He gives me this look, as if, he is supposed to share this with me? “It’s my birthday, I can do what I want!”

I took the first bite and . . . heavenly tastes and textures burst in my mouth. Dang that was a great omelette. Thank you Julia Child!

I spend several days paging through Mastering the Art of French Cooking. I took lots of notes! I really do like this classic cookbook. I suggest every serious cook buy or borrow a copy at some point in their life.

The only drawback to Julia Child’s recipes is the heavy use of butter, cream, and egg yolks. Yes, I have read The Big Fat Surprise, a book that disputes the generally accepted idea that the fats in these foods are bad for you, and instead encourages us to include them in our diet. But still, calories are calories, and stick on my body as weight when I eat too many. Just saying.

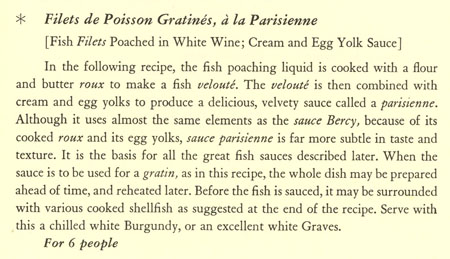
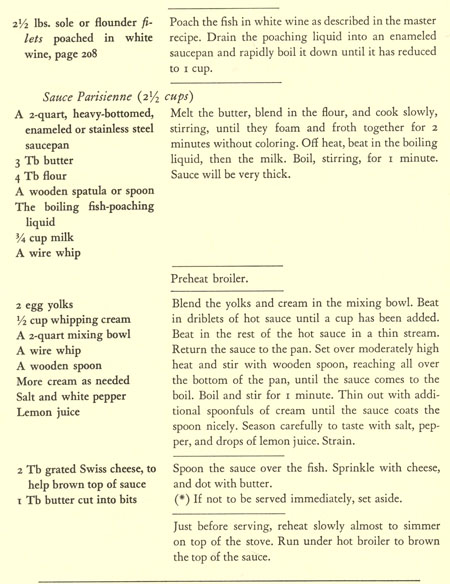
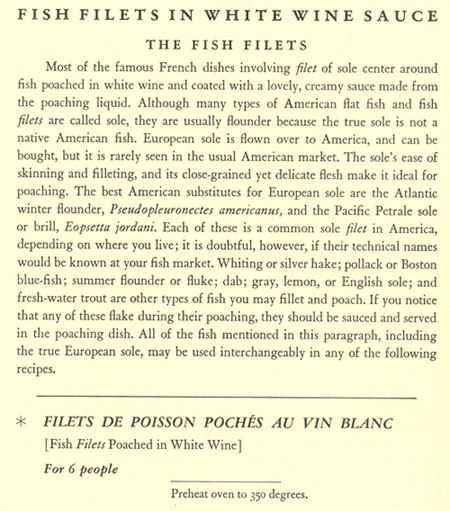
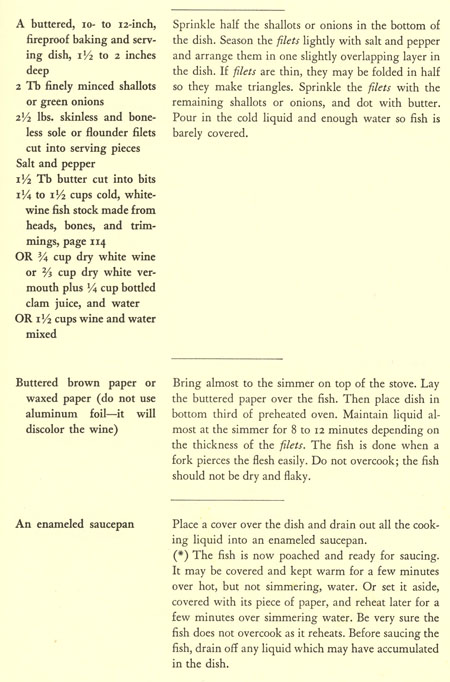
But this week, I will indulge in a Julia Child recipe: Filets de Poisson Gratinés, à la Parisienne, or “Fish Filets Poached in White Wine; Cream and Egg Yolk Sauce.” This recipe is a great example of Julia Child’s presentation style.

fishrecpage1fishrecpage2fishrecpage3fishrecpage4fishrecpage5

Below is my adaptation of this recipe. Note that you need a baking dish that you can heat on the stove top and also place in the oven. I used a LeCreuset.

Poached Sole in Velouté Sauce
serves 2

Poaching the fish:

  • 1 pound sole filets
  • 1 tablespoon minced shallots
  • butter: you need this throughout; I used unsalted butter, less than a cube in all
  • salt and pepper
  • 1/2 cup fish stock (or use water)
  • 1/2 cup white wine
  • a piece of parchment cut to fit the LeCreuset

Turn on the oven to 350˚.

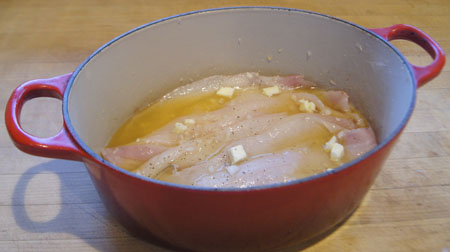
Butter the bottom of a LeCreuset. Sprinkle in half the minced shallots. Season the sole filets with salt and pepper, then place in the prepared LeCreuset, slightly overlapping the filets. Dot with 3/4 tablespoon butter cut into small chunks. Combine the fish stock and the wine and pour over the fish. Add a little more stock if necessary to barely cover the fish. Mine looked like this:

fish ready to poach

On the stovetop, bring the fish almost to simmering. Butter both sides of the piece of parchment. Place the LeCreuset in the 350˚ oven. Bake for 8 minutes, check for doneness by piercing with a fork (you should find just a slight resistance), and bake a few more minutes only if necessary. During the baking, the cooking liquid should be at a light simmer.

Drain the cooking liquid into a small saucepan, leaving the poached fish in the LeCreuset, covered with the parchment.

Boil the cooking liquid until it is reduced to 1/2 cup. This will be use in the sauce.

Veloute Sauce:

  • 1 1/2 tablespoons butter
  • 2 tablespoons flour
  • 1/2 cup reduced cooking liquid (hot)
  • 3/8 cup milk
  • 1 egg yolk
  • 1/4 cup cream
  • “drops” of lemon juice
  • 1/2 tablespoon butter
  • 1 tablespoon grated Swiss cheese

Melt the 1 1/2 tablespoons butter in a small sauce pan, then add the flour and stir until it is all mixed in. Continue cooking until it thickens but do not cook it until it browns. Off heat, beat in the hot cooking liquid and the milk. A whisk works well for this step. Put the pan back on the stove and bring to a boil, stirring constantly. Boil about a minute – the mixture will be thick.

In a bowl, blend the egg yolk with the cream, using a whisk. Add small amounts of the hot sauce and continue beating until about 1/2 cup of the hot sauce is added, then add the rest of the hot sauce in a thin stream. Put the mixture back in the pan and boil and stir 1 minute. You can thin with a little cream if it is too thick for your tastes. Add a few drops of lemon juice and salt and pepper.

Preheat the broiler.

Spoon the sauce over the poached fish (take the parchment off first), then dot the top with the 1/2 tablespoon butter and the Swiss cheese. On the stove top, over low heat, heat until it is just simmering.

Put the dish under the broiler until the top of the sauce is brown.

What is nice about this dish is that you can assemble it with the poached fish covered with sauce, and then do the stove-top heating and broiling steps just before serving. It’s important to bring this dish to the table hot and bubbly.

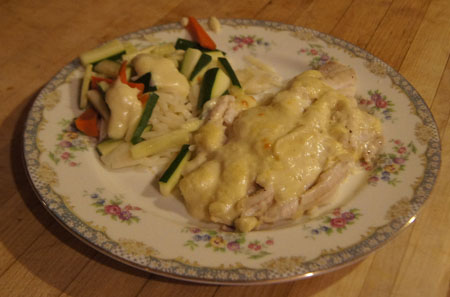
Here is the plated dish.

poached, sauced fish I served with a little orzo and steamed julienned zucchini and carrots on the side. I also served a loaf of my own no-knead bread. And a couple pretty green salads. For dessert? Fresh blackberries over ice cream.salads
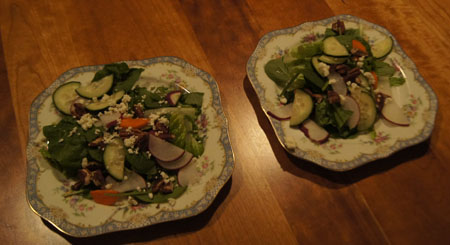
I took my first bite of the fish and then I had to set down my fork so I wouldn’t gobble up the rest too fast. This is absolutely delicious! “One of the best twenty-five meals ever in my life” was my comment.

Thank you Julia Child.

250 Cookbooks: Kerr Home Canning Book

Cookbook #226: Kerr Home Canning Book, Kerr Glass Manufacturing Corporation, National Nutrition Edition, 1943.

Kerr Home Canning Book cookbookThe time is 1943 and World War II is raging when this Kerr Home Canning Book is published. My parents, grandparents, uncles and aunts are affected, whether serving in the armed forces or living in the US. The entire American population gathers together to help the war effort. I wish now that I had had long talks with my parents and grandparents about the war, and learned more about their experiences, their feelings.
During the war, rationing stamps were issued to reduce the pressure on the food supply and indirectly help the war effort. Books like Kerr Home Canning Book encouraged and taught women how to can foods from their gardens to feed their families nourishing foods during those times of food shortages. To me, Kerr Home Canning Book is more a history lesson than a cookbook! Others agree. The Internet Archive (a non-profit) is building a digital library of Internet sites and other cultural artifacts in digital form. “Our mission is to provide Universal Access to All Knowledge.” On their site, I found that they have digitized a copy of the 1943 Kerr Home Canning Book. (And they also archived my own website for organic chemistry students at the University of Colorado, Boulder, beginning in 1998, in the Wayback Machine. I am humbled.)

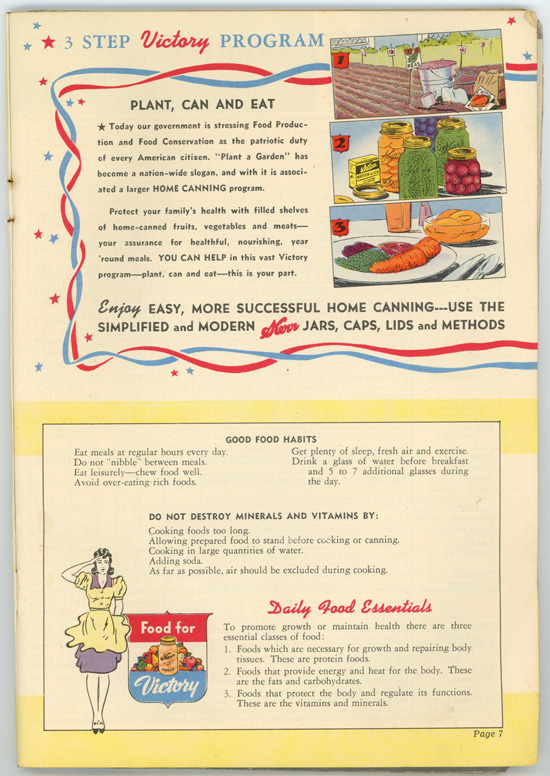
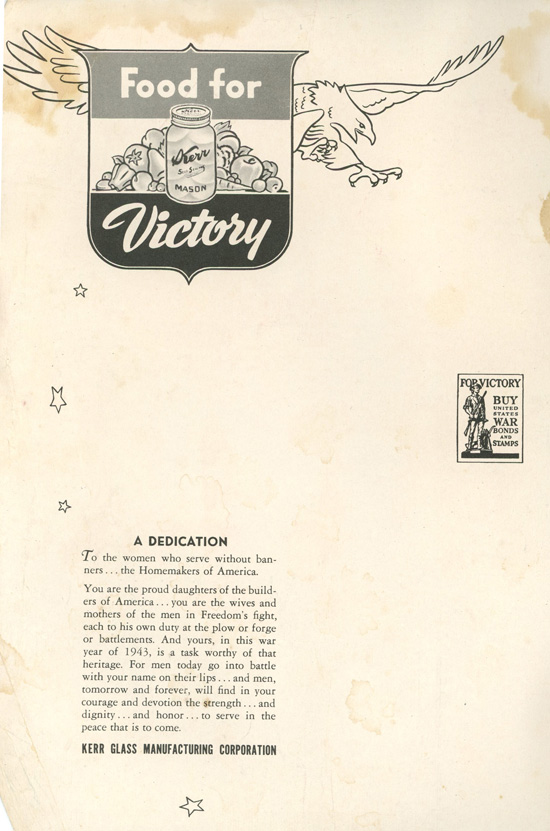
The inner cover is below. Note the “Food for Victory” slogan and the dedication to “the women who serve without banners . . . the Homemakers of America”.

Kerr Canning

Food for Victory refers to “victory” or “war” gardens: fruit and vegetable gardens planted in public parks and private homes during both world wars. According to Wikipedia, by May 1943, there were 18 million victory gardens in the United States. “Grow your own, can your own” was the slogan of these families tending victory gardens.

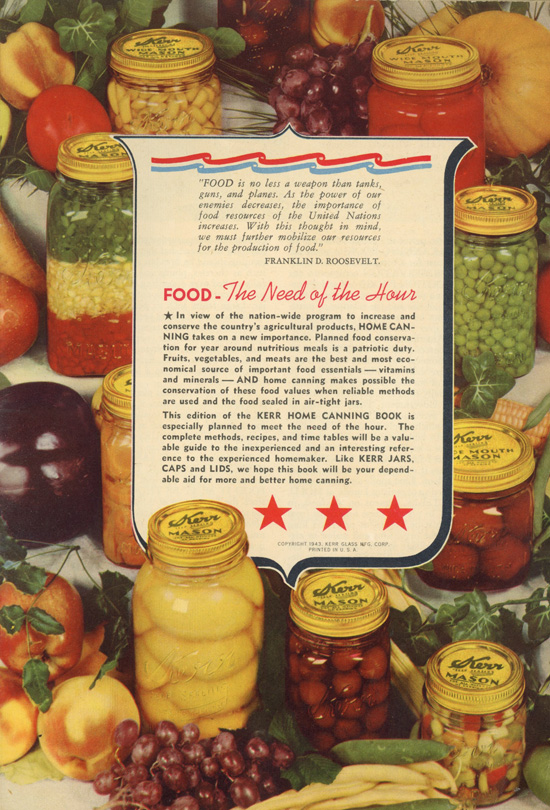
Kerr Home Canning Book has great color photos. Below is the title page. I enjoy the quote from Franklin D. Roosevelt, and “Food – The Need of the Hour”.

Kerr Canning

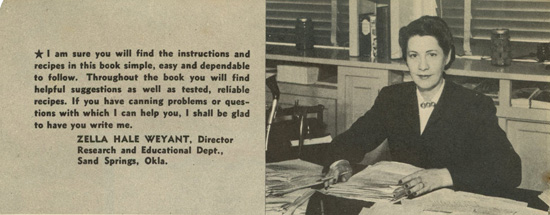
The introduction is written by Zella Hale Weyant, then the director of Kerr’s Research and Educational Deptartment, Sand Springs, Oklahoma. She invites readers to write her with any home canning questions:

Kerr Canning

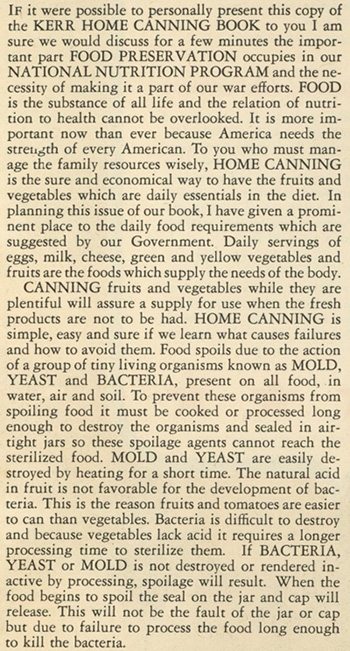
Her introduction begins:

Kerr CanningMore nostalgia:

Kerr Canning

Following the introduction are a few pages of how to put up foods using the open canning method (for fruits and pickles) and pressure cooker processing (for vegetables and meats). The instructions are clear and helpful. (But If I were to use pressure cooker processing today, I would use the instructions that would come with the equipment.) Oven processing is also described.

And now, the recipes! There are some treasures in the main content of this Kerr Home Canning Book.

Canned fruit recipes are first, using the open kettle or hot or cold pack canning methods. When summer and fall Colorado harvests treat me with quantities of peaches or apricots or strawberries, I make jam. Jam takes a lot of sugar. But this book points out that all fruit can be canned successfully without any sugar, as sugar is used only to sweeten the food and does not keep it from spoiling. This is an important fact, since sugar was one of the foods rationed in World War II. Fresh fruit is packed into sterilized jars and and a thin, medium, or heavy sugar syrup is added. Proportions of sugar and water these three types of syrups are given to help canners sweeten sparingly, and recipes for these syrups from white corn syrup or honey are included.

The second recipe section is for canned fruit juices. I found this interesting, because I’d never think of canning fruit juices myself! Most of the juices are canned in a boiling water bath. Some of the more interesting recipes are for mint julep juice, peach nectar, pear nectar, strawberry syrup, and grape juice lemonade.

“Nourishing Tasty Vegetables” and “Deliciously Satisfying Soups” recipes call for pressure cooker processing, or extremely long hot water bath processing. Here is a big reason why I have only rarely tried canning vegetables:

“Note: All vegetables (except tomatoes) and meats canned at home should be boiled in an open vessel 10 to 15 minutes before tasting or using.”

The reason is bacteria, yeast, or mold contamination. Botulism, for example. No thanks, I’ll trust the current food industry for my canned vegetables. But people with a good canning pressure cooker might enjoy the recipes in this section for home-canned broccoli, cauliflower, pimiento peppers, hominy, mushrooms, boston baked beans, and sauerkraut.

The section on jelly making begins with a discussion of pectin. Pectin, in combination with fruit acid and sugar, thickens or “jells” jams, jellies, and preserves. In my post on the Encyclopedia of Cookery, Vol. 9, I learned that pectin comes from the cell walls of citrus, apples, and sugar beets. Before pectin was sold commercially, home canners had to make their own. In the Kerr Home Canning Book, I learn that “the homemaker may extract the pectin from fruits that are known to contains it, such as apples, plums, and quinces, and feel quite confident that she can make jelly”.

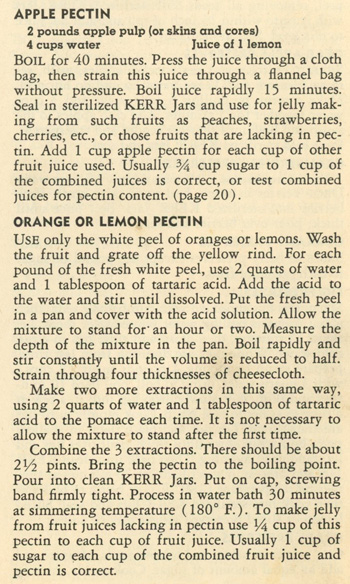
pectin

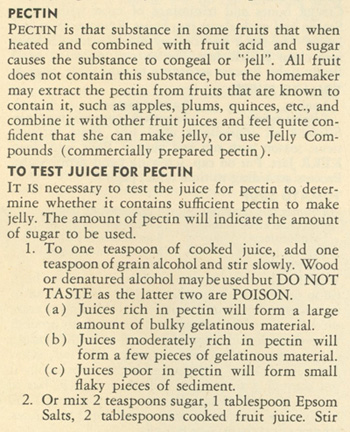
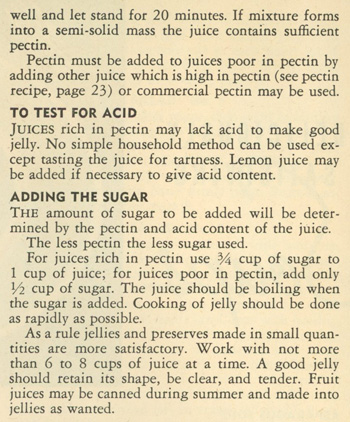
Many fruits – not just citrus and apples – have enough natural pectin and fruit acid to jell without adding pectin. The Kerr Home Canning Book gives instructions for testing if a fruit has enough of these substances:

pectinpectinIn the above excerpt, they do state that “commercial pectin” can be used, so apparently boxed or bottled pectin was available in 1943. Sure enough, Wikipedia states that pectin was commercially produced by the 1920s.
Jelly recipes include mint jelly, orange jelly, pineapple jelly, and rose geranium jelly. Preserves recipes include an interesting pumpkin preserves recipe. Jams are next – I make a lot of jams! I like the variety of recipes in this section, some unusual fruits, interesting mixtures of fruits, and a tomato jam. The recipe for peach jam directs the cook to cut up peaches, cook without the addition of water, measure the cooked peach pulp and for each cup of peaches add 1 cup of sugar, and finally cook until desired consistency. I commonly use the peach jam recipe that comes with the little packets of pectin: you prepare a specific volume of peaches, add a specific amount of sugar and lemon juice, and a packet of pectin. The recipe in this booklet is much more versatile – you can make just as much jam as you have fruit, and skip the pectin altogether.

Fruit butters and conserves are next. I have made fruit butters, namely, apple butter (and sometimes I vary the recipe by adding pears). Kerr Home Canning Book includes recipes for grape butter, peach butter from dried peaches, and tomato and apple butter. Conserves vary from jams in that they are a mixture of several fruits often combined with raisins and nut meats: cherry conserve contains raisins, peach and cantaloupe conserve includes walnuts, and grape gumbo includes grapes, oranges, and raisins.

Marmalades! Again, many possibilities, 18 in all. Pickles are next – someone wrote notes in the mustard pickle recipe, was it Ruth Vandenhoudt, or my grandmother? “Olive Oil Pickles” intrigue me, as well as Pickled Eggs, Pickled Onions, and Watermelon Pickles. Catsups, Chutneys, and Relishes include recipes for apple, crab apple, cranberry catsups, as well as the traditional tomato catsup.

The next section is for canning meat, poultry, and game. I’d never think of home canning these today. “Bunny Sausage” is made from rabbit meat, onions, and spices. Brains, liver, heart, and kidneys are also canned. Or, one can can chili con carne, stewed chicken, or meat stews. Mince Meat is a recipe I’ve run across before (Encyclopedia of Cookery, Vol. 7); mince pie used to be served at Thanksgiving or Christmas at our family gatherings. It’s made from chopped lean beef, suet, and a variety of fruits and spices. Pickled Pigs’ Feet! “Scald, scrape and clean the feet very thoroughly” it says. No thanks, I say!

A short section on canning fish and a section of “a bit of the unusual” like spaghetti sauce and hot tamales end the recipe sections of this booklet.

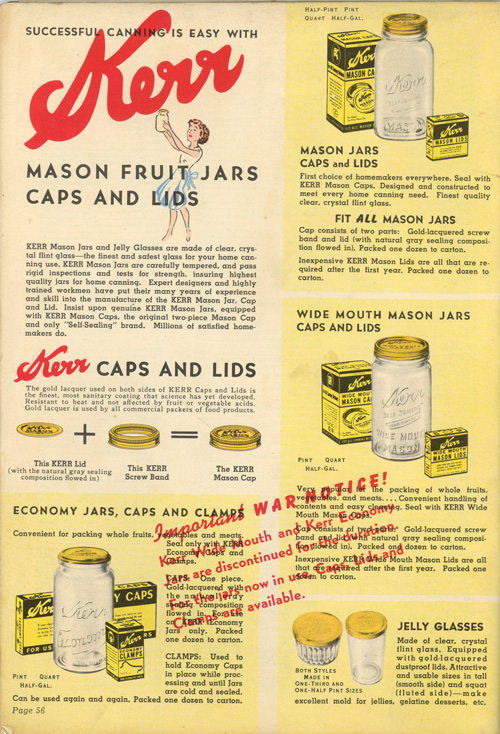
At the end of the book, there are 7 pages of questions and answers, and a comprehensive index. The final page is interesting, note the “Important War Notice!” on it:

Kerr nostalgia

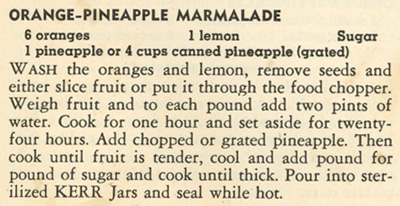
I decide to make Orange-Pineapple Marmalade for this blog.

Orange-Pineapple Marmalade recipe

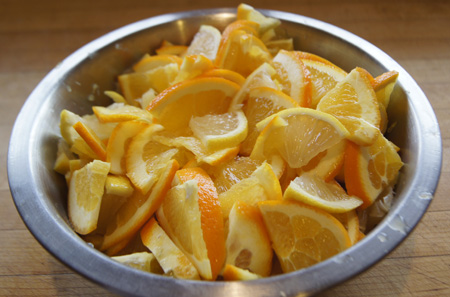
I like the way this recipe is written. You weigh the citrus fruits after they are cut, then add two pints of water per pound of fruit. So, it doesn’t matter how big your oranges and lemons are, because the volume is appropriately adjusted to the amount of water. The same is true for the sugar: weigh the cooked fruit mixture and add a pound of sugar for every pound of cooked fruit. This makes it really easy to make smaller or larger batches of the marmalade. I decide to start with 3 oranges (they are pretty big) and 1/2 of a lemon. Here are my sliced oranges and lemon:

oranges and lemons

They are so pretty! Here is how I made my Orange-Pineapple Marmalade.

Orange-Pineapple Marmalade
makes about 6 pints

  • 3 oranges, seeded, sliced thin or chopped
  • 1/2 lemon, seeded, sliced thin or chopped
  • 2 cups fresh pineapple, chopped in food processor with a few pulses
  • water
  • sugar

Weigh the sliced oranges and lemons, then add 2 pints (1 quart) of water for every pound of oranges/lemon, mixing them in a large (your largest!) pot. Mine weighed 2 pounds and 3 ounces, so I added 2 quarts plus 1 cup water. Bring the mixture to a boil, then simmer (sort of a “high” simmer) uncovered for an hour, stirring occasionally. Cover the pot and let it sit overnight.

Add the pineapple to the orange/lemon/water mixture and cook until the fruit is tender. I cooked about 20 minutes, mainly to boil off some of the liquid, since the fruit mixture will be cooked more after the sugar is added. I let it cool a bit, but not a lot, I simply carefully poured it into a tared metal bowl on my kitchen scale. I had 4 pounds and 12 ounces. So, I added 4 pounds 12 ounces of sugar.

Cook the mixture of fruit and sugar until thick. I cooked mine about 45 minutes at a hard boil using high heat (not my burners highest heat; about 7-8 on a scale of 1-9. I stirred it a lot to prevent it sticking to the bottom of the pan. At first it was obvious that a lot of water was boiling off; later it finally began thickening and foam rather than water bubbles formed on top. When I felt it was thick enough, I used an instant-read thermometer and it registered 212˚ F.

Stir and skim the hot marmalade for 5 minutes. Pour into freshly washed and hot-rinsed jars, top with a canning lid, and invert to complete the seal.

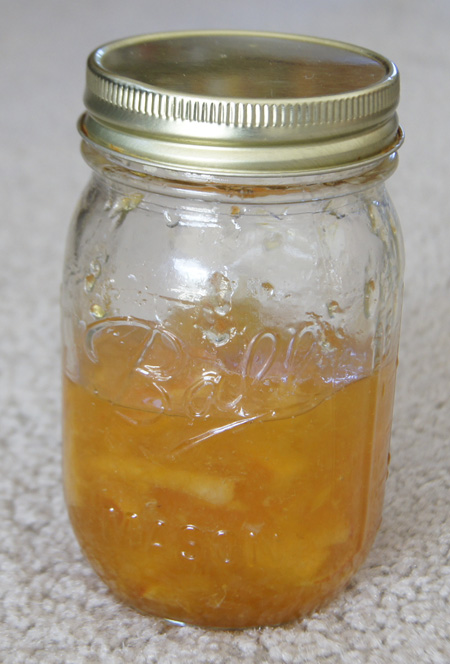
Orange-Pineapple Marmalade

This marmalade is excellent! It is a bit “sticky”, like it was cooked too long. Next time I would add about half the amount of water to boil the orange and lemon slices. And I might even use more pineapple. But for a first try, we sure are enjoying this batch of marmalade.

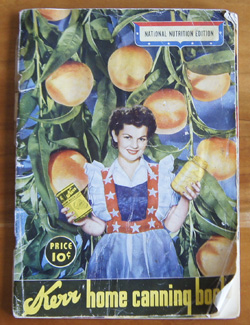
Here is a scan rather than a photo of the nostalgic cover.

Kerr Home Canning Book cover


250 Cookbooks: Philly Dip Party Handbook

Cookbook #225: Philly Dip Party Handbook, Philadelphia Cream Cheese, circa late 1950s.

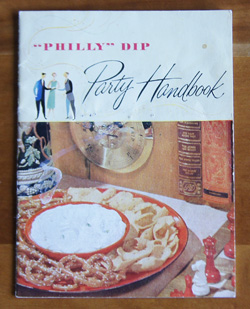
Philly Dip Party Handbook cookbookPhilly Dip Party Handbook is a paper booklet of cream cheese dip recipes. It’s only 4.5 x 6-inches and 20 pages long. Was it my mother’s? Grandmother’s? I am not sure, as there is no handwriting in this booklet. There is no publication date given, but from web searches, I learned that it was published in the 1950s or 1960s.
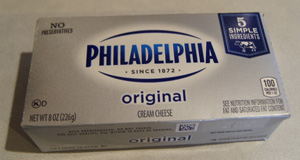
Each recipe includes Philadelphia Cream Cheese, “famous since 1880” according to the back cover. According to Wikipedia, cream cheese is made from a mixture of milk and cream. Bacteria is added so that the mixture coagulates, then it is heated to kill the bacteria. It is not “naturally matured”, and meant to be eaten fresh. The Wikipedia articls states that it is easy to make at home, but I don’t know anybody who does that! Commercial cream cheese has stablizers added, and sure enough, the package I bought has carob bean gum.

I love cream cheese, but use it sparingly because it is high in calories, 90% of which are fat calories. I haven’t made a dip from cream cheese for ages! Since all of the recipes in this book include cream cheese as the main ingredient, I am just going to have to bite the bullet and make a rich dip. Most of the recipes include a little cream to make the cream cheese more spreadable. Most recipes also include Worcestershire sauce too, and from there, a variety of seasonings and sometimes a protein food (clams, crab, ham).

When I picked up this book to start this blog post, I figured I’d recycle it. But I explored online, and found that it is quite popular. It is for sale on many websites, for example, the etsy site. The booklet goes for as little as 4 dollars and as much as 20 dollars. I guess a lot of people like to collect vintage cookbooks! Some artistic types may also use them for art projects.

Here is a fun blog post about the Philly Dip Party Handbook: Steve Bates in “and everything else too”. He scanned in all 20 pages of the booklet. Steve seems to really enjoy cream cheese dips! A quote: “I’m pretty much set on anything that includes Worcestershire sauce in the ingredients, and since that’s nearly every recipe here, it’s gonna be a tough decision to make cuz OMG they all look amazing!”

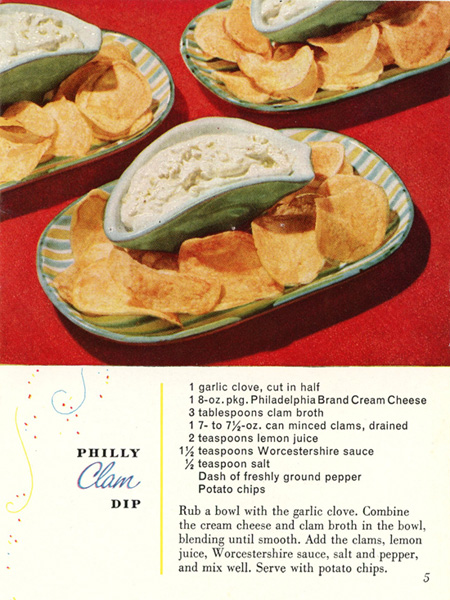
I decide to make Philly Clam Dip for this blog. 

Look at the little clam-shaped dish they put the dip in!

I bought Philadelphia brand cream cheese for my dip. It’s in the same grey and blue package as it was in the 1950s.

Piladelphia Cream Cheese packageI remember with fondness clam dips from my childhood. Often my father would make it, and he always claimed his was clam dip was the “best clam dip ever”. He might have added sour cream to his version. As for me, I’ll make it just like the recipe in the Philly Dip Party Handbook.
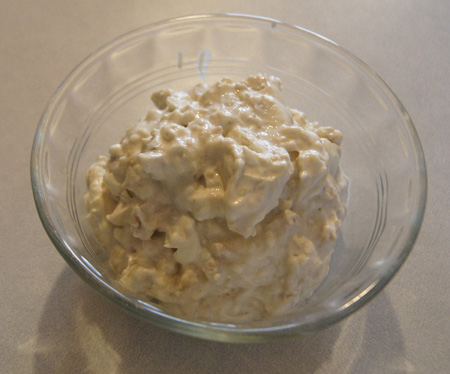
Philly Clam Dip

  • 1 garlic clove, cut in half
  • 1 8-ounce package cream cheese
  • 1 6.5 ounce ounce can minced clams (drain and reserve the liquid)
  • 3 tablespoons clam broth (drained from the clams)
  • 2 teaspoons lemon juice
  • 1 1/2 teaspoons Worcestershire sauce
  • salt and freshly ground pepper to taste

Rub a bowl with the garlic clove. Combine the cream cheese and clam broth in the bowl, blending until smooth. Add the clams, lemon juice. Worcestershire sauce, and salt and pepper, and mix well.

Philly Clam Dip

Yum, this was good! And rich. We each took a taste but will save the rest to share with family on Thanksgiving.

The can of minced clams that I had in my cupboard was only 6.5 ounces. I put in most but not all of the package of cream cheese, because I wanted it clam-ier. I had a bottle of clam broth, and I compared it to the clam juice from the can – the clam juice from the can had a lot more flavor. It was salty, though, so I tasted the dip and decided not to add more salt. I have to admit that I didn’t really measure the lemon juice or Worcestershire sauce, I just guessed at the amounts, tasted the dip and added a bit more of each.

A rich, classic clam dip to enjoy!

250 Cookbooks: The Chinese Cookbook

Cookbook #224: The Chinese Cookbook, Craig Claiborne and Virginia Lee, J. B. Lippincott Company, Philadelphia and New York, 1972.

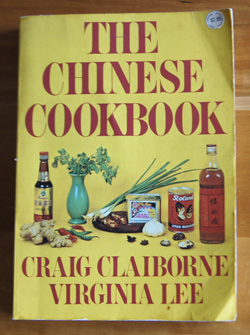
The Chinese CookbookThe Chinese Cookbook is one of my favorite cookbooks. I always keep it in my kitchen for ready reference!
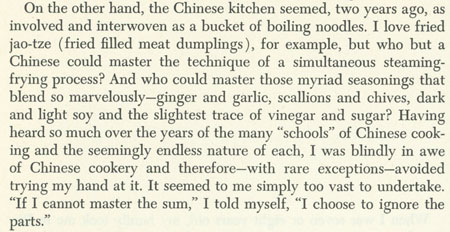
I turn first to Craig Claiborne’s introduction. He writes “I was trained in depth in French cookery in a Swiss hotel school, and it appealed to me from the beginning as a form of cookery that could be, let us say, wholly embraced . . . it seems so logical.” But Chinese cookery? He writes:

page xivClaiborne goes on to talk about his fourteen year stint as the food news editor and restaurant critic for the New York Times, saying “I was tired. I neeeded rest and a respite from cooking. And then I met Virginia Lee.”
Virginia Lee was a renowned Chinese cook who came to the US in 1967. Claiborne interviewed her for an article, and ended up applying for her cooking class. She only taught ten students at a time! But she accepted Claiborne, and eventually they wrote this cookbook together.

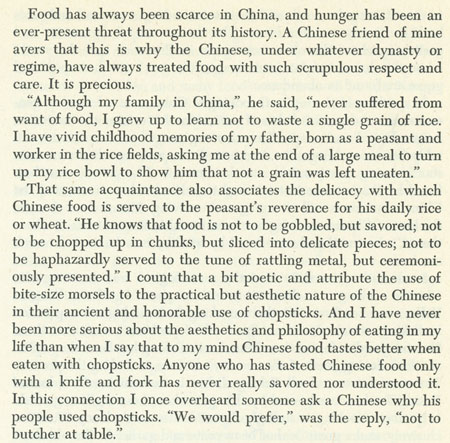
I want to share another excerpt from the introduction, because it says so much about Chinese cooking.

page xviiI learned how to make most of my current repertoire of Chinese dishes from The Chinese Cookbook. The recipes are easy to follow, even though the ingredient lists might look daunting with exotic ingredients. For instance, Hot and Sour Soup:
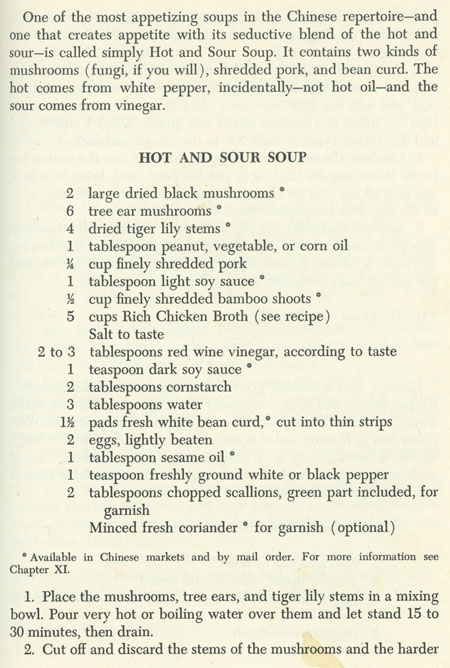
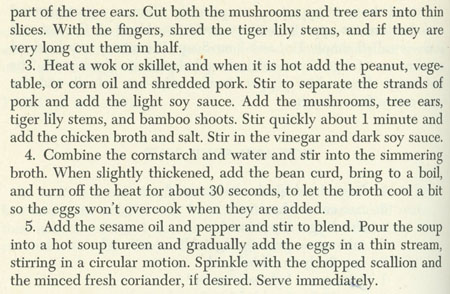
Hot and Sour SoupHot and Sour SoupI’ve made this Hot and Sour Soup many times. Dried black mushrooms, tree ear mushrooms, and dried tiger lily stems! Ages ago, I had to go all the way to Denver to a Chinese market to find all of these ingredients. Nowadays I go to the Asian Seafood Market in Boulder. Sometimes I leave out these exotic ingredients, if I have none on hand, or I use fresh shitakes and skip the tree ear and black mushrooms tiger lilies. Not as much fun, but still a good soup.
Claiborne mentioned Fried Jao-Tze in the introduction (excerpt at the top of this page). Jao-tze (or pot stickers) are little round wonton-type skins, filled with pork and shrimp and vegetables, that are first fried to get the bottoms brown, and then doused with a bit of water and covered and steamed until done. They are served with a dipping sauce made from soy sauce, vinegar, sesame oil, ginger, garlic, sugar, and hot oil. Years ago, before I had ever heard of Jao-Tze from other than his cookbook, one adventurous day I decided to try these. And they were amazing! It was only later that I saw Jao-Tze pot stickers appearing at restaurants, at University event buffets, and even in the frozen food section of markets. I have made Claiborne and Lee’s recipe at home many, many times and they are much better than any I have had out.

Another dumpling I learned about in this cookbook are “Shiu May”. I use square wonton skins, fill with shrimp and pork and vegetables, then steam them. The Chinese Cookbook’s Kung Pao Chicken is extremely tasty and extremely easy. It calls for raw, shelled fresh unsalted peanuts, and I find them at the Asian Seafood Market. It also calls for bean sauce, hoi sin sauce, and chili paste – these ingredients are usually in supermarkets, and they have a long shelf life once opened, kind of like ketchup. If you put enough dried hot peppers in it, your Kung Pao Chicken will please a guest who really likes hot food.

I did a google search to see what others thought of The Chinese Cookbook. A couple bloggers (Undercover Caterer and Collectible Cooking) raved about “The Best Fried Rice”, so I looked it up in my copy of the book. “This fried rice is a bit of a masterpiece” state Craig Claiborne and Virginia Lee. Whoa. I am going to have to try this masterpiece soon.

A couple other recipes I’d like to try are “Beef with Oyster Sauce” and “Beef with Peas and Peanuts”.

Note: I covered another Chinese cookbook that I like in this blog: The Cooking of China, by Emily Hahn and the Editors of Time-Life Books. I put lots of photos of ingredients and one photo of my bamboo steamer in that post.

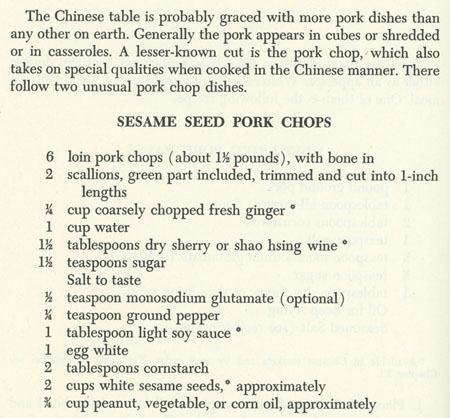
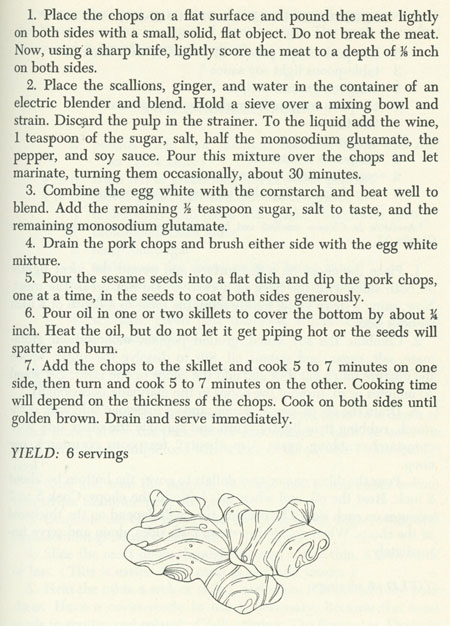
For this blog, I’ll make the Sesame Seed Pork Chops.

Sesame Seed Pork Chops recipeSesame Seed Pork Chops recipeI made these pretty much as per the above recipe, except I left out the monosodium glutamate, and I halved the recipe for two people, but did not halve the amount of egg white/cornstarch mixture. I used bone-in pork sirloin chops, but actually, next time I’d prefer to use boneless pork sirloin.
Sesame Seed Pork Chops
serves 2 as a main entre

  • 2 pork chops, bone-in or boneless (about 12 ounces if boneless)
  • 1 green onion, chopped roughly
  • 2 tablespoons coarsely chopped fresh ginger
  • 1/2 cup water
  • 1 tablespoon sherry or shao hsing wine
  • 1 teaspoon sugar
  • 2 teaspoons soy sauce
  • salt and pepper to taste
  • 1 egg white
  • 2 tablespoons cornstarch
  • 1 cup sesame seeds (about)
  • vegetable oil for frying

Pound the pork chops lightly, then make cross hatches on both sides, using a sharp knife and cutting down to about 1/8 inch deep. Set aside.

Place the green onion, ginger, and water in a blender (I used a mini-processor). Blend well. Pour through a strainer into a bowl; discard the pulp. Add the sherry or shao hsing wine, sugar, soy sauce, and salt and pepper. Pour this mixture over the prepared pork chops in a flat dish or bowl. Marinate at least 30 minutes, turning occasionally.

Combine the egg white with the cornstarch and beat well to blend. Add a bit of sugar (about 1/4 teaspoon) and a little salt.

Put the sesame seeds into a flat dish. Pour oil into a skillet to cover the bottom by about 1/4 inch, then heat, but do not let it get “piping hot or the seeds will spatter and burn”.

Drain the marinade off the porkchops. Put them in the egg white mixture to coat both sides, then dip them in the sesame seeds to coat both sides generously. Put the coated chops in the heated skillet and cook 5-7 minutes (or until golden brown) on one side, then turn and cook 5-7 minutes on the other side. Cooking time will depend on the thickness of the chops.

Serve immediately.

These turned out well. I especially liked taking the green onion-ginger mixture out of the blender – it was green and smelled wonderfully of ginger. The sesame seed layer on the pork chops tended to lift off when cutting them, but it was delicious. I think that boneless pork chops would work better, because they would cut easier into pieces, although the bone-in ones were particularly juicy.

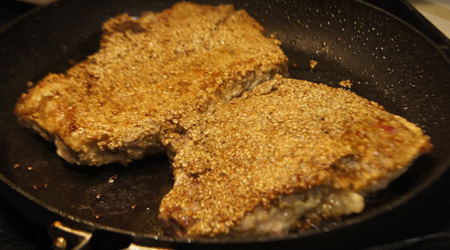
Here are my cooked sesame seed pork chops:

Sesame Seed Pork ChopsTo serve, I sliced the cooked chops into large chunks. It was messy because I had to avoid the bone. But, the pork was very, very juicy and flavorful. I served with fried rice and snow peas and fresh shitakis.
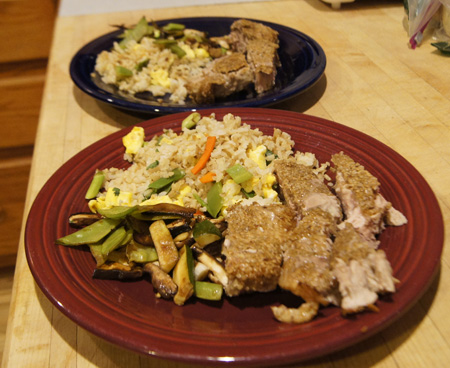
Delicious!

Sesame Seed Pork Chops plated

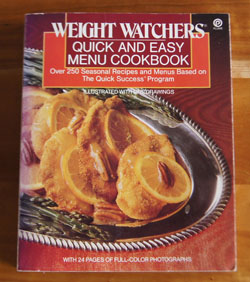
250 Cookbooks: Weight Watchers Quick and Easy Menu Cookbook

Cookbook #223: Weight Watchers Quick and Easy Menu Cookbook, Weight Watchers International, Nal Penguin, Inc., NY, 198.

Weight Watchers Quick and Easy CookbookThis is the second Weight Watchers book that I have covered in this blog, the other was Weight Watchers 365-Day Menu Cookbook. In general, I like Weight Watchers. My best word is “sensible” for the eating plans. Weight Watchers’ plans of the 1980s espoused foods from the entire food pyramid, and taught dieters to watch their portions, learn the foods that have the most calories, and learn the foods that have the most nutrients. They help dieters learn how to eat and enjoy a balanced diet – a “normal” diet, not a “fad” diet – and this knowledge should help them beyond the initial strict dieting phase.
I found Weight Watchers 365-Day Menu Cookbook a bit “weird” – read my post to find out why.

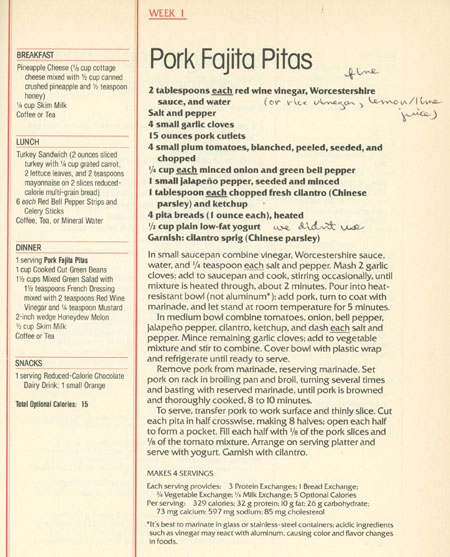
This Weight Watchers cookbook looks more promising. I immediately find a couple recipes I could cook for this blog. It is nicely laid out, with each page being a meal plan for one day (breakfast, lunch dinner, snacks) tucked in a column to the left, and a full recipe for one of those meal plan items on the right. As I scan the recipes, I realize that ingredients are pretty much what I already have in my pantry, so no special trips to the market to find an odd ingredient are needed. Below is a recipe I tried. It illustrated how the book is laid out.

Pork Fajita Pitas recipe

I like the large variety of fresh vegetables in the recipes. The chapters are organized by month of the year, so that you are able to use the fresh foods most abundant at the moment in the market. There are several full page color photos scattered throughout the book. And I like the way each recipe lists calories and exchanges (bread, milk, vegetable, protein, fat), kind of like the diabetic diet book I covered, The Calculating Cook.

One of the recipes I like is the “Swiss Chard Gnocchi”. It is reminescent of the dumplings of my recent blog post, the Cooking of Germany, but the Weight Watchers version incorporates a fresh vegetable (swiss chard) for a less-calorie higher-nutrient version of a dumpling. “Greek Vegetarian Pitas” include cucumber, bell pepper, fresh parsley, garbanzo beans, tahini, yogurt, mint, and feta cheese. Several recipes include kale and fennel. Muffins have raisins and freshly grated carrot. “Capered Turkey Amandine” calls for almonds, capers, and parsley. I’d like to try the “Apple Crisp with Graham Crackers”, since I am always looking for low calorie desserts, and I have lots of graham crackers at the moment, and have never thought of putting graham crackers on an apple crisp.

I like this too: almost all the main dish recipes are written for two people. So convenient for this retired couple.

I do note that most recipes lower the calorie content not only by portion size, but by including less fat. For instance, when I compare my own muffin recipe with the muffin recipes in Weight Watchers Quick and Easy Menu Cookbook, I find mine have more fat and less sugar for the same total calorie amount. This is so very common in the low-fat diet trend of the late twentieth century. (The Big Fat Surprise kind of turned my own ideas about fats entirely around.)

I marked one recipe as tried, the “Pork Fajita Pitas”.

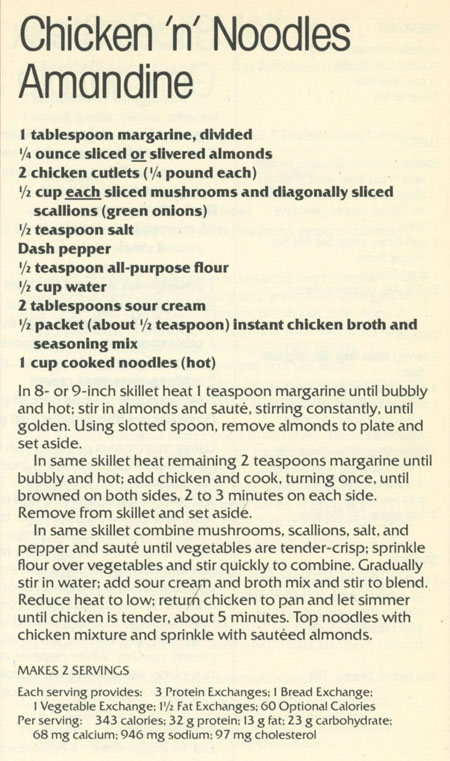
I like this cook book well enough to keep it. For this blog, I’ll make the “Chicken ‘n’ Noodles Amandine”.

Chicken Noodles Amandine recipe

As I look over the recipe ingredients, I recall this about Weight Watcher recipes: they can be a bit nutty about the amounts of each ingredient. Of course, they are listing nutrient values per recipe, so that will only work if the cook carefully measures everything. For example, the directions say to “divide a tablespoon of margarine”, using 1 teaspoon for toasting the almonds and two teaspoons for frying the chicken. “1/4 ounce” of almonds is about a tablespoon (I weighed them and then volume-measured them).”1/2 teaspoon flour” is not going to thicken the sauce, in my opinion, and 1/2 teaspoon of flour only has 5 calories. So I’ll splurge and use a tablespoon, for a huge 37 calories. “1/2 packet” of instant chicken broth and seasoning mix? I don’t have that, so I’ll just use salt and pepper. I am to use “1 cup of cooked noodles”. (Who likes to measure cooked noodles anyway?) That is not very helpful, what I need to know is how many dry noodles to cook. From references, I find that:

  • 1 cup of cooked noodles has 210 calories
  • 1 ounce of dry pasta has 100 calories

Thus, I would weigh out 2 ounces of dry noodles for about 200 calories. I know how much pasta we like: in general, I weigh out 3-4 ounces of dry pastas like spaghetti and penne for the two of us.

I used one big boneless chicken breast, about 12 ounces, and cut it in two horizontally, and pounded it a tiny bit to flatten it. Two people can be a guy and a girl, so sometimes portion sizes have to be nudged.

Below is my version of the recipe. It may have more calories than the printed version.

Chicken Noodles Amandine
serves 2

  • 1 tablespoon sliced almonds
  • boneless chicken breast, 8-12 ounces (use 2 chicken cutlets, or slice a whole boneless chicken breast into two pieces)
  • 1/2 cup sliced mushrooms
  • 1/2 cup diagonally sliced green onions (I used green onions and some leek too)
  • salt and pepper
  • 1 tablespoon butter
  • 1 tablespoon flour
  • 1/2 cup water or chicken stock
  • 2 tablespoons sour cream (or more, if you want; I actually used half yogurt and half sour cream)
  • salt and pepper
  • cooked noodles (cook 3 ounces dry pasta)

Toast the almonds in a dry, non-stick pan until golden. Set aside.

Saute the chicken breasts in a skillet in a bit of hot olive oil. When both sides of the chicken are browned (about 3 minutes per side), remove them from the skillet and set aside.

In the same skillet, melt the tablespoon of butter. Saute the mushrooms and green onions until tender-crisp, then sprinkle the flour over them and stir. Gradually stir in the water (or stock). Stir in the sour cream and salt and pepper to taste. Turn the heat to low, and add back the chicken. Simmer about 5-10 minutes, until all is hot. Serve over noodles and sprinkle with the toasted almonds.

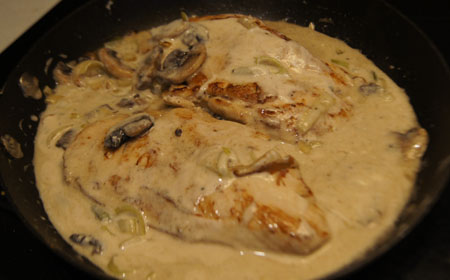
Here are the chicken breasts in the pan, ready to be served:

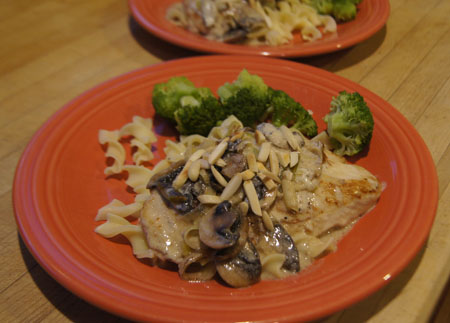
cooking the chickenAnd our plated meal:

Chicken Noodles Amandine

These were tasty and very easy to make. The sauce was a bit thin for our tastes; next time I would add more than a tablespoon of flour. But all-in-all, a success!