250 Cookbooks: Woman’s Day Encyclopedia of Cookery, Volume 5

Cookbook #104: Woman’s Day Encyclopedia of Cookery, Vol. 5, Fin-Gum. Woman’s Day, Fawcett Publications, NY, 1966.
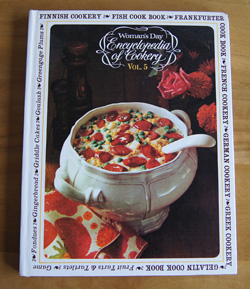
Encyclopedia of Cookery Volume 5This is the fifth in a series of 12 food encyclopedia volumes. I discussed the first four volumes here: Volume 1, Volume 2,  Volume 3, and Volume 4.

“Finland is a land where the seasons and seasonal foods are savored. The winter is long, dark, and quiet, and people stay at home, with good music, and good books. . . . Finnish cookery is Scandinavian, but simpler and more austere.”

So begins Volume 5 of the Woman’s Day Encyclopedia of Cookery. Finnish cookery is followed by a complete section on fish, which includes great photos, a fish cook book, and forty fish sauces. James Beard contributed an article to this useful fish reference. Next comes flageolet (a small green bean), flake (a small, flat, thin loose piece of food which looks like a scale”), flan, flapjack, florentine (“a cooking method which uses spinach as its base), fluke (a fish), and flummery (a dessert). Fondue! Fondues are fun. They were very popular in the seventies and eighties, and we had beef fondue just a couple weeks ago.

Forks? In the 11th century, aristocrats used the fork more as a lark than as a method of serious eating. Frankfurters? An 8-page cookbook, including a photo of frankfurters swimming in a corn-cream sauce. The “Freeze” section includes basic rules for successful home freezing.

French cookery begins with a cute illustration and an article by James Beard. Fritters, frog’s legs (“if it is necessary to dress them, cut off the hind legs close to the body and wash them well in cold water – remove feet”). Fruits, including a good section on fruit tarts. Fudge, gallantine (boned cooked meat covered with aspic, as in “gallantine of eel”), game (bear chops, roast haunch of beaver, roast coot, Maryland muskrat, woodchuck in cream). Garnishes, German cookery, ginger, ginger beer, goulash, Greek cookery (especially, baklava), greens (kale is listed as a green to cook), guinea fowl (“the habits of guinea fowl are not always admirable, they are gregarious and polygamous, they make a lot of noise and lay their eggs in a casual and haphazard manner on the ground, they resist regimentation”), and lastly, gumdrop.

What to make for this blog? Hmmm. Under German cookery, my eyes fall on “kuchen”. Oh, that’s it! The word “kuchen” is a happy one for me. I always think first of a creamy and sweet noodle kuchen, full of eggs and cinnamon. In college a Jewish friend brought this kuchen to a party. After all these years, I still remember it with longing. (Today I can find sweet noodle kuchen recipes online, and yes, they are a traditional Jewish dish.)

The kuchen in the Encyclopedia of Cookery is not made with noodles, but I am trusting my favor with the word kuchen to draw me to a good recipe. According to this encyclopedia, kuchen means “cake” in German, and to “millions of Americans, kuchen, or coffeecake, is the basis for a typical Sunday morning breakfast. Kuchen dough is not too sweet or rich; it is rather the foil for luscious toppings.”

Here is the recipe from the book:
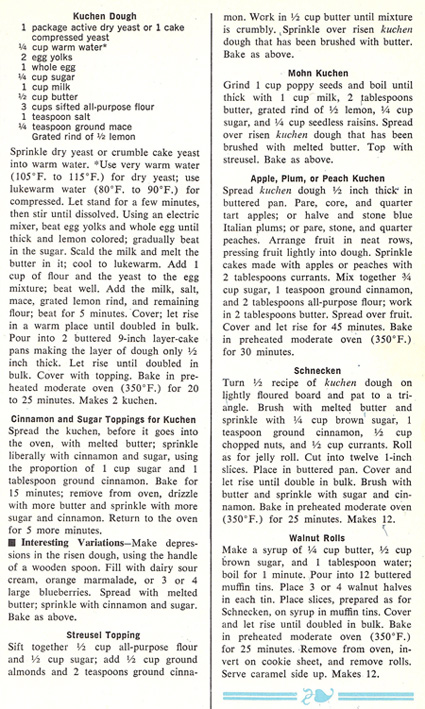
Kuchen RecipeThis kuchen dough recipe has eggs and butter, but not a whole lot of sugar. I agree with the Encyclopedia: it is neither too sweet nor rich.

I decide to cut the recipe in half, and I choose the apple topping variation. Then as I made the dough, I totally goofed. I read “yeast dough” and got it in my head that I would make this in my breadmaker. I had already thrown all the dough ingredients into my breadmaker before I realized my mistake. The dough was thin! Oops. I was supposed to scald the milk and use a mixer. What the heck, I’ll go for it, and see if it works. My breadmaker has a great dough cycle where it heats all the ingredients before beginning the kneading and rising cycles. Should work.

Apple Kuchen Coffeecake
makes one 9-inch cake

  • 5/8 cup milk
  • 1/4 cup melted butter
  • 1 egg yolk
  • 1/2 egg (I whisked one egg in a glass measuring cup and used half of it)
  • 2 tablespoons sugar
  • 1/2 teaspoon salt
  • 1 1/2 cups all purpose flour
  • a pinch of mace or cinnamon
  • grated rind of 1/4 lemon (approximate)
  • 1 1/2 teaspoons yeast

Add all of the ingredients to the bowl of a breadmaker. Set the cycle to “dough” with “pre-heat” and “rise”. This dough is runny: it will not form a big ball of dough.

(Non-breadmaker instructions: Heat the milk and cold butter until the butter melts, cool to lukewarm. Pour into a mixer bowl and add the rest of the ingredients. Beat for 5 minutes. Cover and let rise in a warm place for about an hour.)

Pour the dough into a buttered 9-inch cake pan. Let rise for about 30-45 minutes. (It should “double in bulk” but this is kind of hard to tell.)

Top with the topping:

  • 1 apple, peeled and thinly sliced
  • 3/8 cup sugar
  • 1 tablespoon flour
  • 1 teaspoon cinnamon
  • 1 tablespoon butter

Arrange the apple slices neatly on top of the risen dough.  Mix together the sugar, flour, and cinnamon and spread over the fruit.

Bake at 350˚ for 35 minutes.

Here is my kuchen after the second rising step, just before I put it in the oven:
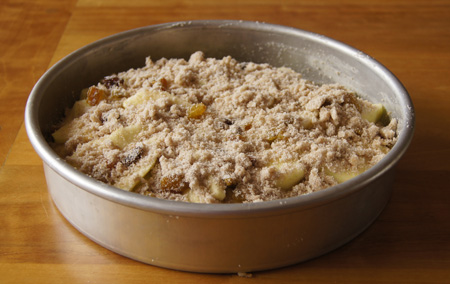
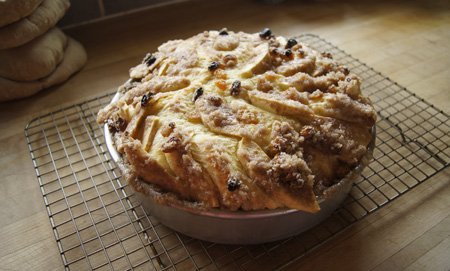
kuchen unbakedAnd here it is, hot out of the oven:

Apple KuchenThis was delicious! It was good as-is, but if you like more apples on top, go for it. The original recipe says to leave the apples in quarter-apple chunks; this might be good too.

I took the above photo as soon as the kuchen came out of the oven. The real story is that as it cooled, it fell. And the falling made it even better: it had a creamy, eggy feel and sweet spicy flavor, reminding me of that noodle kuchen I had back in college.

Yum.

250 Cookbooks: Creme de Colorado Cookbook

Cookbook #103: Crème de Colorado Cookbook, The Junior League of Denver, 1987.

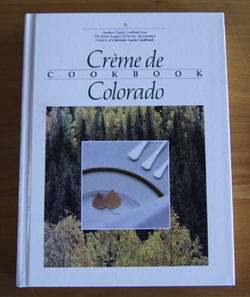
Creme de Colorado CBThis is one of my favorite cookbooks! I store it in my kitchen cabinet with other cookbooks that I use a lot (like my Joy of Cooking). I rely on it for the Denver Cheesecake that I make at Christmas. I love the Creamy Banana Coffee Cake, with bananas, cream cheese, spices, and pecans, baked in a bundt pan. It’s my reference for baklava. I have notes and scrap papers throughout this cookbook.

This cookbook is produced by the Junior League of Denver. To date, they have produced five Colorado cookbooks, and the Crème de Colorado is the second in the series. Beautiful color photos of Colorado landscapes grace the introductory pages of this full-sized hardcover cookbook. John Fielder is the photographer. You can check out his photography on his web page. He used to produce yearly calendars of Rocky Mountain National Park – I bought them every year – but those have been discontinued.

The Crème de Colorado Cookbook is a from-scratch cookbook, with a wide variety of good recipes. Many recipes tend to be high in calories. Butter, cream, and cheese are common ingredients. I use this cookbook more at holiday times than in every day cooking. But looking at the recipes today, I find many that I want to try that either are calorie-appropriate or could easily be made so with a few changes.

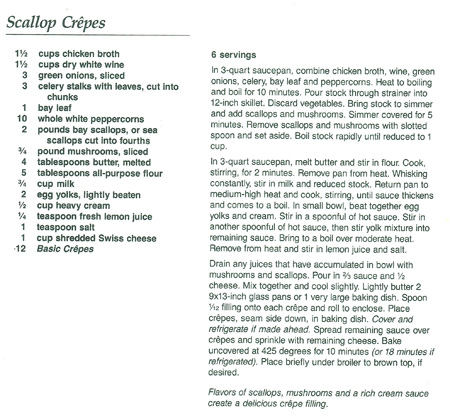
I decide to make “Scallop Crepes” for this blog. This recipe intrigues me because of the way the scallops are prepared. Briefly, the scallops are put in a hot stock for a few minutes and then removed. Thus, the scallops do not get overcooked but all of their juices are released into the stock. I have this big bag of scallops in the freezer that I bought on sale, and I have tried cooking scallops from this bag without success: I fried them, and they leaked liquid into the pan and got very tough. I am curious to try the method in Crème de Colorado to see if I can preserve the texture (and flavor) of these scallops.

Scallop Crepes recipeThe above recipe calls for whipping cream, and I’ll substitute it with milk to save calories. I want to serve these as small, appetizer-sized crepes, so I will make the crepes smaller. I will halve all amounts to serve three instead of six. Other than that, I plan to pretty much follow this recipe.

Scallop Crepes
serves 3 as a main dish, 4-6 as an appetizer

Crepes

  • 1/2 cup water
  • 1/2 cup milk
  • 2 eggs
  • 1/4 teaspoon salt
  • 1 cup flour
  • 2 tablespoons melted butter (optional, leave out for fewer calories)

Combine all crepe ingredients in a blender and mix well. Let stand an hour or so. Make 3-inch crepes in your favorite way. My way is this: I have a dedicated (old) crepe pan, I heat it to very hot, spray with non-stick spray, and immediately pour a small amount of batter onto the pan and roll the pan to distribute the batter. I cook both sides of the crepe about 15 seconds.) Crepes can be made ahead and extras can be stored in the refrigerator for a later dinner (or breakfast!).

Stock, scallops, and mushrooms

  • 3/4 cup chicken stock
  • 3/4 cup white wine
  • 2 green onions, cut roughly
  • 1 or 2 stalks celery, cut roughly
  • 1 bay leaf
  • whole peppercorns (about 5)
  • 1 pound bay scallops
  • 1/3 pound mushrooms, sliced

Combine the chicken stock, wine, green onions, celery, bay leaf, and peppercorns and heat to boiling. Simmer for 10-20 minutes, then pour through a strainer to remove the vegetables. Put the stock back into the pan and add the scallops and mushrooms and simmer 5 minutes (no longer!). Remove the scallops and mushrooms, either by straining or using a slotted spoon. Reserve the scallops and mushrooms. Boil the stock to reduce the volume to about 1/2 cup.

The sauce and filling

  • 2 tablespoons melted butter
  • 2 1/2 tablespoons flour
  • 5/8 cup milk (1/2 cup plus 1 tablespoon)
  • 1/2 cup reduced stock from the previous step
  • 1 egg yolk, lightly beaten
  • 1 teaspoon fresh lemon juice
  • salt to taste (about 1/4 teaspoon)
  • 1/2 cup shredded Swiss cheese

Melt the butter and stir in the flour. Stir for a minute or two, then stir in milk and reduced stock, cooking until bubbly. Keep stirring until smooth and a little thick.

Beat the egg yolk with a couple tablespoons of the milk, then beat in a spoonful of the hot sauce. Stir the egg yolk mixture into the hot sauce and heat until bubbly and thick. Remove from heat. Add lemon juice and salt.

Add a little over half of the sauce to the cooked scallops and mushrooms, along with half of the Swiss cheese. Gently mix, then fill the crepes and roll to enclose. Place the crepes in a lightly buttered or non-stick-sprayed pan. Cover with the remaining sauce and sprinkle with the remaining cheese. Bake uncovered at 425˚ for 10 minutes.

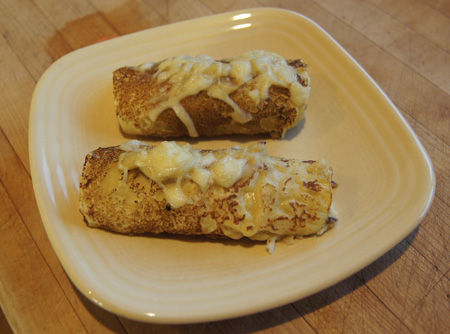
These were good! I added a bit more lemon juice to the sauce (and incorporated that change in my version of the recipe, above). I especially like these as appetizers, rather than a full meal, but that’s just my preference.

Scallop Crepes

250 Cookbooks: All-Time Favorite Beef Recipes

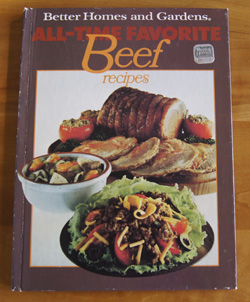
Cookbook #102: All-Time Favorite Beef Recipes, Better Homes and Gardens, Meredith Corporation, Des Moines, Iowa, 1977 (18th printing, 1983).

AllTimeFavoriteBeefRecCBMore ways to cook beef! Guess you know that I am not a vegetarian. I acquired this book in the mid-eighties, and it is a good example of American cookbooks of that decade. The contents include recipes for roast beef, pot roasts, steaks (expensive and less-expensive), meat loaves and meatballs, hamburger recipes, soups and stews, leftover roast beef, and variety meats.

I find it refreshing to open this (dated) cookbook and not be barraged with brand-name ingredients, nor to see packaged mixes as ingredients. Plain fare mostly, not terribly inspiring but some good comfort food recipes.

Paging through this book, I re-discover a recipe I’ve always liked for “Italian Bracioli” – round steak stuffed with onions and rolled up and baked in a tomato sauce. When I was a working mom, I relied on this type of recipe, since I could cook it on a Sunday and heat it up on a weekday. I also tried (and liked) the Spinach-Stuffed Flank Steak and the Oven Swiss Steak. So, I’ll keep this cookbook.

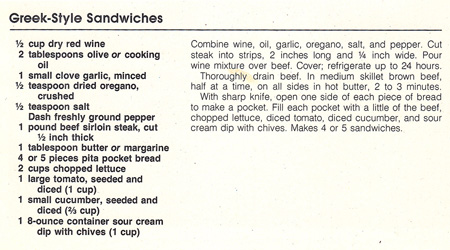
I decide to make “Greek-Style Sandwiches” for this blog. It calls for pita bread, which means I have an excuse to go to the Mediterranean Market on Bluff in Boulder, always an interesting trip (I love exploring shelves of foreign cuisine products).

Greek-Style SandwichesThe above recipe is (in my opinion) an “Americanization” of Greek cooking, so I am calling my version “Beef Steak Pitas”. Most Mediterranean cooking calls for lamb, fish, or chicken rather than beef, and yogurt instead of the sour cream dip with chives. I kept the beef, but I substituted plain yogurt for the sour cream dip, added green onions, and added feta cheese.

Pita breads vary widely. I bought Greek pitas from the Mediterranean store: they were huge and tasty but they did not have pockets. We found we could fold them carefully over the filling like a taco, but it was almost easier to eat them with a fork. Next time I’ll look for pita breads that have pockets. Or, make my own.

Beef Steak Pitas
serves 3-4

  • 1 pound sirloin steak
  • 1/2 cup red wine
  • 2 tablespoons olive oil
  • 1/2 teaspoon dry oregano (or use 1 tablespoon fresh oregano)
  • salt and pepper to taste
  • 1 1/2 cups chopped lettuce
  • 1 chopped tomato
  • 2 green onions, chopped
  • 1/2 of a cucumber, peeled, seeded, and diced
  • 1/2 cup crumbled feta cheese
  • 1/2 cup plain yogurt
  • pita breads

Slice the steak crosswise into thin strips, and then shorten the strips to about 1-inch pieces. Combine the wine, olive oil, oregano, and salt and pepper; add the meat, cover, and marinade up to 24 hours.

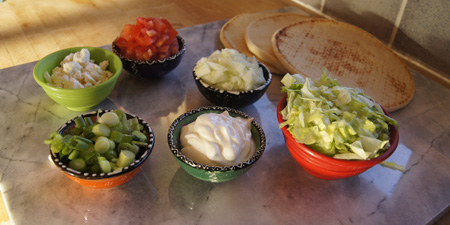
Drain the meat well, then fry in a hot pan for about 5 minutes. Meanwhile, ready the garnishes: lettuce, tomato, green onions, cucumber, feta cheese, and yogurt. (The amounts of these are approximate; add them to your personal tastes. A few hot peppers would be good on these too.)

If your pita is thick, microwave for a few seconds and place the meat and toppings on it and serve it like a taco. If your pita breads have good pockets, slice each pita in half and open each pocket and fill with the meat and garnishes.

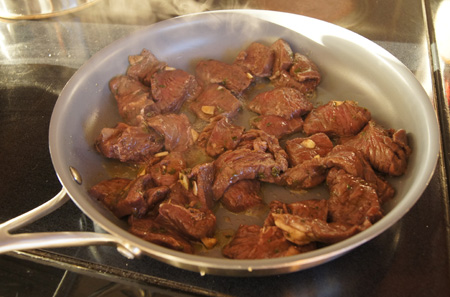
meat for beef pitasI first sliced the meat into quarter-inch wide/two-inch long pieces before marinating, as directed in the original recipe (and as seen in the above photo). On tasting the cooked meat, I found it too chewy, so I chopped the meat into smaller pieces before serving. Next time I make these I’ll cut the steak into smaller pieces before marinating – I incorporated this change in my version of the recipe.

Beef PitasThese are very tasty, albeit a bit unwieldy with the thick pitas. The meat really has a great flavor, and they look so pretty on the plate with all the garnishes. I’ll make them again!

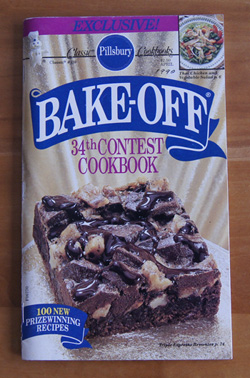
250 Cookbooks: Bake-Off 34th Contest Cookbook

Cookbook #101: Bake-Off 34th Contest Cookbook, The Pillsbury Company, Minneapolis, MN, 1990.

Pillsbury's 34th Contest Bake-Off CookbookThe earliest Bake-Off cookbook I covered in this blog was published in 1959; I discuss these cookbooks more thoroughly in my blog post covering the 1964 Bake-Off Cookbook. By 1990, Pillsbury was producing monthly Bake-Off or Classic Cookbooks, known as “magazine cookbooks”, as I discussed in this post.

This booklet was my mother’s. She only marked one recipe: “Praline Pecan Cheesecake”, “yummy!” and “rich!”. The ingredients of this cheesecake are: a Pillsbury Cake Mix, butter, cream cheese, sugar, eggs, toffee candy bars, brown sugar, pecans, and caramel ice cream topping. If you cut this 9-inch pie into 16 slices, each has 520 calories. I’ll never make this cheesecake, it is too rich and yummy for my style of eating.

The Bake-Off 34th Contest Cookbook offers recipes for salads, breads, brunches, main dishes, cookies, and desserts. Although some are from-scratch, many of the recipes include canned or frozen veggies (I prefer fresh), refrigerated biscuits or crescent rolls, or packaged pie or pizza crusts. Some of the cookie and cake recipes call for brownie or cake mixes. Since I prefer recipes from scratch, I am not going to keep this cookbook, although I saved a couple cookie recipes to try sometime. (Cookies are a weakness of mine!)

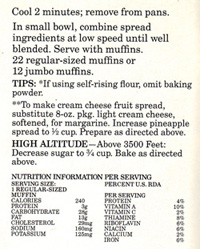
For this blog, I will try Tropical Oat Bran Muffins. This is a from-scratch recipe. It calls for whole bran cereal, bananas, macadamia nuts, coconut, and pineapple. These should be great for breakfast!

TropicalOatBranMuffins recipeTropical Oat Bran MuffinsNote that the recipe calls for either “whole bran cereal with oat bran” or “fortified whole bran cereal”. I have a box of Kellogg’s™ All Bran cereal, and it doesn’t have oat bran in it, so I’ll call my version “Tropical Muffins”. I made two-thirds of the recipe (so it would yield 12 muffins), used more banana than called for (I had 2 ripe bananas), and used a little less flour (high-altitude adjustment). I didn’t make the “fruit spread” (a mixture of lite margarine and jam). My version of this recipe is below.

Tropical Muffins
makes 12 muffins

  • 1 1/2 cup plus 1 tablespoon flour
  • 1/2 cup bran cereal
  • 1/2 cup coconut
  • 1 1/2 teaspoons baking powder
  • 1/2 teaspoon salt
  • 1 teaspoon cinnamon
  • 2-3 ounces macadamia nuts, chopped
  • 1/3 cup butter
  • 1/2 cup white sugar
  • scant 1/4 cup brown sugar
  • 2 eggs
  • generous 1/2 cup mashed banana (about 2 ripe bananas)
  • 1 1/2 teaspoons vanilla
  • 2/3 of an 8-ounce can of crushed pineapple

Prepare a 12-cup muffin pan, either by lining with paper cups or lightly greasing.

Stir together the flour, cereal, coconut, baking powder, salt, cinnamon and macadamia nuts. Set aside.

Use a mixer to beat the butter with the white and brown sugars until light and fluffy. Add the eggs and banana and blend well. Stir in the vanilla and crushed pineapple.

Combine the wet and dry ingredients and stir just until the dry ingredients are moistened. Fill the muffin cups 2/3 full.

Bake at 350˚ for 25-30 minutes.

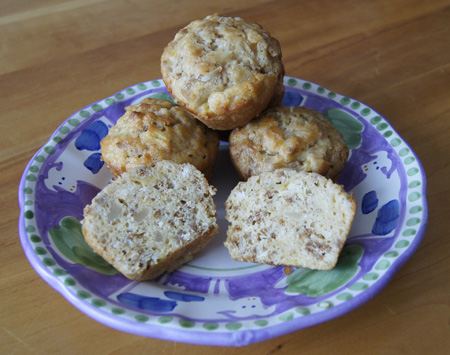
Tropical MuffinsExcellent muffins! I want to make them again already. These have a denser texture than some muffins, since they are chock full of fruits, nuts, and coconut. We both liked them.

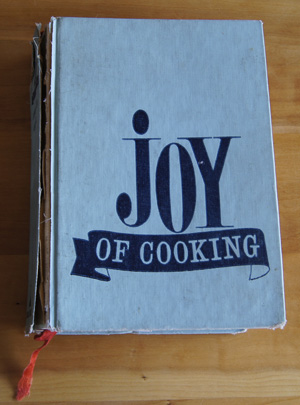
250 Cookbooks: Joy of Cooking

Cookbook #100: Joy of Cooking, Irma S. Rombauer and Marion Rombauer Becker, The Bobbs-Merrill Company, Indianapolis, Indiana, 1964.

Joy of CookingIf my house were on fire, and I was able to save only one of my cookbooks, the Joy of Cooking would be it. It has lived in my kitchen since the seventies. The cover has fallen off the spine and I have many pages marked – but only with note papers, I never wrote in this book, I tried to keep it clean. Quite simply, this is my favorite cookbook, and entirely suitable for the placement of “100” in this blog.

I know I bought this book for myself, but I don’t recall the trip to the bookstore. It must have been in 1974, since that is the last listed printing date on the copyright page. That puts me living in a rented funky old house near downtown Boulder, a graduate student, fairly poor, just beginning to expand my cooking repertoire. I am sure that I stood in the store and paged studiously through this book before I purchased it – brand new and hardcover – with money that I had religiously saved up (or maybe the money was a gift from my Mother). It was a big purchase.

Joy of Cooking has a long history. In 1931 the author, Irma S. Rombauer (1877-1962), a Missouri homemaker from an immigrant German family, created the Joy of Cooking. She began as an amateur – she was neither a writer nor a professional cook. Her daughter, Marion Becker (1903-1976), illustrated the first version of Joy. The second edition came in 1936, and the third in 1943/46. By 1951, Irma Rombauer’s health was failing, and she negotiated a book contract that named her daughter as her sole successor in any future revision. (Wikipedia) Hence, the 4th edition, 1951, is the first authored by both Rambauer and Becker.

My edition of Joy of Cooking is the 5th, first copyright 1962. On the Joy of Cooking website, I learn that there is some controversy about this edition. Apparently the publishers released a 1962 version without the final consent of the authors, a version that was “garbled” and fraught with errors. It wasn’t until 1963 that the 5th edition was published in a form acceptable to Marion Becker. Luckily, my edition was printed in 1974. The 6th edition came out in 1975. To many, the 6th edition is deemed the best, although I would vote that the 5th edition is my favorite.

After Marion Becker’s death, her sons, Ethan and Mark, took over the Joy of Cooking. The book remained unchanged until 1997. During this period, Bobbs-Merrill folded and Simon and Schuster purchased the copyright. Working with Ethan Becker, Simon and Schuster hired a cookbook editor, changed the writing style of the book, and included input from various professional food writers/chefs. Diehard Joy of Cooking fans often don’t like the seventh edition. The eighth edition, the 75th anniversary edition, came out in 2006. The original voice of the Joy of Cooking was restored, and it includes some of the information deleted in the 7th edition.

The Joy of Cooking has been in print continuously since 1936 and has sold more than 18 million copies. Pretty amazing.

Why do I like this book? It is extremely comprehensive, and has a bent that satisfies my scientific side. If I want to learn how to cook just about anything, I consult this book first. I did in the seventies and I do so today. How to make German potato salad? It’s there. How to cook a lobster? Yes. How to pluck a chicken? That too.

I like too that the recipe instructions are clear, and written in “action-style”. For instance, the ingredients for a recipe’s first step are listed, instructions given, then ingredients for the second step are listed, instructions given, etc. (See my recipe scan below for an example.) Often, alternative ways to finish a basic recipe are given, such as different fillings for raviolis, or three different variations for a chicken stew. When recipes include methods or ingredients that are covered in a different section of the book, a referral page number is given for the convenience of the reader. And, this book has a great index.

I enjoy the “voice” of this book. It is written in the first person: “we like this version” or “if you, like us, expect a 100% return on your efforts” or “In the foregoing pages we have supplied . . . “. Countless comments are throughout, for example, for hollandaise sauce they write “Our cook calls this “holiday sauce”, isn’t that a grand name for it?” or for banana cake “Do try this, if you like a banana flavor . . . ” or for maple cream candy “Who would ever suspect that this delicious confection was just plain maple syrup in a more solid form?” Throughout are asides: stories about their travels or historical figures. It’s written with a little attitude or bossiness, as illustrated in the instructions for cooking Puffed Potatoes in hot oil: “Drop the slices in separately. Do not crowd the pan. The slices will sink. This next admonition is not without danger for the unskilled. When, after a few seconds, they rise, use a continuous shaking motion with the pan, which will set up a wave-like action to keep the floating strips bathed in the fat.”

The Joy shows a definite German influence. As such, it appeals to my own German heritage: three out of four of my grandparents were mostly German. Thriftiness, industriousness, stubbornness, holding to traditions – these are the traits that I associate with my German ancestry. Irma Bromauer and her whole family worked hard to get this book out and keep it updated over many decades. And it’s a long book – my edition of Joy is 849 pages. That is a ton of work! Oh – this is touching. In the dedication, Marion Becker writes: “Working with Mother on its development . . . ” Note that she, like I, called our mothers “Mother”. Not mom or mommy or ma. Maybe it’s the German heritage.

Finally, a quote from the foreward that speaks to me: “Most important to us are all of you, both at home and abroad, who are preoccupied every day with that old yet ever-new question, ‘What shall we have for dinner?'”

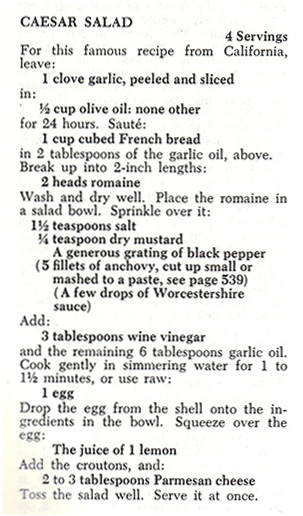
I always use a Joy of Cooking recipe for my cheese souffles, blender hollandaise sauce, cooked red cabbage, and potato pancakes. And Caesar’s Salad, which I decide to make for this blog. I’ve made this tons of times. If I have a Caesar’s salad in a restaurant, I always compare it to the Joy’s version, and they rarely measure up. This is a “classic” Caesar’s, no mushrooms or other vegetables, and the perfect dressing, made on the salad rather than in a bottle.

Caesar Salad recipe Joy of CookingIf you follow this recipe, you will be successful!

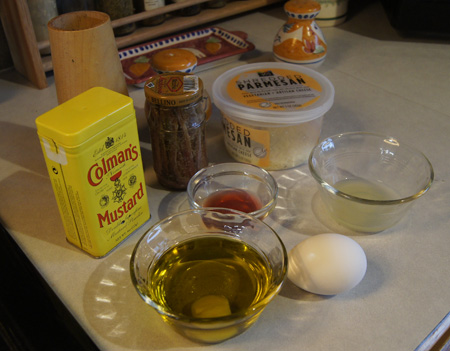
I am not going to type in this recipe, since I always refer to this cookbook to make it. I always halve the recipe for the two of us, but I still use a whole egg. Remember to put a clove of garlic in olive oil early in the day. Use fresh lemon juice, no other. I prefer grated fresh Parmesan cheese rather than the stuff that is sold in a can. I use the amount of romaine lettuce that I think the two of us are hungry for. Anchovies? My husband loves them, I only like them, so I put more in his salad. When adding the vinegar, lemon juice, and oil, I usually measure out the recommended amounts, then add a portion of each, toss the salad, taste, and add more if I feel it needs it.

Here are my ingredients, sans lettuce and croutons:

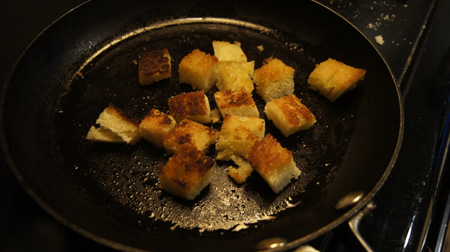
ingredients for Caesar saladThe croutons are stars in this salad. Make them fresh and just before you put the salad together. And use that garlic-soaked olive oil to fry them.

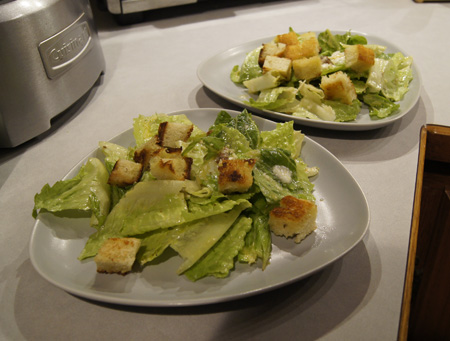
croutonsHere are our salads, moments before we ate them:

Caesar SaladsMmmm. I still have lots of romaine. I think I’ll make Caesar’s salads again tonight! Thank you Joy of Cooking for helping me make a great dinner, once again.

250 Cookbooks: The Calculating Cook

Cookbook #99: The Calculating Cook, a gourmet cookbook for diabetics and dieters, Jeanne Jones, 101 Productions, San Francisco, CA, 1972.

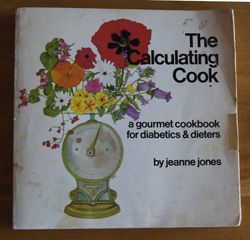
The Calculating CookThe Calculating Cook, a gourmet cookbook for diabetics and dieters is one of my old-favorite cookbooks. I learned about the diabetic “exchange diet” from this cookbook, a diet plan that correlated well with a health club’s plan that I acquired in the early 70s. I still make crepes from a recipe in this cookbook.

So it’s with pleasure that I return to my well-used book. I open to Jeanne Jones’ personal and friendly Introduction. Ms. Jones always loved to cook and went to several French cooking schools. She liked to entertain, holding small dinner parties for friends, filled with good foods and with no thought to calories. Her life changed with a shock: she found out she had diabetes. She felt her life was ruined: “How could I give lovely, gourmet dinner parties when I had been put on a diet that I had never even heard of before, without sugar, with practically no fats and measured amounts of almost everything else!” But a thought came to her: “If I could adjust my favorite recipes, and work out new ones, so that I knew exactly how much of everything was in each portion I could still cook very exciting food and stay completely on the diet program at the same time, and so could anyone else using my recipes. That was the day I stopped crying and became The Calculating Cook.”

The Calculating Cook was Jeanne Jones’ first book (as far as I can tell). Since then, she has authored over 30 books, including Cook It Light Menus for Every Occasion, Homestyle Cooking Made Healthy, and Canyon Ranch Cooking: Bringing The Spa Home. She writes a syndicated column called “Cook it Light” for King Features, a kind of “Dear Abby” column where people write in with recipes that they would like to lighten up. She also consults for spas, restaurants, and food companies, lectures at conferences, and has appeared on TV talk shows. A couple bios: Jeanne Jones website and Women’s International Center. This link to the Akron Beacon Journal website illustrates some of her Cook it Light columns, and here is one on the Arizona Republic.

During my searches, I learned that she is now in her late seventies and lives in Laguna, California, just down the coast from where my husband grew up. In 2013 she was robbed at gunpoint in that home and in 2014 the robber was convicted. I saw a photo of her home online, and it is gorgeous. She was even the executive producer of a film, The Streetsweeper (2003).

Exchange Diet

The exchange diet is a food choice system designed to help diabetics plan manage their glucose levels. Food exchange categories include: fruit, bread/starch, vegetables, milk, meat, and fat. This is a balanced, sensible diet plan that eliminates calorie counting because it’s already been done for you, all you have to do is adhere to portion size and choose the appropriate number of exchanges from each food category each day. More information: USDA National Agriculture Library on the diabetic diet and University of Arkansas’ food exchange list.

What to cook from this book?

I have some trouble finding a recipe in The Calculating Cook to cook for this blog. Why? So many of the recipes call for things that you need to prepare and have on hand, like “tomato juice ketchup”, “jelled milk” (a concoction of skim milk, water, and gelatin), or “magic mayonnaise”. In today’s supermarkets, I can find thousands of low-calorie basics, so no longer do I have to resort to homemade tactics. Many recipes call for sugar substitutes; I prefer not to use these. While I learned a lot from this book when it was new, I have since graduated from it: I have the knowledge in my own head to create light versions of almost any recipe.

I choose to make “Happy Hollandaise Sauce” and serve it over asparagus. My usual hollandaise sauce ingredients for 1 cup of sauce are:

  • 1/2 cup butter (810 calories)
  • 2 tablespoons lemon juice
  • 3 egg yolks (180 calories)

Thus this sauce has close to a 1000 calories in 1 cup. The Calculating Cook’s version has about 350 calories in a cup. That’s quite a difference!

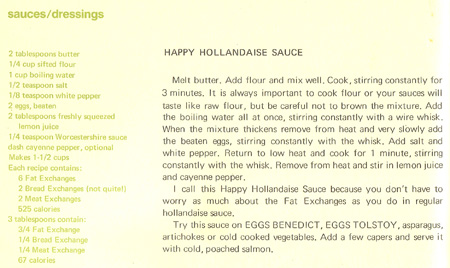
Happy Hollandaise SauceTo go with the hollandaise-asparagus, I find a recipe on Jeanne Jones’ website: Lamb Chops with Herbed Apricot. My slightly changed and re-named version of this dish is below. The original recipe calls for a can of fat-free chicken stock. I usually keep homemade stock on hand, so I used that instead. I always de-fat my stock by placing it in the refrigerator overnight. And that’s exactly how The Calculating Cook tells me to make stock. Maybe I learned this technique from this very book!

Light Hollandaise Sauce
makes about 1 1/2 cups

  • 2 tablespoons butter
  • 1/4 cup flour
  • 1 cup hot water
  • 2 eggs
  • 1/2 teaspoon salt
  • a little pepper (use white pepper if you have it)
  • 2 tablespoons fresh lemon juice

Melt the butter and then add the flour. Cook and stir for at least a minute (do not allow to brown). Add the boiling water all at once and stir constantly until the mixture thickens. Remove from heat.

Whisk the eggs, then add them in a slow stream to the butter-flour-water mixture, whisking constantly. Return the pan to low heat and cook about a minute (to cook the eggs), then stir in the salt and pepper and lemon juice. Serve.

Lamb Chops with Dried Apricots
serves 2

The leaner the lamb the lower in calories this dish will be. I found bone-in lamb chops, and they had a bit of fat on them that I tried to cut off.

  • 2 lamb chops, boneless if possible
  • garlic powder
  • salt and pepper
  • 2 ounces dried apricots
  • 3/4 cup chicken stock
  • 1/4 teaspoon each dried oregano, thyme, and rosemary
  • a few dashes of nutmeg, preferably fresh ground
  • 1/4 teaspoon salt
  • 1 teaspoon vinegar, preferably balsamic

Sprinkle both sides of the lamb chops evenly with the garlic powder, salt and pepper. Heat a non-stick or a cast-iron pan over medium heat. Add a few drops of oil or non-stick vegetable spray if you wish. Brown the lamb chops on both sides.

Combine the dried apricots and the chicken stock in a saucepan and boil, uncovered, for about 5 minutes. Cool a bit, then put in a food processor or a blender. Add the herbs, nutmeg, salt and vinegar and process to a puree.

Pour the mixture over the browned lamb chops in the pan, cover, and simmer for about 10 minutes.

lamb with apricotsComments

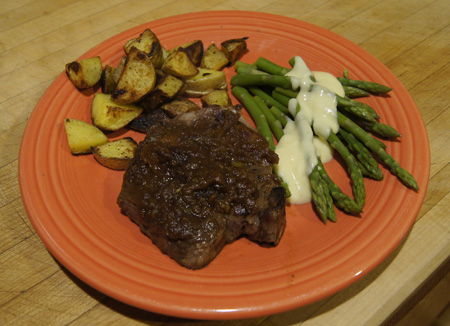
This meal was a hit, from the asparagus with light hollandaise to the lamb chops with apricots. I thought the sweet apricot topping counterbalanced well the distinct flavor of the lamb.

I used fewer apricots than called for. I purchased a 5 ounce bag of dried apricots, and according to the nutrition label, it has “4 servings at 100 calories each”. Thus adding the original amount of 4 ounces would have added close to 400 calories to this dish for two people. So, I cut the amount of apricots. My apricots didn’t contain any chemical preservatives, so they were dark brown. Not pretty, but tasty.

p.s. A couple days later, I reheated the leftover light hollandaise sauce, and it was still very good – over broccoli the second time. It would also be good over fish, I think.

250 Cookbooks: Calories and Carbohydrates

Cookbook #98: Calories and Carbohydrates, Barbara Kraus, NAL Penguin Inc., NY, NY, Eighth Revised Edition, thirty-seventh Signet printing, 1989.

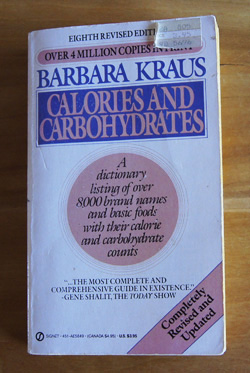
Calories and Carbohydrates CBThis is not really a “cookbook”. It’s a calorie counter reference. But I had it entered in my 250 cookbooks database so I consider it a proper book to cover in this blog. My blog, my rules.

I used to count and limit calories as a means to lose weight. This went on for decades. The height of my obsession with this dieting method were the years that I weighed the foods I ate, calculated the calories, entered the calories and my weight in a database, and graphed the results. I don’t do that anymore. But it was an important phase of lifetime weight management, because I learned how to estimate calories in foods, and to pay close attention to portion size.

This book is a holdover from those days. I bought it for myself, brand new. Probably in a January . . . New Year’s resolution time.

Calories and Carbohydrates lists the calorie/carbohydrate contents of common (and uncommon) foods as well as brand-name packaged food items. For instance, let’s look at the entries for beef. Different cuts of beef are listed with the calories per ounce. A pound of raw flank steak has 653 calories; 4 ounces of braised flank steak has 222 calories. Armour frozen Dinner Classics Beef Stroganoff has 370 calories in an 11 1/4 ounce meal.

This book has so much information that it takes awhile to find what you want. Ice cream is listed by flavor and manufacturer. Wine is listed not by red or white, but by type, such as merlot or chardonnay. Oranges are listed by variety, such as Florida or California valencia or navel. So you have to remember which type you bought. Oh! Just above “oranges” I find that 4 ounces of roasted opossum has 251 calories and 0 carbohydrates. (There are some fun tidbits in this book.)

Note the publication date of my copy of Calories and Carbohydrates: 1989. At that point in time, food products were sold without a nutrition content label. Thus this book once provided a great service. Beginning May 8, 1994, food companies were required by law to begin using nutrient content labels on packaged foods, a label mandated for most food products under the provisions of the 1990 Nutrition Labeling and Education Act (NLEA), per the recommendations of the U.S. Food and Drug Administration. These package labels are a boon to the calorie counter.

The Internet was just beginning to bloom 1989. (I remember, I was there, with my first MacPlus and a dial-up modem.) Today, it is very easy to find calorie content online. My go-to site is Nutrient Facts. The nutrition fact labels for packaged products are often online; here is the entry for Planter’s Dry Roasted Peanuts. Most chain restaurants post the calories of their meals. For instance, from this site, you can download a pdf that lists the calories, fat calories, protein, and nutrition values for all menu items at McDonalds restaurants.

The latest edition of Calories and Carbohydrates appears to be 2005; perhaps because the need for this book has diminished.

For this blog entry, I decide to cook one of my everyday meals and calculate the calorie total using two different sources: Kraus’ book and values I find on the Internet. Sounds like fun.

I choose to make a chicken-vegetable-cashew stir fry.

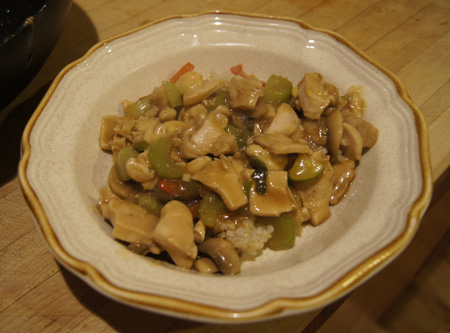
chicken stir fryI weighed each ingredient during preparation. I felt like a scientist again! Later I looked up the calories in both Calories and Carbohydrates and on the Internet. Here are my results:

Kraus’ book Internet source
brown rice, 2/3 cup dry not available 453
chicken breast, 10 oz. uncooked 308 (8 oz. cooked) 310
soy sauce, 3 tablespoons not available 30
vinegar, 1 tablespoon 2 0
celery, 2 1/2 ounces 12 5
green onion, 1/2 ounce 5 5
mushrooms, 2 3/4 ounces 23 28
red pepper, 3/4 ounce 7 7
cashews, raw, 1 ounce 159 157
cornstarch 30 30
vegetable oil 120 124

Total calories, internet values, 1149. (Divided between two people, this is under 600 calories/person.)

Comments on calorie results

Time: I timed each search, book and Internet. It took me 10 minutes and 15 seconds to look the ingredients up in the book, and 6 minutes and 50 seconds to look them up online.

Ease of search: The book values for chicken are not exactly helpful. It lists the calorie count for a whole, bone-in chicken, or for cooked chicken (either baked or fried). The value for raw chicken is the one I needed, because It is impossible to weigh cooked chicken after it is in a sloppy stir fry. This was frustrating. The book lists calories for cooked white rice, but the only brown rice listing was a value for Uncle Ben’s brown rice parboiled with butter. Not helpful.

I tried Nutrient Facts first for the Internet search on each item. It is easy to find raw or cooked values for the chicken, and it is easy to change the measurements between different weight or volume values. The Nutrient Facts site did not have “cashews”, so I simply entered “cashew calories” into a google search and the result popped up immediately.

Conclusion: Internet is fastest and easiest (not surprising!). Accuracy might be an issue but note the close agreement between the book and Internet values.

Even with the Internet, I would like to always have one printed book of calorie counts in my possession, but I will not keep Calories and Carbohydrates (I have other calorie-counter books on my shelves). Calories and Carbohydrates contains so many entries that searching is difficult, and values for meats are difficult to decipher. I will recycle this book.

Extra note

. . . about a note of mine that I found in this book. I date this note to about 20 years ago.

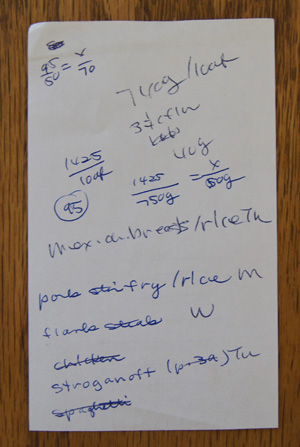
note left in calorie bookThe calculations are for the calories in a loaf of “my daily bread” and specifically, that there are 95 calories in a 50 g slice.

The scribbles under that are for meals that I planned for the week: Mexican chicken breasts over rice on Thursday, pork stir fry on Monday, flank steak on Wednesday, stroganoff on Tuesday. These could be the meals I would cook in a week to this day! I AM IN A RUT!

This sad state of affairs led me to find something new to cook on a weeknight. (Retirement has its pluses. Most of all: Time.) On the Cooks Illustrated website, I found Tuscan-Style Beef Stew and served it over Creamy Parmesan Polenta (Cooks Illustrated too). The sauce created by the slowly baked meat is wonderfully complex, with garlic, shallots, carrots, rosemary, bay leaves, cracked black pepper, tomato paste, anchovy paste, and a lot of red wine. After a long slow braise, the sauce is strained, more wine added, and reduced. Absolute yum factor. I’ve made the Creamy Parmesan Polenta before and it was a perfect base for the dark sauce and tender beef.

250 Cookbooks: Soups and Stews Cook Book

Cookbook #97: Soups and Stews, Better Homes and Gardens, Meredith Corporation, Des Moines, Iowa, 1978. (Twelfth Printing, 1983)

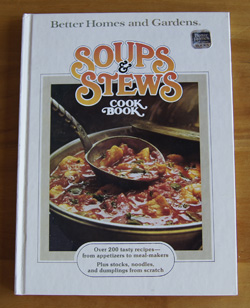
Soups and Stews Cook BookAnother magazine cookbook. This one is hard bound, full size, and about 90 pages. I have no idea how I acquired this cook book, and have no notes in it.

So. At first glance, I find this a decent compilation of recipes for soups and stews, but not terribly inspiring. I usually just toss together a soup sans recipe, using whatever is on hand that catches my eye or imagination (or that needs to be used up). For this blog, I settle on “Turkey Soup with Danish Dumplings”, because I have turkey stock from last Thanksgiving and leftover turkey too. What the heck are Danish Dumplings . . . ? I am directed to page 90 at the back of the cook book.

And at page 90, I discover a few gems. Homemade noodles: plain, spinach, or cheese, made using a simple dough rolled out on a breadboard. Dumplings: Danish, fluffy, matzo, corn, and herb. Crackers! Either from white or whole wheat flour. I am a little bit goofy but I really want to try all of these. They will perk up my soup making.

About the soup recipes. The section on cold soups does not interest me. The hot soups are mostly pretty quick to put together, and in general call for fresh vegetables (good) and few packaged ingredients (good). Nutrition information is not included. I see some good ideas for soups; I am reminded that I haven’t made wonton soup in ages, or a Mexican-style soup. So I have some ideas for future meals. This cook book does serve a purpose and I will keep it.

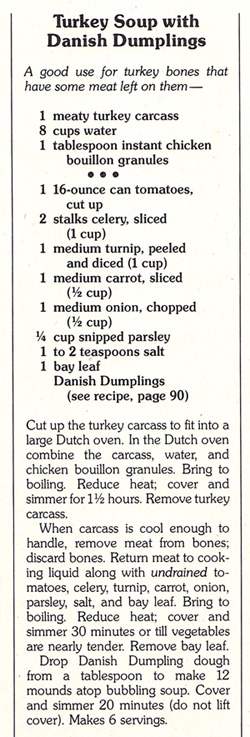
Here is the original for Turkey Soup with Danish Dumplings:

Turkey Soup recipeI am going to have to re-name the soup “Turkey Soup with Sneaky Dumplings”. More on that later. I have my own turkey stock and cooked turkey in the freezer, so I will use those instead of following the above recipe. We don’t like turnips so I plan parsnips instead. I will also shake in a few more herbs.

Turkey Soup with Sneaky Dumplings
serves 2-4

soup:

  • 4 cups turkey stock (can use chicken broth)
  • 1 cup chopped, cooked turkey (or chicken; can use more or less turkey)
  • 1/2 of a 14-oz. can diced tomatoes, undrained
  • 1 stalk celery, sliced (about 1/2 cup)
  • 1 parsnip, sliced
  • 1 carrot, sliced
  • 1/2 of an onion, chopped
  • 2 tablespoons fresh parsley (or 2 teaspoons dried)
  • fresh or dried basil and thyme (to taste)
  • 1 bay leaf
  • 1/2 teaspoon salt, or to taste

dumplings:

  • 2 tablespoons butter
  • 1/4 cup water
  • 1/4 cup flour
  • 1/2 baking powder
  • pinch of salt
  • 1 egg
  • 1/2 tablespoon chopped fresh parsley (or less dried)

Combine the stock, cooked turkey, tomatoes, celery, parsnip, carrot, onion, parsley, basil, thyme, bay leaf, and salt in a cooking pot. Simmer about 30 minutes, covered. Remove bay leaf.

While the soup simmers, prepare the dumplings. Combine the butter and water in a small pan and bring to a boil. Mix the flour, baking powder and salt and dump in all at once, stirring vigorously all the time. Continue cooking, stirring constantly, until the mixture forms a ball that doesn’t separate. Remove from heat and allow to cool slightly. Add the egg and immediately beat it into the dough until the mixture is smooth. Stir in the parsley.

Drop the dumplings from a tablespoon into the bubbling soup, making about 8 mounds. Cover the pot and simmer, covered (do not peak!) for 20 minutes.

Serve!

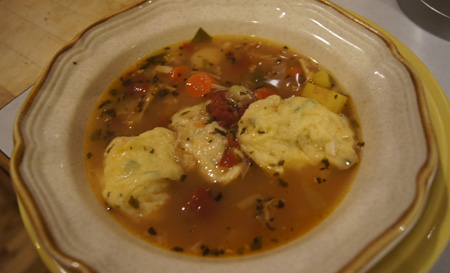
Turkey Soup with Sneaky DumplingsComments

The soup is good, the star is the dumplings. The dough for these Danish dumplings is a cream puff dough, or pâte à choux. I have made cream puffs before: when you bake them in an oven they puff up and leave a big hole in the middle. As a scientist, I find this just a lot of fun. As an eater, well, yum! Fill them with cream for cream puffs or a filling for eclairs or a savory mixture for appetizers and you have a special treat. Baked, unfilled cream puffs are convenient because they store for awhile (you don’t have to cook them at the last minute). The disadvantage, in my often-on-a-diet lifetime, is the high percentage of butter in the recipe.

Okay. We know what cream puff dough is. It is usually baked on a sheet in a hot oven. On top of a wet soup? How will this turn out?

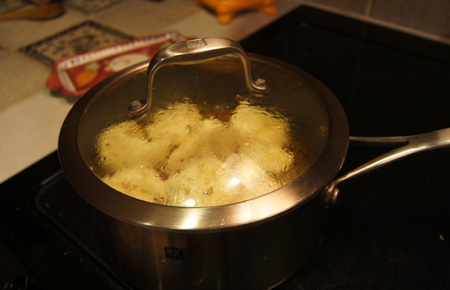
I note that the original recipe tells me to not lift the pan lid while the dumplings are cooking. Probably so that the dumplings will cook through. Can I resist the temptation to peak? No, but I can get around the obstacle by using a glass lid.

About 20 minutes before serving the soup, I drop 8 small globs of dough on top of the bubbling liquid. I note that there is a lot of soup surface uncovered. I cover the pot.

A few minutes later, I look over at the cooking pot. Whooa! The dumplings have grown!

sneaky dumplingsAnd a few minutes later, they have grown so huge that all I can see on top of the soup is dough, reaching almost up to the pan’s lid. I worry a bit that the soup will be overtaken by the dumplings.

Just before I serve the soup, I look in the pan: Oh! The dumplings shrunk! Now they are just nice-sized blobs on top.

So I call them “sneaky dumplings”. During their cooking, they stretch way up to the lid and then retreat back. If I had used a solid lid I wouldn’t have caught the dumplings in the act.

These dumplings are fun, but are they good? Yes! They are delicate and tasty and a great addition to a soup. And they take very little time to put together. I will make them again, definitely!

250 Cookbooks: Sunset Recipe Annual, 1992 Edition

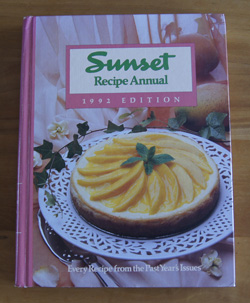
Cookbook #96: Sunset Recipe Annual, 1992 Edition, Sunset Publishing Corporation, Menlo Park, CA, 1992.

Sunset Recipe Annual 1992January 1, 2015. A new year! And what to cook? Something for New Year’s Day, something a little less calorie-laden than the last two weeks of slight overindulgence. I pull several cookbooks from the shelf, but as soon as I open Sunset Recipe Annual, I know I’ve found the book I want!

Southwestern accents, lots of vegetables and fruits, light and practical . . . hey, I’ve written about this cookbook before! A quick search of my own blog pulls up Sunset All-Time Favorite Recipes, an entry I made in 2012 for a quite-similar Sunset cookbook published in 1993. Like for that book, I want to try at least half of the recipes. Nuff said. I’ll keep this cookbook out for a while and sample some of its attractive recipes.

I settle on “Supper Nachos” for this blog. This recipe is in the “January” chapter, and quite appropriate for New Years Day, casual and tasty, great for serving while the football games play. And lower in fat than most nacho recipes.

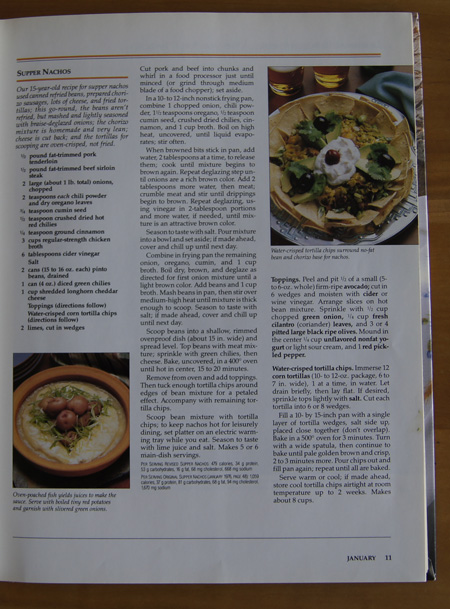
Supper Nachos Recipe

This cookbook has a pleasing layout. Note the lengthy directions for Supper Nachos.

This recipe utilizes the technique of “braise-deglaze” to bump up the flavor while eliminating cooking oil (and associated calories). Briefly, the vegetables (onions in this case) are mixed with a little broth or water and cooked over high heat until the liquid evaporates and brown bits begin to stick to the pan. More liquid is added in small amounts and the process repeated until the vegetables have a rich brown color. I am familiar with this technique, but don’t use it a whole lot, and usually only with wine as the deglazing liquid.

Calories are reduced by using pork tenderloin and lean beef instead of store-purchased hamburger. These meats are mixed with the cooked onions and spices to make a chorizo-like mixture. (Chorizo is a Mexican sausage available nearly everywhere here in Colorado. I have found that each brand I purchase is different, but most are pretty fatty. Sometimes it is formed into sausages, sometimes sold in bulk.)

Calories are further reduced by substituting mashed, seasoned pinto beans for traditional refried beans. And, instead of bagged tortilla chips, I will be baking wedges cut from tortillas.

I changed a few things (beef broth instead of chicken, less cider vinegar, more spices); my version is below.

Light Nachos with Homemade Chorizo
serves about 4 as a meal

for the chorizo:

  • 1/2 pound pork tenderloin (trim off any visible fat)
  • 1/2 pound lean beef (trim off any visible fat)
  • 1 onion, chopped
  • 2 teaspoons chile powder
  • 1 1/2 teaspoons oregano (use Mexican oregano if you have it)
  • 1/2 teaspoon cumin
  • 1/2 teaspoon hot chile flakes
  • 1/4 teaspoon cinnamon
  • 1 cup chicken or beef broth
  • 2 tablespoons cider vinegar

for the beans:

  • 2 cans pinto beans (15-16 oz.), drained
  • 1 onion, chopped
  • 1 teaspoon oregano (Mexican if possible)
  • 1/2 teaspoon cumin
  • 2 cups chicken or beef broth

for the chips:

  • 12 corn tortillas

for putting the baked nachos together:

  • 1 4-oz. can diced green chiles
  • 1 cup grated cheddar cheese

for toppings:

  • avocado, chopped
  • chopped green onion
  • fresh cilantro
  • black olives
  • prepared salsa
  • tomatoes
  • low-fat sour cream or plain yogurt

Directions: chorizo

Chop the pork and beef into big chunks and process in a food processor until just minced. (Do not grind it to a pulp, you want some texture.) Set aside.

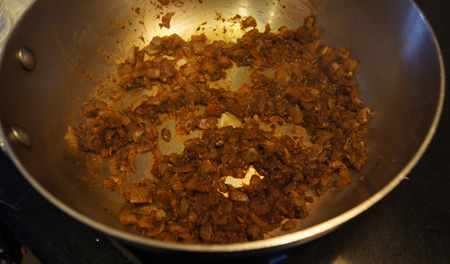
Combine the onion, spices, and broth in a pan. I suggest a stainless steel pan rather than a non-stick pan (see my discussion below). Stirring a lot, heat the onion mixture over fairly high heat, uncovered, until the liquid evaporates and brown bits stick in the pan. Then, add a couple tablespoons of water and cook until the mixture begins to brown again. Repeat adding water and boiling it off – “deglazing” – until the onions are a rich brown color.

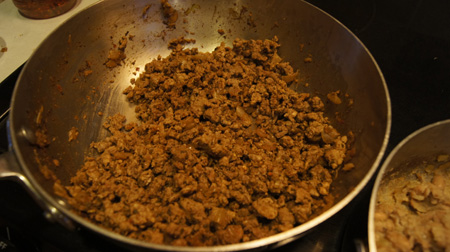
braised onionsAdd the minced meat mixture and a couple tablespoons water and stir until the liquid is again evaporated and the meat is beginning to brown. Deglaze once with 2 tablespoons cider vinegar and then several times with water until the mixture is an “attractive brown color”.

cooked chorizo mixtureCheck the seasoning of the chorizo mixture, adding salt and/or additional seasonings to your own taste. Set aside. The chorizo mixture can be prepared ahead and stored refrigerated or frozen.

Directions: beans

Combine the onion, oregano, cumin, and 1 cup of broth and boil dry, brown, and deglaze as directed for the chorizo onion mixture until the onions are a light brown color. Add the pinto beans and another cup of broth to the onion mixture. Mash the beans in the pan, then stir and heat until the mixture is as thick as refried beans. Check the seasonings, add salt to taste. These beans can be prepared ahead and stored refrigerated or frozen.

Directions: chips

Dip each corn tortilla in water and drain briefly. Lay all the water-dipped tortillas out flat on your work surface and sprinkle the tops with salt. Cut each tortilla into 6 wedges.

Heat your oven to 500˚.

Lay the tortilla wedges on a half-sheet pan or cookie sheet. (I lined my pan with parchment for easy clean-up.) Put them in a single layer – you may need two pans to do this, or, bake in batches.

Bake the tortilla wedges for 3 minutes in a 500˚ oven. Turn with a spatula, then put them back in the oven for another 2-4 minutes, until the chips are “pale golden brown and crisp”. Watch carefully so that they don’t burn. (These will sit for about 15 minutes while the nachos bake. If you want to serve them warm, put them back in the oven with the nachos during the last minute or two of baking.)

Directions: baking the nachos

Turn the oven down to 400˚.

Put the beans on a large, ovenproof dish. Mound them a bit in the center. Top the beans with the chorizo mixture, then the green chiles and the cheese. Bake at 400˚ for 15-20 minutes, until the beans and meat are hot and the cheese melted.

Serving

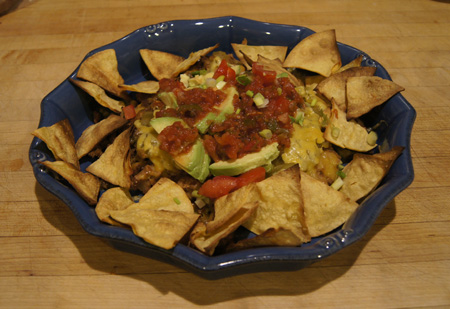
Arrange the tortilla wedges around the baked nachos. Top the beans with avocado, green onions, tomatoes, salsa, olives, and sour cream. Feel free to experiment!

nachosComments

These took a lot of time to make. In the midst of all the preparation, I thought, what the heck did I get myself into so much work for! Well, the answer came when we ate them. They were yummy. Definitely. The meat mixture was especially good. And the chips.

I made a full recipe of the meat mixture for the two of us and I froze half of it for a future meal. I made a half recipe of the beans and the amount was perfect for two people as a meal.

The beans were good, but they really didn’t “stand out”. The main advantage to this bean recipe is the low-calorie aspect. To save time, I suggest canned low-fat refried beans. Don’t get me wrong, the beans in this recipe tasted fine, it’s just not really worth the time to make them unless you are in the mood.

The chips? They were very good. They taste better than any of the bagged “baked” tortilla chips that I have purchased. I will make them again!

In summary, the chorizo is the star of this dish. The finished nachos are excellent because they are baked in the oven; the presentation is special because I served them on a pretty platter with the chips and toppings.

A note on pan choice

I started cooking the onions for the chorizo in a non-stick pan, specifically, a Zwilling J.A. Henckels Sol Thermolon sauce pan. Total disaster. When the first broth boiled off, the onion-spice mixture stuck in a film to the bottom of the pan. It started to blacken to a dark tar and I quickly transferred the mixture to a stainless all-clad pan.

You could try the deglazing in a different type of non-stick pan, it might work. But the all-clad worked great, and clean-up was easy.

I love-hate the Henckels Thermolon pans. I had to send my first Thermolon frying pan back for replacement because after a year, everything stuck to it and it was impossible to clean. I do praise the customer service at Henckels. They responded quickly and told me that I should never have this pan at a temperature higher than medium. Well heck, it’s a frying pan! I often browned meats in this pan over medium-high heat.
Nothing sticks to my newly replaced Thermolon frying pan, but I treat it with the utmost care, never heating it on a burner that is set higher than medium. (I guard this pan!) My Thermolon sauce pan that I used briefly in this recipe needs to be replaced.)
250 Cookbooks: Cookies, Brownies and Bars

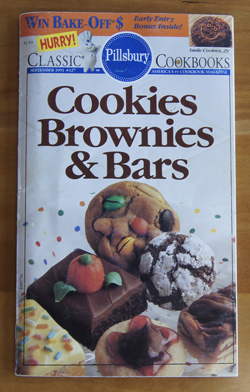
Cookbook #95: Cookies, Brownies and Bars, Classic Cookbooks, The Pillsbury Company, Minneapolis, MN, 1991.

Cookies, Brownies and BarsI have covered several Pillsbury Bake-Off cookbooks in this blog, and three Pillsbury cookbooks that are not Bake-Off associated: Simply From Scratch Recipes (1977), Healthy Home-Style Cooking (1989), and Cookies, Bars and Brownies (1994). I recall a time when these small cookbooks became available monthly, either at the supermarket’s check-out stand or by subscription. I did a little web research and found this to be true:

“Pillsbury Publications launched the concept of digest-sized, full color food magazines in 1979. By 1989, the concept had developed into a monthly series of Pillsbury Classic Cookbooks that were available at supermarket checkouts and later by subscription. The recipes all use Pillsbury name brand products. The wonderful photos are guaranteed to get you in the mood to cook! Advertising Cookbooks is pleased to carry many of the back issues of this popular recipe magazine.” —Advertising Cookbooks, accessed 12/2014.

These “advertising” cookbooks can have some great recipes. The Advertising Cookbooks website even offers some of the back issues for sale. They sell my Healthy Home-Style Cooking for $6 USD. Pillsbury, Better Homes and Gardens, Betty Crocker, Women’s Circle, Land O Lakes and many other companies produced/produce this type of cookbook. (If interested, do visit the Food Company Cookbook blog associated with the Advertising Cookbooks website.)

My copy of Zestful Recipes for Every Meal – published in 1931 – is the oldest digest-sized, in-color advertising cookbook that I own. It’s pretty cool.

Cookies, Brownies and Bars is one of my favorite Pillsbury Classics Cookbooks. It was published in 1991, at a time when I was baking a lot of cookies for my young family or for friends at work or for Christmas packages. I tried and liked a lot of recipes in this cookbook: Peanut and Candy Jumbles, Almond Kiss Cookies, Ranger Crispies, Oatmeal Coconut Fun Chippers, Chocolate Chip Cookies Supreme, Chocolate Raisin Smile Cookies, Almond Fudge Brownies, Fruitcake Fantasy Brownies, German Chocolate Saucepan Brownies (these are fantastic! I’ve made them a lot), Chocolaty Caramel Pecan Bars, Mocha Almond Fudge Bars, and Applesauce Granola Bars. And the recipe for Chocolate Pixies is quite similar similar to one of my Favorites: Chocolate Chews.

Now that is a record amount of cookie recipes for me to have tried from one book!

Another thing I like about this cookbook are the “Cook’s Notes” on many of the pages. Next to a recipe for gingerbread bars that calls for molasses, a Cook’s Note explains the difference between light, dark, and blackstrap molasses. Another note helps the cook decide between butter and margarine. The Chocolate Raisin Smile Cookies have a Cook’s Note about dark and golden raisins.

And another good thing! A lot of the recipes call for what we generally consider “healthy” ingredients, such as fruits and vegetables (e.g. apples, raisins, zucchini) and whole grains (whole wheat flour, oatmeal). Most of the recipes are from-scratch. They even give directions for baking at high altitude.

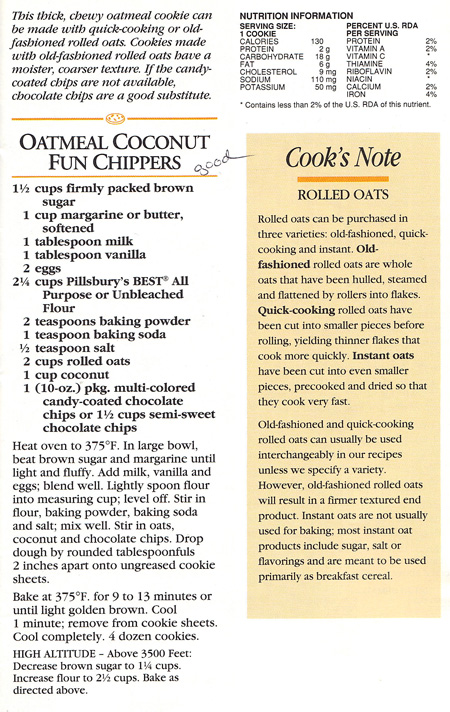
I decide to make “Oatmeal Coconut Fun Chippers”. I made them before and marked them as “good”. This drop cookie recipe has brown sugar, a lot of vanilla, oatmeal, coconut, and M&Ms®. I am sure these are better than just “good”!

Oatmeal Coconut Fun Chippers original recipeNote the note next to the recipe in Cookies, Brownies and Bars. It explains the difference between old-fashioned rolled oats, quick-cooking rolled oats, and instant oats. For this recipe, I have the option of either old-fashioned or quick-cooking oatmeal. I chose old-fashioned, which I am advised will result in a firmer textured cookie. I can also choose between butter and margarine: I chose butter. And, I can choose between M&Ms® or chocolate chips: I chose M&Ms®! Also, since we live at high altitude, I added an extra 2 tablespoons flour.

Getting the M&Ms® required a trip to my small town of Lyons, since I don’t keep them in my pantry. It was a frigid, snowy, icy drive, but I did it – anything for this blog! I was lucky to find them at the gas station store, since the two markets in Lyons carry mostly natural foods. Aah, Colorado.

My version is below.

Oatmeal Coconut M&M® Cookies
makes about 4 1/2 dozen

  • 1 1/2 cups firmly packed brown sugar
  • 1 cup butter (I used salted butter)
  • 1 tablespoon milk
  • 1 tablespoon vanilla
  • 2 eggs
  • 2 3/8 cups flour
  • 2 teaspoons baking powder
  • 1 teaspoon baking soda
  • 1/2 teaspoon salt
  • 2 cups oatmeal (I used old-fashioned, quick-cooking might give a more tender cookie)
  • 1 cup coconut
  • M&Ms®, about 1 1/2 cups (10 oz.)

Beat the brown sugar and butter until light and fluffy. Add milk, vanilla and eggs and blend well.

Stir together the flour, baking powder, baking soda and salt, then add to the beaten mixture and blend until mixed in. Stir in the oatmeal, coconut, and chocolate chips.

Drop dough by rounded tablespoonfuls onto cookie sheets (I lined my cookie sheet with parchment). Bake at 375˚ for 10 minutes.

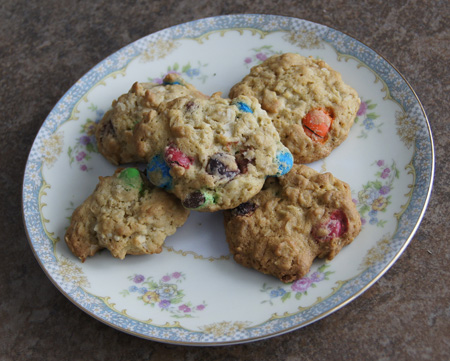
OatCocoMM cookiesComments

These are not just good, they are very good, and chewy and hearty and sweet! These cookies would be a great energy food on a hike, because they hold together well (like a granola bar).

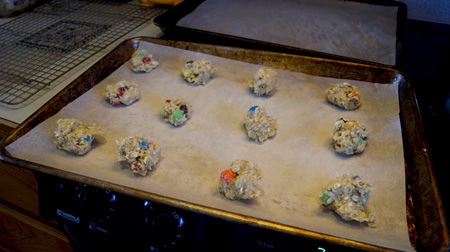
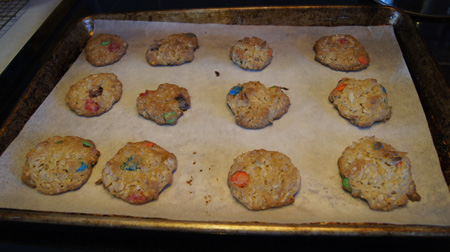
Here is a batch of cookies waiting to be baked. See the M&Ms®?

ready to bakeI baked the first batch 12 minutes and I think they got a little too browned:

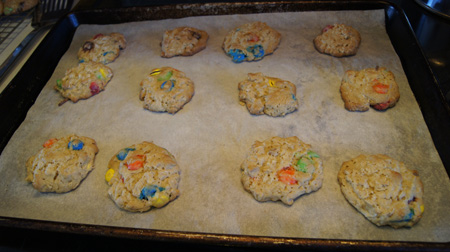
12 minutes bakingI baked the rest of the batches 10 minutes and liked them better. It’s my opinion that they keep better if they are a little bit under-baked.

baked 10 minutes I’ll make these again!