250 Cookbooks: All-Time Favorite Recipes (Better Homes and Gardens)

Cookbook #156: All-Time Favorite Recipes, Better Homes and Gardens, Gerald Knox (editor), Meredith Corporation, Des Moines, Iowa, 1979.
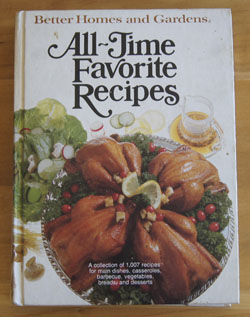
All-Time Favorite Recipes BHG cookbook

I like this book a lot! I don’t think I have ever looked at it before. It’s from my mother’s collection. This is on the inside cover:
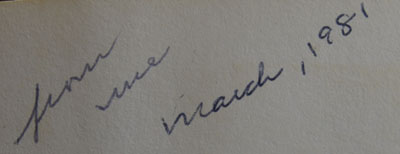
Mother's inscription

That’s my mothers’s writing, and I’m pretty sure it says “from me March, 1981”. That made me smile. She bought it for herself and wrote a little inscription to mark that fact.

This cookbook has the type of recipes I grew up with, so I’m not surprised she chose this book for herself. She never worked outside the home, and thus her personal spending money was pretty special to her. So this is a special book to me.

All-Time Favorite Recipes is bound, rather than loose leaf like her Better Homes and Garden New Cook Book. It’s a big book: 480 pages! The introduction reads:

“Through the years, the editors of Better Homes and Gardens, like all good cooks, have collected a huge recipe file. In All-Time Faovrite Recipes, we have compiled for you the favorites of all the recipes we’ve published. Whether you are planning a meal for family or guests, you’ll find dishes for the entire meal in these pages. Choose a main dish from the meat, fish, poultry, or casserole pages. Or, for warm weather entrées, turn to the barbecue recipes. Complete your menu with dishes from the vegetable, salad, bread, and dessert sections. From one good cook to another, we give you our favorites.”

After this short intro the editor gets right into the recipes. On page 9, I find a recipe for Sauerbraten. Mother says it is “Delicious” and the “gravy is yummy!” You take a beef round rump roast, marinate in red wine vinegar, spices, and onions for 3 days, simmer a couple hours, and then add crushed gingersnaps. I bought gingersnaps for the first time in years just last weekend, with sauerbraten on my mind. I’ll try this recipe soon. She also liked the Pot Roast Dip Sandwiches on the same page. Other main dishes she favored are the Sicilian Meat Roll and Manicotti. The Tetrazzini Crepes on page 121 is the same recipe as in All-Time Favorite Casseroles, another Better Homes and Gardens book that I covered in this blog.

I think the recipe she used the most from this book is 24-Hour Vegetable Salad on page 248. The book opens easily to this page, like it’s been opened there a lot, she marked it “Delicious”, and I see a couple food stains on the page. This is a great large-potluck dish. The day before, you layer romaine, Swiss cheese, hard boiled eggs, cooked bacon, leaf lettuce, thawed frozen peas, mayonnaise, and green onions. The next day, toss and serve! (I found a similar recipe in the Carousel of Cultures Cookbook, so if I ever want such a salad, I’ll compare and contrast the two.) Mother liked a few of the other salad recipes, but not the “Cheesy Coleslaw Mold”. For that she says simply: “Do not make again”. Ha! I’d never try it in the first place!

The recipe I use for “Biscuits Supreme” is on page 390 with her notes, and she liked the whole wheat rolls. She marked the Banana Nut Bread “Delicious” – and I found that someone reviewing this cookbook on Amazon really liked this banana nut bread too. I’ll have to try this recipe sometime, it’s a bit different from the one I currently use.

That’s about all she marked in this cookbook. I made a list of about ten recipes I’d like to try. Good ideas in this old cookbook!

I decide to make Cinnamon Swirl Loaf for this blog.
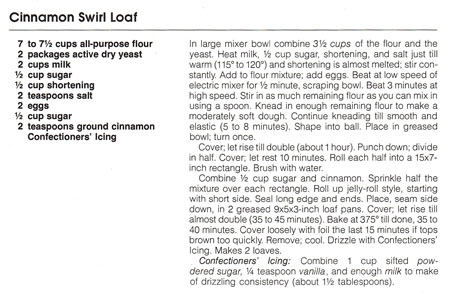
Cinnamon Swirl Loaf recipeIn this recipe, a sweet and rich yeast bread dough is rolled around cinnamon and sugar before baking. I’ve tried swirled breads before, but after baking they always had big gaps in the swirls. Why? Because I always brushed butter onto the dough before the cinnamon and sugar. The butter sent the layers flying apart when the loaf was cooked. This recipe uses water (duh! says this chemist) to keep the dough layers together. I want to see if it works.

I plan to make a few changes: I want to use a breadmaker, I prefer butter over shortening, and I want raisins in the dough. Plus I’ll skip the glaze. And make just one loaf. Below is my adaptation of this recipe.

Cinnamon-Raisin Swirl Loaf
makes 1 9×5-inch loaf

for the bread

  • 1 cup milk
  • 1/4 cup butter, cut in small pieces
  • 1/4 cup sugar
  • 1 egg
  • 17 ounces bread flour or all-purpose flour
  • 3/4 teaspoon salt
  • 2 1/2 teaspoons yeast
  • 1/3 cup raisins

for the swirl

  • 1/4 cup sugar
  • 1 teaspoon cinnamon

Put the bread ingredients EXCEPT the raisins in the order given into a breadmaker and set to a dough cycle with a rising step. Watch the dough as it kneads and add a little flour or water if necessary. Add the raisins near the end of the kneading cycle – most breadmakers have a “beep” or such for adding raisins or nuts.

When the dough is ready, roll it into a 15×7-inch rectangle. Brush with water. Combine the 1/4 cup sugar and 1 teaspoon cinnamon and sprinkle it over the dough. Starting from the short side, roll up jelly-roll style. Pinch the long edges and ends together to seal them (a little extra water helps seal the dough edges). Place seam side down in a greased 9×5-inch loaf pan.

Let rise just until the dough crowns above the edges of the pan, about a half hour. Bake at 350˚ for 45-50 minutes. (I used an instant read thermometer and baked until it tested close to 200˚).

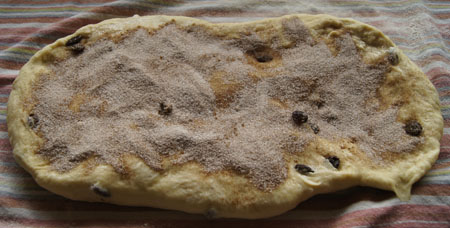
Here is the dough rolled out. Note it is glistening a bit since I had just brushed it with water.
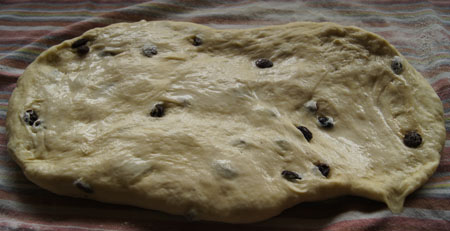
cinn swirl dough 1The cinnamon-sugar sprinkled on top:

cinnamon sugar sprinkled on doughNow the next photo isn’t terribly pretty. This bread about overflowed the pan on baking and leaned to one side. But it tasted great! Next time I make it, I will probably start with less milk and less flour or maybe less yeast (this is not written into the above recipe). I baked it at 375˚, and the crust was browner than I like; next time, I will bake it at 350˚. Otherwise, I will definitely make this again! The swirled layers stayed together, just like I wanted.
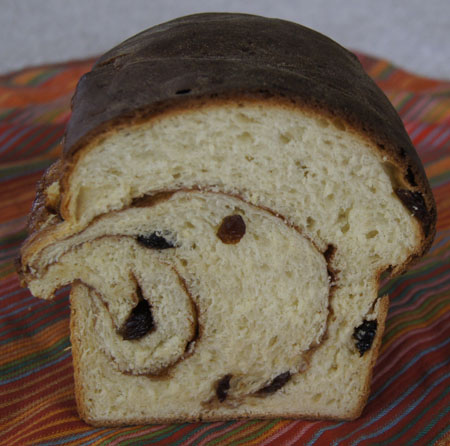
Cinnamon Swirl Loaf

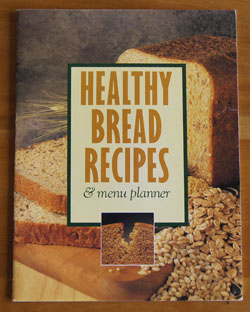
250 Cookbooks: Healthy Bread Recipes

Cookbook #155: Healthy Bread Recipes, Salton/MAXIM Housewares, Inc., Mt. Prospect, IL, 1998.

Healthy Bread Recipes cookbook

Healthy Bread Recipes reminds me that I purchased a Breadman breadmaker around 1998. My second breadmaker, it was highly recommended by King Arthur Flour. I recall that it eventually died – a problem with the dough bucket paddles binding up. I replaced it with another Zojirushi in 2008. The Breadman brand is currently owned by Spectrum Brands Inc. I wrote about my thoughts on yeast breads and breadmachines in the post My Daily Bread.

Healthy Bread Recipes has less than 20 recipes. But since they all have whole grains and are designed for breadmakers, each recipe is right up my alley. I’ll keep this booklet.

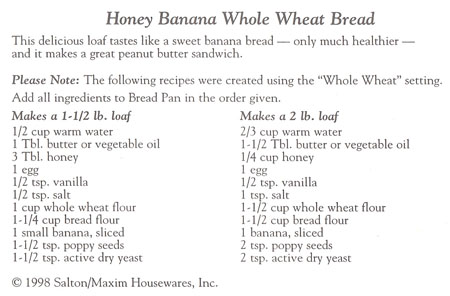
I decide to make “Honey Banana Whole Wheat Bread” for this blog. I’ve made banana yeast breads before, but don’t quite remember which recipe I used. I don’t expect the banana flavor to come through very strongly in this very wheat-y yeast bread, but I like the poppy seeds it calls for and it should be good for breakfast toast and as they say, for great peanut butter sandwiches!

Honey Banana Whole Wheat Bread recipe

Comments

This recipe calls for “1 banana”. Bananas do not come in one size! The banana I had sitting on the counter must have been bigger than they meant because I had to add almost a cup more flour to get the dough “right”. (I weighed one of its bunch-buddies and it was over 6 ounces.) With this big banana and the extra flour, my bread came out huge! It tasted great and had a good texture, but was not pretty in the pan. And it didn’t taste banana-y enought for me, even with all that banana.

Next time, I will slice the banana into a measuring cup, then add water (or milk) to 1 1/3 cup liquid volume. That’s much more scientific and should provide consistent results. And, it will have a higher banana to water ratio and perhaps more banana flavor. I’ve incorporated these changes into the directions below, but I haven’t tried this newer version yet.

Honey Banana Whole Wheat Bread

  • 1 banana, sliced
  • water or milk (see directions below)
  • 1 1/2 tablespoons butter
  • 1/4 cup (3 ounces) honey
  • 1 egg
  • 1 teaspoon vanilla
  • 3/4 teaspoon salt
  • 9 ounces whole wheat flour (I used whole wheat, not white whole wheat)
  • 7 ounces bread flour (I added a bit of gluten flour into this weight)
  • 2 teaspoons poppy seeds
  • 2 teaspoons yeast

Slice the banana into a 2-cup glass measure. Add water (or milk) to 1 1/3 cup volume. Dump the mixture into your bread machine. Add all of the remaining ingredients.

Choose a dough cycle that kneads and takes the dough through the first rise cycle. Watch the dough during the kneading process and add flour or liquid if it needs it (this recipe isn’t perfected yet!).

Remove the dough from the machine and form into a loaf. Place in a 9×5-inch loaf pan. Bake at 375˚ for 30-35 minutes. (When I baked my loaf, I used an instant-read thermometer and when the bread looked brown and done, it tested to 190˚.)

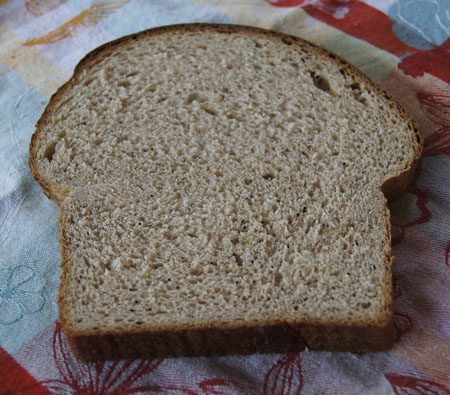
Honey Wheat Banana Bread

This bread is very good! I won’t say excellent (yet) because I want more banana flavor, I’m hoping my suggested revisions will do the banana flavor trick. (Adding dried banana chips might help too.)

Honey Banana Whole Wheat Bread is excellent in peanut butter sandwiches. And it’s good for toast. It might be kind of weird in deli meat sandwiches, but go ahead and experiment.

An even better idea for this bread is: French toast! I used Honey Banana Whole Wheat Bread to make French toast this week liked it so much that I’ll make this bread again just for the delicious treat.

250 Cookbooks: Italian Light Cooking

Cookbook #154: Italian Light Cooking, Elisa Celli, Prentice Hall Press, Ny, Ny, 1987.

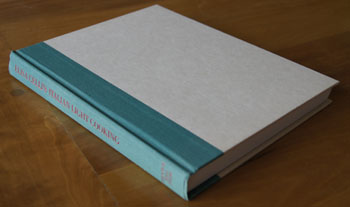
Italian Light Cooking cookbook

I haven’t opened this book in years! I bought it for myself, probably at The Peppercorn. One more venture into finding low-calorie recipes to cook, a common pastime until last year when I read The Big Fat Surprise by Nina Teicholz. (Which may have been a mistake!)

I like this book. Elisa Celli’s ideas for lighter cooking are pretty much like the Mediterranean diet of today: lots of fresh vegetables and fish, less red meats and cheeses, lots of “green olive oil”. (Green olive oil is extra virgin olive oil.) Celli also advocates for durum wheat pasta, which she claims is lower in calories than white flour pasta. She wrote several cookbooks in the late 1980s, and has a current presence on Facebook and YouTube.

Betsy Balsley wrote a review article of this cookbook in the November 1987 LA Times. It’s a good article, and says what I’d like to say – better! Here it is: Remembrance of Things Pasta: Cookbook Writer Elisa Celli Knows What Makes Good–and Bad–Italian Food.

What Celli calls “light” is not necessarily “low-calorie”. Celli feels that Americans add too much butter, cream, and cheese to pasta. In Italy, where she grew up, only small amounts of these heavy ingredients are added to the meals – her Italian food is “light” with lots of vegetables and herbs and fish and small amounts of lean meat. For the dieter, calorie values are clearly listed with each recipe.

(Some recipes do excede the allowance on a low-calorie diet.)

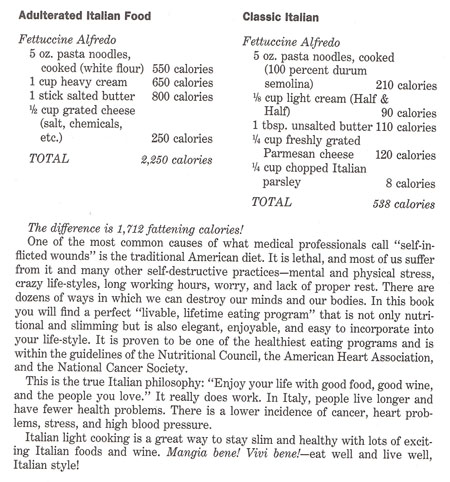
I chose three recipes to try: fettucini, a fish dish, and a dessert. The fettucini recipe comes from the introductory pages of this book and illustrates the Italian light way of cooking:

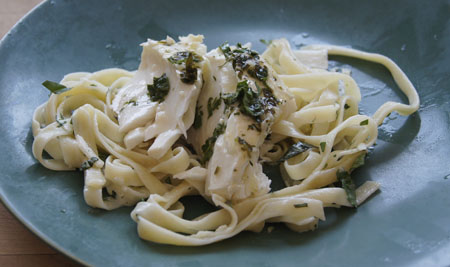
Celli's fettuccine

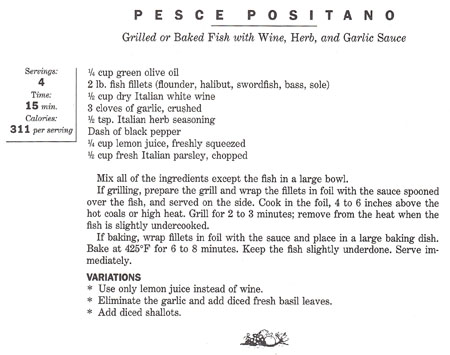
The fish is Pesce Positano, or Grilled or Baked Fish with Wine, Herb, and Garlic Sauce:

Grilled Fish Italian recipe

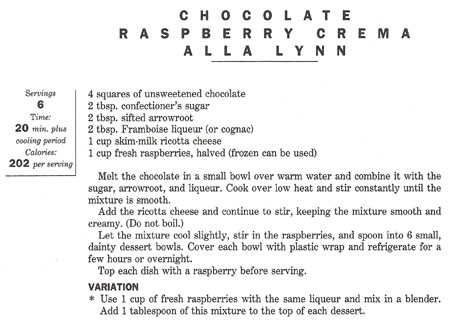
The dessert is Chocolate Raspberry Crema Alla Lynn. I chose this because I like chocolate had some leftover ricotta cheese in the refrigerator!

Chocolate Raspberry Crema recipe

Comments

The fettucini was delicious. It’s a simple recipe: cook the noodles and toss with a small amount of butter, half and half (you could use cream), Parmesan cheese, and parsley. However, I was not able to find a “durum semolina” pasta that had only 210 calories in 5 ounces. I stood in Whole Foods for a long time reading labels. I found several that were “100% durum”, but the lowest calorie value I could find was 500 calories in in 5 ounces. My fettucini dish was good, but not as low calorie as specified in Italian Light Cooking. (Online research reveals: both semolina and durum flours are made from durum wheat; semolina is the milled inner kernel of the wheat – endosperm – and it is a coarse-grind flour; durum is the milled grain, I think it’s everything except the endosperm but I’m not positive.)

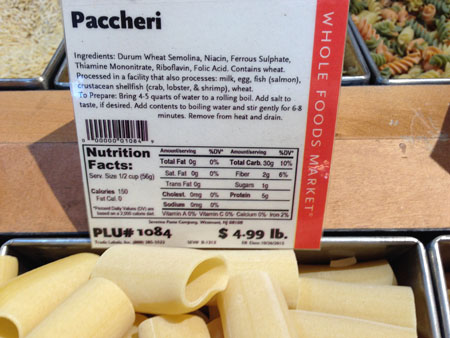
*Note: A few weeks after I wrote this post, I found Paccheri at Whole Foods, made from “durum wheat semolina”. The calorie value is 150 calories per 56 grams, so about 375 calories in 5 ounces. Lower, but not as low as Italian Light Cooking specified.

Durum Pasta

The chocolate dessert tasted “almost good” – we both said that! This is probably due to my mis-interpretation of the measurement of chocolate. The recipe calls for “4 squares of unsweetened chocolate”. What’s in a “square”? My package of Baker’s unsweetened chocolate claims that 2 of the squares in their package (1 ounce) equals 1 square of past-packaging. I do not know what type of packaging Celli’s book meant, so I assumed it was “past-packaging” and I used 4 ounces, or 8 squares, of Baker’s chocolate. It was waaaayy too much chocolate. The dessert hardened quickly into a mass like a pile of hard and cold cookie. It tasted good but a little too bitter, and the mouth-feel was not good. (If I made this again, I would use 2 ounces of bittersweet chocolate.)

The fish was very good and the recipe as I prepared it is below. The drawback to this recipe is that we live in Colorado. Miles from any ocean. I only like fish purchased very fresh and that means very expensive. Wild caught fresh halibut was $27.99 per pound at Whole Foods. I do buy fish this expensive on occasion, since we rarely eat out (and usually save money by eating at home). But it’s really a ridiculous price.

Grilled Fish with Wine-Garlic Sauce
serves 2

  • 3/4 pound fish fillets (flounder, halibut, swordfish, bass, sole)
  • 2 tablespoons extra virgin olive oil
  • 1/4 cup dry white wine
  • 2 tablespoons freshly squeezed lemon juice
  • 1-2 cloves garlic, crushed
  • 1/2 teaspoon dry Italian seasoning (I added a little fresh basil too)
  • black pepper to taste
  • 1/4 cup chopped fresh Italian parsley

To make the sauce, whisk together all of the ingredients except the fish.

Put the fish on a piece of foil. Since you will be pouring the sauce over it, you need to make the foil boat-like. Pour most of the sauce on the fish and wrap the foil around it tightly. Save the rest of the sauce to pass at the table or to pour over the cooked fish before you serve it.

Prepare a hot grill (I use a gas grill). Put the foil-wrapped fish on the grill and cook on high direct meat for 3-4 minutes. Peek at the fish to see if it looks nearly cooked through; if it isn’t, cook a few minutes longer. Keep the fish very slightly underdone.

Serve immediately.

Italian Grilled Fish

I put my fish on top of the fettucini. It was very good! Well seasoned, and the halibut I used was yummy. My dining partner said it was almost “too healthy” tasting. I scarfed it up because I was starving. This is a nice way to cook fish on the grill, since you don’t have to worry about it burning, nor was there any mess to clean up.

250 Cookbooks: Tone’s Easy Entertaining

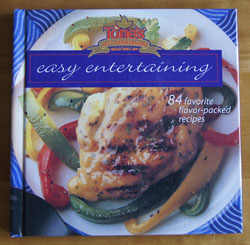
Cookbook #153: Easy Entertaining, Tone’s 125th Anniversary, Tone Brothers, Inc., Iowa, 1998.

Tones Easy Entertaining cookbook

Where/when/why did I buy this cookbook? Dunno. But it is a pretty cookbook, nicely laid out, and some of the 84 recipes are tempting. I don’t find any post-its or writing in it. It’s in great shape! I’ll keep this cookbook.

So what is “Tone’s”? I am unfamiliar with this brand. I learn in the first pages of this book that Tone’s is a brand of spices. In 1873, Jehiel and Isaac Tone founded Tone’s Brothers, Inc., in Des Moines, Iowa. The reason I don’t have any Tone’s spices on my shelves is that they are sold in warehouse stores, like Sam’s Club. None of those stores close to my small town of Lyons!

Tone’s early product line included cinnamon, nutmeg, cloves, allspice, mace, and ginger. And, black pepper. But not black pepper like we have today! No, it was a mixture of pepper, ground olive stones, cayenne pepper, and black coloring. The black coloring was called “lamp black”, and it was made from soot. And we complain today about food additives! Thank you, brothers Tone, for the “revolutionary idea of selling pure ground pepper”.

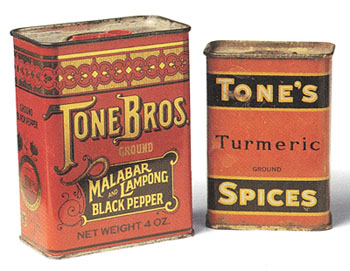
Tones Brothers introduced other innovations in spices, including selling spices in individual consumer units. At first, the containers were made of paperboard and tin.

Tones containers

Tone’s was the first spice company to use clear plastic packaging (1980s). By the 1990s, they produced more than 250 varieties of seasonings and mixes. Tone Brothers was a family-owned-and-run business until the 1970s, when it was purchased by Mid-Continent Bottlers. Then it was swept up in the merger and acquisition frenzy of the business world, and the brand name has now been owned by a series of conglomerates. (Here is a good history of the company.) Tone Brothers registered these different trademarks: Tone’s®, Durkee®, DecACake®, Spice Islands®, Spice Advice®. Tone’s current website is here.

The 84 recipes in this book range from appetizers to salads and sides to main dishes to desserts to beverages. A few years ago I tried the “Mesa Corn with Chili-Seasoned Pork” and liked it so much I added it to my personal recipe files. I’d also like to try: Greek Cauliflower Dip, Coconut Pork Stir-fry, Quesadilla Pie (flour tortillas layered with with rice, chicken, and cheese), Broccoli Pesto Fettucine, Spanish Gaspacho Salad, Sesame Spinach Salad, French Potato Salad, Tuscan Green Beans, and Zucchini Raisin Wheat Muffins.

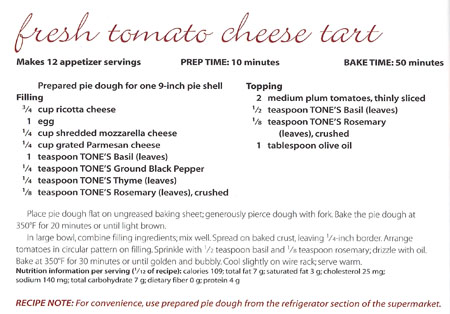
For this blog I choose to try “Fresh Tomato Cheese Tart”. I hope it turns out as good as it looks, because I plan to take it to a potluck dinner-meeting. I decided to use dried basil in the filling as called for in the recipe, but fresh basil for the top.

Fresh Tomato Cheese Tart recipeFresh Tomato Cheese Tart
serves about 12 as an appetizer

crust

  • pastry for one 9-inch pie crust, purchased or homemade

filling

  • 1 egg
  • 3/4 cup ricotta cheese
  • 1/4 cup grated mozzarella cheese
  • 1/4 cup grated Parmesan cheese
  • 1/2 teaspoon dried basil
  • 1/4 teaspoon ground pepper
  • 1/4 teaspoon dried thyme
  • 1/8 teaspoon dried crushed rosemary, or fresh rosemary chopped fine

topping

  • 1-2 fresh plum (roma) tomatoes, unpeeled, sliced thin
  • fresh basil, several leaves, sliced or chopped
  • 1/8 teaspoon dried crushed rosemary, or fresh rosemary chopped fine
  • 1 tablespoon olive oil

Roll the pie crust to a 9-inch circle. If you make your own, you will need to cut it neatly around the edges. Place it on a piece of parchment on a baking sheet, or put it in a large pie plate, like a quiche dish. Poke a lot of holes in it with a fork. Bake at 350˚ for 20 minutes, or until light brown. Let cool before adding the filling and topping.

For the filling, whisk the egg, then whisk in the ricotta cheese and the remaining filling ingredients. Spread carefully and evenly on the crust, leaving a 1/4-inch border.

Arrange the tomato slices on top in a single layer. Sprinkle with the basil and rosemary. Drizzle with the olive oil.

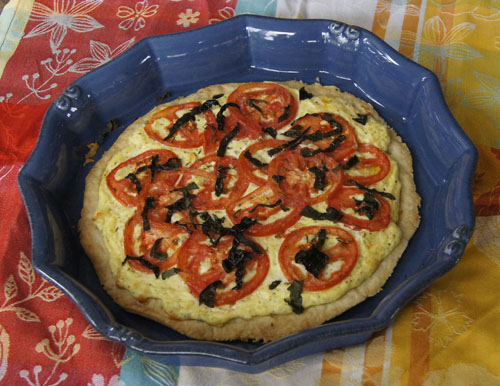
Bake at 350˚ for 30 minutes, until golden and bubbly. Serve warm. (If you cook this on parchment, slide it carefully onto a plate to serve. I baked it in the pan showed in the photo, below.)

Fresh Tomato Cheese Tart

This was delicious! Savory and rich. I strongly recommend the fresh basil – it adds a burst of flavor and color to this dish. Next time, I think I’ll put the fresh basil leaves under the tomatoes.

250 Cookbooks: Recipes for a Small Planet

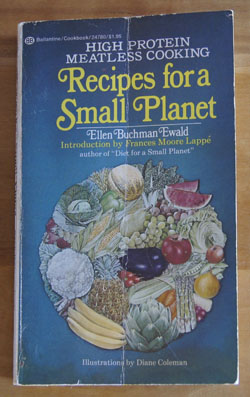
Cookbook #152: Recipes for a Small Planet, Ellen Buchman Ewald, Ballantine Books, NY, 1973.

Recipes for a Small Planet

“If you are already complaining that your don’t want to spend an extra minute in the kitchen, read no further.” So writes Ewald in her introduction to Recipes for a Small Planet. That could be the intro line for this-here blog of mine!

This book goes hand-in-hand with Diet for a Small Planet by Frances Lappé, a book I covered in a previous post. Recipes for a Small Planet provides hundreds of recipes for high protein meatless cooking – combining different vegetables (with dairy) to get complete or complementary proteins, while Diet for a Small Planet focuses mainly on the theory behind the method. (Since Lappé’s book was published, the research her “complementary proteins” is based on has been disputed. Read the Diet post for details.)

The two women, Ellen Ewald and Frances Lappé – or “Frankie”, as Ellen calls her – were close friends. Lappé writes in the Diet for a Small Planet introduction:

“The fun of writing this book was increased immeasurably by the aid and encouragement of friends. First I must thank the person who created the delicious dinner that introduced me to the pleasures of eating without meat – Ellen Ewald. After dinner I went through her kitchen asking: What’s this? What’s that? And she sent me home with a variety of samples – soy grits, whole oats, buckweeat groats, bulgur – all these strange sounding foods which are really amount the most common foods in the world! Ellen is also the person you  can thank for many of the appetizing redipes you’ll find later in the book. Her help made compiling the recipes an adventure.”

Ellen Ewald’s preface reads:

“If we all took a little time to nourish our bodies in the best way possible (instead of in the quickest way), life could be long and healthy. If we choose to disregard the importance of what is in the food we eat, we may as well disregard the importance of having clean air to breathe. (But it should be obvious to all of us that most industries, including the food industry, consider profit before they consider air polution and the internal polution of our bodies.)”

“Food industry”. Unless we have our own gardens, we are dependent on it, for better or worse.

The recipes in this book tend to have long lists of ingredients. Yes, Ellen Ewald likes spending extra minutes in the kitchen! Each recipe is followed by a little box that shows us the “complete protein” combination. Note that hers is not a vegan diet; milk products and eggs are prevalent throughout the book.

The chapters are: breakfast, lunch, soups and stews, salads, dinners, breads, cookies and bars, desserts, and dairy drinks. Some of the recipes do not appeal to me at all: oatmeal soup (stock, milk, garlic, onions, rolled oats, tomatoes), barley and yogurt soup, cabbage soup, garbanzo stuffed cabbage, soybean stroganoff, and split peas in a cheese sauce over rice. I did find several recipes in the bread, dessert, and cookie sections that were more up my personal-taste alley.

My pantry is not stocked with the ingredients to make many of the recipes. Ewald relies heavily on soy beans. Soy products, once the darling of the vegetarian movement, have faded in popularity. It’s not too hard to find soy beans in local stores, and tofu, but soy grits or soy flour can require searching several natural foods markets or online sources.

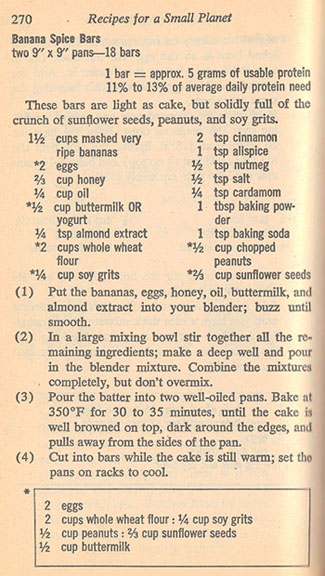
I choose to make “Banana Spice Bars” for this blog.

Banana Spice Bars recipeI really don’t think these bars will be “light as cake”, not with the whole wheat flour and nuts and seeds to weigh it down. I couldn’t find soy grits, so I used 3 ounces of tofu.
There are 17 ingredients in these bars!

The box at the bottom of the above recipe lists the sources of protein in these bars. The eggs and buttermilk have complete protein on their own; the whole wheat flour and soy grits are complementary; the peanuts and sunflower seeds are complementary. I am making a half-recipe in a 9-inch pan; if I cut them into 9 bars, each will have 5 grams of usable protein.

Banana Spice Bars
makes one 9-inch pan

  • 3/4 cup mashed bananas
  • 1 egg
  • 1/3 cup honey (4 ounces)
  • 2 tablespoons oil
  • 1/4 cup buttermilk (or yogurt)
  • 1/8 teaspoon almond extract (or vanilla)
  • 2 tablespoons soy grits OR 3 ounces tofu
  • 1 cup whole wheat flour
  • 1 teaspoon cinnamon
  • 1/2 teaspoon allspice
  • 1/4 teaspoon nutmeg
  • 1/8 teaspoon cardamon
  • 1/4 teaspoon salt
  • 1 1/2 teaspoons baking powder
  • 1/2 teaspoon baking soda
  • 1/4 cup chopped peanuts
  • 1/3 cup sunflower seeds

Put the bananas, egg, honey, oil, buttermilk and almond extract in a blender or food processor. If you are using tofu, add that too. Process until smooth.

Stir together the flour, soy grits (if you are using them), the spices, salt, baking powder, baking soda, and peanuts and sunflower seeds. Pour in the banana mixture and stir to combine (do not overmix).

Pour the batter into an oiled or non-stick-sprayed 9-inch pan. Bake at 350˚ 30-35 minutes, until they test done with a toothpick.

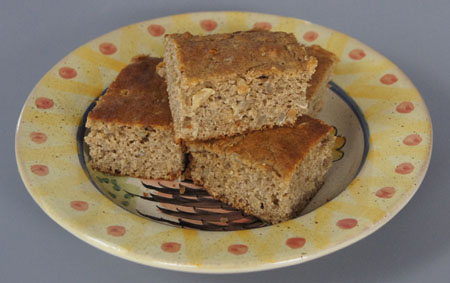
Banana Spice BarsTo my surprise, these really are light as cake! And delicious too! They fall into my personal classification as “healthy”: honey instead of sugar, whole wheat flour, very little oil, tofu, and nuts and seeds. A good snack for an active day.
I was going to recycle this cookbook, but this recipe turned out so well that I think I’ll keep it around and try a few other recipes.

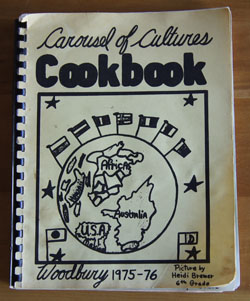
250 Cookbooks: Carousel of Cultures Cookbook

Cookbook #151: Carousel of Cultures Cookbook, Woodbury 1975-76, The Multicultural Committee, Woodbury Elementary School, Garden Grove, California, 1976.

Carousel of Cultures cookbook

I just returned from a fun visit to my sister’s lovely home in Southern California, so when my hand reached for this cookbook on the shelf yesterday, I smiled. My sister taught at Woodbury Elementary School and she gave me this cookbook way back when. In it are handwritten notes for me. I’m keeping this cookbook!

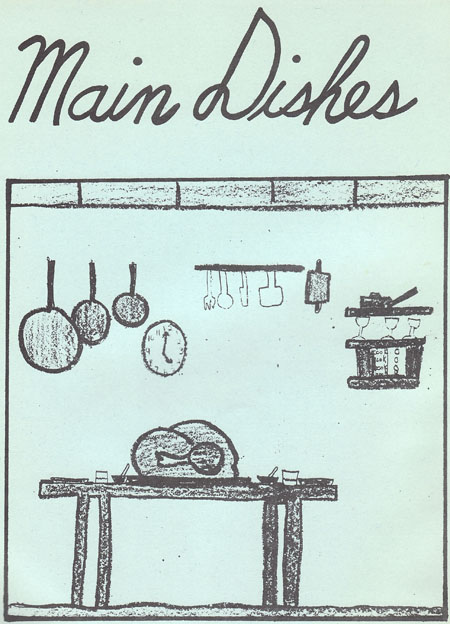
Carousel of Cultures Cookbook is a “community” cookbook, similar to my Lyons Elementary Cookbook. Teachers and parents at Woodbury Elementary contributed all of the recipes. The introduction reads: “This cookbook is our way of sharing the different ways food is enjoyed in the many cultures of our community.” Each section is illustrated with a drawing by one of the students.

student drawing

So many cultures joining together in Southern California in 1976! Below are the countries represented and a sample recipe title from each:

African (Fufu)
Chinese (Chinese Beef and Peppers)
English (Maids of Honour cakes)
French (Crepes with Creamed Seafood)
German (Sauerbraten)
Greek (Telley Savalas’ Lamb Pallakari)
Indian (Hurgha Kari)
Italian (Fettuccine)
Mexican (Pescado en Mantequilla)
Moroccon (Lamb Moroccan)
Philipino(Chicken a la Monja)
Polynesian (Crab Meat Polynesian)
Swiss (Chicken with Tomato Sauce and Bacon)
Spanish (Leg of Veal)
Turkish (Rice Pilav)
Russian (Karabakh Loby)
Sweden (Rye Bread)
U.S.A. (Company Stew)

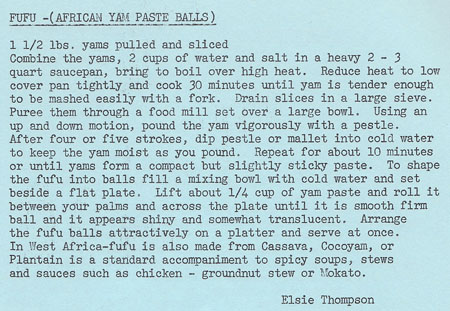
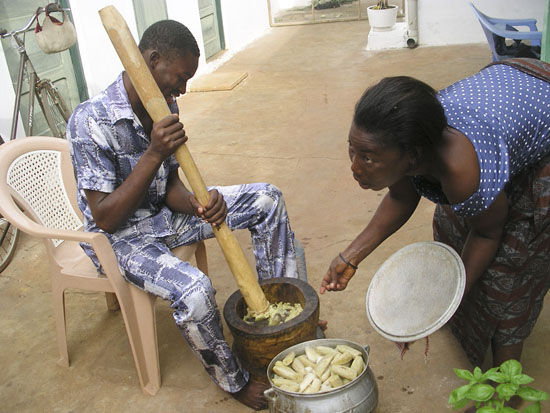
I was surprised to see a recipe for the African dish “fufu” in this 1976 gathering of recipes. In 2010, we traveled to Togo, West Africa to visit our daughter in the Peace Corps. Her favorite food there was fufu. Of course we had never heard of it! Making fufu in Africa was a long and usually social project. The ingredients were plaintains (a less sweet banana usually eaten cooked) and yams. But the “yams” were not the orange sweet potatoes that we eat at Thanksgiving. No, these yams are large and long and white and starchy, and look like a root. (See my footnote on yams at the bottom of this blog entry.) For fufu, they are peeled and then boiled, then they are put in a huge wooden bowl and pounded with a large mallet for about an hour. Traditionally, the men take turns doing the pounding, and the women move the mixture around under the mallet between pounds. When the pounding is finished, the fufu has a consistency of sticky mashed potatoes. Here is a photo of authentic fufu prepared in Togo at a gathering of friends of my daughter in 2010:

making fufu

Here is the recipe for fufu from Carousel of Cultures:

Fufu recipe

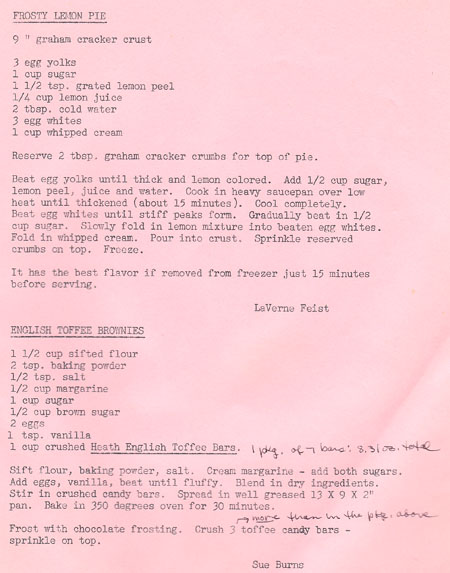
I was surprised at how many recipes I’d like to try from this cookbook: a Greek lamb dish, French seafood crepes, sauerbraten, rice and bread puddings, fig nut bread, Greek nut cake, and one or all of the raw apple cakes. Spinach Salad, with notes from my sister, is a classic potluck dish that is worth saving. I like the almond cookies for a Chinese meal. My sister contributed a recipe for English Toffee Brownies and my mother contributed Frosty Lemon Pie. My sister’s mother-in-law contributed Chocolate Nut Balls.

family recipes

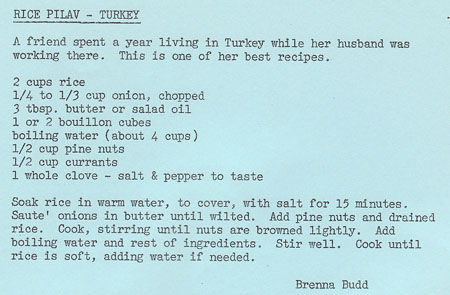
I decide to make “Rice Pilav” for this blog:

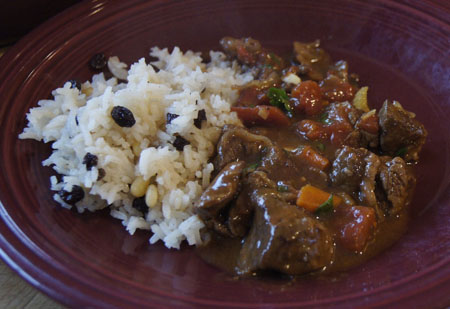
Rice Pilav recipeWe traveled to Turkey a couple years ago and thoroughly enjoyed the food (and the trip!). We often had rice like this rice pilav on that trip.
Rice Pilav (Turkey)
serves about 4

  • 1 cup white rice
  • 1/2 teaspoon salt
  • 1 tablespoon butter
  • 1/4 cup chopped onion
  • 1/4 cup pine nuts
  • 2 cups boiling water and 1 cube bouillon OR mix and boil 1 cup water and 1 cup chicken stock
  • 1/4 cup currants
  • 1 whole clove, or a few shakes of ground cloves
  • salt and pepper to taste

Cover the rice and salt with hot tap water (this is not the boiling water indicated in the ingredient list). Let soak about 15 minutes, then drain.

Melt the butter and add the chopped onion; cook until the onion wilts. Add the pine nuts and the drained rice; cook and stir until the pine nuts are lightly browned. Add the boiling water/bouillon OR water/stock mixture, currants, clove, and salt and pepper. Cover and cook until the rice is soft, adding more water if necessary.

Rice Pilav

I served this with my own Lamb Stew with Cinnamon and it was delicious! Perfect combination of flavors.

Footnote about yams
(a note about the yams used in fufu)

In the US, yams and sweet potatoes are often called the same thing. In botanical terms, they are different species. True yams are seldom grown in the US, but around the world, over 150 species of yams are cultivated. Yams can range from potato-size to over 7 1/2 feet long and 120 pounds. The ones we saw in Togo were about a foot long, white to tan in color, and a couple inches in diameter. (Reference: Food Lover’s Companion)

250 Cookbooks: Woman’s Day Encyclopedia of Cookery, Volume 7

Cookbook #150: Encyclopedia of Cookery, Vol. 7, Kid-Moc, Woman’s Day, Fawcett Publications, NY, 1966.

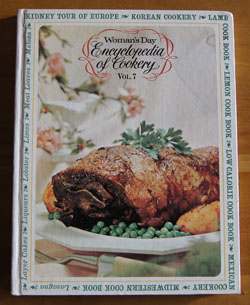
Encyclopedia of Cookery Volume 7 cookbookI have a set of twelve Encyclopedia of Cookery volumes and this is the seventh of that set – I covered the first six in previous posts. I’ve enjoyed all of them so far, and I happily open this one to learn curious and helpful information about foods from kid(ney) to moc(ha).
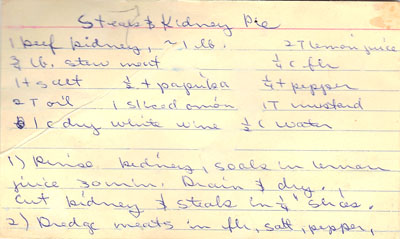
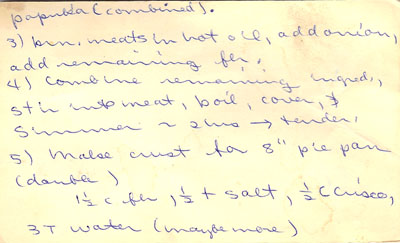
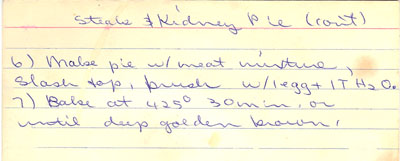
The entry for kidney begins with a story by of a woman who traveled through Europe with her kidney-loving husband. He believed the worth of a restaurant is revealed by how well they cook this organ meat. Well, I’m not a fan of kidneys as food. I used to eat this meat because some health food authors of the day touted its nutritional value (like Adele Davis). I gave up that idea long ago, although I used to make a decent “Steak and Kidney Pie”. Below is my own recipe card, written sometime in the 1970s.

Steak and Kidney PieSteak and Kidney PieSteak and Kidney Pie

The next entry that catches my eye is “kiss”. The Encyclopedia defines a kiss as “a small chewy mound-shape confection prepared with egg white and sugar”. A kiss also refers to a bite-size piece of candy, including commercially producte chocolate, usually wrapped in paper or foil. Yup, Hershey’s Kisses™!

One of my husband’s favorite meals is knackwursts (or knockwursts). He likes them served with sauerkraut and mustard. According to the Encyclopedia, “The name is of German origin, knack meaning ‘to crackle’ or ‘to make a noise when breaking’, and wurst means sausage”. Knockwursts are made from a recipe similar to hot dogs, except they have more garlic and are a lot bigger. Sadly, I’ve only rarely been able to find these in local markets since the 1970s.

I continue through the K’s and L’s. Korean cookery (Mother tried a recipe for “Korean Broiled Short Ribs” and didn’t like it), kumquat (these grew in our yard in Southern California where I grew up), Lamb Cook Book, lard. Lard is pork fat from “fat backs, clear plates, and leaf kidney fat which has been rendered [melted away from connective tissues] and clarified”. The Encyclopedia gives a recipe for lard pastry – I might try this someday, since “lard is particularly desirable in making flaky texttures in biscuits and pastry.”

I am not surprised that my mother lingered on the “layer cake” section. She tried the “Orange Gold Layer Cake” and declared it “delicious”. This is a cake with 8 egg yolks, orange juice, and orange rind in the batter, and a butter frosting made with orange juice, lemon, butter, egg yolk, and powdered sugar. Sounds good, and rich.

Lebkuchen (a spicecake of Germa origin and one of the oldest of cakes) and Lemon Cookbook. Lentils are one of the first plants whose seeds were used for food. “The lentil is extremely nutritious and is one of the staple foods of the Near East, where a dish called ‘Esau’s Dish of Lentils’ is still a favorite.” The story goes that Esau sold his birthright for bread and a “pottage of lentiles”.

Lobsters – the first English settlers to America bought lobsters for as little as a penny apiece! I learn that mace, a spice, is made from the arillode that covers the nutmeg seed. The mango tree is considered sacred in India. (I love mangoes but my body responds to them with a food allergy.) The manioc is a tropical plant also known as cassava, mandioc, or yucca. Maraschino cherries are made from sweet cherries that are “bleached, pitted, and steeped in a syrup made of sugar, water, a touch of oil of bitter almonds, and food coloring.”

Mother liked the “Basic Meat Loaf” on page 1125. I like the meat balls! This volume has a section on Midwestern Cookery that kind of intrigues me.  Mirepoix is the culinary term for a concentrate of diced carrot, onion, and celery cooked in butter – I use this mixture of vegetables a lot to begin sauces, now I have a fancy name for it. Mincemeat pies were a family tradition when I was a little girl. Those pies began with purchased mincemeat; this book has an 18th-century recipe for mincemeat from ground beef, apples, candied lemon and orange peels, citron, raisins, currants, orange and lemon juice and rind, beef suet, brown sugar, allspice, cinnamon, cloves, coriander, mace, nutmeg, bourbon, and rum.

The last entry is mocha. We know this as a mixture of chocolate and coffee, but it originally referred to a kind of coffee grown in the Yemen district of Arabia and exported from the port of Mocha on the Red Sea.

And what shall I make for this blog? I decide to make “Lentil Salad”.

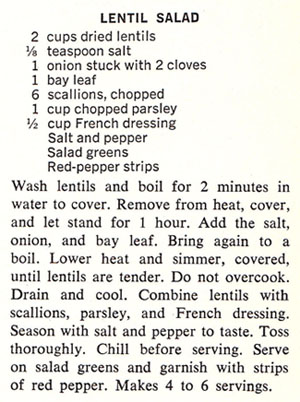
Lentil Salad RecipeI’ve cooked lentils before, but not very often. I think this salad sounds tasty and fresh, and nutritious!
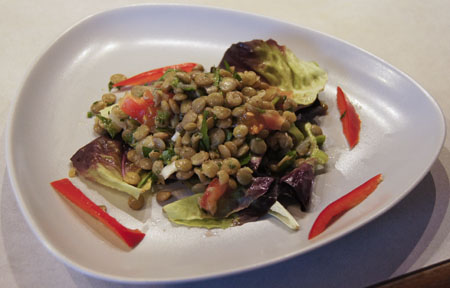
Lentil Salad
serves 2-4 as a side salad

  • 1 cup dry lentils
  • 1/4 teaspoon salt
  • 1/2 of a medium onion, chopped
  • 1 bay leaf
  • 2-3 green onions, chopped
  • 1/2 cup fresh parsley, chopped
  • 1/4 cup French dressing (bottled or *home made)
  • salt and pepper to taste
  • garnishes, such as lettuce, red pepper strips, chopped tomatoes

Wash the lentils, then put in a pot with the salt; cover with water and boil 2 minutes. Remove from heat, cover with a lid, and let stand for about an hour.

Add the onion and bay leaf and bring again to a boil. Lower heat and simmer, covered, until the lentils are tender, about 15-20 minutes. Check often – do not overcook! You want them tender but not mushy.

Drain the lentils (I used a strainer). Place them in a bowl and add the green onions, parsley, and French dressing. Season iwth salt and pepper.

Serve chilled or at room temperature. If desired, plate over salad greens and garnish with strips of red pepper.

*Keeping on the alphabetical theme of Kid-Moc, I used the Lemon French Dressing from page 1053 of this cookbook. Briefly, shake together 1/2 cup fresh lemon juice, 1 1/2 cups vegetable oil, 1 teaspoon dry mustard, 1 teaspoon paprika, a dash of cayenne, 1/2 teaspoon salt, and 1/4 teaspoon pepper.

Comments

I served the lentil salad alongside grilled lamb (keeping with the “L” theme!). Even my dining partner liked it! Not something I could serve every day, but it’s a good salad and nice to have in my repertoire.

Lentil SaladI liked the cooking method for the lentils because it didn’t get them too done. Note that I left the cloves out and used chopped onion, changes from the original recipe. This basic lentil salad could be varied tons of ways with different seasonings, vegetable additions, and dressings.
250 Cookbooks: Soup and Crock-Pot Recipes

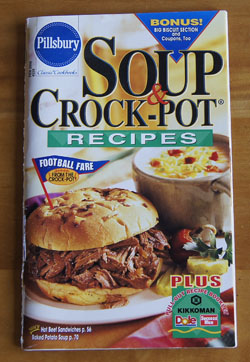
Cookbook #149: Soup and Crock-Pot Recipes, The Pillsbury Company, 2000.

Soup and Crock-Pot Recipes cookbook

This is one of the series of “Classic Pillsbury Cookbooks” – I discussed their history in a previous post.

Soup and Crock-Pot Recipes has three main chapters: Quick ‘n Easy Soups, Hearty Crock-Pot Meals, and Slow-Simmering Soups. The recipes in the Quick ‘n Easy Soups chapter call for brand-name convenience foods: packaged au gratin potatoes, rotini tomato soup, purchased cole slaw blend, instant rice, canned spaghetti sauce, and even ramen noodle mix. Far, far from my love of from-scratch cooking!

So I turned to the “Hearty Crock-Pot Meals” chapter with some trepidation. Will I be able to find something to cook from this book? To my pleasant surprise, the recipes in this chapter are more up my line of cooking. I jot down “Jerked Chicken Sandwiches” and “Hot Beef Sandwiches au Jus” to try. Between chapters, I find a recipe I like for a yeast bread called “Wild Rice Batter Bread”.

The “Slow-Simmering Soups” chapter yields a couple more recipes. I note “Pork and Tortellini Soup” (because I often find pork loin on sale and tortellinis are good) and “Chicken Soup with Cornbread Dumplings” (because I love dumplings and it uses leftover chicken). Finally, “Roasted Vegetable Soup” looks interesting – you roast zucchini, onions, red bell pepper, whole mushrooms, and garlic in the oven, then add them to a broth and cream mixture for a short time on the stove top. Might not get this soup past my meat-eating husband, but us girls would probably like it.

Will I keep this cookbook? No, I will recycle it. But first I will scan in the recipes I want to try. For this blog, I will make the “Jerked Chicken Sandwiches”.

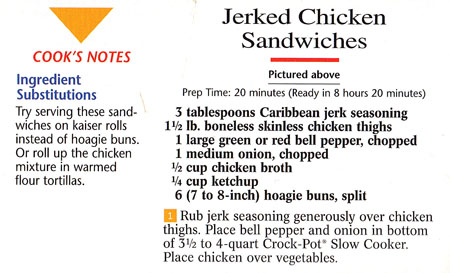
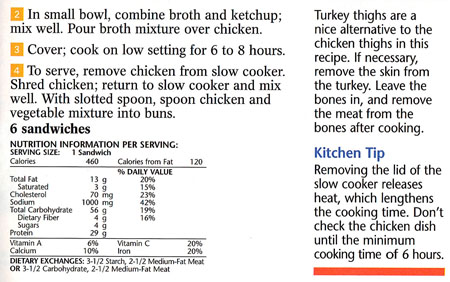
JerkedChickenSandRec1Jerked Chicken RecipeIt’s a crock pot recipe, but I plan to simmer the jerked chicken on the stove top instead. For the rolls, I will make my own from a King Arthur Flour recipe.
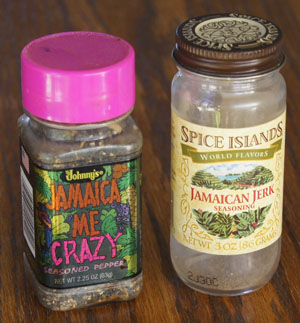
Jerk seasoning is usually easy to find in a market, and often it is called “Jamaican” rather than “Caribbean” jerk seasoning. Each brand will vary, but most are made from a combination of hot pepper, onion and garlic powders, and the spices cinnamon, nutmeg, and allspice. You can make your own jerk seasoning too – just search online. In my own spice cabinet I found the two jerk seasoning jars in the photo below. I combined them to get 3 tablespoons, finishing one jar in the process.

Jerk seasonings

Jerked Chicken Sandwiches
makes about 6 sandwiches

  • 3 tablespoons jerk seasonings (see my notes in the above paragraph)
  • 1 1/2 lb. boneless skinless chicken thighs
  • about 1 cup chopped mild peppers: I used half a green bell pepper and half a pablano pepper
  • 1 medium onion, chopped
  • 1/2 cup chicken stock
  • 1/4 cup ketchup
  • sandwich or hoagie buns (I made Philadelphia-Style Cheesesteak Sandwich rolls, a King Arthur Flour recipe)
  • sandwich garnishes like mustard, sliced onions, tomatoes, lettuce

Rub the jerk seasoning into the chicken thighs.

Put the peppers and onion in a large pot (for stove top cooking) or in a slow cooker. Add the chicken thighs, broth, and ketchup. Mix.

If you are cooking on the stove top, simmer about 2 hours, or until the chicken is tender. In a slow cooker, cook 6-8 hours on the low setting.

Remove the chicken pieces from the cooking pot, shred them, then put them back in the pot.

Slice the sandwich rolls in half. Spread mustard on the rolls if you wish. Remove the jerked chicken mixture with a slotted spoon (too much of the liquid can soak the rolls) and pile it high on each sandwich. Garnish as desired, and serve!

Jerked Chicken Sandwiches

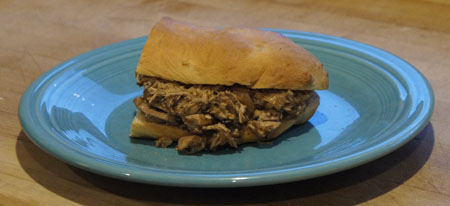
These were a hit. I took the photo before I added the garnishes. The lettuce-tomato-onion was a last minute idea on my part, and it was a great idea – these sandwiches were delicious! Hubbie added mustard to his second sandwich. Yes, he went back for seconds. That’s why I give a thumbs up for this recipe.

The pablanos were a good idea too. They are flavorful and just a bit spicy hot. You could go hotter with fresh green chiles or even jalapenos.

My homemade rolls were great. Really great! Soft but tough enough to hold together, not too tall, not too flat, had a delicious flavor . . . these may just become a standby in my kitchen repertoire. I baked two of the rolls in a baguette pan and one on parchment and found that the parchment method worked best.

Note: This jerked chicken recipe would adapt well to an electric pressure cooker. Also, you could double the batch and freeze leftovers for later quick meals.

250 Cookbooks: The Fannie Farmer Cookbook

Cookbook #148: The Fannie Farmer Cookbook, Wilma Lord Perkins, Little, Brown and Company,Boston, Toronto, 1965.

The Fannie Farmer Cookbook

I think I found The Fannie Farmer Cookbook in an old house that we lived in from 1975-76. The house, known as “Walnetto” in our group of friends, was on Walnut Street in Boulder, at about 21st. The backyard of the house stretched back to a creek. We had a big garden. Chickens. Volleyball games. Parties. We could walk to downtown bars. I rarely drove my old VW bug because I could walk up to the university where I was a grad student. Once the house a couple doors down was on fire, and my boyfriend-now-husband pulled an elderly woman to safety.

Of course those times are gone and the land is now covered with apartments and condos. But we have our memories.

So what is The Fannie Farmer Cookbook? It’s important enough in American cooking history to have its own Wikipedia entry. I learn that Fannie Farmer, born in 1857, was raised in a family that valued education, but could not attend school because of a crippling illness as a teen. So she started cooking at a boarding house at her parents home. Her interest in cooking took her to the Boston Cooking School, where she excelled as a student and eventually became school principal.

Fannie’s food interests covered nutrition, diets for the sick, sanitation and cleanliness in the kitchen, the chemical analysis of food, techniques of cooking and baking, and managing the kitchen and household. These “domestic science” topics were part of a movement in the US around 1890, and Fannie was there at the right time with the right interests and intelligence and the right – spunk! In 1896 she wrote her first book: The Boston Cooking-School Cook Book. (I have a copy of the 1906 edition of that book on my bookshelves – still to be covered in this blog.)

(The practice of “domestic science” – nutritious foods and clean kitchens and efficient homes – improves the lives of families and individuals on a daily basis. It got a bad rep in the hippy/women’s lib movements as being yet another gender-defiining ploy: “let the girls stay in the kitchen”. Women in my generation knew domestic science as “home economics”, or “home ec”. Most girls – me included – took home ec in junior high.}

Fannie Farmer left the Boston Cooking School in 1902 to continue her teaching at Miss Farmer’s School of Cookery. She lectured on diets and nutrition for the sick at Harvard Medical School. “To many chefs and good home cooks in America, her name remains synonymous today with precision, organization, and good food” reads the current Wikipedia entry.

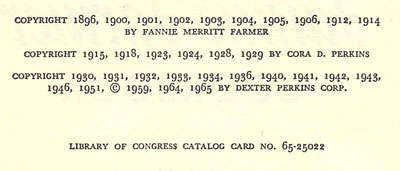
My 1965, eleventh edition of The Fannie Farmer Cookbook has been revised many times:

FFCB copyright page

Note that Fannie’s last edition was the 1914 one; Cora D. Perkins revised from the editions from 1915-1929 and Wilma Lord Perkins 1930-1965. After 1965, a few other editions were published; Marion Cunningham is listed as the author from 1979 on. I think the last issue was the 1996 Anniversary Hardcover edition.

This is the first time I have really read my copy of The Fannie Farmer Cookbook. The writing style is friendly and clear and to the point. (One of my favorite American-standby cookbooks, The Joy of Cooking, tends to be a bit bossy.) It’s well organized and the index is almost 100 pages!

I am impressed with how the recipes still stand today as cookable. The clam chowder, with fresh shucked clams and salt pork, is a recipe I’d like to try. Roast guinea hen with a slice of bacon inside and more laid across the top also sounds interesting. Classics of American cooking like Boston Baked Beans. Alligator pears? Avocados! Recipes for leftover chicken and turkey. Sauerbraten and potato dumplings and Alfredo’s noodles. Cinnamon apples.

My favorite sections of The Fannie Farmer Cookbook are dessert recipes. I learn that “cottage pudding” is a classic American cake that can be frosted and/or filled. Fruit desserts include grunts and dowdies and dutch apple cake, cobblers and upside down cake. All of the recipes are made from scratch. I do like this book!

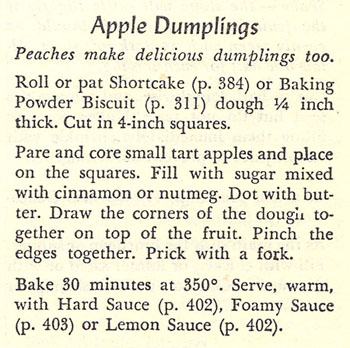
I am going to make Apple Dumplings. At first I thought that the “dumpling” would be boiled but no, these are kind of like a baked apple wrapped in shortcake-biscuit dough and doused with sauce.

Apple Dumplings Recipe

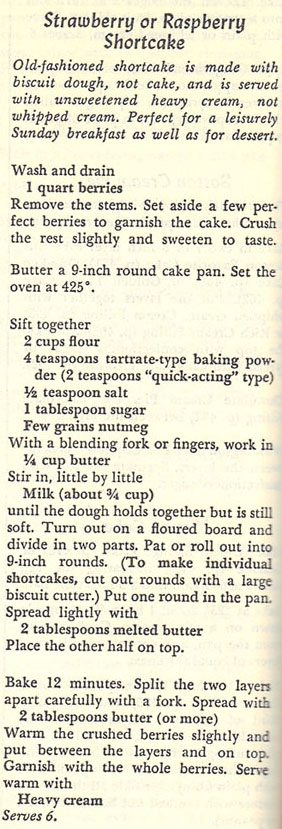
It’s up to me to decide the type of dough and the type of sauce. I choose a shortcake dough (p. 384) and the hard sauce (p. 402). Oh – I caught a mistake! The shortcake dough is on p. 484.

Shortcake Recipe

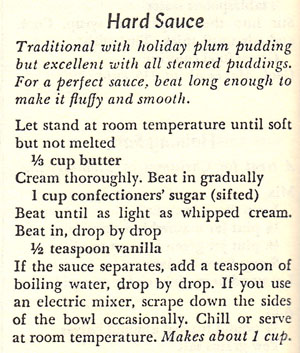
As these were baking, my daughter said these would be best with ice cream. So I didn’t make the following hard sauce, which is simply a frosting made from butter and powdered sugar.

Hard Sauce Recipe

I found that the shortcake recipe made just the right amount of dough for 5 small granny smith apples. You can adjust the amount of dough for the number of apples (e.g., servings) you desire, or you can use leftover dough to cook as biscuits.

Apple Dumplings
makes 5; best if you serve one per person!

Apples

  • 5 small tart apples
  • 1/2 cup sugar (I used white sugar; brown would be good too)
  • 1 t cinnamon
  • freshly grated nutmeg to taste
  • butter

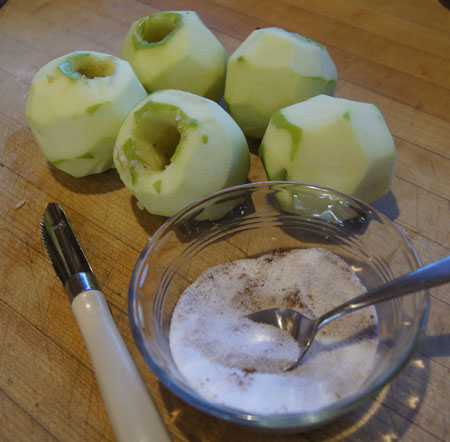
Pare and core 5 small tart apples. Mix the sugar and spices.

apple preparation

Shortcake

  • 2 cups flour
  • 2 teaspoons baking powder
  • 1/2 teaspoon salt
  • 1 tablespoon sugar
  • a few gratings of nutmeg
  • 1/4 cup butter (unsalted)
  • milk: about 3/4 cup

Stir together the flour, baking powder, salt, sugar, and nutmeg. Cut in the butter with a pastry cutter or your fingers, or use a few pulses in a food processor.

Stir in the milk, little by little, until the dough holds together but is still soft. Turn out on a floured board (fold over a few times if necessary) and roll to 1/4-inch thickness.

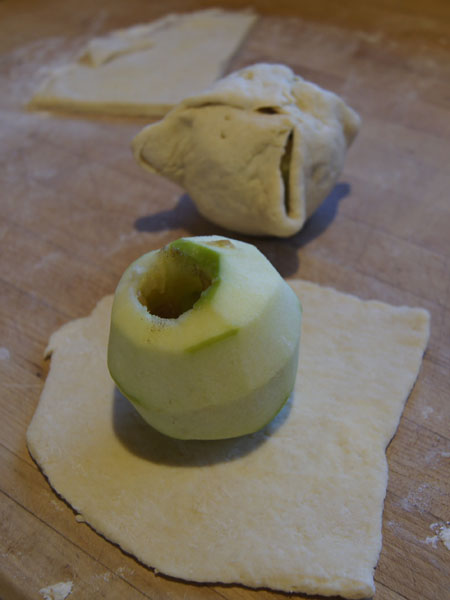
Divide the dough into 5 equal pieces and roll each to a size that will wrap up and around one of the apples. My rolled dough wasn’t really a square, it was more free form.

apple dumpling preparation

Place an apple on a piece of dough and fill the apple with some of the sugar-spice mix. Dot the inside with a little butter. Fold the dough up from four opposing sides and pinch together over the top of the apple. Continue until you finish all the apples and dough.

Place the apples in a baking pan so they are not touching. I sprinkled some of the remaining sugar-spice mix on top of the dough and highly recommend this step.

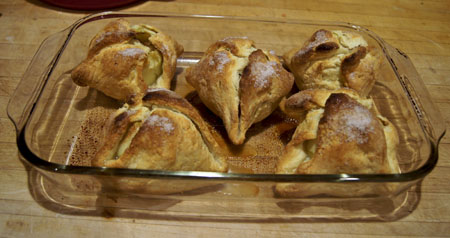
Bake at 375˚ for about 45 minutes, until the dough is golden brown. Serve warm with ice cream.

Apple Dumplings

Great great great! These are delicious. So fun and different. We had never had anything like it before!

It will be interesting to compare The Fannie Farmer Cookbook with my 1906 edition of Farmer’s The Boston Cooking-School Cookbook. How much of the friendly style is Fannie’s or the revision author? What were the original recipes? A post to look forward to.

250 Cookbooks: Microwave Guide & Cookbook

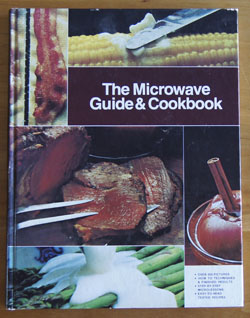
Cookbook #147: Microwave Guide & Cookbook, General Electric Co., USA, 1979.

Microwave Guide & CoobookWho needs an instruction book for a microwave oven? You just put in your coffee cup or lunch, set the dial for a minute or two, and click start, right? And if you ever want to know how long to cook a particular food item, you just google it.
So were my thoughts as I sat down with this book. I started leafing through it. The very first pages describe how microwave ovens work. A magnetron in the microwave oven generates and transmits microwaves. “Microwaves” are high frequency (and short wavelength) radio waves. AM, FM and CB radiowaves are lower frequency (and higher wavelength) than microwaves. Your microwave oven is similar to a miniature broadcasting system! It is self contained – only the inside of the metal-lined oven sees the broadcast.

How do microwaves cook food? They agitate water molecules and cause them to vibrate and generate heat. Most food has plenty of water in it so it heats – and cooks. (And the air around the food does not get hot, so the food does not brown.)

On page 5 of The Microwave Guide & Cookbook, a potato is comparisonally cooked in a pan, an oven, and in a microwave. For each process, they recorded a “heat photo” or thermograph. This tickles my scientistific nerve! After 4 minutes, a microwaved potato is all yellow or hot, while it takes an hour for a potato in a conventional oven to show the same thermograph.

Twelve big pages show photos of foods that cook particularly well in a microwave; I find this practical, visual, and useful. This book recognizes the limits of microwave cooking, while reminding me that I could be using it for more foods than I currently do. A few pages describe microwave safe dishes and food coverings.

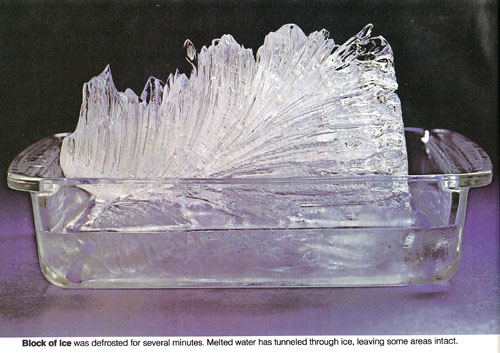
And then, in the defrosting section, a lovely photo of a block of ice partially thawed in a microwave:

microwaved block of ice

Isn’t that cool? I think this book is a keeper! I like reviewing the science behind my appliances and I like having good cooking references at home for those times when we don’t have the internet in our semi-rural area.

The Microwave Guide & Cookbook presents different foods in separate chapters: appetizers, meats, poultry, fish, eggs and cheese, sauces, pasta and rice, vegetables, breads, desserts, and jams. Each of the meat, poultry, and fish chapters begins with a description of how to defrost different forms of the food (e.g., details for hamburger, steaks, and roasts) and then gives cooking instructions and a few recipes. The recipes are often for illustration – the cook is encouraged and guided to adapt his or her own recipes to a microwave version.

What I learned or found useful:

In the ground meat section, I liked the instructions for defrosting. My current microwave oven has an autodefrost function that works miserably; now I have the knowledge to use a manual defrost mode more effectively.

In the steak section, they say you can grill a steak briefly to get the grill marks and flavor, then heat it up in the microwave at dinner time. Sounds like a good idea for a busy cook.

I found a ham and pork loaf recipe that might help me use up leftover ham and have an interesting filling for sandwiches.

Bacon can be microwaved on a plate covered with a paper towel.

Explicit instructions for cooking chicken are given: number (and size) of the chicken pieces; cooking power; cooking times; turning instructions. This cookbook has a microwave version of Mexican Chicken Casserole that I would like to compare and contrast with the two versions I have covered in this blog: one and two.

You can boil pasta in a microwave! Maybe we will (again) have an extended power outage and I will only have the use of my microwave oven when using our somewhat-limited backup generator system.

The egg section gives a good “microlesson” on how to microwave scrambled eggs and how to poach an egg. I could definitely learn from this. Hey, they have an egg and cottage cheese scramble, like I make on the stove top! Microwave oven users are given a strict warning NOT to microwave whole eggs in the shell. Oh boy, I learned this in lab. Back in the 70s I was working in a molecular biology lab. We had a microwave oven in the lab, ostensibly to liquify agar gel for bacteria plates. Well, one of our young lab helpers decided to microwave a whole egg in it. It burst loudly and violently! The lab stank for weeks.

The vegetable section is excellent and complete with tables and comments. I know I’ll refer back to this in the future.

Desserts. How to melt chocolate, make fudge, s’mores, custards, puddings, and pies. Brownies. Cakes in a microwave oven rise higher but are not brown; the texture is great, though, and frosting will cover any difference. Quickie chocolate sauce, butterscotch sauce, and cinnamon sugar sauce might come in handy and tasty.

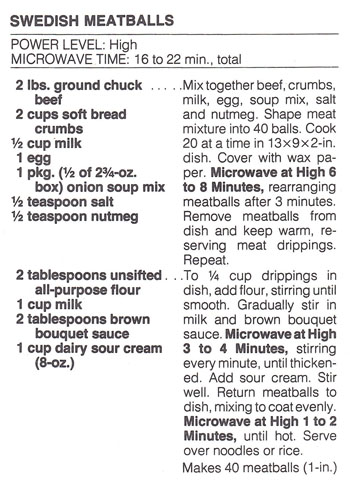
With all these good ideas and learning lessons, what to choose to cook for this blog? Umm, I do love meatballs. Let’s try a microwave meatball recipe and compare and contrast with my usual stovetop method. How about Swedish Meatballs?

Swedish Meatballs recipeIn the Microwave Guide & Cookbook, general instructions for microwave meatballs are given on the same page as the Swedish Meatballs recipe. I find these instructions useful:
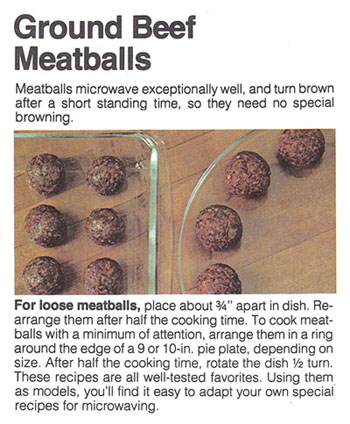
microwaving ground beef meatballsI halved the recipe for the two of us. I usually cook 12 ounces of meat for us – I cooked about 14 ounces this time and had a few meatballs left over. I didn’t have brown bouquet sauce (kitchen bouquet) so I left it out.
Microwave Sweedish Meatballs
serves about 2

  • about 14 ounces ground beef
  • 1 cup bread crumbs
  • 1/4 cup milk
  • 1/2 egg (whisk an egg, measure wieght or volume, use half)
  • 1/2 packet onion soup mix*
  • 1/4 teaspoon salt
  • 1/4 teaspoon nutmeg
  • 1 tablespoon flour
  • 1/2 cup milk
  • 1/2 cup sour cream

*Onion soup mix still comes with 2 packets per box. But, now the box weighs 2 oz. instead of the old 2 3/4 oz. I opened one packet and used about half of it for my version of the recipe.

Mix the ground beef, bread crumbs, milk, egg, onion soup mix, salt, and nutmeg. Form into 20 meatballs (I used a kitchen scale to get them all equal-sized).

Put the meatballs in a glass baking dish that fits in your microwave oven. (I used a 9×11-inch glass pan.) Cover with wax paper.

Microwave on high for 6-7 minutes (until done), rearranging the meatballs halfway through the cooking. (If you question whether or not they are done, you can gently cut an opening in one to check.)

Remove the meatballs from the baking dish and set aside. Add the flour to the drippings that remain in the baking dish and stir well, then gradually stir in the milk. Microwave at high for 3-4 minutes, stirring every minute, until the mixture is thickened. Add the sour cream and stir.

Stir the reserved meatballs into the sauce and mix to coat evenly. Microwave at high for 1-2 minutes, until hot. Serve over noodles or rice.

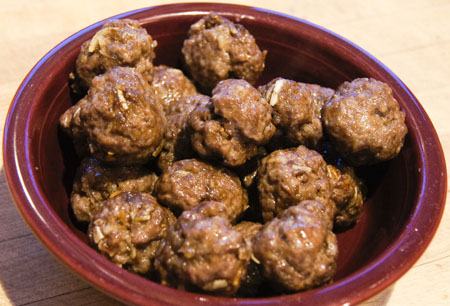
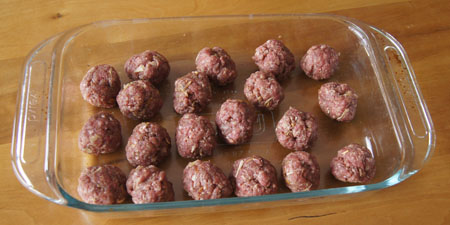
Here are the meatballs before cooking:

uncooked meatballsAnd here they are cooked:

cooked meatballs

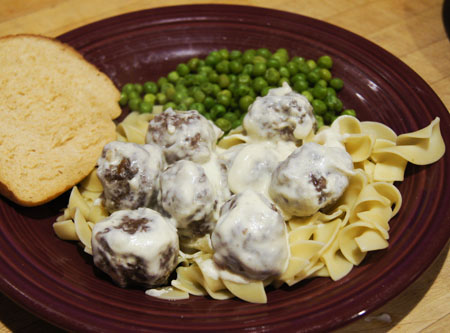
Plated:

Microwave Swedish Meatballs

I got raves for this simple dish! It really was easy and fast, and tasted great. I didn’t have a splattered range top to clean either. I did kind of miss the good odor of browning meat. But other than that, I think these are just about as good as traditionally-cooked meatballs.

It would be easy to adapt any of my current meatball recipes to this microwave version: the rule is 20 meatballs from 14 ounces of meat baked on “high” in a microwave oven for 6 minutes. If I used a pound of meat, I might increase the cooking time a half minute or so. If you are cooking two pounds of meat, cook in two batches.

Success!

Note: I covered another microwave cookbook (that I didn’t like) and a bit of the history of microwave ovens in a previous post. I got my first microwave oven (a Whirlpool) in 1981 and it lasted 23 years. I’m currently on my second microwave oven, a combination convection-microwave JennAir.