250 Cookbooks: KitchenAid

Cookbook #187: KitchenAid, KitchenAid Portable Appliances, MI, circa 1991.
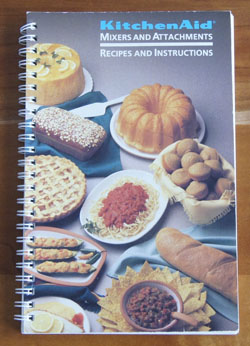
KitchenAid cookbook

My KitchenAid mixer was a gift from my husband, and wow, have I ever used (and loved) this mixer! I call it “Big Bertha” everytime I lift it out of the lower cabinet below my work surface. I have considered replacing it with a new model, but dang, I have no complaints with how this one works. It’s about 25 years old (I wrote “Model KSM90, 12/91” on the inside cover of my KitchenAid booklet). The only part I’ve replaced is one of the beaters (our water ate through the inside metal). Sometime last year, my handy husband took the mixer apart and fixed a broken cross shank in the drive shaft (he made the replacement part himself).

This KitchenAid replaced my Sunbeam Mixer, which I wrote about in this post. Before I got a bread machine, I used the KitchenAid with the dough hook attachment to knead yeast dough. Currently, I use this mixer for cookies, cakes, muffins, quick breads, and other general mixing tasks.

The KitchenAid booklet has maybe 100 recipes in recipes 5 chapters. I start with the first, “Appetizers, Entrees, and Vegetables”, but none of the recipes entice me or offer anything not already in my repertoire. In the “Cakes, Frostings, and Candies” chapter, I might like the Double Chocolate Pound Cake if I ever want a very chocolatey cake baked in my (new) bundt pan. I have used the Angel Food Cake recipe quite a bit – often when I have egg whites leftover from making custard ice cream. I know I’d like the Divinity, a candy my mother used to make. The fudge recipe is interesting because it is made from a cooked sugar mixture that is beat for 8 minutes, like a true candy.

For me, the “Cookies and Quick Breads” chapter repeats recipes I already have. One note: I’d like the Vanilla Custard Filling that is included with the cream puffs recipe. In “Pies and Pastries”, I find a recipe I’d like to try: Country Pear Pie.

Now we come to the “Yeast Bread” chapter. The mixer-kneading techniques dilineated helped me develop my current breadmaking skills, as discussed in My Daily Bread. I have notes throughout this chapter! I do remember the French Bread recipe – I tried to duplicate store bought baguettes with only so-so results for many years, until I discovered the no-knead method (see also Artisan Bread). The recipe for Basic Sweet Dough is a good one to have in my repertoire; I have used it to make Cinnamon Swirl Rounds in muffin tins. I have made (and should make again!) the Honey Oatmeal Bread. I’d like to try the Dutch Apple Bread because it uses fresh apple in a dough that is rolled around a cinnamon sugar filling. Orange Breakfast Bread is rich, but interesting to me because it is filled with an orange marmalade-ricotta cheese mixture and baked in a bundt pan.

I decide to make Sixty-Minute Rolls for this blog. These are basic yeast dinner rolls that are ready in 60 minutes, with only 2 15-minute rises and then a 12 minute bake. Might be nice to have such a quick recipe in my repertoire.
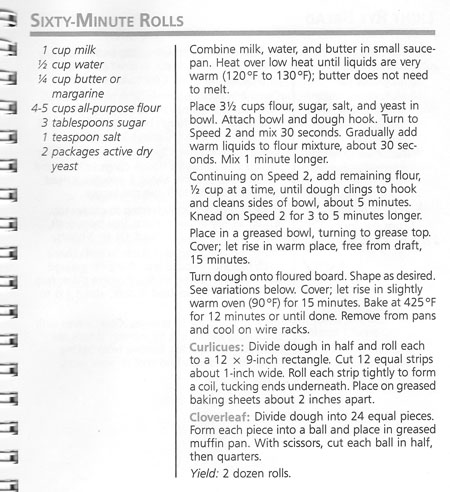
60 Minute Rolls recipe

How long will it really take me to make these? I’ll check the clock when I start!

Sixty-Minute Rolls
makes 1 dozen

  • 1/2 cup milk
  • 1/4 cup water
  • 2 tablespoons butter
  • 2-2 1/2 cups flour
  • 1 1/2 tablespoons sugar
  • 1/2 teaspoon salt
  • 1 scant tablespoon yeast

Combine the milk, water, and butter in a small sauce pan (or microwave) and heat until warm (the butter does not need to melt).

Stir together 1 3/4 cups of the flour with the sugar, salt, and yeast in the big bowl of a mixer. Using a dough hook (if possible) or the regular beater, add the milk mixture to the flour mixture and beat on low speed about a minute.

Continue beating on low speed while adding enough of the remaining flour (1/4 – 3/4 cup flour) so that the dough clings to the beater and cleans the sides of the bowl, about 5 minutes. Then, mix on low speed about 3-5 minutes.

Cover the bowl and let rise in a warm place for 15 minutes. Grease or Pam-spray a muffin pan.

Turn the dough onto a floured board and fold over several times. Divide the dough into 12 equal sized pieces (I used the scale to help). Roll each into a smooth ball and place in the muffin tin. Slice an “X” across the top of each bun. (Or, make cloverleaf or curlicue shapes as in the original recipe in the above scan.)

Let rise in a warm place for 15 minutes. (Cover if possible.) Bake at 425˚ for 12 minutes.

Here is my KitchenAid, mixing the dough:
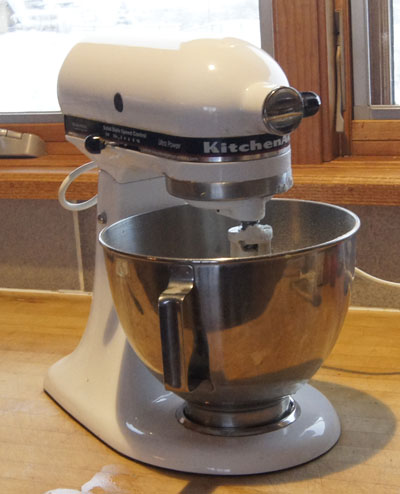
my KitchenAidHere are the rolls, ready for the oven after the first rise. They rose to just above the top of the muffin tin.
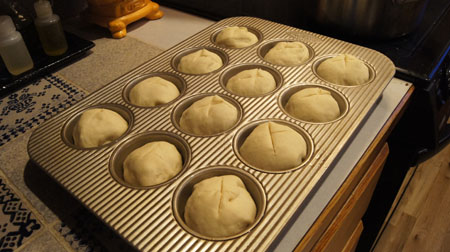
60 minute rolls, unbakedAnd here are the golden brown rolls, baked:
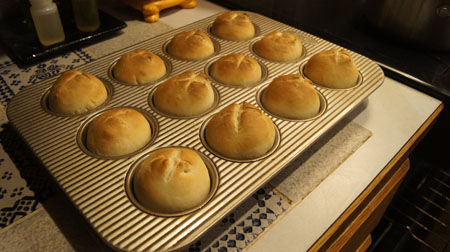
baked 60 minute rolls

Comments

How long did these take from start to finish? 65 minutes. But about 5 minutes of that time was me looking for my dough hook. Never found it! It’s gotta be somewhere. I used the regular beater instead and it worked fine.

The dough mixed about 8 minutes in the KitchenAid. It was noisy! I am so used to my breadmachine doing a quiet kneading.

I did not cover the rolls during the rising step. In my experience, both plastic wrap and towels stick to rising dough. Even though the dough dried out a bit, they turned out fine.

I am not satisfied with the KitchenAid method for the second 15 minute rise in a “slightly warm 90˚ oven”. My oven does have a very low setting, 100˚, but I only have one oven and needed to be heating it to 425˚ for the baking step. I set them in the 100˚ oven for 15 minutes, then took them out and heated the oven to 425˚ and popped the rolls into the oven as soon as it reached temperature, about 5 minutes. I re-wrote the instructions to just have the second rise “in a warm place”. Like, on top of the oven that is heating to 425˚. I am sure it will work.

Taste? These rolls are good, especially hot out of the oven. With butter melting into them. I will keep this recipe in my repertoire for those times I have not planned ahead and need dinner rolls in 60 minutes!
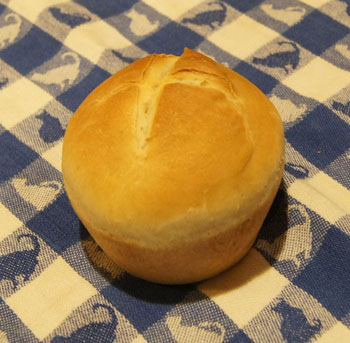
60 minute rollNote: I put the extra rolls in the freezer. A week later, I need bread for a dinner, so I popped three in the microwave on high for 60 seconds. Perfect! Now these are “60 second 60 minute rolls”.

250 Cookbooks: Cuisinart Prep 11

Cookbook #186: Cuisinart Prep 11, Cuisinart, East Windsor, NJ, 2001.

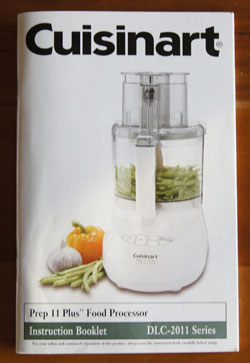
Cuisinart Prep 11 cookbookThis is the instruction booklet for my first Cuisinart, a DLC-2011 series, that I gave to my daughter a year ago. It is still a working unit, although over the years I had some issues with the top and its attachment to the working bowl. (And now the blade has been recalled due to issues with the rivets in the blade falling apart.)
Included in this instruction booklet are about 40 recipes for appetizers, soups, breads, entrees, pizzas, sauces and dressings, sides, and desserts. The instructions for all recipes are excellent. I love the recipe for hummus – have made it many times. Although I have my own banana bread recipe, I read with interest the one in this booklet: finally a recipe that does what I came up with on my own. Why hand mash bananas? Use a processor, mix the bananas with other wet ingredients, and then fold in the mixed dry ingredients. I have used the pizza dough recipe, but not often. You can use the dough blade and the unit to knead yeast breads, but I rarely do.

The pesto recipe on page 43 is excellent and I have used it lots. As the instructions state, this pesto “is lower in fat than traditional pestos, and just as flavorable”. It makes a lot, but can be frozen (I’ve frozen it before in ice cube trays).

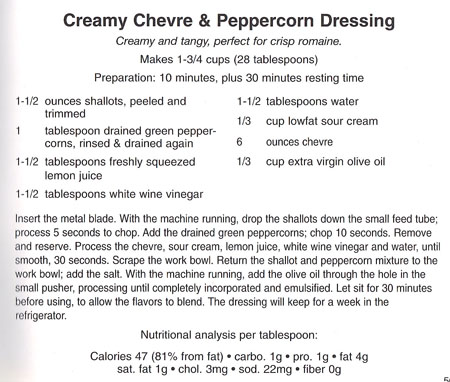
Creamy Chevre and Peppercorn Dressing catches my eye. This is a salad dressing with shallots, green peppercorns, lemon, vinegar, sour cream, and olive oil. I think I’ll make it for this blog! If I ever want to make my own mayonnaise using a food processor, I would use the recipe in this booklet.

I use a modified version of the french-cut green beans on page 54. Generally, I start with the chopping blade in place, then run the machine andI drop in a clove or two of garlic. I leave the garlic in the bowl, but remove the blade and insert the slicing disc and use it to process the green beans. Then I dump the lot into a sauce pan and saute in butter for a few minutes, add water and cook another few minutes, drain and serve.

I will definitely save this cookbook. I noted at least 10 recipes to try!

Below is the recipe for Creamy Chevre and Peppercorn Dressing.

Creamy Chevre Peppercorn Dressing recipe“Chevre” is more commonly called “goat cheese”, at least where we live. I have used green peppercorns before (ages ago), and they were packed in brine, as called for in the printed Creamy Chevre & Peppercorn Dressing recipe. According to my Food Lover’s Companion, “the green peppercorn is the soft, underripe berry that’s usually preserved in brine. It has a fresh flavor that’s less pungent than the berry in its other forms”. But all I could find on my venture to Whole Foods was a spice jar of hard, dried green peppercorns. I bought that jar, and soaked a few peppercorns in a mixture of salted hot water and vinegar for awhile, then drained. They were still pretty hard. Thinking they are sort of like capers flavor-wise, I used half a tablespoon of these peppercorns and half a tablespoon of capers. If you can’t find brined green peppercorns, I suggest substituting with a teaspoon of capers and then grind some fresh black peppercorns into the dressing to your own taste.
Creamy Goat Cheese Dressing
makes about 1 3/4 cups

  • 1 1/2 ounces shallots, peeled and roughly chopped (for me, this was one medium-sized shallot “clove”; you could substitute a portion of a regular onion)
  • 1 tablespoon drained and rinsed brined green peppercorns (or substitute as I suggested in the above paragraph)
  • 1 1/2 tablespoons freshly squeezed lemon juice
  • 1 1/2 tablespoons white wine vinegar
  • 1 1/2 tablespoons water
  • 1/3 cup sour cream
  • 1/4 teaspoon salt
  • 6 ounces goat cheese
  • 1/3 cup extra virgin olive oil

Insert the metal blade in a food processor. Start the machine, and drop the shallots down the feed tube; process 5 seconds. Add the green peppercorns and process 10 seconds. Scrape the mixture out of the bowl and reserve.

Add the lemon juice, vinegar, water, sour cream, salt, and goat cheese to the food processor bowl. Process until smooth, about 30 seconds. Scrape down the sides of the bowl and add the shallot/peppercorn mixture. Start the machine running, and slowly add the olive oil through the feed tube. Process until all the olive oil is added and incorporated.

Remove the dressing from the processor. Let stand at least 30 minutes for the flavors to blend. This dressing will keep for a week in the refrigerator.

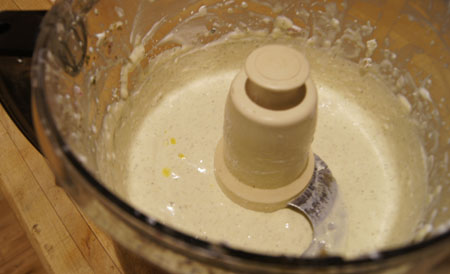
Below is a photo of my just-finished dressing, still in the processor. You can see I have a couple drops of olive oil still on top.

mixing dressing

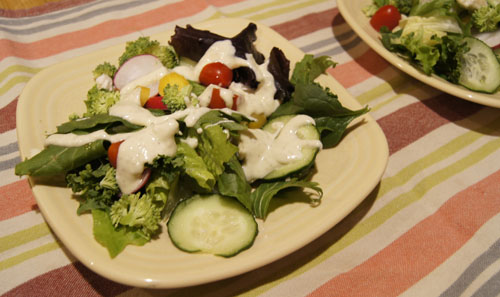
I honestly didn’t think my husband would like this goat cheese dressing. So when I made up our salads, I only dressed mine, and told him he could make his own choice.

Goat Cheese DressingHe ended up choosing the goat cheese dressing, and he liked it! He even chose it the next night too.
Me? I love this dressing. It’s creamy and pungent and only about 50 calories in a tablespoon. It was even better the second night. I am using it for all of my salads until it is gone!

250 Cookbooks: Presto Pressure Cooker Recipe Book

Cookbook #185: Presto Pressure Cooker Recipe Book, National Presto Industries, Eau Claire, WI, 1970.

Presto Pressure Cooker Recipe Book cookbook

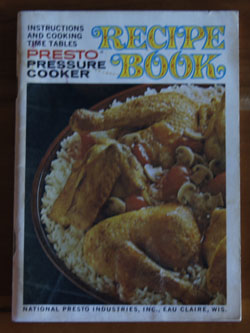
I saved this little booklet from way back in the early 1970s, when I got my first pressure cooker, a Presto. That cooker lasted until the late 1990s. It still semi-worked, but the gasket leaked and I don’t think I could find a new one. So I bought a Fagor pressure cooker, as I described in another blog post, Fagor Pressure Cookers. That pressure cooker also failed because of gasket issues. Currently, I own only an electric pressure cooker. It is a dream!

I looked carefully through the Presto Pressure Cooker Recipe Book to see if there are enough good recipes in it to warrant keeping it. Only one – Savory Chicken – catches my eye. So I will recycle the booklet.

I’ll get to that recipe later. As I write this, I have already made the recipe, and it was delicious! In fact, I was so impressed with my electric pressure cooker, that I have to rave about it a little. I cooked the chicken (10 minutes) and meat for a stew (16 minutes) sequentially one afternoon, for a total prep/cook time of maybe 45 minutes. Each recipe made enough for two meals. Each tasted great. Amazing.

I recently covered two methods of braising meats: slow cookers (crockpots) and clay pots. I also often braise meats in a covered range-top to oven casserole (like a LeCrueset). Each has its advantages and disadvantages. Braising in general includes:

  • a browning step in an open pan
  • a covered baking/heating step
  • a final heating step in an open pot to reduce the gravy

Slow cookers generally require a separate pan for the browning step. Most slow cooker recipes take 6-8 hours to cook, which can be good (you can be gone) or bad (often some ingredients in the dish are overcooked). Gravy reduction can be done right in the pot. If the slow cooker has a removable crock, it can be pretty easy to clean, especially if it fits in the dishwasher.

Clay pots do not allow browning/gravy reduction in the pot (but meats cooked in them brown anyway!). Cooking time is about an hour. I find taking the very hot clay pot out of the oven difficult. Gravy must be thickened in a different pan. The pot takes an overnight soak to clean.

LeCruesets allow stove top browning/gravy reduction and are easy to get out of the oven and to clean. Most recipes take a few hours in the oven (and smell delicious all the time!).

Electric pressure cookers are about the best in all of the braising steps. The unit is shaped like a slow cooker, with a light weight non-stick insert (easy to clean). You brown the meats right in the unit using a “browning” setting. Then, you add all the ingredients, seal the unit with the lid, and set the timer to however long you want to cook on high (or low) pressure. It heats up, hisses briefly, then settles into the  cooking time with just a tiny bit of hissing. Pressure is released slowly or quickly with the release knob. If the meat isn’t done enough, or if you want to add another ingredient like potatoes that need a short cooking time, the unit quickly gets back up to pressure. After the pressure cycle you take off the lid and set to the browning cycle to reduce the pan juices. Cook times are short! 15 minutes to cook stew meat! Clean-up is very easy, a quick wash in soapy water is all the insert needs.

(A note about the older style stove top pressure cookers. They allow browning and gravy reduction directly in the pan, and cooking/cleaning steps are short. But, the little pressure regulator/rocker hisses loudly during the cook time. To release the pressure, the heavy hot pot must be taken to the sink and run under cold water. And if the meat is not yet done or you want to add potatoes, it takes a long time to for the pressure cooker to heat up again.)

I found a great website with a lot of recipes for electric pressure cookers: Pressure Cooking Today. I love the author’s statement on the main page – Today’s pressure cookers aren’t the scary pressure cookers your mom used.” That’s exactly how I felt about my manual pressure cookers!

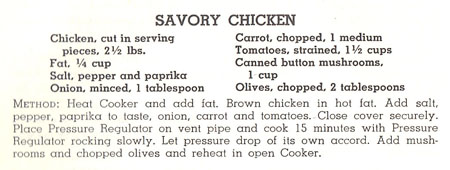
Here is the recipe for Savory Chicken, as printed in Presto Pressure Cooker Recipe Book.

Savory Chicken recipe

The version of this recipe, below, is my adaptaion of Savory Chicken for my electric pressure cooker.

Savory Chicken
serves about 4

  • 1 chicken cut into serving pieces (or buy already cut up)
  • 2 tablespoons olive oil
  • 1 teaspoon paprika
  • 1 small onion, chopped
  • 1 carrot, chopped
  • 1 14-ounce can diced tomatoes
  • salt and pepper to taste
  • 1 small can chopped or whole button mushrooms
  • half of a small can of chopped olives (use the entire can if you want)

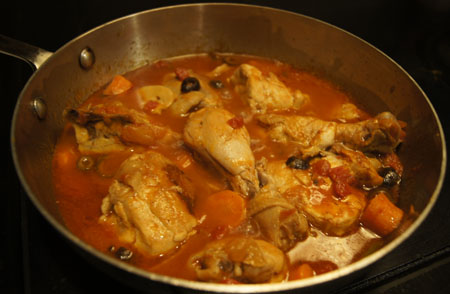
Heat the oil in a pressure cooker set to “brown”. Add the chicken pieces and brown all sides. Add the paprika, onion, carrot, tomatoes, and salt and pepper. Cover and seal the pressure cooker. Set to high pressure, 10 minutes. Start the cycle.

Quick-release the pressure regulator. Open the pot and remove the lid. Add the mushrooms and olives. Again set to “brown” and reduce the pan juices to your desired thickness. (I needed the pressure cooker for another recipe, so I did this last step on the stove top.)

Savory ChickenThis tasted great! I served it over rice, but noodles would work well too. The chicken was juicy and tender and very flavorful.
250 Cookbooks: The Bakery

Cookbook #184: The Bakery, New and Improved Recipes, Zojirushi America Corporation, Bell, California (circa 1980s).

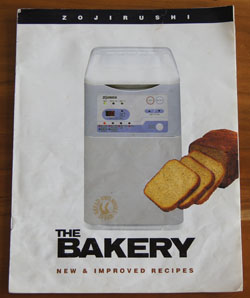
The Bakery cookbook

This is the recipe/instruction booklet that came with my first bread machine, a Zojirushi, sometime in the 1980s. I enjoyed kneading breads by hand, but it took too much time for a working mom – with the machine I made yeast breads a lot more. In fact, for a time I had two bread machines and used them simultaneously, often to make a “My Daily Bread” loaf and a breakfast bread loaf or a pizza dough. I also felt I needed two machines because if one broke, I would have a backup.

My first Zojirushi machine (I still have it) made upright loaves (note the photo of the cover, above). This older Zojirushi model is particularly great at kneading and baking 100% whole wheat bread. I also have another Zojirushi (Home Bakery Supreme). It bakes loaves shaped like traditional loaves baked in an oven. I rarely bake my breads in the machine, but if I do, I prefer the traditional shape. (I usually use the machine to knead and rise the bread dough, then bake the loaf in an oven.)

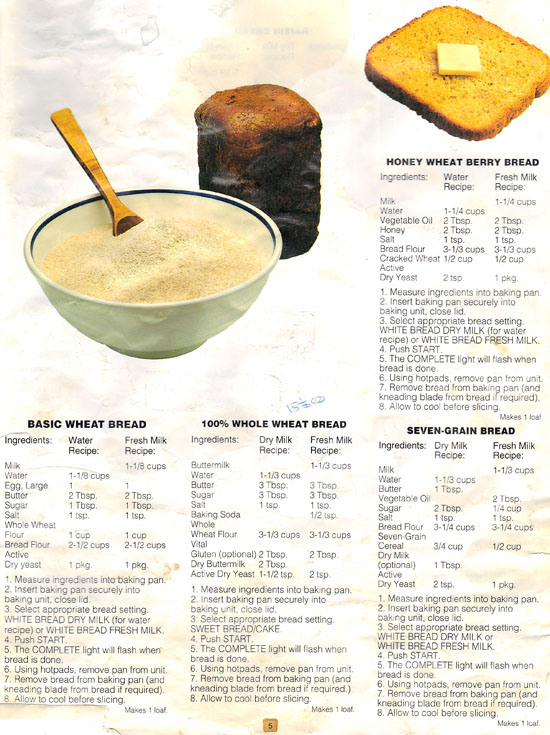
My copy of The Bakery is very well used. It is wrinkled and full of writing and stains and post-it notes. The center pages are falling out. After all these decades, I still keep it in my kitchen with other oft-used references. The Zojirushi recipe for “Buttermilk Wheat Loaf” is the basis for “My Daily Bread“, a white whole wheat bread. Other favorites are 100% Whole Wheat Bread, Raisin Bread, and Apple Oat Bread. I used to make the Pizza Dough a lot. This recipe uses beer for the liquid, and includes oilive oil. I usually made it with part whole wheat flour and baked the pizza on a hot stone. (These days, I make thin crust pizza using a no-knead recipe.)

I know that any recipe I try from The Bakery will turn out. For this blog, I choose to make “Honey Wheat Berry Bread”. It’s one of the recipes in the scan below – I wanted to illustrate the condition of this booklet so I scanned the entire page:

Honey Wheat Berry Bread recipe

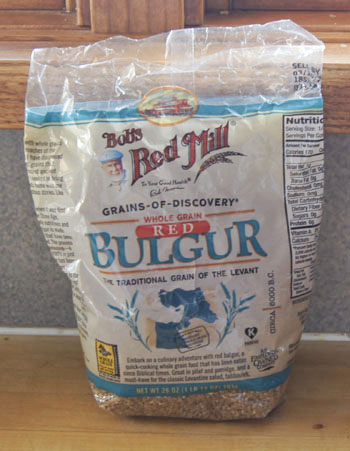
Although the title is “Honey Wheat Berry Bread”, the ingredient list calls for “cracked wheat”. What is cracked wheat? It is milled whole wheat grains or “wheat berries”. Over the years I have purchased several different forms of cracked wheat, sometimes labeled “bulghur”or “bulgur”. Different milling produces small particles or large particles. Long-cooking cracked wheat is large particles, and is good as a hot cereal, or can be used as a side dish or salad. Quick-cooking bulgur is made from wheat that has been pre-cooked. This type is often used for salads, like Tabouli (see my post on the book Diet for a Small Planet.)  I once found a wheat product called burghul or cracked wheat, similar to something we had in Turkey. That burghul took a long time to cook and was big and chewy.

I search my pantry, and find that this is what I have on hand:

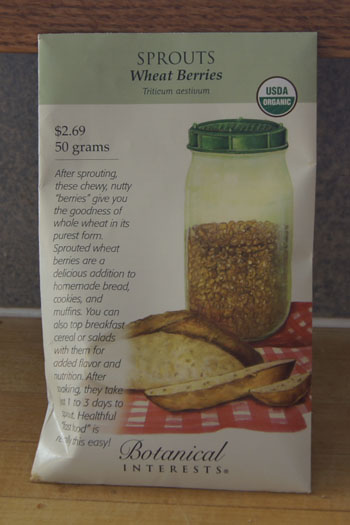
Wheat Berries

Cracked Wheat

The wheat berries are sproutable, and I have used them to make Sprouted Wheat Bread. The Bob’s Red Mill whole grain red bulgur consists of fairly large grain particles; the cooking instructions say to soak in boiling water for 1 hour before use in recipes.

I decide to use the Bob’s Red Mill bulgur for my bread. I’d prefer a quicker-cooking cracked wheat, since this type will probably be a bit chewy, but the store is a long ways away! To soften it a bit, I decide to add it directly to the milk and let it sit 30 minutes before the kneading process.

I goofed and used butter instead of oil, but it turned out to be a good “mistake” so I kept it in my recipe below. Below is how I made Honey Cracked Wheat Bread, based on The Bakery recipe.

Honey Cracked Wheat Bread
makes one large loaf (9×5-inch)

  • 1 1/4 cups milk
  • 2 tablespoons butter
  • 2 tablespoons honey (1.5 ounces)
  • 1/2 cup cracked wheat
  • 3/4 teaspoon salt
  • 3 1/3 cups bread flour (17.5 ounces, I used King Arthur Flour unbleached bread flour)
  • 2 teaspoons yeast

Combine the milk, butter, honey, cracked wheat, and salt. Let stand 30 minutes. (My Zojirushi has a pre-warm dough cycle, so I just put everything in the breadmaker and started the “pre-warm dough cycle”.

Add the flour and yeast and set the bread machine to a kneaded dough cycle with a rising step.

When the cycle is complete, take the dough out, form a loaf, and place it in a 9×5-inch loaf pan. Let rise until it crests the top of the pan, about 20-30 minutes.

Bake at 385˚ for 22-25 minutes, until golden brown.

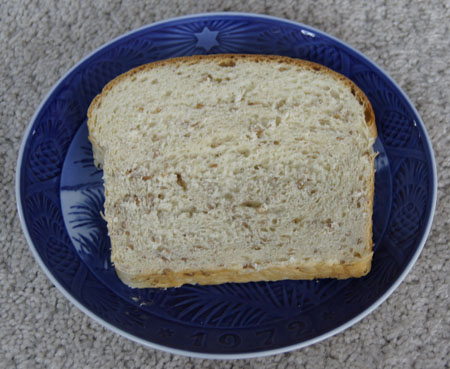
Honey Cracked Wheat BreadThis bread has an excellent flavor and a pleasant crunchy-chewiness. Not too chewy as I feared. Great for sandwiches, toast, and with stews and spaghetti. A success!
250 Cookbooks: The Label Reader’s Pocket Dictionary of Food Additives

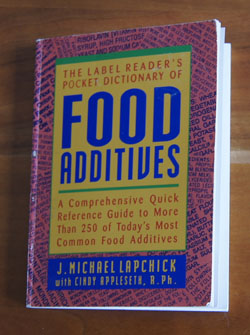
Cookbook #182: The Label Reader’s Pocket Dictionary of Food Additives, J. Michael Lapchick, 1993.

The Label reader's Pocket Dictionary of Food Additives

Such a long title for such a small booklet! It’s only 4 x 5.5 inches, and indeed could fit into a large pocket. Amazingly, you can still purchase this decades-old book online. From the reviews, it’s a popular little booklet.

I like to know what’s in the foods I eat. I cook from scratch as much as possible – homemade meals including from-scratch baked breads – partly because I can better control what we consume. I often read food labels. In this day and age it’s almost impossible to avoid food industry products (unless you live on a farm). The Pocket Dictionary of Food Additives is a great little reference for deciphering food labels, and the author thinks along the same lines that I do. Here, an excerpt from page 13:

“A certain trust is implied every time we pick a product off the shelf and put it in our grocery carts. We trust the label reads true. We also trust the ingredients are safe, sanitary, and desirable. But as we scan the list of ingredients and they become less and less familiar, we are asked to trust a little more. What about those ingredients we can’t even pronounce? Should we assume the products must be safe if they made it to the supermarket?”

Food additives (chemicals) are added for lots of reasons, for example, to make foods last longer on the shelf, have a better texture, have enhanced nutritive value, and have better flavor and color. Even hundreds of years ago, food additives such as salt were used to make foods last longer, but the list of available preserving chemicals was short. This all changed in the mid-twentieth century. According to the Pocket Dictionary of Food Additives, “in the 1900s, particularly after World War II, food manufacturers began to look for ways to market their fresh products nationwide. Products not only had to be fresh, but look and feel fresh, too. The manufacturers turned to chemical companies.”

Thus began the flow of chemicals, good and bad, into our food supply. Does the FDA protect us from dangerous food additive chemicals? I turn to page 20 of the Pocket Dictionary of Food Additives, wherein the author states “Today, a new additive first must pass tests required by the FDA. The tests are performed by the chemical manufacturer and evaluated by the FDA. If the results are accepted, the compound is granted a ‘regulated’ status and can be used in food. If the manufacturer wants to pursue a GRAS [Generally Recognized As Safe] rating, which may make it more enticing to food companies, it must publish the test results in certain journals and publications. Still, a GRAS status does not necessarily mean an additive is completely risk-free.” (This last statement is not explained further, but the author does state in earlier pages that several facets of his health improved when he eliminated food additives from his diet.)

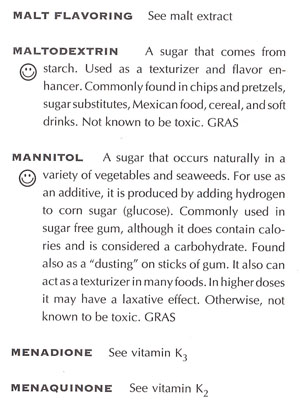
An alphabetical list of food additives makes up the bulk of this book. Each entry includes a smiley-frowny face graphic:

PG to food aditives guide

Here is a typical food additive entry:

PG food additives sample page

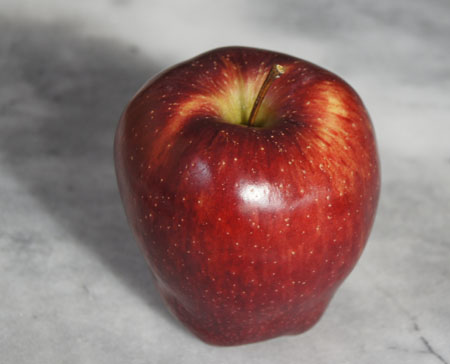
I can’t cook a recipe from this book (there are none!). But here is an example of something this book would recommend eating, an organic apple! No additives at all.

apple

I will keep this booklet. I admit, though, that I am more likely to search the internet if I am curious about a chemical added to food. Or, I could download an appropriate phone app and have the information at the ready, in my pocket, at the grocery store.

Some thoughts on learning about food additives

My interests in chemistry, and in food, and in healthy eating, probably led me to buy this little book. But I might have purchased it as a reference for my work, when I was the coordinator for the organic chemistry teaching labs at CU Boulder. At the time, I wanted students to become familiar with chemicals they used in their everyday lives. So, I wrote an assignment for beginning organic chemistry lab students that involved reading food and household product labels and learning about the chemicals listed.

We hear so much about what is added to or gets into our foods and our water supplies. Sometimes it’s hard to separate unfounded cries of alarm from scientific fact. For this reason, I often like to go to scientific journal articles and read for myself, employing the research skills in biochemistry/chemistry learned in my long career. Reading a journal article as full text versions gives me an idea of how reliable and accurate the research is.

For instance, this week I came across a lay article entitled “Common Food Additive Promotes Colon Cancer In Mice“. The authors studied two food additives, polysorbate 80 (P80) and carboxymethylcellulose (CMC). Briefly, the researchers concluded that P80 and CMC can alter intestinal bacteria in a manner that promotes intestinal inflammation (e.g., inflammatory bowel disease, IBD), which in turn increases the risk of colorectal cancer. According to the Pocket Dictionary of Food Additives, P80 is okay (happy face) and is used as an emulsifier and a stabilizer in salad dressings, baked items, frozen dessert toppings, and pickled items. CMC is not in the booklet; Wikipedia states that it is an emulsifier used in various products such as ice cream.

I read the full text of the journal article:

Dietary emulsifier-induced low-grade inflammation promotes colon carcinogenesis. Emilie Viennois, Didier Merlin, Andrew T. Gewirtz and Benoit Chassaing, Journal of Cancer Research, 7 November 2016.

I first looked to make sure the authors did not have a conflict of listed: “none” is stated. This is good. The details of the methods and analyses sound solid to me. The study was done in mice, using doses similar to amounts of the chemicals commonly used in food industry products. My thoughts are that a mouse study might or might not translate to humans. Another question: just because doses used in mice are similar to amounts used in the food industry does not mean that we are actually ingesting these amounts of emulsifiers. All in all, the article convinced me to read the labels of the foods that I cook with and check for P80 and CMC, as well as other emulsifiers. Sounds like eliminating these chemicals from our diet might decrease inflammation in our intestines.

250 Cookbooks: Original Schlemmertopf Recipes

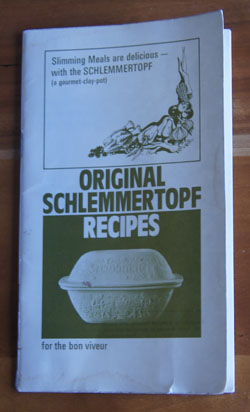
Cookbook #181: Original Schlemmertopf Recipes, Scheurich-Keramik, publication date not given.

Original Schlemmertopf Recipes cookbookA “Schlemmertopf” is a covered clay baking pot. I received my first clay pot as a gift sometime in the 70s. I wrote a lot of background material in Römertopf Cooking is Fun, so I won’t repeat that information here.
Original Schlemmertopf Recipes is the instruction/recipe booklet that came with my first clay pot (the one that broke long ago). Even though there is no publication date given, this booklet is obviously decades old. (I have a newer instruction/recipe booklet that came with my second clay pot.)

Both Romertopf and Schlemmertopf brands of clay pots are currently available. Each is made in Germany. A search for “which clay pot is best” pulled up a few sites that discuss clay pots and where to buy them, like the Kitchn site, but no reviews. Romertopf has a website, but Schlemmertopf does not seem to have one.

Originally, I used a Schlemmertopf for making stews and braising meats, as I discussed in Römertopf Cooking is Fun. In the 2000s, I bought a Schlemmertopf to replace my broken one, but I bought it mainly for baking crusty no-knead bread. The yummy pot roast that I cooked for  Römertopf Cooking is Fun was the first time I had used my new one for something other than bread.

Clay pots are a bit different to use than other types of covered cooking pans or casseroles. Never, ever can you use a clay pot on the range top, like when you want to brown meat or saute vegetables, or to make a gravy after the baking process. Before you start, you soak the pot in cold water, then you put the pot (with your food inside) into a cold oven (clay pots don’t do well with quick thermal change). Once in the oven, you can turn the temperature way up, even to 475˚. After cooking, removing the hot, heavy, covered pot from the oven can be difficult (and these pots break easily). If you want to make a sauce or gravy, you have to pour out the pan juices into a stove-top pan. Cleaning the pot usually requires an overnight soak in soapy water (no dishwasher for clay pots!).

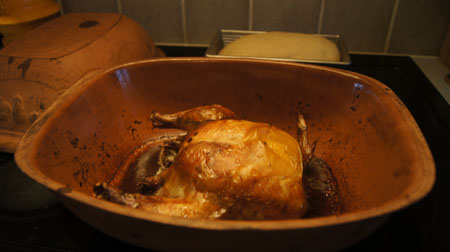
So why use a clay pot? Because the results are juicy, well-browned, tastily braised meats.You don’t have to brown the meat before starting. The recipes cook faster than a slow cooker or even a typical oven braising. If you don’t make a gravy, it is a one-step process, just put the food in the clay pot and bake.

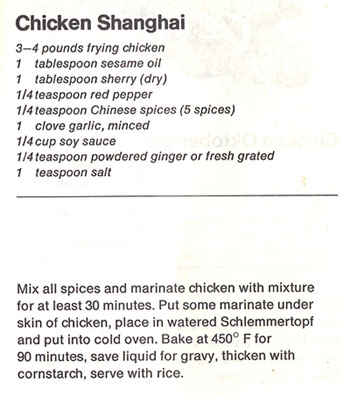
Since the pot roast that I cooked for Römertopf Cooking is Fun was such a success, I am looking forward to cooking another braised meat recipe from Original Schlemmertopf Recipes! I choose “Chicken Shanghai”, because I have a whole chicken in the freezer.

Chicken Shanghai recipe

I often roast a whole chicken in an open roasting pan; it will be interesting to compare/contrast the different cooking methods.

Chicken Shanghai
serves 3-4

  • 1 whole chicken, 3-4 pounds
  • 1 teaspoon sesame oil (more if you like the flavor a lot)
  • 1 tablespoon dry sherry
  • 1/4 teaspoon red pepper (or use a little hot chili oil)
  • 1/2 teaspoon Chinese 5 spice powder
  • 1 clove garlic, minced
  • 1/4 cup soy sauce
  • 1/4 teaspoon powdered ginger (or use freshly grated ginger)
  • 1-2 tablespoons cornstarch
  • cooked rice

Mix the marinade ingredients (everything except the chicken, cornstarch, and rice). Put the chicken in a bowl and add the marinade to it, rubbing some under the skin. Let stand at least 30 minutes, turning occasionally.

While the chicken marinates, soak the top and bottom of a clay pot in cold water. (Note: if the bottom of your clay pot is glazed, it does not need to be soaked in cold water.)

(Leave your oven off!)

Pour the water out of the soaked clay pot and wipe it with a towel. Add the chicken and its marinade in the pot, cover, place in a COLD oven and turn the oven to 450˚. Bake for 90 minutes.

Carefully remove the clay pot from the oven and uncover. When cool enough to handle, remove the chicken to a plate and cover to keep warm. Pour the clay pot pan juices into a sauce pan and add 1-2 tablespoons cornstarch mixed with a little water. Boil this sauce until it thickens.

Slice the chicken and serve over rice with the sauce.

Shanghai Chicken

Comments

This chicken was extra-nicely browned! And unlike my other roast chicken recipes, the clay pot cooking method caused no oven splatter, since it is roasted covered. The meat was very juicy and moist. And the flavor was great, of both the meat and the sauce. We both loved it. I did think the sauce a bit salty (and I even left the added salt out of the recipe) and fatty; next time I might use a gravy separator before thickening.

I definitely will roast more chickens using a clay pot. I have a few of my own recipes I can adapt, or can look for others online, like this one using lemony thyme, sage and oregano. I am glad I have re-discovered clay pot baking – it definitely adds variety to my repertoire.

250 Cookbooks: General Foods Cook Book

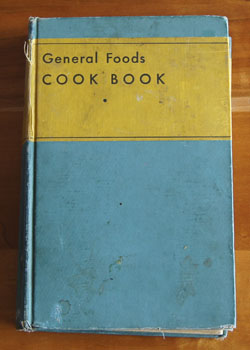
Cookbook #180: General Foods Cook Book, General Foods Corporation, NY, NY, 1932.

General Foods Cook Book

Mother would have celebrated her 100th birthday this week. She loved celebrations! In her honor, I choose her vintage General Foods Cook Book to cover for this blog.

General Foods Cook Book was one of Mother’s textbooks when she attended Woodbury’s Business College from 1934-36. She would have been 18-20 years old at the time. On the inside cover are several notes about due dates for assignments, oven temperature notes, and some calculations. I remember from family history that she had attended this business school, perhaps more of a “secretarial” school. Obviously, since she had this General Foods Cook Book as a text book, she took a course in “home economics”. The culture of the time and place encouraged young women to stay at home and run their household, as their vocation, sort of like a business. I tell you, my mother, a traditional stay-at-home mom, would have been an excellent business woman! Our household ran smoothly, and she was a fast typist and great at keeping books and records.

Woodbury’s Business College, founded in Los Angeles in 1884, was one of the first institutions of higher learning in Los Angeles, and also one of the first colleges in the West to admit women. At its beginning, Woodbury’s offered bookkeeping, commercial law, and telegraphy studies, it eventually expanded to fashion and inerior design and business administration, and by 1969 offered an MBA. In 1974, the school name changed to Woodbury University.

My mother would have attended Woodbury’s while it was located in downtown Los Angeles. She wasn’t married to my father yet, so that means she had to travel about 30 miles from Covina to attend classes. I have no idea how she made the trip, by car? train? bus? What was it like in the mid-1930s in the LA area? Wish I had a time machine.

By the time I was born, our young family was living in Burbank. In 1985, Woodbury’s re-located to Burbank, on the old Catholic school campus known as Villa Cabrini. So many times as a child or teen I passed the Villa Cabrini school – and now it is the home of the college my mother attended, so long ago.

As you can tell, this cookbook has a lot of meaning for me. I definitely will keep it, if just for the memories!

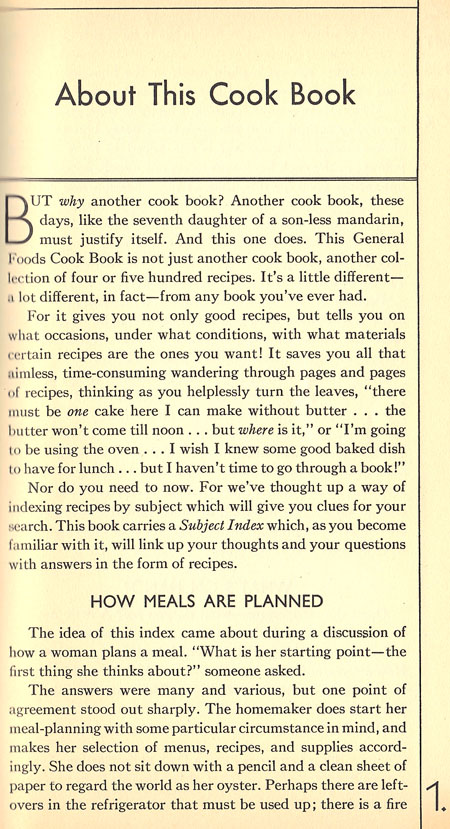
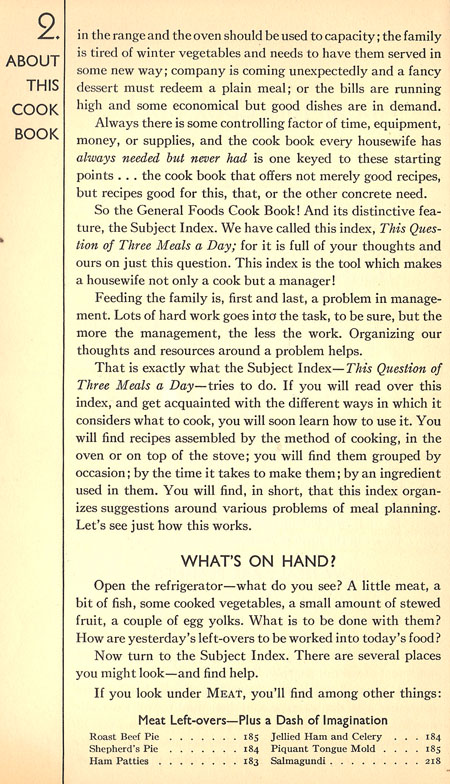
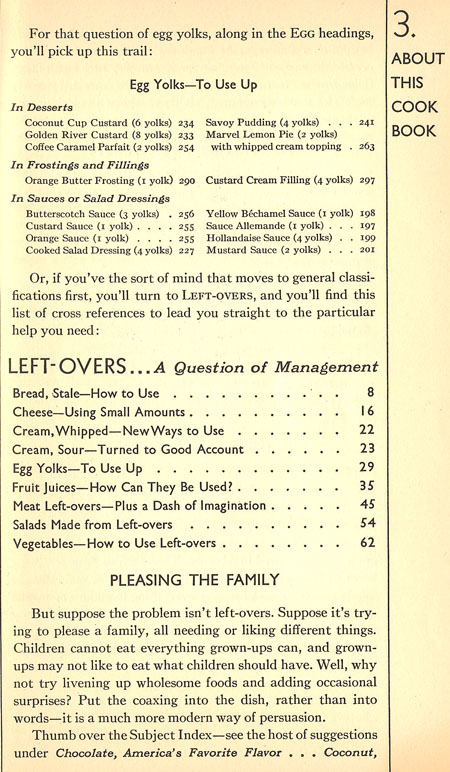
General Foods Cook Book teaches young women how to run their household like a business, promotes General Foods products, and has a lot of recipes. The best way to tell you about this cook book is to let you read a few pages.

page 1

page 2page 3

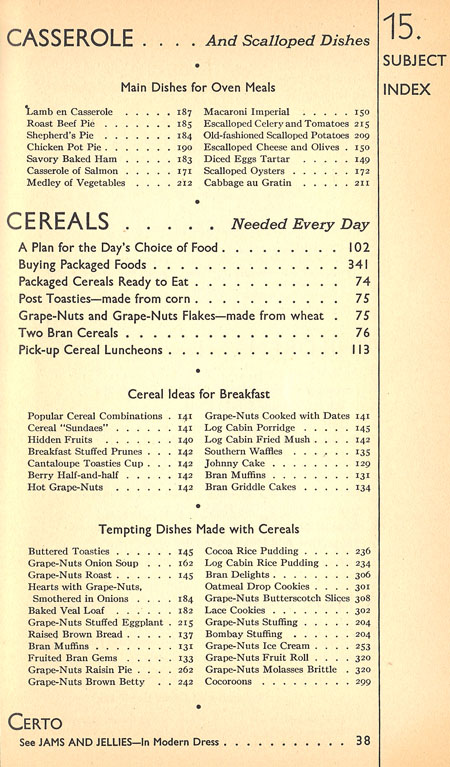
The first sixth of this cookbook is a cross-refernce called a “Subject Index”. This index is an ingenious way for an organized cook to plan the requisite “three meals a day” using what they have on hand and the situation or the meal they are planning. Here is a sample page from this section:

gfcbpage15

After the Subject Index is a chapter entitled “General Foods Corporation”:

“Most of you know General Foods Corporation. At least, you know its products; for many of them are old friends, kept regularly on the pantry shelf, and used nearly every day – Jell-O, Minute Tapioca, Swans Down Cake Flour, Maxwell House Coffee, Baker’s Chocolate, Baker’s Coconut, Calumet Baking Powder, Grape-Nuts, Postum, Certo, and many others.”

“These foods were not always in one family, of course. The building of this company, operating some forty-five plants, and distributing over seventy different products, is one of the romances of modern business.”

General Fooods was established by Charles Post in 1985 in Battle Creek, Michigan. His poor health led him to experiment with food products, and out of his research Postum Cereal was developed, then Grape Nuts and Posts Bran Flakes. (Wikipedia has more information on the history of General Foods.) At the time of General Foods Cook Book’s publication, 1932, the company’s products included: Maxwell House Coffee and Tea, Sanka, Postum Cereal, Baker’s Cocoa, Post Toasties, Grape-nuts, Swan’s Down Cake Flour, Calumet Baking Powder, Jell-O, Minute Tapioca, Baker’s Unsweetened Chocolate, Baker’s Coconut, Certo (pectin), Log Cabin Syrup, and Diamond Crystal Shaker Salt. The energy value of each of these foods is discussed, as well as the proper way to store them. Later sections in this book discuss “how to provide an adequate diet” using General Foods products.

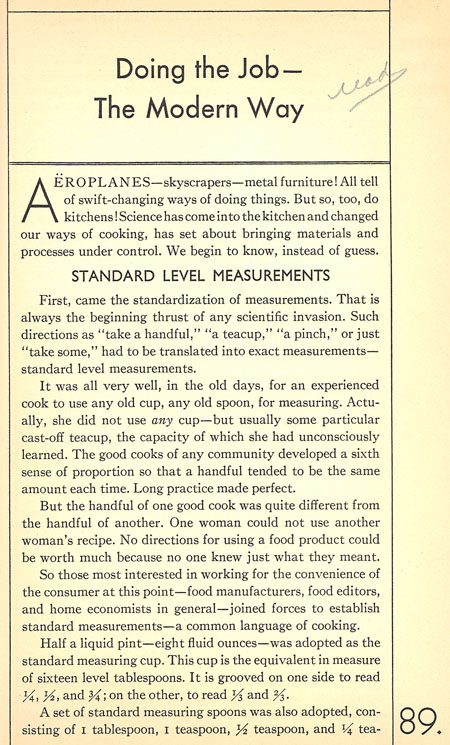
Page 89 caught my eye. I smile at Mother’s note to herself: “read”.

page 89

The rest of the book is recipes. I took a long time turning the pages and reading the old recipes, reading my mother’s notes. I spent two weeks on this cookbook – instead of the usual one week – for this blog. Some things cannot be rushed.

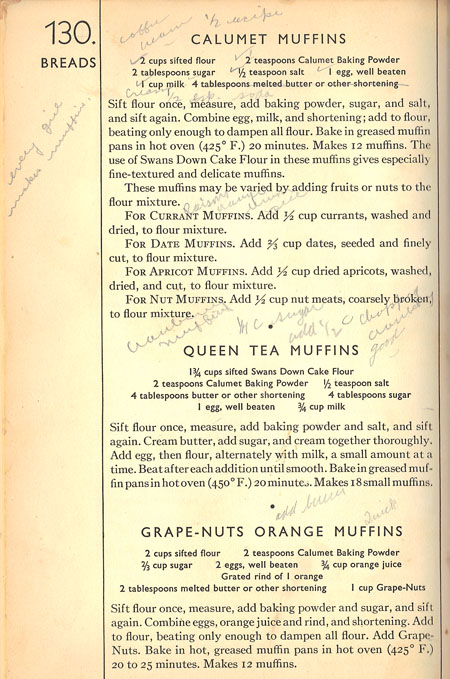
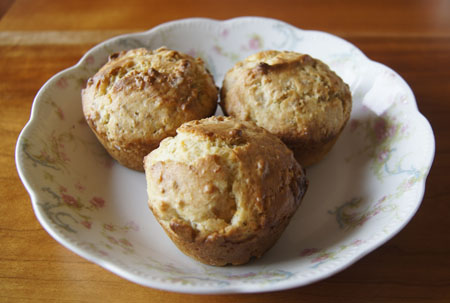
I decide to buy a box of Grape-Nuts and make two recipes for this blog. First, Grape-Nuts Orange Muffins. Note my mother’s writing on the left hand side: “every girl makes muffins”.

page 130I’ll also make “Grape-Nuts Brown Betty”:
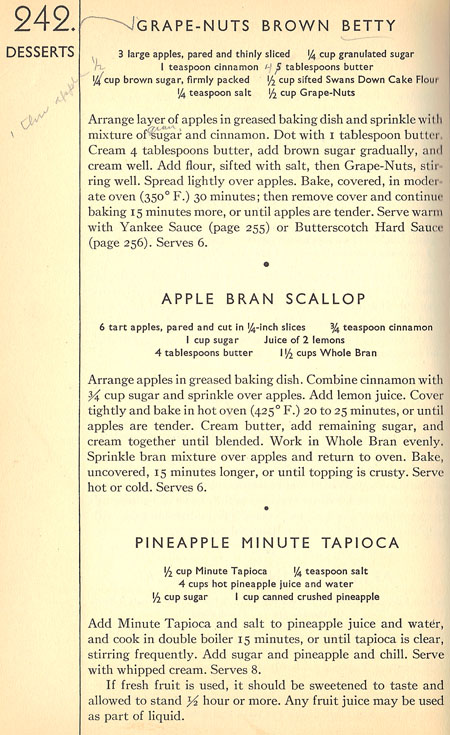
page 242

Each recipe will require a few changes for successful baking in my own “modern” kitchen. But I am confident in my cooking skills and I know I will do the proper adjustments.  I learned both how to cook and to love cooking from my mother.

I am thankful to her every day of my life. Happy 100th, Mother. Wish you were here to enjoy these with us, your ever enlarging family.

Grape-Nuts Orange Muffins
makes 11 big or 12 smallish muffins

  • 2 cups flour
  • 2 teaspoons baking powder
  • 2 tablespoons butter
  • 2/3 cups sugar
  • 2 eggs
  • 3/4 cup orange juice (or, the juice from one orange plus enough milk to make 3/4 cup)
  • grated rind of one orange
  • 1 cup Grape-Nuts cereal

Stir together the flour and baking powder, set aside.

Use a mixer to beat the butter, then add the sugar and eggs and beat well. Mix in the orange juice and rind. Add the flour mixture and mix only until just combined.

Fill 12 (or 11, if you like them bigger) muffin cups and bake at 400˚ for 18-20 minutes, until they are lightly brown and test clean with a toothpick.

Grape-Nuts Orange MuffinsGrape-Nuts Brown Betty
serves 4-6

  • 4 largish apples (I used granny smiths)
  • 1/4 cup granulated (white) sugar
  • 1 teaspoon cinnamon (I used more because I love cinnamon)
  • 5 tablespoons butter, divided
  • 1/3 cup brown sugar
  • 1/2 cup flour
  • 1/2 cup Grape-Nuts

Peel and slice the apples. Place in an 8×8-inch baking pan. Mix the 1/4 cup white sugar with the cinnamon and pour over the apples. Mix in with your hands, then let stand about a half hour to macerate the apples.

Beat 4 tablespoons of the butter with a mixer, then add the brown sugar and cream well. Add the flour and the Grape-Nuts and mix well (the mixture will be crumbly).

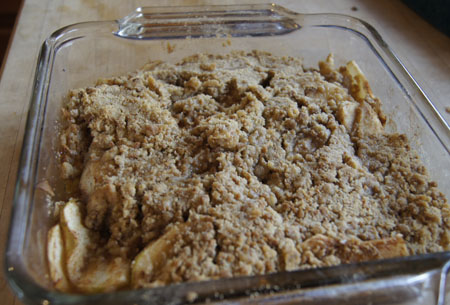
Dot the macerated apples with the 1 tablespoon butter. Spread the Grape-Nut mixture over the top. Cover with foil and bake at 350˚ for 30 minutes, then uncover and bake another 15 minutes.

Serve warm with ice cream.

Apple Brown BettyBoth recipes were delicious!

250 Cookbooks: Elena’s Famous Mexican and Spanish Recipes

Cookbook #179: Elena’s Famous Mexican and Spanish Recipes, Elena Zelayeta, Dettners Printing House, San Franscisco.

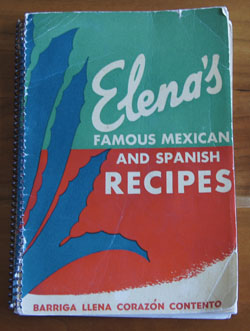
Elena's Famous Mexican and Spanish Recipes cookbook

Driving out of Boulder last week, I noticed a new Mexican grocery store. I wanted to go in! I love discovering small stores with interesting ethnic products. I used to get the best corn tortillas from a store in almost the same location. Makes me hungry for Mexican food. Time to pull another Mexican cookbook off my shelf!

And I have only one that I have not yet covered: Elena’s Famous Mexican and Spanish Recipes. I covered another of her cookbooks, Elena’s Secrets of Mexican Cooking, in one of my earliest posts. That book was published in 1958, and this one in 1944. Inside the back cover is the price it originally sold for: $1.50 from May Co. I think I bought it from a used book or junk store, way back when we lived in Boulder. But I am not sure. It could have been my mother-in-law’s – there is some writing in this book that might be hers.

The introduction to Elena’s Famous Mexican and Spanish Recipes is written by Elena’s friend Katherine Kerry, while the introduction to the (later) 1958 book is written by Helen Evans Brown. Her friends just loved her! If you read my other blog entry, you will learn that Elena lost her sight as an adult, but blindness didn’t stop her from cooking. That amazes me so much! Katherine Kerry writes of her friend’s book:

“This book of her own much-used recipes is just one expression of Elena’s love of people, her knowledge of how to make them happy. Each recipe is a shining star of courage, faith and hope, plus a full measure of gastronomic enjoyment for you who use them.”

“Elena is a bouncing ball of pep, gaiety, kindliness and heart – a heart so big it encompasses all she meets.”

Some of the recipes in Elena’s 1944 book were carried through to the later book – “because no book on Mexican cuisine could possibly be without them”.

The first chapter of Elena’s Famous Mexican and Spanish Recipes is “Sopas – Soups”. I learn that there are two types of soup in Mexico: wet and dry. Wet soups are liquid (plus meats and vegetables) and served at the beginning of the meal, dry soups are served next. Dry soups are rice or vermicelli cooked in soup stock, the stock being entirely absorbed in cooking, in effect making them more like our idea of seasoned cooked rice.

“Eggs, Glorified ways of serving them”, the next chapter, has at least one recipe I’d like to try: “Rice Nests with Egg”. In this recipe, bacon is wrapped around a small pile of cooked rice and secured with a toothpick, then topped with a raw egg and baked in the oven. I like this recipe for a couple reasons. One, it sounds good! And two, it illustrates Elena’s Mexican dishes. They are often simple home cooking, and barely our typical ideas of “Mexican” cooking.

Some of the salad recipes look very good, like an avocado salad with pineapple, oranges, fresh mint, lettuce and French dressing. Chiles Rellenos – green chiles stuffed with cheese, dipped in egg batter, deep fried, and served in a spiced tomato sauce – are in the vegetable chapter. I have made them Elena’s way for years! She suggests frying them the day before serving, an idea that might me prepare these delights more often. (Much easier than frying while your guests are there.) Fish, poultry, meats and beans each has its own chapter. (Some of the meats, like tripe, kidneys, rabbit, and pigs feet, I guarantee I’ll never cook.)

“Tortillas, Tacos, Tostadas, Enchiladas and other things made with masa” is the title of another chapter. Elena talks about treating a pan with “hydrated lime” when one makes homemade tortillas. Hydrated lime is not made from limes, instead, it is calcium hydroxide, and is used to help the masa bind together. All of her recipes that include masa (a type of cornmeal) call for purchasing it fresh from a Mexican store. I’m not sure this type of masa is still available, and I ran into problems when I tried making a tamale casserole using the bagged masa that is currently sold in US supermarkets. But in general, her recipes call for store bought tortillas, so it’s not a huge problem. She also mentions an item I’d like to find called “raspadas”, thin tortillas specially made for tostadas.

And last but not least, desserts! Flan, rum and macaroon pudding, Mexican bread and rice puddings, banana pudding, cookies (Little Drunkards sound interesting!), and turnovers are among the sweet recipes in this chapter.

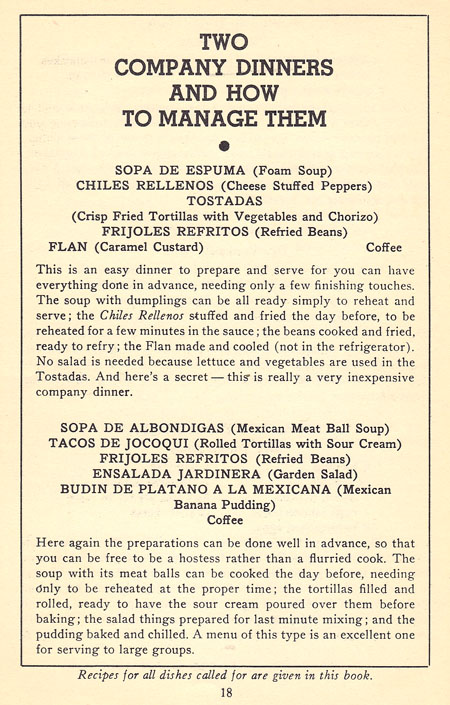
Elena’s Famous Mexican and Spanish Recipes includes several pages of menus for Mexican meals. Below is a great example:

Mexican menus

I do like this cookbook and definitely will keep it. Lots of good recipes, information on historical Mexican cooking, and written by an interesting woman.

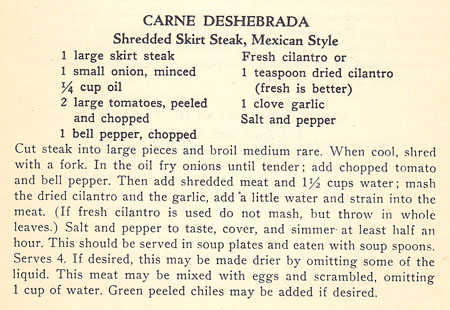
For this blog, I decide to make Carne Deshebrada, or Shredded Skirt Steak, Mexican Style:

Shredded Skirt Steak recipe

Usually when I make “shredded beef”, I braise a roast for a long time until it falls apart easily when shredded with a fork. In this recipe, the skirt steak is broiled just to medium rare – sounds like an interesting variation. I found it hard to “shred with a fork”, so I went back and forth using a fork and a sharp knife to shred/chop instead of following the directions. I couldn’t find a green bell pepper, so I used a red one. I like lots of fresh cilantro and garlic so I increased the amounts. And I added the green chiles as suggested. I preferred not to serve this “in soup plates and eaten with soup spoons”. Instead, I kept the meat a little drier by adding less water, and served the mixture in a corn tortilla with grated cheese and salsa.

Shredded Skirt Steak
serves 4

  • 1 skirt steak, about 1 1/2 pounds
  • 1 onion, chopped
  • 2 large tomatoes, peeled and chopped
  • 1 green (or red) bell pepper, chopped
  • 1 teaspoon chile powder (optional)
  • fresh cilantro, 1/4 cup chopped (or to taste)
  • 2 cloves garlic
  • 1 small can chopped green chiles

Cut the steak into several pieces and broil in an oven just until medium rare. Cool, then shred with a fork and a sharp knife.

Fry the chopped onions in a little oil until tender. Add the tomatoes, bell pepper, chile powder, cilantro, garlic, chiles, the shredded meat, and about 1/2 cup water. Salt and pepper to taste. Simmer about a half hour, adding a bit more water if needed to keep the mixture moist. Serve wrapped in tortillas with cheese and salsa.

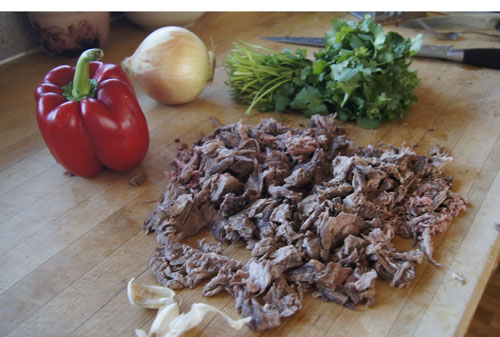
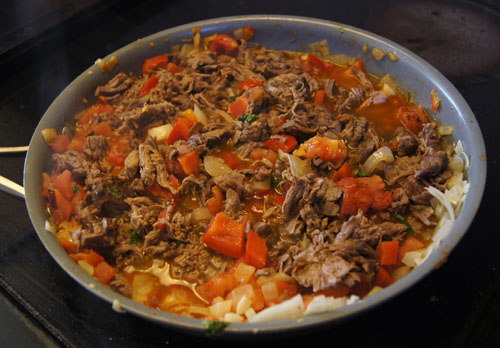
Below is a photo of the skirt steak after I cooked and “shredded” it.

shredded skirt steak ingredientsAnd here is the pan of shredded beef and vegetables, ready to be served.
Shredded Skirt Steak

And how did it turn out? Wonderful! The skirt steak was so, so flavorful! A different experience than my braised style shredded beef. I used “Tortillaland” corn tortillas, half-cooked tortillas that heat up on a dry grill into soft but sturdy tacos. These tortillas were strong enough to stay together, even packed with shredded beef and fixings.

I made another meal using the leftovers by mounding the mixture and some grated cheese in thin flour tortillas, rolling them up, then browning in a big fry pan in a little oil just until all sides were browned. Then, I cut into bite-sized pieces and served with salsa and sour cream. Yum again.

250 Cookbooks: Elam Biggs Favorites

Cookbook #178: Elam Biggs Favorites, Elam Biggs, Grass Valley, CA, 2009.

Elam Biggs Favorites cookbook

We stayed at the Elam Biggs Bed and Breakfast Inn while visiting family in Grass Valley in 2009. The breakfasts there were amazing! Fruit, juice, eggs, sausage or ham or bacon, and breakfast pastries, served at a fancy table setting. All homemade and wonderful. It was so pleasant to sit and chat with other guests as Elam showed us his card tricks. The rooms are ornately decorated with antiques. A great stay!

I couldn’t resist buying one of the little booklets of breakfast recipes that they offered. Seven years later, though, and I haven’t cooked a single recipe from this booklet. The reason is that they are a little more calorie-laden than we usually have for breakfast (when not on vacation). Elam Biggs Favorites has sat on my shelf as a souveneir of our visit, rather than as a “cookbook”.

There are only eight recipes in this booklet, so it won’t take long to decide which to make for this blog:

  • Dutch Babies (my chosen recipe, below)
  • Corn Flake Potatoes (hash browns, mushroom soup, sour cream, cheese topped with cornflakes and baked)
  • Breakfast Omelette (butter, eggs, flour, baking powder, green chiles, cottage cheese, Jack cheese, baked in the oven)
  • Stuffed French Toast (sourdough bread, cream cheese, raisins, milk, eggs – start the night before)
  • Brunch Enchiladas (flour tortillas rolled around ham, onions, green chiles, and cheese, topped with eggs and half-and-half and baked – start the night before)
  • Scalloped Corn (canned corn, butter, eggs, sour cream, corn muffin mix)
  • Overnite Strawberry French Toast (bread soaked in eggs and milk overnight, next morning put strawberries and bananas in a pan and cover with the soaked bread and bake)
  • Elam’s Eggs (cheese and eggs baked in a ramekin)

I decide to try “Dutch Babies”. These are Dutch pancakes, or pannenkoek. Many versions are available on the web – basically, they are a mixture of eggs, milk, and flour poured into a hot buttered pan and baked. They puff up and then fall, leaving the edges fluffy and the middle gooey and rich. You can serve them with powdered sugar or fruits or syrup. I found 4 clipped Dutch baby recipes in my old “clips” database – and noted that I made them once and loved them. They have always intrigued me, but they rarely fit into our eating pattern. Time to change that!

Below is my adaptation of Elam Bigg’s recipe for Dutch Babies.

Dutch Babies
serves 2

  • 3 eggs
  • 3/4 cup milk
  • 3/4 cup flour
  • 1/4 cup butter

Put the eggs in a blender and blend about half a minute. Then, with the blender open, add the milk and then the flour and blend another half a minute. This batter can rest a while if your pan is not yet ready.

Choose a pan that holds 2 quarts and is at least 2 inches in depth. Add the butter and heat the pan in a 425˚ oven until the butter melts.

Remove the hot pan from the oven and pour in the batter. Put it right back into the oven and bake for 20-30 minutes, or until puffy and the edges are well browned.

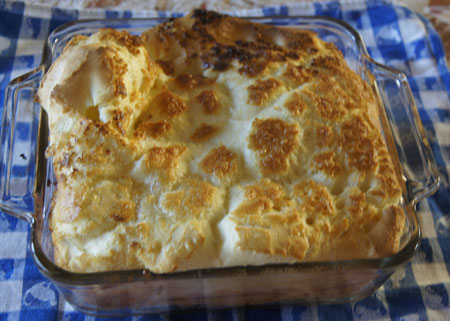
Here is my Dutch baby right out of the oven:

Dutch Baby

As it cooled the middle fell (as expected). As soon as it was cool enough to eat, we cut chunks and smeared them with fresh peach jam and enjoyed. Very eggy and very buttery. I think you could use less butter (and save a few calories), but this Dutch baby tasted great as is!

Note

Elam Biggs’ directions for other sizes of Dutch babies:

  • 4 eggs, 1 cup milk, 1 cup flour, 3 quart pan
  • 5 eggs, 1 1/4 cup milk, 1 1/4 cup flour, 4 quart pan
  • 6 eggs, 1 1/2 cup milk, 1 1/2 cup flour, 5 quart pan
  • ramekins or any size pan: fill one-quarter full with batter

250 Cookbooks: Cover and Bake

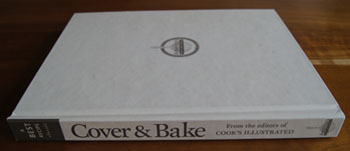
Cookbook #177: Cover and Bake, by the editors of Cook’s Illustrated, a Best Recipe Classic, America’s Test Kitchen, Brookline, MA, 2004.

Cover and Bake cookbook

I discovered my first Cook’s Illustrated magazine sometime in the early 2000s. This magazine has no ads – what a treat! I clipped and saved several recipes, then I subscribed to Cook’s Illustrated online. (It’s the only cooking magazine I subscribe to.) I ordered this book, Cover and Bake, and I use it a lot.

Christopher Kimball founded the enterprise that includes Cook’s Illustrated and America’s Test Kitchen, where they develop the recipes in their publications. This “Kitchen” is located in Brookline Massachusetts, and is where the TV show “America’s Test Kitchen” is filmed. Most of my friends who are into cooking love this show!

Cook’s Illustrated recipes always include a lengthy discussion. In their test kitchen, they try each recipe many different ways, and report on their findings. This appeals to my scientific side! Plus, when I follow the directions, the recipes always come out excellent. For instance, their recipe for pie crust taught me how to finally make a tender, easy-to-roll crust. I often browse the site for new ideas, or how to cook . . . anything! I also use their reviews of kitchen equipment to help decide on a new purchase.

The chapters in Cover and Bake are: Assemble and Bake (casseroles), Pot Pies and More, Oven Braises and Stews, Skillet Casseroles, Savory Side Dishes, Breakfast and Brunch, and Slow-Cooker Favorites. My favorite chapters are the pot pies and oven braises and the slow-cooker recipes. I have so many notes in this cookbook!

It will be easy to find a recipe to cook for this blog. I start flipping through the pages. What catches my eye is “Chili Mac”, from the first chapter, Assemble and Bake. I haven’t made many of the casseroles in this book, and it’s time to try one.

Chili Mac is an American comfort food, although I’ve never made it before. It even has its own Wikipedia entry. Briefly, it’s made with meat-bean chili, noodles, and topped with cheese. Sounds good to me!

Because of copyright issues, I am not scanning in this recipe. It’s a relatively recent publication, and the editors are still actively publishing. The original recipe is on pages 80-81 of the Cover and Bake. Page 80 is a two-column discussion of how they got this recipe “perfect”! Page 81 gives the recipe in 1 1/2 columns. This is the typical layout of Cook’s Illustrated recipes: not a fast food publication! I changed their recipe a bit (my adaptation is below).

Chili Mac: adapted from Cover and Bake, America’s Test Kitchen
makes a 9×13-inch casserole, enough to serve 8, depending on appetites

  • 8 ounces elbow macaroni
  • 3/4 cup reserved macaroni-cooking-water
  • 1 1/2 pounds hamburger (I used 90% lean)
  • 2 onions, chopped
  • 1 red bell pepper, chopped
  • 2 tablespoons finely minced garlic (4-8 cloves)
  • 2 tablespoons hot chili powder
  • 1 tablespoon ground cumin
  • 1 14.5-ounce can diced tomaotes
  • 1 28-ounce can tomato sauce
  • 1 tablespoon brown sugar
  • 8 ounces grated cheese, preferably “colby Jack” or a mixture of cheddar and Jack cheese

Cook the macaroni in salted boiling water until al dente. At my altitude of 5300 feet, this took about 10 minutes; it would take less time at sea level. (It’s important not to boil the macaroni too long, as it will continue to cook when the casserole is baked.) Before draining the pasta, reserve 3/4 cup of the pasta water; this will be used later when the casserole is assembled.

As the macaroni cools, cook the hamburger in a large pan or pot, salting to taste. (The original recipe recommends cooking the hamburger in a little oil; it’s up to you.) When the meat is cooked, drain it in a colander to remove (and discard) the fat. Set the meat aside.

Add a little oil to the now-empty pan and cook the onions, red bell pepper, garlic, chili powder, and cumin, stirring, until the vegetables soften and begin to turn brown (about 10 minutes). Add the diced tomaotes, tomato sauce, brown sugar, the 3/4 cup reserved pasta water, and the drained hamburger. Simmer 20 minutes.

Stir the cooked macaroni into the pot and season to taste with salt and pepper. Pour the mixture into a 9×13-inch rectangular casserole and sprinkle with the grated cheese. Bake at 400˚ for 15 minutes, or until the cheese is melted.

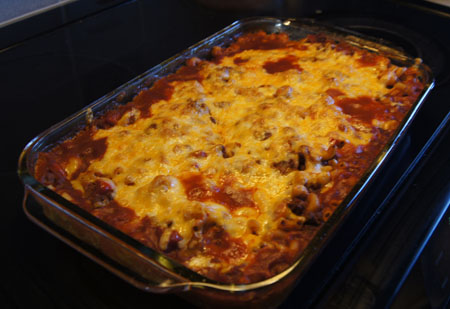
Chili MacOh yes, this was good! Yum!

I will definitely keep this cookbook. (And tucked inside is the little Rival Crock-Pot Cookbook that I mentioned in an earlier post.) With fall coming on, I am sure I’ll be back to Cover and Bake soon, looking for warm and hearty meal ideas.