250 Cookbooks: Artisan Bread in Five Minutes a Day

Cookbook #44: Artisan Bread in Five Minutes a Day. Jeff Hertzberg and Zoe Francois, Thomas Dunne Books, St. Martin’s Press, NY, 2007.
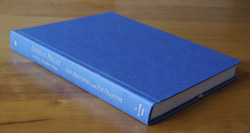
Artisan Bread CookbookFinally, one of my contemporary cookbooks! 2007! I bought this book to learn more about a new way of making yeast breads, called the “no-knead” technique.

No-knead yeast breads are prepared by mixing flour, yeast, and water into a wet dough and letting the mixture stand at least overnight. The dough is then shaped gently into a free-standing loaf and baked on a stone or in a crockery pot in a very hot oven. The result is an artisan-type bread, like you would buy from a good bakery in your town. The crumb is uneven and creamy, the crust is thick and chewy and dark brown. It’s amazing. I experimented with  bread baking for forty years but never produced an artisan loaf until I tried this new method.

The method is not only new to me, it’s new to the world of baking, according to this 2006 article in the NY Times: The Secret of Great Bread, let time do the work. I read that article, and Jim Lahey’s recipe that goes along with it, sometime in 2007, but did not try the technique until I saw a recipe in a King Arthur Flour catalog for “The Almost No-Knead Baguette“. I studied that recipe, and re-read the NY Times articles, and then tried the baguette. It turned out great.

I bought the cookbook Artisan Bread in Five Minutes a Day from King Arthur Flour after my success with the baguette. I tried several recipes from this book, mostly with success. Then I saw a class on no-knead breads offered by the Culinary School of the Rockies – I signed up for it. It was a great class. Today, in 2013, I am totally hooked on this technique. So much so that I wrote about it on my other blog: A Lovely Loaf (2011).

Traditional bread making employs the process of kneading to “develop the gluten”. This means, the gluten molecules move into a side-by-side alignment and then bind to each other to produce the elastic network that gives yeast breads their lift and their texture. No-knead bread making uses time and a wet dough to the same end. Since the no-knead dough is wet, the gluten molecules can move about on their own, but it takes some time (at least a few hours).

Now, I never hand-knead breads anyway, I always use my bread machine for that. So why would I want to try the no-knead method? First, it sounded like a good experiment. Second, once I did it, I found the result quite different from kneaded bread. Usually there are (desired) uneven pockets of air in baked no-knead bread, and the crust is always thick and chewy. No-knead breads just look cool. I still make both kinds of yeast breads; one method is not better than the other – each has its place in my repertoire.

No-knead bread advantages:

  • if you are used to kneading your bread without a machine, these breads use less of your hands-on time
  • they bake up like artisan loaves
  • great for pizza dough and focaccia
  • can store the dough in the refrigerator for two weeks

Kneaded bread advantages:

  • you can use a high proportion of whole grain flour in your breads
  • the crust is soft and easy to cut through to make sandwich slices
  • the texture is smooth and uniform (sometimes nicer for sandwiches)
  • you don’t have to start your bread the day (or week) before

The recipes I gleaned from the cooking class call for mixing the ingredients for a loaf of bread the day before baking. In the Artisan Bread book, you can bake the bread the same day, or you can let it sit in the refrigerator for up to a couple weeks. This is an advantage, especially if you have a full schedule of work and family and play. Time in the refrigerator also helps develop the bread’s flavor. The disadvantage is that the dough takes up a chunk of refrigerator space.

I made the “Deli-style Rye Bread” from the Artisan Bread cookbook. Since this is a recently-published book, I’m not going to scan in the recipe (copyright issues). Briefly, this cookbook has a plain design, with some black and white photos in the “how-to” section and a few glossy photos in the center. It is clearly written and friendly. I highly recommend it for the adventurous bread maker.

(In addition, there are recipes for items that go with or use bread: Tuscan White Bean Dip, Bruschetta, Spicy Pork Buns, marmalade, kebabs, and more.)

My version of the recipe below is a little different from the book’s, and the directions are written to explain how I make this bread in my own kitchen.

No-knead Rye Bread
makes 4 1-pound loaves

Mixing and Resting

  • 3 cups water
  • 1 1/2 tablespoons yeast
  • 1 tablespoon salt
  • 3 tablespoons caraway seed (I like lots of caraway; use less if you don’t)
  • 1 cup rye flour
  • 5 1/2 cups bread flour (you can use all-purpose flour)

Mix all the ingredients in a large mixing bowl. You can used a stand mixer, or you can do it by hand. Mix only until all the flour is incorporated. It’s really, really sticky. It took some work to get all the dough off these beaters:
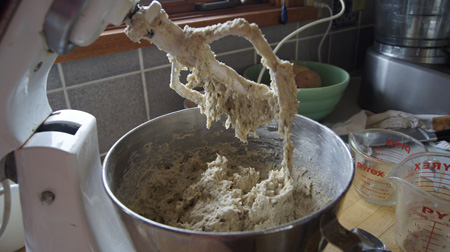
rye bread doughLet the dough stand at room temperature a couple hours (covered lightly).

Note: I left the dough in my mixer’s metal cooking bowl and it (1) rose up over the top and (2) stuck to the bowl, making it hard to clean. I suggest moving the mixed dough to a glass, plastic, or enamel bowl that is lightly oiled and large enough to allow the dough to rise to double its bulk.

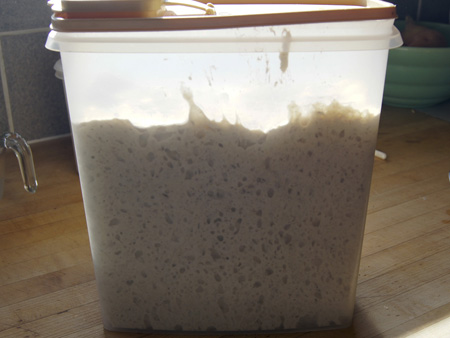
After two hours, use the dough immediately or better yet, put it in your refrigerator. (The refrigerating step makes the dough easier to handle when you go to bake it, and it adds some flavor as the yeast works with the flour and sours it a bit.) If you decide to refrigerate the dough, transfer it to a plastic container large enough to allow for the dough to grow in volume by at least 50%. Lightly cover the dough in the container.

Here is my dough (in the bright light of the morning), after a couple days in the refrigerator:

rye bread dough

Baking

You will need:

  • a pizza peel
  • a large baking stone
  • cornmeal
  • flour
  • a cornstarch/water glaze (microwave 1/2 teaspoon cornstarch in 1/2 cup water for 60 seconds)
  • a baking pan with about a half-inch of water in it

Sprinkle some cornmeal on a pizza peel. Take the dough out of the refrigerator and dust with a little flour (just enough to make it less likely to stick to your hands). Grab about a quarter of the dough: if you weigh it, it should be about one pound. This is a messy process:
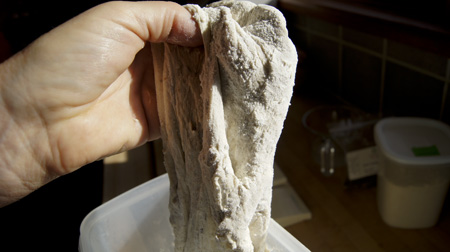
pulling doughThis is sticky dough! I had to keep washing my hands to take these photos.

(Put the rest of the dough back in the refrigerator. It keeps two weeks.)

Here’s what the dough looked like before forming the loaf:
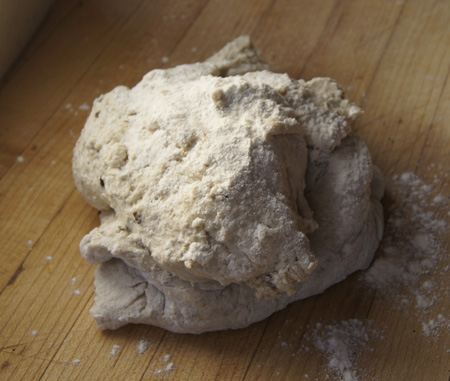
doughCloak the dough. This means that you take it in two hands, and stretch the outside of the ball of dough down to the bottom, rotating as you work around the dough. (I’ve used this method a lot of times to form rolls; it’s hard to explain. What you want is a smooth surface on top, with the ends are tucked down on the bottom side of the formed ball of dough. It takes about 30 seconds.)

Place the dough on the corn meal sprinkled pizza peel. I had a lot of flies in my kitchen, so I put some plastic wrap on top (with a tiny amount of cornmeal sprinkled on the loaf to prevent it from sticking).

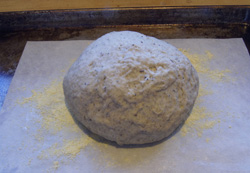
Here is my formed loaf, before rising:
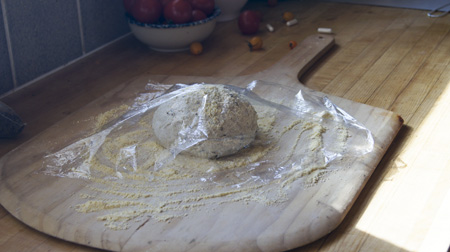
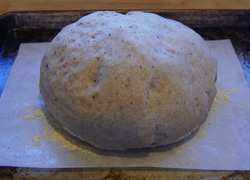
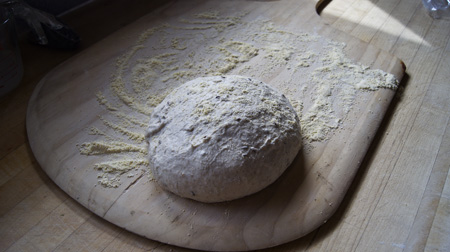
formed loaf before risingLet stand 40 minutes to 1 1/2 hour (I let mine rise 1 1/4 hours). Dough that has not been refrigerated will take the lesser amount of time. You won’t see the dough rise a whole lot, especially if it has been refrigerated. (In fact, mine flattened out.) Here is my “risen” dough:
risen doughAt least twenty minutes before you bake the bread, put a baking stone in the oven and preheat to 450˚. Put in on the top oven rack.

Just before you put the dough in the oven, put the pan with water in it on the rack under the heated baking stone. (This helps develop a good crust.)

Brush the dough with the cornstarch/water glaze and slash the top with deep cuts using a serrated knife. I sprinkled it with more caraway seeds. Slide the loaf off the pizza peel onto the heated stone in the oven.

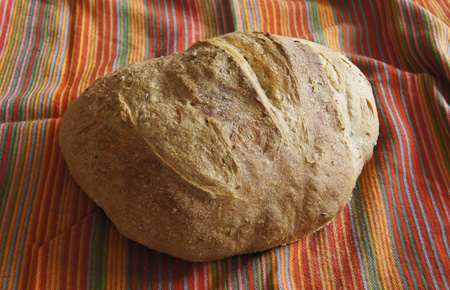
Bake 30 minutes. Voila! You are done.Rye BreadThis bread makes great corned beef sandwiches. I used my own dill pickles – yummy. I sliced the bread after only an hour’s cooling, and found it easiest to slice the chewy crust with an electric knife. Since there is rye flour in the dough (whole grain flours break up air bubbles), the texture is more uniform than on my no-knead white-flour only loaves.
I had fun with this bread project. It was a hot day, so I wanted to bake it in the morning and have it ready for lunch. While it rose on my counter and the oven heated, I was off on a bike ride, getting exercise as advised by Jane Brody in her NY Times column (Jane Brody’s nutrition book was my preceding cooking blog entry). Bread baking doesn’t have to mean that you spend your whole day in the kitchen.

250 Cookbooks: Encyclopedia of Cookery, Vol. 2

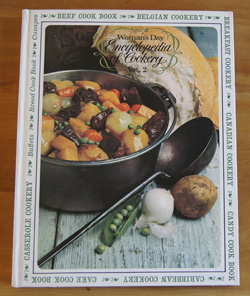
Cookbook #35: Woman’s Day Encyclopedia of Cookery, Vol. 2, Bea-Cas. Woman’s Day, Fawcett Publications, NY, 1967.

Encyclopedia of Cookery 2This is the second in a series of 12 food encyclopedia volumes. I discussed the first in an earlier post. Briefly, these cookbooks are interesting sources of information about food items and cooking methods. Sure they are dated, but I always find something in them that is interesting or odd. And a good recipe or two.

The first entry in this cookbook is “Bearnaise”. The first interesting entry is “beaten biscuit”. I have never heard of these, so I read on:

“This crackerlike Southern bread harks back to pre-Civil war plantation days when kitchen help was assured, for labor, not a leavener, softens the gluten of the flour in these biscuits. They are baked slowly, are of a pale gold color, and have a characteristically dry brittle texture … There were beaten-biscuit machines, consisting of a marble slab or a wooden box with a double roller and a handle to turn. The dough was put through the rollers many times, or until it blistered and became smooth. Beaten biscuits are part of America’s food folklore.”

Interesting! You can google “beaten biscuits” for updated recipes, if you are interested.

Continuing on to the B’s, I find “beef”. “Beef is the flesh of an adult animal of the Bovidae family of ruminants which has been killed for food.” The section goes on to discuss more beef history, then cuts of beef, cooking times and methods, and recipes. My mother tried and liked the meat loaf recipe, but not the beef with noodles one. At beets, she liked the pickled beets. At breads, she tried “limpa” (a round rye bread) and potato rolls.

The buffets entry is interesting:

“In French culinary language, a buffet indicates a good-size tiered table on which various dishes have been arranged in a decorative manner and, by implication, a restaurant that has such an arrangement. But even in French-speaking countries, the word is also used for an informal restaurant where a quick meal can be found, such as in Buffet de la Gare, “a station restaurant.” In America, the word buffet is used as a term for a meal where the guests help themselves from a table on which the foods are placed in a decorative array. Buffet entertaining has become popular in recent years for three good reasons. First fewer people have servants in this modern era … third, informality is the keynote of much of life today … but buffet meals do require careful planning and special equipment.”

(Fewer people have servants??)

On to cakes. I have enough cake recipes, but if I ever want to make the Chocolate Charlotte Russe cake, which includes ladyfingers, I’ll know that my mother tried and liked it. She also liked the Sweet-and-Sour Red Cabbage.

“Canadian Cookery” is followed by “Candies”. I don’t make candies anymore, but I’m making a note to myself that in this book, in this section is Mother’s divinity recipe that I could never find before! Divinity is a candy made from corn syrup, sugar, egg whites, vanilla, and chopped nuts. I remember divinity from childhood. She clearly used the recipe in this book, as it is marked with her notes. There is also a recipe for penuche, a brown sugar candy, although she did not mark this recipe. I remember penuche, too, from childhood.

Canning, carving, and finally casseroles round out this volume.

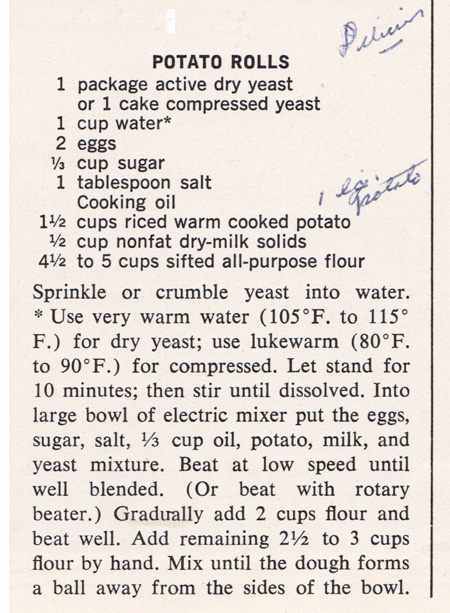
I decided to try the “Potato Rolls” from the section on breads. I like that it uses a potato rather than dried potato flakes, and my mother had marked the recipe as “Delicious“.

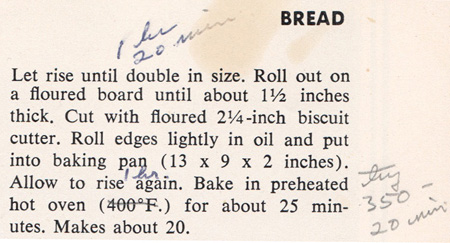
Potato RollsPotato Rolls I will make a half-recipe but other than that, I plan no changes to this recipe.

Potato Rolls
makes about 10

  • 1 1/2 teaspoons yeast
  • 1/2 cup warm water (105-115˚ F)
  • 1 egg
  • 2 1/2 tablespoons sugar
  • 3/4 teaspoon salt
  • 2 1/2 tablespoons oil
  • 3/4 cup riced cooked potato (boil or microwave a medium potato, then skin it and mash it well with a fork or masher or put it through a ricer if you have one)
  • 1/4 cup dry milk
  • 2 1/4 to 2 1/2 cups bread flour

Sprinkle the yeast into the warm water and let stand for 10 minutes, then stir until dissolved.

Put the yeast mixture and the egg, sugar, salt, oil, potato, and dry milk into an electric mixer and beat at low speed until well blended. Gradually add 1 cup of flour and beat well. Slowly add an additional 1 1/4 to 1 1/2 cups flour, first using the mixer, then by hand. Add enough flour so that the dough forms a ball away from the sides of the bowl. You do not need to knead this dough.

Put the dough in a lightly oiled bowl and let rise until double in size (less than an hour in a warm kitchen).

Press the dough out on a floured bread board until it’s about 1 1/2 inches thick. You can use a roller, but it’s hardly necessary. Cut with a 2 1/4-inch biscuit cutter, re-rolling the dough as necessary. Make about 9-10 rolls. Place the rolls in a buttered 8×8″ baking dish. Let rise again until they puff over the top of the baking dish; this will probably take a little more than a half hour if your kitchen is warm.

Bake at 375˚ for about 25 minutes.

Serve immediately with hot butter!

Comments

These turned out great!

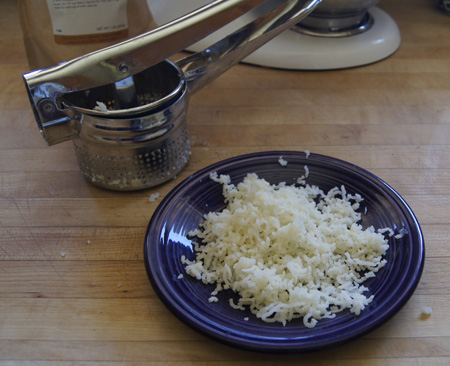
You don’t need a potato ricer, I just used one for the fun of it. However, my ricer leaves a lot of un-riced potato stuck in the bottom, so to make the necessary 3/4 cup, I had to hand-mash what the ricer missed. Turns out, my dough looked a little lumpy. I suggest you mash the potato thoroughly with a fork, then mix it well during the blending step in the mixer.

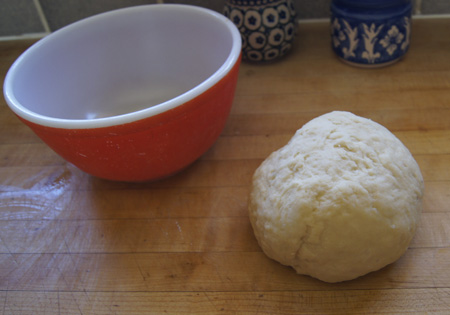
riced potatoesHere is my lumpy, unrisen dough:

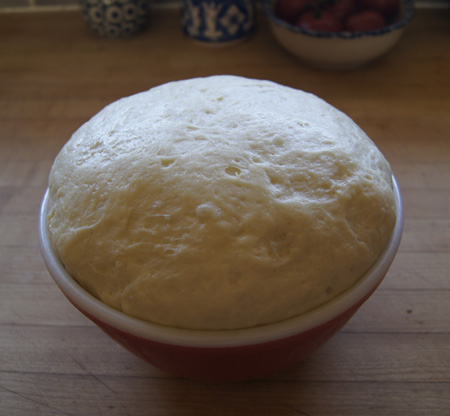
unrisen doughRisen dough:

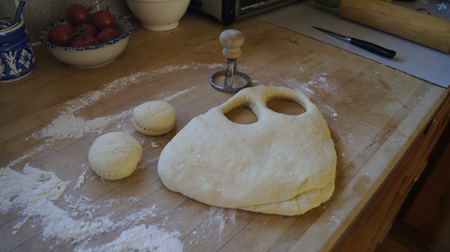
risen doughI plopped the dough out onto a floured breadboard. Then I used a roller on the dough and wished I hadn’t. After brief rolling, the dough thickness was under 1 1/2 inches, and when I cut out a roll, it smushed down even further.

cutting the rolls

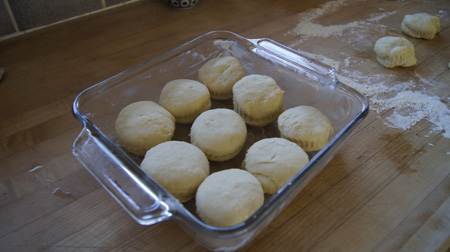
So, I ended up with about 12 rolls, and only 9 fit in the pan. I put the others in a separate pan.

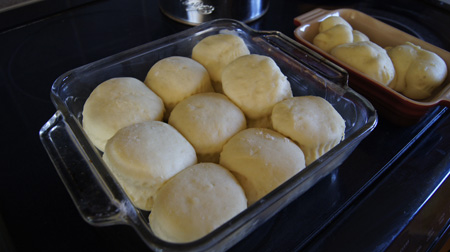
unrisen rollsNote that the above nine rolls are not quite touching. By the time they rose for about half an hour, they looked like this:

risen rollsYou can see the extra three malformed rolls in the other pan.

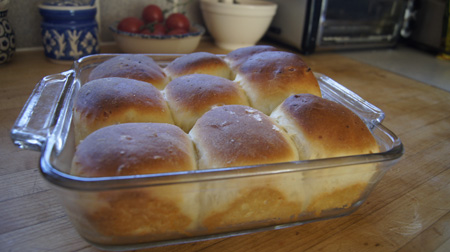
After baking, the rolls are golden brown and light and puffy:

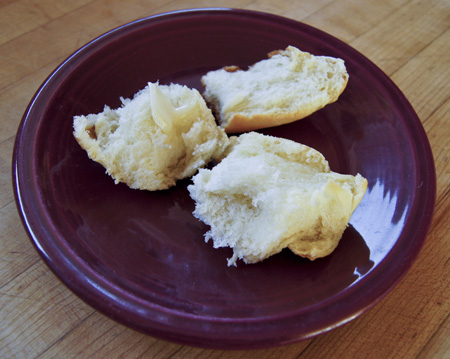
potato rollsI couldn’t resist. I just had to taste one. And they literally sang out butter! I put one on a plate and pulled it apart and put some butter on it. It took a lot of willpower to stop to take a photo before putting this roll in my mouth.

potato roll with butterSoft and yummy and as good as the aroma promised. I’ll make these again.

250 Cookbooks: The Bread Machine Cookbook II

Cookbook #30: The Bread Machine Cookbook II. Donna Rathmell German. Bristol Publishing Enterprises, San Leandro, CA, 1991. (Nitty Gritty Cookbooks)

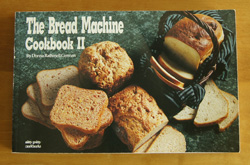
Bread Machine Cookbook IIThis is a great little cookbook for anyone who has a bread machine. When I first started using a bread machine, I learned as much from this book as I did from the instruction manuals that came with the machines. The first chapters have straightforward instructions and questions and answers about what to watch out for when using a bread machine to make yeast breads; the rest of the pages are recipes for over 100 different breads. This cookbook is especially helpful for making bread from many different types of flours and grains. I am glad that I re-discovered this book for my 250 Cookbooks project!

I cover bread machine basics in my recipe for “My Daily Bread“. Just so you know: I use the machine to knead and rise my yeast breads, and then bake them in a conventional oven.

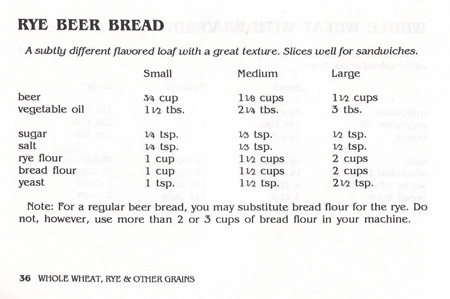
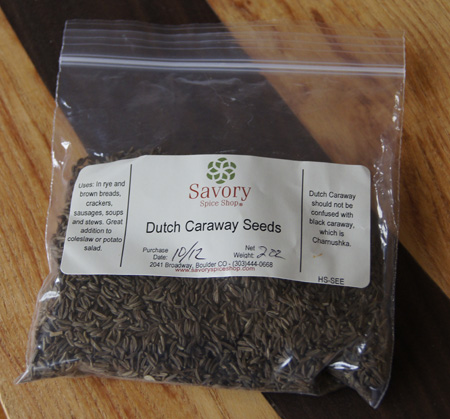
I decided to try “Rye Beer Bread”. This particular recipe is half rye flour; my old favorite recipe is only one-third rye flour. That fact and the addition of beer should give this bread a nice flavor and hearty texture. I’m adding caraway seeds too – what’s a rye bread without caraway seeds?!

Rye Beer Bread recipeNote how the above recipe simply gives the amounts for different sizes of loaves; I usually begin with about 1 cup of liquid so I chose the middle size. Instructions for using the machine are given in the introductory pages of The Bread Machine Cookbook II and are not repeated in each recipe. The version below indicates how I adapted the recipe for the way I always make bread.

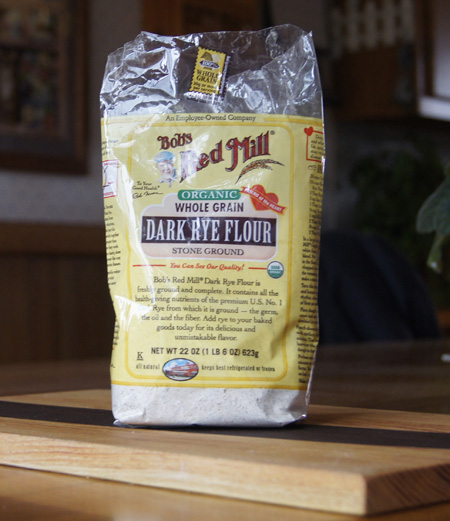
Caraweed SeedsRye FlourRye Beer Bread
makes one 8½ x 4½-inch loaf

  • 1 1/8 cups beer (I used a good local microbrewery pale ale)
  • 2 tablespoons vegetable oil
  • 1/2 teaspoon sugar
  • 1/2 teaspoon salt
  • 1 1/2 teaspoons caraway seeds
  • 1 1/2 cups bread flour (8 ounces; I included a little gluten flour)
  • 1 1/2 cups rye flour (6 1/2 ounces)
  • 2 1/2 t yeast

Put all of the ingredients in a bread maker and set to the dough cycle. (Choose a cycle that both kneads and rises the bread.) Watch the dough as it kneads and add a bit more flour or a little water if necessary to have a smooth, non-sticky ball of dough.

When the dough/rising cycle is done, take the bread out of the bread maker and form into a loaf. Place in a small loaf pan (8½ x 4½-inch). Bake at 385˚ for 25 minutes.

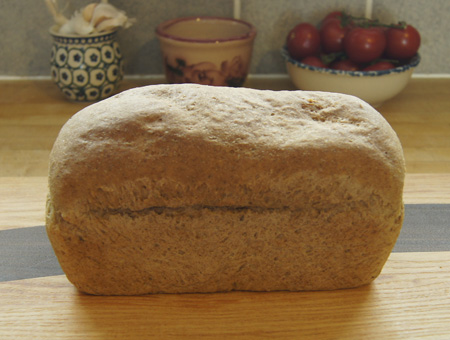
My dough was a little sticky, and I should have added a little more flour. This is reflected in the photo of the baked loaf; it fell just a little as it baked, you can see some deep dimples on the top. It was still excellent.

Rye Beer Bread loafSliced, the bread looks great. I used it to make corned beef sandwiches for lunches several days in a row.

Rye Beer Bread slicedAnd yes, I am going to keep this cookbook!

250 Cookbooks: Diamond Walnut Recipe Favorites

Cookbook #26: Diamond Walnut Recipe Favorites. Diamond Walnut Growers, Stockton, CA. No publication date given.

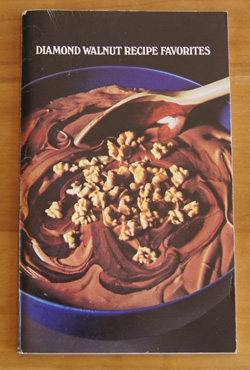
Diamond Walnut Recipe Favorites CBThere is no date in this booklet, but my guess is that it was printed sometime in the 80s or 90s. It was my mother’s. Since it was produced by the Diamond Walnut Growers (in California, where I grew up), I think it is mostly a gathering of recipes that had appeared on the packages of Diamond Walnuts over the years.

My mother did not mark a single recipe in this book. I had a hard time finding a recipe to cook since most are high in calories (even the few entrees). I’m not going to keep this book, it will go to the recycle pile. Someone might appreciate it. The recipes are not bad, they just aren’t very different from the many cookie, cake, and bread recipes that I already have.

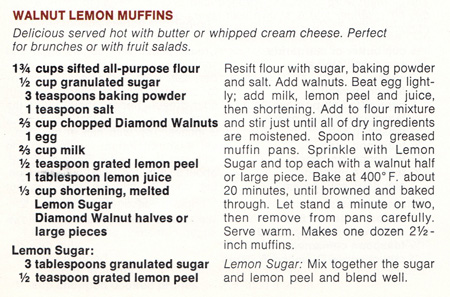
I decided to make the “Walnut Lemon Muffins”. I will substitute vegetable oil for the melted shortening, add vanilla, and add a bit more lemon juice and rind. Also, I learned from Alton Brown’s Good Eats that sugar is to be treated as a liquid, so I added it to the wet instead of the dry ingredient mixture.

Walnut Lemon MuffinsWalnut Lemon Muffins

  • 1 3/4 cups flour
  • 1 tablespoon baking powder
  • 1/2 teaspoon salt
  • 1/2 cup sugar
  • 1 egg
  • 2/3 cup milk
  • 1 teaspoon grated lemon peel
  • 2 tablespoons lemon juice
  • 1 teaspoon vanilla
  • 1/3 cup vegetable oil
  • 2/3 cup chopped walnuts
  • topping: 2 tablespoons sugar mixed with 1/2 teaspoon grated lemon peel (to top the muffins)
  • optional: 12 whole walnuts for the tops of the muffins

Prepare 12 muffin cups, either by lining the cups with paper muffin cups, or by spraying a non-stick pan with non-stick cooking spray. Heat the oven to 400˚.

Stir together the flour, baking powder, and salt.

Beat the egg lightly, then add the sugar and beat well. Mix in the milk, vanilla, 1 teaspoon lemon peel, lemon juice, and oil. Stir in the dry ingredients just until all of the dry ingredients are moistened, then add the walnuts. Do not over mix.

Put into the prepared muffin cups. Sprinkle the muffins with the sugar-lemon peel mixture and then top each with a walnut half. Bake at 400˚ for about 20 minutes, until browned.

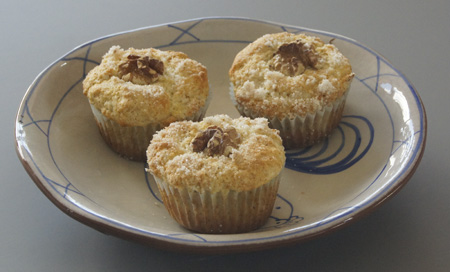
Walnut Lemon MuffinsThese are very good! We had them (first) for Sunday breakfast. Even with my extra lemon, they aren’t very lemony-tasting, but the walnuts make them great. Don’t skip the lemon-sugar topping – it really brightens the flavor and appeal of these muffins.

These reminded me of how much I like my own Lemon Poppyseed Muffins. It’s a recipe I tweaked until perfect, then added to my old 1990s Blog. It includes 1/4 cup of lemon juice, and they are definitely lemony-tasting.

250 Cookbooks: Sunset Cook Book of Breads

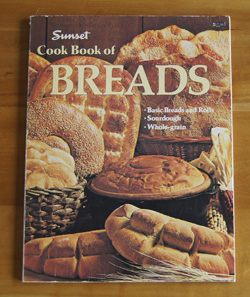
Cookbook #21: Sunset Cook Book of Breads. By the Editors of Sunset Books and Sunset Magazine, Lane Publishing Co., Menlo Park, California, 1978.

Sunset Cook Book of BreadsI opened this book and immediately knew I’d keep it. I found many recipes I wanted to try. It was published 35 years ago, so that’s pretty amazing. Why haven’t I marked it up and tried a bunch of these recipes?

Oh, I see. I gave this cookbook to my mother Christmas 1979, she wrote a note to that effect on the inside front cover. She was more interested in baking pies and cookies and casseroles than breads. I was always the one with a passion for yeast breads.

I organize all the recipes that I clip from magazines, newspapers, and other sources by entering them in a database I began in the 1990s. (Over 800 entries!) Thinking that several recipes in this Sunset Cook Book of Breads look familiar, I checked that database. Sure enough, ten of this cookbook’s recipes are referenced there. So before I gave the cookbook to my mother back in 1979, I must have copied several pages of recipes to try, and I still have those copies today.

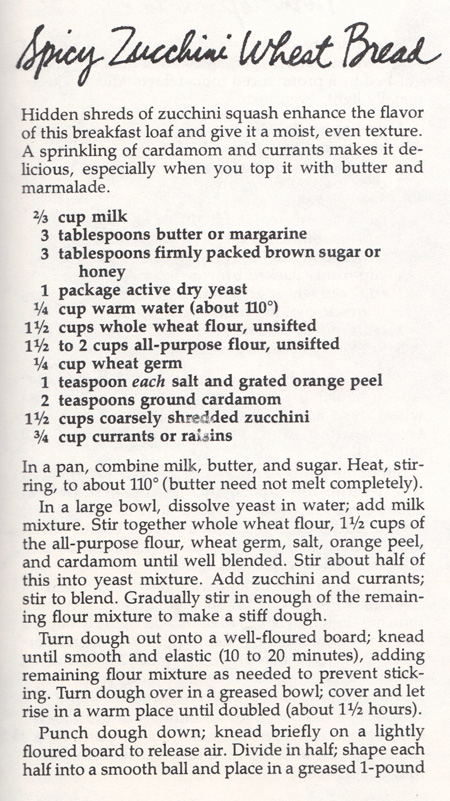
The bread recipe I will bake this week is “Spicy Zucchini Wheat Bread”. It is not one of the recipes I copied all those years ago, but it appeals to me now. I like incorporating vegetables in breads; the zucchini will add fiber and nutrients and keep the loaf moist. I like the inclusion of whole wheat four and wheat germ too. Cardamom is the spice: Wow! Cardamom usually pops up in ethnic cuisines, not American bread cookbooks from the 70s. I’m tempted to substitute with cinnamon, but I’ll stay with the cardamom. Live dangerously.

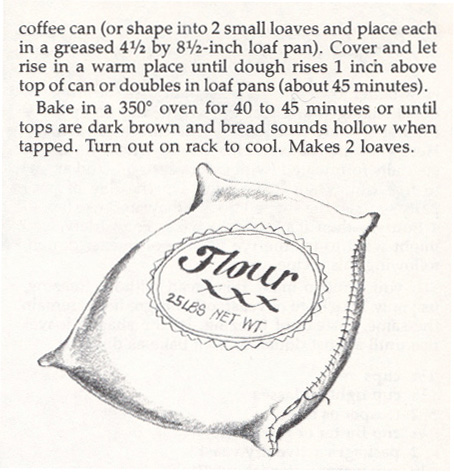
Here is the original recipe:

reciperecipe I will use my bread machine and write my own version of the recipe incorporating my changes. If you don’t have a bread machine, follow the original version for mixing and rising.

Spicy Zucchini BreadSpicy Zucchini Wheat Bread

  • 1 cup milk
  • 3 tablespoons butter
  • 3 tablespoons honey
  • 1 1/2 cup (7.5 ounces) whole wheat flour
  • 2 1/4 cup (10.5 ounces) bread flour (or use all purpose flour mixed with 2 ounces/1/4 cup gluten flour)
  • 1/4 cup wheat germ
  • 1/2 teaspoon salt
  • 1 t grated orange peel
  • 2 teaspoons cardamom
  • 1 1/2 cup grated zucchini
  • 3/4 cup currants or raisins
  • 1 tablespoon yeast

Combine all ingredients in the bread machine and set to the dough cycle. (The dough cycle should mix and rise the dough.) Check the dough during the first few minutes of mixing to make sure that the dough is coming together into ball of dough; add a little more flour or water as necessary.

Take the risen dough out of the bread machine. Form into 2 loaves and place in lightly greased 4 1/2 x 8 1/2-inch loaf pans. Let rise until the dough is 1/2-1 inch above the rims of the pans.

Bake at 375˚ for 30 minutes.

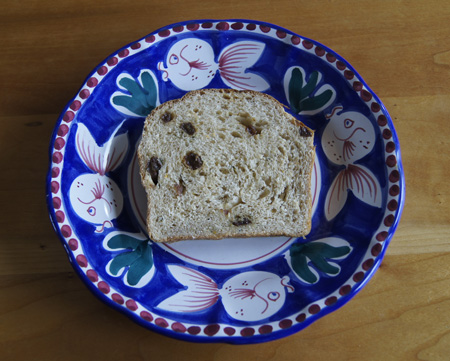
Spicy Zucchini BreadThis bread turned out great, and I will definitely make it again. I like it best toasted with a little light cream cheese or jam or apple butter.

Apple Oat Bread

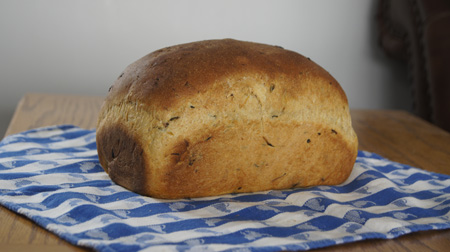
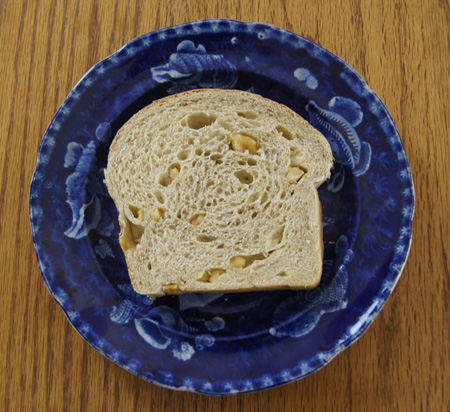
apple breadApple Oat Bread is a great bread for toast and for peanut butter sandwiches. It’s been a favorite of mine for twenty years. The recipe originated in the small booklet that came with my first bread machine.

I thought about making this bread a couple weeks ago – I craved it. But alas, I didn’t have any dried apples in the house. I put “dried apples” prominently on my next shopping list. I tried the groovier store first (Whole Foods), but only found some brownish ones in the bulk section. No problem, I’ll get them at the regular store (Safeway). But they had no packaged or bulk dried apples. Only some “apple chips” that had been fried in oil.

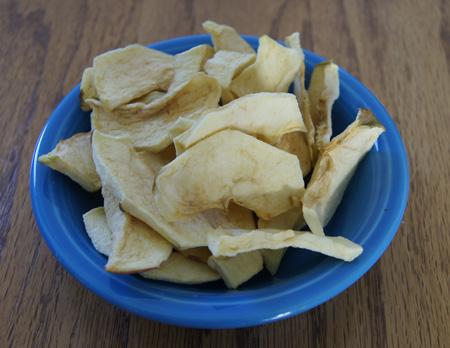
Okaaay. Guess I’ll have to make my own. So I purchased a few fresh apples. The next day I used my dehydrator to dry them …

dried apples… and the next day I made Apple Oat Bread. It was worth it all! My recipe is below. Please refer to my post “My Daily Bread” for my methods of kneading, rising, and baking yeast breads, as well as information on flours and measuring.

Apple Oat Bread

  • 1 cup apple juice
  • 1 1/2 tablespoons butter
  • 1 teaspoon sugar
  • 1/2 teaspoon salt
  • 3/4 teaspoon cinnamon
  • 1/3 cup dried apples, chopped into the size of raisins
  • 12 ounces bread flour (about 2 1/4 cup)
  • 1/2 cup oatmeal (quick works best)
  • 2 1/2 teaspoons yeast

Put all the ingredients in a bread machine and set to the dough cycle. Most machines take about 1 1/2 hours to knead and rise the dough. Some machines have the option to add ingredients like raisins late in the kneading process; this is not really necessary for dried apples because they will hold up okay through the kneading process.

When the bread machine is done, remove the dough from the machine and set it on a bread board. Fold it over a few times, then form into a loaf. Put it in an 8 1/2″ x 4″ loaf pan and set it in a warm place to rise until it is above the edges of the loaf pan. (See My Daily Bread for reference.)

Bake at 385˚ for 22 minutes.

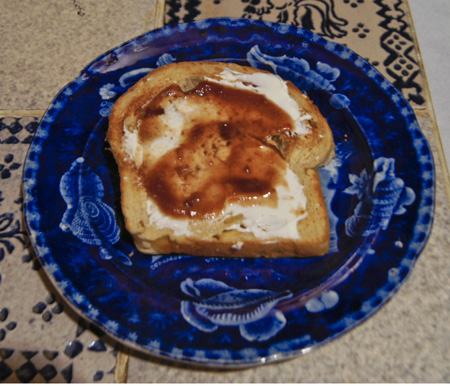
It’s yummy toasted with cream cheese and Apple Butter! Toasting brings out the cinnamon, permeating the whole house with its wonderful aroma.

Apple Oat Bread toasted

My Daily Bread

slice of bread

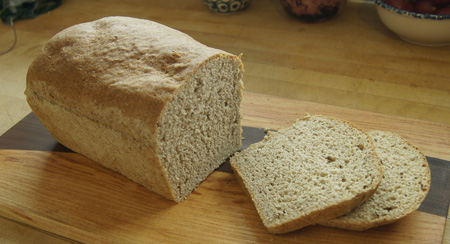
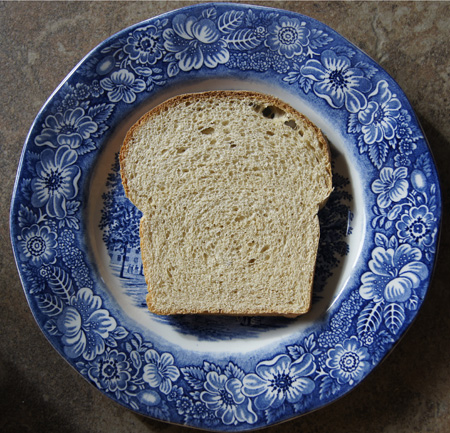
This is the bread I make every week for my sandwiches. Whole wheat and hearty but soft and pliable.

I am not going to try to teach you guys how to make yeast bread. Lessons for that skill are covered by a multitude of books, or passed on by family members or friends, or learned in a cooking class. But I will share my own methods and tips as I go along in this cooking blog. And a little philosophy.

I learned how to make bread soon after I was out on my own. I wanted to make cookies, pies and cakes, but couldn’t afford the calories. So I turned my love of baking to yeast breads. I remember when I was twenty-one and living in Huntington Beach, California. I was in the kitchen of a funky old house, kneading bread. Someone knocked at the door, and I went to answer with whole-wheat-dough-messy hands. It was Jehovah’s Witnesses, and they started giving me advice on how to make bread!

It was the 1970s, and I of course was bra-less, wearing beat-up jeans. Hippie time. My first loaves made from heavy wheat flour were dense and heavy and flat. But the smell, the smell! Freshly baked bread, even heavy bread, smells wonderful.

I grew up a little and moved to Colorado and got a real job. I continued to hone my bread making skills, gleaning knowledge from books and magazine articles and later, online communities. Like those Jehovah Witnesses, everyone had their opinions on how to make the best bread.

I learned how to combine flours to make a healthy and light loaf of bread. At first, I hand-kneaded my breads. Yes, there is a sense of accomplishment in this task, and the elastic, perfectly kneaded loaf feels good under your hands. But I’m not the most patient person. My results were inconsistent, but I kept going, I still kept baking.

I received as a gift a KitchenAid mixer in the 80s, and soon I employed it to knead bread. That made a huge difference in the consistent outcome of my bread loaves. I watched the bread as it kneaded and adjusted the flour and liquid as necessary to get a smooth, elastic loaf.

That went on for a decade or so. Then I was given a bread machine, and wow, was I hooked. Today I use a bread machine to knead most of my loaves of bread (there are no-knead breads too, but that’s another post). The machine controls kneading as well as rising factors; you can plan your time because you know exactly when it will be read to bake. I’m a chemist, and the more factors you can control in an experiment, the more you are able to play around with ingredients. I prefer to bake my loaves in a conventional oven, though. I just don’t like taking a loaf out of a bread machine and having to take out the little mixing paddles from the bottom of the loaf. Currently I am on my third bread machine, I wore out one, and I keep an older one in case I want to knead two kinds of bread at the same time!

Again bringing in my chemist-background lab experience, I weigh my flours and carefully measure the liquids. There is no better way to consistently get the proper liquid/flour proportions in a loaf. I also  watch a loaf as it kneads in the bread machine and add more flour or liquid as necessary. I still have occasional failures, when I experiment a little too much! But “My Daily Bread”, the recipe below, works for me week after week.

I am not going to force my method of bread making on anyone. I’ll give you tips, but no more. Take them or leave them. You can only learn how to make yeast bread by many tries, many failures, many successes. With practice, each person figures out their own way to make perfect bread. Each person works with currently available ingredients and equipment, societal fads, and their own preferences. Each person finds their own way, and their way is as good as any other, as long as it’s enjoyable.

Bread making is a journey, like life.

Here is my daily bread, my staple for sandwiches and toast. It is high in fiber, while still making a bread that slices for sandwiches and toast. I know my ingredients, so I am assured that there are no preservatives or excess sugars or fats. I trust this bread to keep me healthy, as well as provide great taste!

My Daily Bread

Two thin slices of this bread (60 grams) have about 100 calories.

  • 1 cup buttermilk
  • 1 tablespoon vegetable oil
  • 1 tablespoon sugar
  • 1/2 teaspoon salt
  • 1/2 teaspoon baking soda
  • 12 ounces flour (see below)
  • 1 tablespoon active dry yeast

Each week, I vary the types of flours that I use. I always use about 1/3 cup gluten flour, a half-cup of all purpose flour, and a large amount of white wheat flour (King Arthur Flour). Sometimes I include about a half-cup of oat or other whole grain flour, and a few tablespoons wheat germ, hi-maize high fiber flour, or flax seed meal. What is important is that the weight of the flours is 12 ounces. (If you add too much whole grain flour other than white wheat flour, the bread will not rise well and the cooked loaf will be dense.)

If I have leftover cooked hot cereal, barley, or rice, I sometimes add it too (about a half cup). But if I do, then I’ll watch closely as the bread kneads, and add a bit more flour if necessary.

Put all the ingredients in a bread machine and set to the dough cycle. Watch the dough as the machine kneads it. Sometimes a paddle will not rotate and needs some fixing. Sometimes the flours are too dry, and you see just lots of clumps instead of a ball of dough. If this happens, add more liquid by the tablespoon until it forms a ball. Sometimes the dough is too sticky; if this happens, add more flour by the tablespoon until the dough looks smooth and elastic. Most machines will knead and rise a loaf of bread in about 1 1/2 hours.

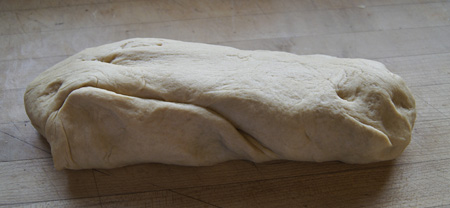
When the bread machine signals that it is done, remove the dough from the machine.

dough

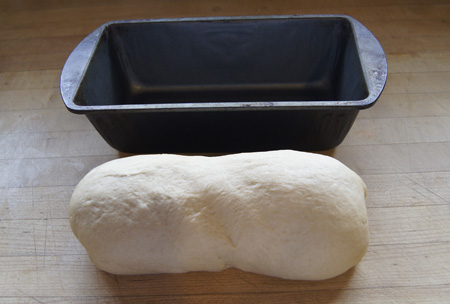
Next, fold in thirds and push it around a little to re-distribute the yeast, then form it into an oblong that will fit into an 8 1/2 x 4″ loaf pan.

into pan

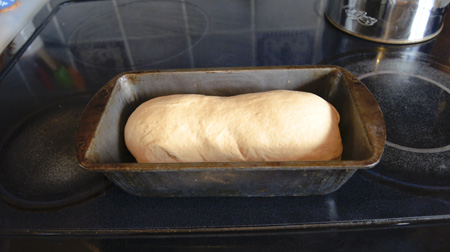
Place it in the loaf pan and set it in a warm and non-windy part of your kitchen. I usually put it on the top of the stove. Start preheating your oven to 385˚.
before rising

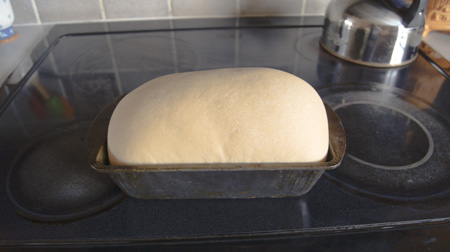
Let the loaf rise until it’s double in bulk, or until it has risen above the edges of the loaf pan. In the summer, this might take only 20 minutes. When my kitchen is cool in the fall or winter, it might take 45 minutes. Here’s a well-risen loaf:

risen

Bake at 385˚ for 20 minutes. Take it out and let it cool. It’s tempting, but if you cut it now and eat a hot slice, it really messes up the loaf for later neat-slicing. (I don’t always follow this rule <grin>)

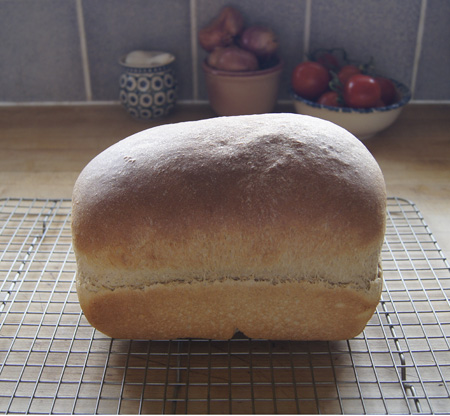
baked loaf

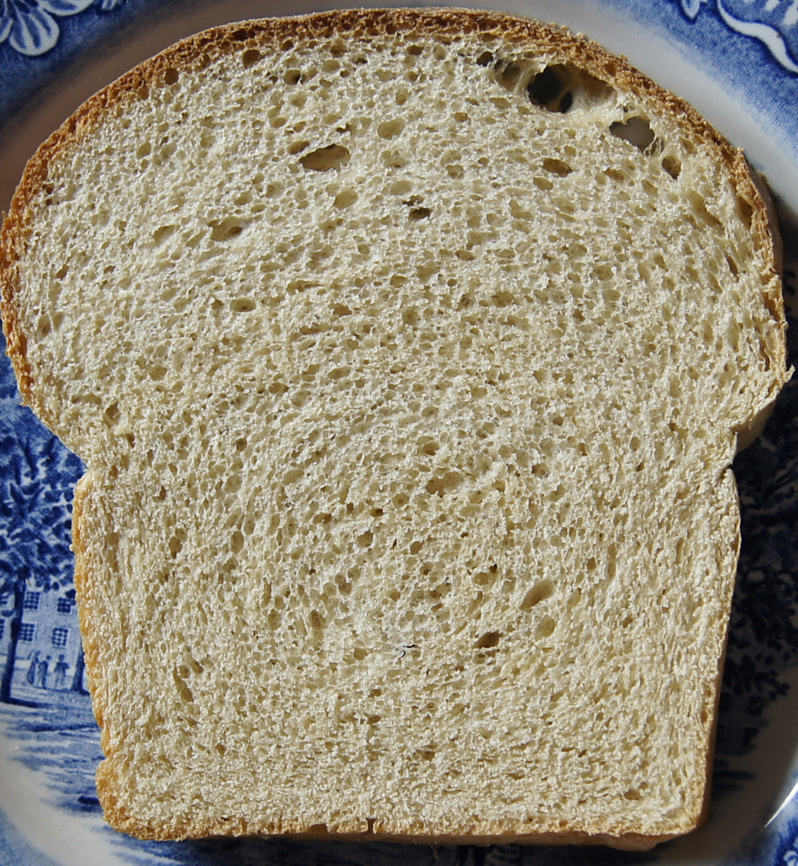
Here’s a close-up of the great crumb and texture of this bread. Click on this photo and it will get even larger:

slice of bread

I do love my bread! It’s great for sandwiches, and great for toast!

Favorites: Tortilla Flat breads

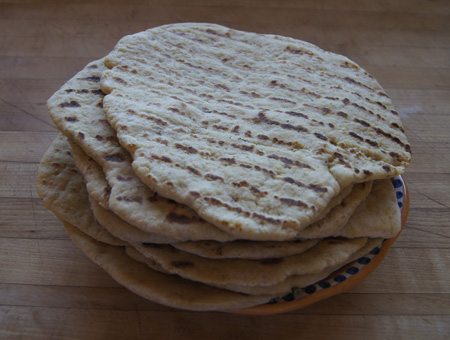
tortilla flat breads

Several years ago I ran across an interesting recipe in a King Arthur Flour catalog for yeast-dough tortillas. At the time, I had just taken a class in Middle Eastern cooking where I had learned a great way to make flat bread pizzas by cooking them on an indoor grill pan. The King Arthur recipe could be adapted to grill pan cooking, I thought. I just had to try it!

Now, a little bit about King Arthur Flour. This is a company that specializes in ingredients for baking. I learned about them through a “user group” in the late 90s. User groups preceded listserves and I guess, now, Facebook as a way of people with like interests to share ideas. Anyway, the consensus at that time was that King Arthur flours are the best for baking. I ordered them through the catalog, liked them, and eventually found that this brand of flour is sold at Whole Foods and now even Safeway. Today I only buy this brand of flour.

There are drawbacks to King Arthur flour recipes, though. This a company that sells baking ingredients (and related cookware), so their recipes often have a long list of different types of flours. They are, after all, trying to sell their products. I can forgive them for that. The take-home lesson is: Substitute when necessary. Feel free to use all-purpose flour for any of the specialized flours called for in a recipe.

Some of the specialized King Arthur flours or ingredients I have tried and now keep on hand. For instance, I like their “Hi-maize® Natural Fiber” because it adds fiber and lightness to loaves. In the recipe below, free to substitute it with all-purpose flour. I am a huge fan of gluten flour, but you can use all-purpose flour. I also have their Salsa Seasoning.

Cooked on a grill pan, these tortilla flat breads come out thick, unlike any tortillas that you find in stores. They are more like pita or naan bread. But the mixture of cornmeal, all purpose and whole grain flours, dry milk, and seasoning make these into a sensory sensation. They do take a bit of time to prepare, but if you are cooking for two you will have extras to freeze away, or if you have company you could make them ahead of time.

I usually serve them topped with beans and taco meat and cheese, popped into the microwave for a minute. Then lettuce and tomatoes and salsa. You can pick them up like a little pizza, or roll them like a taco, but they are soft so they are also cut-able with a fork.

This recipe makes 10 flat breads. They freeze wonderfully, and you can pull out a few for a very quick and impressive meal.

Tortilla Flat breads

This recipe is based heavily on the King Arthur Flour recipe for tortillas. I’ve written this for the bread machine; if you don’t have one, refer to the original recipe for kneading and rising instructions.

  • 1/2 cup cornmeal
  • 1 1/2 cups boiling water
  • 1 1/2 cups all-purpose or white whole wheat flour (or a mixture)
  • 1/2 cup barley flour or oat flour (I rarely keep oat flour around, so I process oatmeal in the food processor and measure a half cup)
  • 1/2 cup Hi-maize® Natural Fiber (from King Arthur Flour)
  • 2 tablespoons vital wheat gluten (I swear by this, but use all-purpose if you have to)
  • 2 tablespoons vegetable oil
  • 1/3 cup dry milk
  • 3/4 teaspoon salt
  • 1 1/2 teaspoons yeast
  • 1 1/2 teaspoons salsa seasoning, optional (from King Arthur Flour)

A good substitute for the salsa seasoning:

  • 1 teaspoon oregano (preferably Mexican oregano)
  • 1/2 teaspoon basil
  • 1/4 teaspoon chili powder
  • a few shakes of garlic and onion powders, maybe a few shakes of cumin

Place the cornmeal in the bucket of a bread machine. Pour the boiling water over it and stir a little. Let it cool for about 10 minutes.

Add the remaining ingredients and set the bread machine to the dough cycle (this should include both kneading and rising). Peek a few times as the bread is kneaded, and add a little flour if it is too sticky (looks wet), or a little water if it is too dry (if it is just a bunch of unconnected bread clumps). The dough should become elastic, but stay quite soft.

When the bread machine cycle is finished, take the dough out onto a floured bread board. Divide it into 10 balls.

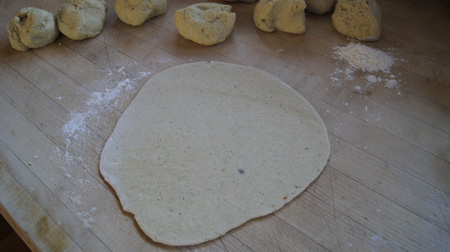
Heat a grill pan to medium-high heat. While it heats, start rolling the balls of dough into rough circles about 7-8″ in diameter. I usually start cooking the tortillas as soon as I have a couple rolled, then work rolling and cooking at the same time. If you want to roll them all out before you start cooking, you should cover the rolled ones to keep them from drying out.

roll out the tortillas

Your grill pan is ready when you hold your palm an inch above its surface and feel the heat coming off it. Don’t heat it until it smokes. Drop a little oil on the surface (I prefer olive oil) and brush it across the surface. Then put a tortilla on it and let the first side cook about a minute. The first side is done when you peek and see nice grill marks.

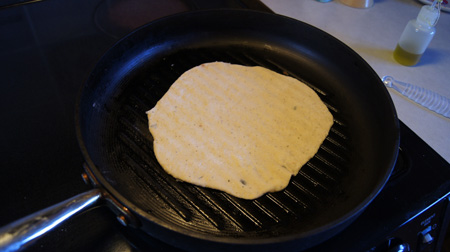
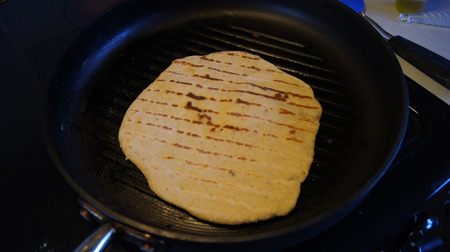
cooking the first side of the tortillaFlip the tortilla and cook the other side. Note the great grill marks!

cooking the second sideContinue rolling and cooking until all the tortillas are cooked.

Used these topped with beans, spicy meats, cheese, lettuce, and salsa, like a tostada. Or wherever your imagination takes you!

250 Cookbooks: Beard on Bread

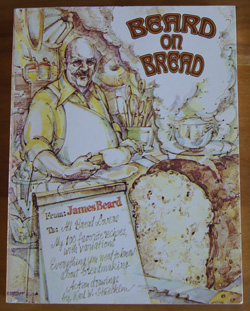
Cookbook #5: Beard on Bread, James Beard, 1974. Published by Alfred A. Knopf, NY.

Beard on Bread

I pulled this book off the shelf and happily tucked into it. Bread is my passion. I have baked at least a loaf a week for twenty-five years. My bread-making techniques have changed over the years, and I have learned from both successes and failures. I am still learning, and am always willing to try something new. But when I try a new yeast bread recipe from one of my 250 Cookbooks, I will not follow the recipe exactly as printed in the book. Instead I will incorporate my hard-earned bread-making knowledge.

Let me explain. First, I include “gluten flour” in all my loaves. This is a high-protein flour that gives a loaf its stretchiness as you knead it, and that gives a cooked loaf the structure to stay together rather than crumble apart. Gluten flour helps tremendously when you want to include whole grain flours in a recipe.

Second, I use a bread machine set on the “dough” cycle to knead my breads and take them through the first rise step. The machine does a great job of kneading, and I can go off and do other things. Maybe this is “cheating” in some people’s opinions, but in my years as a working mom, the bread just wouldn’t have been made if not for the bread machine. And the machine keeps the temperature perfect for the rising step, so I’ll know exactly when to come back and get the loaf ready to bake in my oven.
Reading James Beard’s introduction, I don’t think he would pooh-pooh bread machines (he wrote it before home bread machines were available). For instance, he writes that using a mixer with a dough hook is okay. I heartily agree with Beard’s love of bread: “Good bread is the most fundamentally satisfying of all foods; and good bread with fresh butter, the greatest of feasts.” He enjoys “. . . the sensual pleasure in smelling a yeasty loaf baking in the oven, the sense of accomplishment in offering a real bread at a meal – to say nothing of the knowledge that each loaf is full of goodness instead of being just a starchy filler.” He writes that including multiple flours and meals just to make a bread more nutritious fails if you end up with a loaf that has a terrible texture. I agree with this too.

I enjoyed re-reading his discussions of flours, kneading, and baking methods. Beard on Bread was one of the books I studied as I developed my own yeast bread techniques in the 70s and 80s. Making bread is an ancient art and most of his information is timeless.

The recipes in Beard on Bread begin with a basic white bread with his observations and notes. If you have never made a yeast bread from scratch, you could learn how to make bread from this book alone. I scanned this book cover-to-cover, lingering on many recipes. I like his historical notes on each type of bread. I noted about ten recipes for my own personal “to try” list. I was pleasantly surprised to find a section of quick breads; I had never thought to look in this book for that type of recipe. This book is a keeper!

I decided to make Sourdough Rye bread. It’s a little “out there” from my usual style of bread, so I might learn something. I’ve made sourdough bread in the past, from home-passed or purchased starter, but it’s kind of hard to keep a sourdough starter fed and growing, and eventually I always forget them and they dry up and die. This recipe calls for a simple starter that you begin from ingredients on hand 4 days before you make the bread. I can manage that – and it should be enough to add a touch of sourness to the bread. I also like the good proportion of rye flour in the recipe, and I like the addition of poppy as well as caraway seeds.

Recipe: Sourdough Rye
five stars


“This sourdough rye appeared in the columns of The New York Times several years ago. I tried it, made some changes in it, and discovered that it was one of the best recipes I have ever used. The bread has a nice crumb, slices well, and keeps extremely well. I enjoy it for sandwiches and find that, thinly sliced and well buttered, it’s delicious served with smoked fish and oysters or other shellfish.” [James Beard’s note.]

My note: The recipe below is for half the original recipe: it makes one loaf instead of two. Other changes from the original are the inclusion of gluten flour and the use of a bread machine.

  • 1 package active dry yeast (1 tablespoon)
  • 1 1/2 cups plus 1/4 cup warm water
  • 3 cups all-purpose flour, approximately
  • 1 cup rye flour
  • 1/3 cup vital wheat gluten
  • 1 teaspoon salt
  • 1 1/2 teaspoons caraway seeds
  • 3/4 teaspoon poppy seeds
  • 1 tablespoon melted butter
  • 1 1/2 tablespoon sugar
  • Cornmeal
  • 1 egg, lightly beaten with 1 tablespoon water

Four days ahead of breadmaking, prepare the “starter”. Combine 1 1/2 teaspoon yeast, 1 cup warm water, and 1 cup all-purpose flour in a plastic bowl or container. Cover tightly and let stand at room temperature for 2 days.

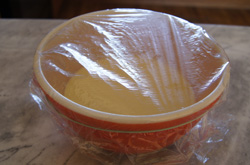
Note: I put it in a bowl and covered it with plastic wrap like this:

sourdough rye starter

After the 2 days at room temperature, put the starter in the refrigerator for at least another day.

The day before preparing the dough, combine 1/2 cup of starter, the rye flour, and 1 cup warm water in a bowl. Cover with plastic wrap and let stand at room temperature overnight. (Note: You will have more starter than you need for this recipe. If you want to keep it going, replenish with equal parts of warm water and flour, let stand again at room temperature, and then refrigerate. Continue the process each time you use some of it.)

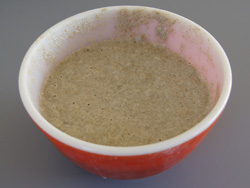
Here’s how it looked the next day, just before I stirred it down:

sourdough rye overnight

The next day stir down the dough, then put it in a bread machine* and add rest of the yeast (1 1/2 teaspoons), dissolved in 2 tablespoons water, salt, caraway seeds, poppy seeds, butter, and sugar. Add 1/3 cup vital wheat gluten and 1/2 cup all-purpose flour. Set the bread machine to the “dough” cycle. Watch it as it kneads and add more all-purpose flour as necessary to keep the dough from being too sticky. You want it to form a nice, round ball of dough. I added enough flour so that it was still “tacky” feeling but not “sticky”. Leave the dough in the bread machine through the rise cycle.

*Hand kneading directions: Add the flour a little at a time, to make a stiff but workable dough. Knead for 10 to 12 minutes, then shape into a ball. Place in a buttered bwol, turning to coat the dough with the butter. Cover and let rise in a warm, draft-free place until doubled in bulk, about 2 hours.

Take the risen dough out of the bread machine (or bowl, if you hand kneaded) and punch it down. Shape into a round loaf and place on a buttered baking sheet generously sprinkled with cornmeal.
formed loaf

Cover and let rise again until doubled in bulk, about 1 hour (mine rose in 30 minutes in a 73˚ kitchen).

Here’s the risen loaf. You can see how much bigger it is compared to the last picture (above).risen loafBrush with the egg wash, and bake in a preheated 375˚ oven for 30 minutes, or until lightly browned and the loaves sound hollow when rapped with the knuckles. Cool, covered with towels to prevent the crust from hardening.
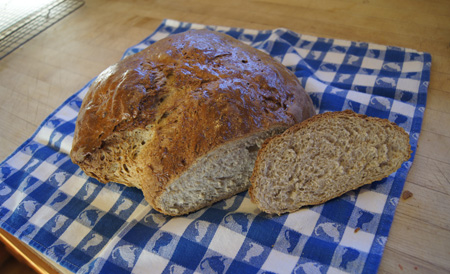
Here’s the baked loaf. I wish you could smell it too!

baked loaf

Next time I’ll be a little more careful when I form the loaf, you can see that it did not bake perfectly round. If I had been more careful, I would have had a prettier picture! Plus I cut the loaf when it was still kind of hot. But let me tell you, it tasted wonderful. We had it with a good homemade beef barley soup, and slices of cheese that melted into the warm bread.

Favorites: Hamburger Buns and BBQ Beef Sandwiches

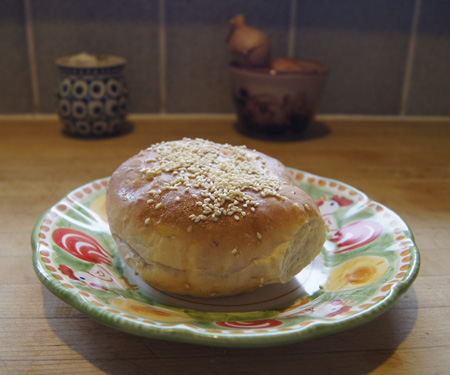
hamburger buns

I make my own hamburger buns. I’ve finally settled on a recipe that consistently yields what I consider the “perfect” bun: just the right size, texture, and taste. These are great for burgers and all sorts of cold and hot sandwiches.

I was wondering what to do with the leftover meat from my Cookbook #2 recipe, Colorado Chuck Steak on the Grill. I should make barbecue beef sandwiches! And they would be best on homemade hamburger buns, and thus I thought I’d share my burger bun recipe.

BBQ Beef Sandwiches

To make the sandwiches, just chop the leftover meat into small chunks, then lay on the sliced burger buns with some barbecue sauce – your own, or bottled – and onions, pickles, and any other condiments you favor.)

Hamburger Buns

My burger bun recipe is essentially from the King Arthur Flour website (accessed 2012), although I did make a few changes. But I always use King Arthur Flours; they are available at both regular and natural foods markets in my area.

I like to use a bun or muffin-top pan to bake the buns. This helps in a couple ways: it makes me flatten the dough to the proper size, and it gives the bottom of the buns a little rim around the edge. Before I had this pan, my burger buns turned out too high. I don’t like buying special-purpose cookware, but I made a rare exception in this case.

I always use a breadmaker to knead and rise the dough. You can knead it by hand and let it rise until double before forming rolls, if that is your preference.

Recipe: Hamburger Buns

3/4 cup water
1 egg
2 tablespoons oil
2 tablespoons sugar
2 tablespoons sesame seeds (mix in with the dough)
2 teaspoons yeast
1/2 teaspoons salt
11 1/2 ounces (2 3/4 cup) flour (bread flour if you have it, or all-purpose)
more seeds (such as sesame)

Mix in all ingredients breadmaker on dough cycle. When the cycle is complete, form into 6 buns. Make them pretty flat, because they poof up a lot as they rise and bake. You want them 4 inches in diameter before you let them rise. Use a bun pan if you have one.

Let rise until double, then bake at 375˚ for 10 minutes. Take out and brush the tops with a beaten egg (or egg white or use egg substitute), and sprinkle with sesame seeds (or other seeds). Return to oven and bake 5-8 min more, until golden brown. Take off the pan soon or the egg glaze can cause the buns to stick to the pan.

These can form big pockets, kind of like pita bread, especially if you use a high-gluten flour. I don’t think this matters. They are soft and make great sandwiches, not only for hamburgers.